Have You Tried My Spray Basting Technique?

Weather you are quilting along with me making your version of Ticker Tape, or any other quilt for that matter, basting is an important part of the machine quilting process. Take a look at the video below to see how I spray basted 2 of my earlier quilts, both made from my Black, White & Bright fabric from Benartex.

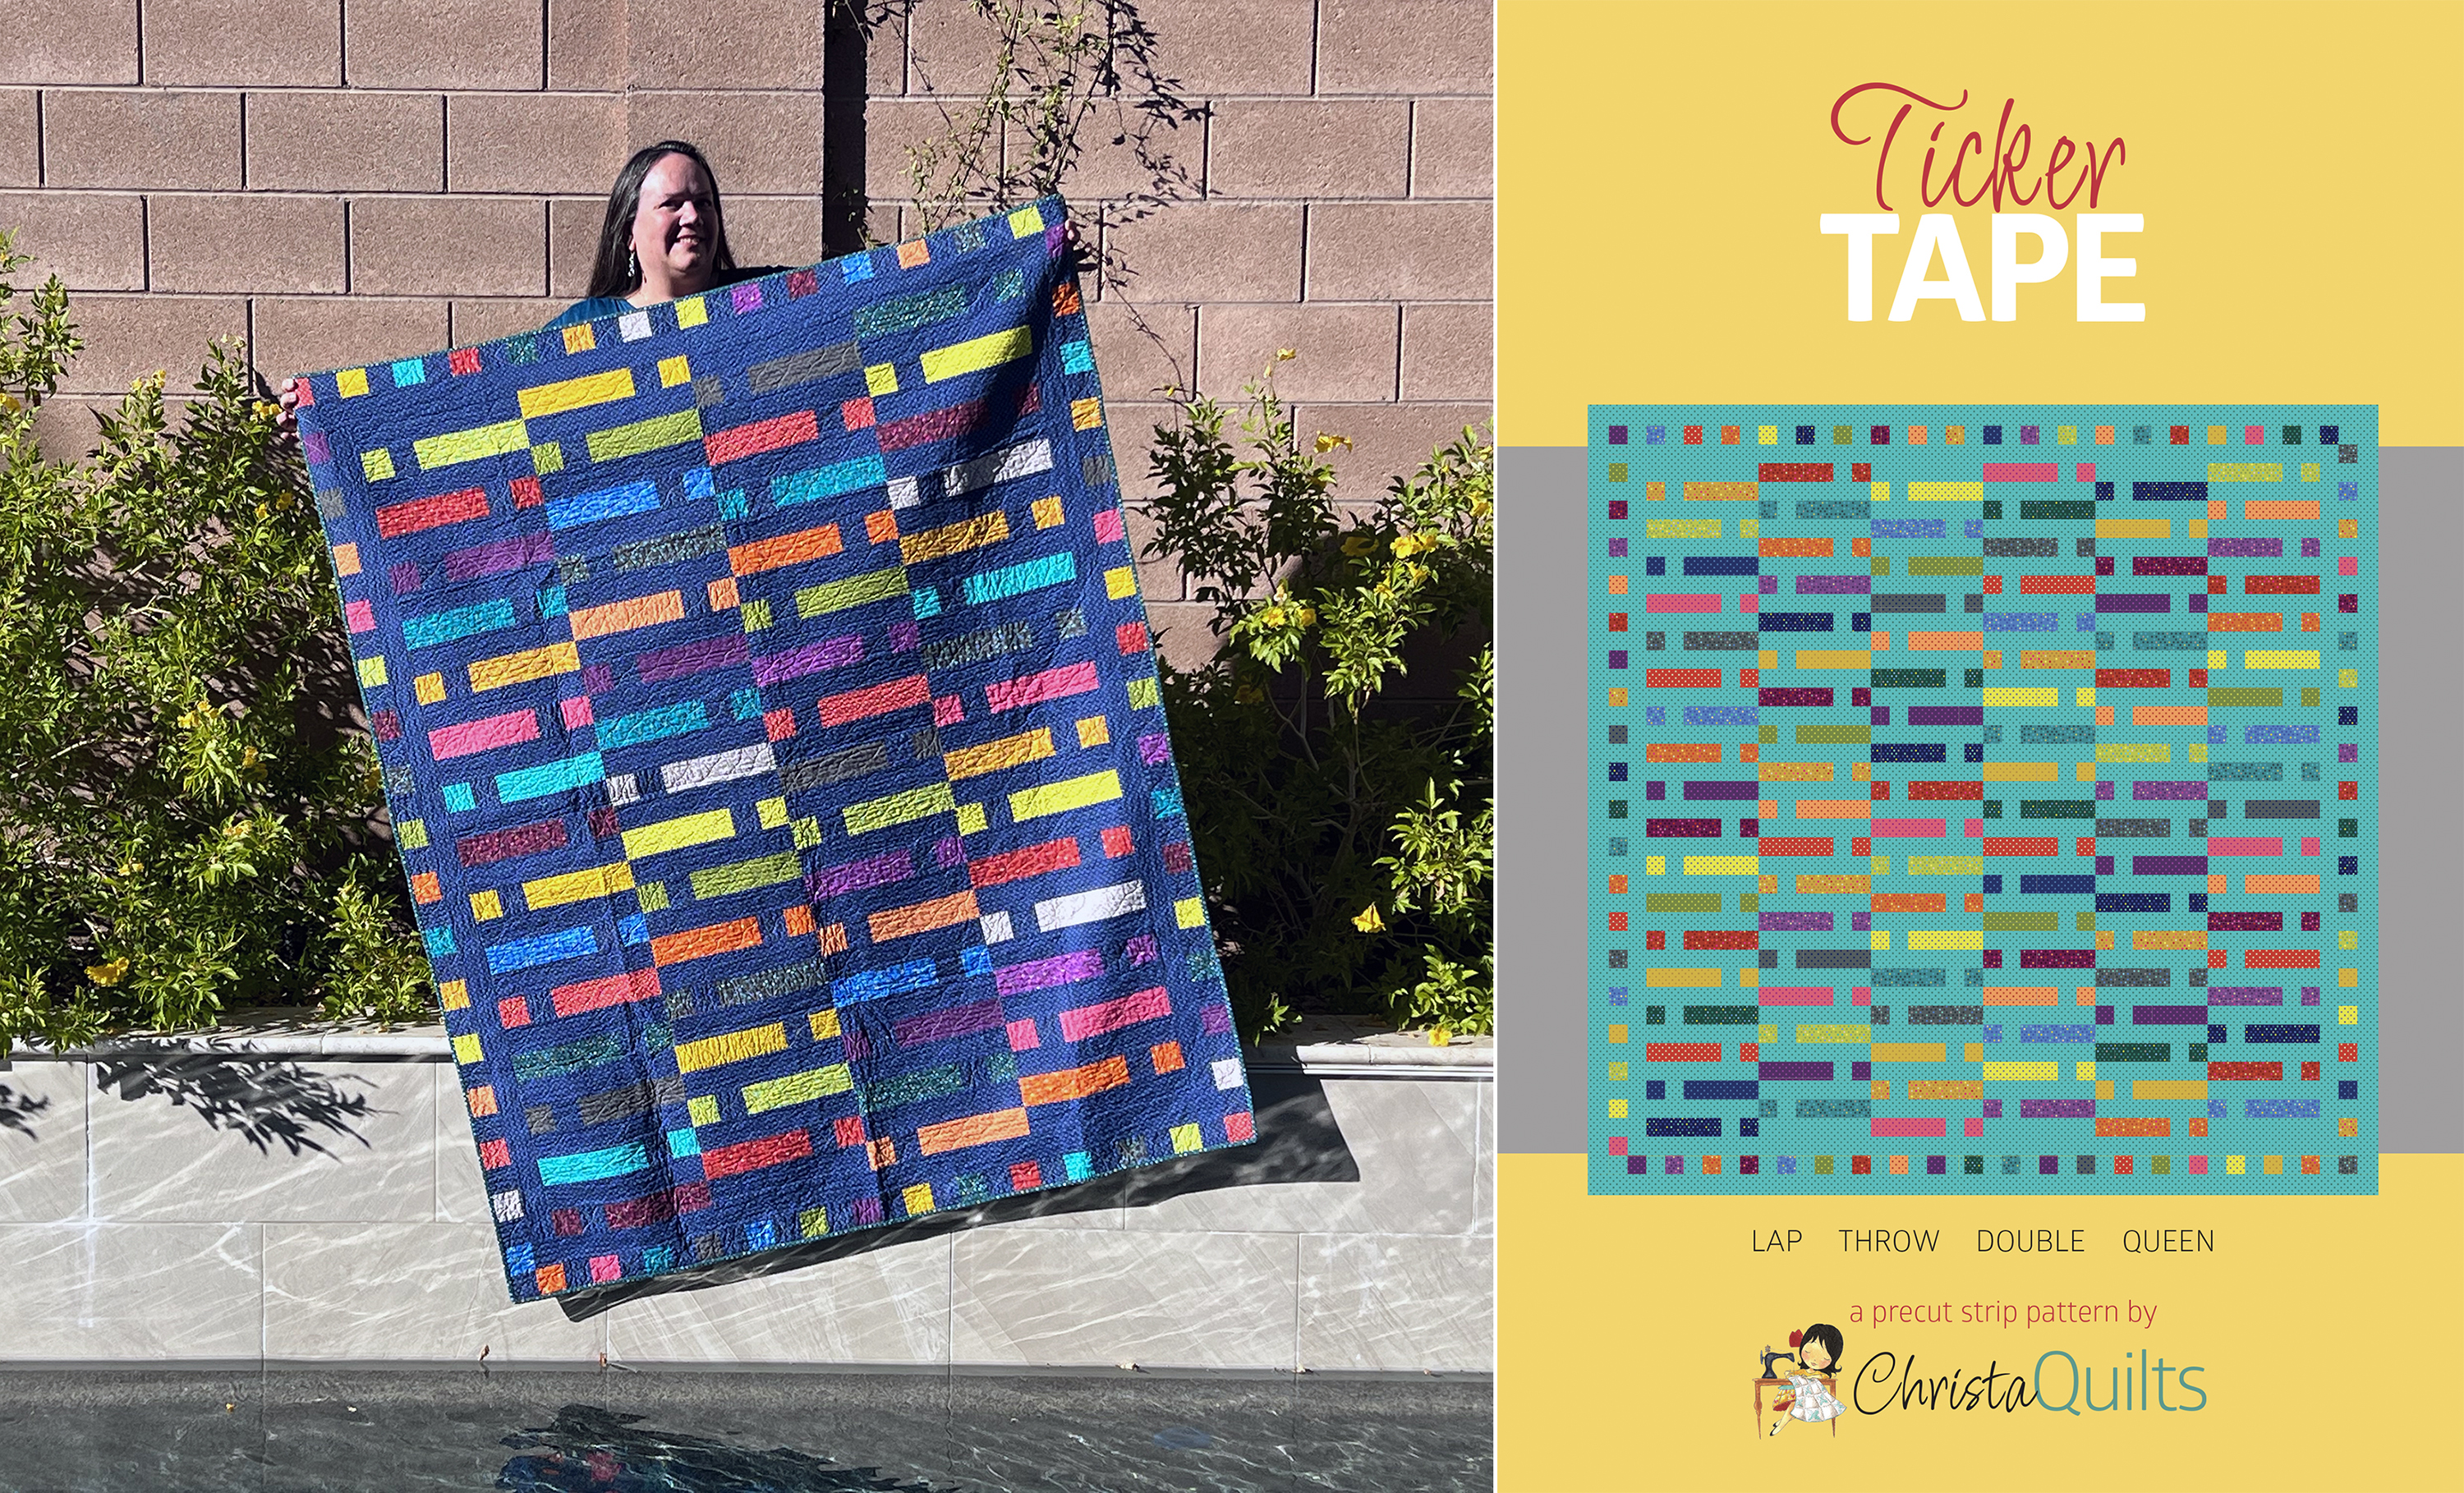
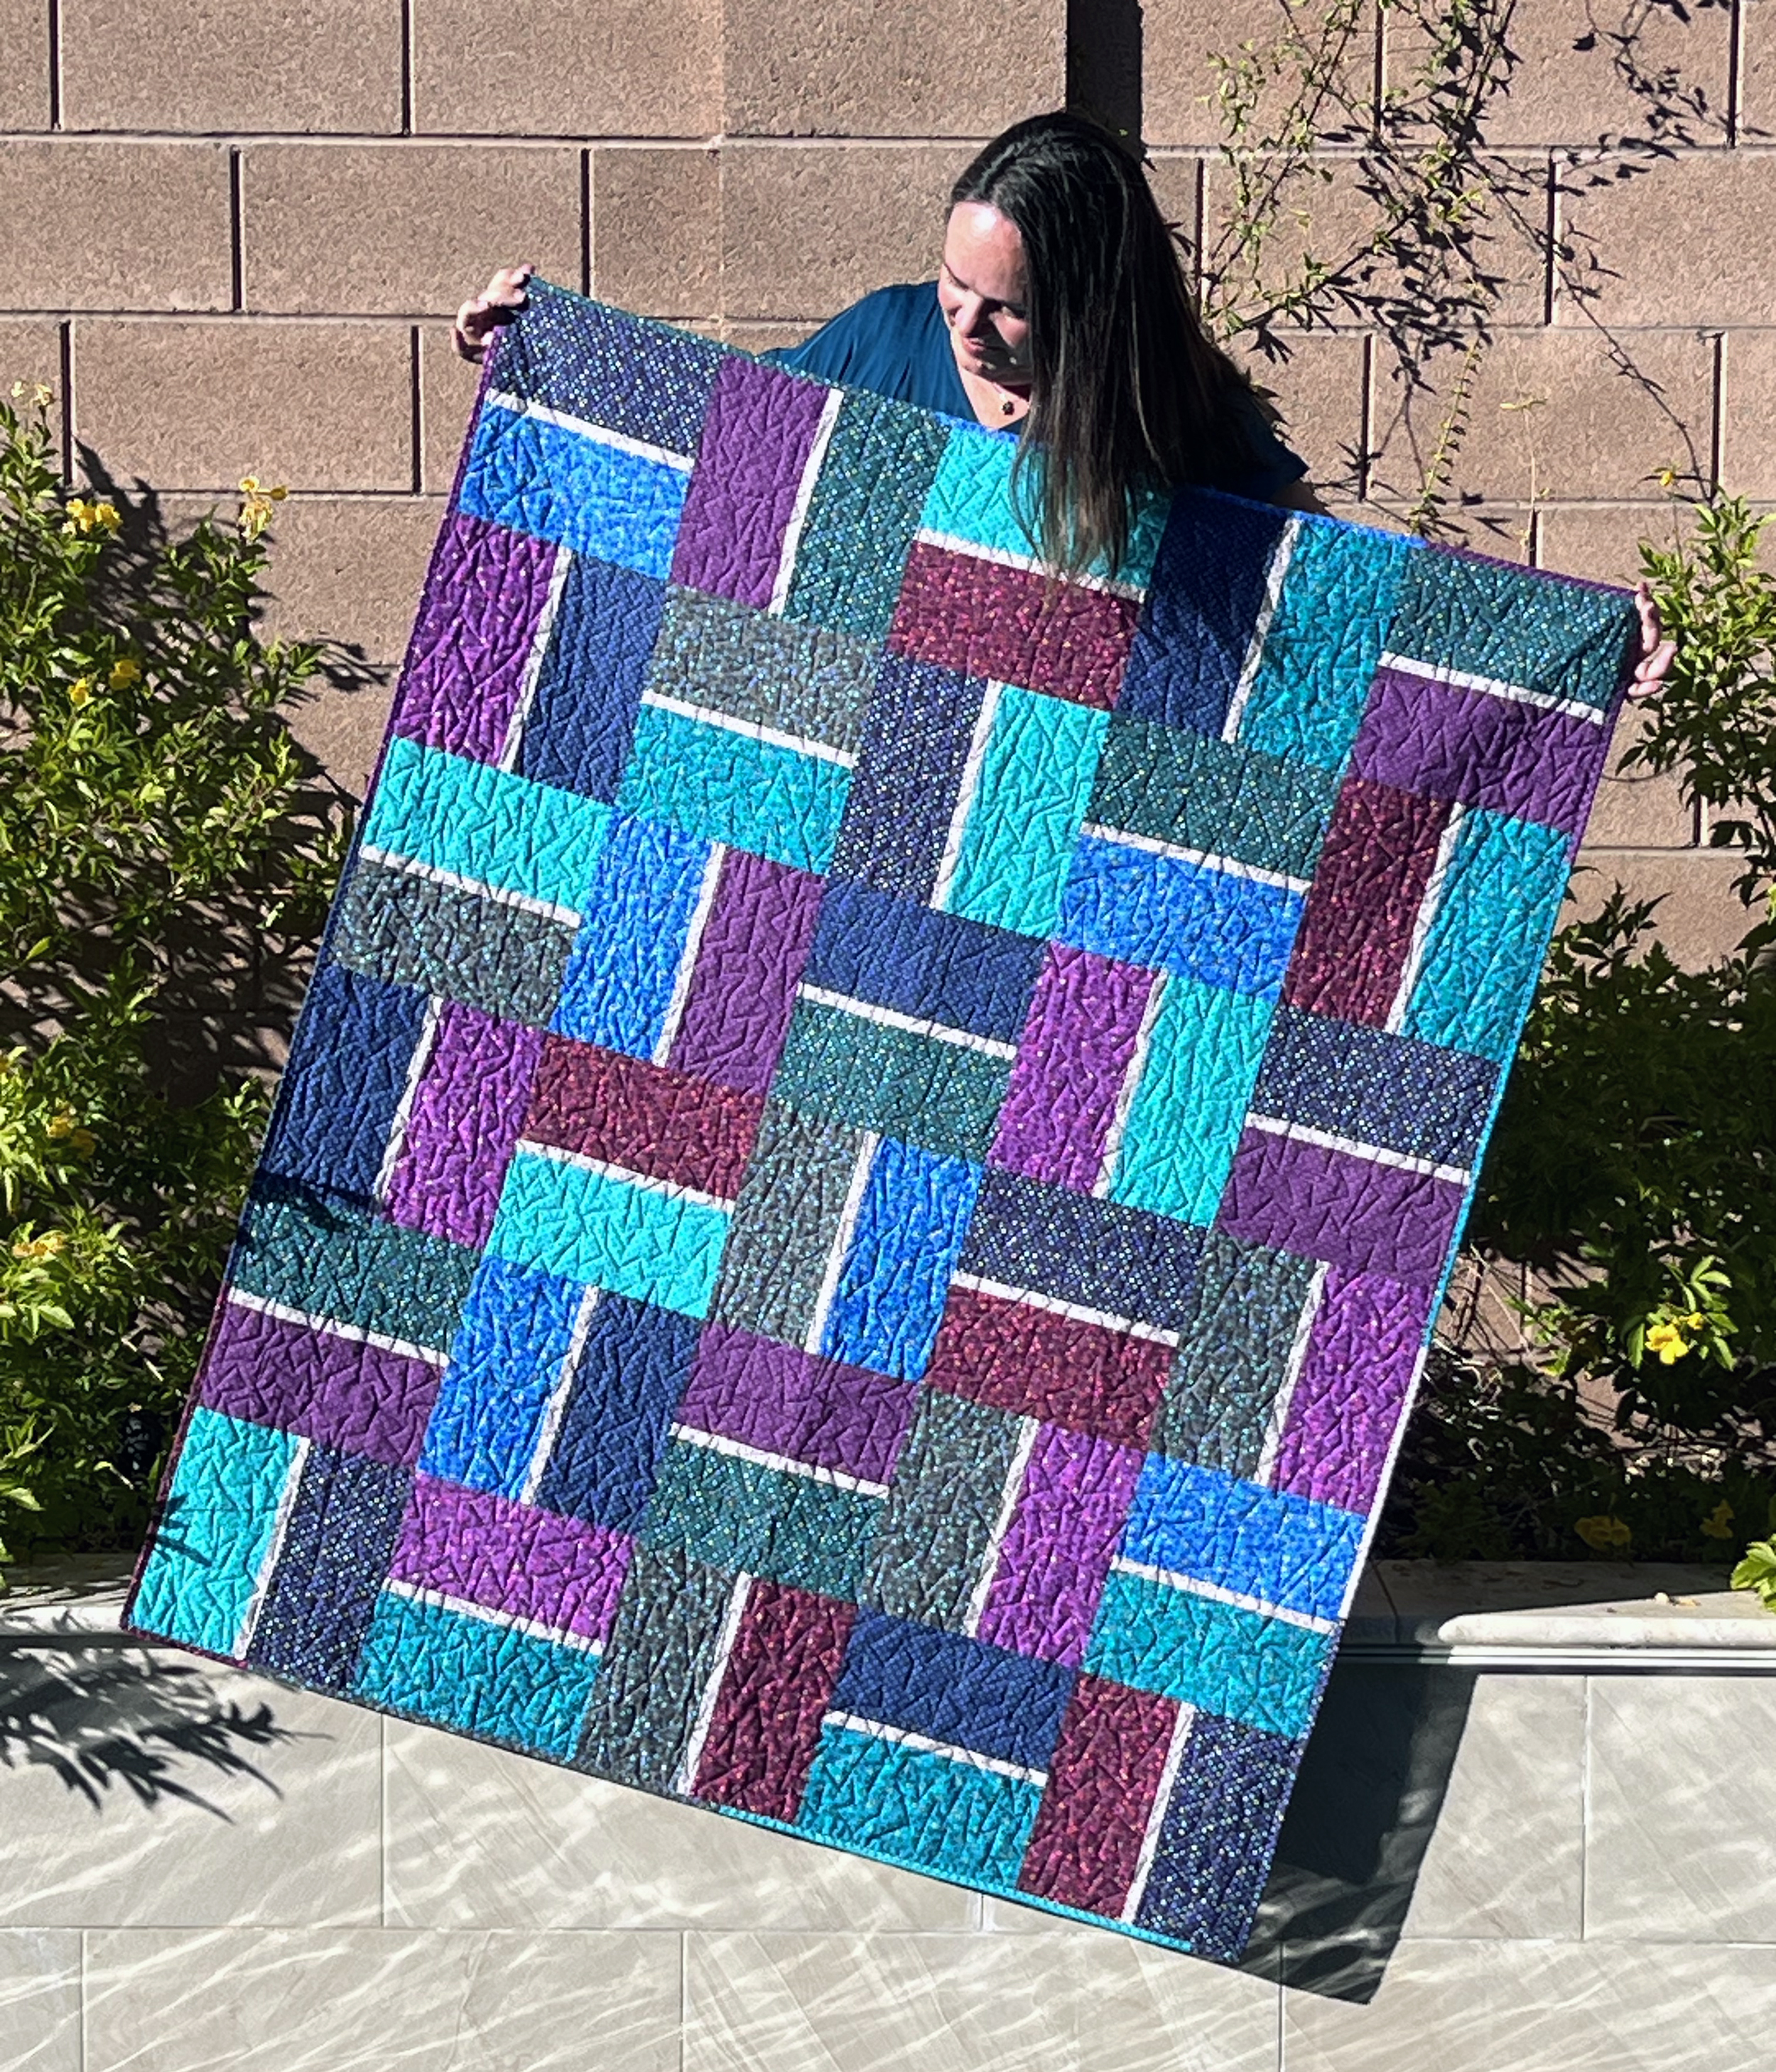
I used this same technique for my larger Ticker Tape quilt shown on my design wall below. Now it’s time to quilt it!

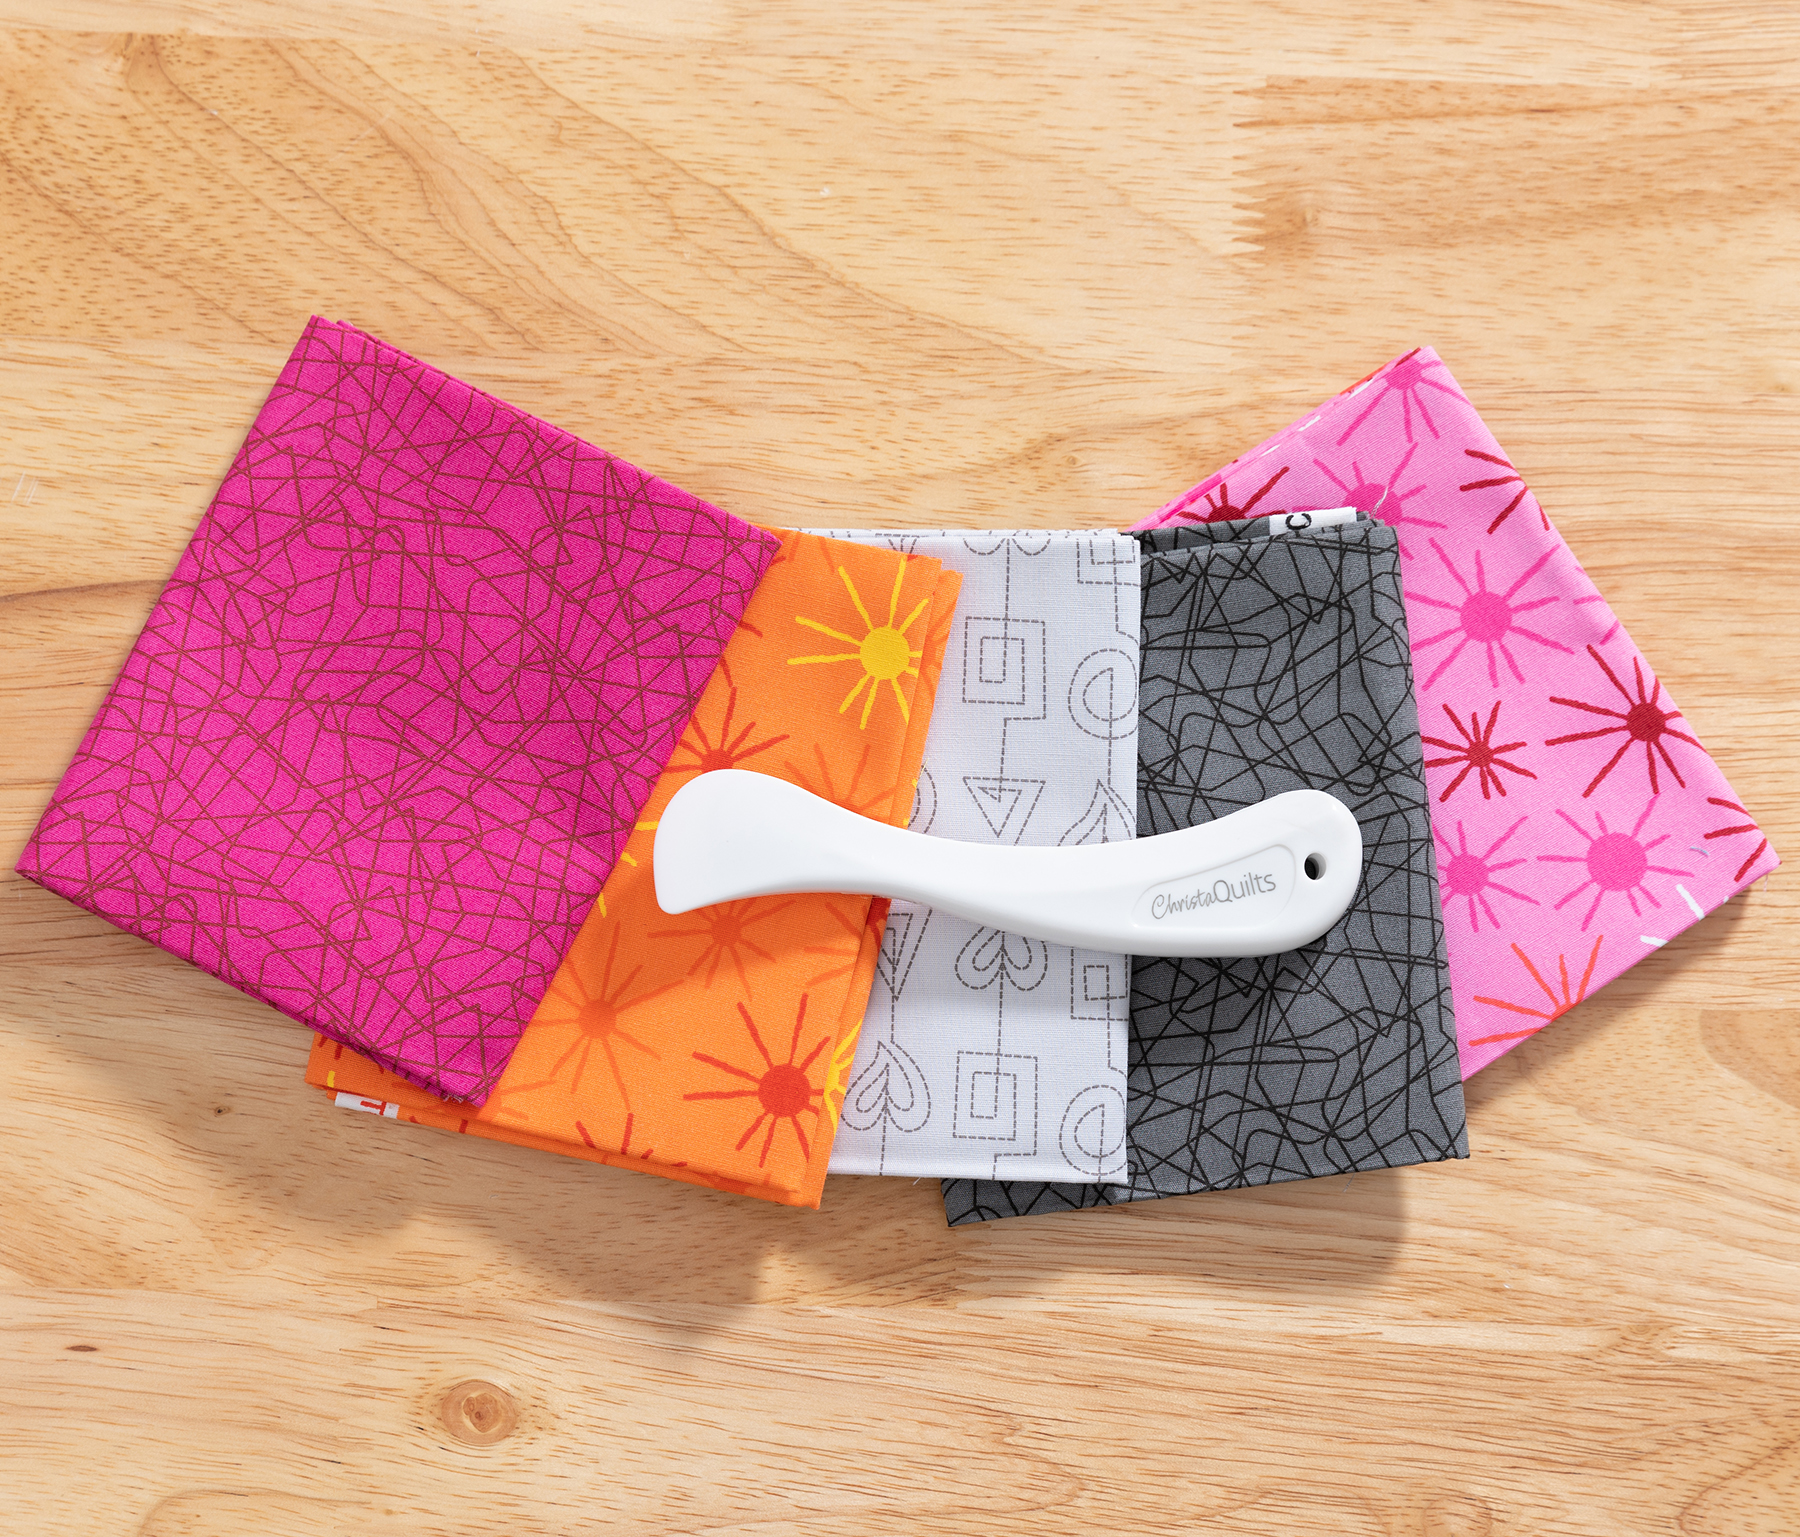
Here’s a bonus tip when basting: trim up the edges of the quilt, so there’s only about an inch or 2 of batting and backing sticking out. That will reduce the bulk under the machine, but more importantly, it will prevent the edges from getting folded under your machine while quilting! I use my batting shears to cut batting from the bolt and trim it up around the quilt.

Cick here to get my batting shears with my cute logo – they’ll make you a better quilter!

In Other News… I’m Heading to Paducah this Spring!

I’m still processing all of the amazingness that was QuiltCon 2024, but one thing is for certain. My favorite thing to do is teach others how to successfully quilt on their home machines. The excitement of my students when they “Get It” is unlike any other feeling I’ve seen.

If you missed the QuiltCon fun, the next place you’ll find me out and about is teaching at AQS quilt week in Paducah, KY from April 24-27, 2024. Here’s a short teaser video I made talking more about it.

Click here for my full teaching schedule and registration information.

As of this writing, 2 of my 5 classes have sold out, but there are a few spots left in 3 of them, plus my lecture. I will be lecturing and teaching from my latest books and I can’t wait. I’ve never been to this show before (although my Facets Quilt won a ribbon at the show a few years ago – read more about that here.)

If you plan to attend, please let me know. I’d love to see you there!

New Video: Combining Free-Motion Quilting Designs on Fancy Gifts Quilt

Hi everyone! I’m a little behind on posting due to my amazing trip to QuiltCon 2024 (more on that later)!! But I’m excited to share my latest video tutorial featuring my Fancy Gifts quilt. I’m showing how to combine 3 fun free-motion designs to create a new edge-to edge design that that goes with the theme of the quilt. Take a look by clicking play below to watch:

Lucky attendees of QuiltCon who received a swag bag got a copy of the quilt pattern + Dazzle Dots swatches to make this quilt. However, I want everyone to feel lucky, especially since I *am* from Las Vegas!!

I was able to secure a few extra copies of the Fat Quarterly magazine in which my quilt appears, so I’m able to offer a limited number of kits which include the pattern + everything you need to make the quilt top and binding.

Click here to grab the Fancy Gifts quilt kit (while supplies last.)

Now I’ve got to unpack from my trip, go through all my photos and videos that I took from the show and put them all together into a travel-log video for you all – so stay tuned!!

Ticker Tape Quilt Along Week 3 – Quilt Top Assembly

Just a quick reminder for all of those making Ticker Tape along with me: remember to work at your own pace – you are never “behind” because the quilt along posts will stay up indefinitely! Here’s the reveal of my turquoise version – I love a good “quilt top drop!” Click the image below to play the short video:

So this week’s “homework” is to join all of the blocks into rows and assemble the quilt top. You’ll be using the leftover squares to make a fun pieced border which frames the design nicely.

If you are just joining us, grab a copy of the Ticker Tape quilt pattern to follow along!
Click here to view all PDF patterns in my Etsy shop.

Here are some bonus tips that should help as you sew your quilt top together:

Lay Out Your Quilt Blocks On a Large Surface

This can be a design wall, the bed, or even the floor! But laying them out and then taking a picture of the order will help speed up the row assembly.

Press as You Go

I can’t over emphasize the importance of pressing. Whether you press your seams open like I do, or to the side, if you press every single seam as you go, it will help your quilt top lie flat and everything will go together much more smoothly. I use a hot dry iron with no steam. I press each unit in the block, then each block, and then reach row as I sew it together.

Pins are Your Friends!

Because I press my seams open, my seams don’t nest. So instead, I use a generous amount of pins to get my seams to line up perfectly. The trick is to pin perpendicular to the seam and place those pins on either side of the seam rather than in the middle so it won’t wiggle open. Take a look at this short video demo below. Click the image to start the video:

Enjoy the View

I actually finished sewing the Turquoise version of the quilt top while on a recent beach vacay. It was chilly outside but I had a great view from inside. I love taking my singer Featherweight with me on sewing vacation!

Make it Any Size You Want

The nice thing about my quilt patterns is that I offer them in multiple sizes and it’s also pretty simple to customize your size by adding or reducing blocks, rows and borders. I loved this quilt so much I’m making 2 versions of it. Here are a couple in progress images of the smaller Navy version which I made as Lap sized.

Stock up on Dazzle Dots!

As of this writing, I was able to cut out several more Ticker Tape quilt kits in all 4 colors I offer. You can also stock up on your favorite Dazzle Dots fabrics for the backing, and some folks have grabbed an extra yard or 2 to make it a little bigger. But you know what – no matter which fabrics and colors you choose, or what size you make, it’s going to look great!

Looking ahead to next week it will be time to baste – so stay tuned for more quilt along fun!!
Remember, you can share your progress and get extra help anytime in my Facebook group.

My QuiltCon 2024 Schedule

Will you be attending QuiltCon this year? It takes place in Raleigh, NC February 22-25. It’s my favorite show of the year! Although my workshops are completely full, you’ll be able to attend my lectures if you are there. I’m also doing a few meet ‘n greets with different vendors on the show floor.

To kick things off, I’ll be hanging out in BERNINA World of Sewing booth #211 just after the show opens on Thursday, from 10:30-11:30 am. These guys are also sponsoring the BERNINA room that I’ll be teaching in all weekend so I’ll get to know them quite well over the course of the show!

Thursday afternoon I’ll be teaching a sold out free-motion quilting workshop. Then on Friday, I’ll be teaching 2 walking foot workshops which are also full, followed by 2 lectures on Saturday which have plenty of room since they are taking place in a large lecture hall that can hold hundreds of people.

Click here for QuiltCon registration to get on the waiting list or sign up for my lectures.

My lectures and workshops will be based on my 2 latest books: 99 Machine Quilting Designs and How Do I Quilt It. If you don’t have those yet, you can click here to snag signed copies of my books.

Just after my first lecture on Saturday morning, I’ll be heading over to my new friend Deborah’s booth #501: Fish Museum and Circus from 10:30-11:30 AM. She’s known for her whimsical ceramic pincushions which always sell out at every show. We met at quilt market last fall and became fast friends!! She’ll host several fun designers events during the show, so that should be lots of fun!!

Finally, after my sold out walking foot workshop on Sunday, at 1 PM I’ll head over to the Threaded Lines Quilt Shop booth #321 for a book signing and chat. I can’t wait!!

I’ve attended each and every QuiltCon since the first one in 2013 and I love making new friends and catching up with my quilting buddies. Please let me know if I’ll see you there!

New Video Tutorial: Easy Custom Quilting Plans That You Can Quilt on Your Domestic Machine!

Have you ever wanted to add custom quilting texture to your quilts but were afraid to mess up your quilt? Well, with this week’s video I’m taking the fear out of free motion by breaking down my custom quilting process step by step. I’m featuring 2 different versions of Charming Chevrons, but you can apply these techniques to any quilt in your UFO pile! Click play below to watch:

Here’s my custom quilting process in an nutshell: first, stitch in the ditch in key areas of your quilt to anchor or secure the quilt. This is usually quilting an outline around the main block areas in between each row. Then, quilt one design in the background areas, and a different design in the blocks. It really is that simple!

Grab the Goodies While They Last!

Here are a couple of detailed images below. Both versions of Charming Chevrons are quilted using my “divide and conquer” technique, but the designs – aka quilting motifs – are completely different.

My secret is to utilize walking foot style quilting to create separation between the different design elements of the quilt. That allows your eye to move across the quilt taking in all the gorgeous texture!

Get the Optional Charming Chevrons Kits

Fun fact: I designed my Good Vibes fabric collection to include half lights/half darks. This is so that I could utilize all of the fabrics in the collection to create sparkle and contrast in my quilts. My philosophy is why use just 1 background fabric when 20 will do?? While supplies last I’m offering kits to make both versions of Charming Chevrons.

Click here to view all Good Vibes fabric & kits.

The smaller version is made from 5″ squares while the larger version is made from 10″ squares. I used 2 different binding fabrics (peach and blue) to make the original versions, but sadly those are now out of print. So for the kits, I included the lime green Gumballs print for binding which is just as much fun!!

Now I’m curious to know – have you ever made a quilt completely from precuts?

Ticker Tape Quilt Along Week 2 – Sewing the Blocks

Are you having fun quilting along? Even if you don’t make the Ticker Tape quilt, you can still follow along virtually. And the best part is, you can apply many of the tips and tricks I share to any quilt you plan to make!

Once your pieces are cut (click here for last week’s blog post), it’s time to sew them together into blocks. Be sure to follow the Ticker Tape quilt pattern instructions carefully for proper layout of the blocks. You can actually arrange the colors a few different ways. In the navy version, I used 2 of the same fabrics in each row of the block.

However, in the Turquoise version, I decided to change things up and make it super scrappy with a different fabric in each area of the block. Remember – there’s no right or wrong way to arrange the colors in the blocks – that’s completely up to you!

Here’s another tip: when sewing the block units together, if you sew with the background fabric on top each time, that will switch sewing directions each time you piece the units together. This helps prevent warping of the blocks, so it’s a good habit to get into. Check out my short video demo by clicking the image below:

I prefer pressing all of my seams open because that ensures that the blocks will lie super flat which makes it much easier to machine quilt. My tips are to use pins when joining seams and sew with a shorter stitch length, for example 2.0 instead of 2.5.

Contrary to popular belief, you *can* stitch in the ditch with seams pressed open, and in my experience it does *not* weaken the seams. But remember, these are techniques that work for me – you are welcome to use any processes that work for you.

So your “homework” for this week is to sew all of your blocks! The pattern includes instructions in several sizes, so make the number of blocks according to the size you have chosen. Set aside the leftover squares for borders which you can finish up next week.

Click the video below to see my pretty stack!!

Grab the Pattern, Fabric, or Optional Kits

Be sure to grab the Ticker Tape quilt pattern to follow along if you haven’t done so already. It’s available in both print and PDF.

And while supplies last, I’m offering Ticker Tape quilt kits made from my Dazzle Dots fabric. Aren’t they fun??

Click here to view all available quilt kits.

Next week, we will join all the blocks together to make the top, and sew the pieced borders. Stay tuned!! If you’d like to share your progress or get extra help, be sure to post pics in. my Christa Quilts group on Facebook.

Have You Seen My Magical Notions?

For this week’s video, I’m demoing how to use my 5 sewing notions that will help you make amazing quilts! I use these in each step of the quilt-making process: cutting, piecing, basting, quilting AND binding. Take a look by clicking play below:

Click here to view my complete collection of notions for sewing and quilting.

You can grab the whole set, or just collect them one at a time. The large shears cut through thick batting like butter, and the gloves add extra grip while pushing bulky quilts through the machine, reducing hand fatigue.

The crease marker – also known as a Hera tool – allows me to mark guidelines on my quilt to follow when stitching. The ergonomic rotary cutter is comfortable to grip and pairs up nicely with my mini mat and ruler set. Be sure to watch the video above to see them all in action!

Don’t they look pretty with my Stitchy fabrics?? I love how they coordinate!

Add my notions to your quilting toolbox and make magical quilts!

Ticker Tape Quilt Along Week 1: Cutting

By now you all have probably figured out that I love making more than one version of the same quilt. So during this fun quilt along, I’m going to share some “making-of” photos & videos of 2 different versions. I made a smaller version of Ticker Tape with a Navy background last fall, and I’m making the larger version with a Turquoise background now.

So for this week’s assignment, make sure you have a copy of the Ticker Tape quilt pattern and choose the size that you’ll be making – from Lap to Queen. Then gather the fabrics you’ll need for the size you’ve chosen. For the Turquoise Double Size version, I’m using my Dazzle Dots Snazzy Squares in Turquoise for the background, along with one full Dazzle Dots strip-roll.

I specifically chose how many strips of each color I wanted in the precut bundle when I designed my Dazzle Dots line. There are 22 fabrics in the collection and a total of 40 strips in the bundle, but I only included 1 strip of a few fabrics I thought would make great backgrounds, and 2 of everything else. That way you can set aside that one strip (like the turquoise I chose) and then still have enough fabrics to make all the blocks.

After you are happy with your chosen fabrics, follow the cutting instructions in the pattern on page 2 to cut out all of your pieces. Now here’s a bonus tip: I prefer to cut all of my pieces to the correct size rather than strip piecing them. This will make your blocks more accurate, reducing the chances that you’ll stretch your blocks out of shape.

Here’s what it looked like after I cut out all my pieces for the Lap Sized Navy version:

Keep all of the background units together and organize your colors so that all of the same fabrics are together. Thinking ahead to sewing the blocks next week: you can make the blocks coordinated, or super scrappy. Since I’m making 2 quilts, I’m doing one of each technique – so stay tuned for more details next week!

Let me know what questions you have as you make this quilt. I’m here to cheer you on every step of the way! If you’d like to share pics of your progress and get feedback from me, please share them over in my Christa Quilts Group on Facebook.

Until next time, happy quilting!!

Free Motion Quilting Tutorial: Stitching Edge to Edge.

The biggest hangup I see in my free-motion quilting workshops is students’ fear of not knowing where to go next. However, after getting comfortable with some warm up exercises, and with permission to just have fun, the vast majority come out of class loving free-motion quilting and that really makes me happy.

In a nutshell, practicing one design edge to edge over the entire quilt is the best thing you can do to improve your skills. So that’s what this week’s video focuses on. Take a look by clicking play below:

My other big tip is to practice on real quilts (and then give them away)! In my Jewel-toned version of Terrace Tiles I showed how to quilt one of my modern go-to designs called Jagged Stipple. It’s my answer to those who want to quilt something more interesting than regular stipple, but still want to get ‘er done quickly.

For a limited time, you can grab the Jewel colored quilt kit in addition to the Citrus kit that I introduced previously. (Check out the Terrace Tiles Citrus video if you missed it earlier – it has a completely different quilting plan!)

In addition to showing details of my basting and quilting progress, I included a bonus section on machine binding in the video above. Sometimes when I’m in a hurry, it’s a great option. I also love using up leftovers to make a scrappy binding.

Let me know if you plan to make this quilt (or have done so in the past). Can you believe I’ve made six of them so far?? It really is one of the fastest & easiest quilts you can make!

Restocking Kits & Bundles + Check out My Sale Section!

Have you visited the sale section on my website lately? Each time I get in a new fabric line, I like to consolidate and clean out some of the earlier stuff because I only have so much storage room in my studio. So now that Dazzle Dots is here, it’s time to clear out the remaining Geo Pop & Gridwork Yardage.

I’m also doing something different this time around. I took about a dozen or so “end of bolt” pieces fabric and am offering them at a better discount.

In addition to offering the larger chunks, I also cut out more fat quarters from my several of my previous fabric lines. Check out the Stitchy bundle right next to Dazzle Dots. Wouldn’t they look fantastic together in a quilt??

Finally, I reissued a couple of popular kits made from my Bling quilt pattern. One showcases Stitchy in a fun random looking layout, while the other version forms huge Hashtag blocks made from my Black, White and White collection. Hurry though, as once these are gone, they’re gone!

Can you believe that both of these quilts are made from the exact same Bling quilt pattern? It’s fun to see how different they can look due to fabric choices and block layout.

In case you missed it the first time around, you can watch this fun video showing how to assemble land quilt the Hashtags version of Bling. Now — don’t you want to make another one (or three) of these??