Road to California Wrap Up 2014

There’s so much to say about my fabulous Road to California trip that it will take me several blog posts to cover it all! Fortunately I was able to share a summary of the event from a modern perspective for my weekly Craftsy blog post.

You can click here to read it and hopefully this will tide you over until I get a chance to write about it more indepth on my own blog. 🙂 In fact, you can bookmark this page which will be a landing page for all of my future Craftsy posts!

Modern Quilts from Road to CA

A few of the Modern Quilts at Road to CA 2014

Suffice it to say, Road to California was awesomely amazing and inspiring. As soon as I get a chance to reflect on my weekend, I will plan on sharing pictures of all the modern quilts plus a few summaries of the classes and lectures I took.

It just so happened that my hubby and kids were able to have their own fun adventure while I was having mine. 🙂 They got to go on a last minute trip to Disneyland with the grandparents. Yay for Disney (we are huge fans)!

Disneyland

Disney at night, from the perspective of my 17 year old son.

To help me feel like I was still a part of the fun, my oldest son would text me pictures at various locations throughout the day and have me guess where they were. Hopefully, if this year turns out well with all of my new quilting aspirations, we’ll all be able to go there again soon!

Christa’s Soap Box – Teach a Friend to Quilt….

Teach a friend to quilt… and you’ll have a fabric-friend for life.  My longtime friend Janice popped in over Christmas and she asked the best favor that any friend could request – she asked me to teach her how to machine quilt!

Janice Quilt

Janice and Her Quilt

First a little backstory – Janice and I have been friends since just after I got married and she’s always been crafty. In fact, I’ve mentioned her on my blog before and we’ve swapped a few artistic creations over the years. Way back in those days when I started quilting I told her I’d make a quilter out of her someday… and now that day has finally come!

Janice reads my blog on a regular basis and recently told me she was inspired to learn to quilt because of my quilt alongs. Living across the country from me, she sought out her local quilt shop and signed up for a class. Although her beginner’s class only focused on piecing the top, she proudly showed me her beautiful piece. (Why, oh why, do shops not teach how to make the entire thing from start to finish?? That’s another soap box post for another day!)

Minky on the back

Minky on the back is super cozy!

She backed it in soft minky and had the shop quilt it for her in a pretty swirly design. Then she promptly sat me down and asked me for a lesson in free-motion quilting. Yay! 🙂

So I started her off how I usually do when introducing machine quilting to my students, with a paper and pencil, and we set to sketching out some interesting designs.

Quilt Doodles

Doodling on paper is so fun!

First she filled up a page with some simple stipples…

Janice Quilts

Practice on paper first!

Then we went to town trying all sorts of fun motifs like pebbles, swirls, geometrics and loops. After a few pages, she had the rhythm down and started to make that muscle memory connection between her brain and her hands. After all, the hardest part of machine quilting is knowing where to go next!

Next, it was time to hop on my machine and try out what she’d learned.

Janice Quilts

FMQ can be fun!

While she practiced, I made sure to tell her all about my favorite FMQ tips and I gave her a mini tutorial on binding by machine. I mentioned that it may take awhile to get the knack for free-motion quilting, but she can feel proud of doing it herself!

(These pictures remind me that I really should pretty up my hands when I quilt, LOL!!)

Janice Quilts

By George, I think she’s got it!

I fully expect that when Janice comes out for her annual visit next time, she’ll have completed her next quilt completely – from start to finish. I can’t wait for the show and tell!

Fabric Friday – Carolyn Friedlander’s Botanics

I’m excited to start a new series with you this year – Fabric Friday! I will try to keep up a regular schedule of posting about a few of my new fabric finds every other week.

Here’s a little background before I get into the meat of this post. Although I’ve been selling fabrics online in some form or another for 10 Years (yes – 10!) I’ve always shied away from being too marketing-driven on my blog.

Botanics

Botanics by Carolyn Friedlander

For years I’ve tried to keep a separation between quilting for business and quilting for pleasure. But after getting hit over the head with the “modern” stick, I’ve realized that often times, they are one and the same for me.

Since quilting is my business and business is my pleasure, I’ve decided it’s okay to talk fabric with you all. After all, without fabric, how would we ever make quilts?!

Botanics

Botanics Fabric Swatches

So I’ll start off this series by gushing about Carolyn Friedlander’s Botanics. This collection first caught my eye when everyone was blogging about their trips to last fall’s quilt market.

I love how Carolyn furnished her booth with a simple splattering of color and design. I think these fabrics are universally appealing because of their rich tone-on-tone color with a nod to elements of nature. Botanics is only her second line for Robert Kaufman, and I hope she sticks around with them for a long time!

Botanics at Market

Carolyn’s Wall of Color at Quilt Market, Fall 2013

Botanics precuts are available as 31 piece fat quater bundles, 42 square layer cakes, and 40 strip roll ups (Kaufman’s version of jelly rolls). Aren’t they lovely? And just itching for the right project, too! I love it when a collection includes both rich colorful focus prints and soft background (low-volume) colors.
Botanics FQ

Botanics Jelly Roll


Kaufman was also clever enough to put together a roll up of Kona solids that coordinate with the line.

Botanics Solid CoordinatesBotanics Solids


I have a healthy number of these precuts available in my store right now, but I recently checked the manufacturer’s website and not-surprisingly, they are no longer available for stores to re-stock once we sell out.

It’s always a guessing game for stores, trying to figure out how many of a certain item to purchase, and balancing that with your business budget while predicting what will be a smart purchase. But that’s also part of the fun of running a shop – keeping my eyes and ears tuned to what’s trending in blog-land. It’s all good! 🙂

I’m Heading out on the Road to California – Hope to See You there!

I’m excitedly packing my bags and gathering my supplies for a fun-filled weekend of quilting and inspiration. 🙂 I’ll be attending the annual Road to California quilters conference and I’m super excited!

Quilting Vacation

Quilting Trips are the Best!

I’ve signed up for a full slate of classes, including Jacquie Gering’s improv class, plus several machine quilting classes from the likes of Karen McTavish, Gina Perkes and Debby Brown. I’m especially excited about attending a lecture on batting, plus I’ll get a chance to meet the ever-delightful Eleanor Burns.

Stich N Flip

Jacquie Gering Stitch and Flip Improv

Victorian Feathers

Karen McTavish Victorian Feathers


This is definitely an investment in my quilting education which will pay out rich rewards. Attending large events like this helps me to improve both my quilting skills and my teaching skills. I love to observe how professional teachers engage with their students, and I take mental notes on their tone and presentation style. I’ve never been disappointed yet!

Feathers and Fills

Gina Perkes Fantabulous Feathers and Fills

Feather Phobics

Debby Brown Feather Phobics Only


Are any of you planning on attending? It would be fun to bump into some friendly faces. I’ll be the short one with tons of enthusiasm and a big smile on her face! 🙂

How to Make Quilting Your Business #1 – Introduction

Over the years I’ve had many people ask about different aspects of my quilting career and how they can get started turning their passion into a business. With the start of a new year, I thought it would be a fun to write up a series based on my personal experiences, with occasional tips and pointers from some of my friends and colleagues in the industry.

Although I am by no means an expert, I will be happy to share my thoughts and encouragement for any of you thinking of making quilting your business. After all, don’t you agree that sharing makes the (quilting) world a better place?

My plan is to blog about this topic on a regular basis, exploring the subjects below. Click on each underlined link to go to that post.

This list may grow as the series develops. If you have other ideas you’d like me to discuss, or specific questions you have, please ask away. I may not reply directly, but will definitely incorporate your thoughts into future blog posts.

A quick word about the “business” side of things. Keeping records, filing taxes and setting up your business entity are probably the hardest things to do to get started. If you can handle the paperwork, you can handle anything!

I’m not going to business legalities in detail other than to encourage you to take the first step by setting up a separate bank account and contacting your local tax office to file the appropriate business documents. It varies by state or country, but most states’ governments have a wealth of information online and can walk you through the process.

For a quick definition of the different types of US business entities to choose from, you can read this post that I found online after doing a quick search. For specific business questions you may have, be sure to google it and you can literally spend hours online learning everything you need to know!

Christa QuiltsOnce you’ve made the plunge to decide to create your own business, treat it as such. Set realistic goals and working hours for yourself. If you take yourself seriously, so will those around you. 🙂

I’ll be back with this series next week, sharing my thoughts on choosing a quilting career!

Sew and Tell – A Visit with Cindy Needham

This past weekend I had the great pleasure of meeting quilting diva Cindy Needham and taking a fabulous machine quilting class from her, on how to quilt heirloom feathers and backgrounds. All photographs were taken by me and shared with Cindy’s permission.

Cindy and Christa

Cindy Needham and Christa Watson at DQN Guild Meeting

Cindy’s specialty is turning vintage heirloom linens into beautifully quilted masterpieces! She is my hero because she find joys in extensively quilting her quilts and encourages others to conquer their fear of free-motion quilting. I love this quote from Cindy, shared on the back of one of her beauties:

Cindy's QuoteIt reads, “Take the time to quilt something beautiful. Your work will speak to generations to come about your passion for quilting, and give your quilt a voice to speak to those who choose to listen…” Isn’t that lovely?

Click on each of the pictures shared below to enlarge and appreciate the details!

Cindy Needham Quilting

Heirloom quilting by Cindy Needham.

Although Cindy’s quilting style is beautifully vintage, with heirloom quality stitches machine quilted on a breathtakingly small scale, I was able to learn so much from her and contemplate how I might apply her techniques to my modern quilts.

Cindy Needham Quilting

Cindy’s quilt sample. Imagine what a beautiful, modern wholecloth this would make!

In fact, during class I kept laughing to myself whenever she would show samples of her “larger scale” designs. I mentioned that her large scale is my small scale. 🙂 I think that a good way to describe the differences in motif size could be called be “Heirloom Scale” and “Modern Scale” – both equally beautiful and appropriate for their quilting styles.

Cindy's Feathers

Cindy’s Feathers

Cindy reminded us that it was okay to be “consistently inconsistent” and that perfection in quilting is over-rated. Words to live by. The sample below is one of my favorites. I love her nod to asymmetry in this piece! I think it’s a touch modern, don’t you?

Cindy Quilts

Quilting Sample by Cindy Needham

If you ever get a chance to take a class from Cindy, or listen to one of her lectures, I highly recommend it! She also has a couple of machine quilting classes on Craftsy, one of which I reviewed previously on my blog. Now I’m off to doodle… and dream sweet machine quilting dreams….

Free BOM and Craftsy Flash Sale

Now that I’m going to be blogging for Craftsy on a regular basis (thanks to so many of you for reading my first Craftsy post), I thought it’s only fair to spread the Craftsy love whenever I think they are doing cool stuff. And don’t worry, I’m not going to slack around here – I still have plenty to say on my own blog, LOL!!

Craftsy BOM 2014So anyway, I love the fact that Craftsy offers so much free content on their site, including this year’s free block of the month series. The 2014 BOM is all about applying color theory to your quilts for dynamic results. I know that picking colors and choosing fabrics is my hardest part of making a quilt, so I’m excited to pick up a few tricks of the trade as I follow along with instructors Amy Walsh and Janine Burke.

Craftsy BOMI mean, doesn’t this look simply scrumptious?? And if such loud colors aren’t your thing, you can always go back and sign up for the BOM for 2013 or 2012 here. They are still available online for free! (I love free – don’t you?)

If you do get that itch to sign up for more classes, Craftsy is having a “flash sale” through the end of the day tomorrow, 1/19/14. There are a nice selection of quilting classes, most of which I signed up for during the last sale. 🙂 Here are a couple couple of quick recommendations if you’d like to check them out:

Craftsy Class SaleCraftsy SaleCraftsy SalephotographyClick here to view all classes on sale this weekend and get started on something crafty!

Riley Blake MQG Challenge Quilt Post #2 – The Blocks

Over the last couple of weeks I had a chance to work some more on my Riley Blake Challenge hosted by the Modern Quilt Guild.

Post #1 for this quilt was about block design. This week I finished sewing my blocks and I’m pleased with how the quilt is starting to shape up. I may just make that February 17th deadline yet!

Riley Blake Challenge

Riley Blake Fabric Pull – it took me 3 tries to get the right shade of grey I wanted!

I had originally chosen a grey background for my improv blocks and it took me several tries before finding the right shade (I can be a little finicky like that).

Riley Blake Challenge

Original Design Sketch

However, once I made up a sample block it wasn’t really speaking to me. Then on a whim I decided to go with a much darker background – the Riley Blake Charcoal solid included in the original challenge bundle.

Fabric Audition

Auditioning a darker shade of grey – Charcoal solid by Riley Blake

I pulled in several more Riley Blake Basics in coordinating colors, then cut out a bunch of different length strips and sewed them together in an improv way (so fun – even if it does waste a bit of fabric). Using a large square ruler, I trimmed the blocks to size. I was going for the effect of a foundation string pieced block – without the pesky foundation part!

Riley Blake Challenge

Improv Strips Sewn Together

Now I’m starting to like how the blocks are coming together.

Riley Blake Challenge

Riley Blake Challenge Blocks

I timed myself while working and it took a total of 21 hours to starch, press, cut and sew a total of 36 – twelve inch blocks (not including prewashing all the fabrics first!) That seems like a long time for me, but I sewed them together just a few blocks at a time to make sure I knew what I was doing.

Improv String Blocks

Riley Blake Challenge – Improv String Blocks

This is my first attempt at an improv design and it was very liberating. As I finished each block, it was fun to see the wonky, graphic design emerge. I may rearrange them to balance out the colors and I’m toying around with adding a border of dark charcoal around the edges to make the whole thing appear to float. We’ll see.

I can’t wait to sew the blocks together and then start on the super fun part – the quilting!!

Book Review and Blog Hop – Vintage Quilt Revival

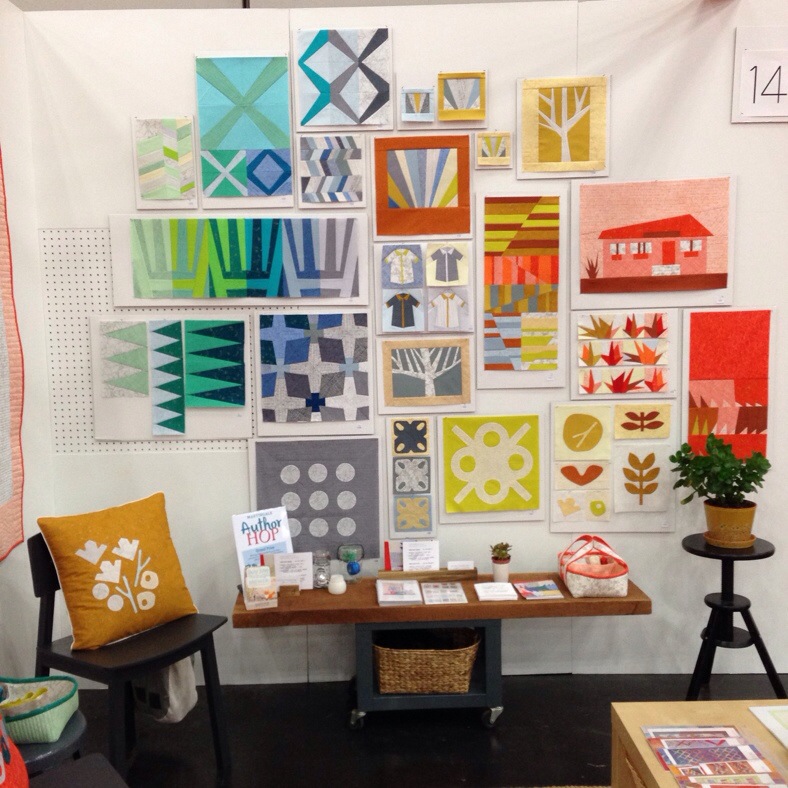
Today I would like to tell you about some fabulous friends of mine who put their brilliant minds together to create an amazing quilting book that actually has something to say!

QuiltCon Dinner

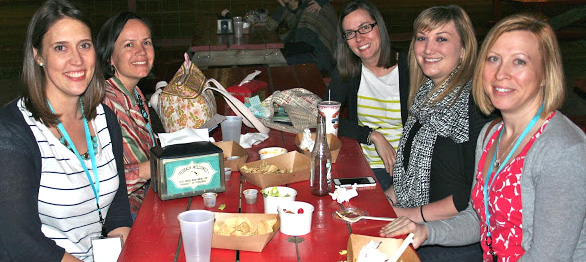
Dinner in Austin, TX, 2013
From Left to Right: Katie, Christa, Faith, Holly, Lee

At QuiltCon last year, I got a chance to chat about quilting over dinner with Vintage Quilt Revival authors Katie Clark Blakesley, Lee Heinrich, and Faith Jones (plus their fantastic friend Holly who’s on the hop later in the week).

Even though I didn’t know they were writing their book at the time, their passion for modern quilting was quite contagious! In fact, when I arrived home from QuiltCon last February, I was ready to take on the modern quilting world, in part due to their enthusiasm for it!

Vintage Quilt RevivalSo let me tell you a little bit about their book, Vintage Quilt Revival. In addition to an extremely well written volume that is beautifully illustrated, they have included mini history lessons for each block, plus design notes and tips throughout.

It’s a whopping 159 pages full of creative inspiration and instruction including sections on tools and techniques, new settings and color approaches, and re-imagined blocks that will take your breath away!

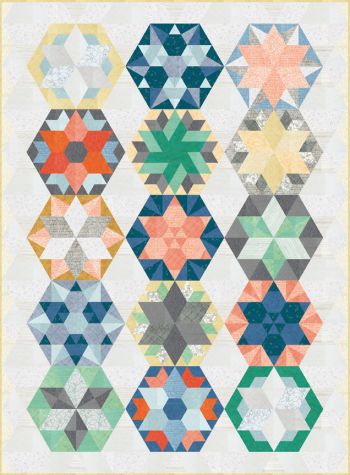
The book is organized block by block, with instructions on how to make each of the twenty 12″ finished blocks, followed by a full-sized project to make from each and every block.

Sugar Snow Quilt

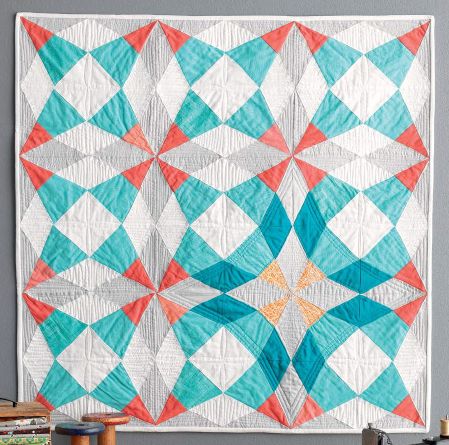
Sugar Snow Quilt by Lee – one of my favorites from the book!

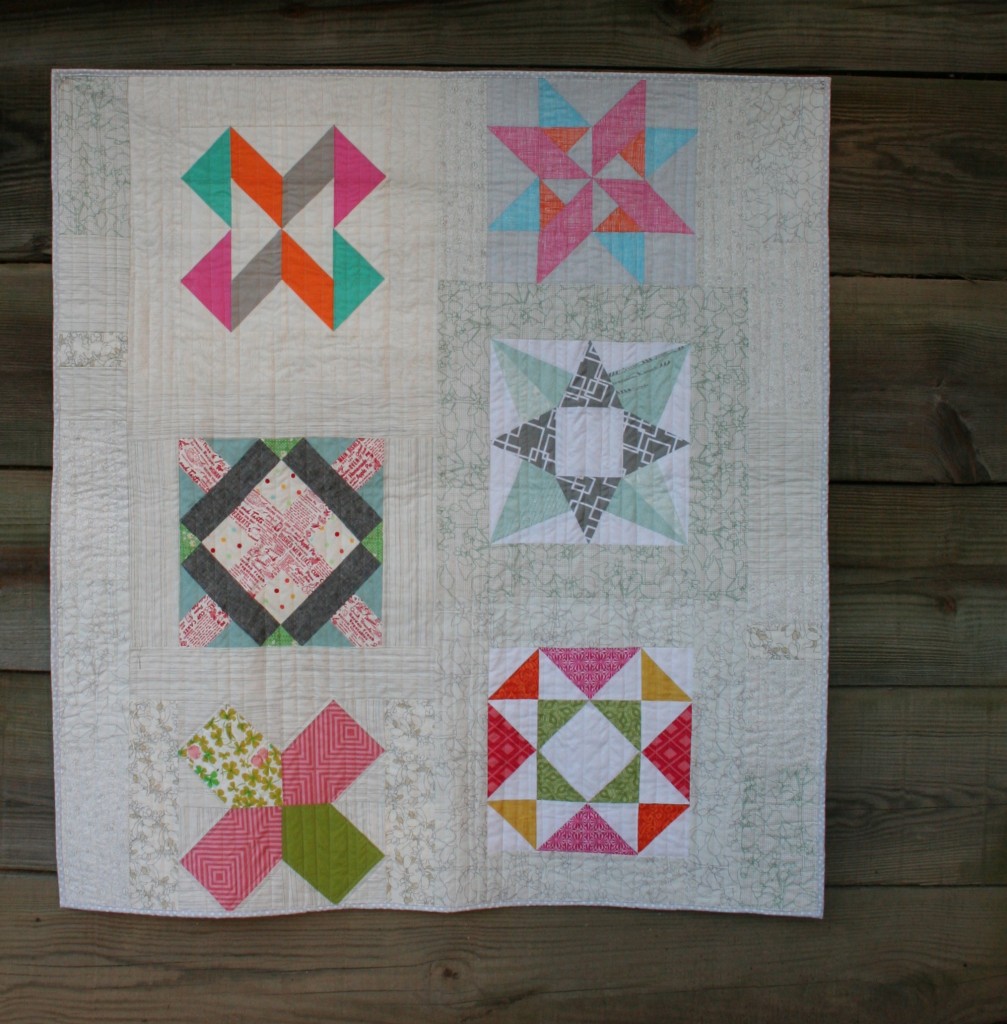
And this is where the creativity really comes in. Adapted projects include fun accessories like totes and pouches, to full sized quilts using a variety of settings. The icing on the cake is the included sampler quilts, made by each of the authors showcasing a different way to combine all of the blocks!

Vintage Quilt Revival

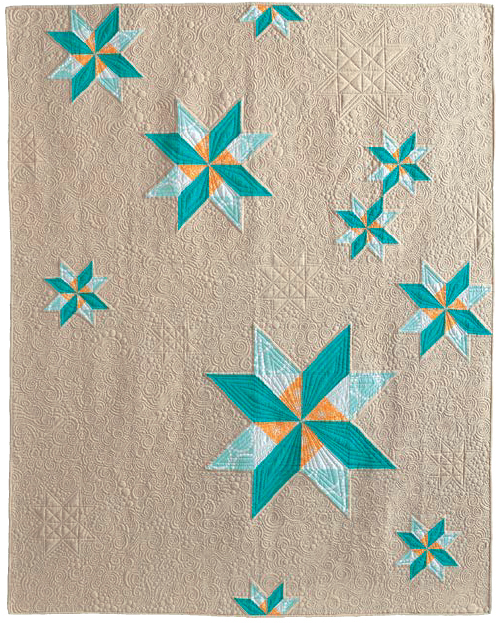
Faith’s Sampler Quilt – I absolutely love this setting!

Many of the blocks utilize paper piecing techniques, and the book comes with a CD so that you can print out as many full-sized foundation templates as you need. They’ve thought of everything!

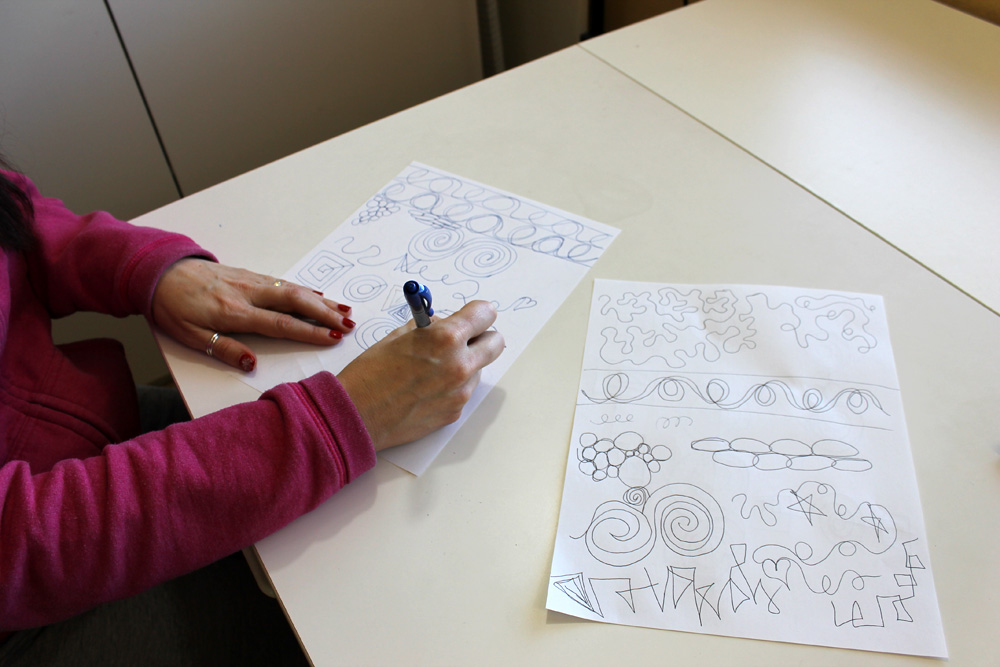
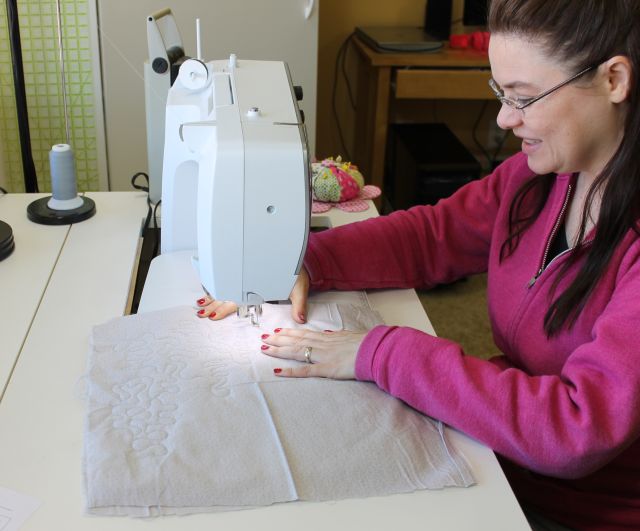
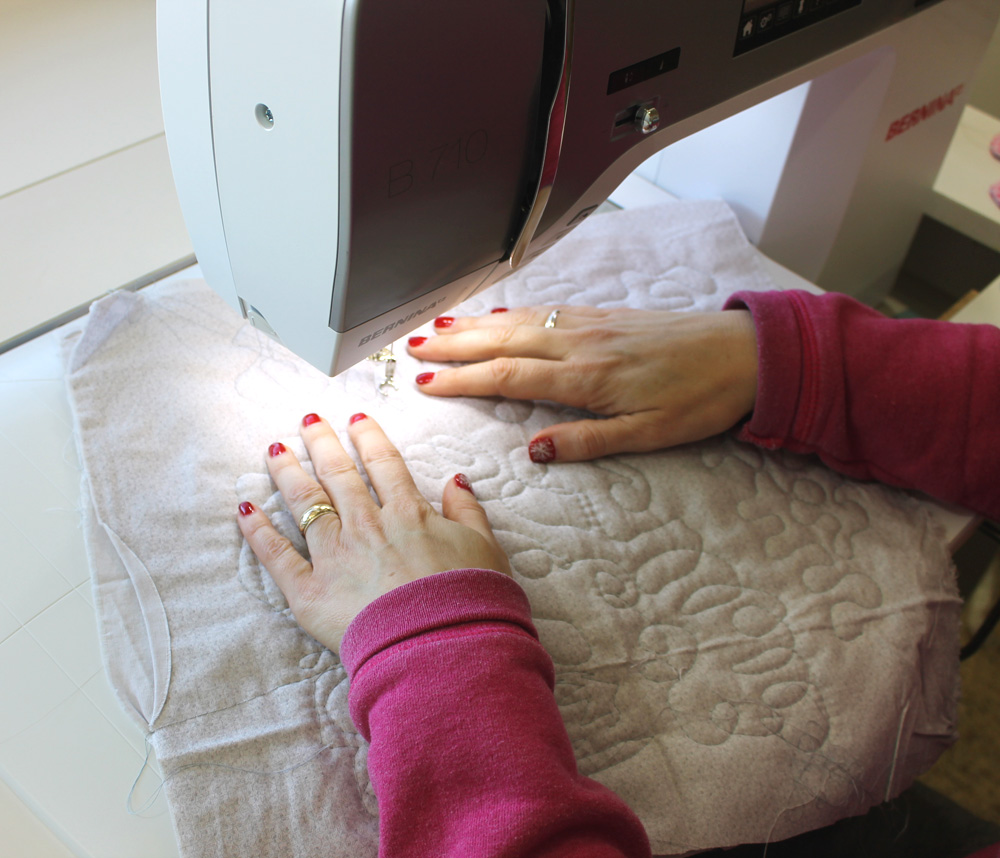
I also give Katie, Lee, and Faith extra credit points for quilting a vast majority of the quilts themselves, including tidbits of inspiration on how they chose the quilting designs. I love it when authors show that it is possible to make amazing modern quilts yourself from start to finish. 🙂

Cut Glass Quilt

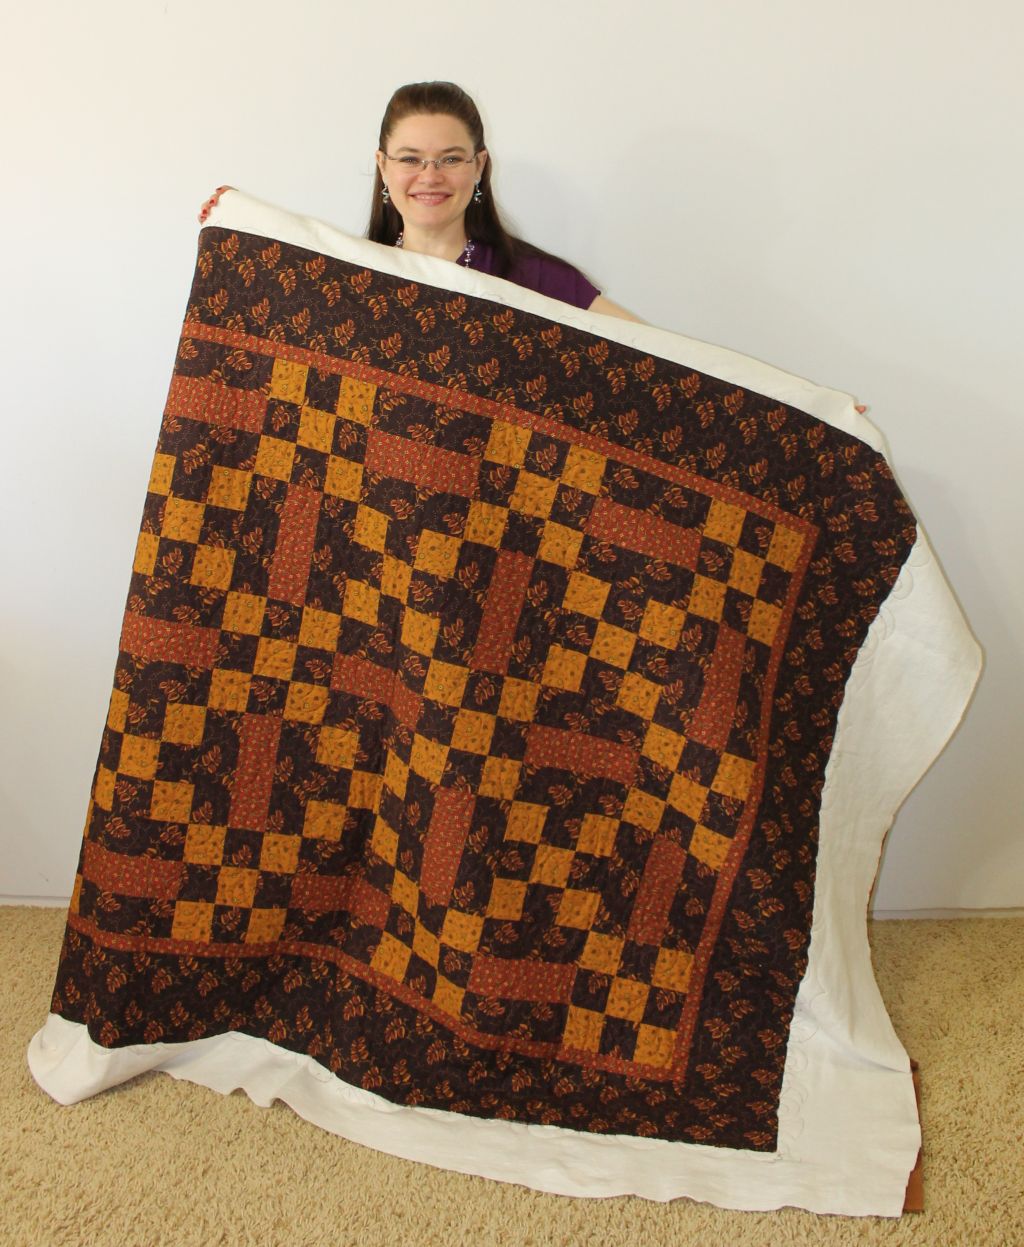
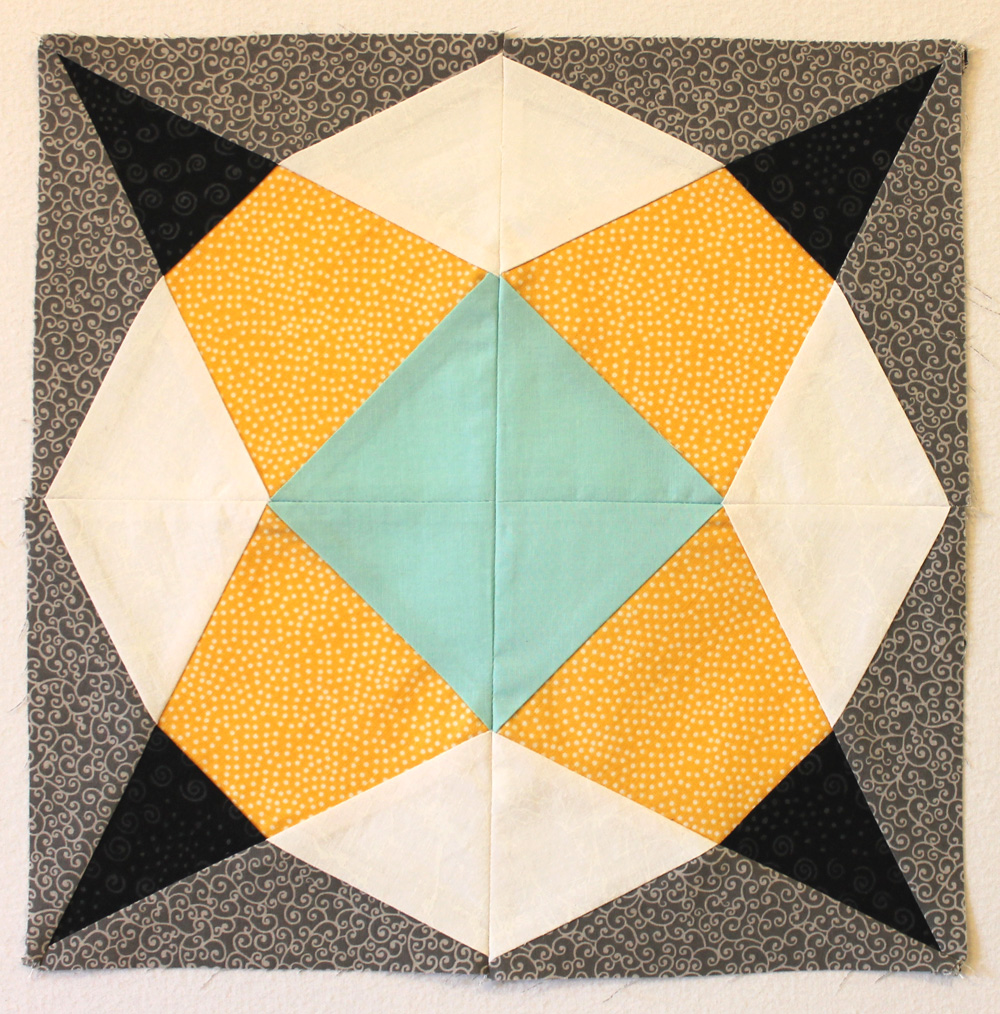
Katie’s Cut Glass Baby Quilt – I got to recreate a couple of these amazing blocks!

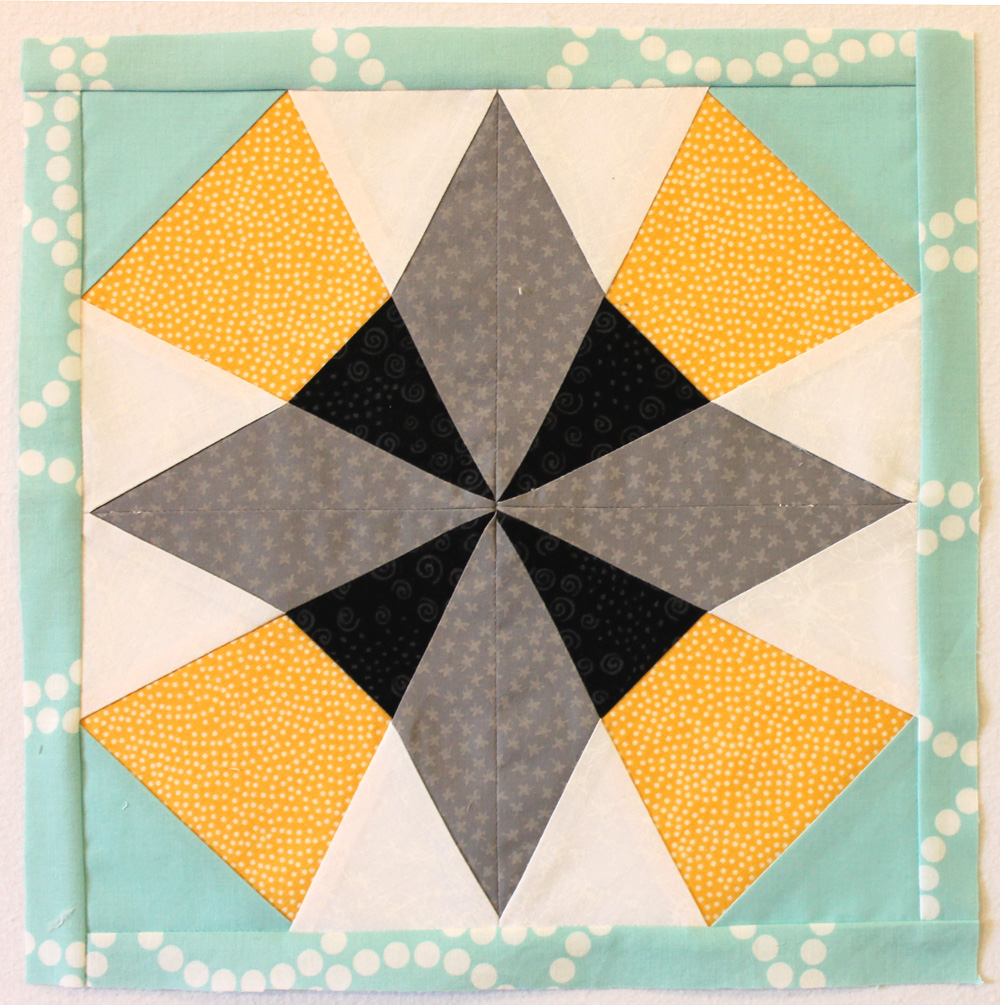
Vintage Quilt Revival is worth reading and perusing as a coffee table book, even if you never make a block – but make a block I did! Each of the 20 bloggers on the hop got to construct a different block from the book using our own colors and fabric choices. Such fun! My block was the Classic Geometric Star Block – the one Katie chose to make her Cut Glass Baby Quilt, shown above.

Geometric Star Block

My version of the Geometric Star Block

Even though this particular block was listed as an “advanced” skill level block. I had no problems following the clear-cut instructions to make my block.

Just for fun, I also made another block with the points going the opposite way and added a little sashing border around it, to demo how fun it can be to mix things up!

Geometric Star Block

Geometric Star Variation, with Border

I’m very touched that the authors have chosen to incorporate all of our sample blocks into charity quilts which will be revealed at the end of the hop. It will be fun to see how they all come together.

Updated – See The Finished Charity Quilts!

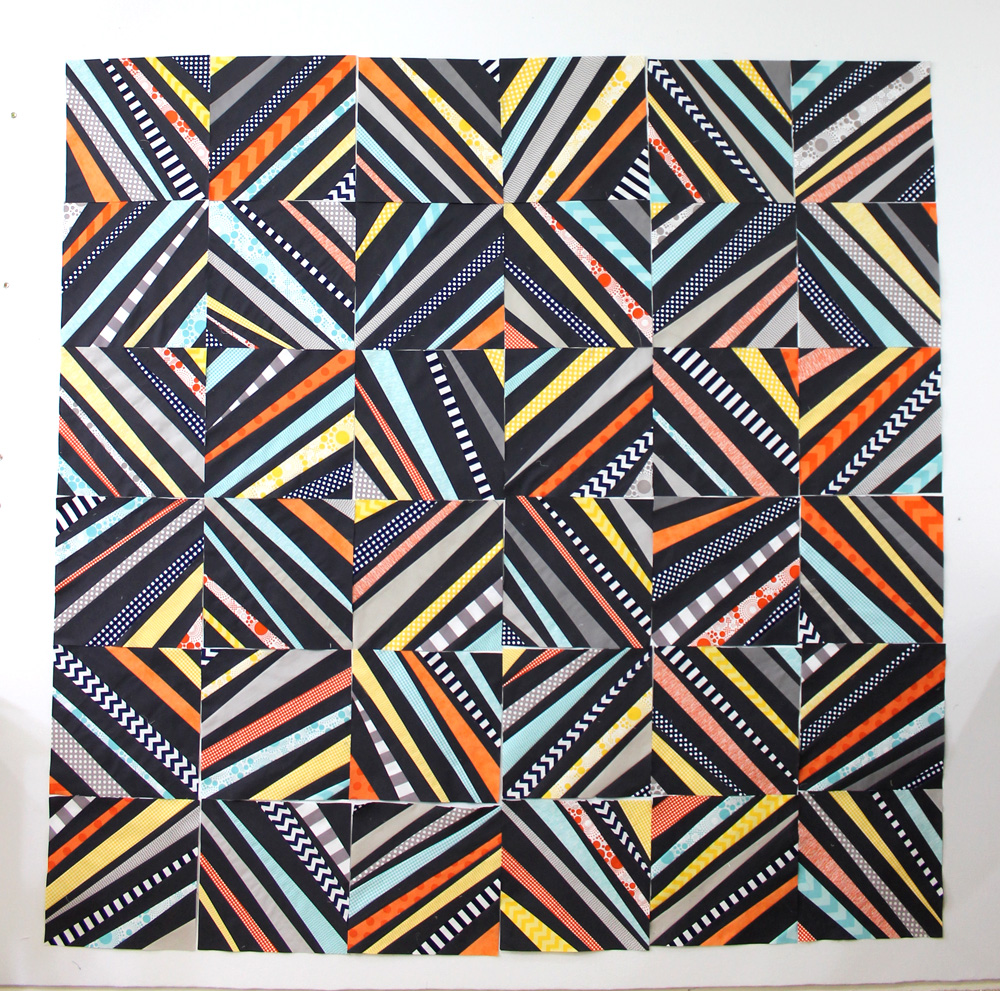
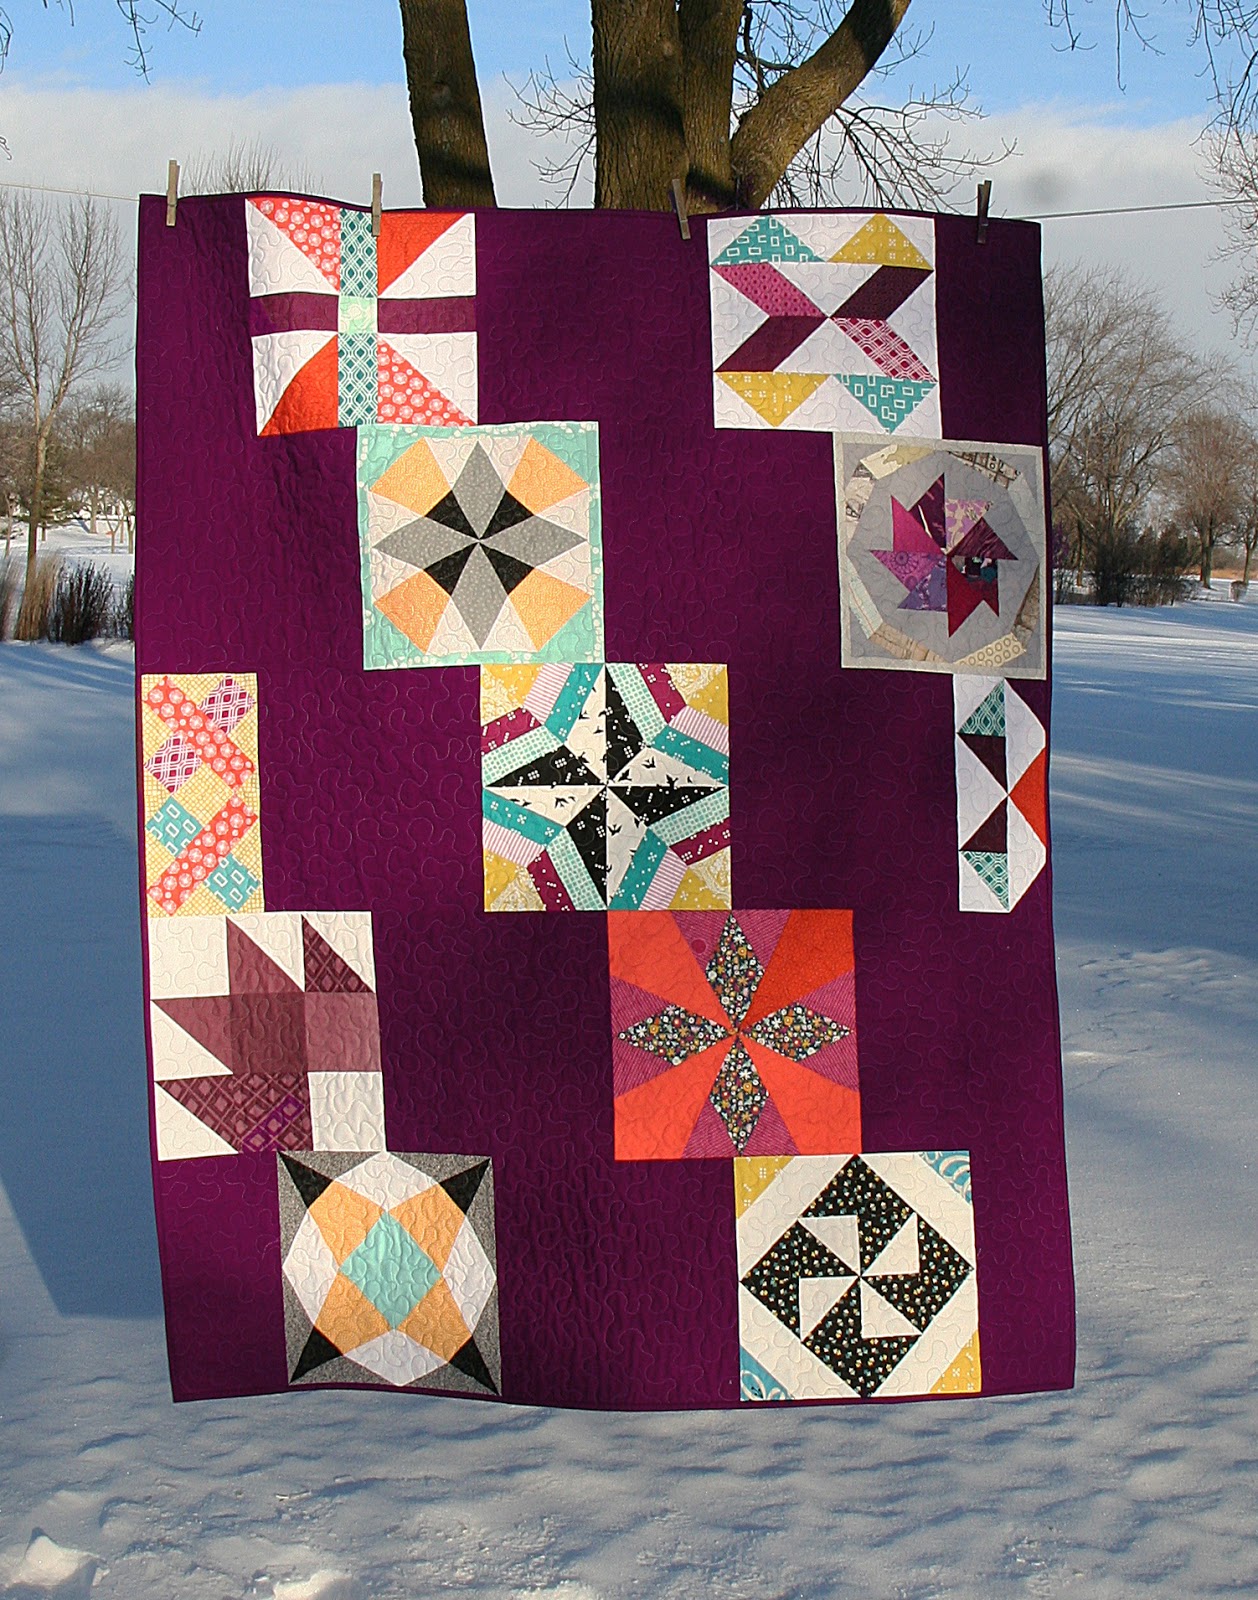
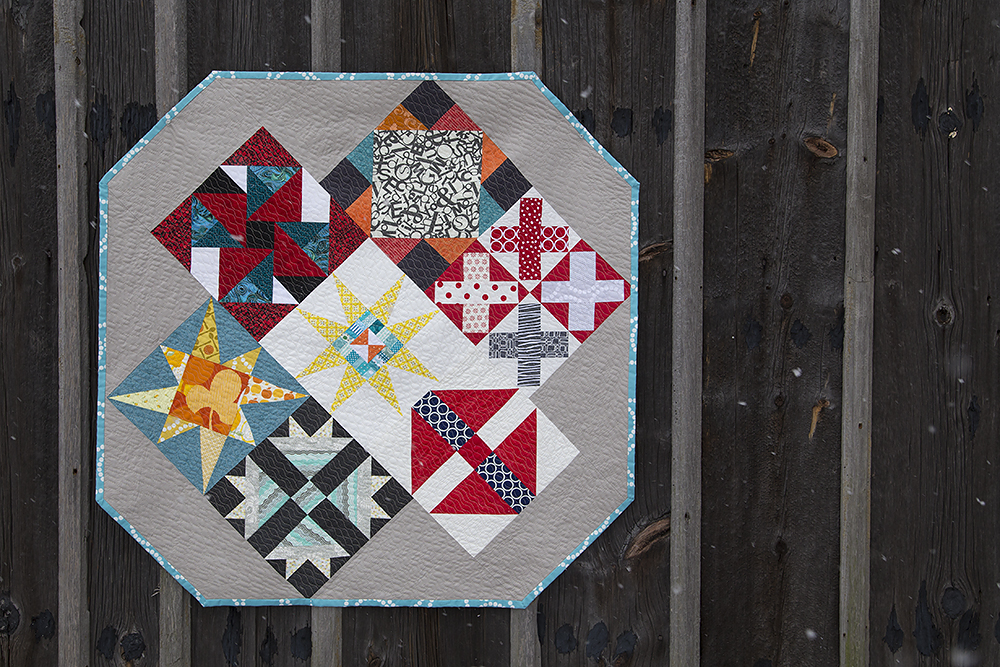
I was so thrilled to see the three charity quilt finishes put together by Katie, Lee and Faith. I am impressed with how they were able to take all of the blocks and combine them into three cohesive quilt designs. Remember, the participants had free reign when it came to fabric and color choices. Aren’t they just wonderful?

Katie's Charity Sampler

Katie’s Charity Sampler

Lee's Charity Sampler

Lee’s Charity Sampler

Faith's Charity Sampler

Faith’s Charity Sampler

To see more Vintage Quilt Revival inspiration, be sure to check out the entire blog hop schedule below. I feel truly honored to be included among such talented people!

January 13th (Monday):
Crazy Mom Quilts – Amanda Jean
Don’t Call Me Betsy – Elizabeth
Film in the Fridge – Ashley
Happy Quilting – Melissa
Noodlehead – Anna

January 14th (Tuesday):
I’m A Ginger Monkey – Katy
Quilting Is My Therapy – Angela
A Quilting Life – Sherri
Sew Mama Sew – Kristin
Tall Grass Prairie Studio – Jacquie

January 15th (Wednesday):
Christa Quilts – Christa
Diary of a Quilter – Amy
Quilting Gallery – Michele
Sew Take a Hike – Penny
V and Co. – Vanessa
West Coast Crafty – Susan

January 16th (Thursday):
Bijou Lovely – Holly
Don’t You Know Who I Am – Sukie
Lily’s Quilts – Lynne
One Shabby Chick – Amber

January 17th (Friday):
Swim, Bike, Quilt – Katie
Freshly Pieced – Lee
Fresh Lemons Quilts – Faith

Craftsy Guest Post – Tips on Free Motion Quilting

Did you know that Craftsy has a blog? And did you know that a lot of bloggers I follow share their knowledge there? I’ve been reading Craftsy’s blog for a few months now, especially the posts related to quilting because I can always learn something new. 🙂

I was invited to contribute a post this week, writing about my favorite subject, machine quilting. Click here to read my blog entry and hopefully pick up a tip or two for yourself!

2014_cq_background_texxture

All of of the pictures I shared in the post came from tutorials and quilt alongs I’ve shared on my blog. It was fun to gather them together and use them to illustrate some of my favorite machine quilting tips.

Happy reading and quilting!