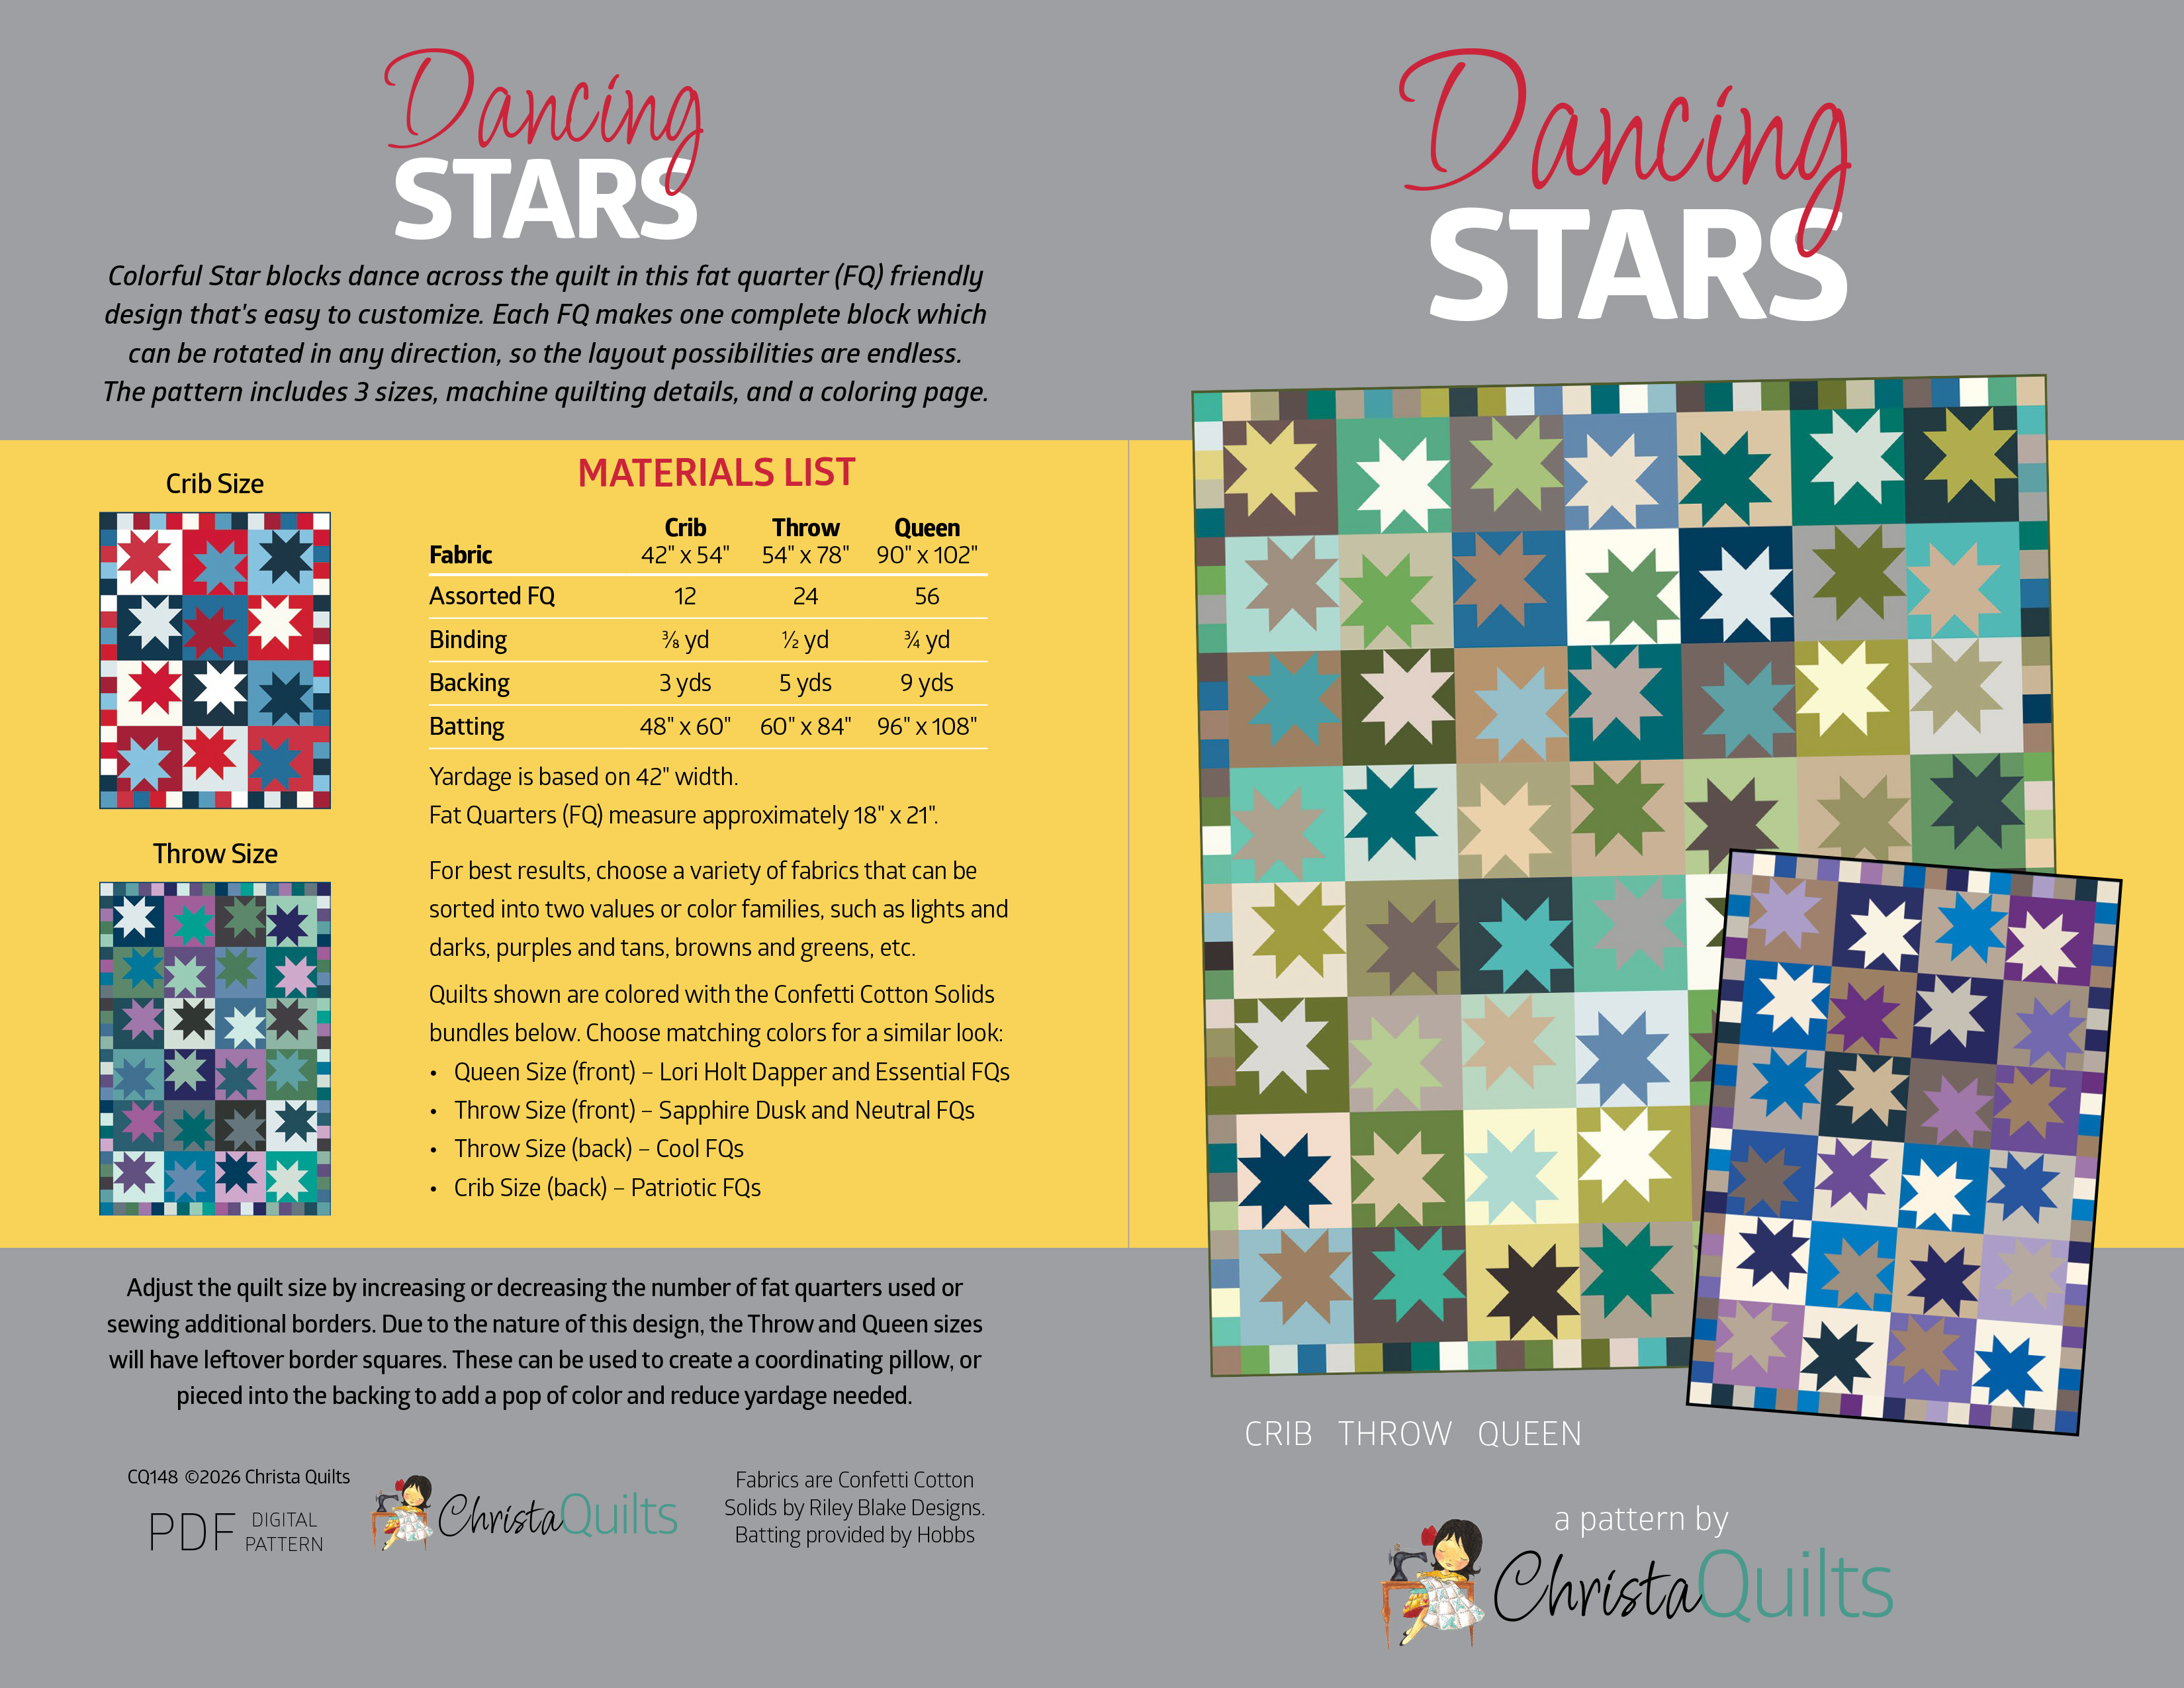
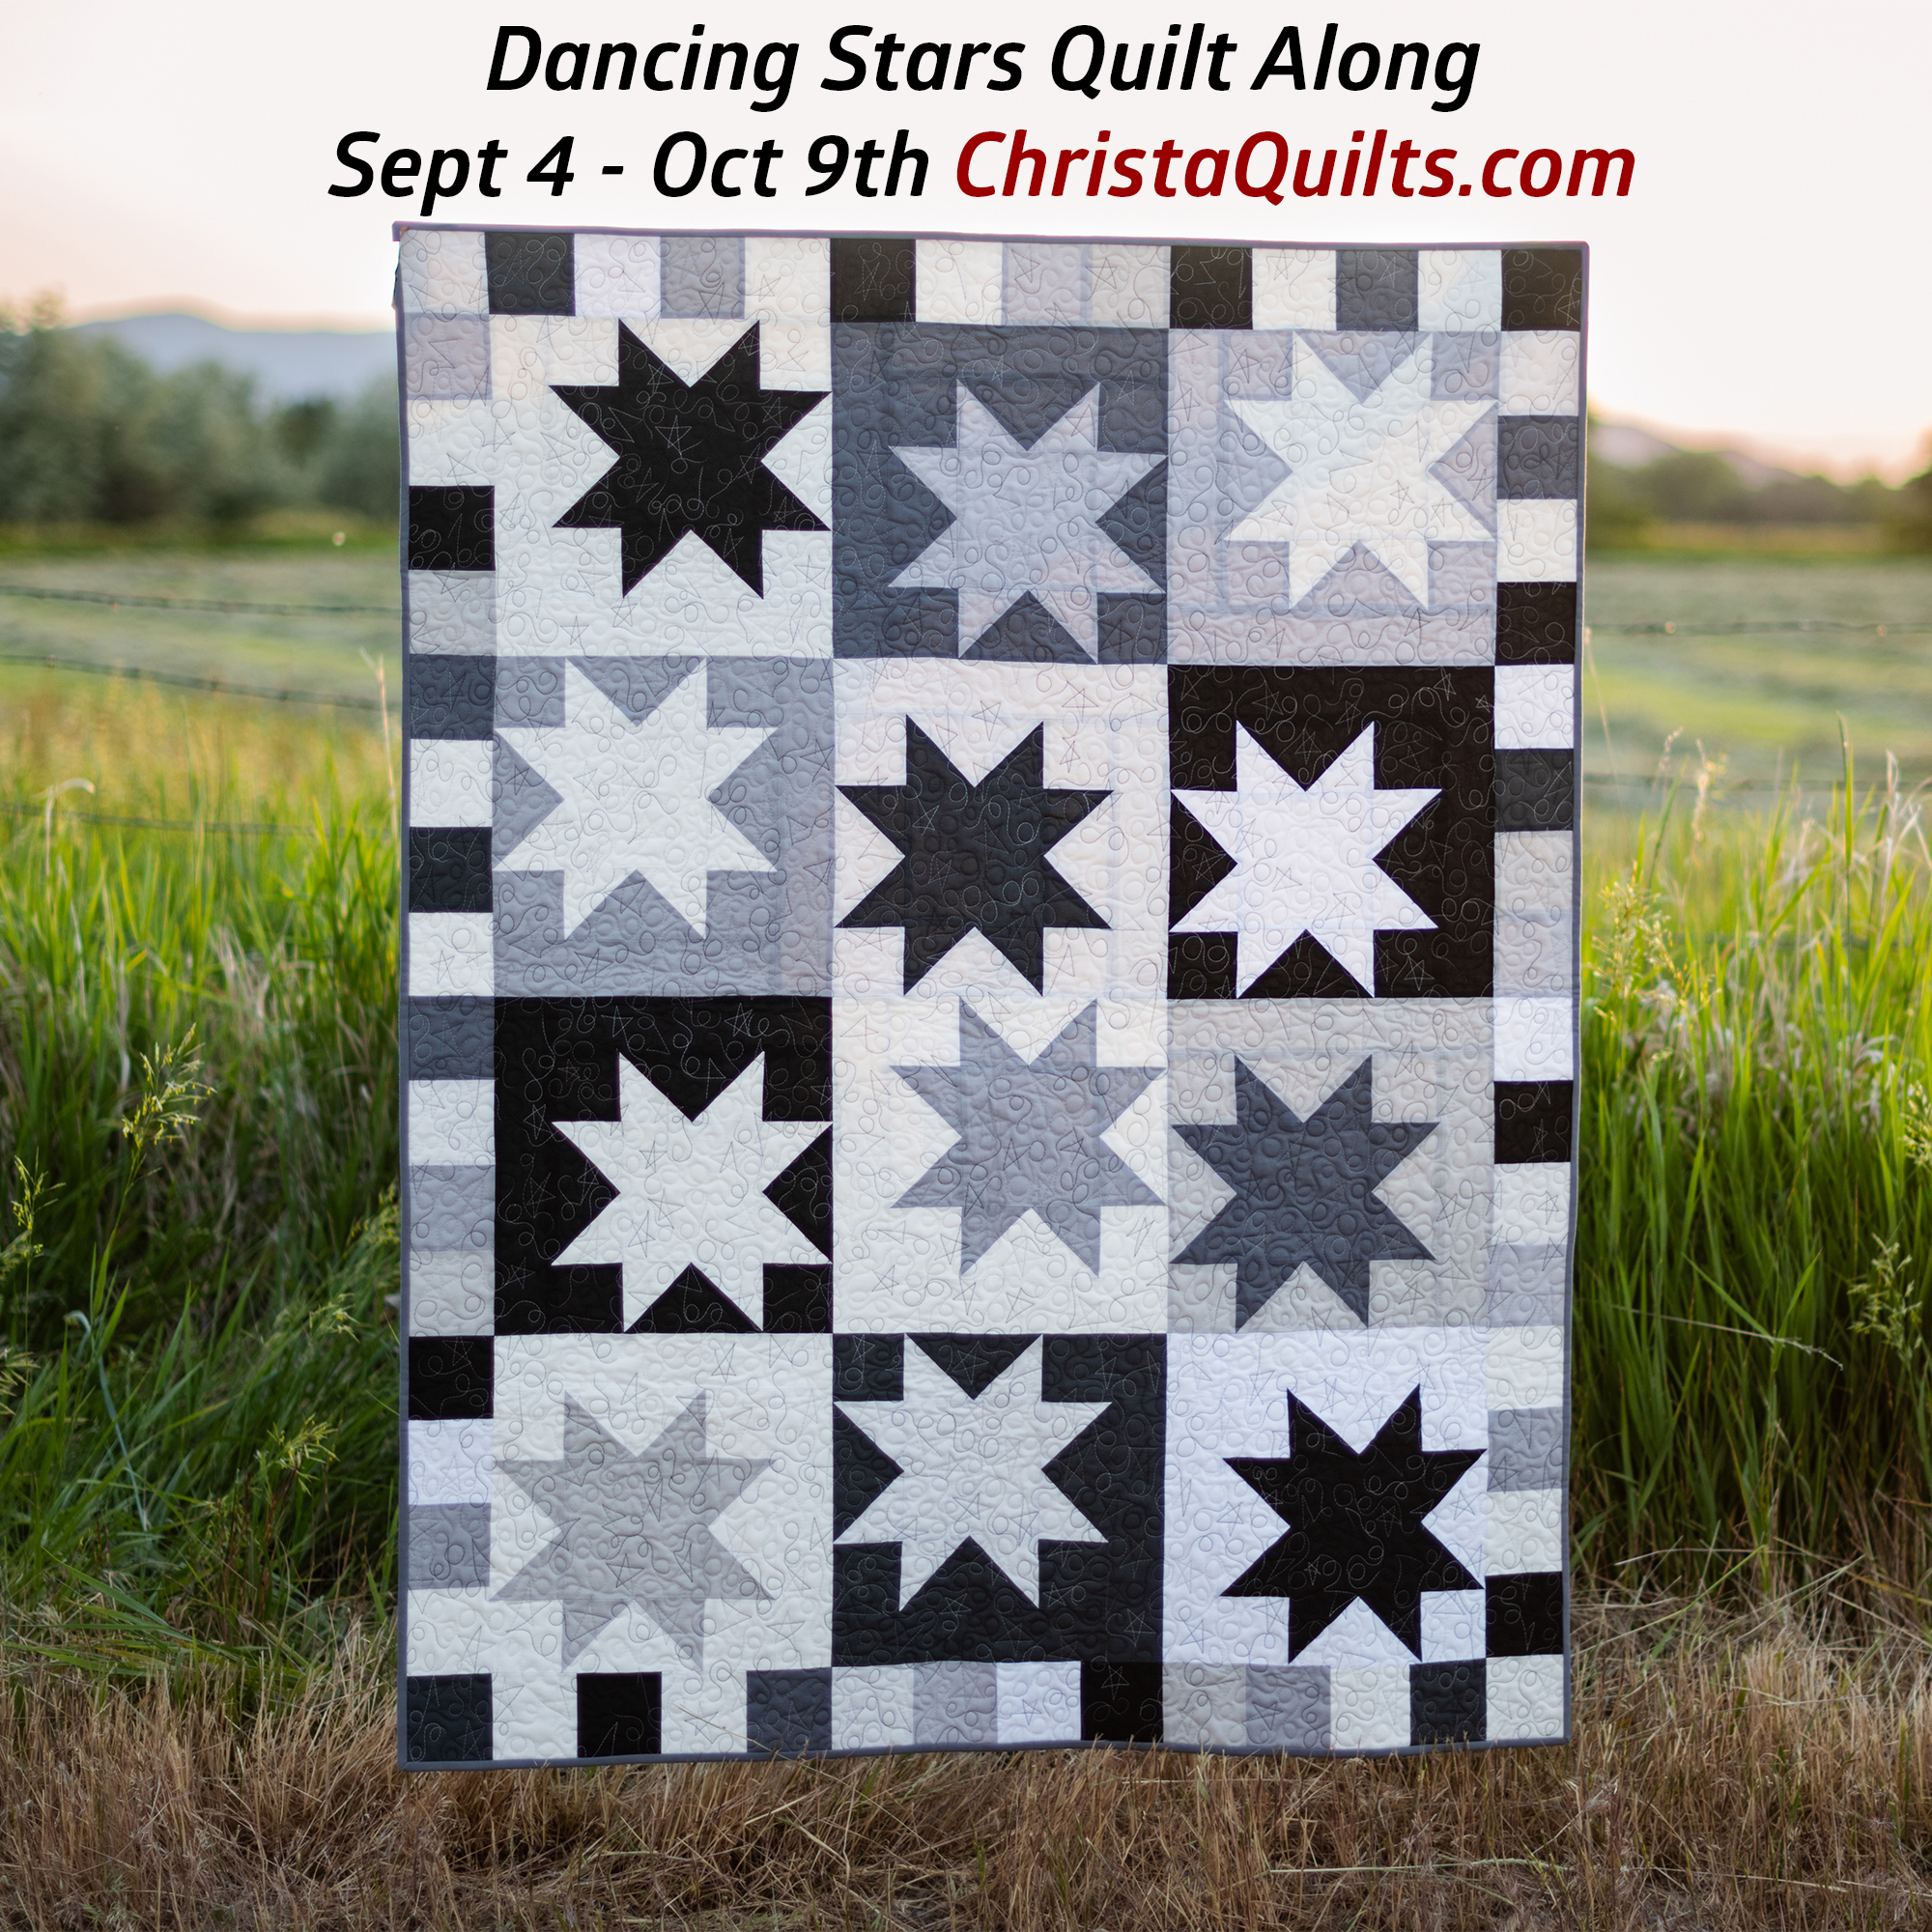
It’s quilt along season and I’m excited to share one of my newest patterns with you! This fall beginning in September we’re going to make my Dancing Stars quilt. This is a fat quarter friendly design that’s easy to customize and make it your own!
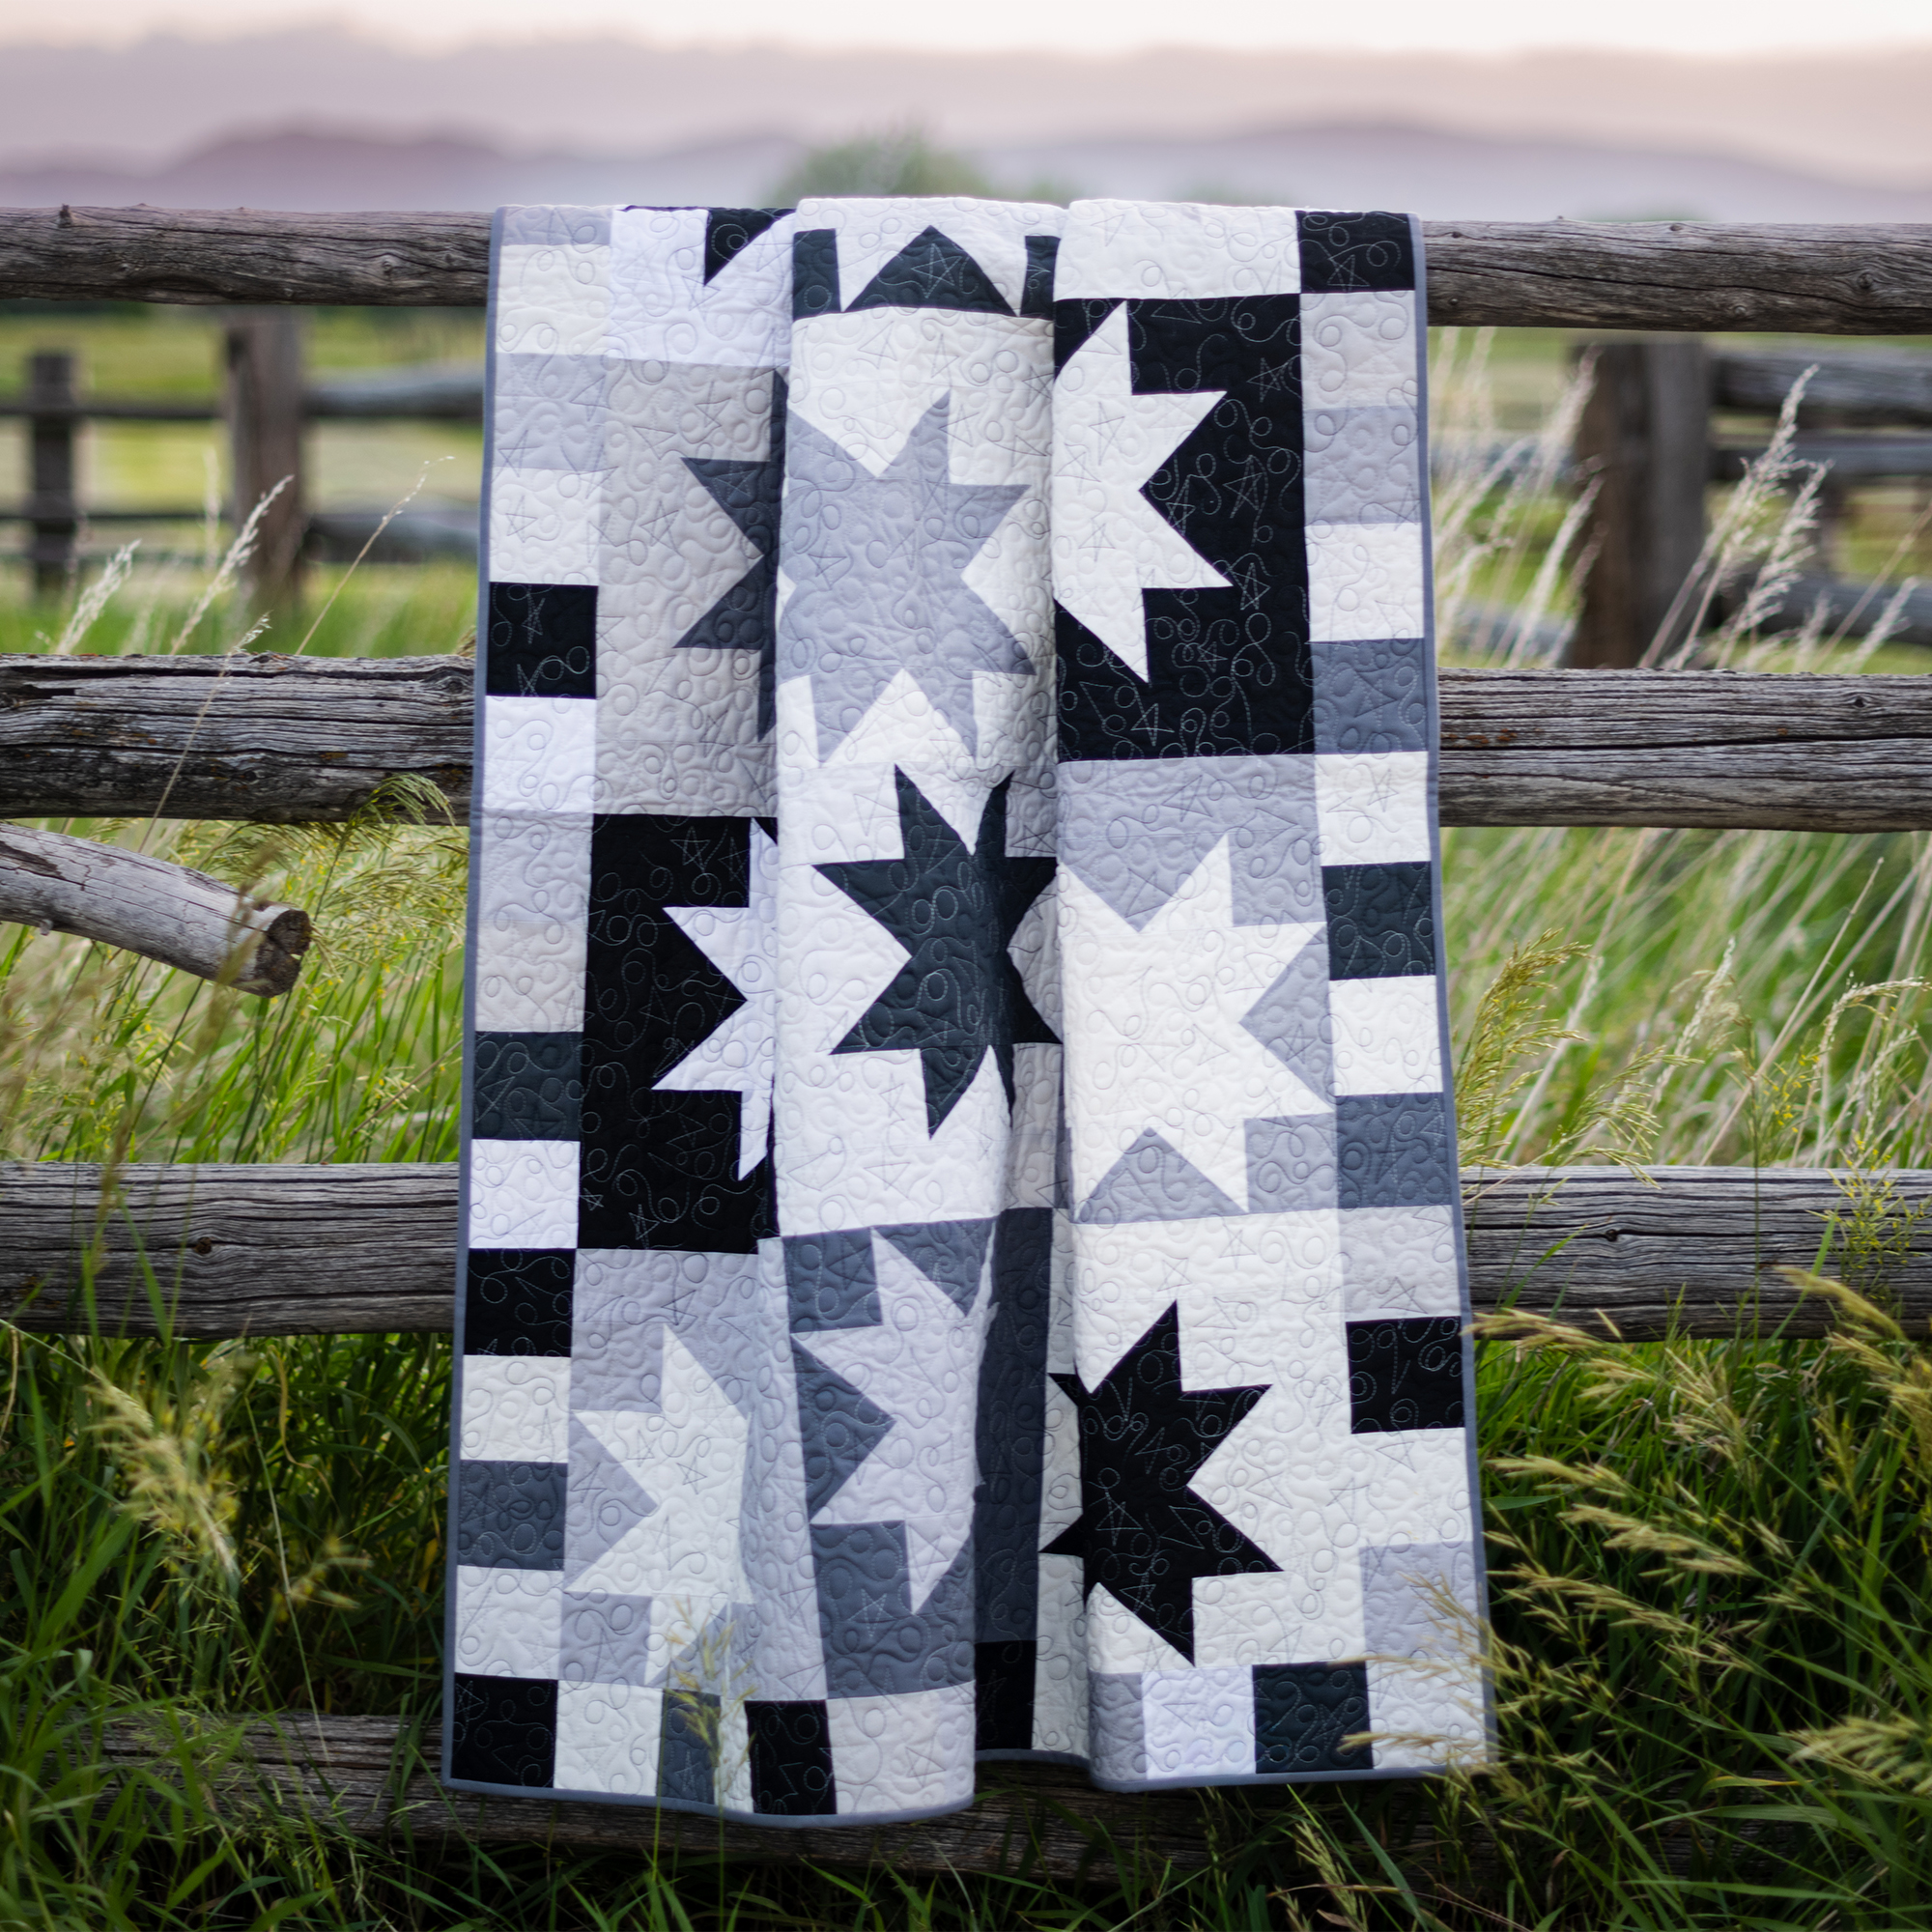
In additional to including three size options and colorways in the pattern above, I’ve already made two versions of this eye catching quilt. The first one was made from black, white and grey Confetti Cotton Solids shown below.
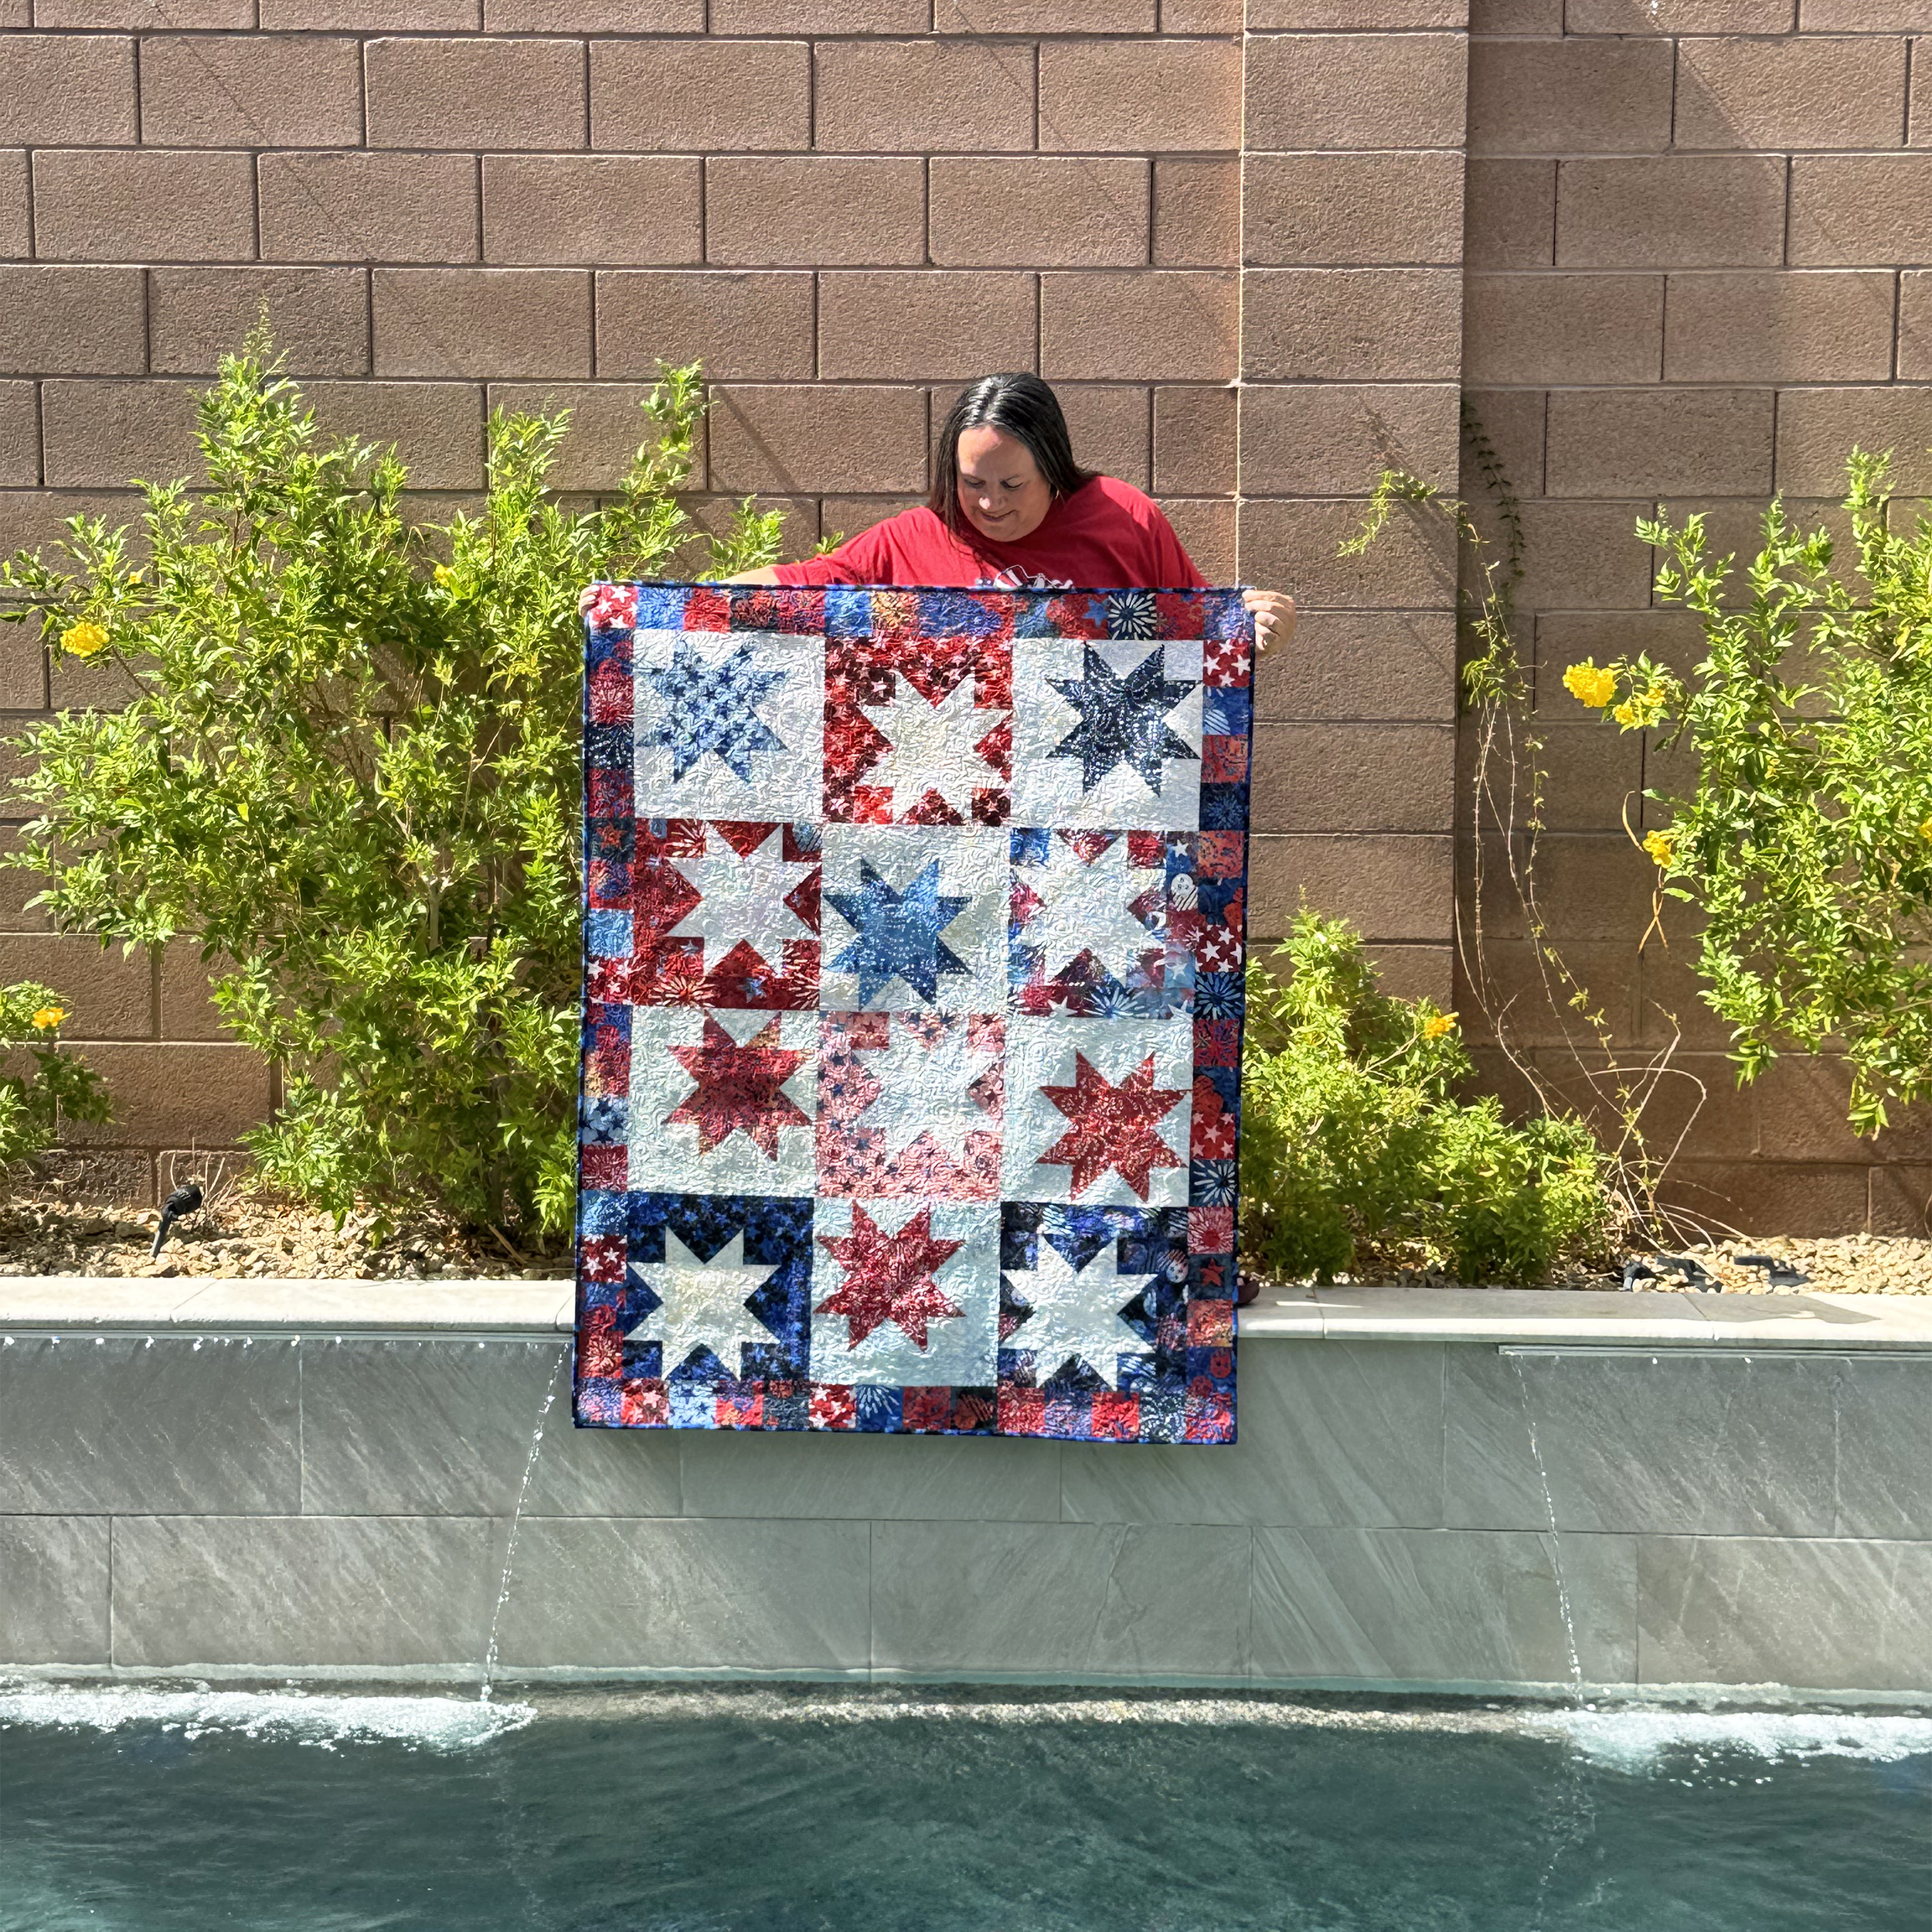
Then just for fun, I whipped up a patriotic version made from batik scraps, shown below.
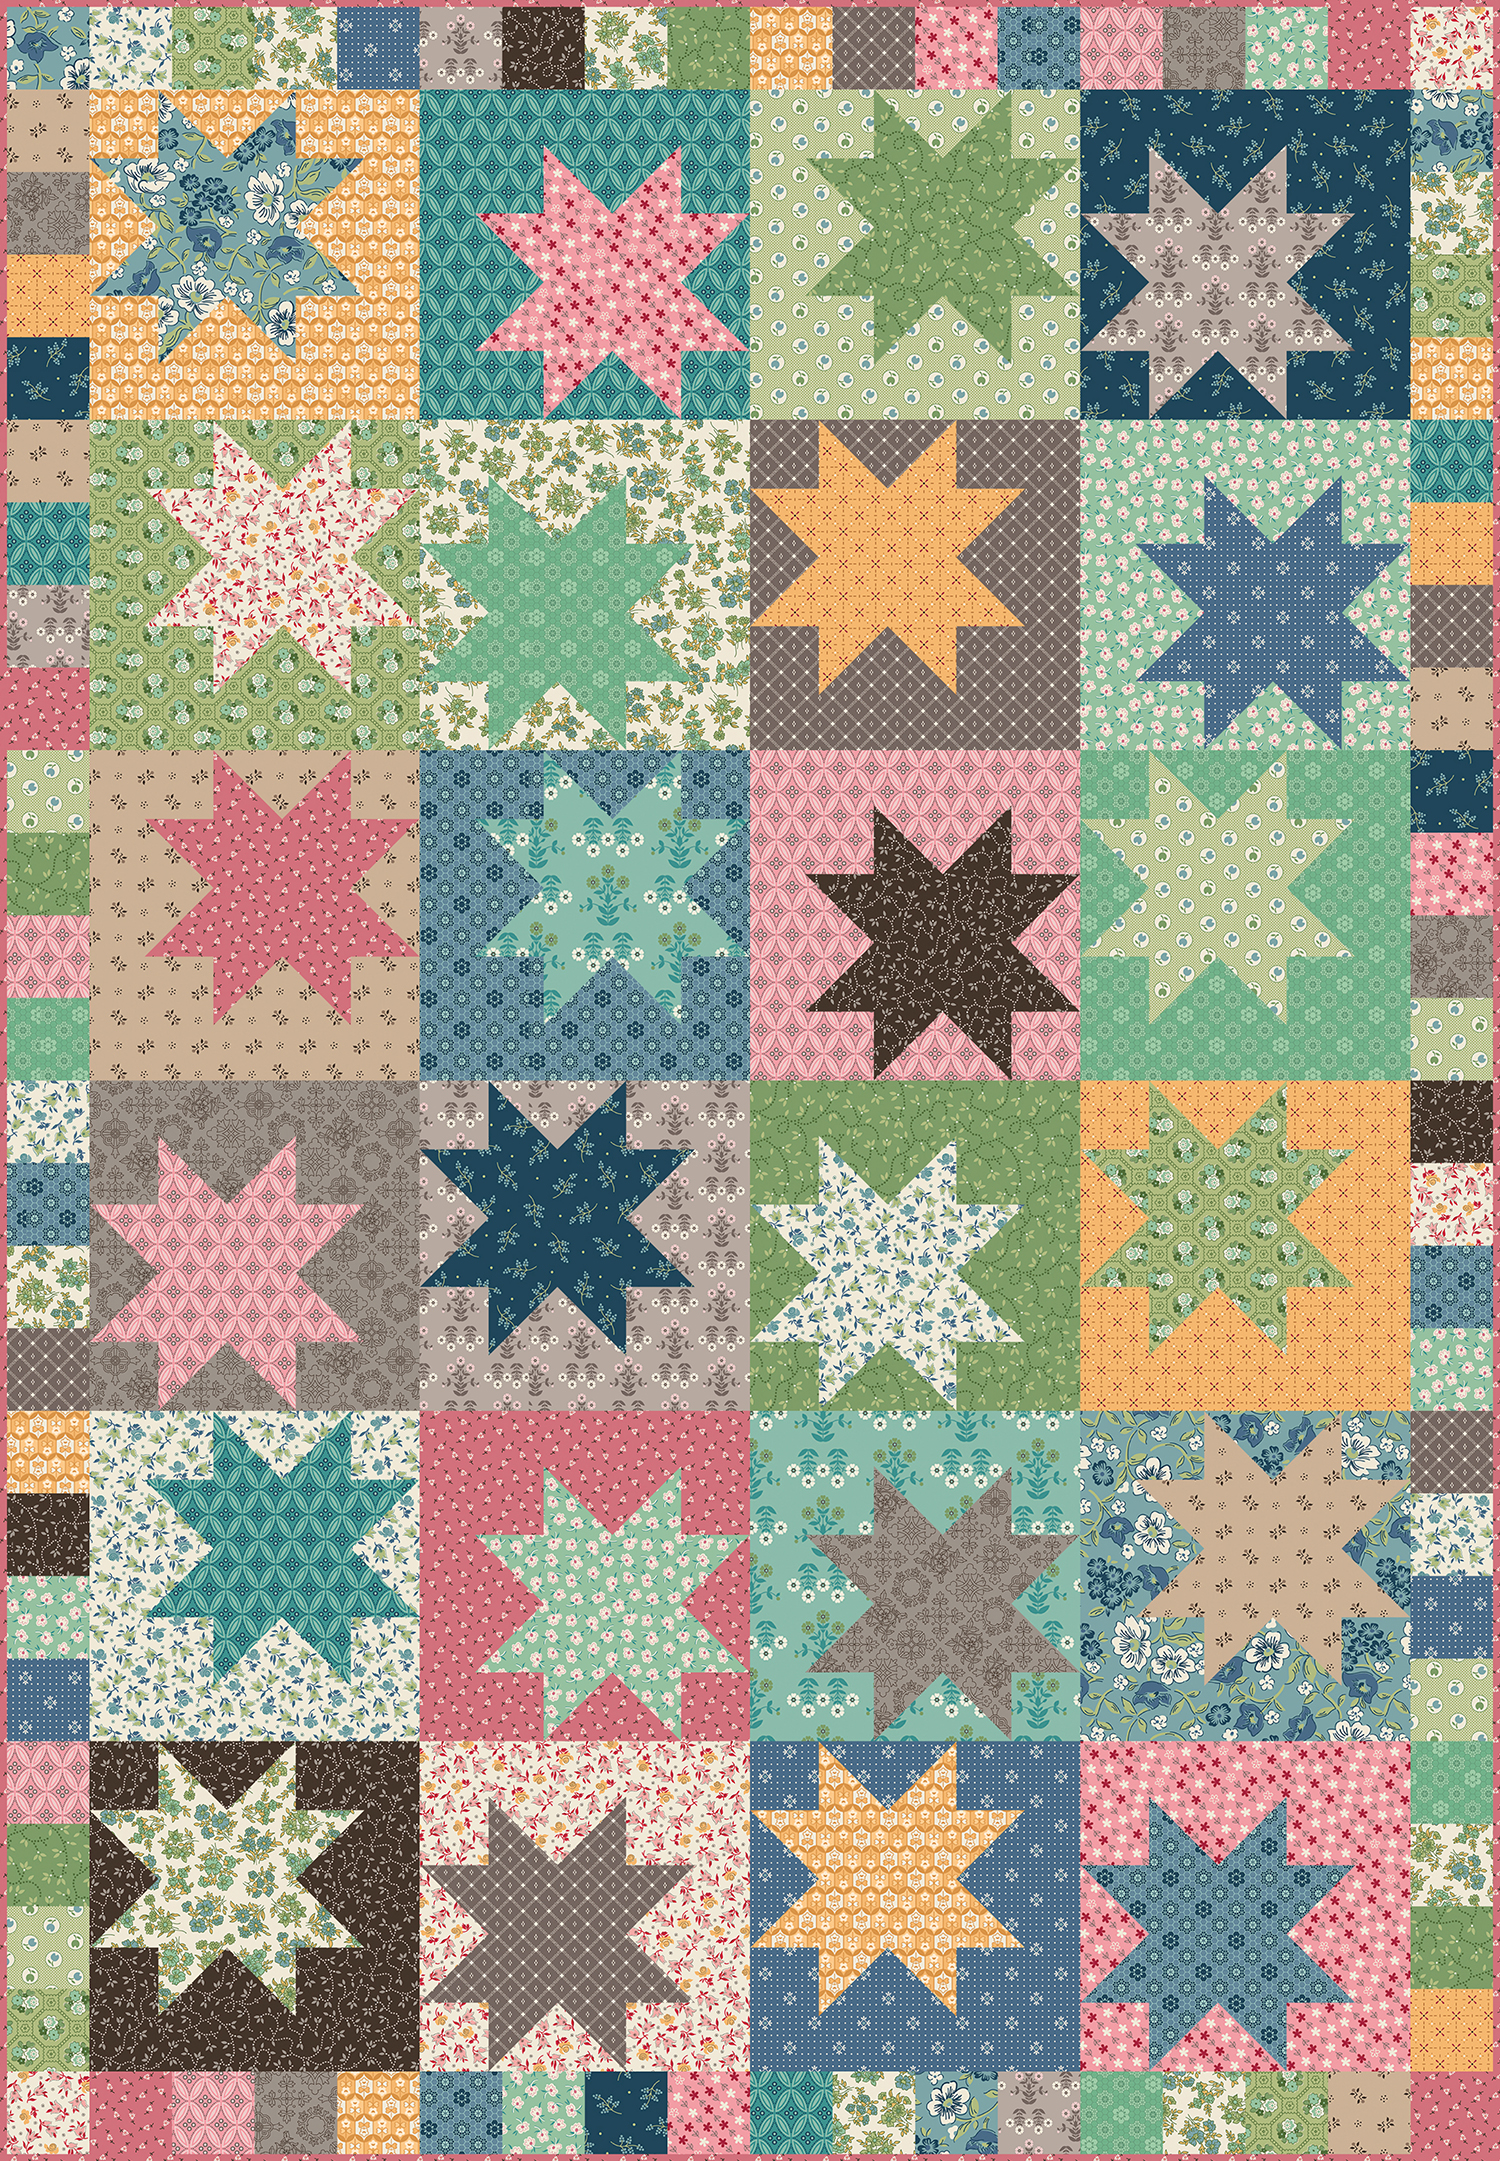
Then by request, I digitally recolored another version using Lori Holt Family Reunion from Riley Blake Designs. Isn’t it cute??
To join, you just need to purchase a copy of the Dancing Stars Quilt pattern in print or PDF and you’ll be all set. I’ll include weekly updates here on the blog, including a bonus machine quilting video showing how I quilted both versions shown above.
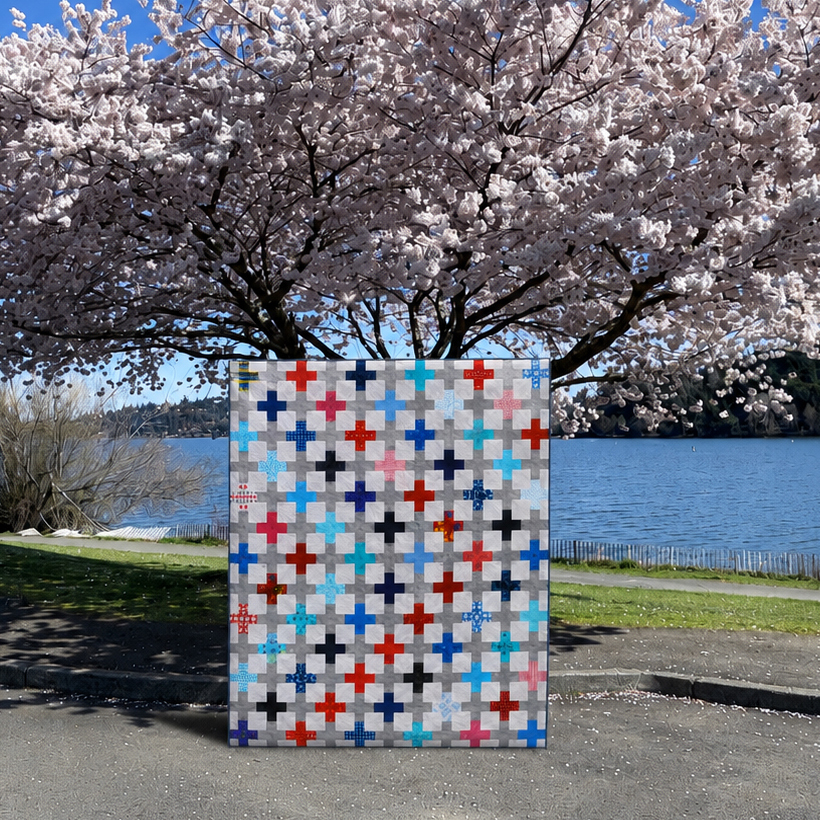
I recently finished two patriotic quilts that I’m excited to share as I say, “Happy Birthday, America!”
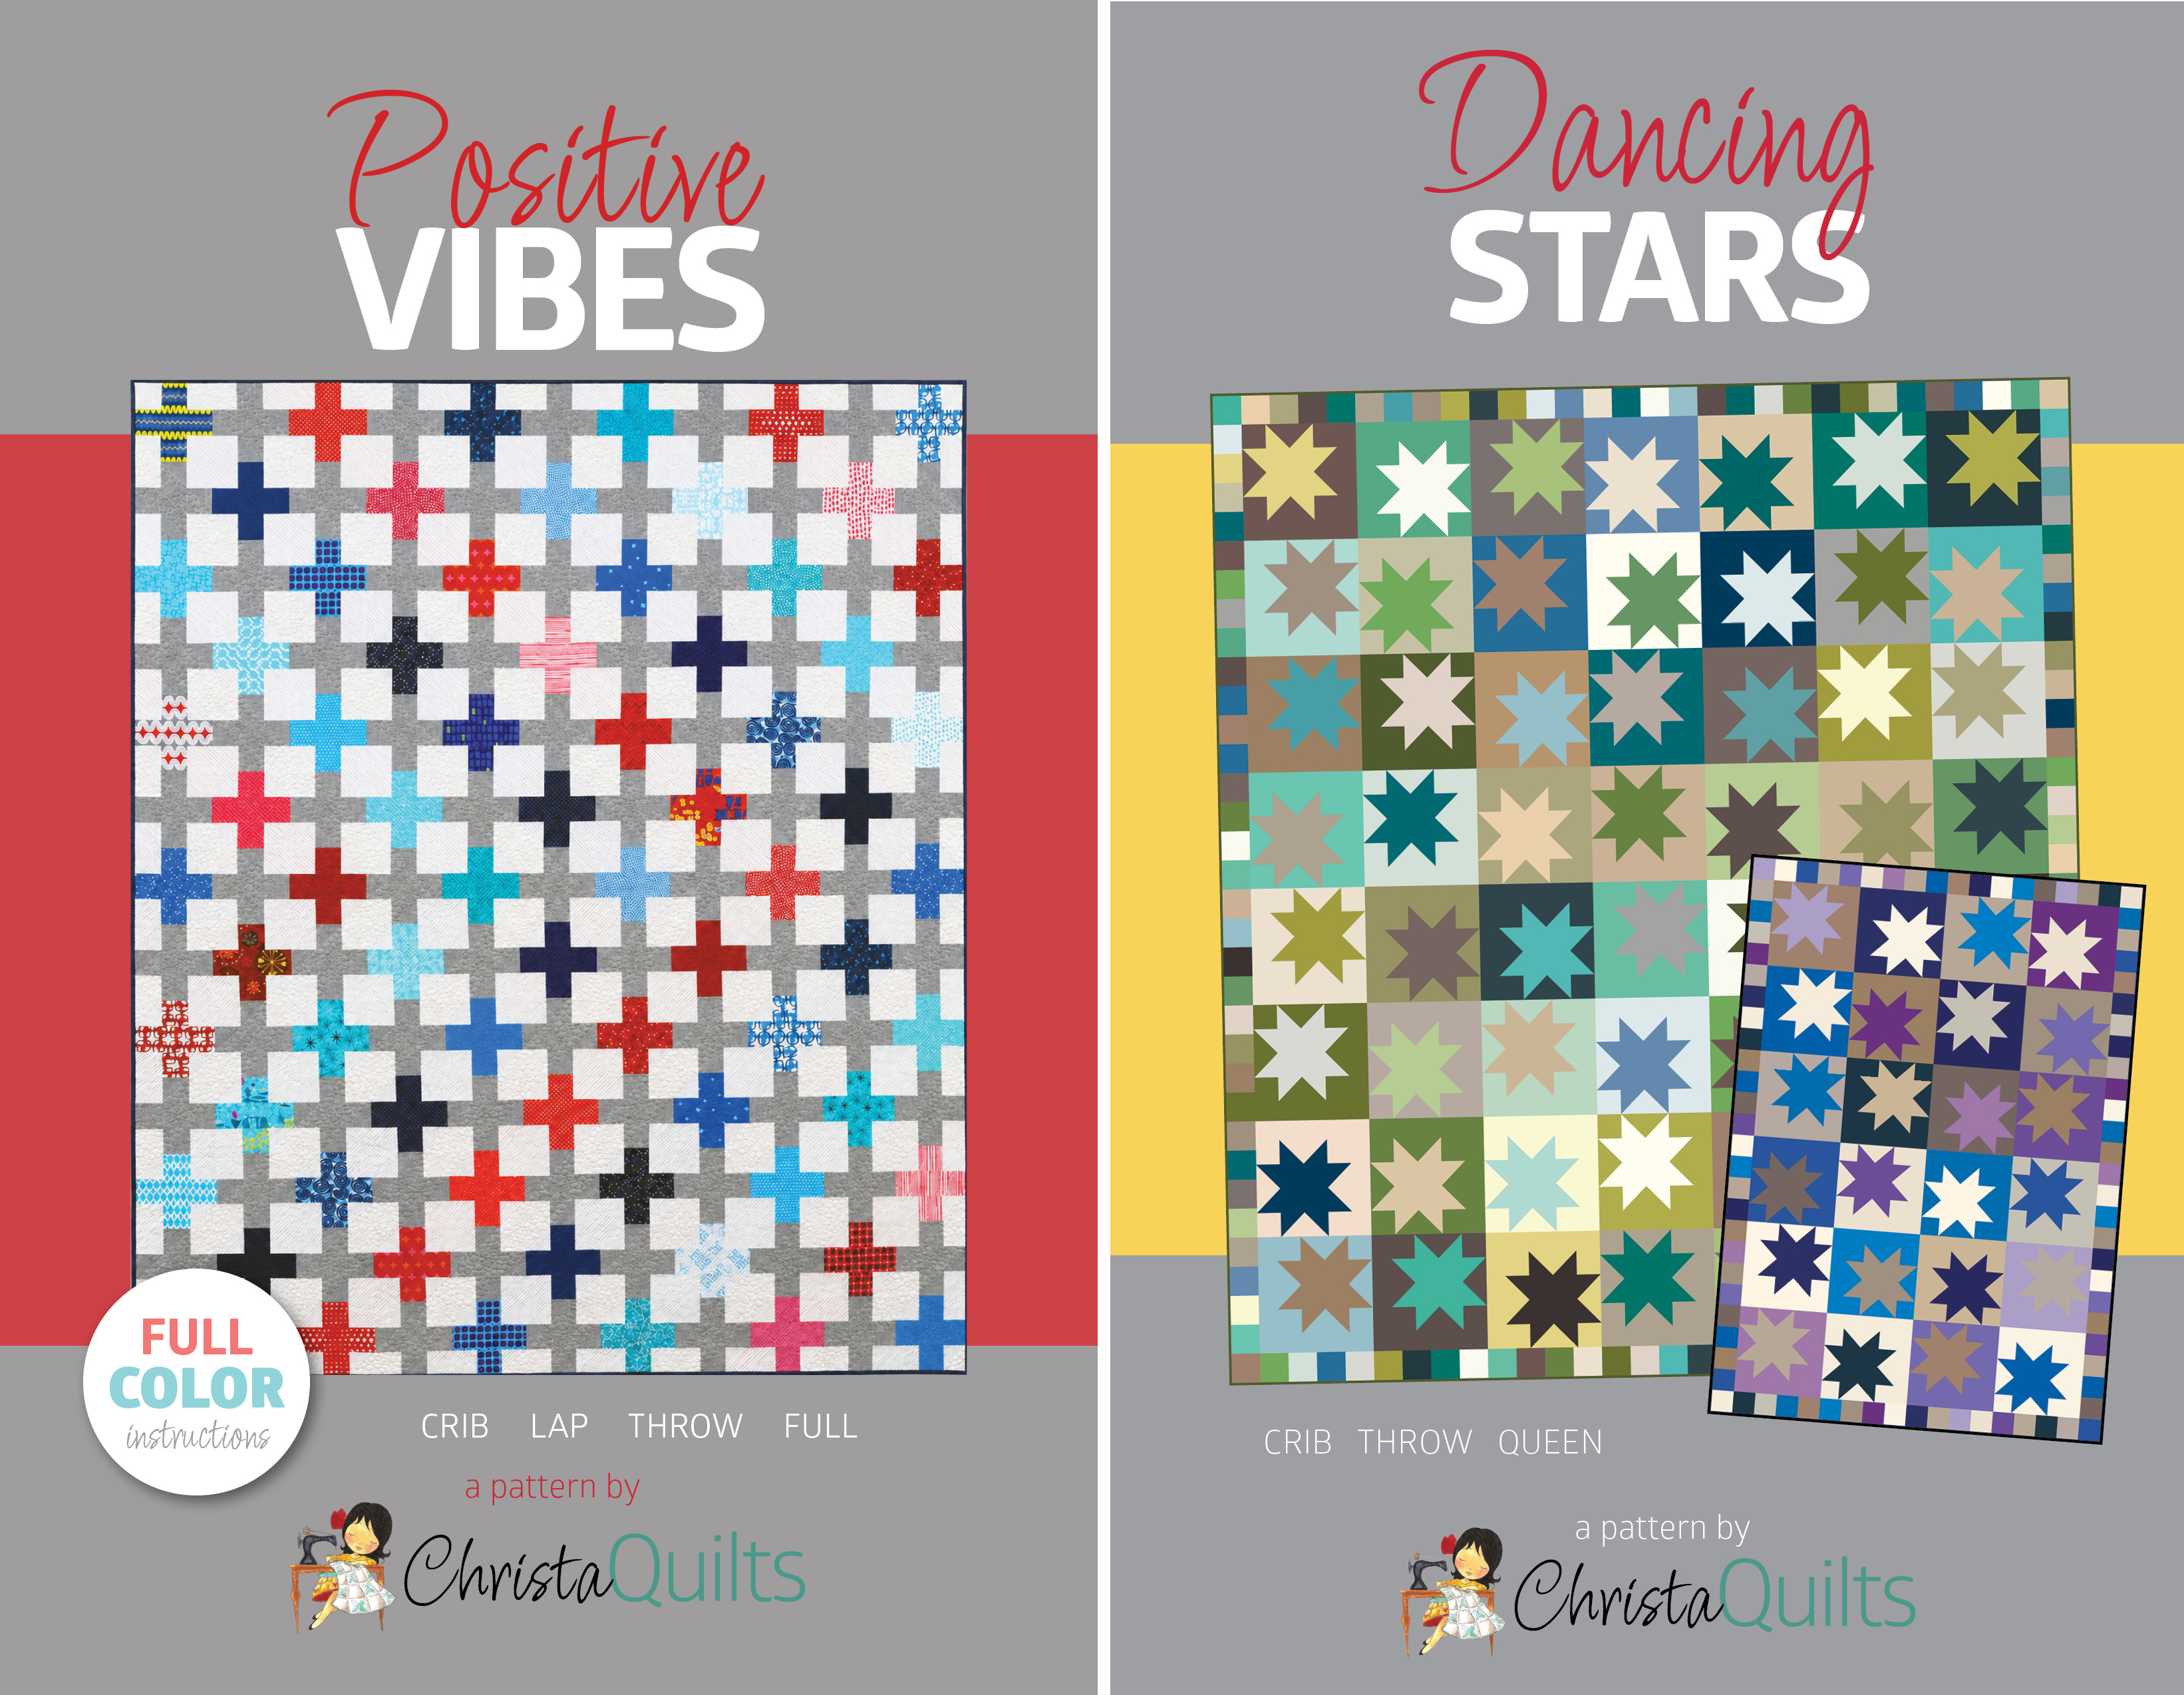
This first one is called Positive Vibes and is a remake of a pattern I first had published in a magazine nearly 10 years ago. That was before I became a fabric designer and I always knew I wanted to remake using red, white and blue scraps of my own fabrics.
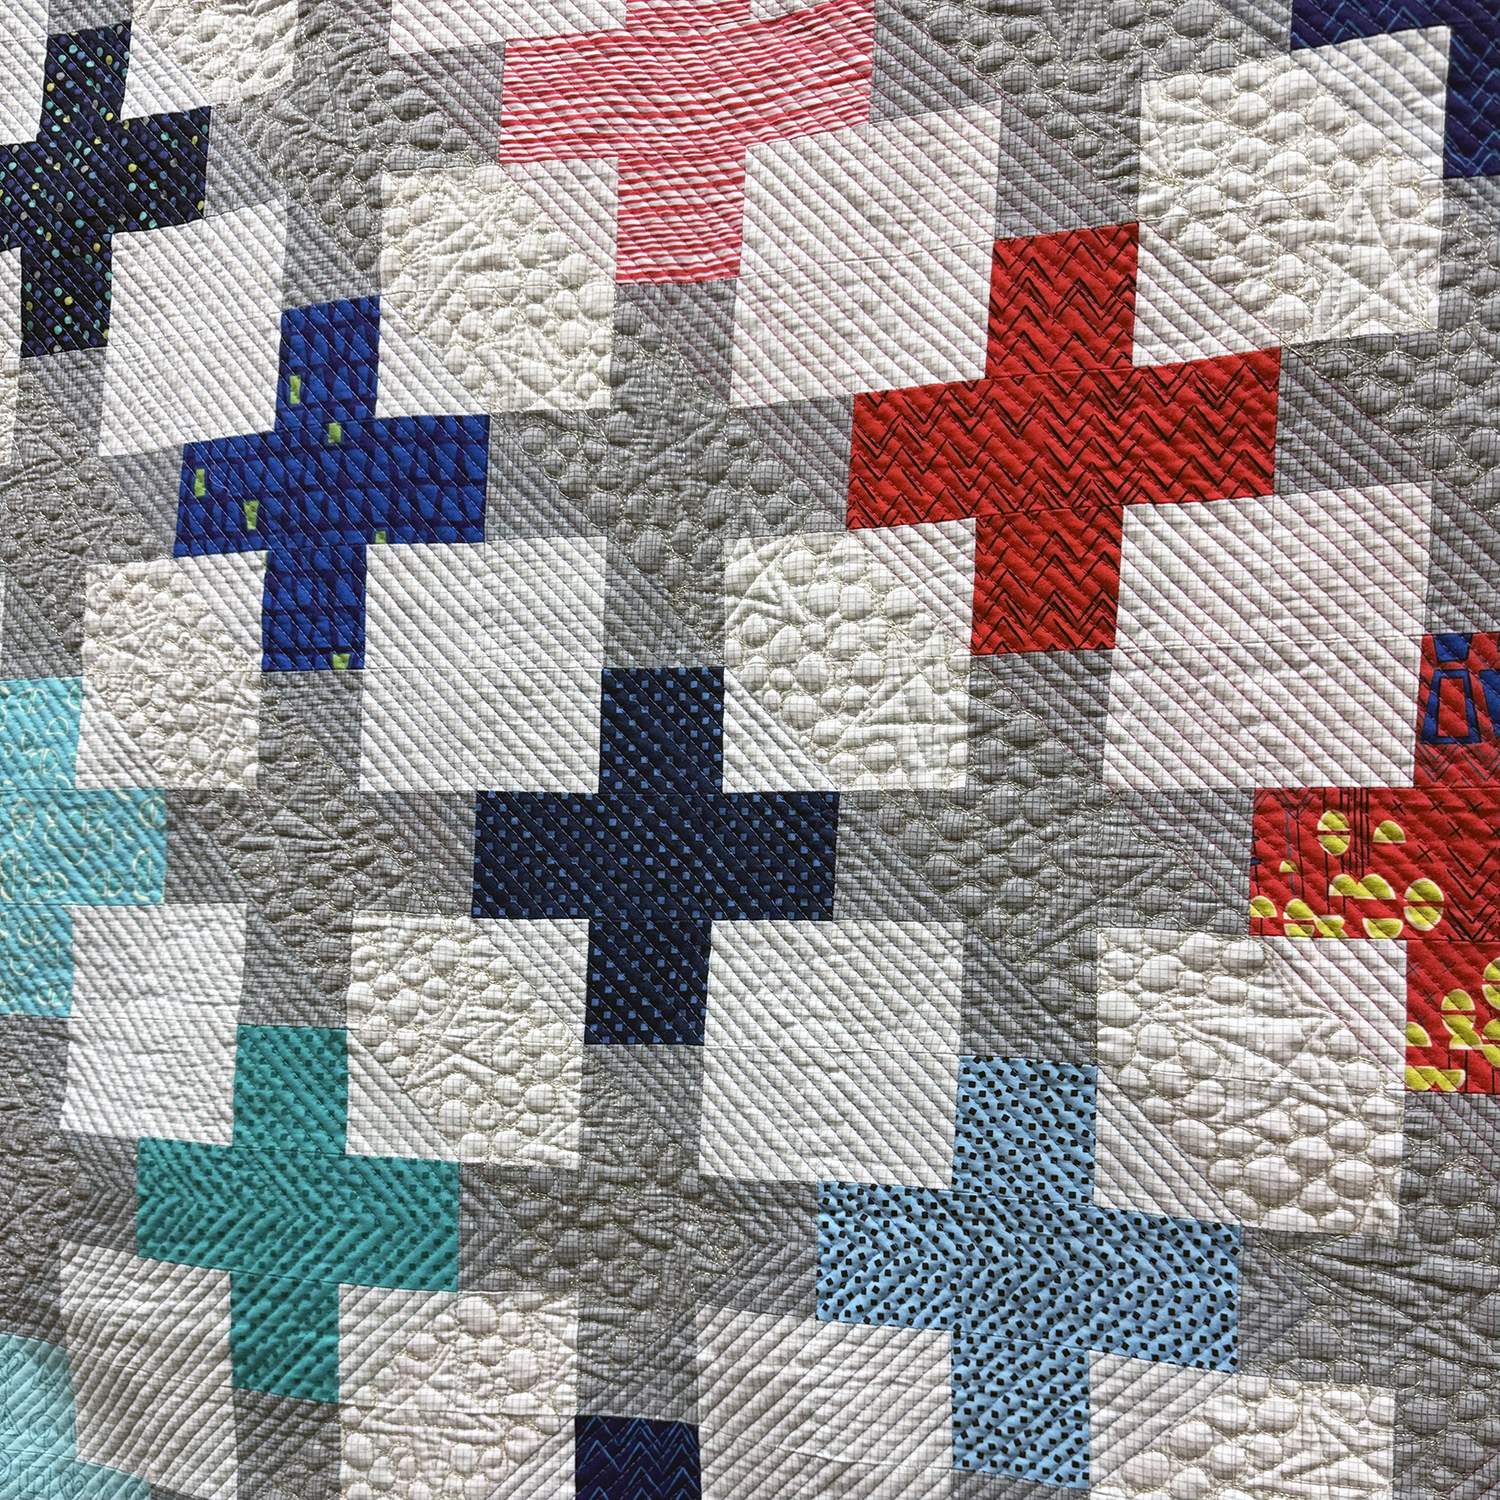
I quilted it with Red, Aqua, Navy and Gold Metallic threads. In each of the aqua, red and navy rows of plus blocks, I quilted straight lines to represent stars. In the alternating rows I added the gold stars with pebbles for added texture.
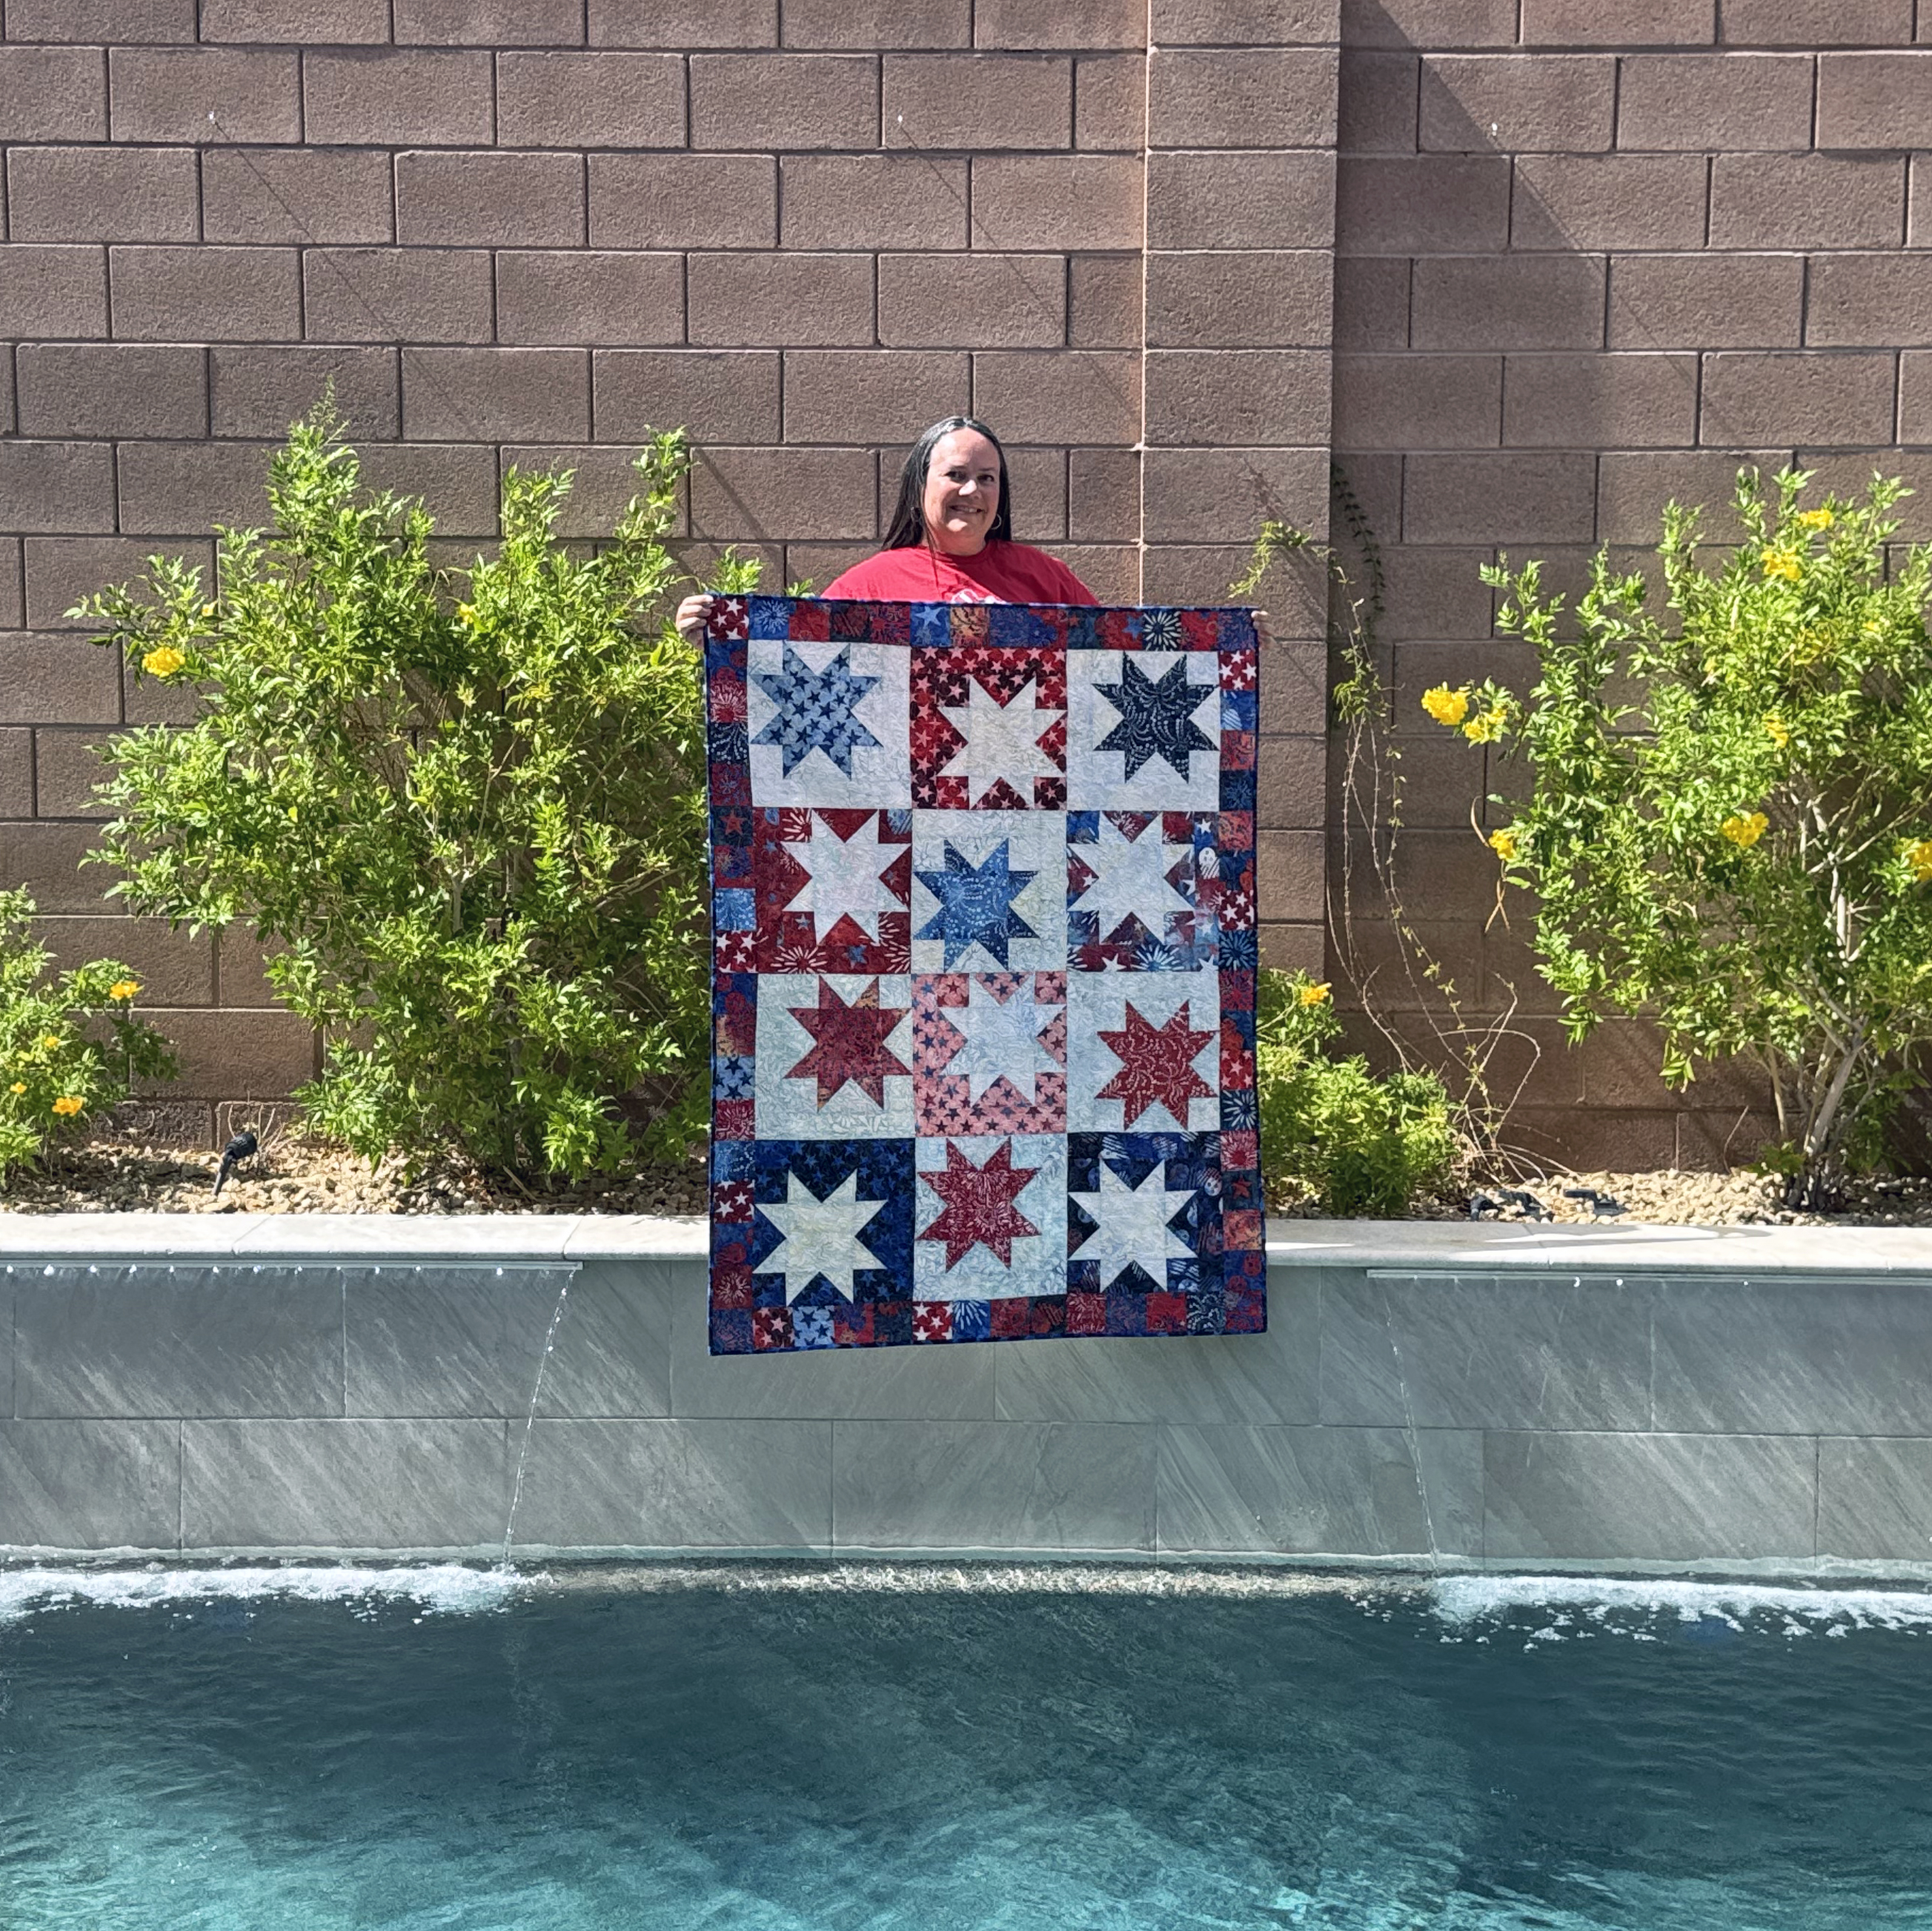
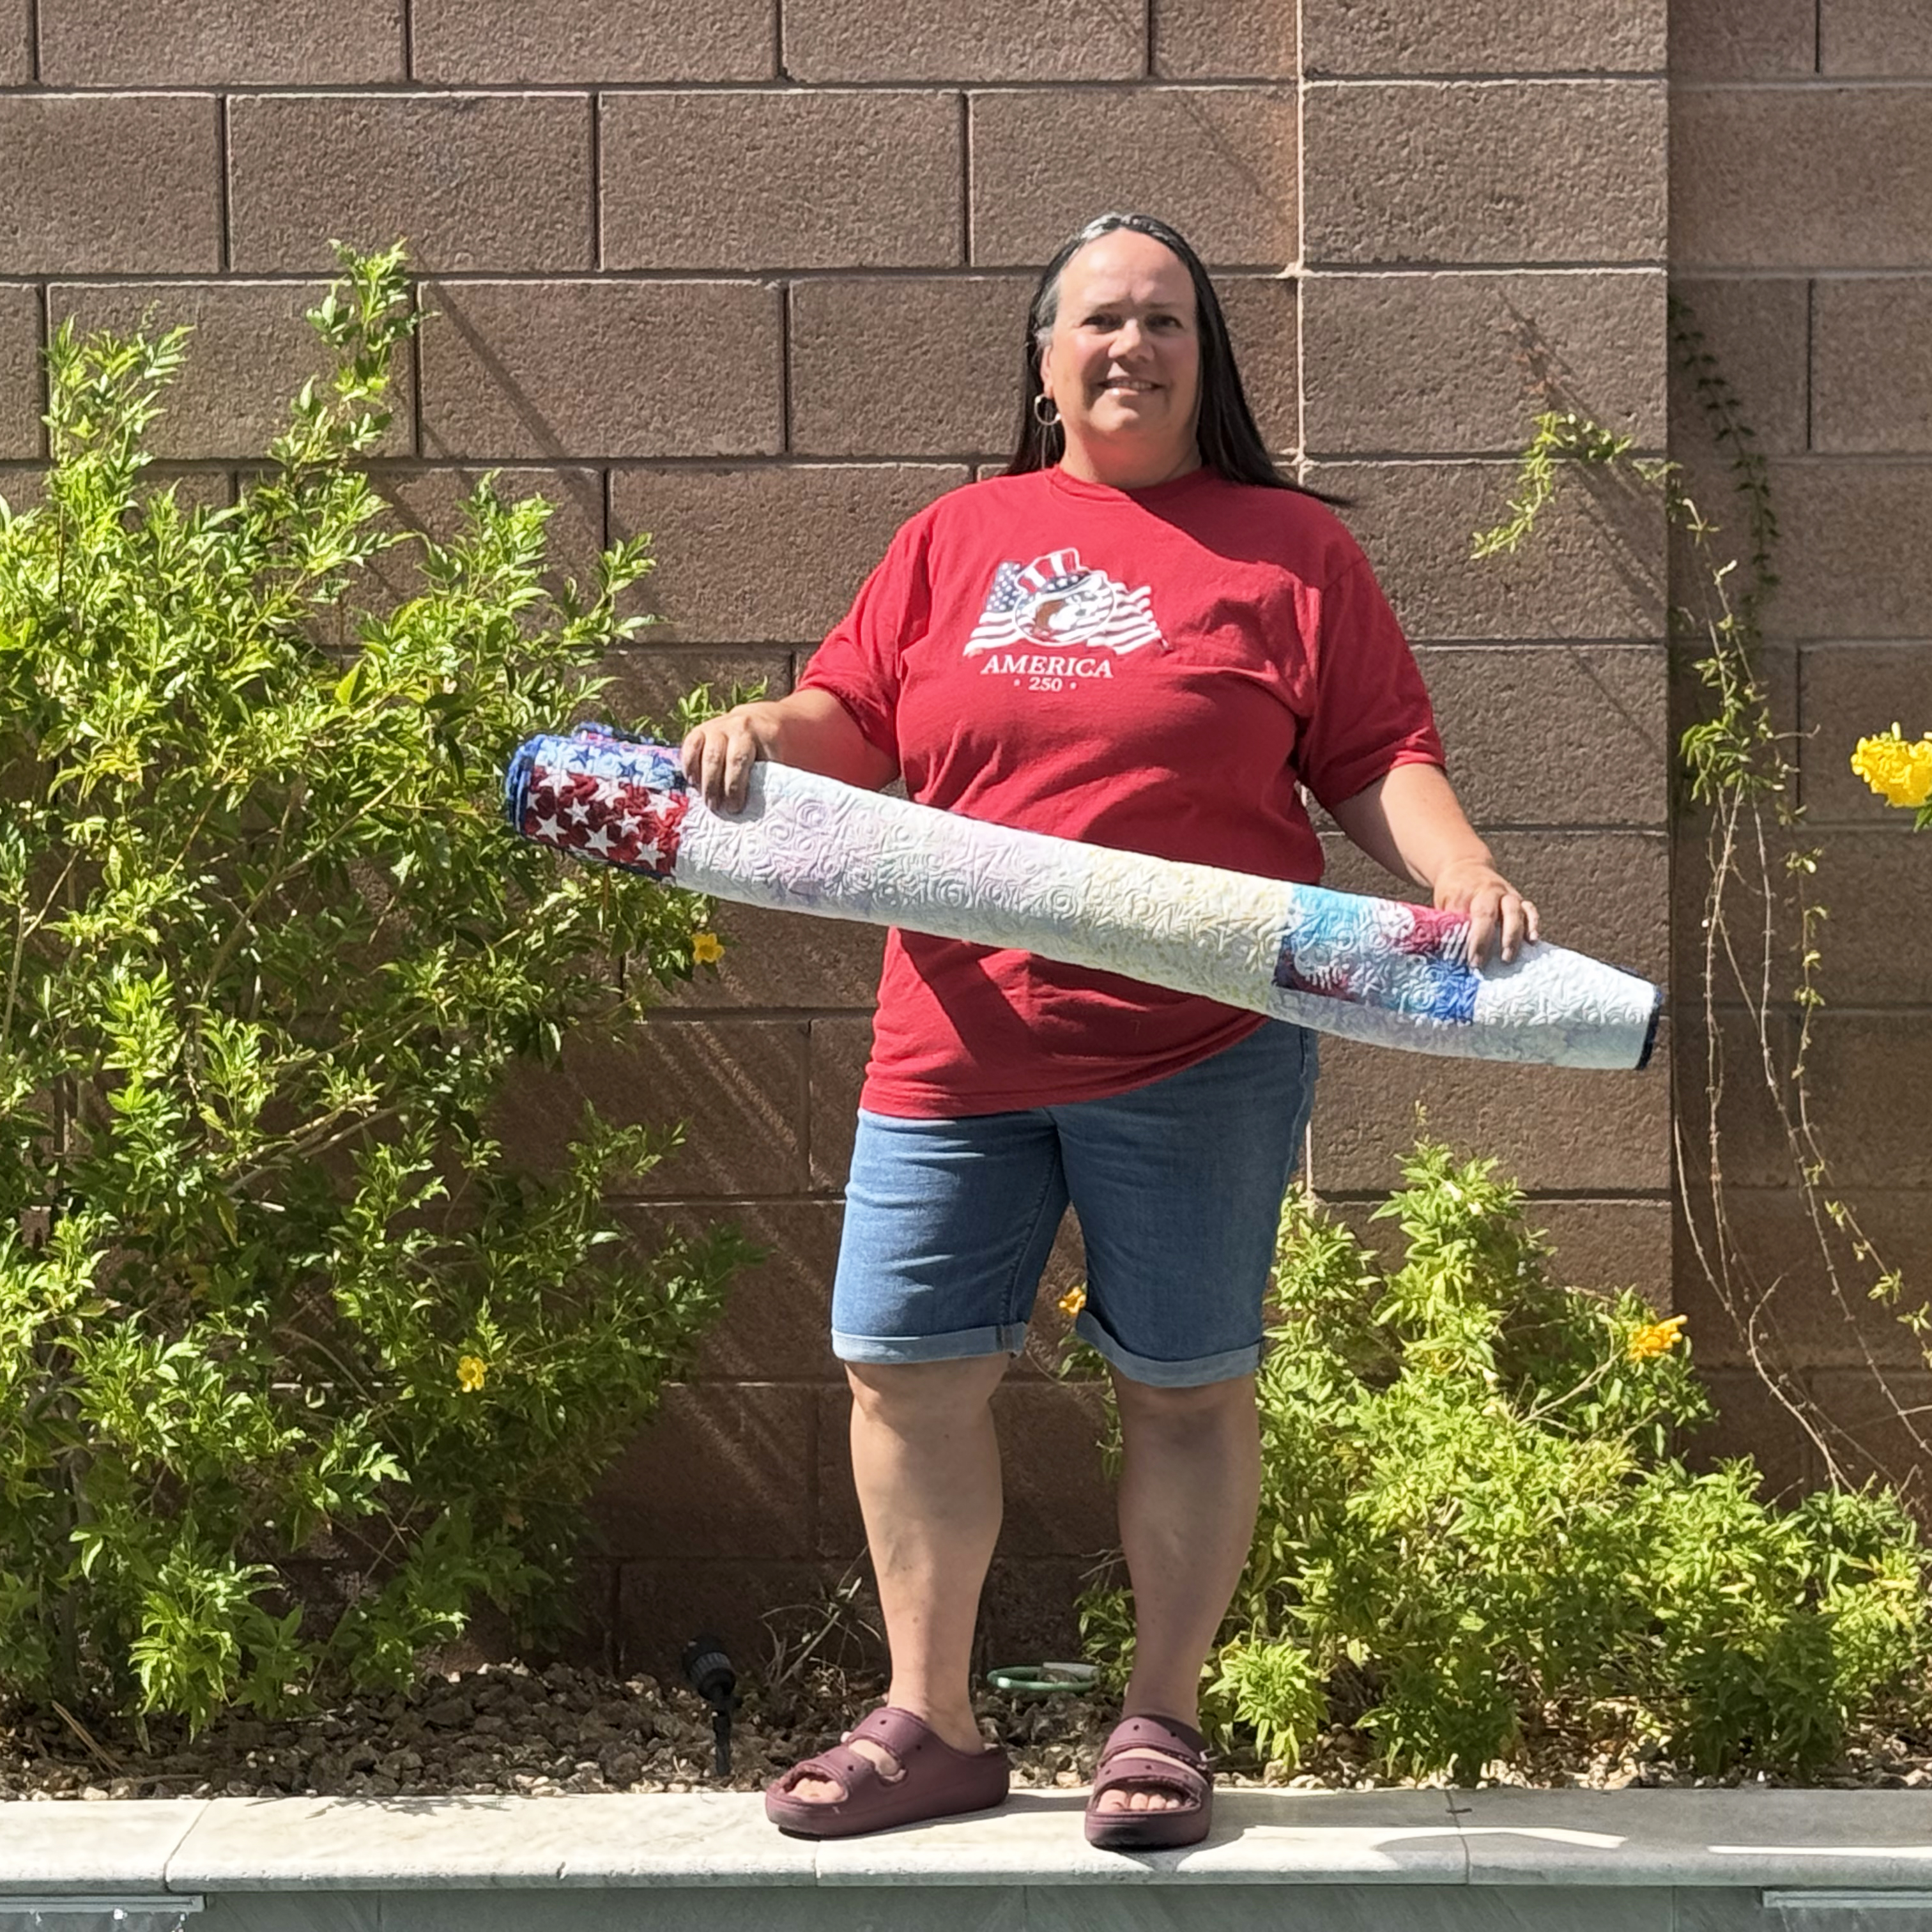
The second one I literally just finished today in time to share for the 4th of July is called Dancing Stars. I made this from Riley Blake Batik scraps to test them out. It’s been years since I’ve sewn with batiks and I wanted to make sure I love working with them before I dive in and design my own line of batiks in the future…
The fabrics were wonderful to work with during piecing, basting, quilting AND binding. So they definitely get my stamp of approval! Here’s me proudly showing off my patriotic Buc-ee’s shirt that we picked up on a cross country drive earlier this summer.
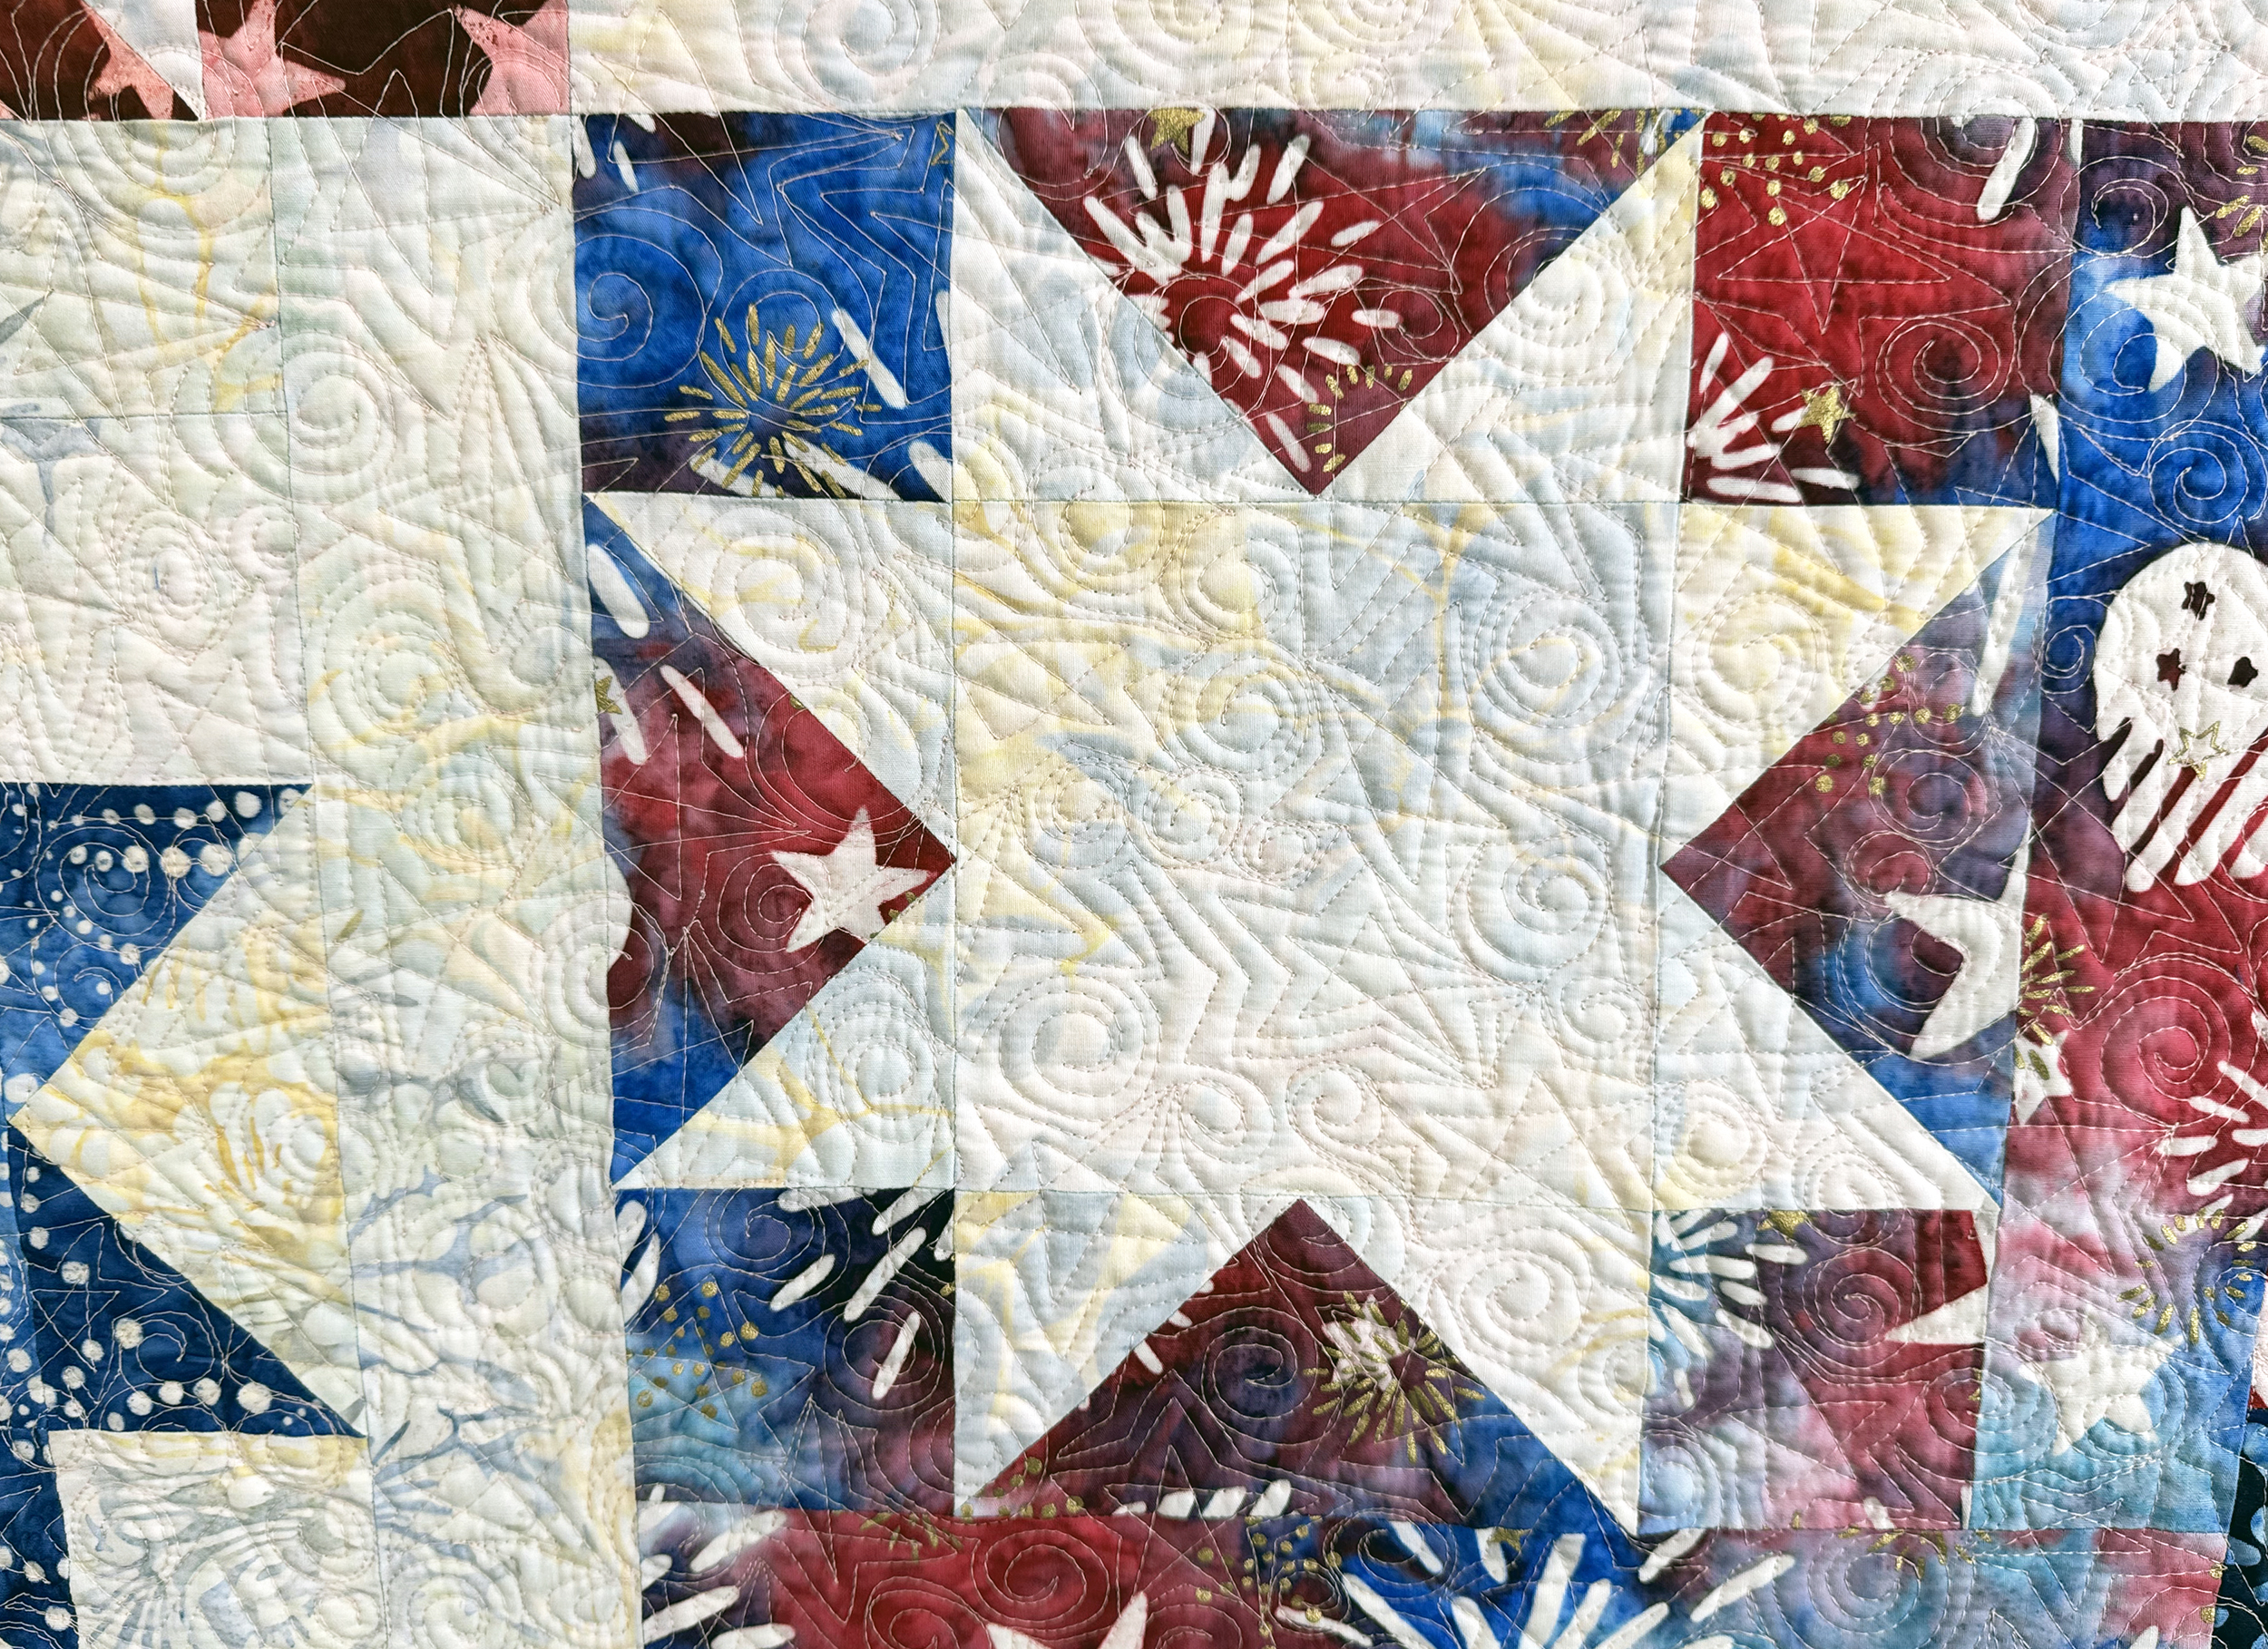
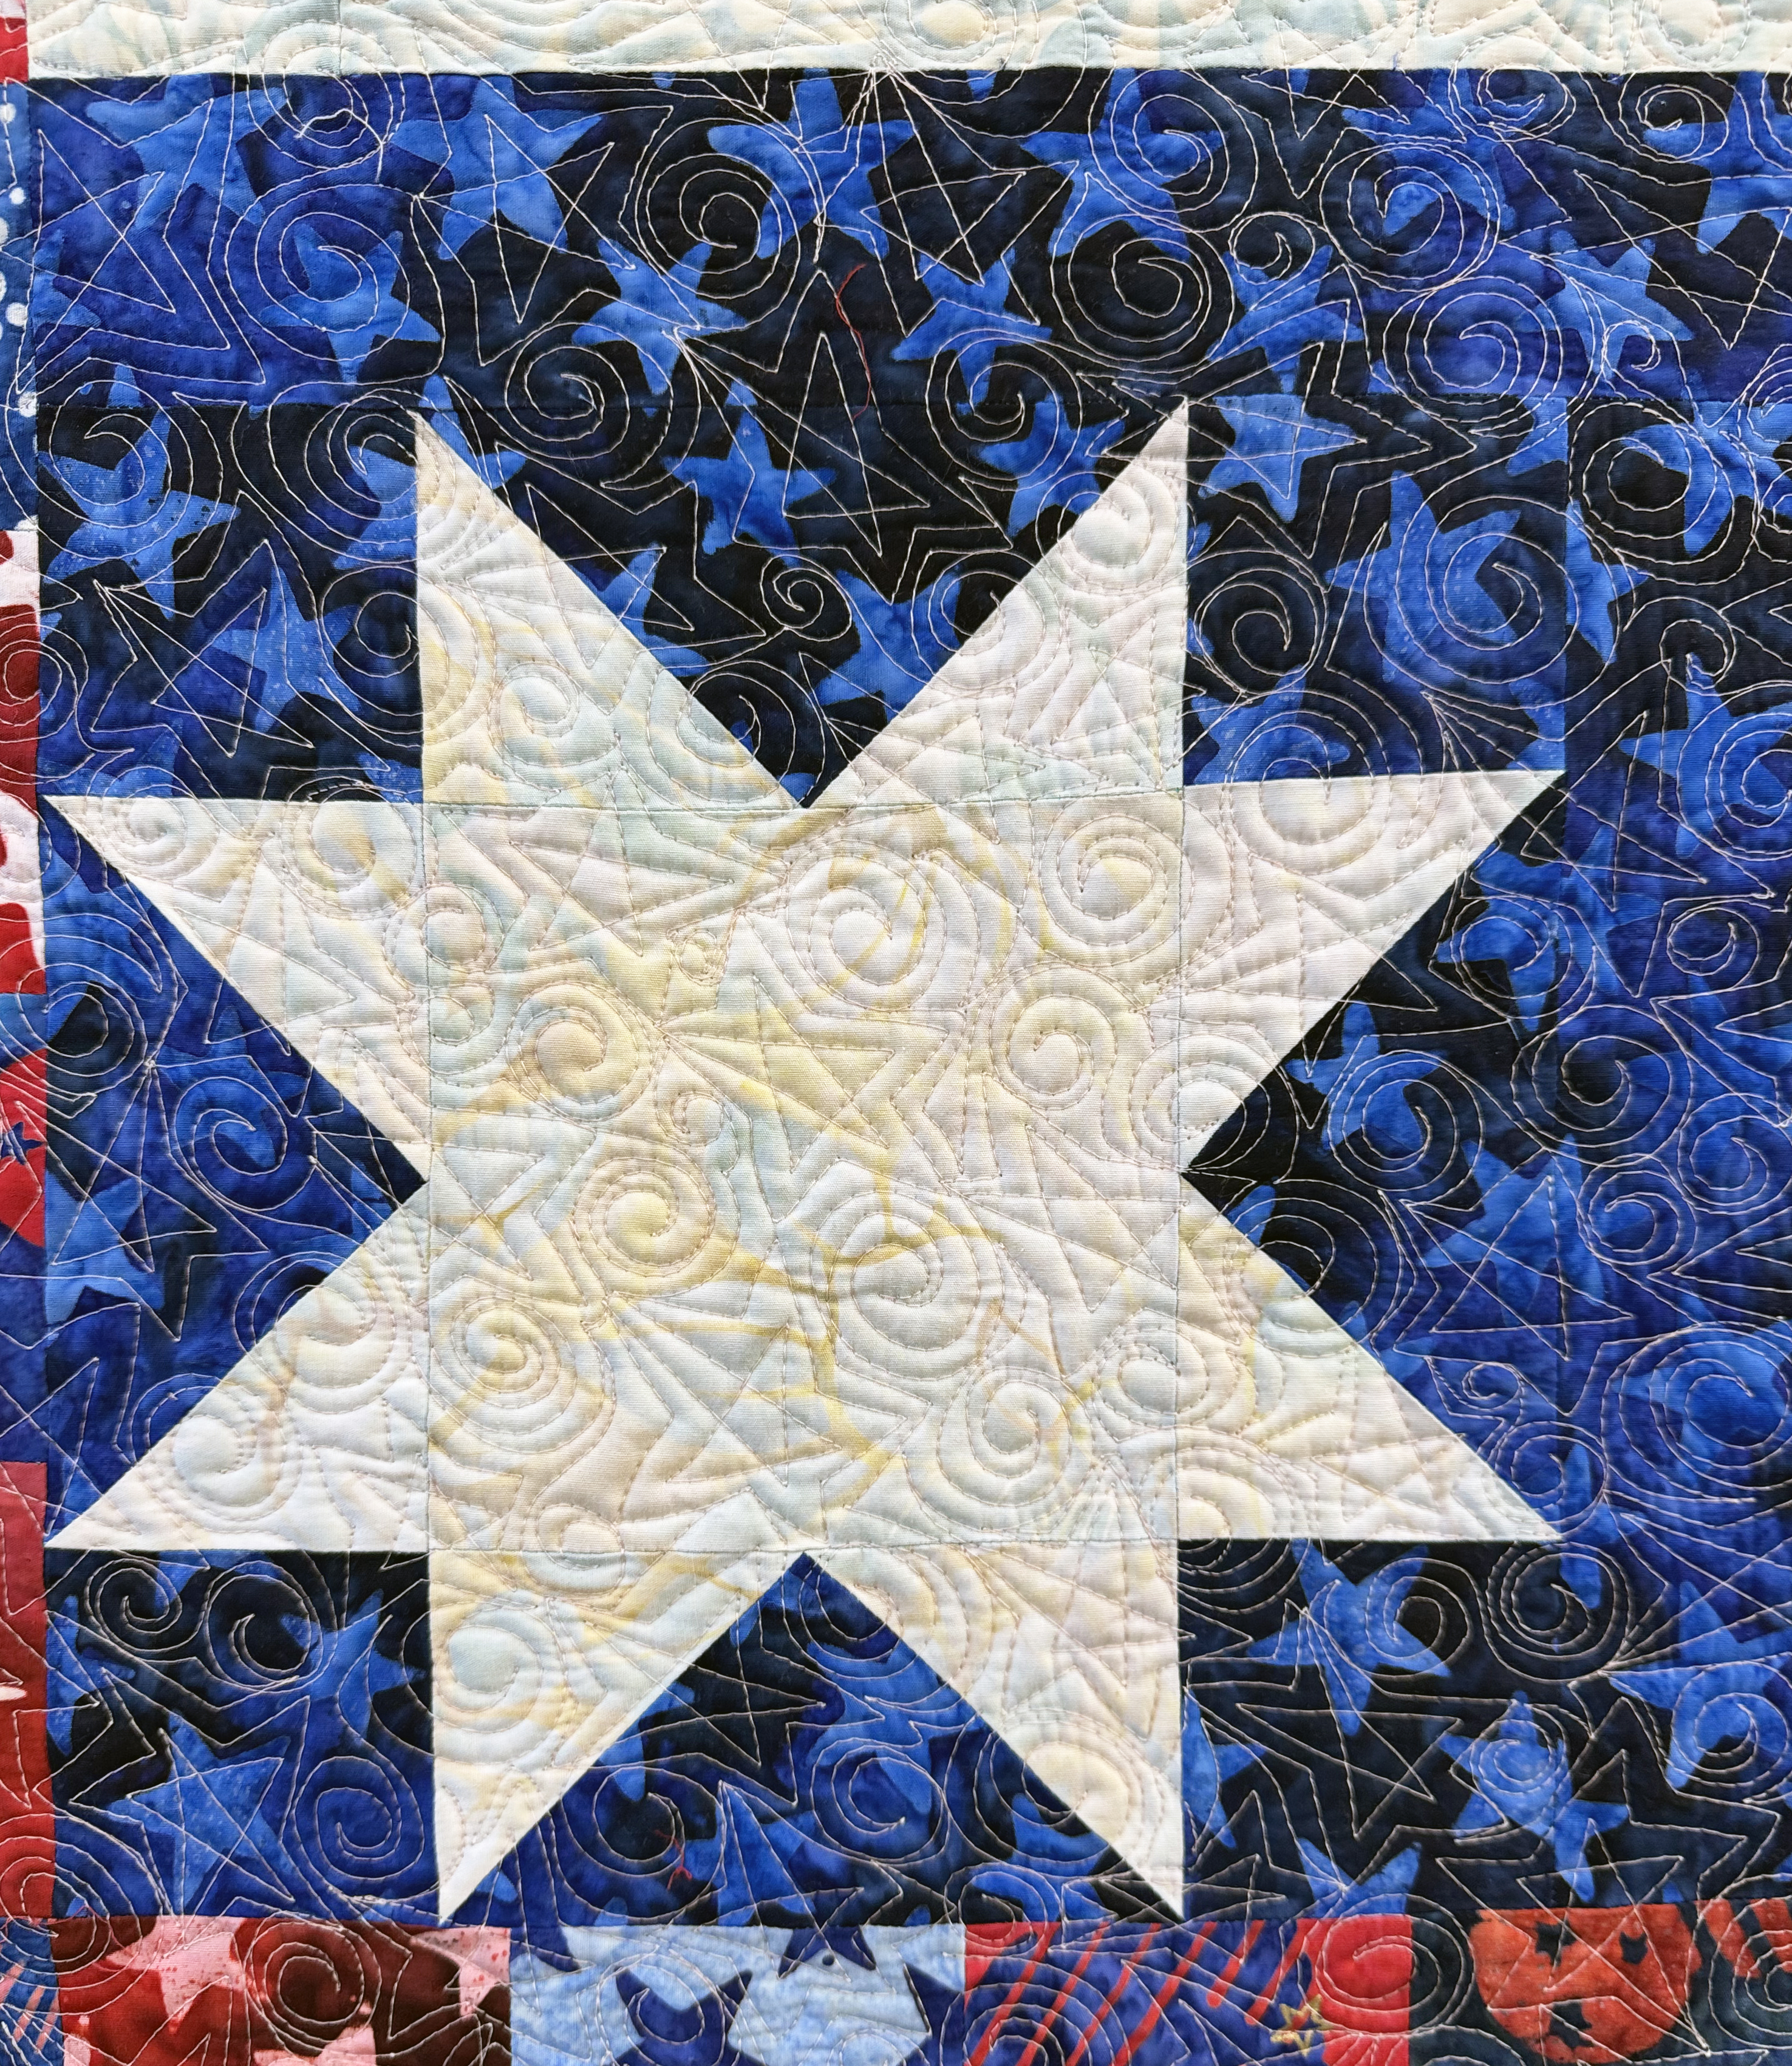
And here are so closeup details of the quilting. I stitched an edge to edge free motion mix of echoed stars and swirls.
My #1 free-motion quilting tip is to practice one motif across an entire quilt. When you’re done with the quilt, you’ll be an expert at that design!
Both of these quilt patterns are available as PDF downloads in my Etsy shop. Click the links below to grab them:
We are nearly to my favorite part of any quilt – the machine quilting! But first we need to prep our quilts by making sure the backing is big enough, and then basting. I love making pieced backs from leftovers or other coordinating fabrics because that makes the quilt twice as nice!!
Because I had too many pictures of this process to share, I thought it would be much easier to put them all together into a super short video and talk over the process. You can watch that by clicking play below:
Once the quilt is basted, you are ready to quilt. Just remember, all of these quilt along posts will stay up indefinitely so you can make your quilt any time you wish. I’m here to help you every step of the way!
In case you missed it, here’s a super short recap of all of the free domestic machine quilting tutorials I shared over the past year. Click play below for a quick peek of all 99 designs. Credit to my son Ryan for composing the original music to go along with it!
If you’d like to catch up on any of them that you’ve missed, I’ve created a playlist of all 99 Machine Quilting Designs. These come straight from my best-selling book of the same name. The playlist spans a total of 56 videos plus an in-depth introduction to the series which shows how to set yourself up for machine quilting success.
The number one question I get when showing these tutorials is how to quilt these designs on a real quilt. In each of the video tutorials I share a few quick tips and show examples of real quilts.
However, due to popular request, I’ve created another, on-going playlist that walks you through from start to finish how to quilt a real, full sized quilt. I will be adding more to this series on a regular basis, each time a make a new quilt, so stay tuned for more!
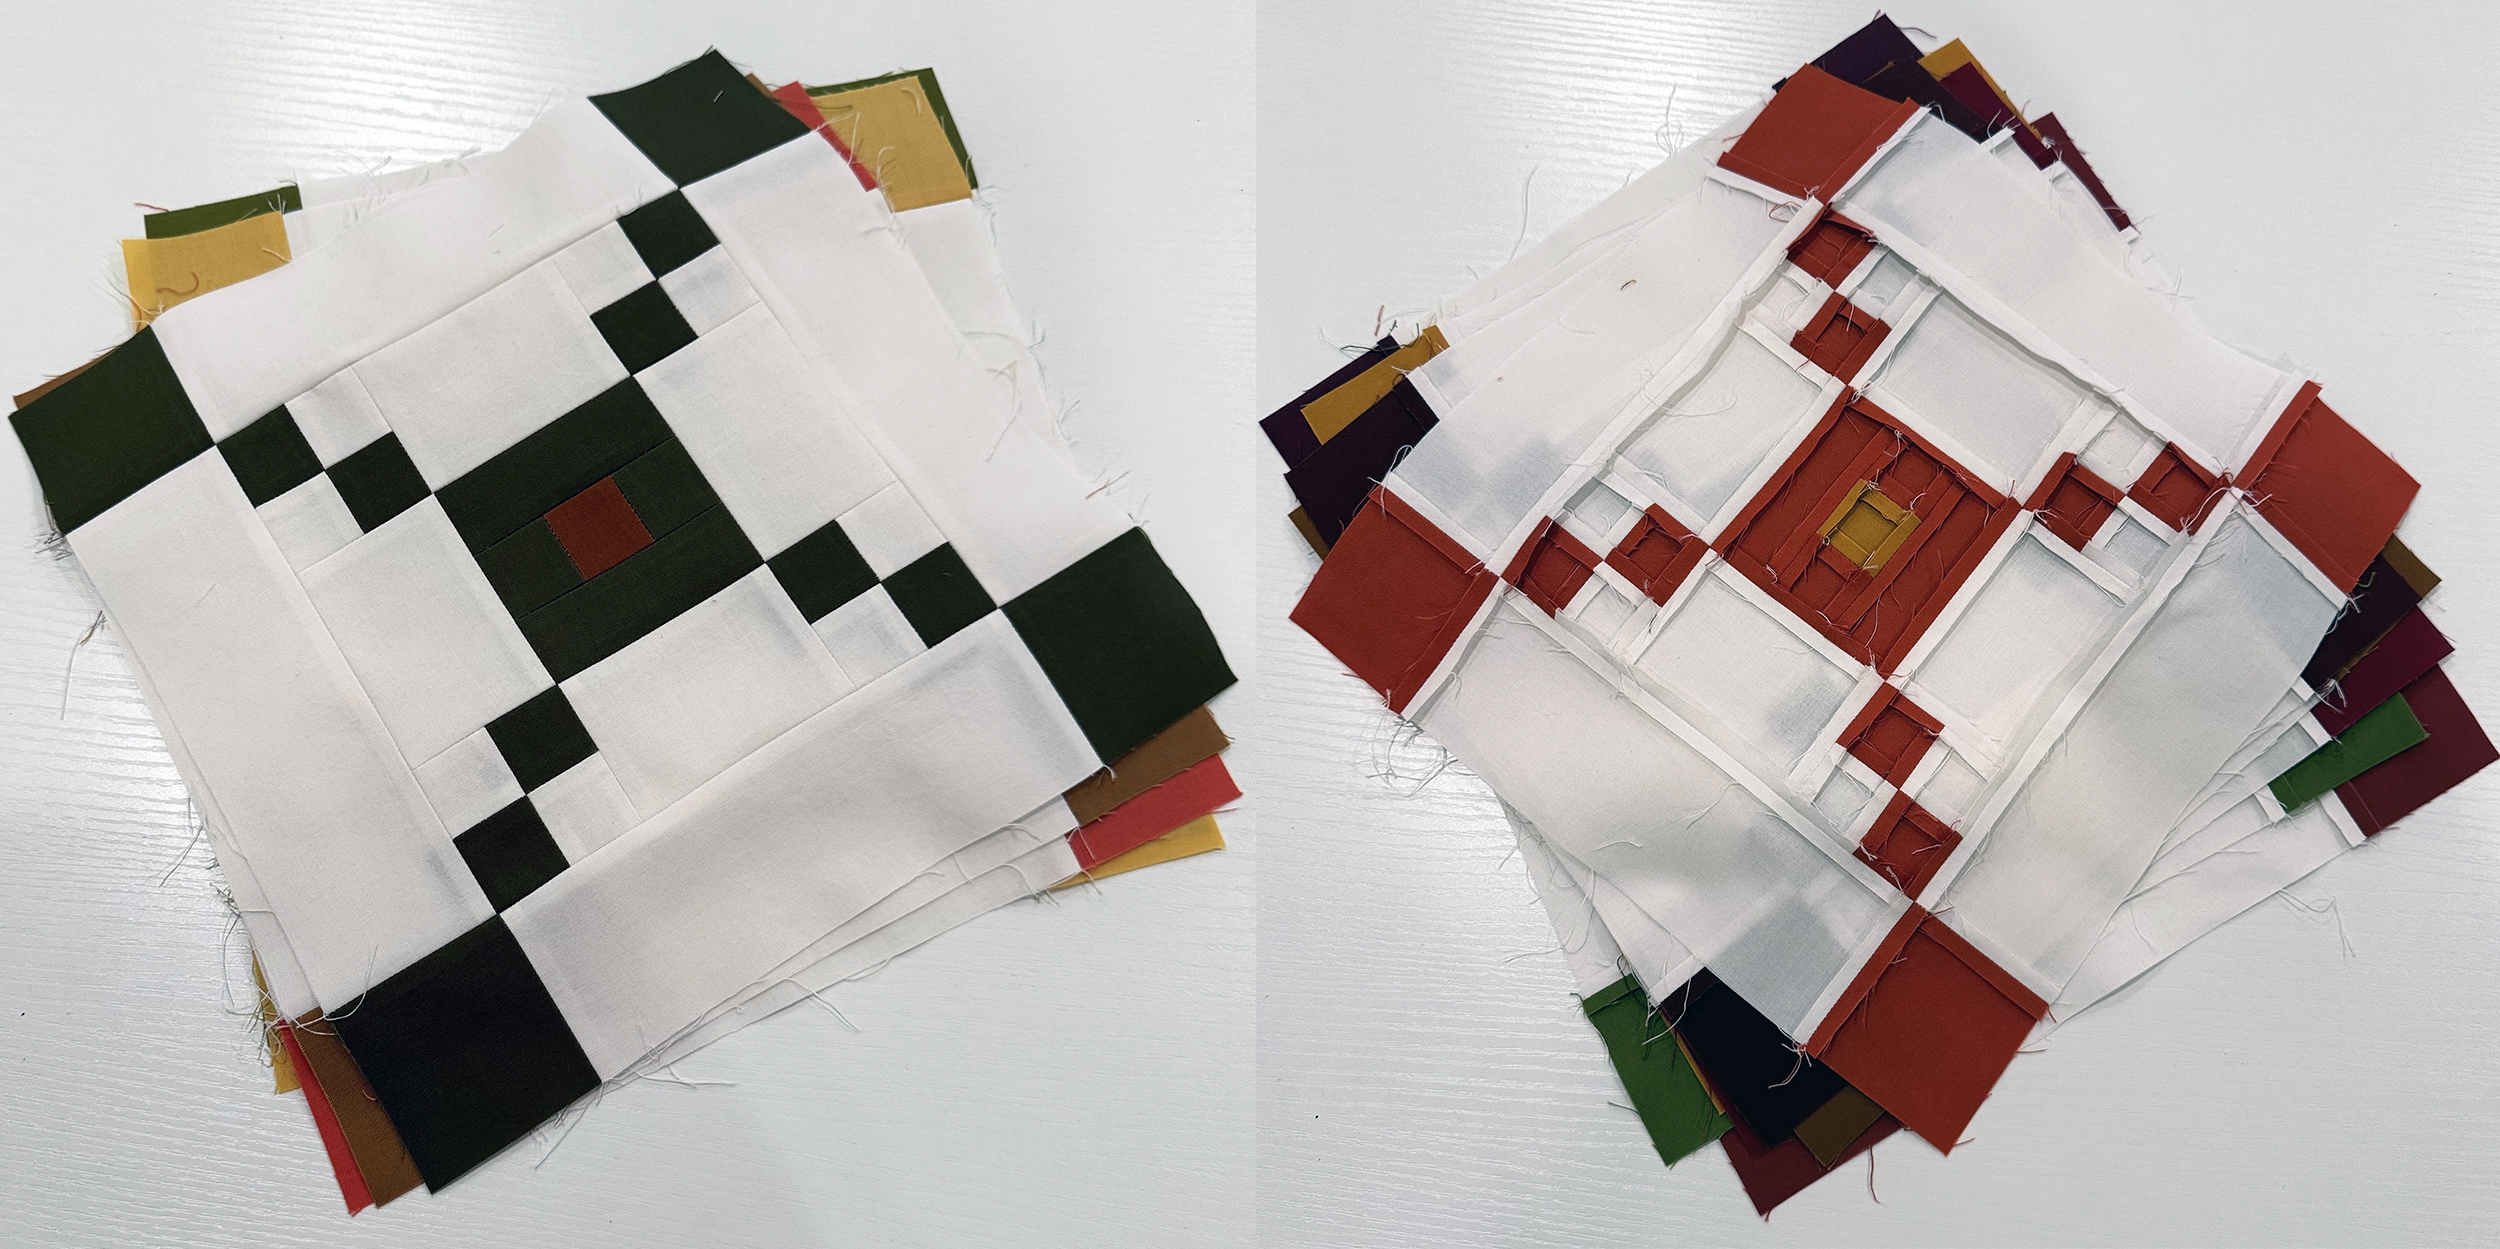
How are your Daisy Chain blocks coming along? If you are just starting, be sure to grab a copy of the Daisy Chain quilt pattern and join the fun. We are currently working through pages 12-13 of the pattern. But the tips I’m sharing below can apply to any quilt in your UFO pile!!
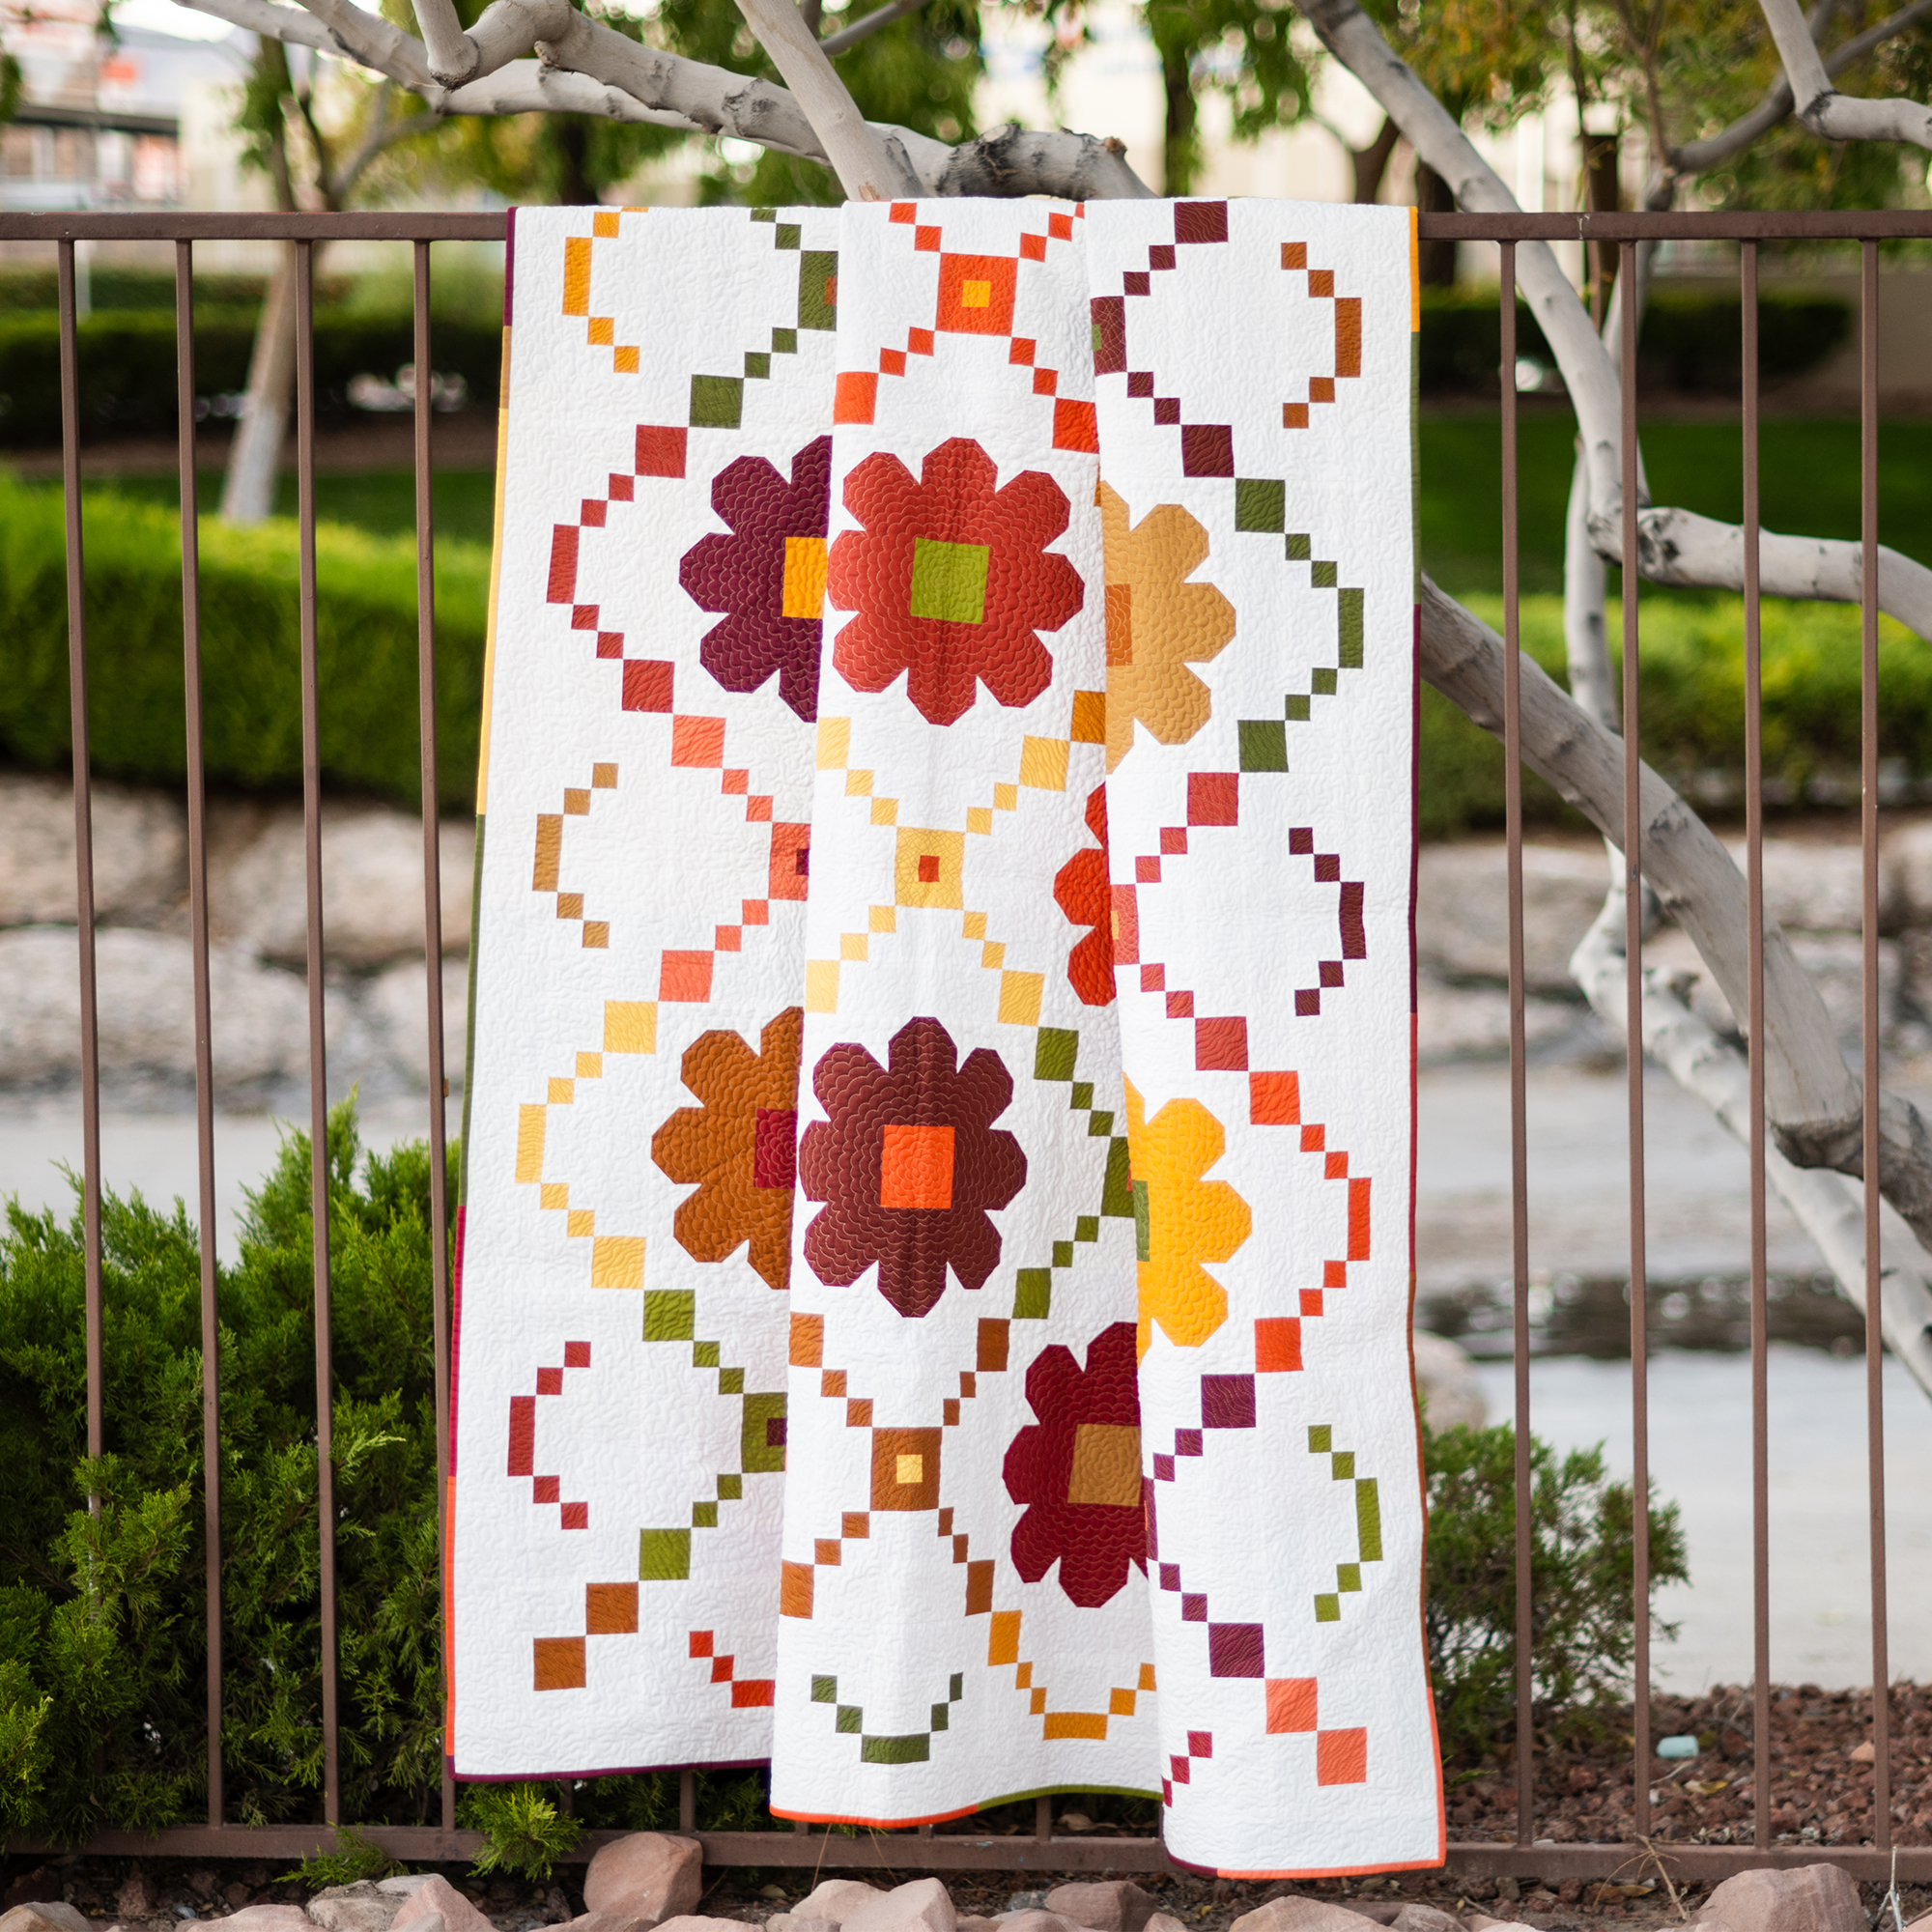
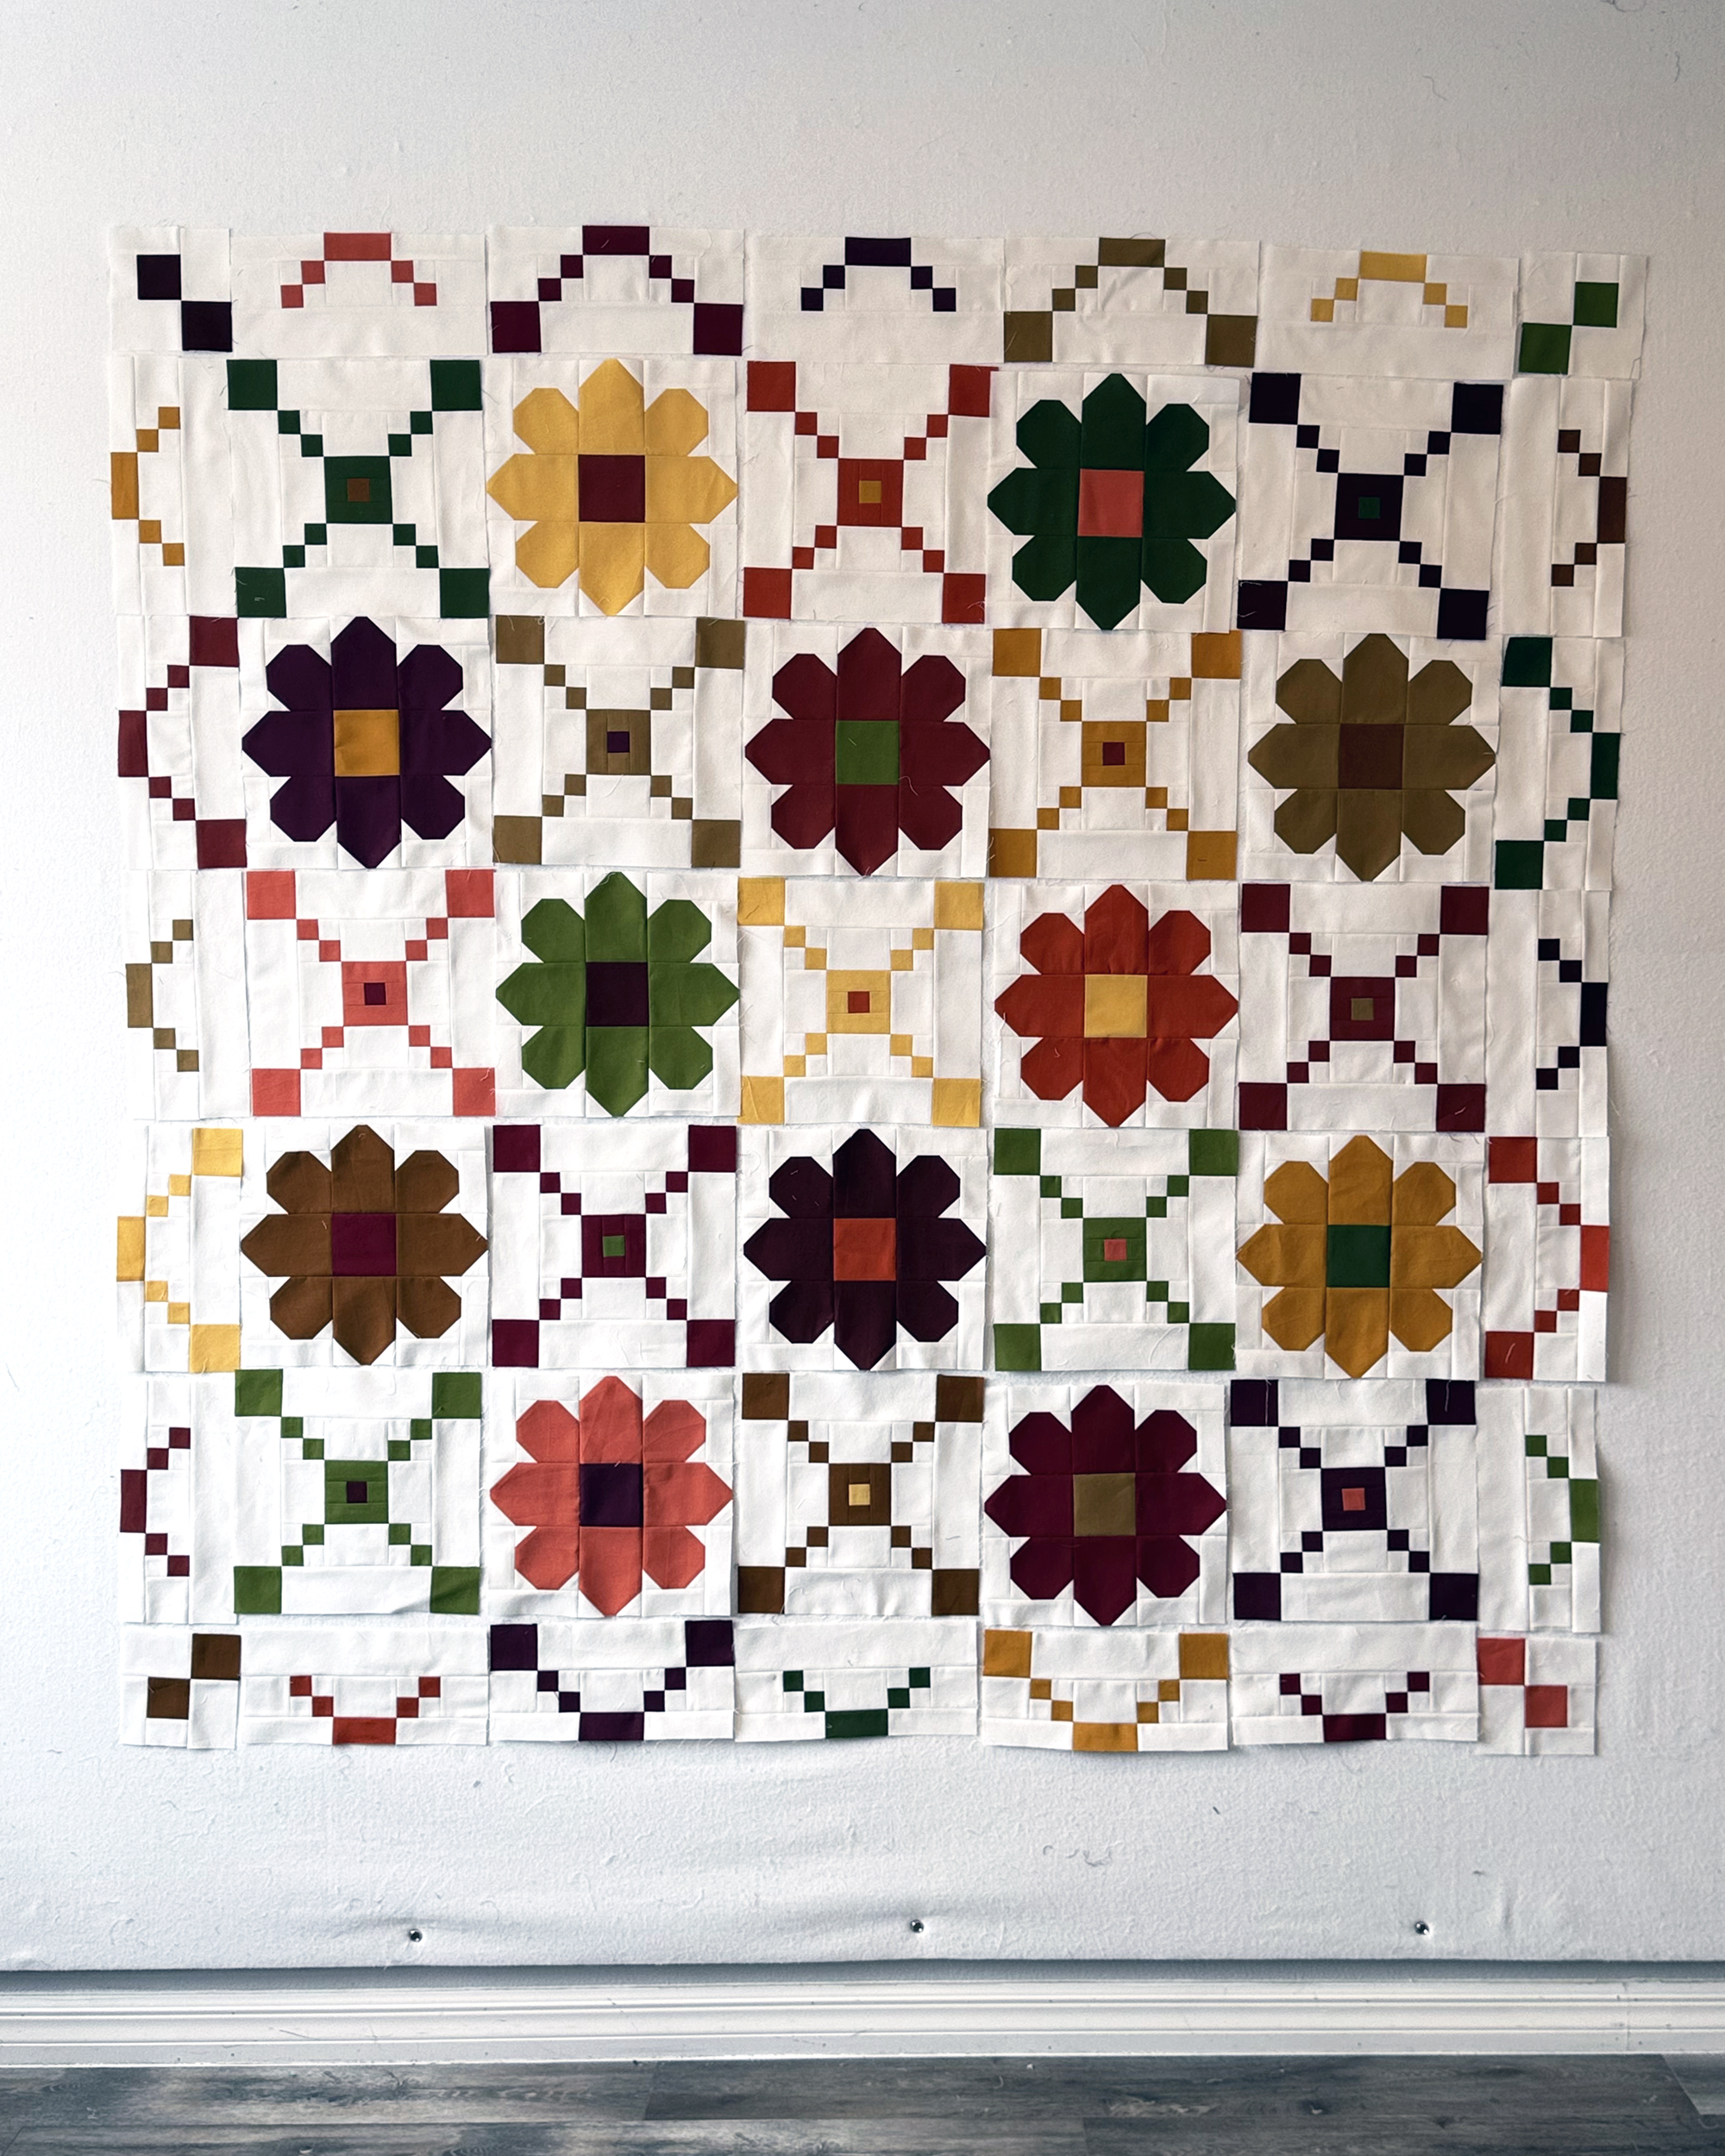
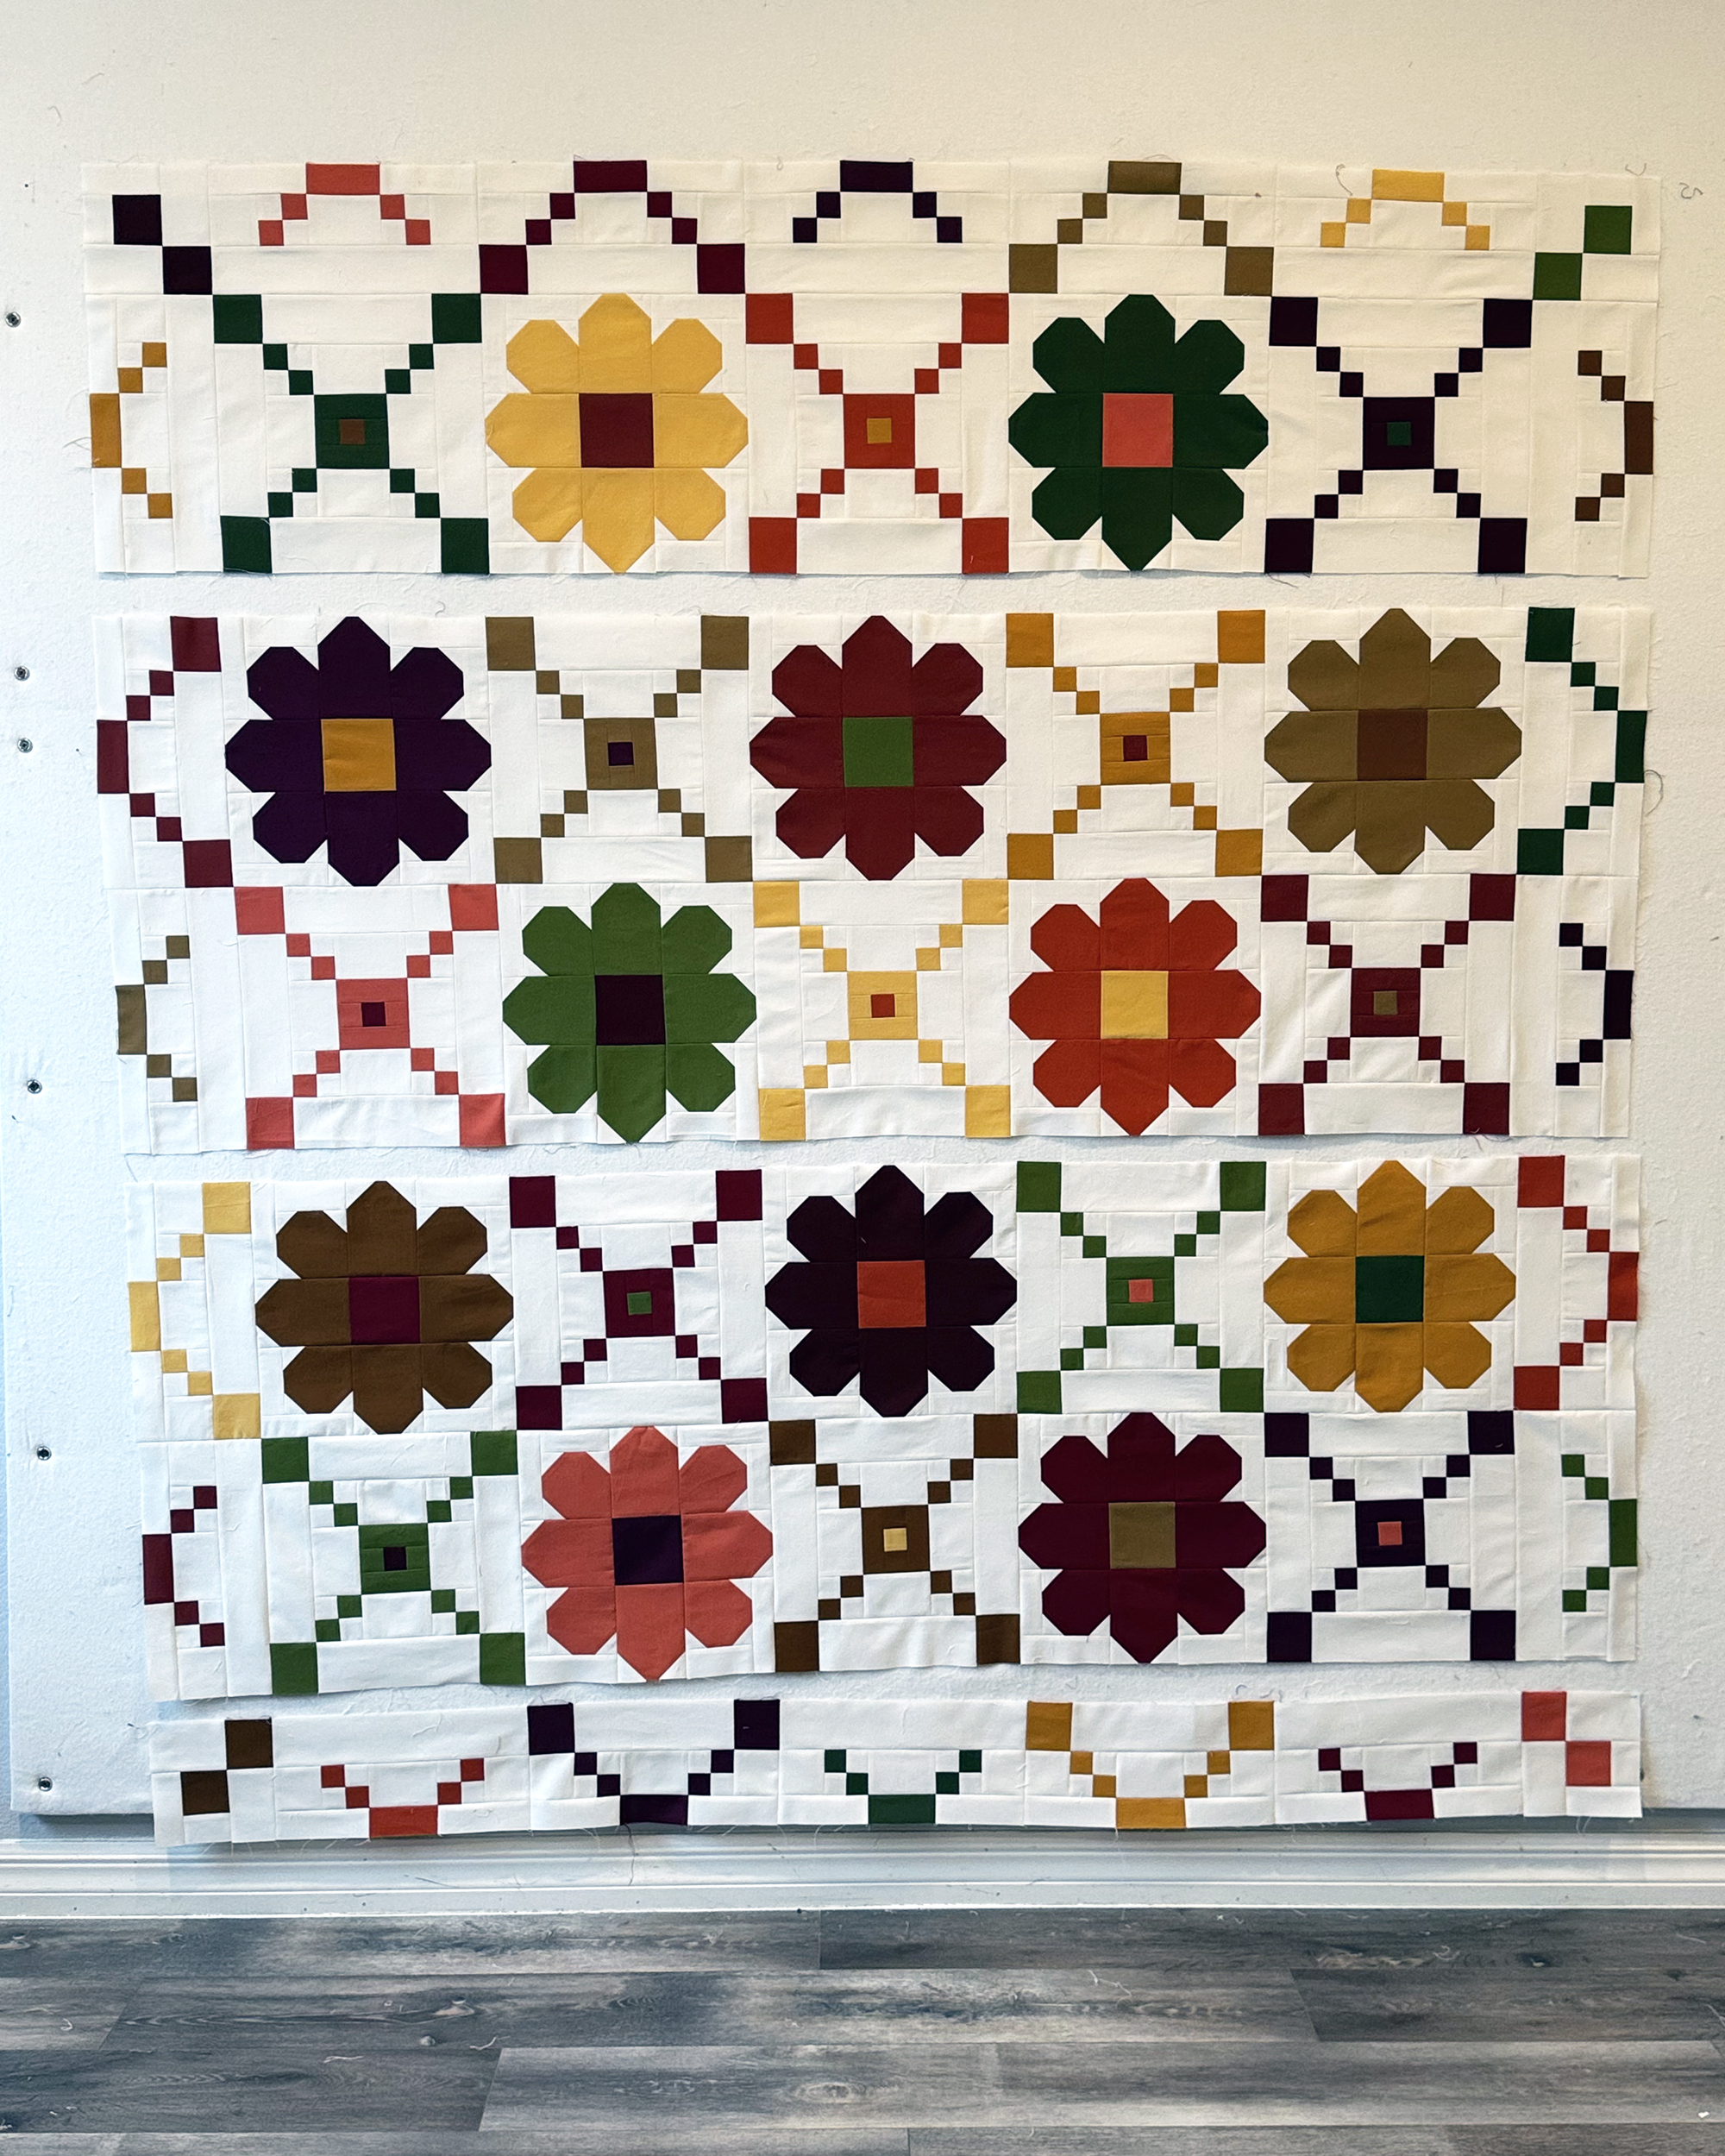
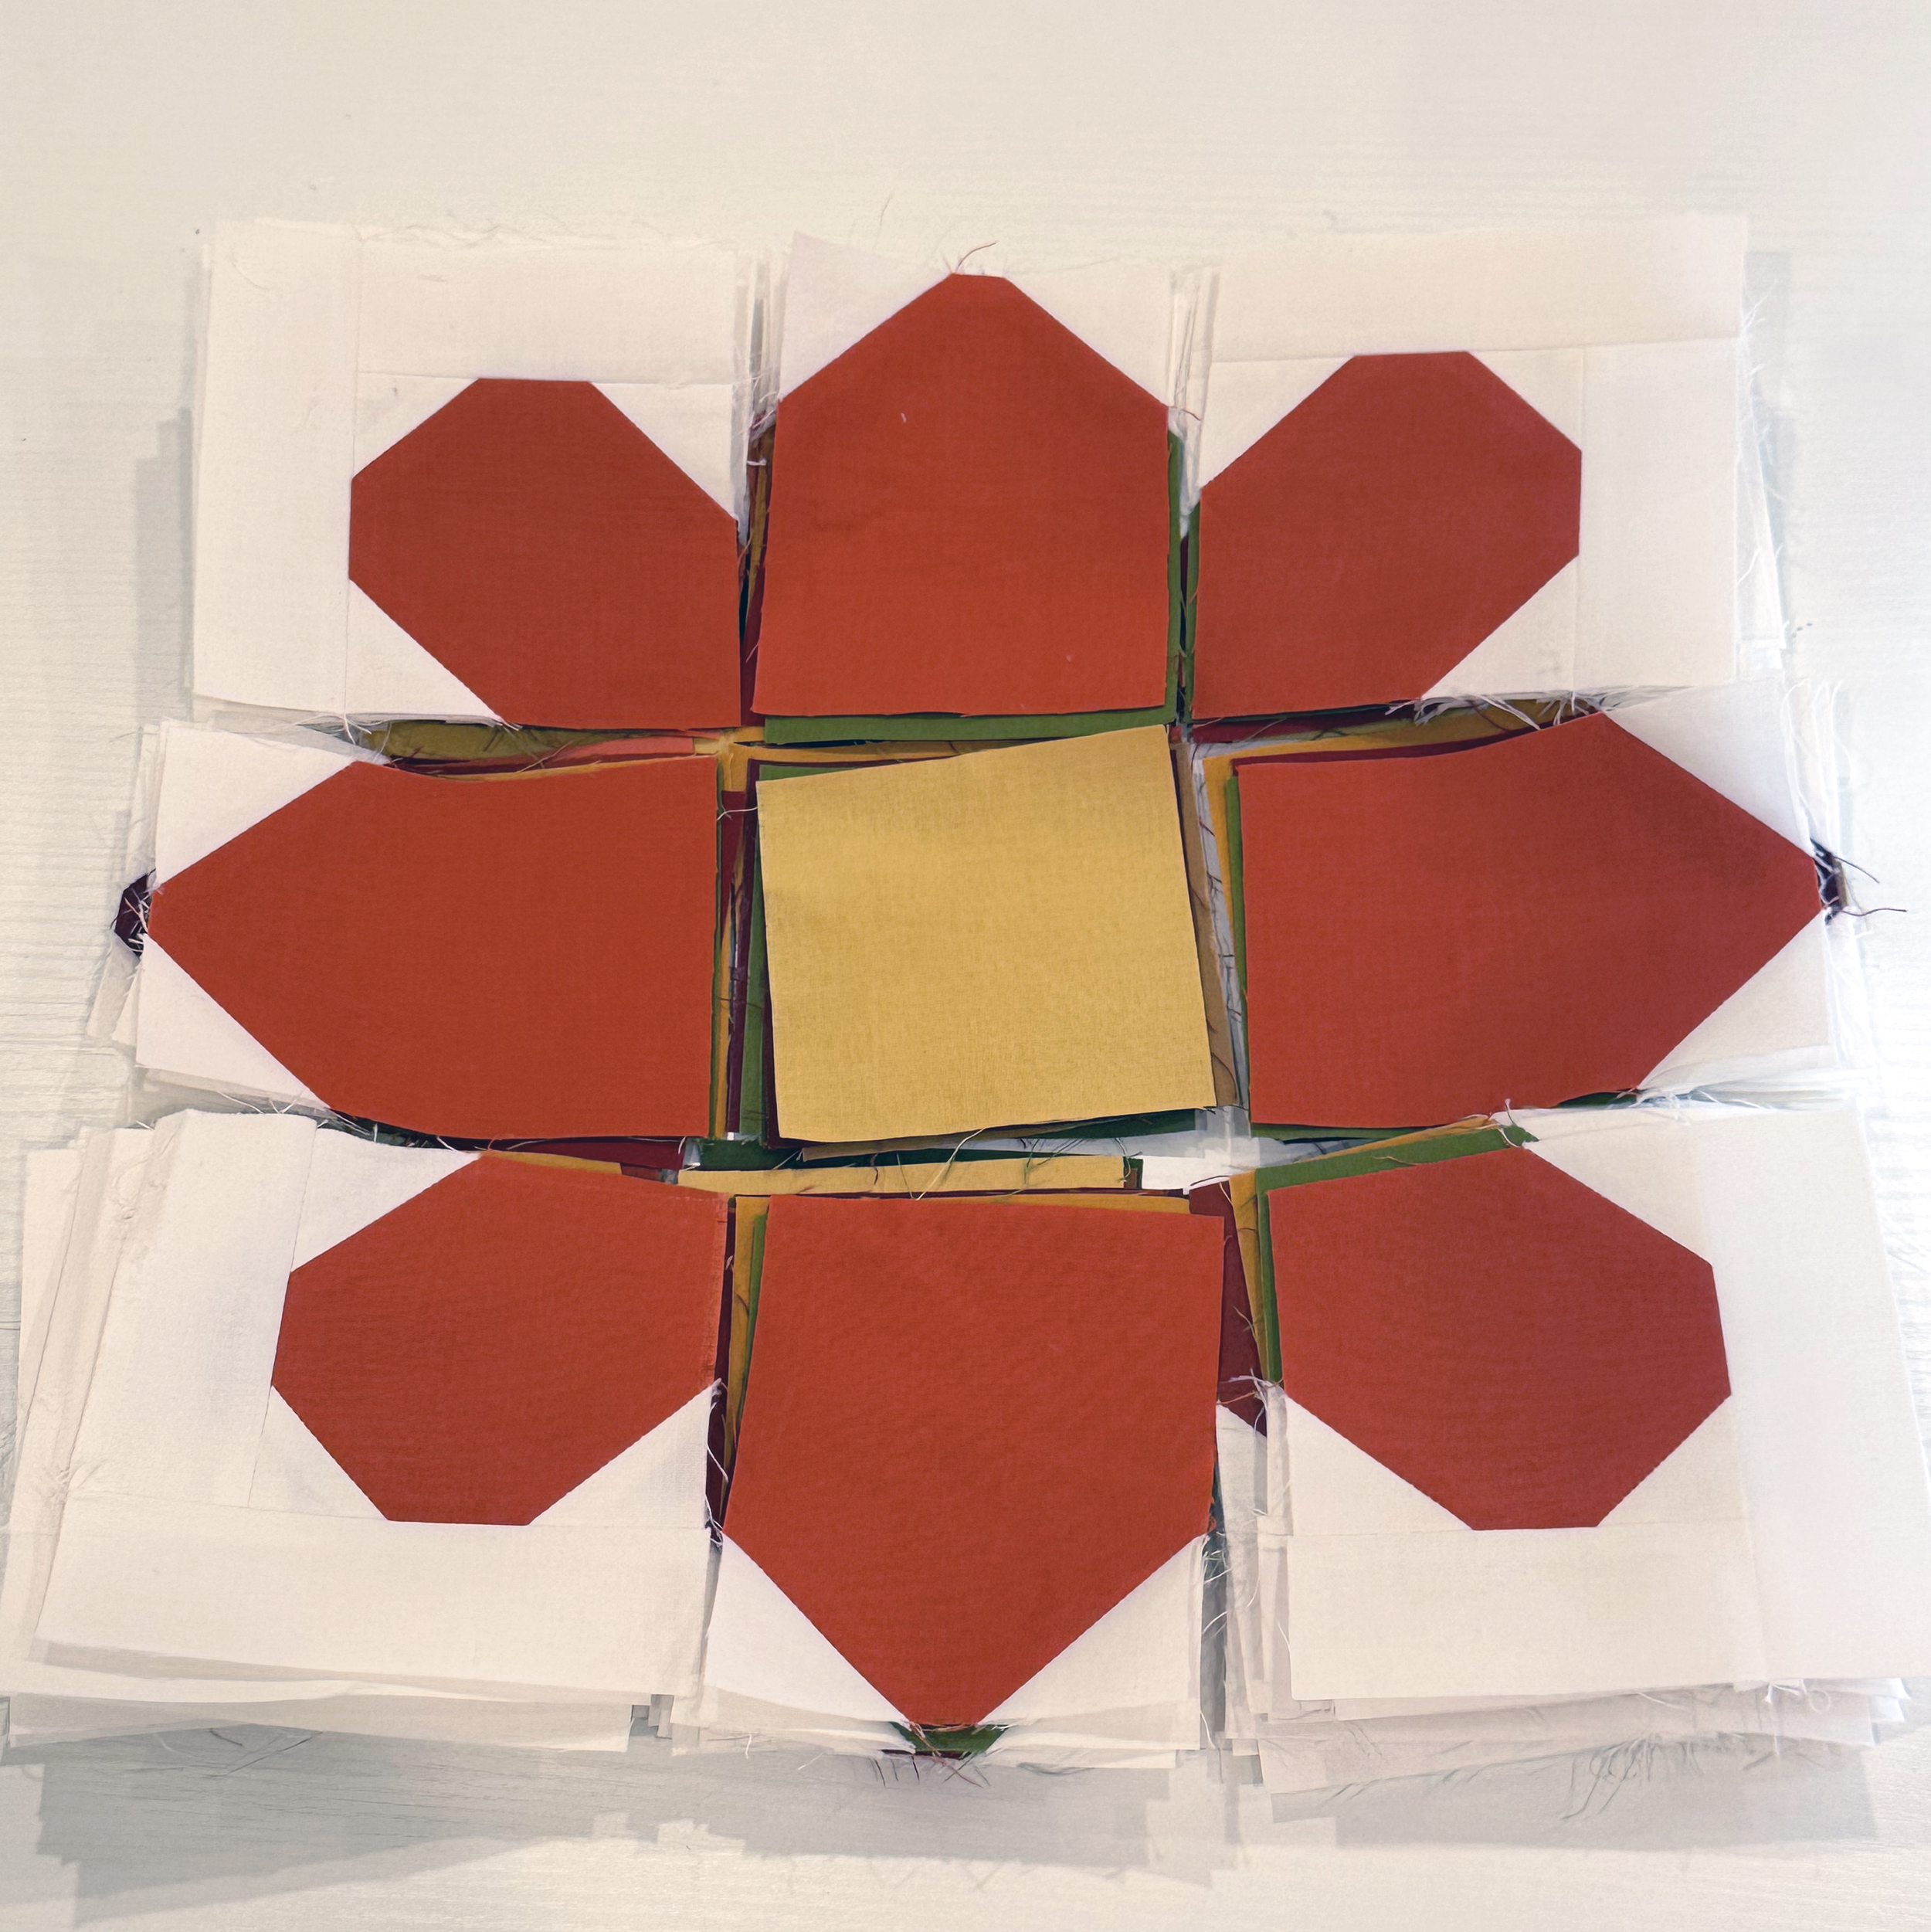
The first thing I like to do whenever sewing a quilt top together is to get all of my blocks up on the design wall and spread out the color. Then I’ll take time to arrange them into a pleasing layout. That’s what I did for the first version of this quilt I made in Autumn colors shown above.
A Design Bed Works Too!
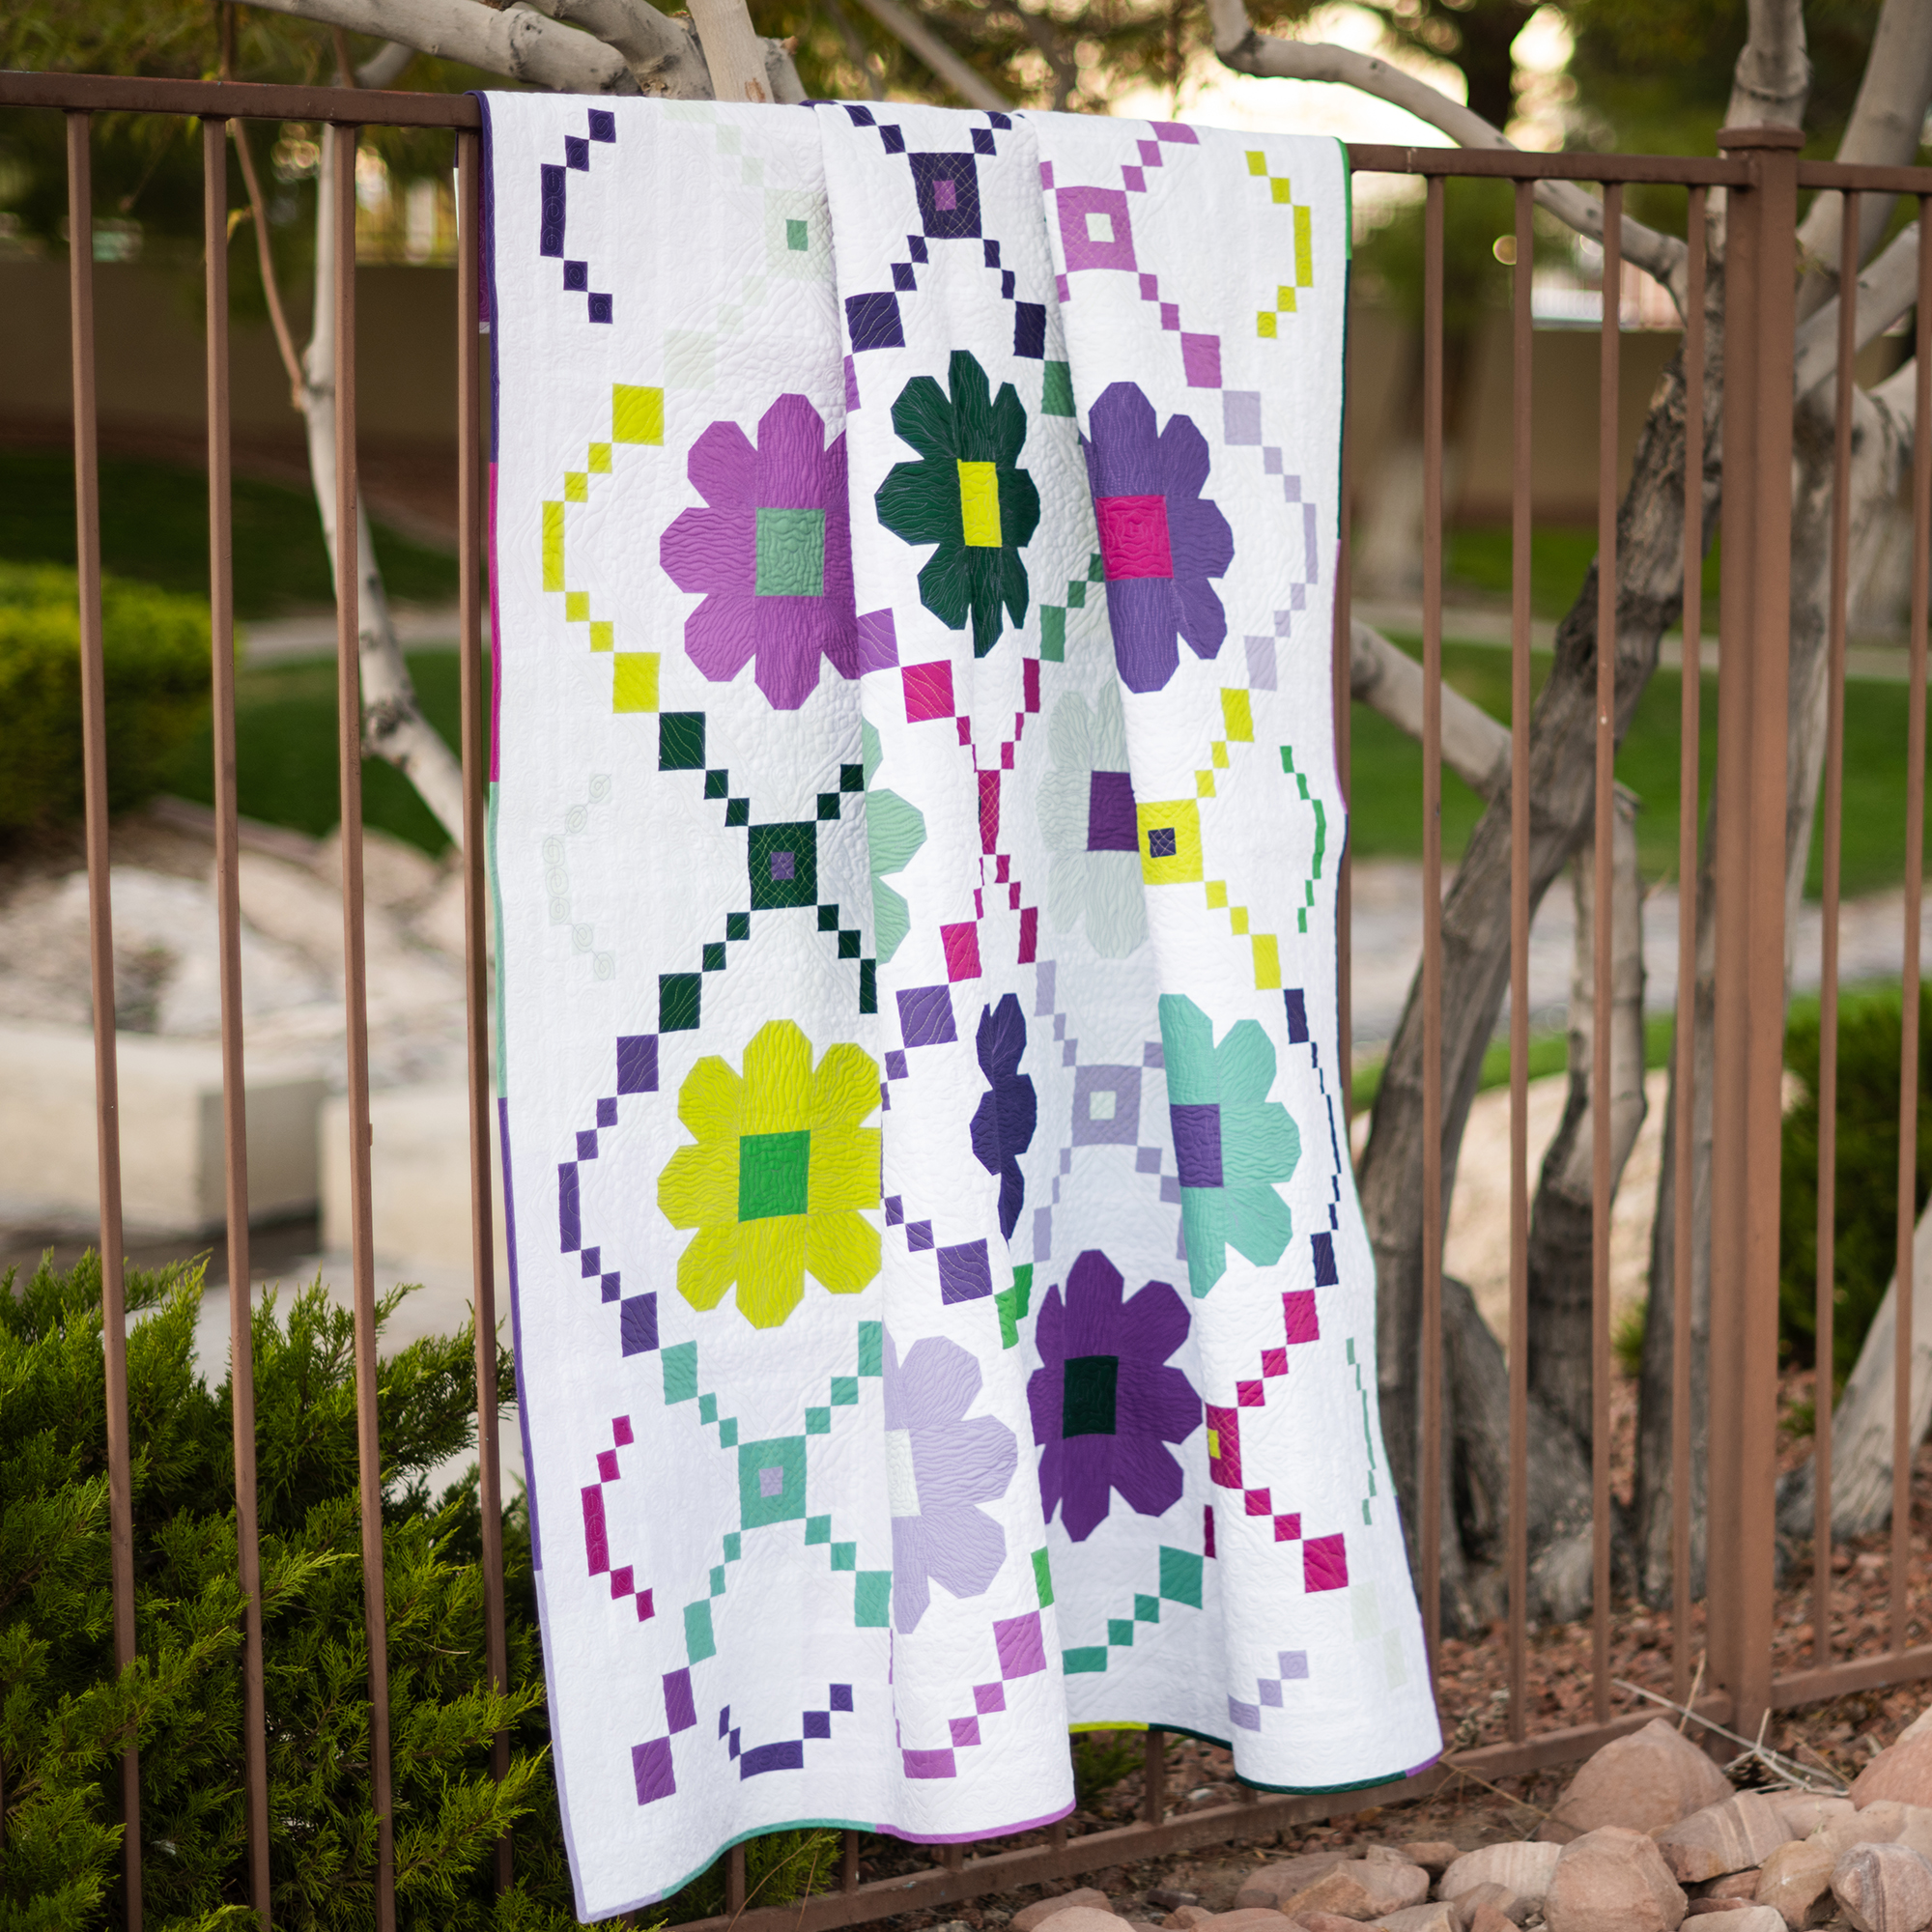
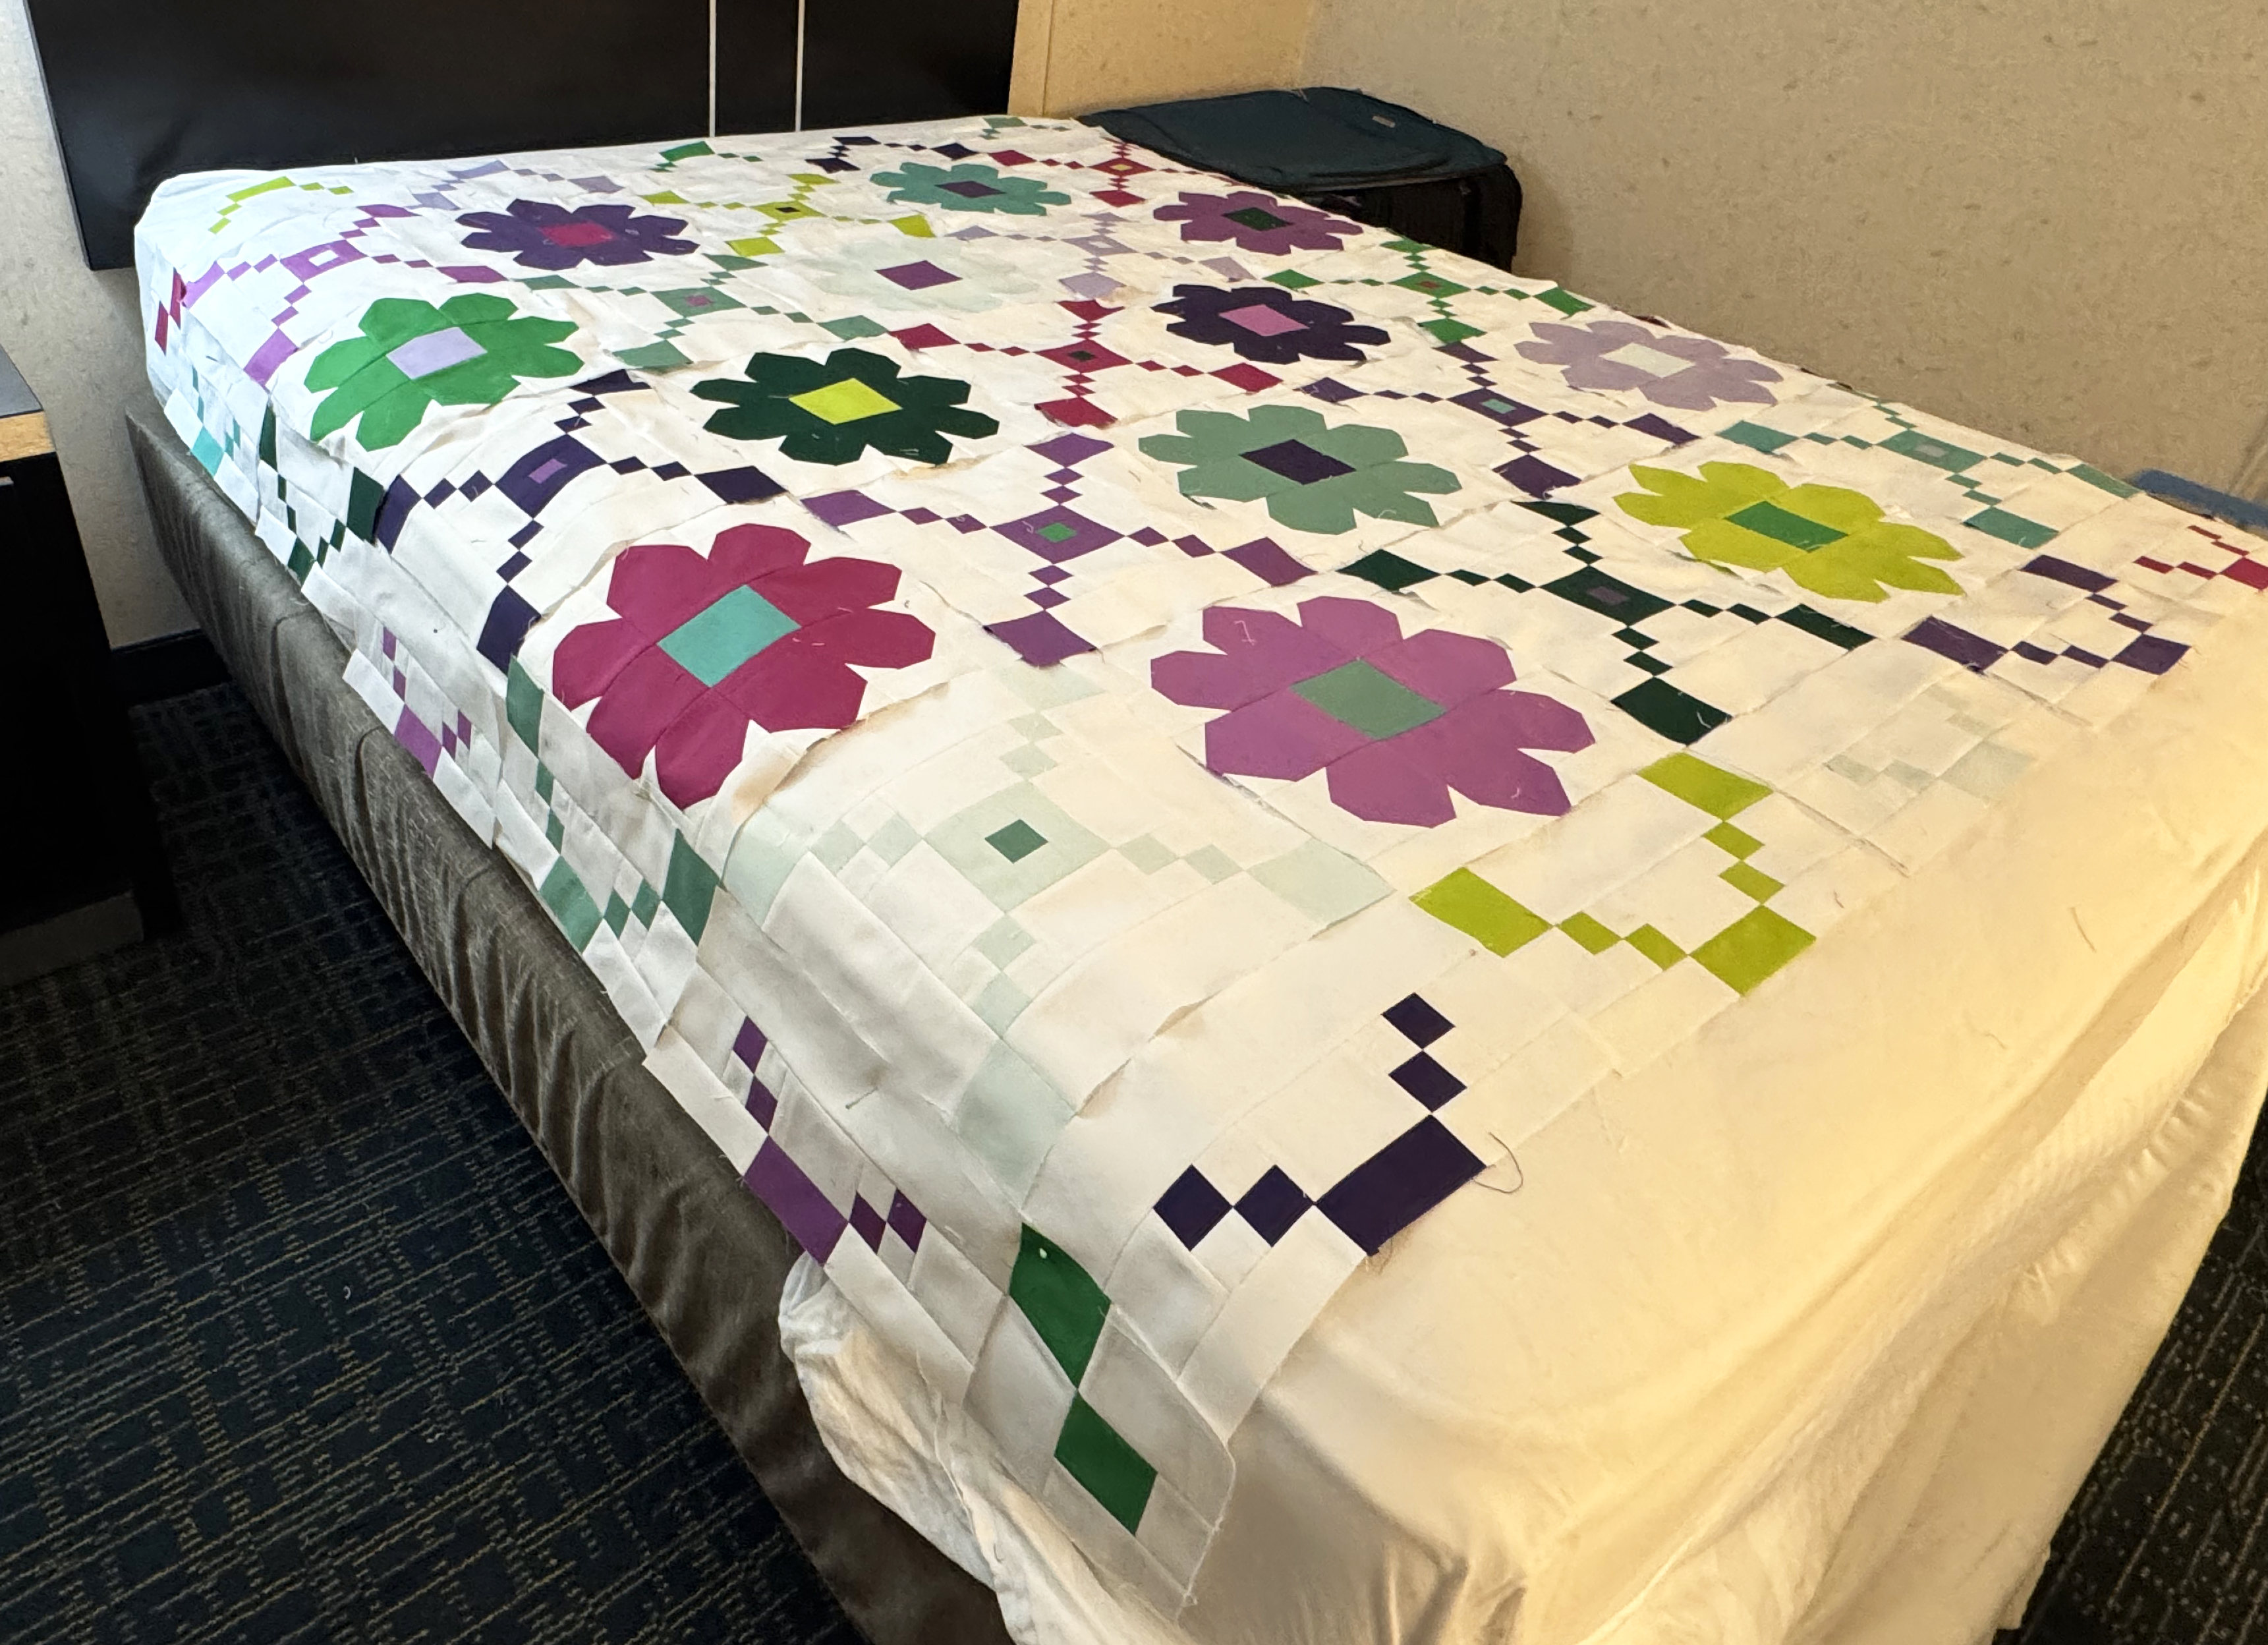
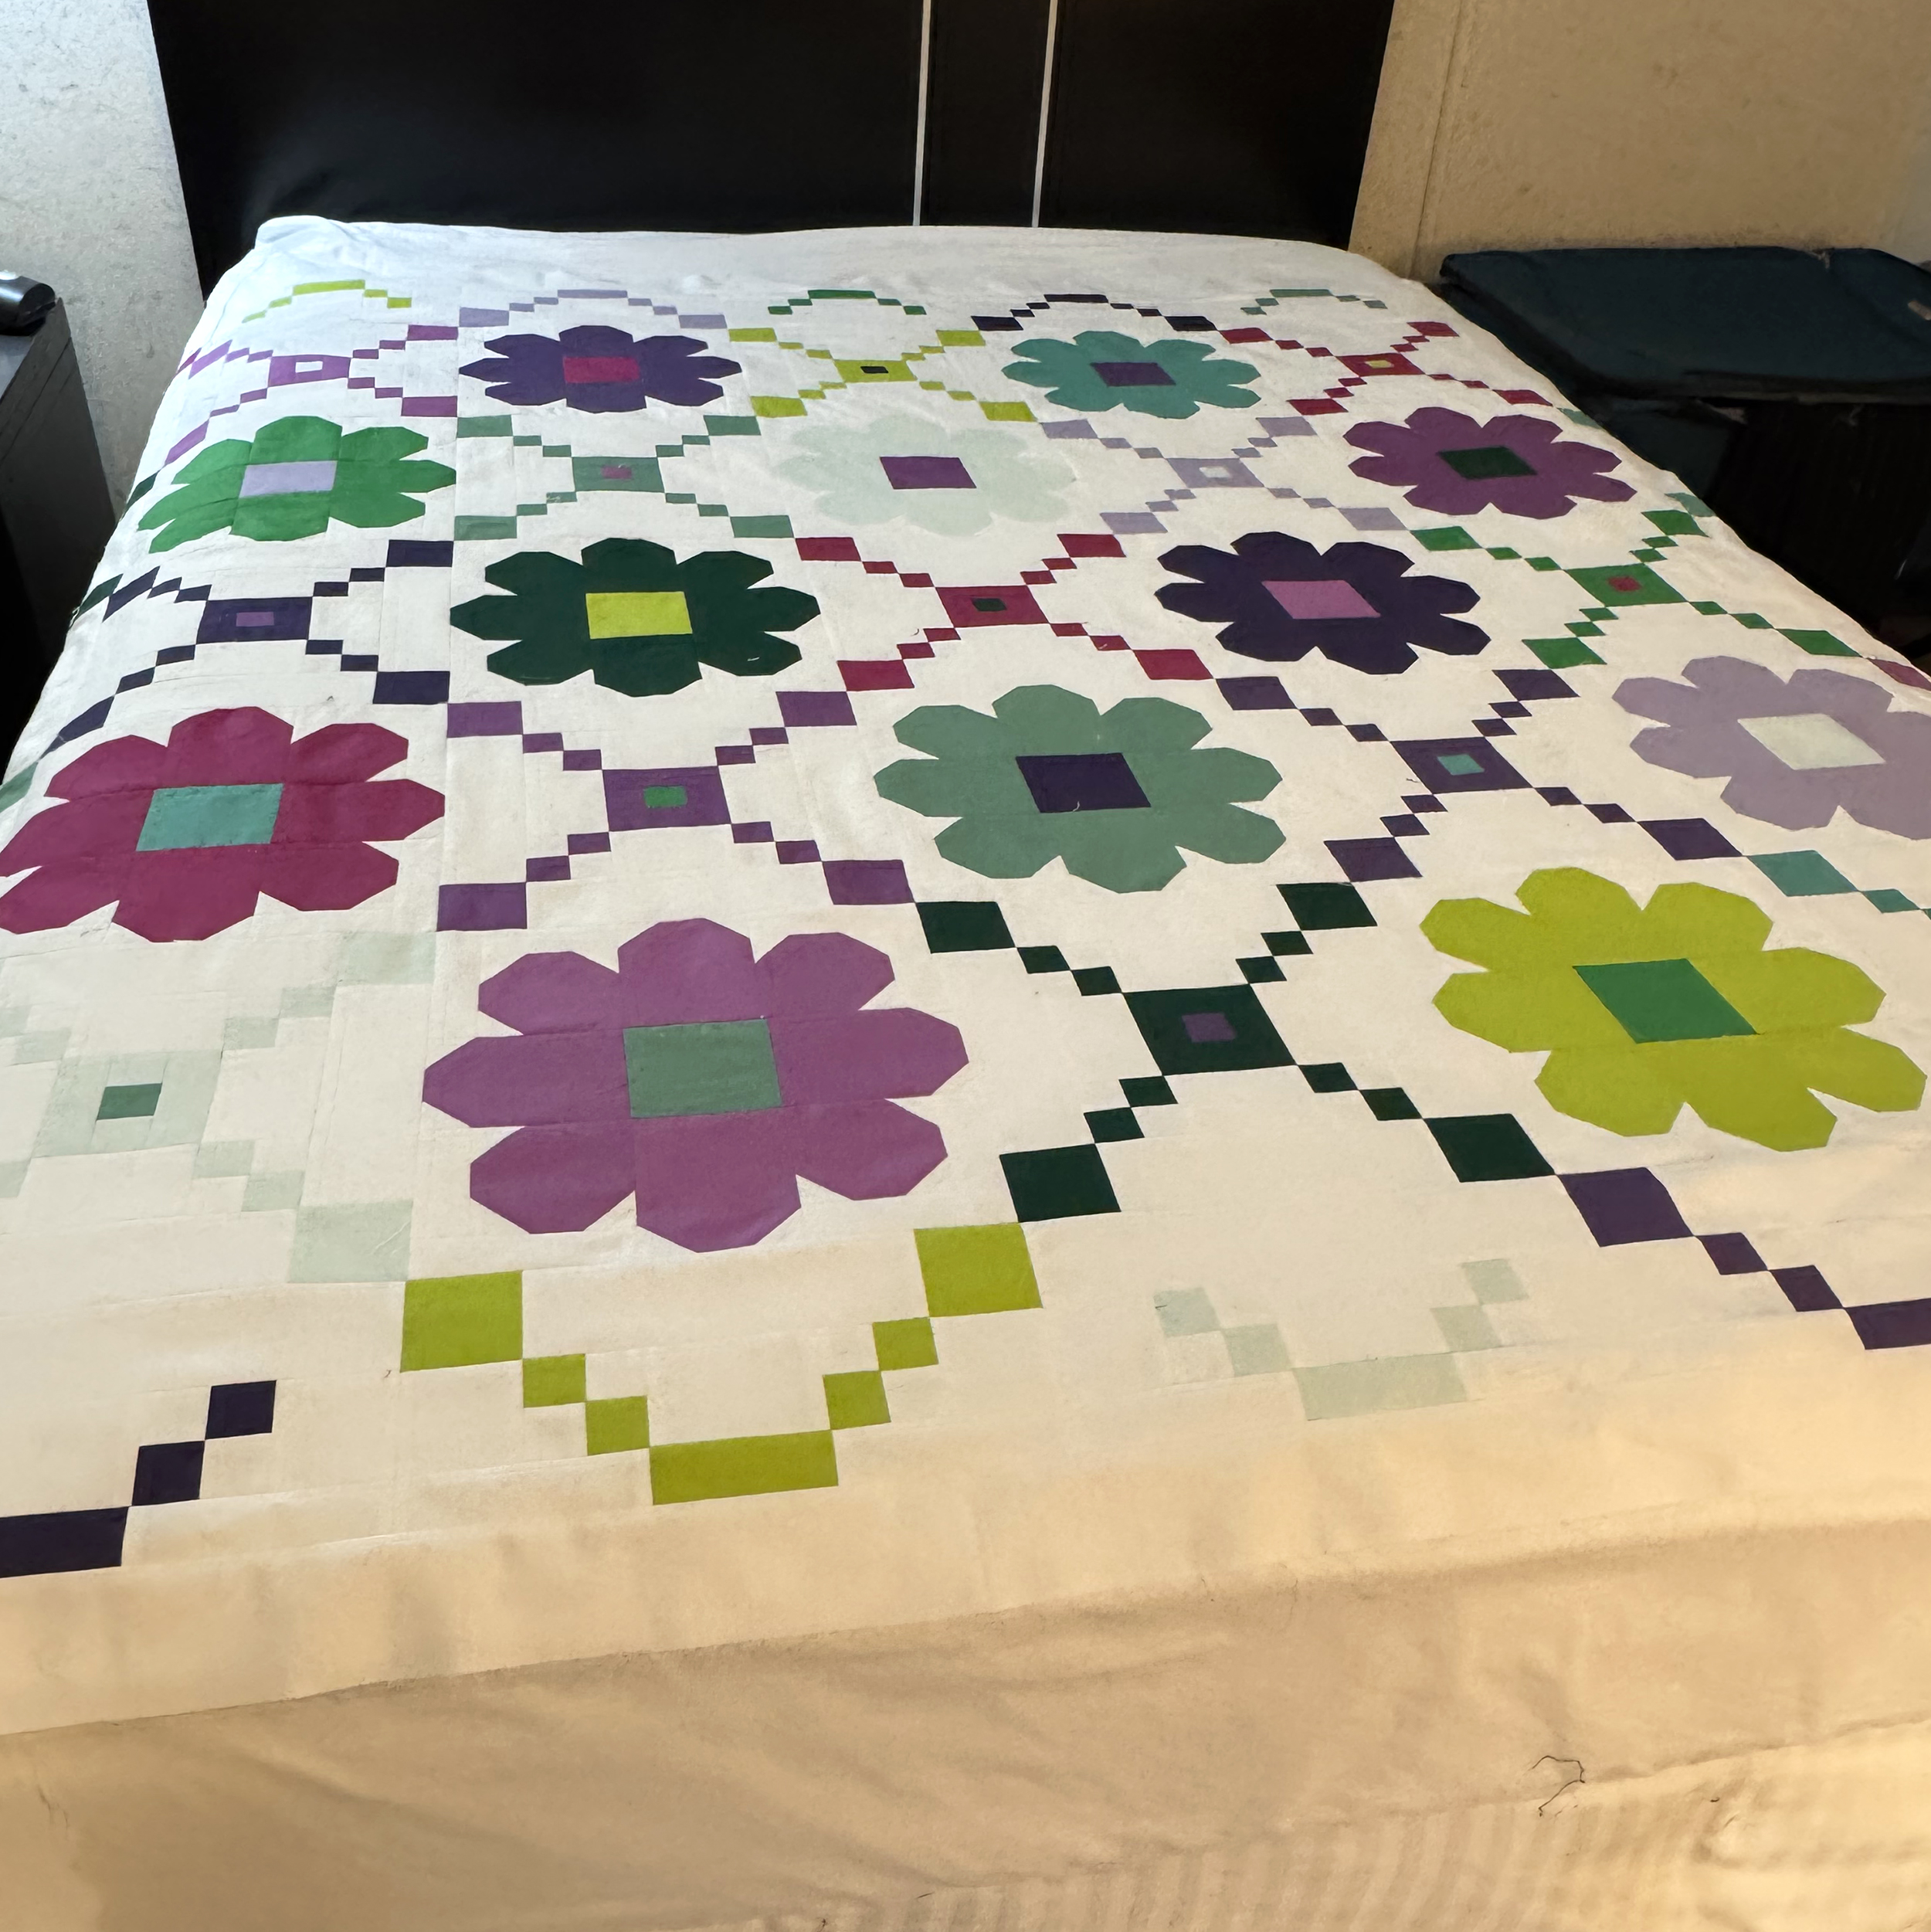
If you don’t have a wall, you can use the floor, a bed, or anywhere there’s room to spread out a little. For my Purple Vibrations colorway below, I sewed the entire top in a hotel room when I was out of town teaching. My bed worked great for the layout, LOL!!
Use what you have to lay out your blocks!
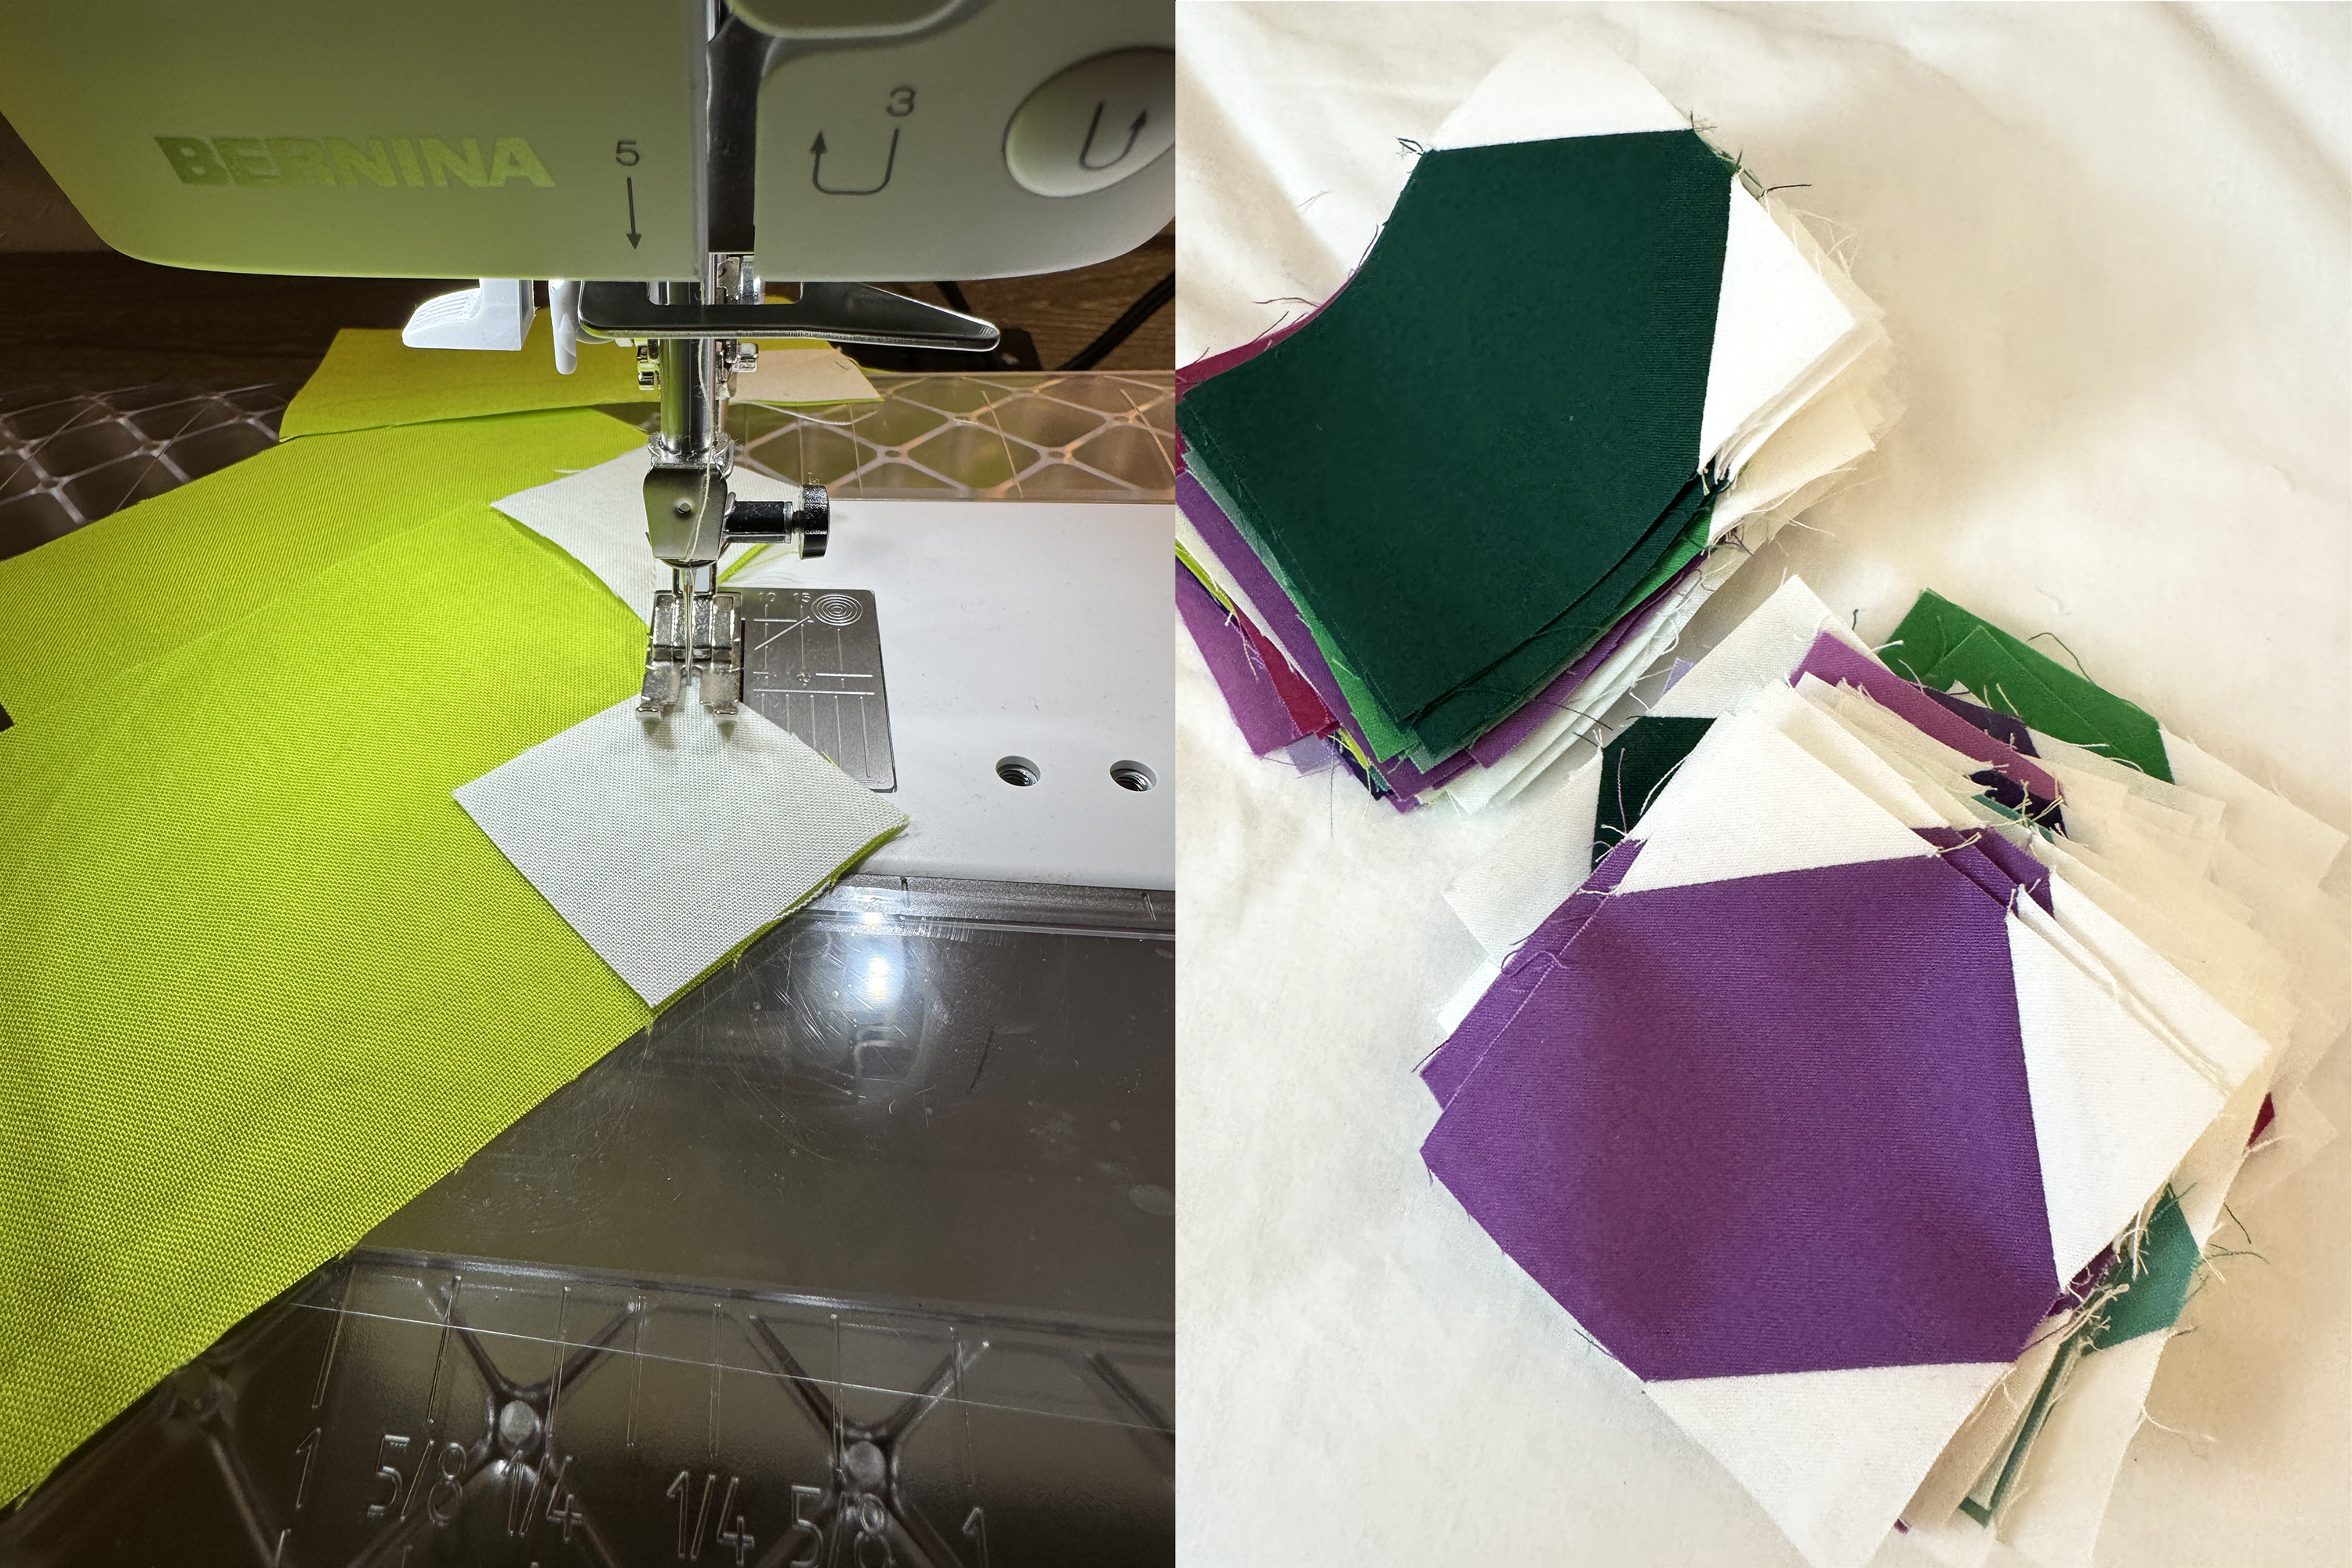
Once I’m happy with the layout, I will take a picture that I can refer to while sewing everything together. This helps me keep the blocks in order. I’ll pick up the blocks in stacks of 2 and then put them next to my sewing machine in order. Just like when sewing my blocks, I press each and every seam as I go. I pin generously and prefer to press all my seams open, but you can press whichever way works for you.
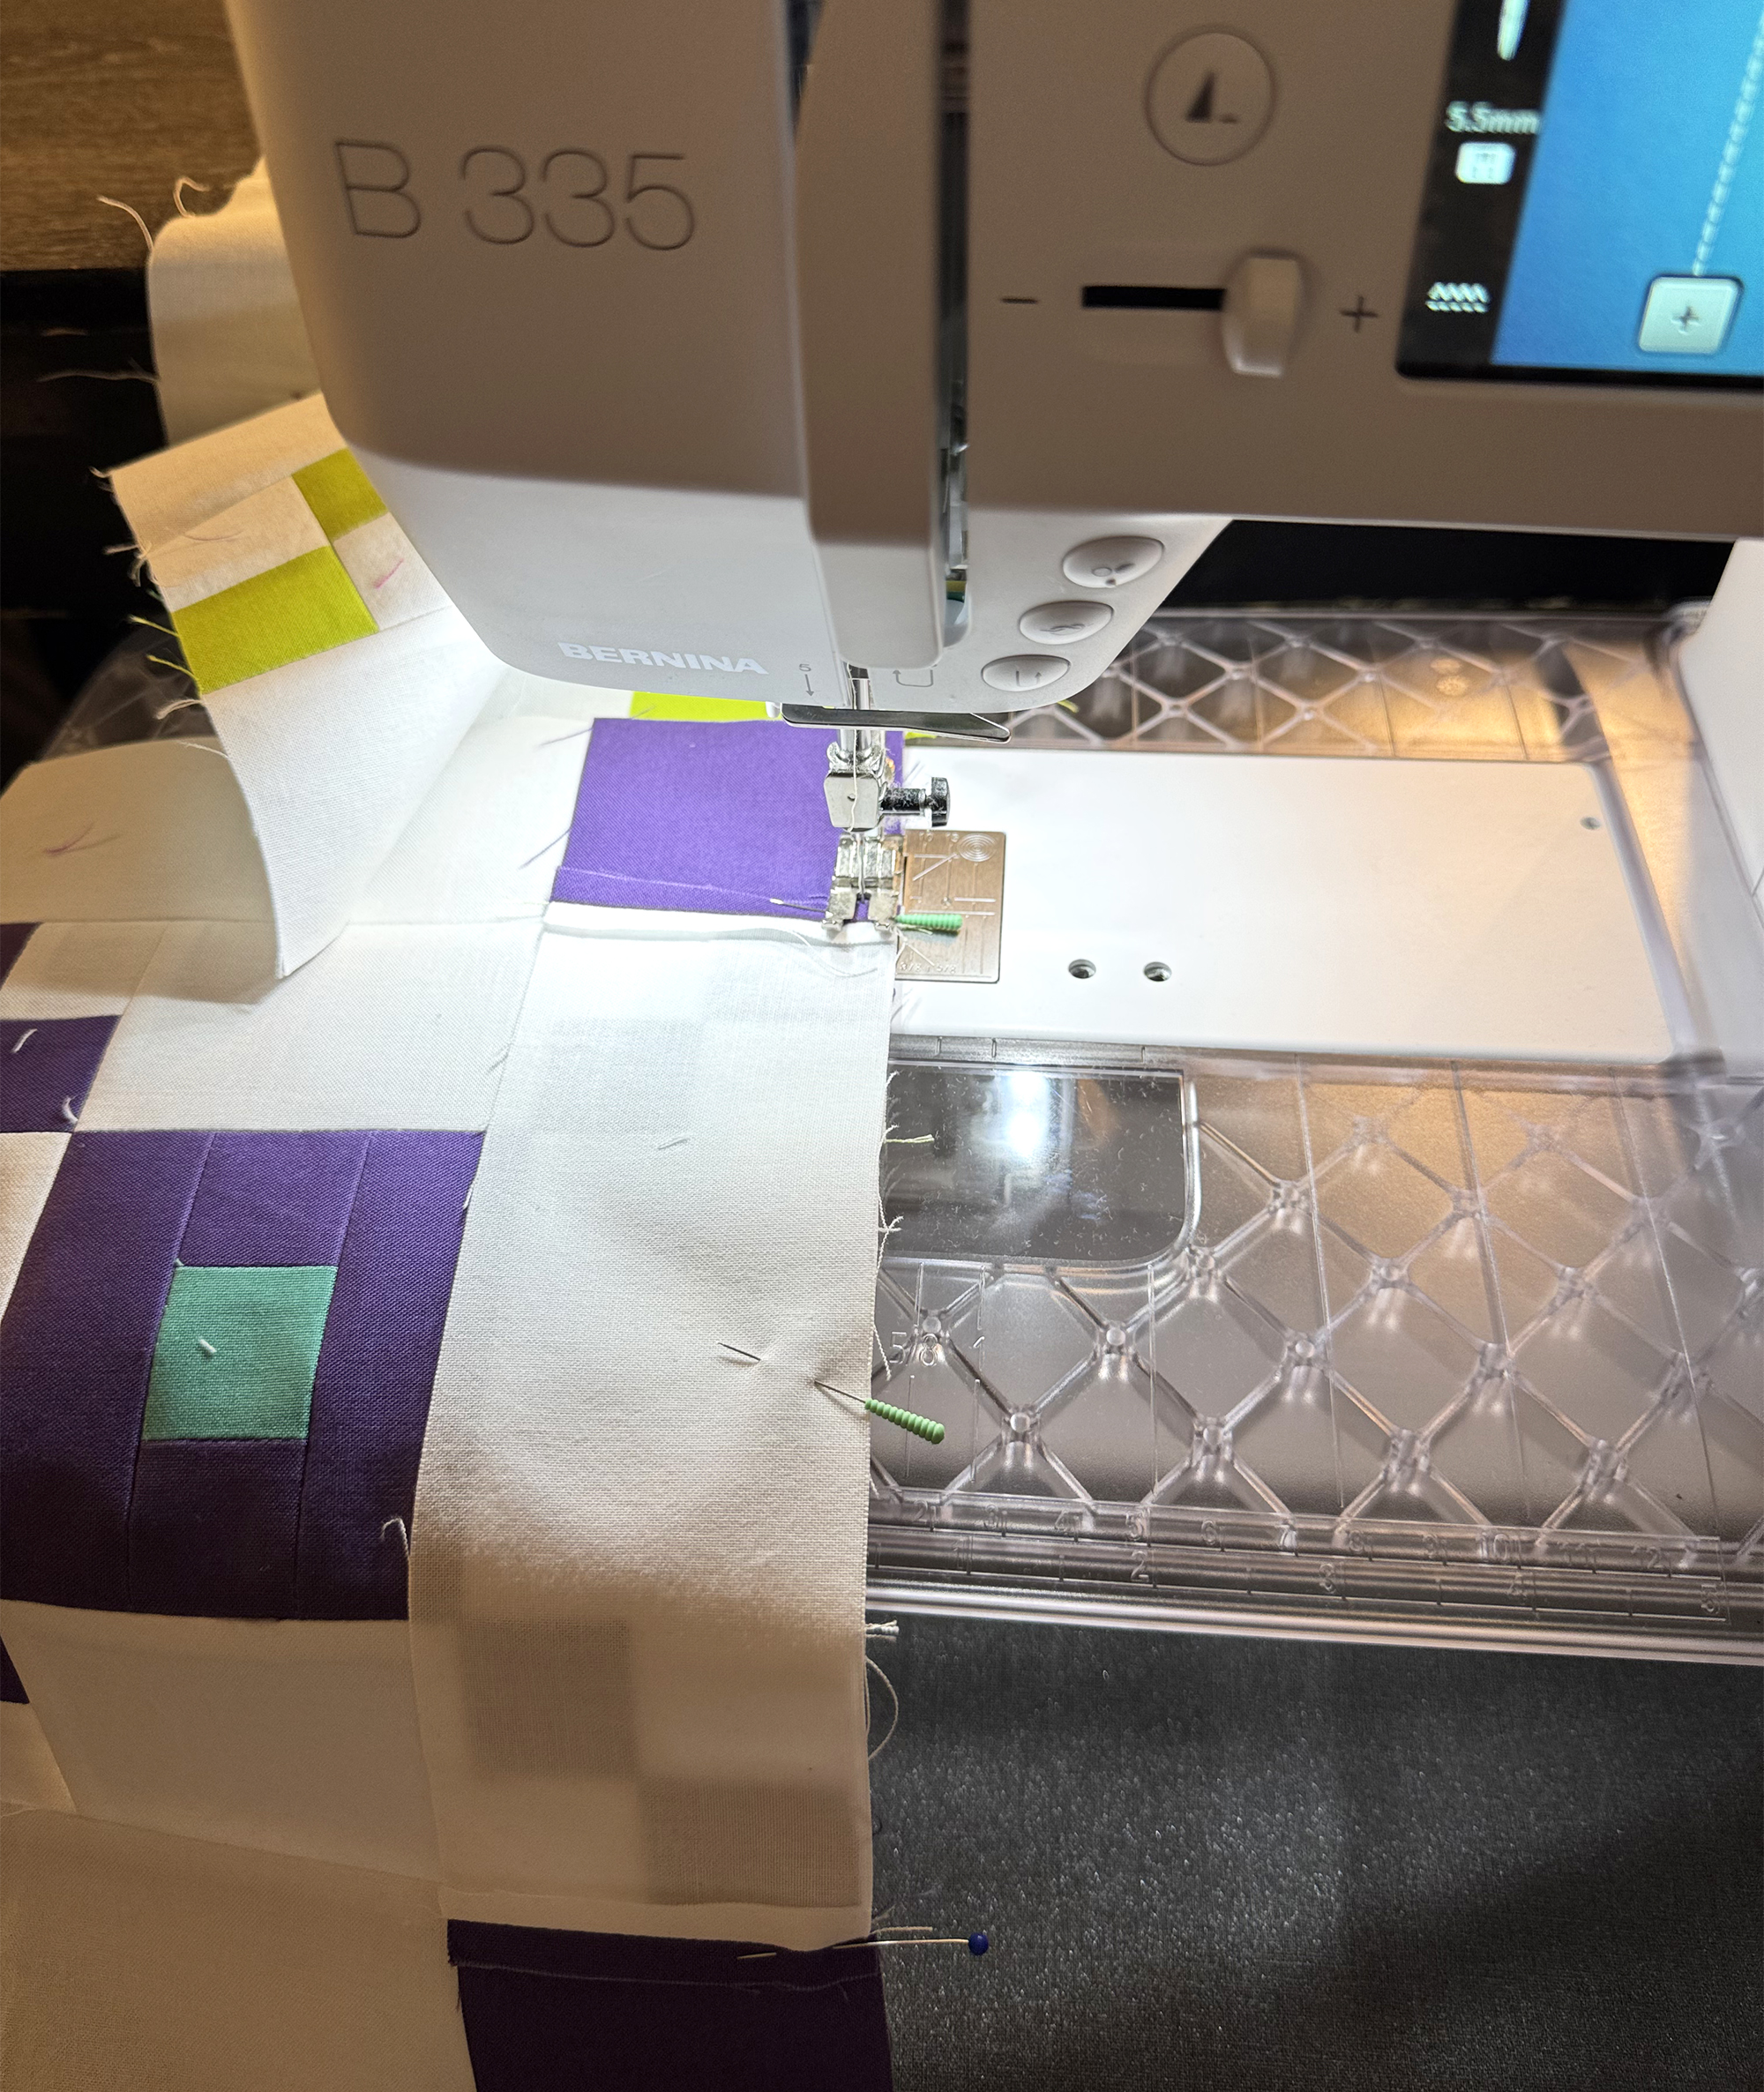
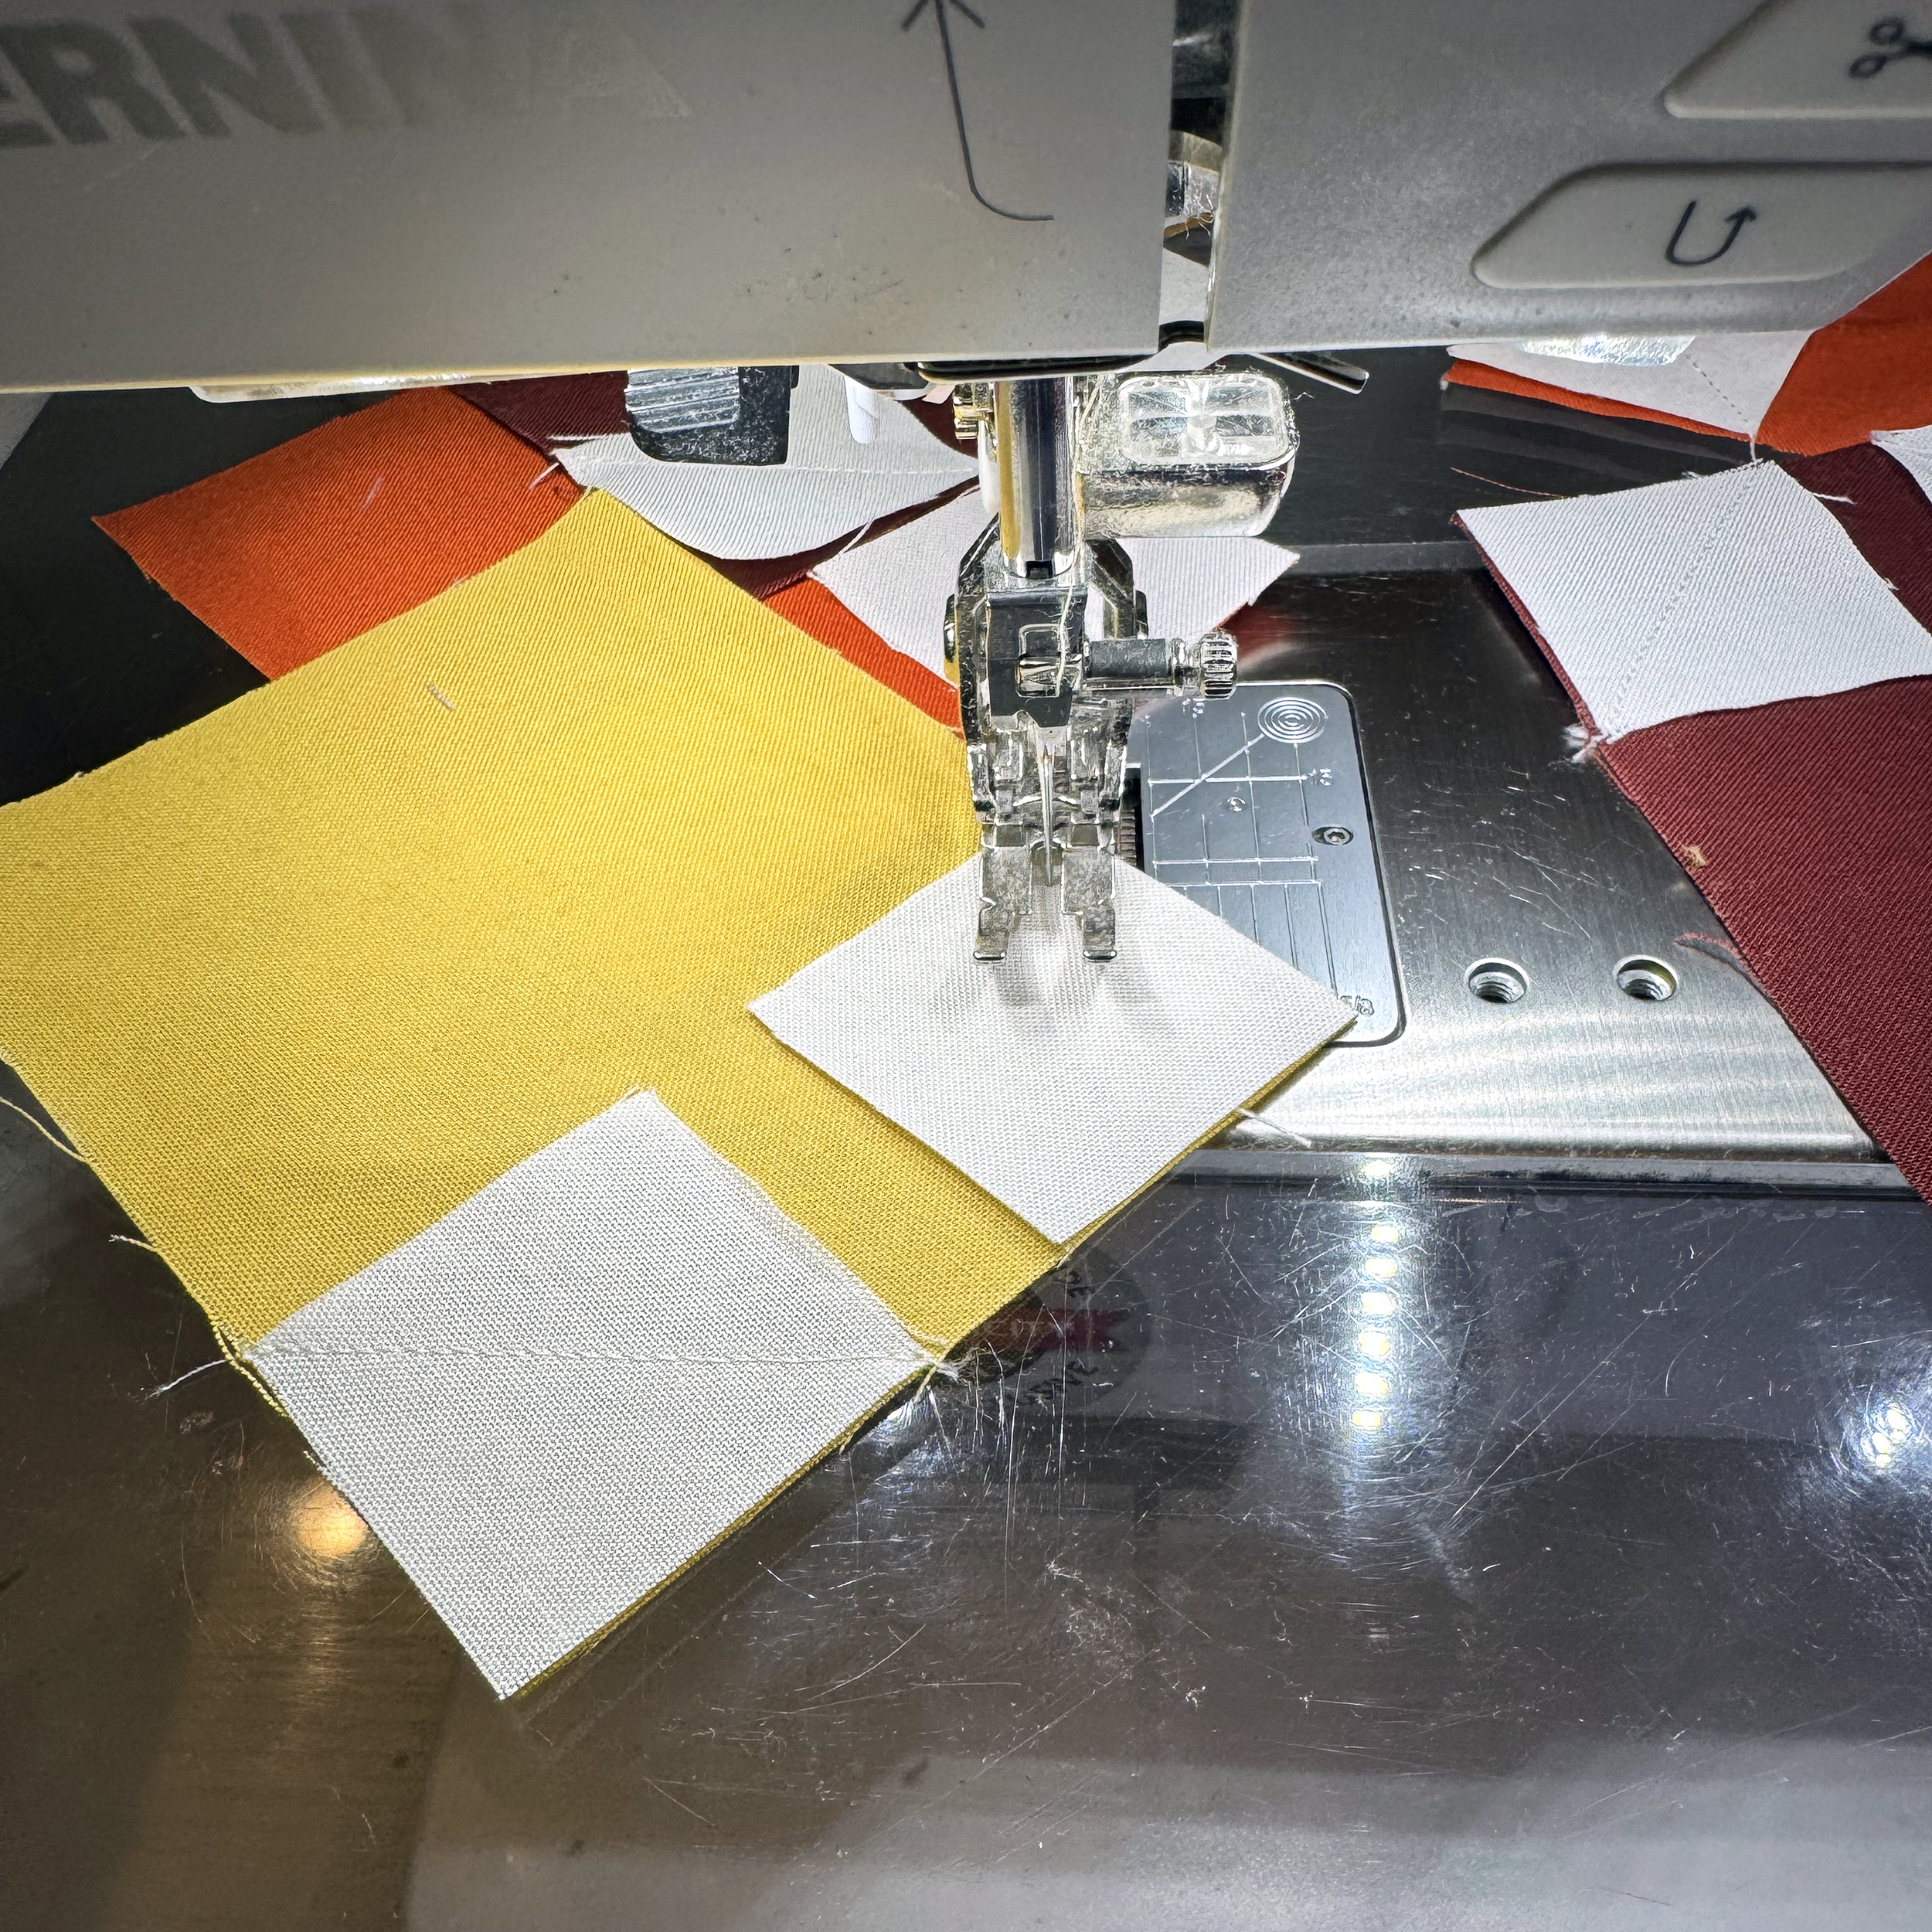
Below is a pic from when I was sewing in my hotel room. I had borrowed a BERNINA 335 machine to sew on which was perfect because it’s so lightweight. It didn’t take up much room in the hotel but it did the trick and I pieced the entire quilt top on it!!
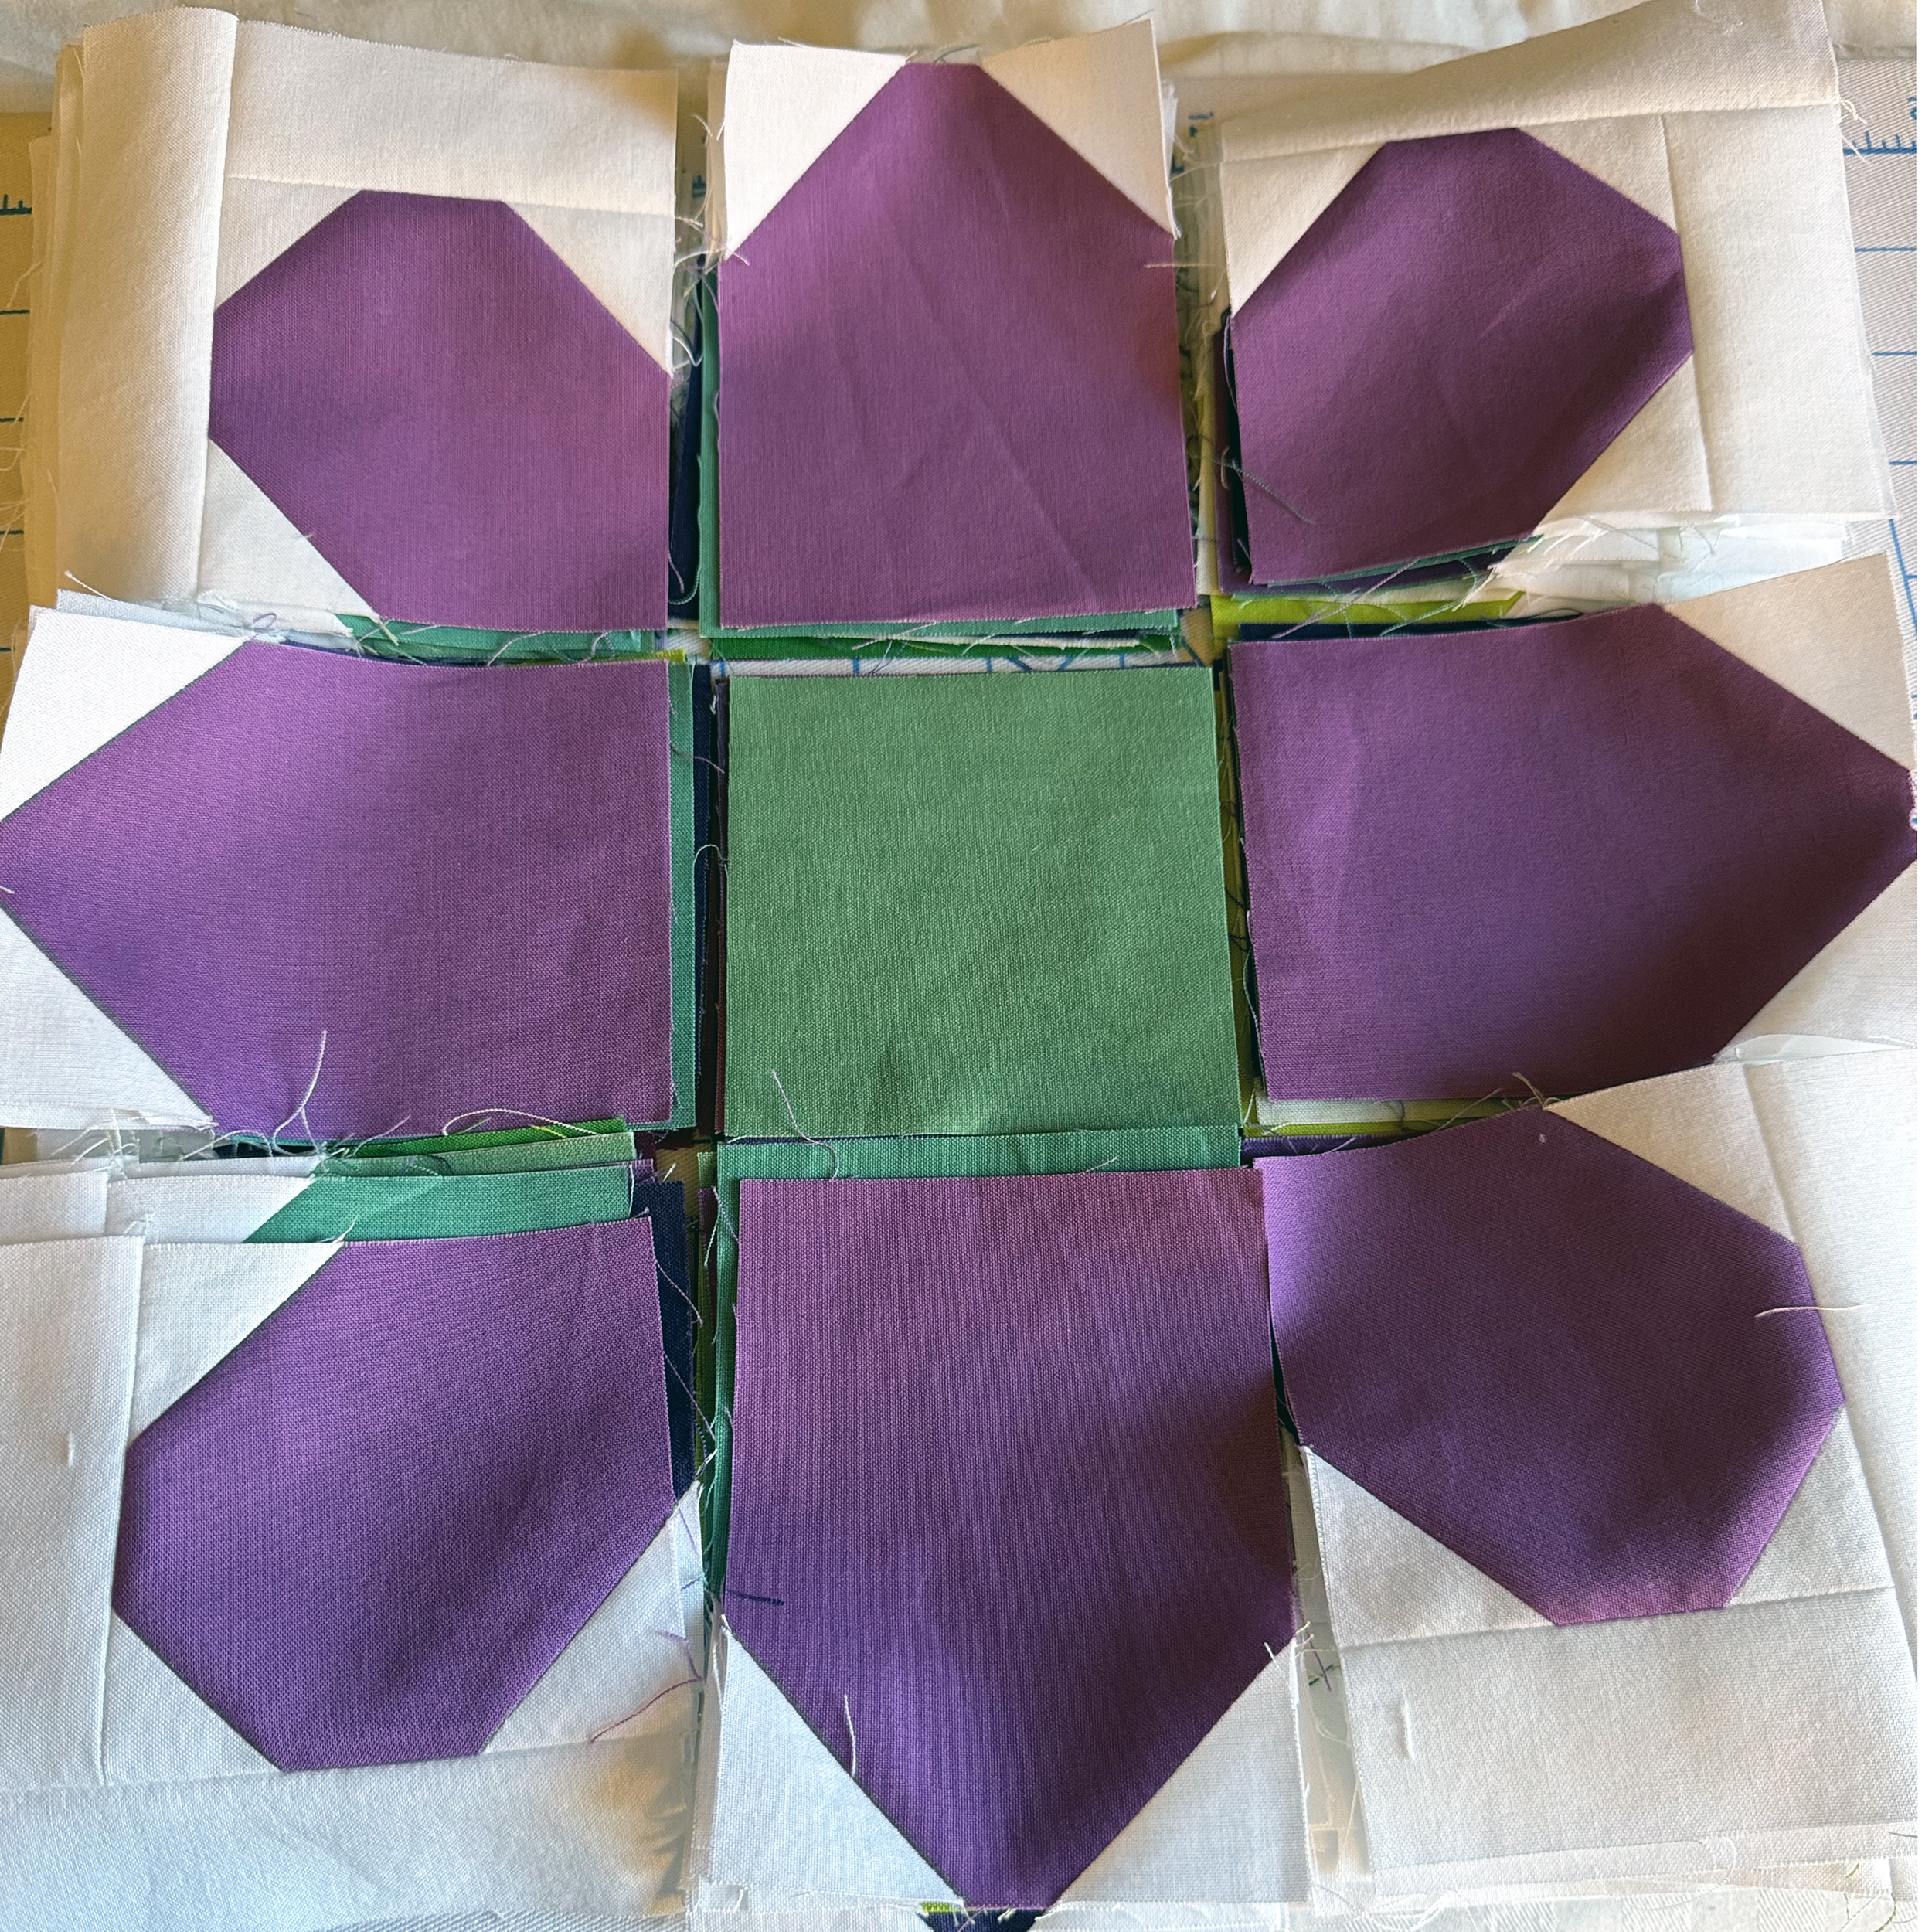
As I complete each row, I will press the entire row from the front and again from the back, then put it back up on the design wall (or bed) to make sure everything stays in the correct order. I’ll repeat this until all of the rows are complete. Then I’ll join rows together to make bigger sections of the quilt.
Once the rows are done I will add the borders. I often like to add a “floater” border which is just more of the background fabric that frames the quilt and gives it a little breathing room. This also comes in handy later when it’s time to square up the quilt and add the binding.
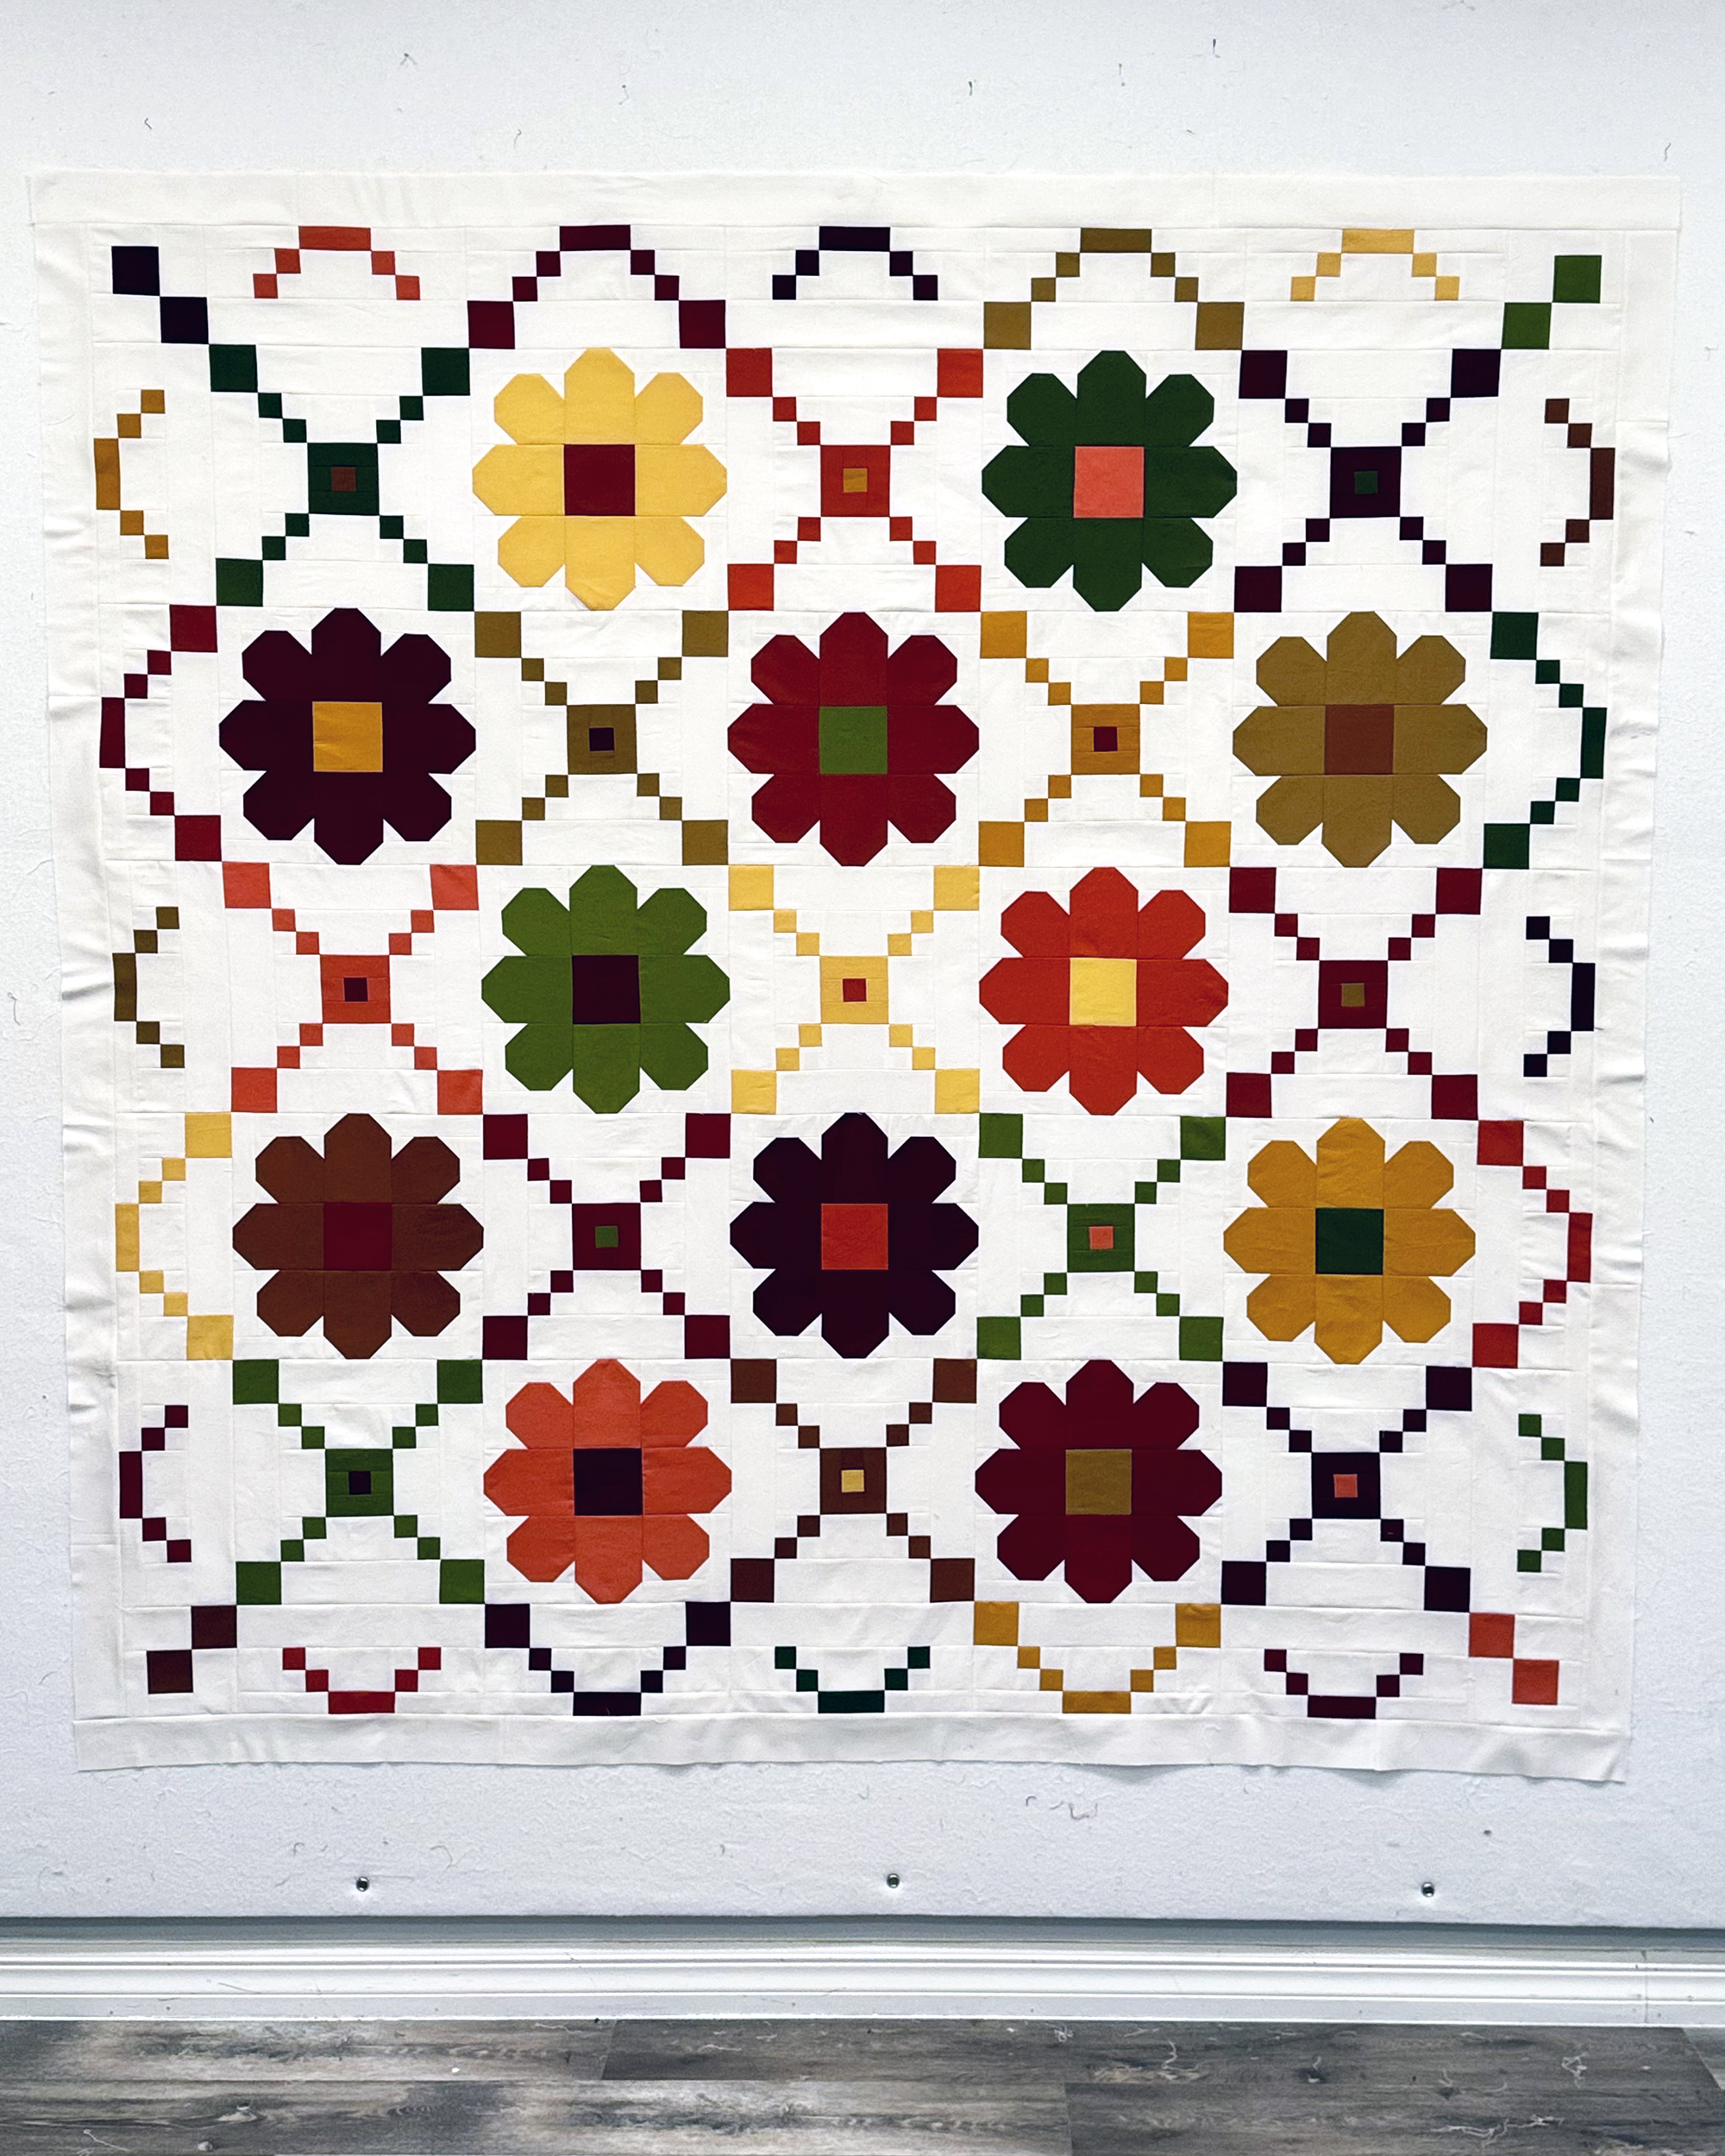
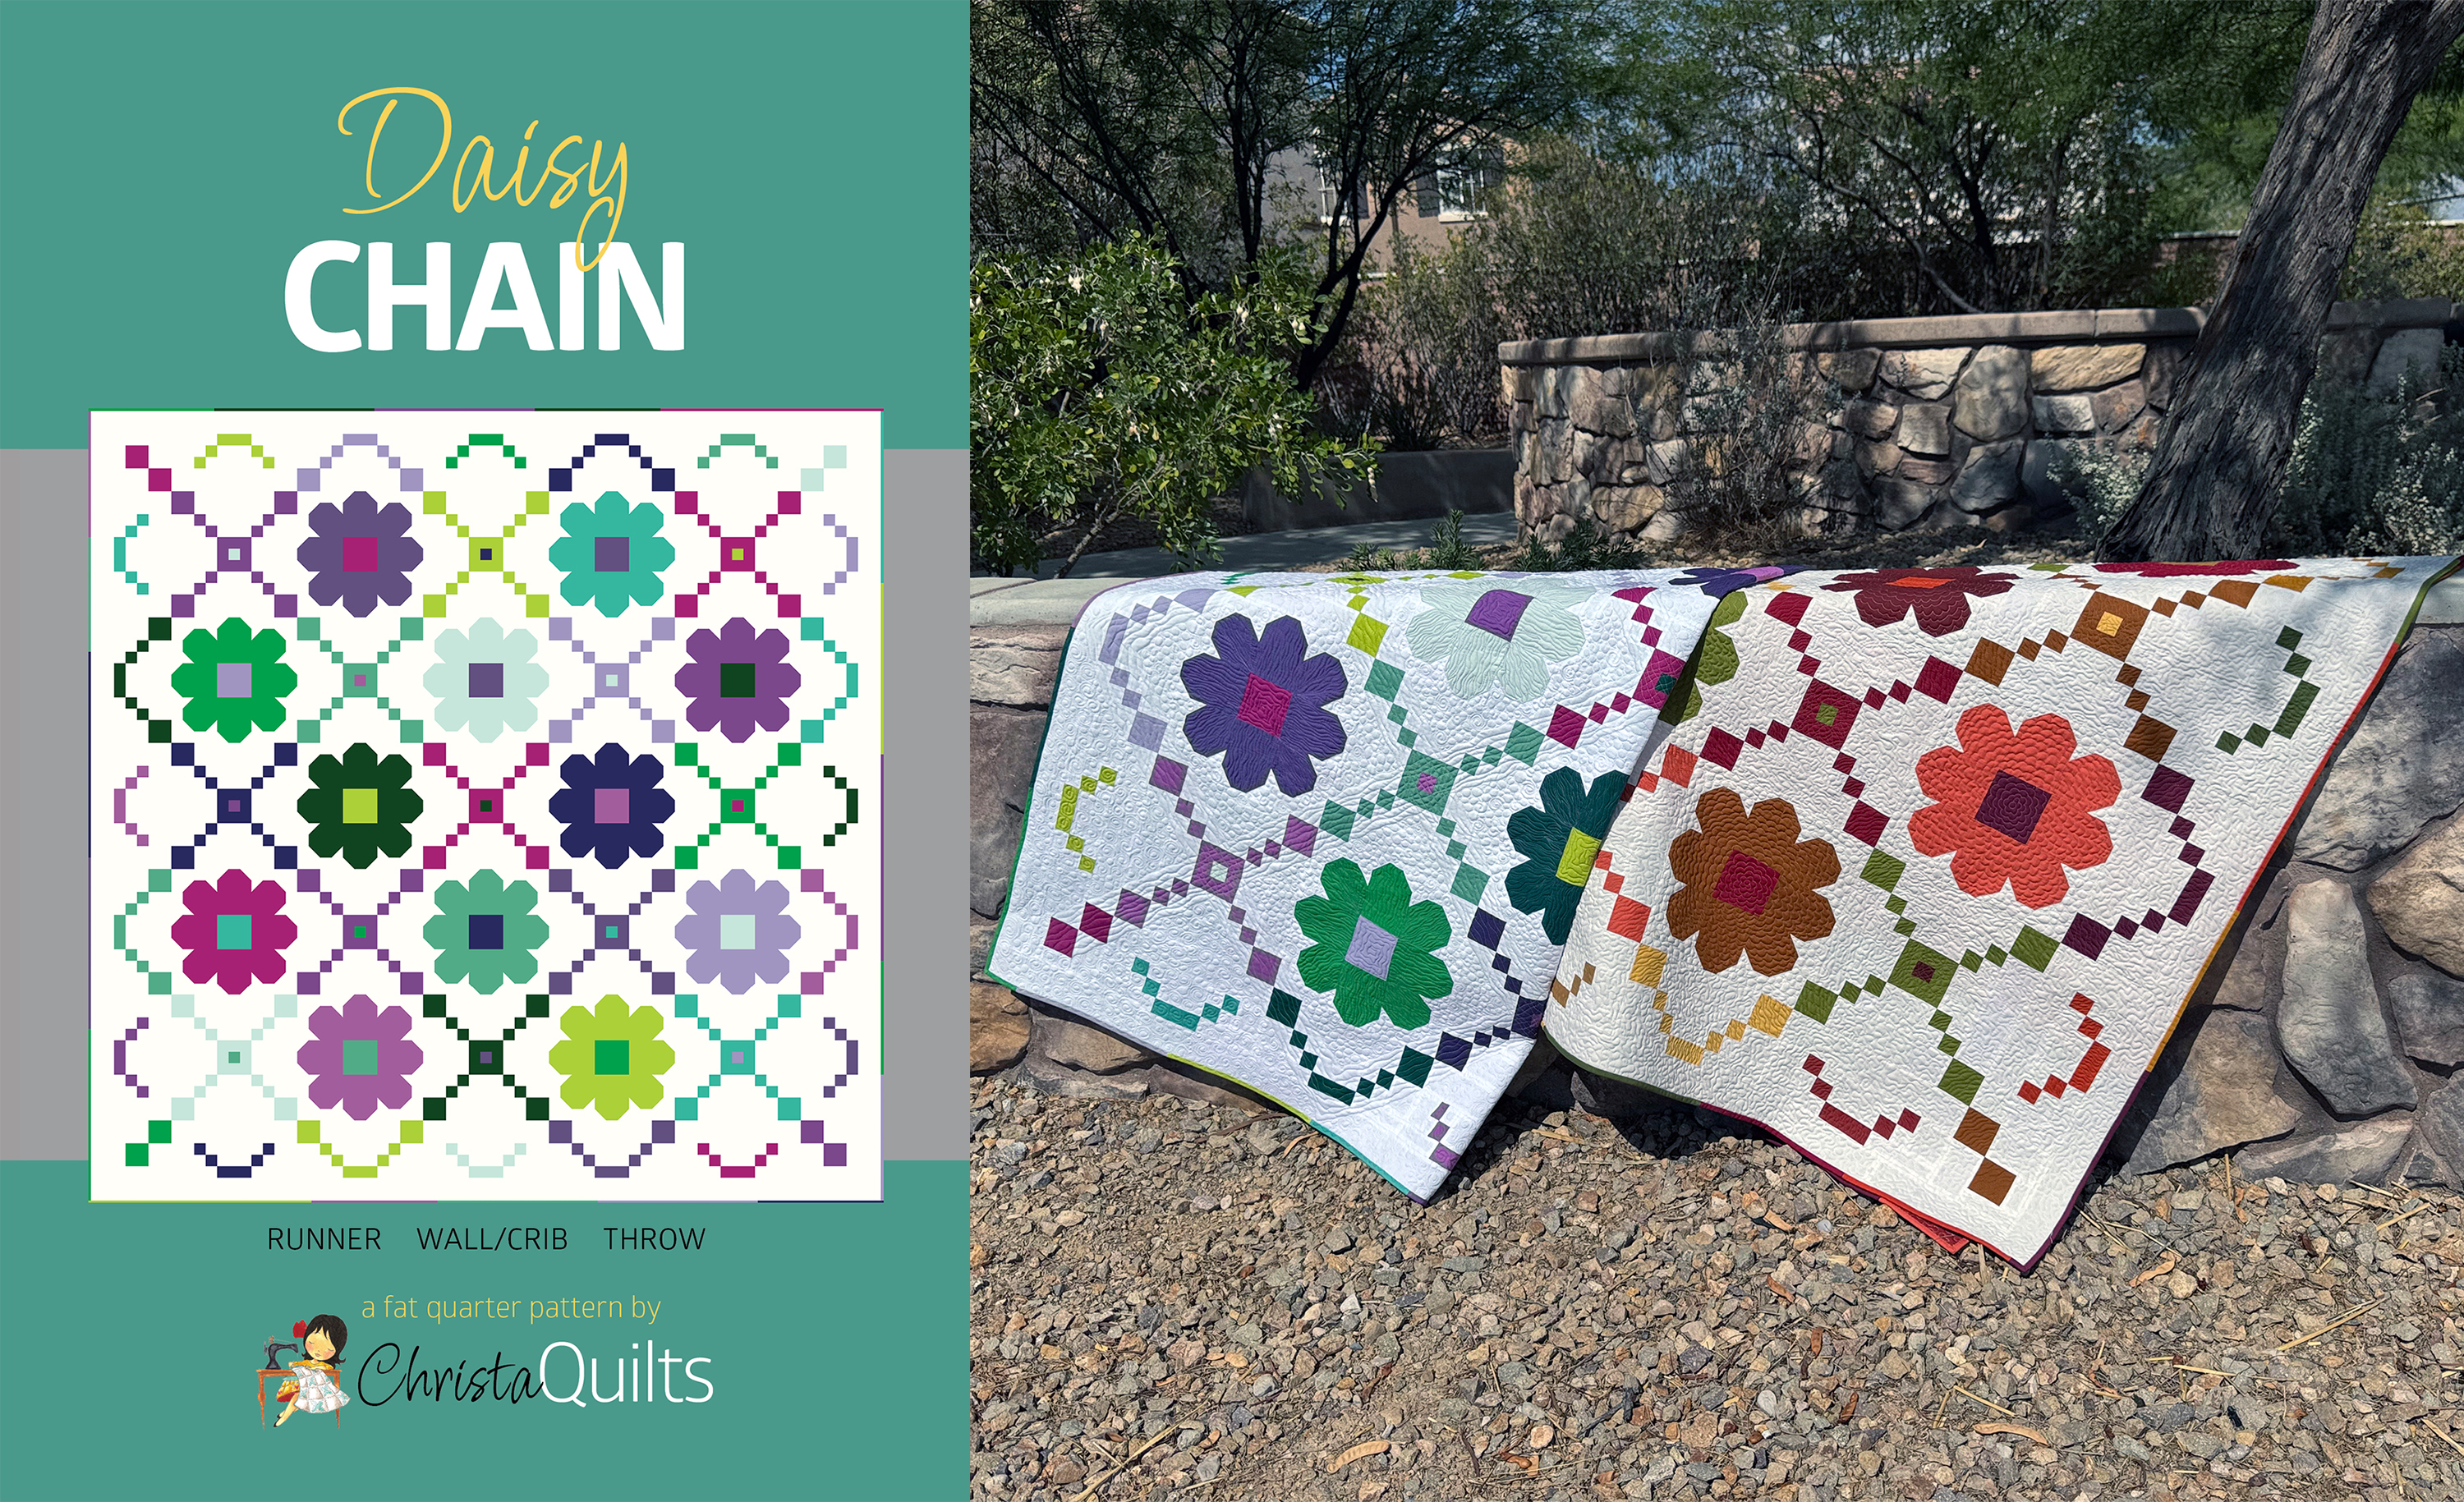
Finished Daisy Chain Quilt Top
Ta-Da! Both of my quilt tops are complete and ready to quilt!
Quilty Homework
Finish your quilt top and share pics of your work. Next week it will be time to prep the backing and baste. That will give you some time to catch up if you’re just getting started. But remember, you can work on this quilt on your own schedule!
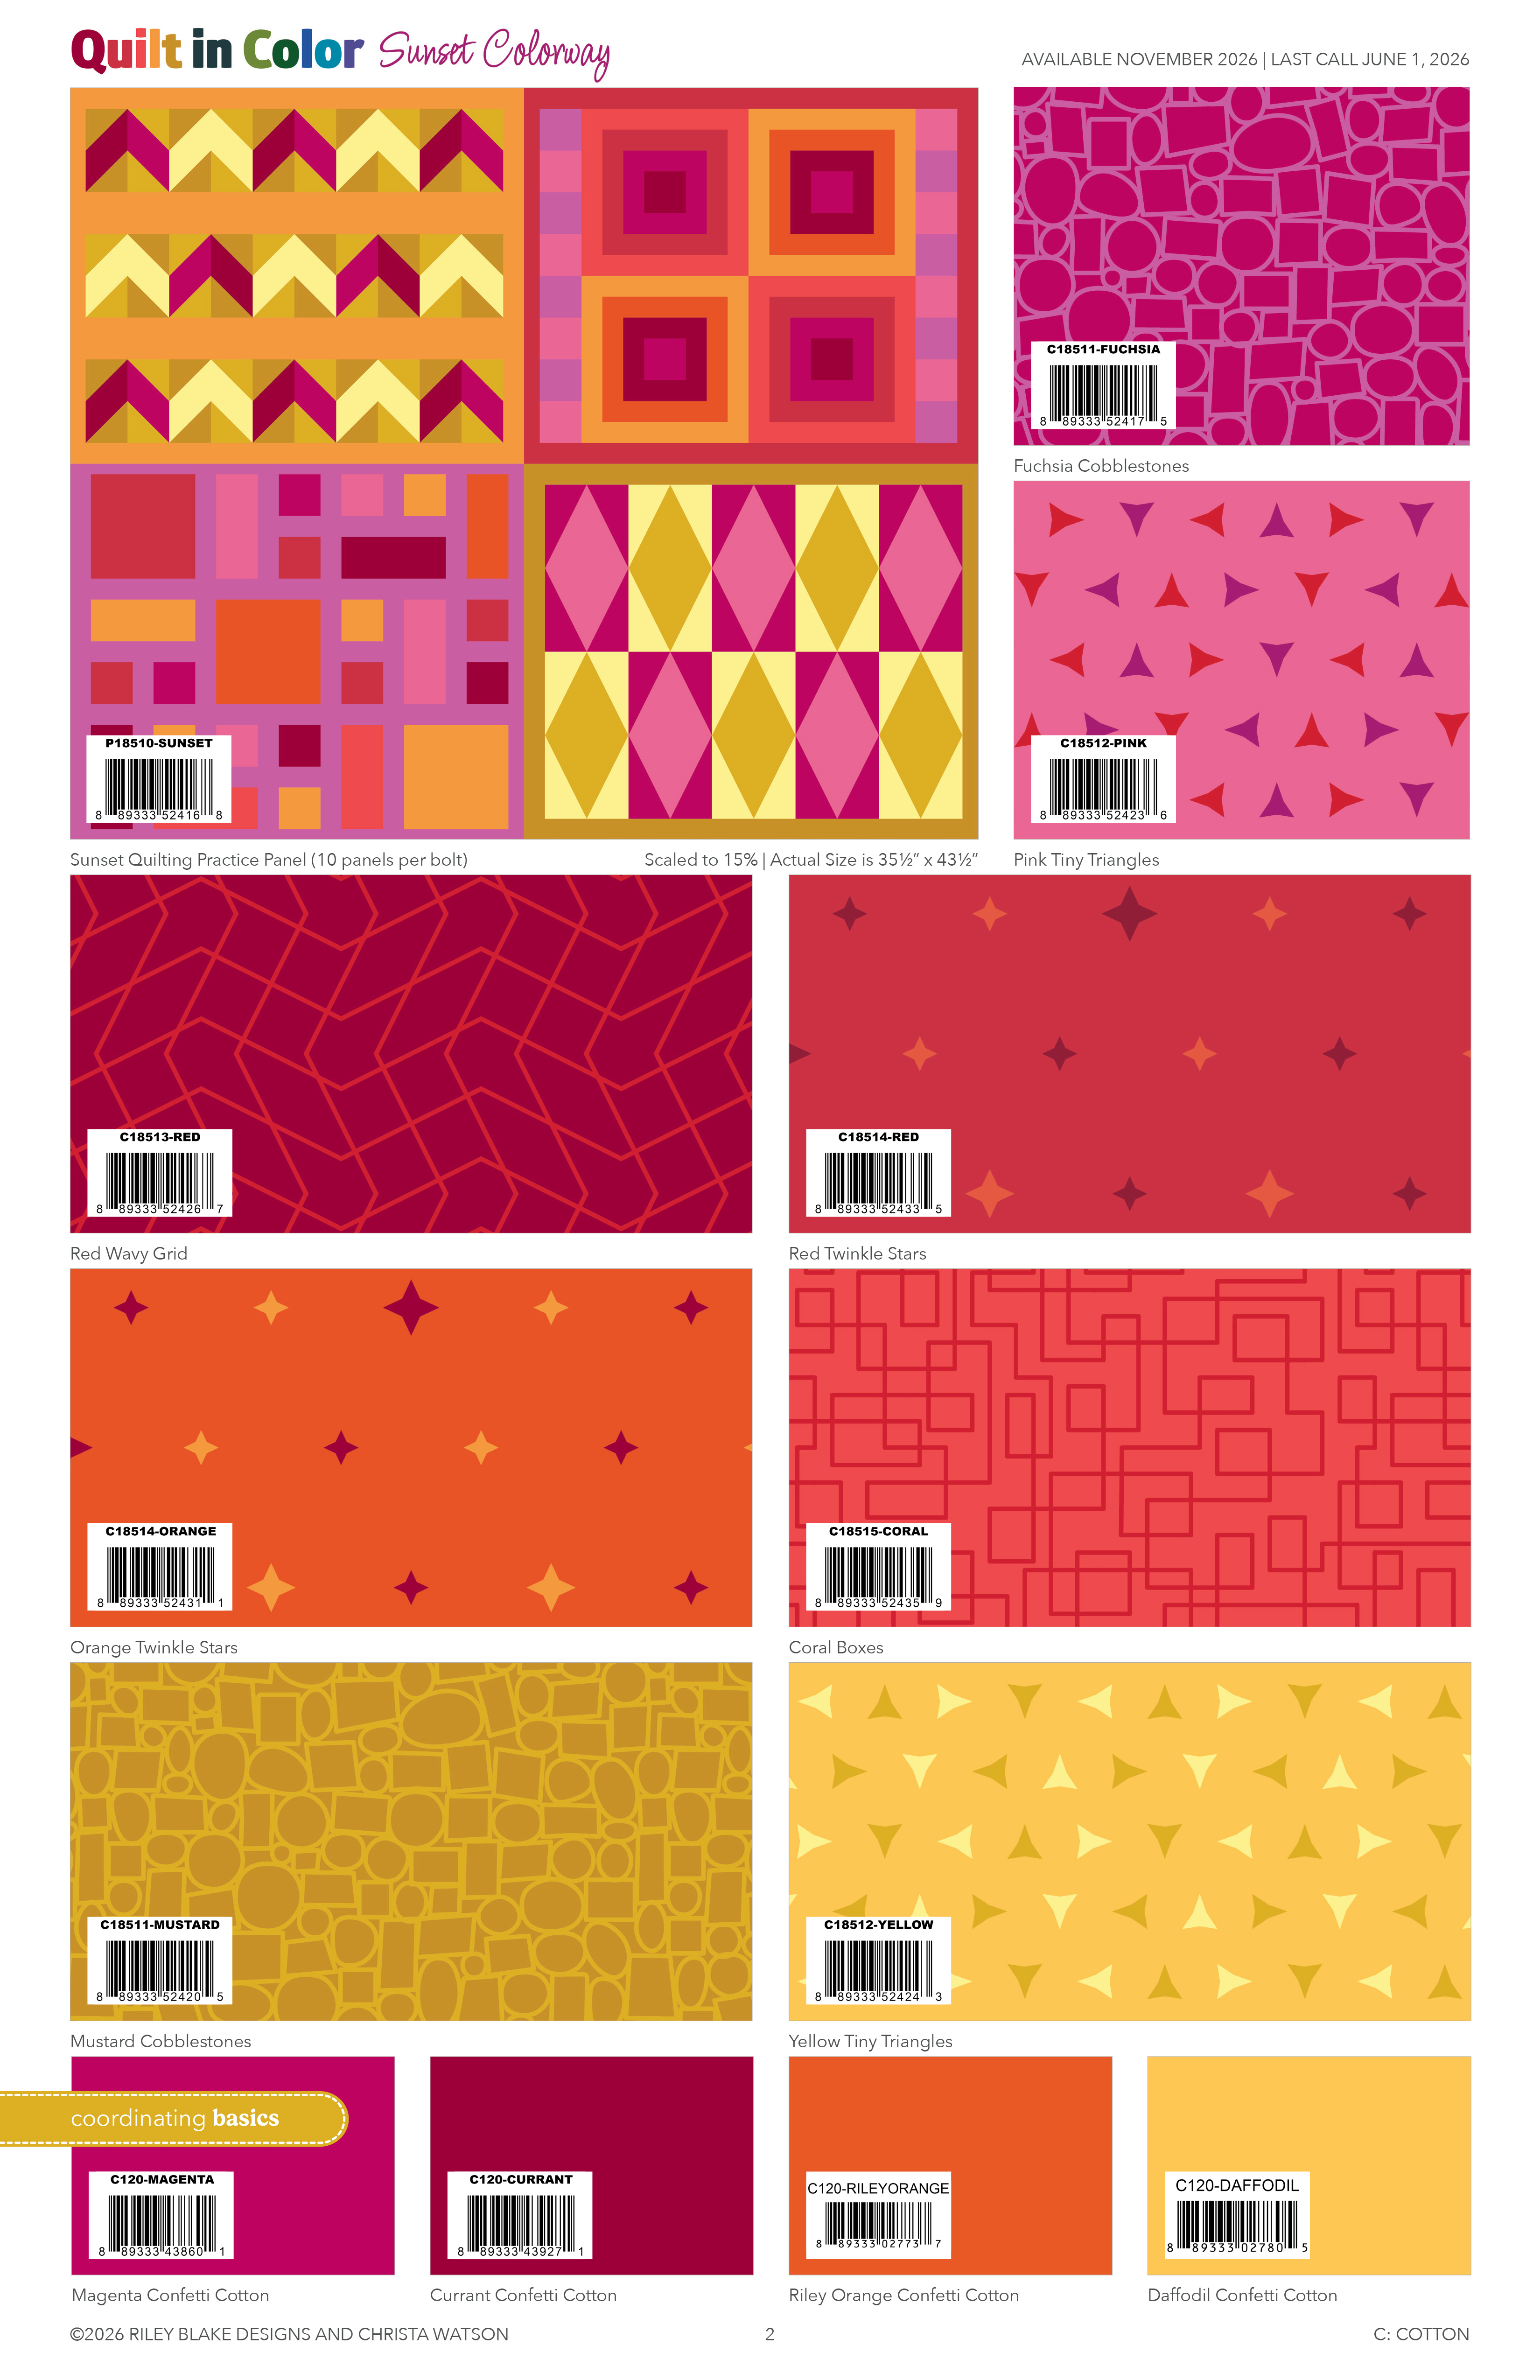
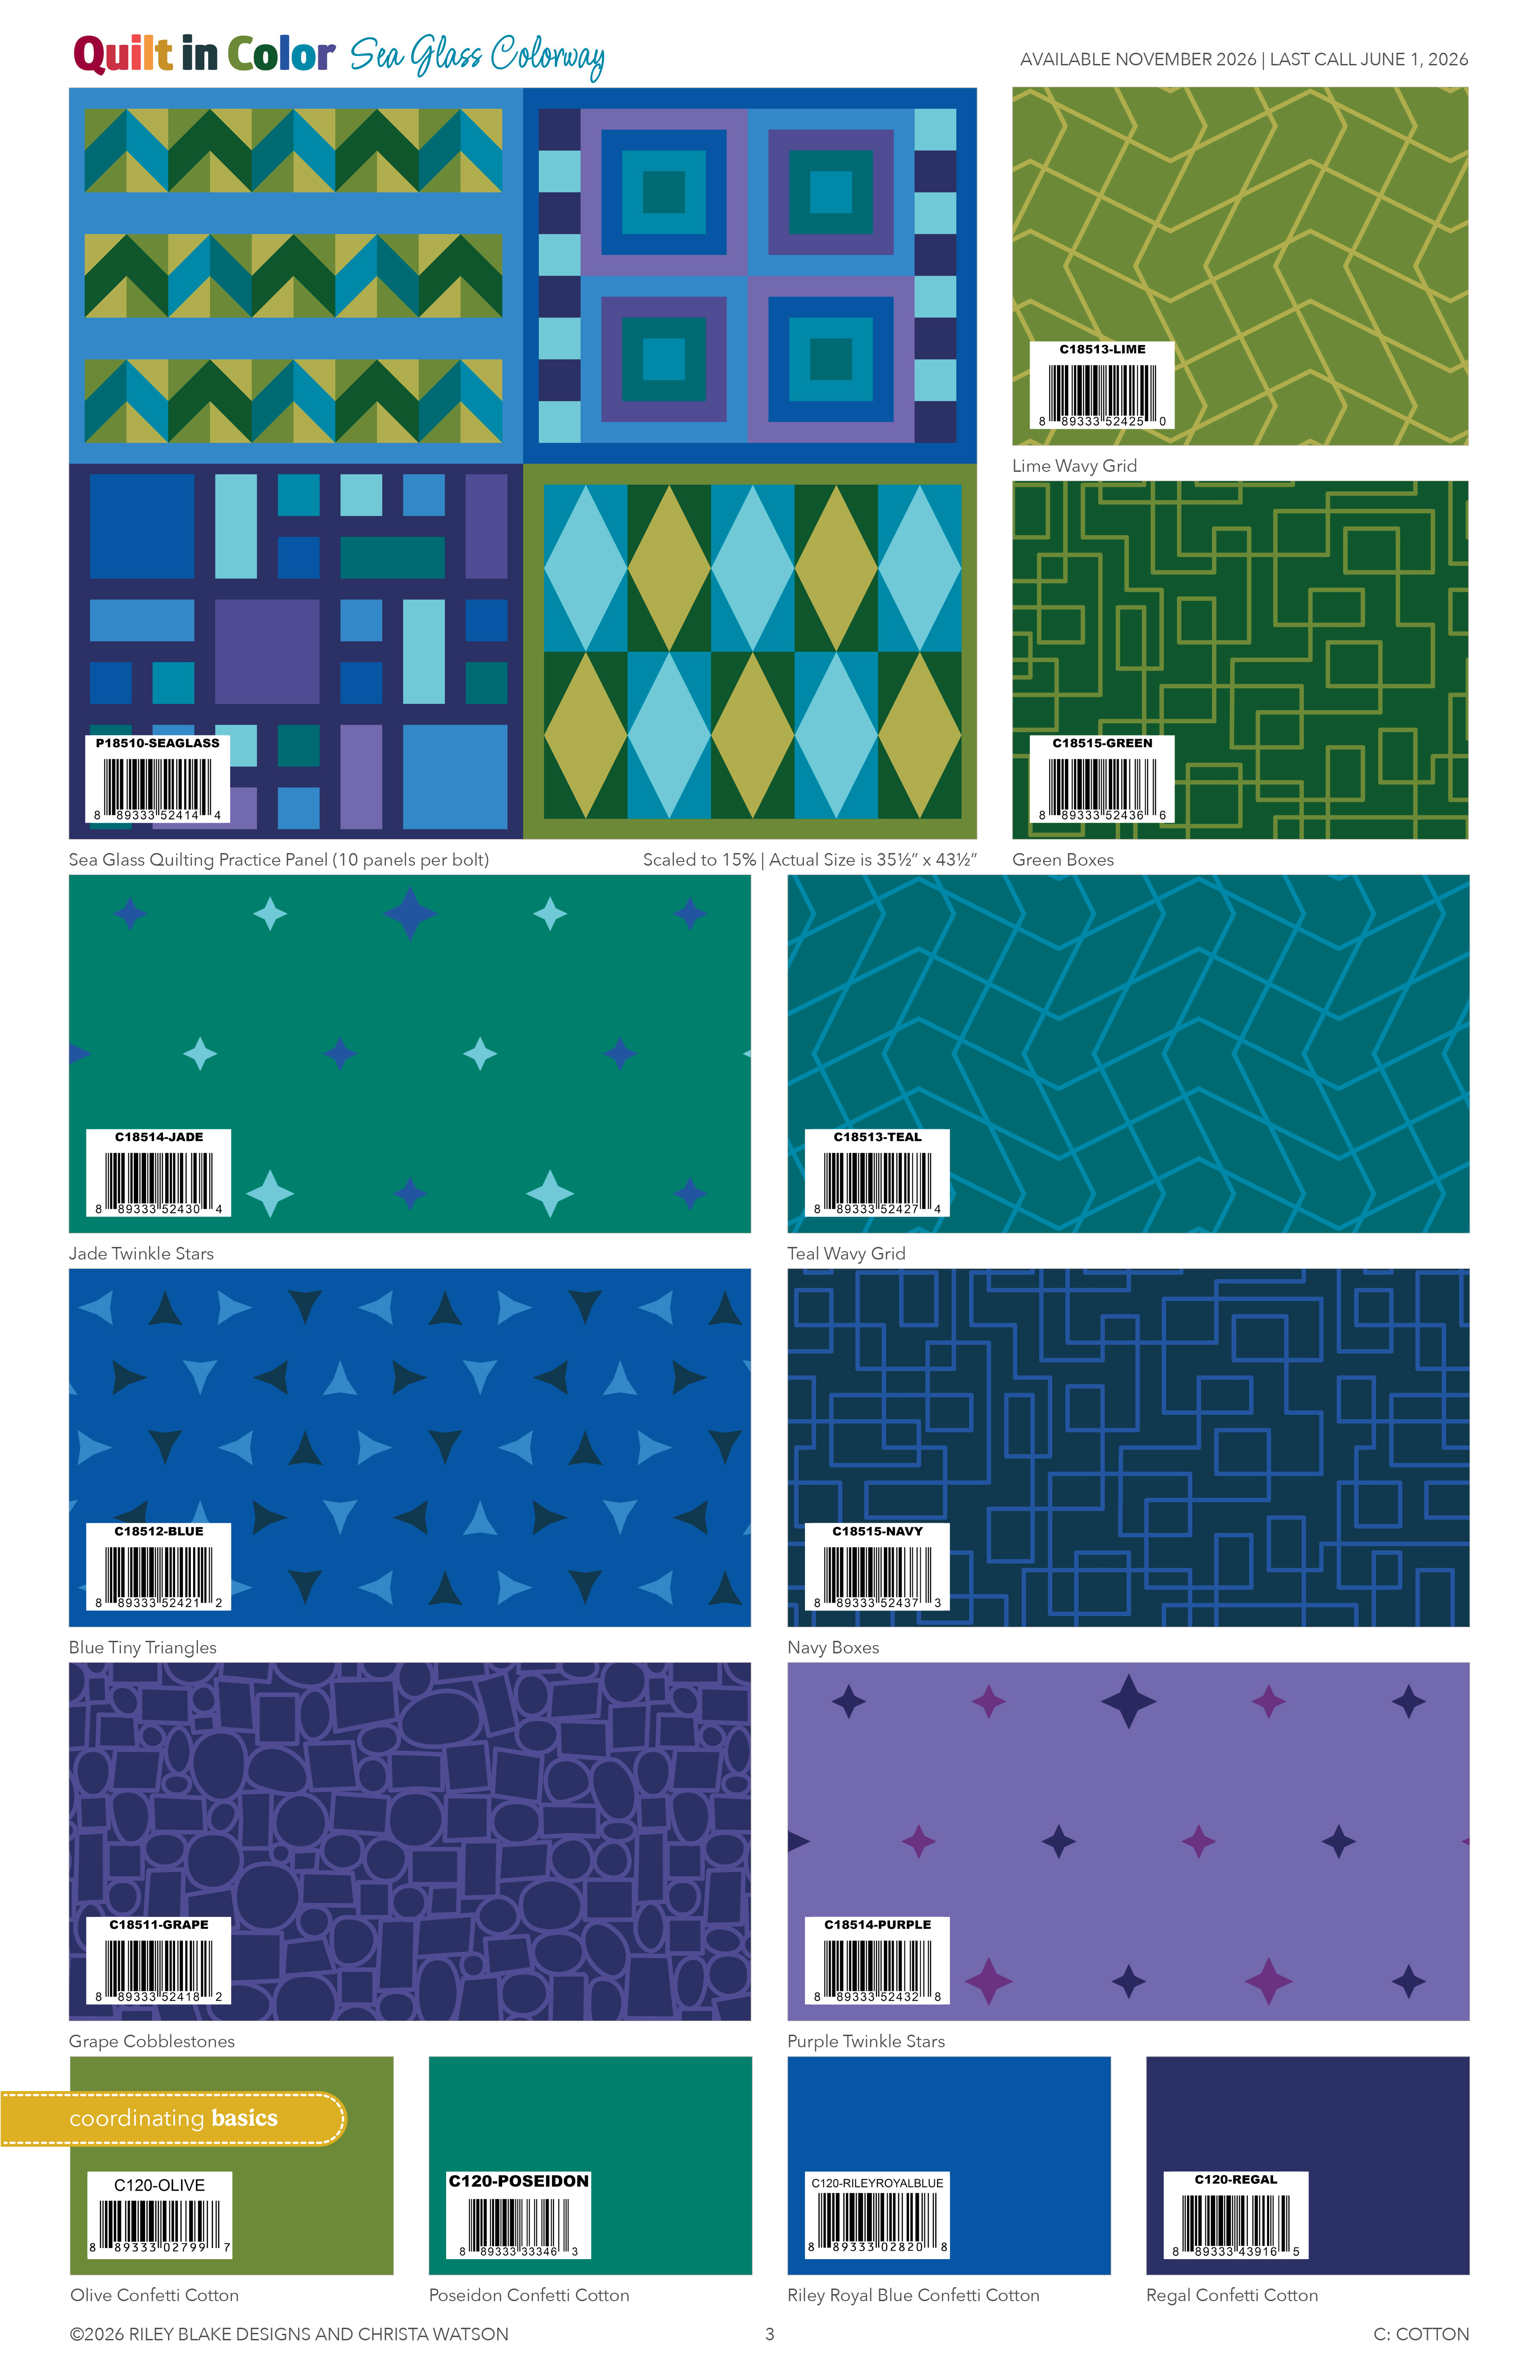
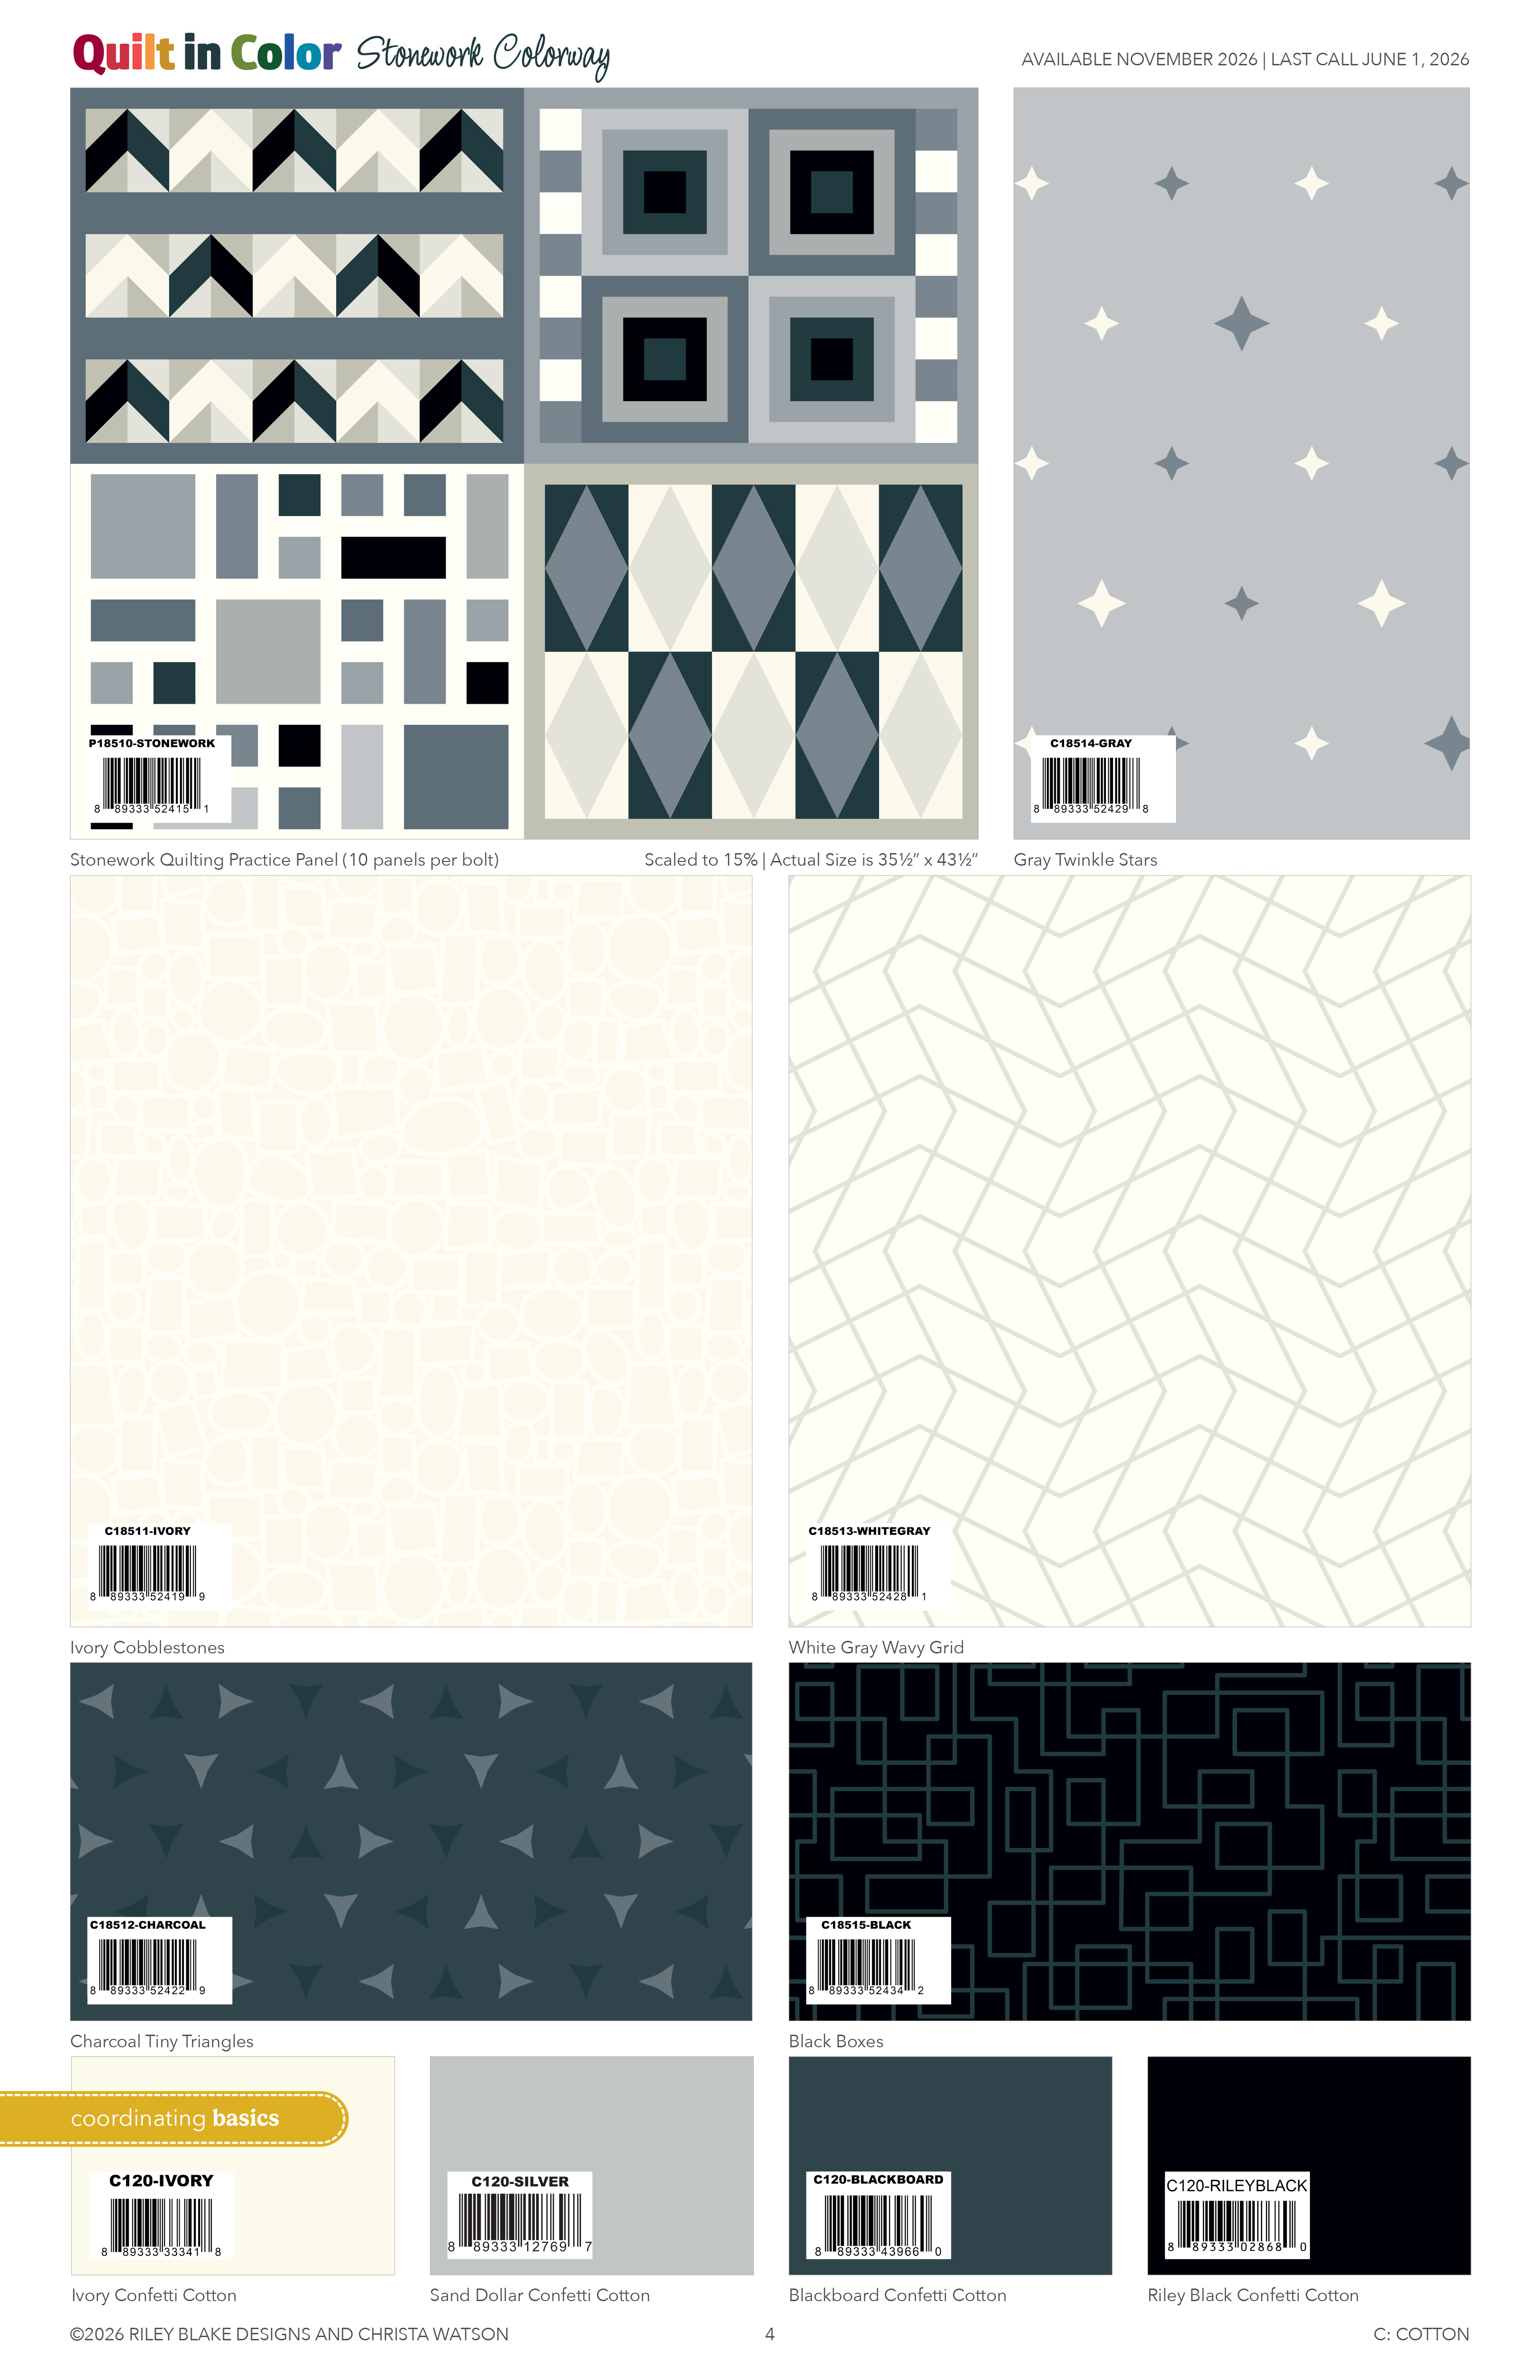
I’m so excited about my debut fabric line with Riley Blake called Quilt in Color. Now you may be wondering why I switched fabric companies? Simply put, it was time for me to stretch my wings and grow. In all of my previous 10 fabric collections, I had help with the technical aspects of design. But this one is ALL me and I couldn’t be more proud! Take a look at the color cards below:
What do you think? I poured my heart and soul into this collection. It includes 21 colorful prints + 3 machine quilting practice panels. Each of the 1 yard panels includes 4 different fat-quarter sized pieces that are perfect for free motion AND walking foot quilting.
Now I have a favor to ask – please ask your favorite quilt shops to pre-order this collection. It won’t be out until November, but sales reps are showing it to shops now so they can gauge how much they’ll need to print. This can really boost a collection and ensure that there will be more to come in the future.
So what do you think – would you want to add this to YOUR stash? I’ll be sharing more projects made from these over the next few months, so stay tuned!
Follow along in the Daisy Chain quilt pattern pages 8-11 as you work on this week’s quilty “homework.” Start by chain piecing your strips that create the small 4-patch units. I’ve given step-by-step diagrams to follow in the pattern so it shouldn’t feel so daunting. Just remember to take it one section at a time!
Aren’t these units so cute??
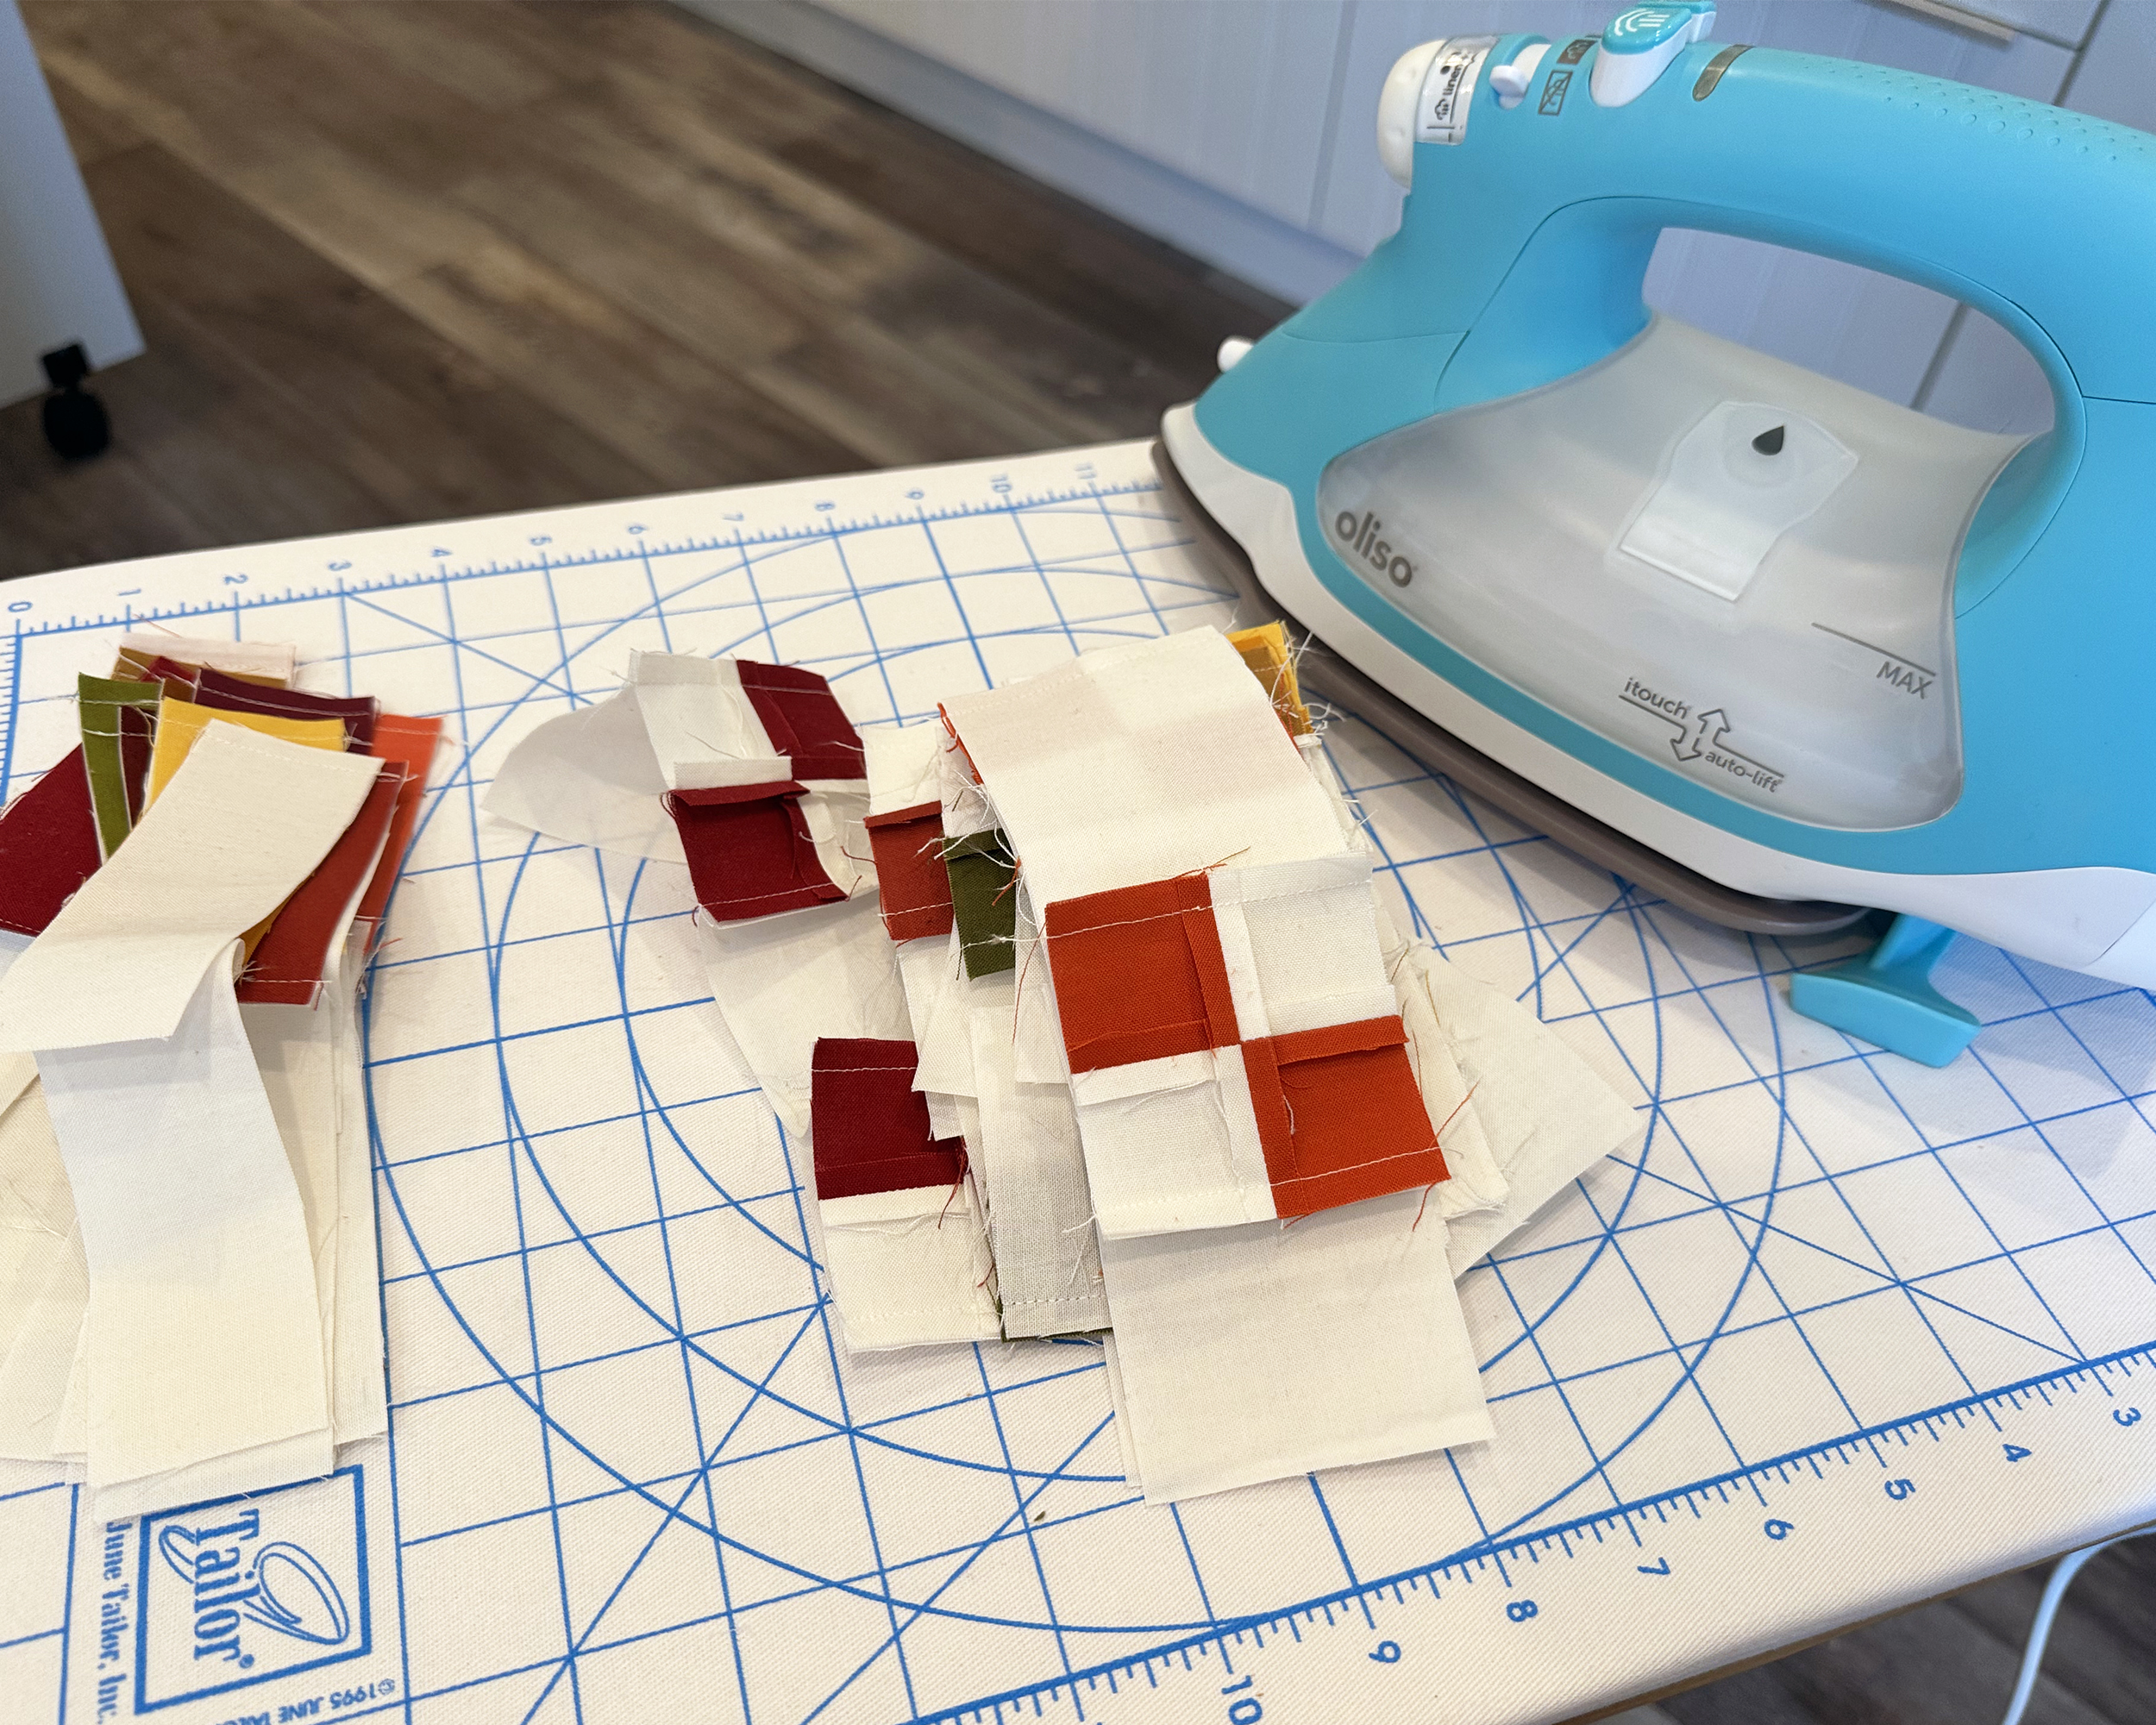
Keep all similar colors together so it’s easier to create each chain block or border unit. I’m pressing all of my seams open and sewing with a shorter stitch length so my small pieces will lie flat as everything goes together. I’ll work on the border blocks first, since those are smaller and it’s nice to get them out of the way.
Once the 4 patches are sewn, they can be treated as a single unit when sewing the rows together in each block. I’ll stack all of the same units on top of each other so I can sew a whole bunch at once.
This is one of the border units. Each piece is the same color so you can play around with final block placement later.
I use lots of pins and press after each and every seam. The Daisy Chain pattern includes the correct sizes that each unit should be at each step so you can double check your measurements as you sew. Accuracy is key to getting things to line up, so test your 1/4″ seam allowances and adjust if needed.
I chain piece, and then I assembly line press to speed things up.
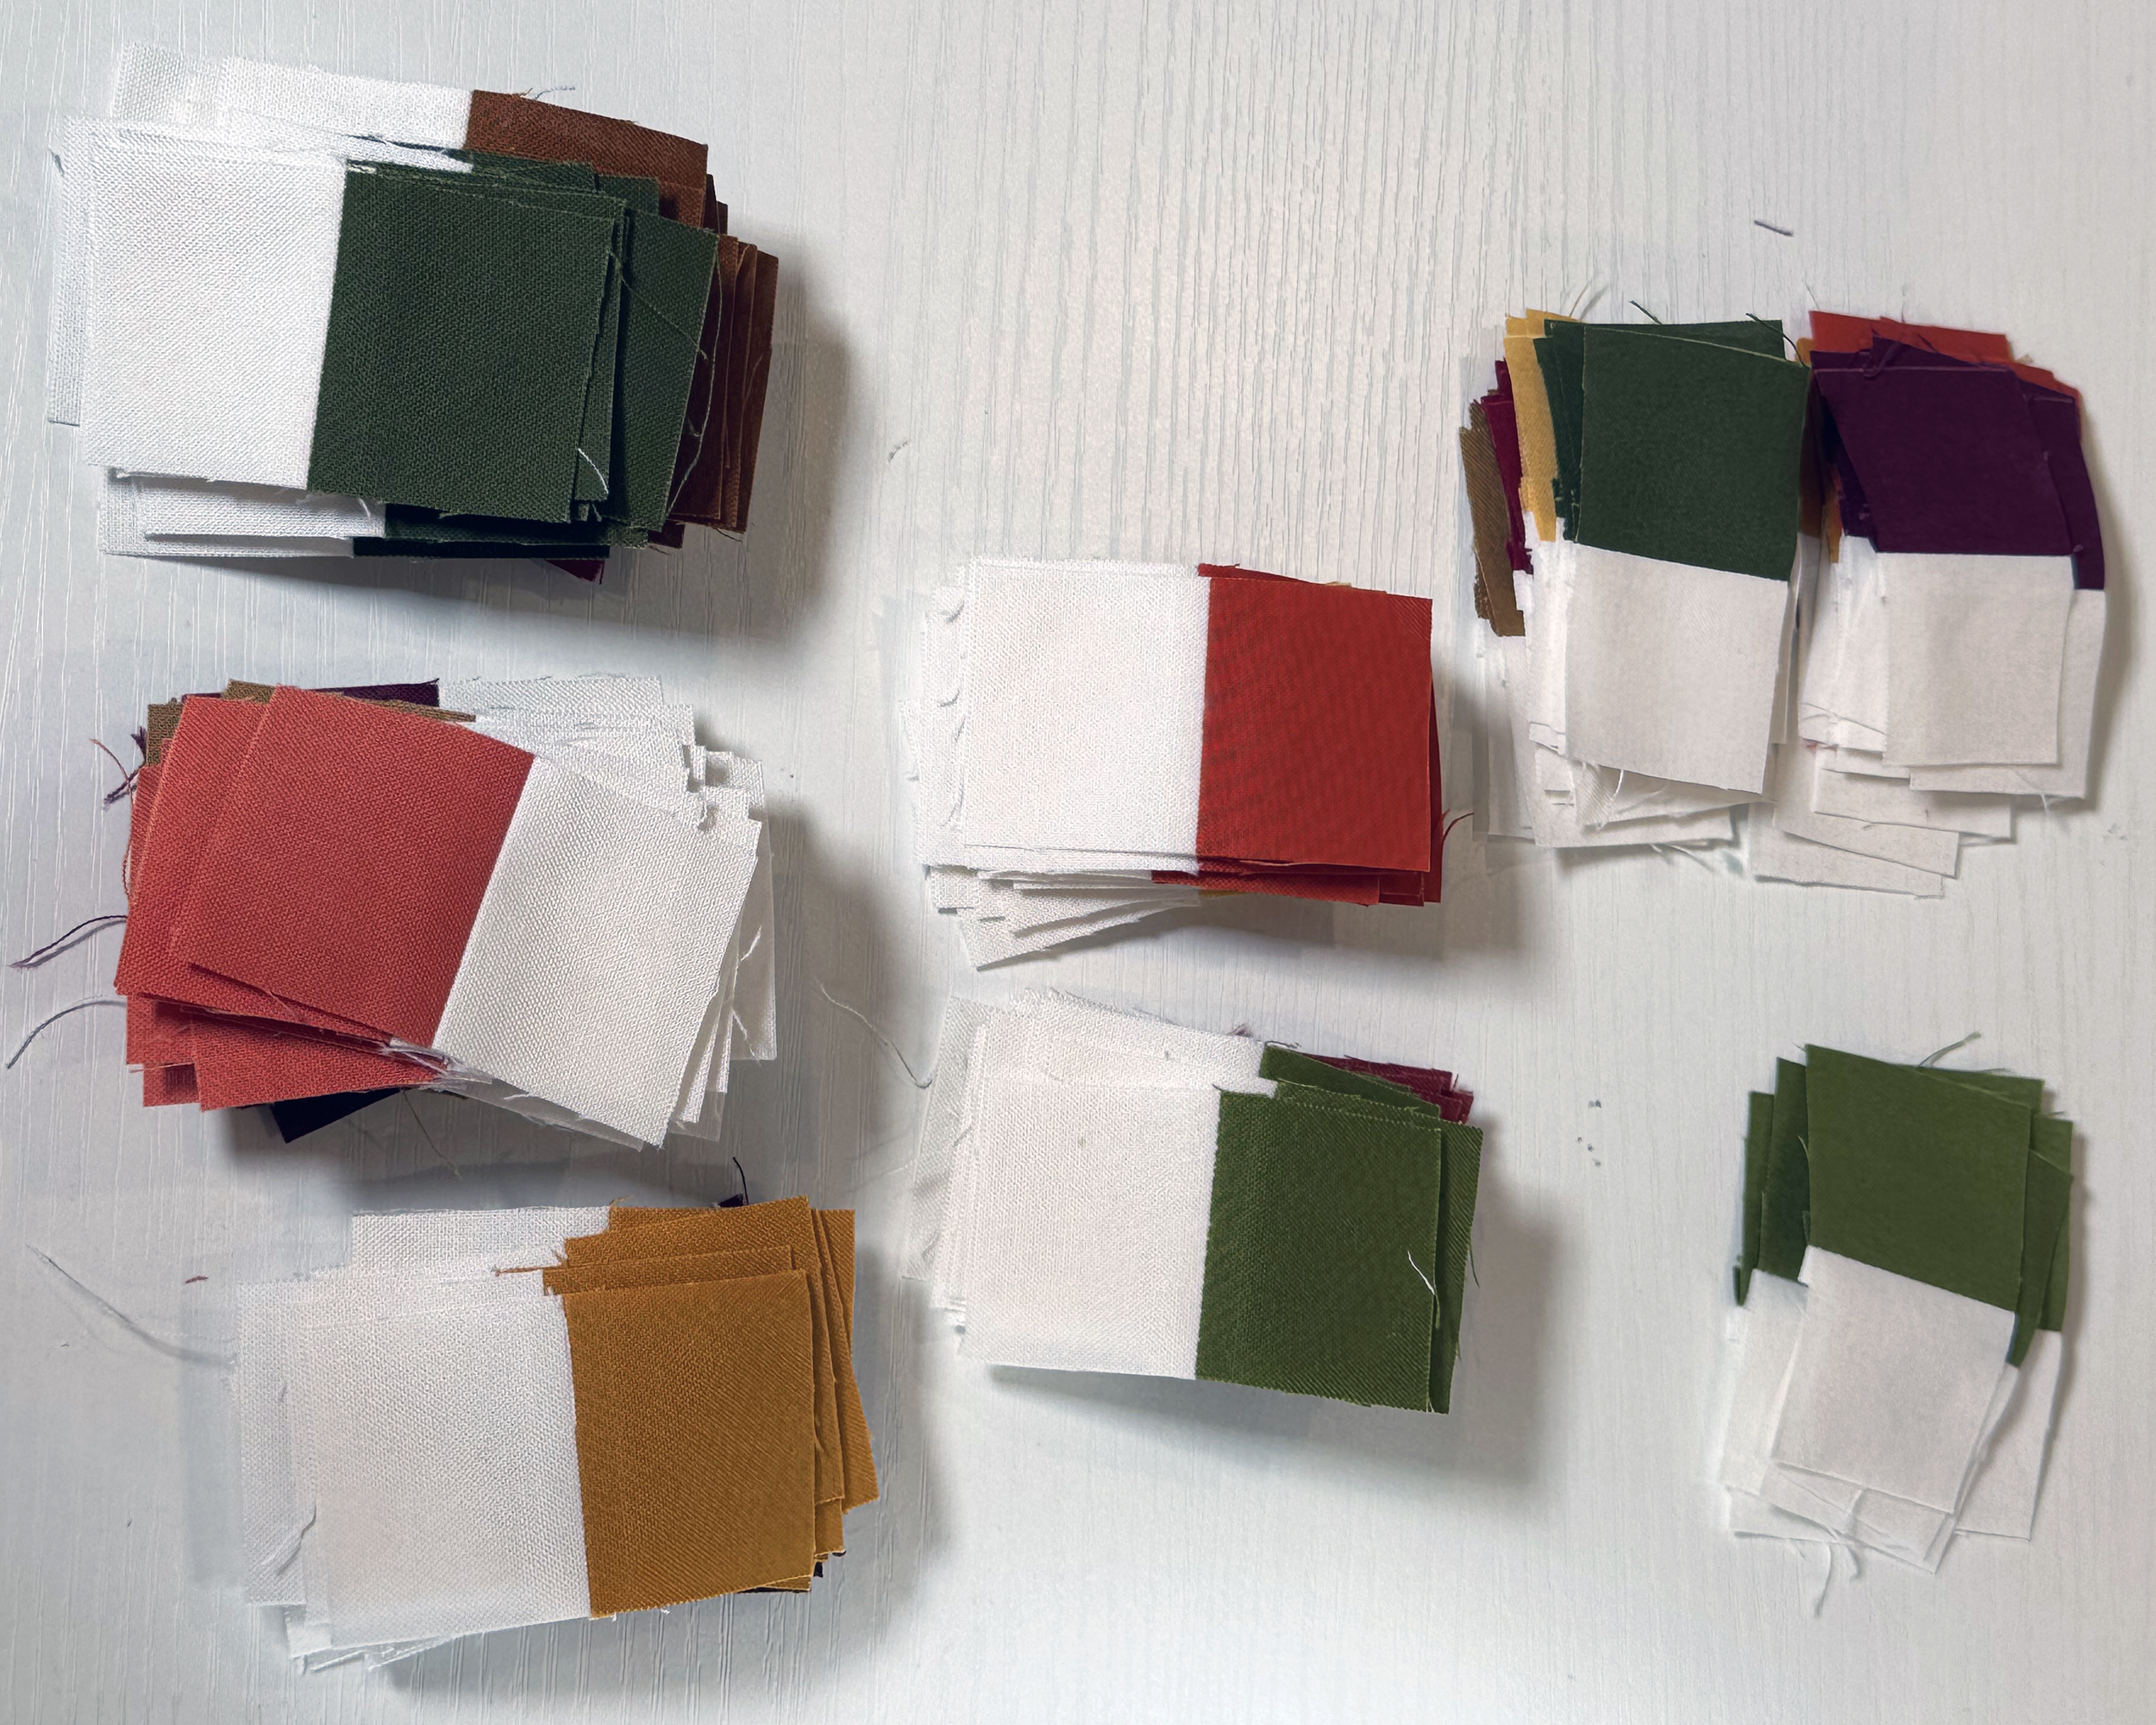
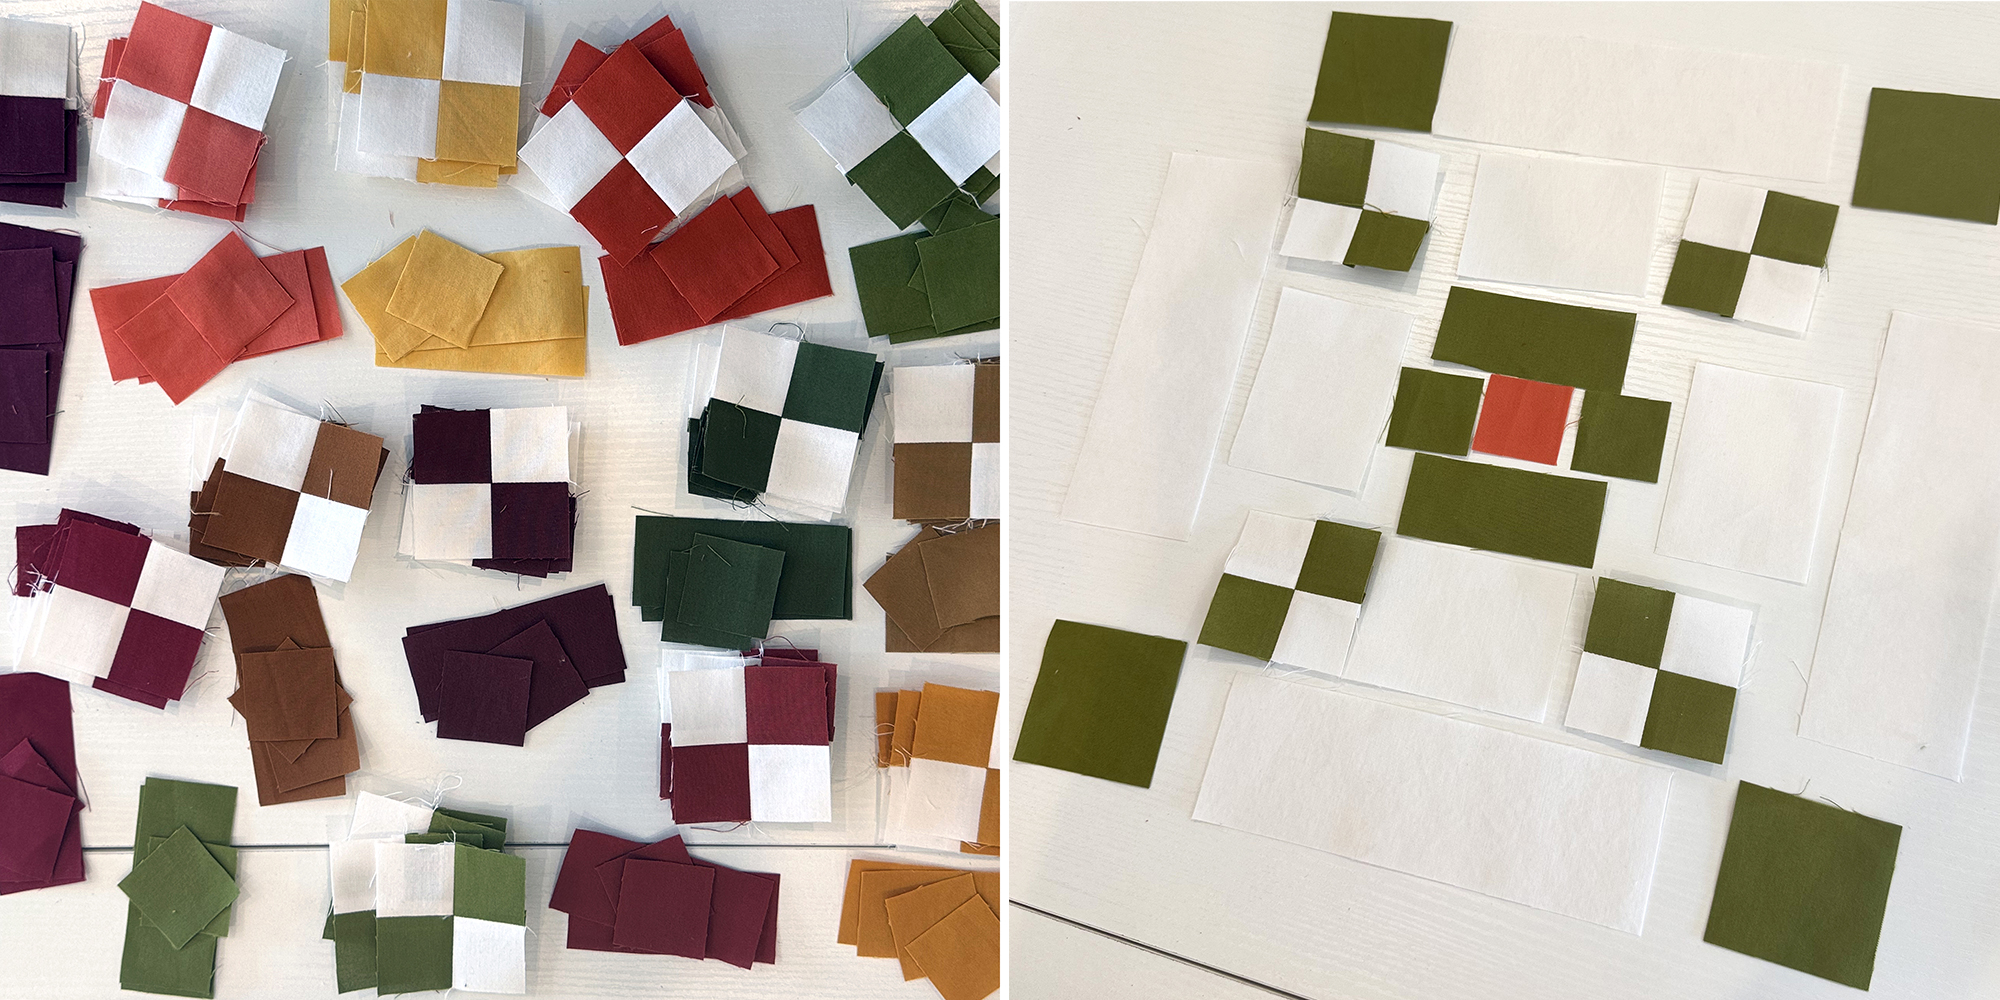
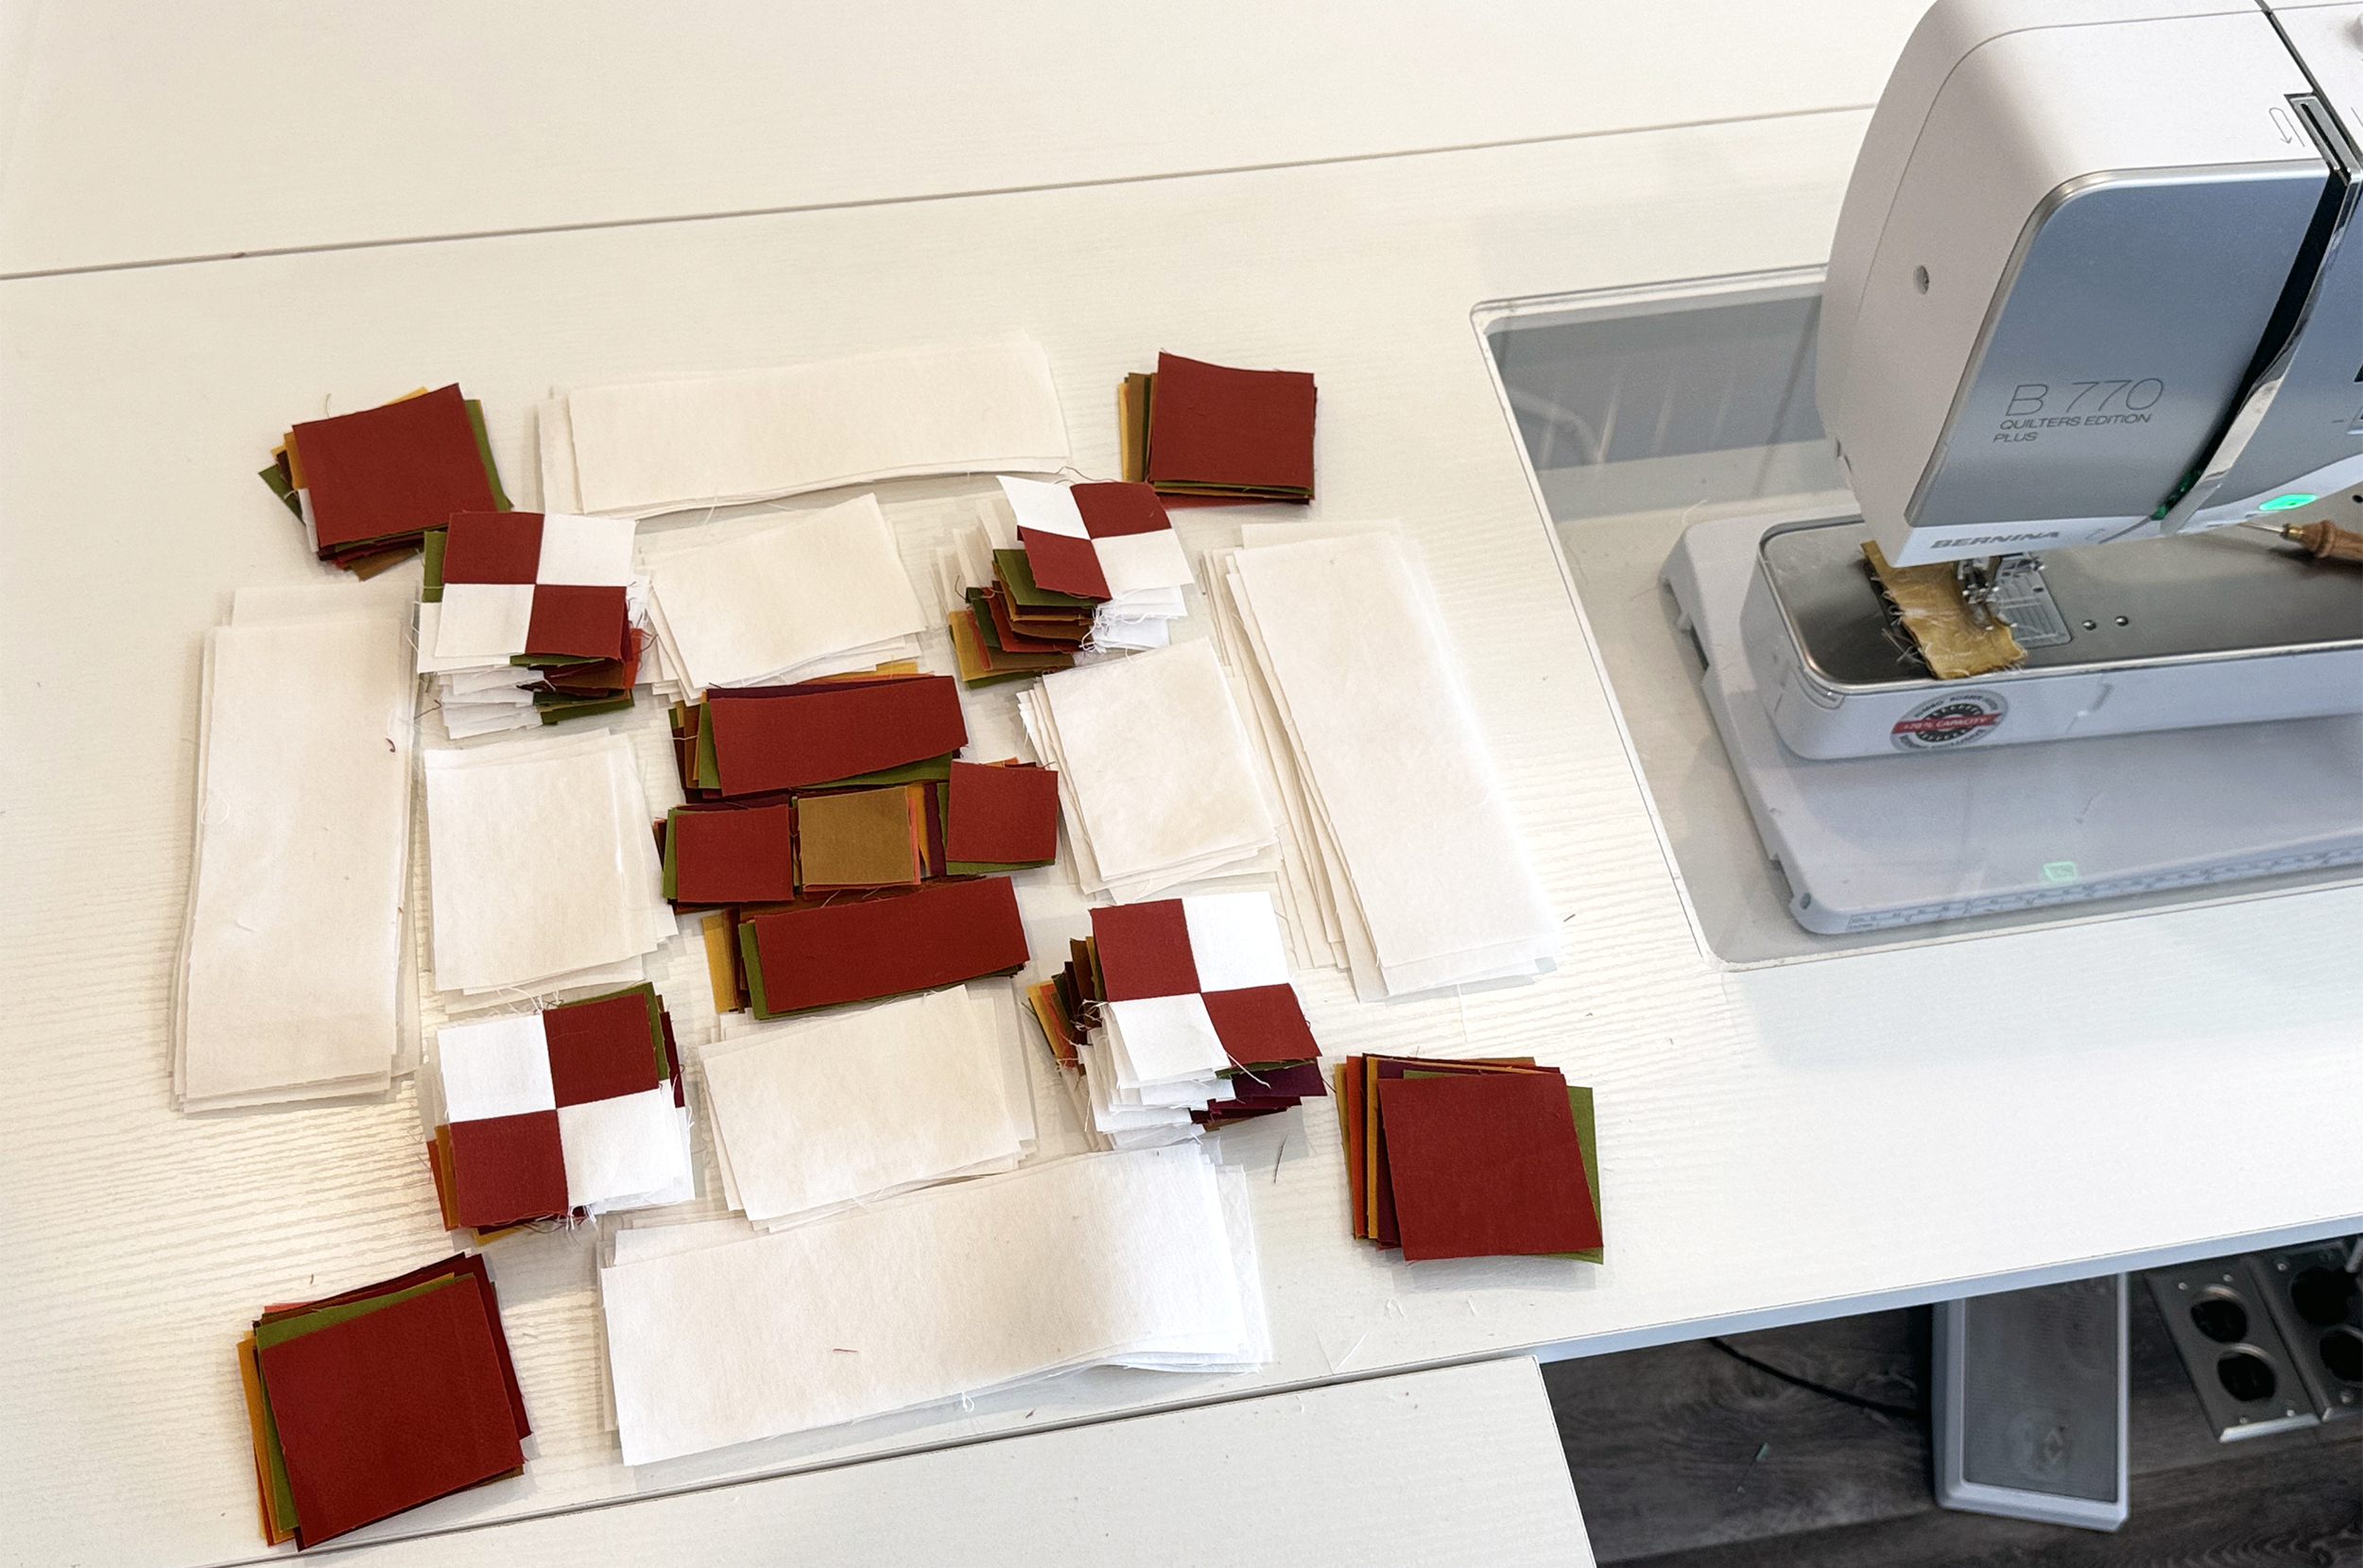
Now it’s time to organize everything else for the full size chain blocks. It’s a lot of pieces but as long as you organize all the smaller units by color, they go together fairly quickly. I make sure that the pieces for all of one block are laid out correctly first.
It’s really fun to sew all of these units at once, then stack them together by color.
Next, I stack all of the rest of the units on top right next to my sewing machine. I like to chain piece, or assembly line sew as I go. This means I don’t cut threads in between each pair of units I’m sewing. I’ll do that at the end. It looks like the background pieces are so much smaller, but that’s only because the seam allowances aren’t sewn yet.
Bonus tip: be sure to use a contrasting fabric for your center square of each block so the colors don’t look “muddy.”
When I chain piece, I will sew 2 units together at a time and finish up a whole stack at once.
Below is my pretty stack of finished blocks! I used pins at each intersection so that my corners matched up nicely. Here you can see that I’ve pressed each an every seam open, resulting in super flat blocks!! I made another stack in another colorway, but sadly forgot to take a pic of my finished blocks, but you’ll see more of the other version in the next post, so stay tuned!
Homework for next time
Don’t forget to sew the corner blocks, and next week it will be time to assemble the Daisy Blocks, Chain Blocks and border blocks into the quilt top.
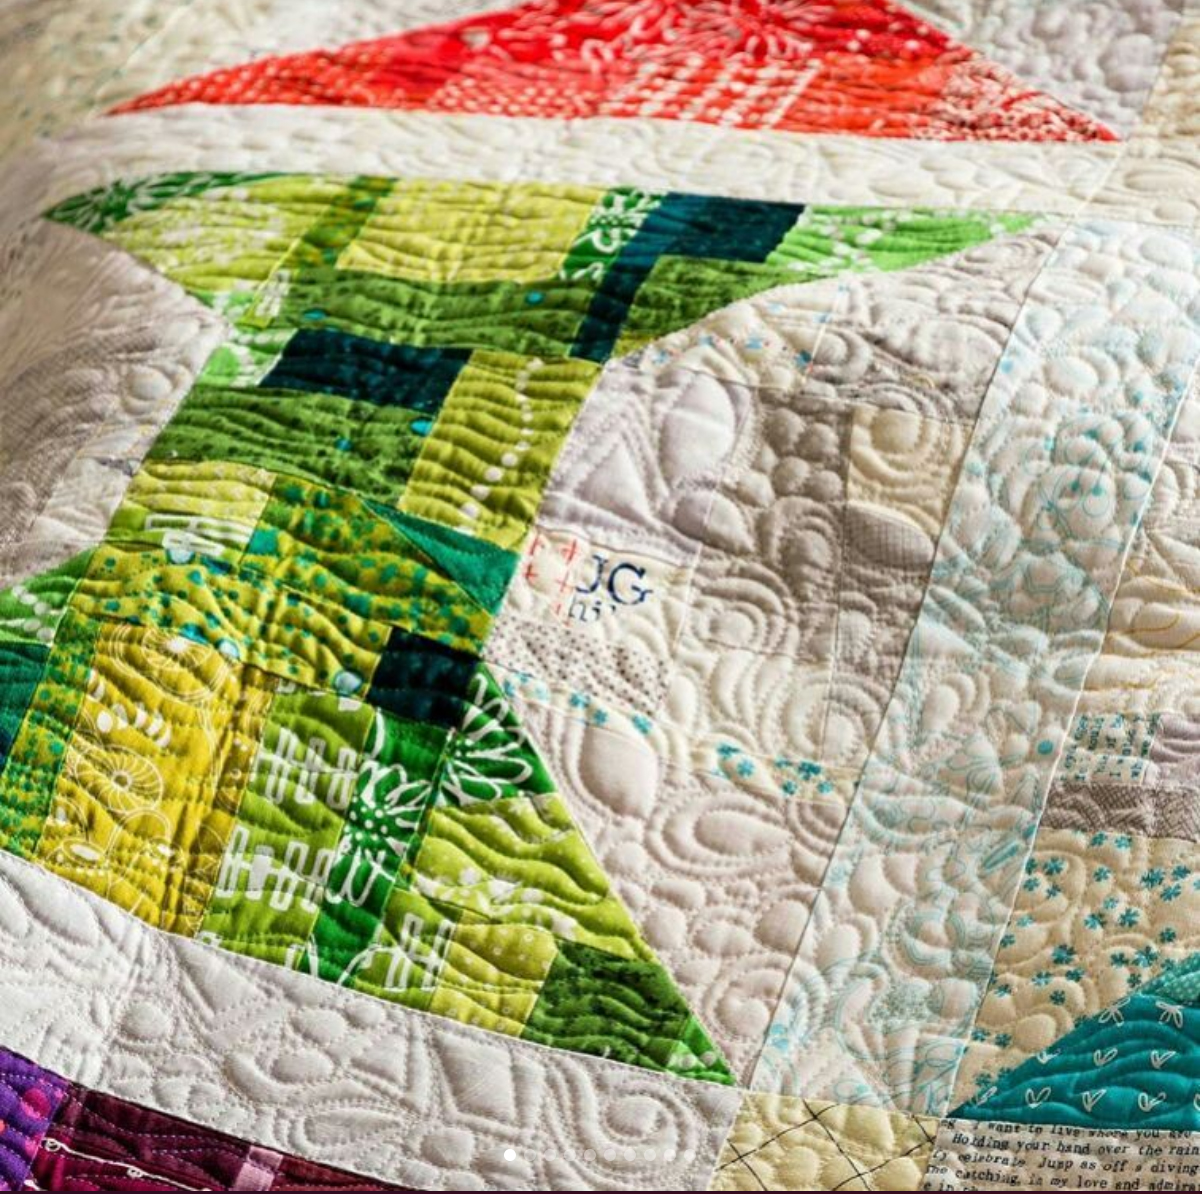
It’s bittersweet as we come to the end of my 99 Machine Quilting Designs video series. The last design is basically the grand finale. What happens when you take ALLLL the designs and mash them together? That’s what I’ve done with a fun technique I’ve called free-motion improv. Take a look below and give it a try!
Featured Quilts from this Video
I shared two quilts where I used Improv Quilting as a dense filler in the background. The first one is called Spools from my book Piece and Quilt with Precuts:
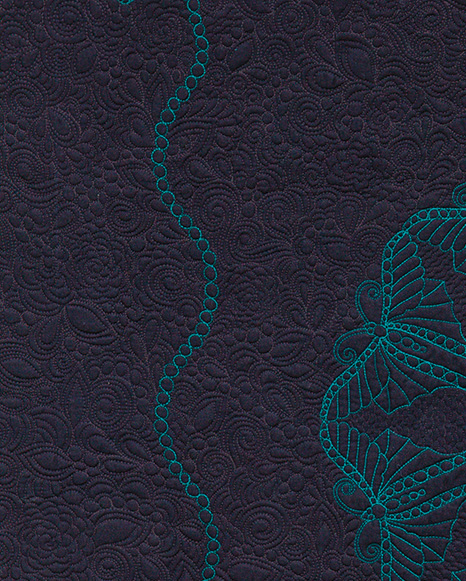
The second one was from my Swirling Butterflies wholecloth that I created for my book with Angela Walters, called The Ultimate Guide to Machine Quilting.
Although my first 4 books I wrote are now out of print, you can still get them as a PDF download in my Etsy shop.
And even though this series is ending, I will still continue to make quilting videos whenever I make a new quilt. That way you can see how I continue to apply these designs to real, full sized quilts!
Whenever I’m sewing quilt blocks that have lots of pieces, I find it much easier to sew the smaller units of each block into larger units, then chain piece everything for speed and efficiency. Follow along in the Daisy Chain quilt pattern on page 6-7s for the images and tips shown below. I’m making two of these at the same time in 2 different colorways: Autumn & Purple Vibrations.
Making Stitch-N-Flip Units
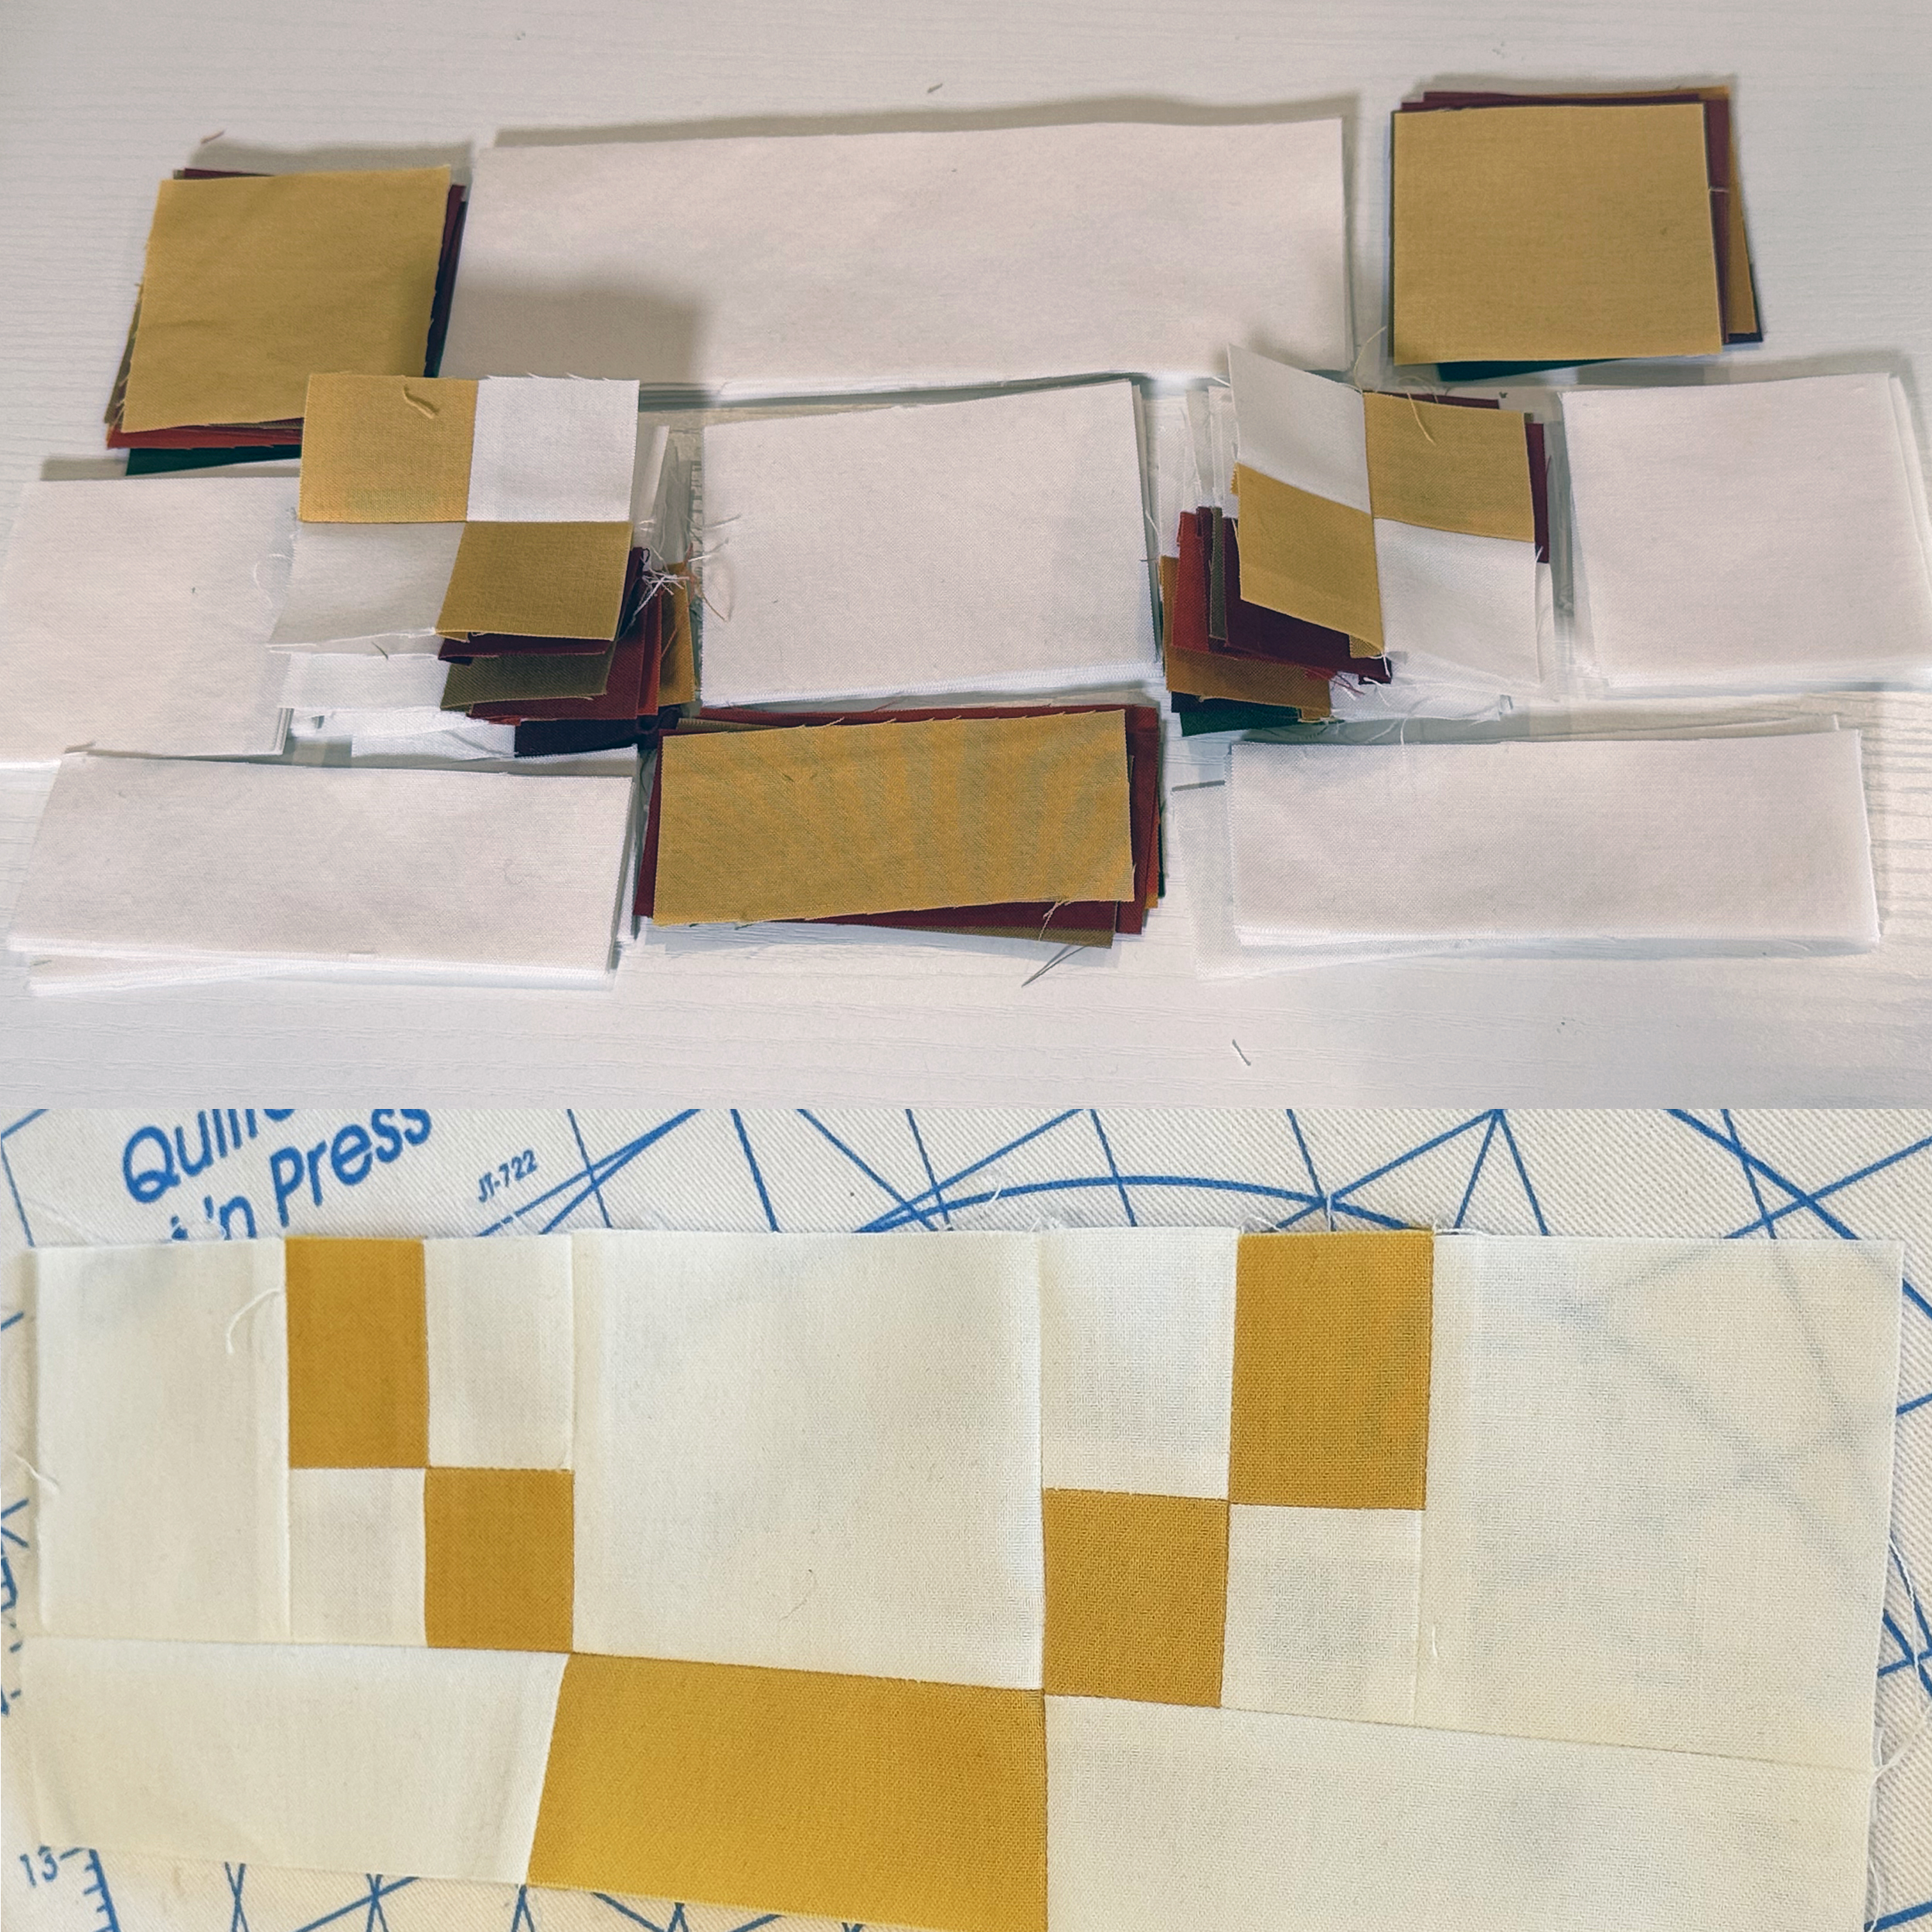
So the first thing we are doing is sewing all of the stitch-n-flip units which will make the petals of each daisy flower block. You can either mark lines down the center of each background unit, or you can eyeball since they are very small.
At each step in the pattern I give what the measurements should be so that you can closely follow along. It’s not that huge of a deal if your units aren’t the exact same size as mine, but you do want them to be all the same size for consistency.
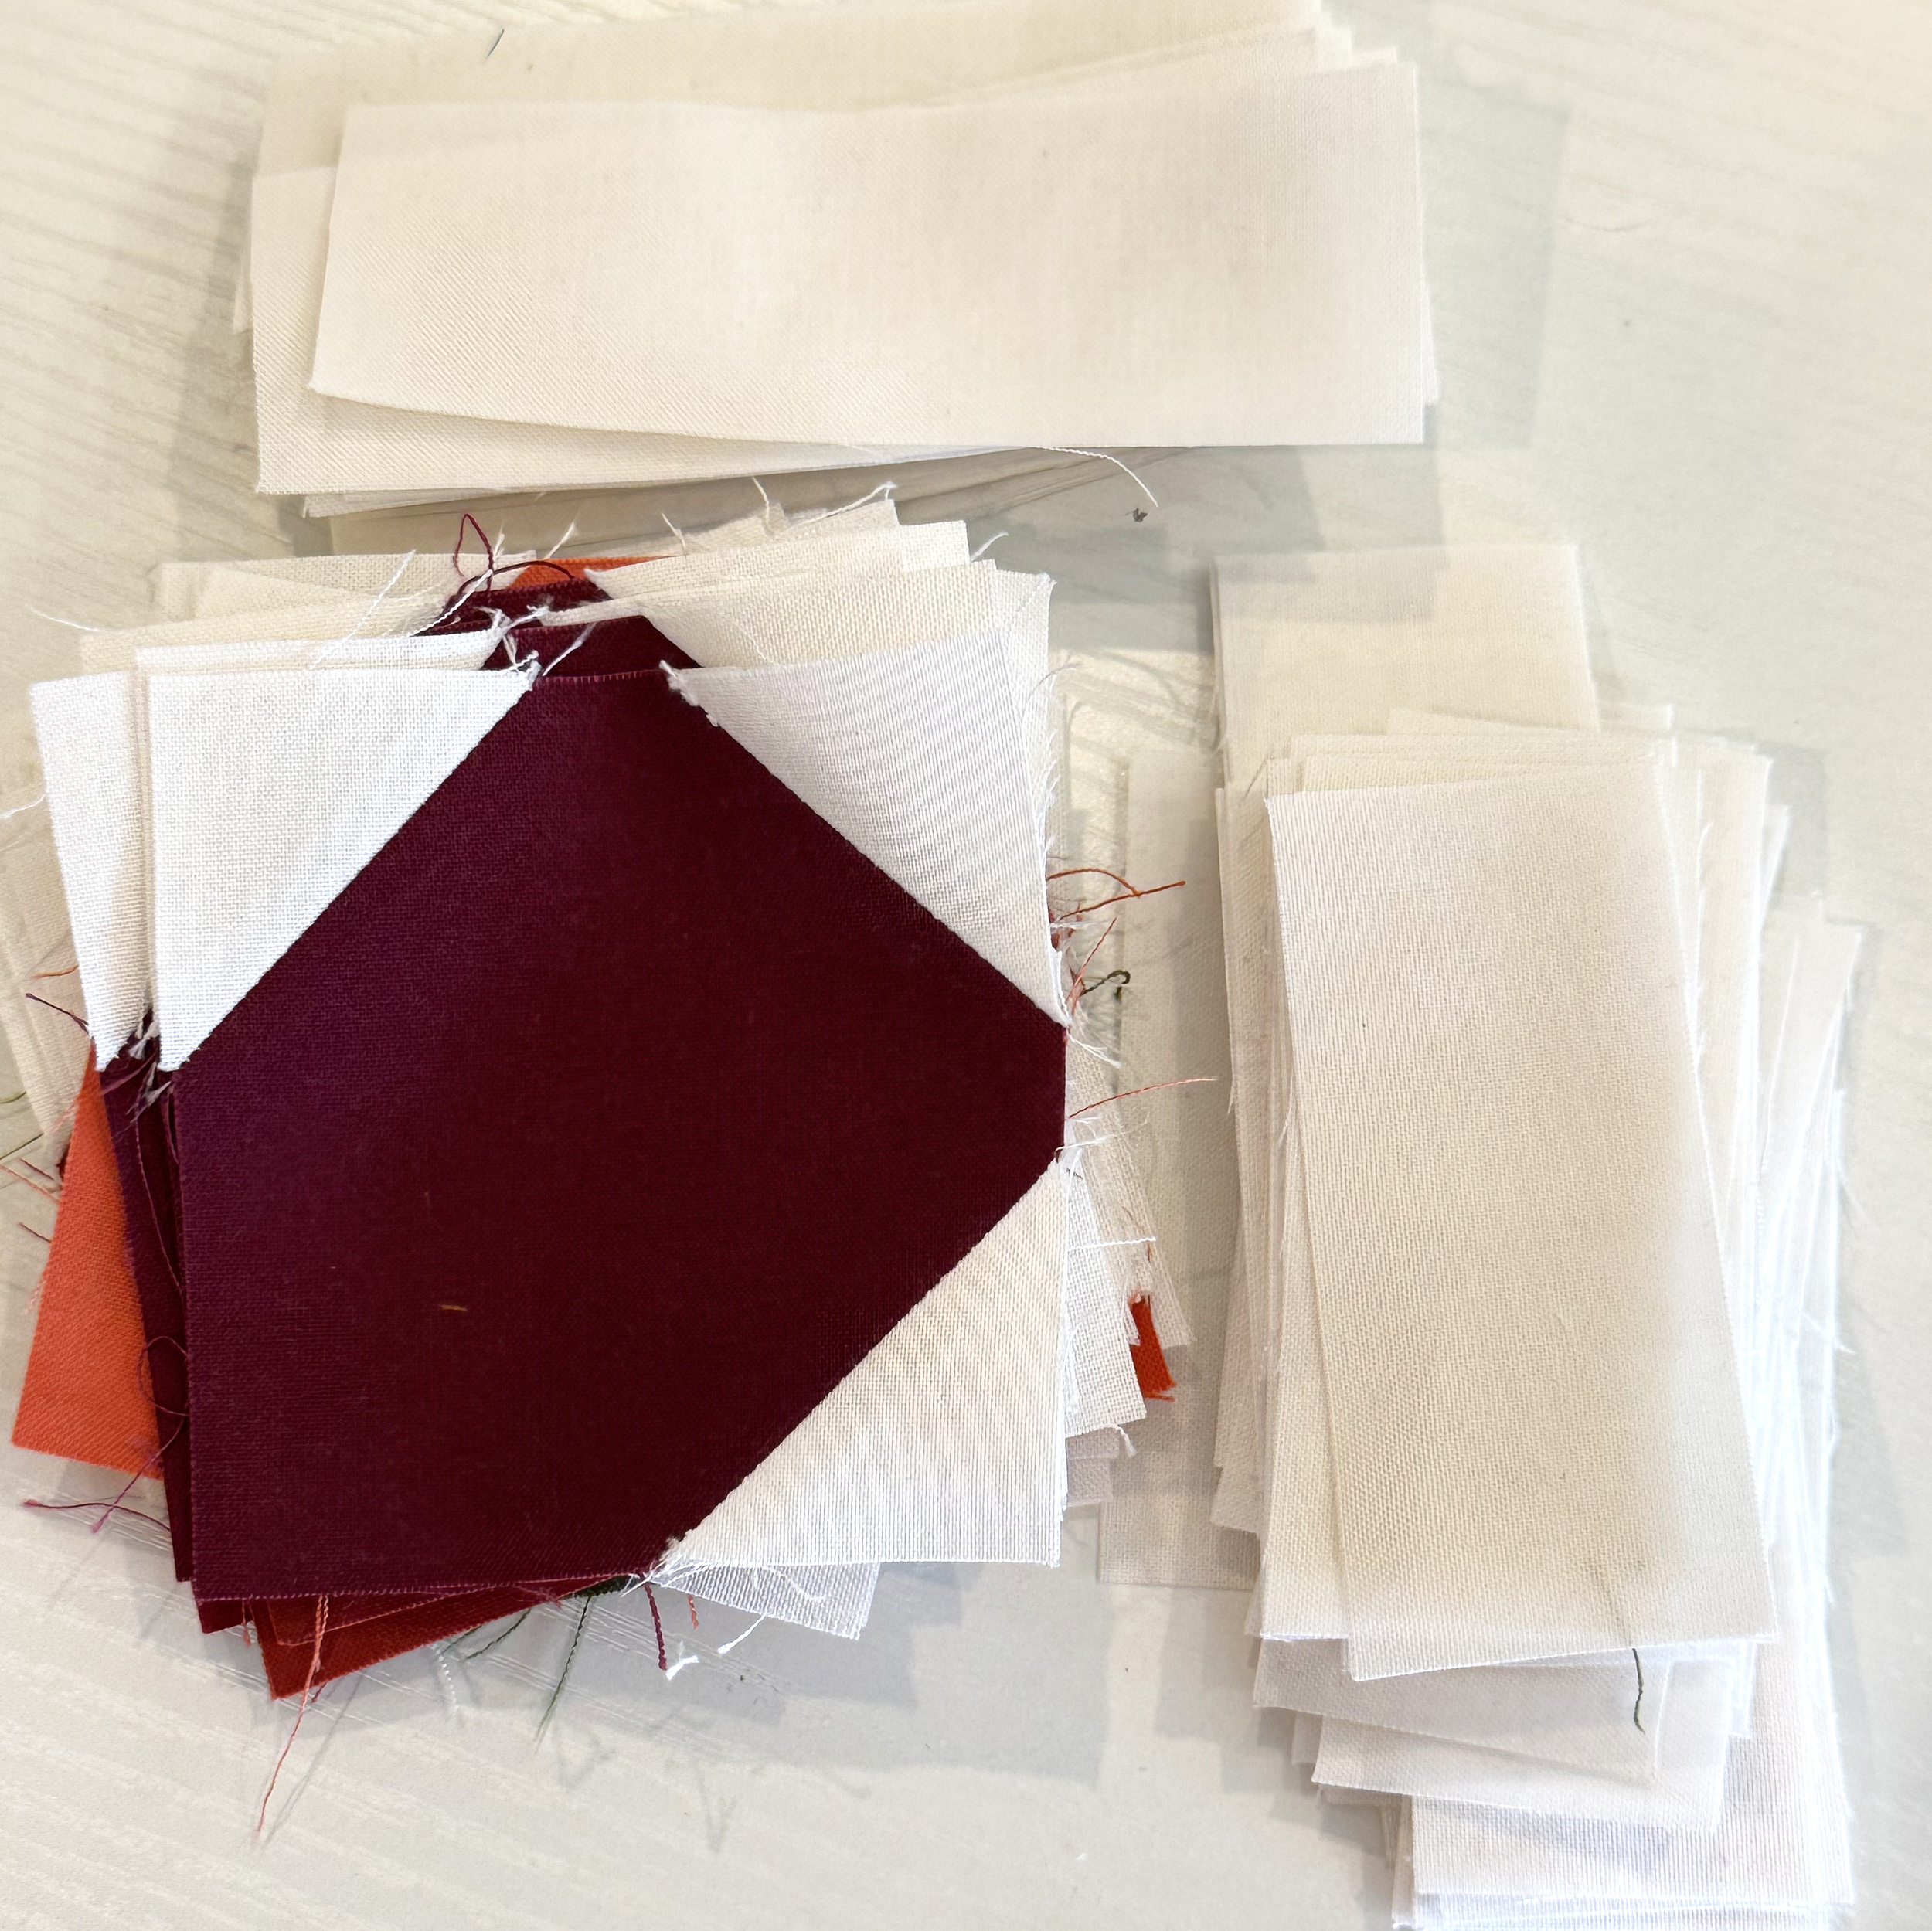
I prefer to sew all of the little stitch-n-flip squares on one side of each block so I can chain piece. That means assembly-line sewing a whole bunch without cutting threads in between. Then I will trim off all the corners at once and press my seams open.
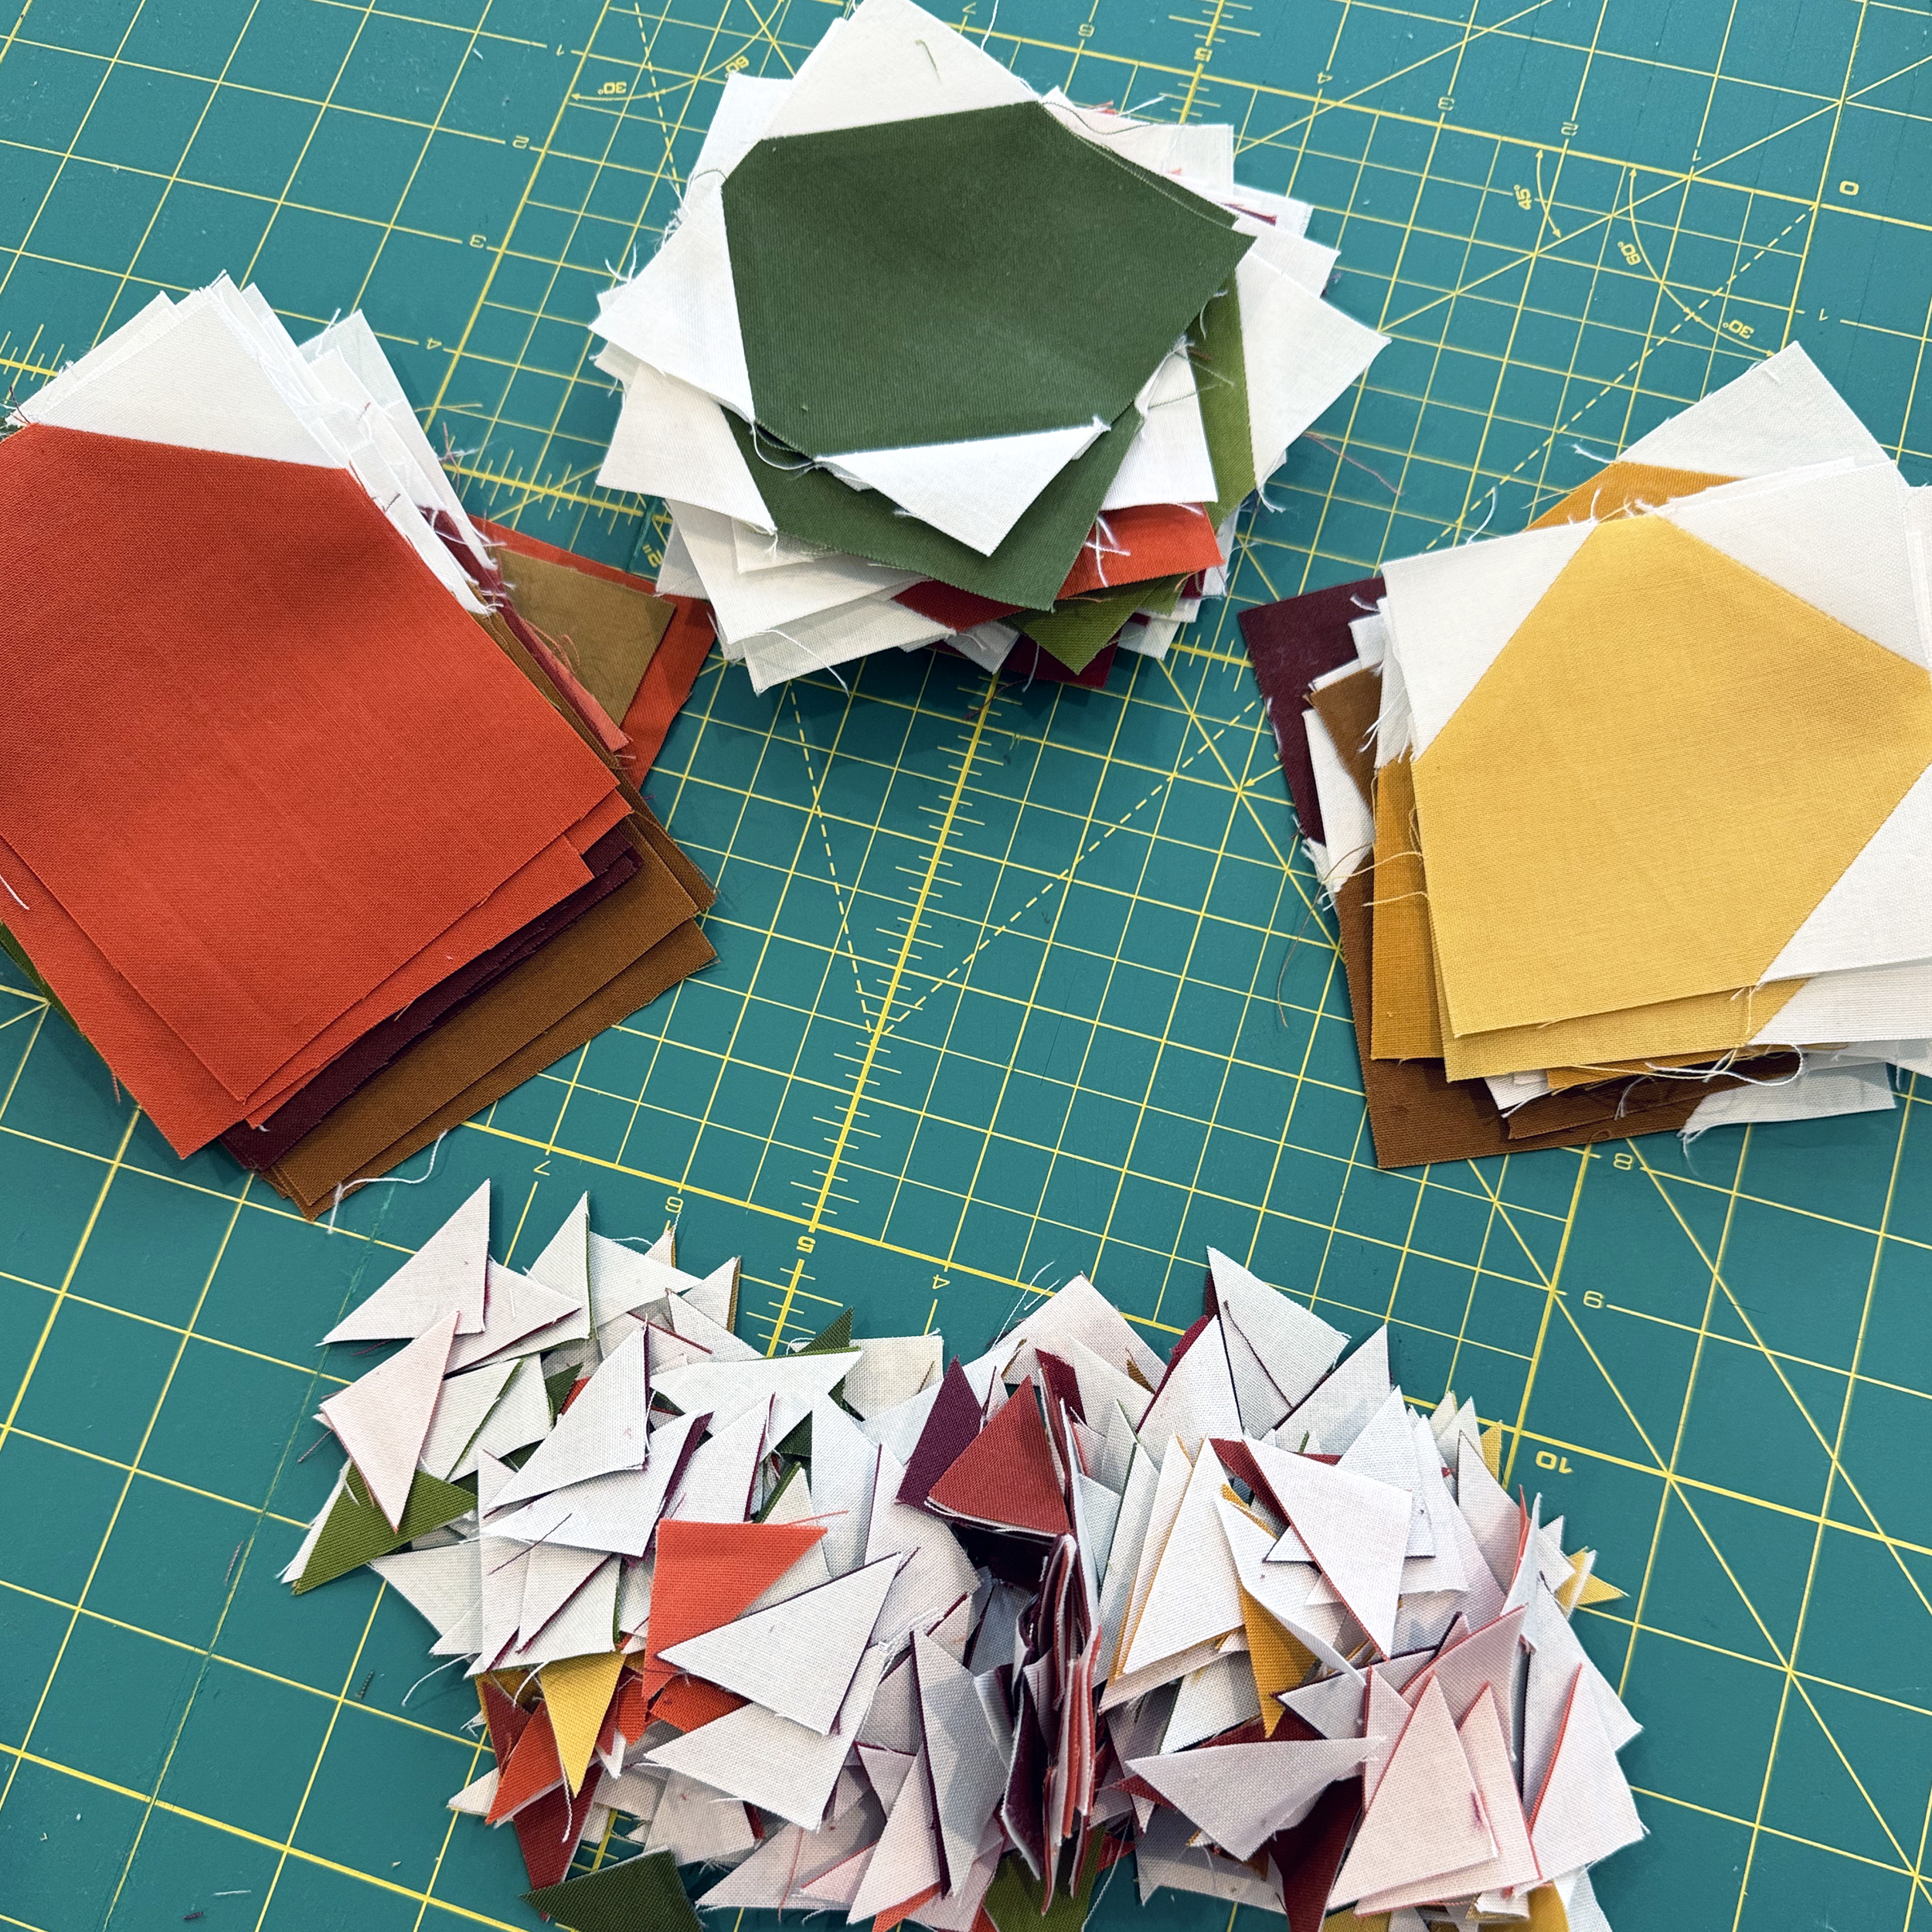
I end up with a lot of leftover triangle tips at the end. You can totally save these for another project if you want to! You’ll also notice that some of the petals have 2 white corners and others have 3. Be sure you follow the pattern diagrams closely to sew them onto the correct corners.
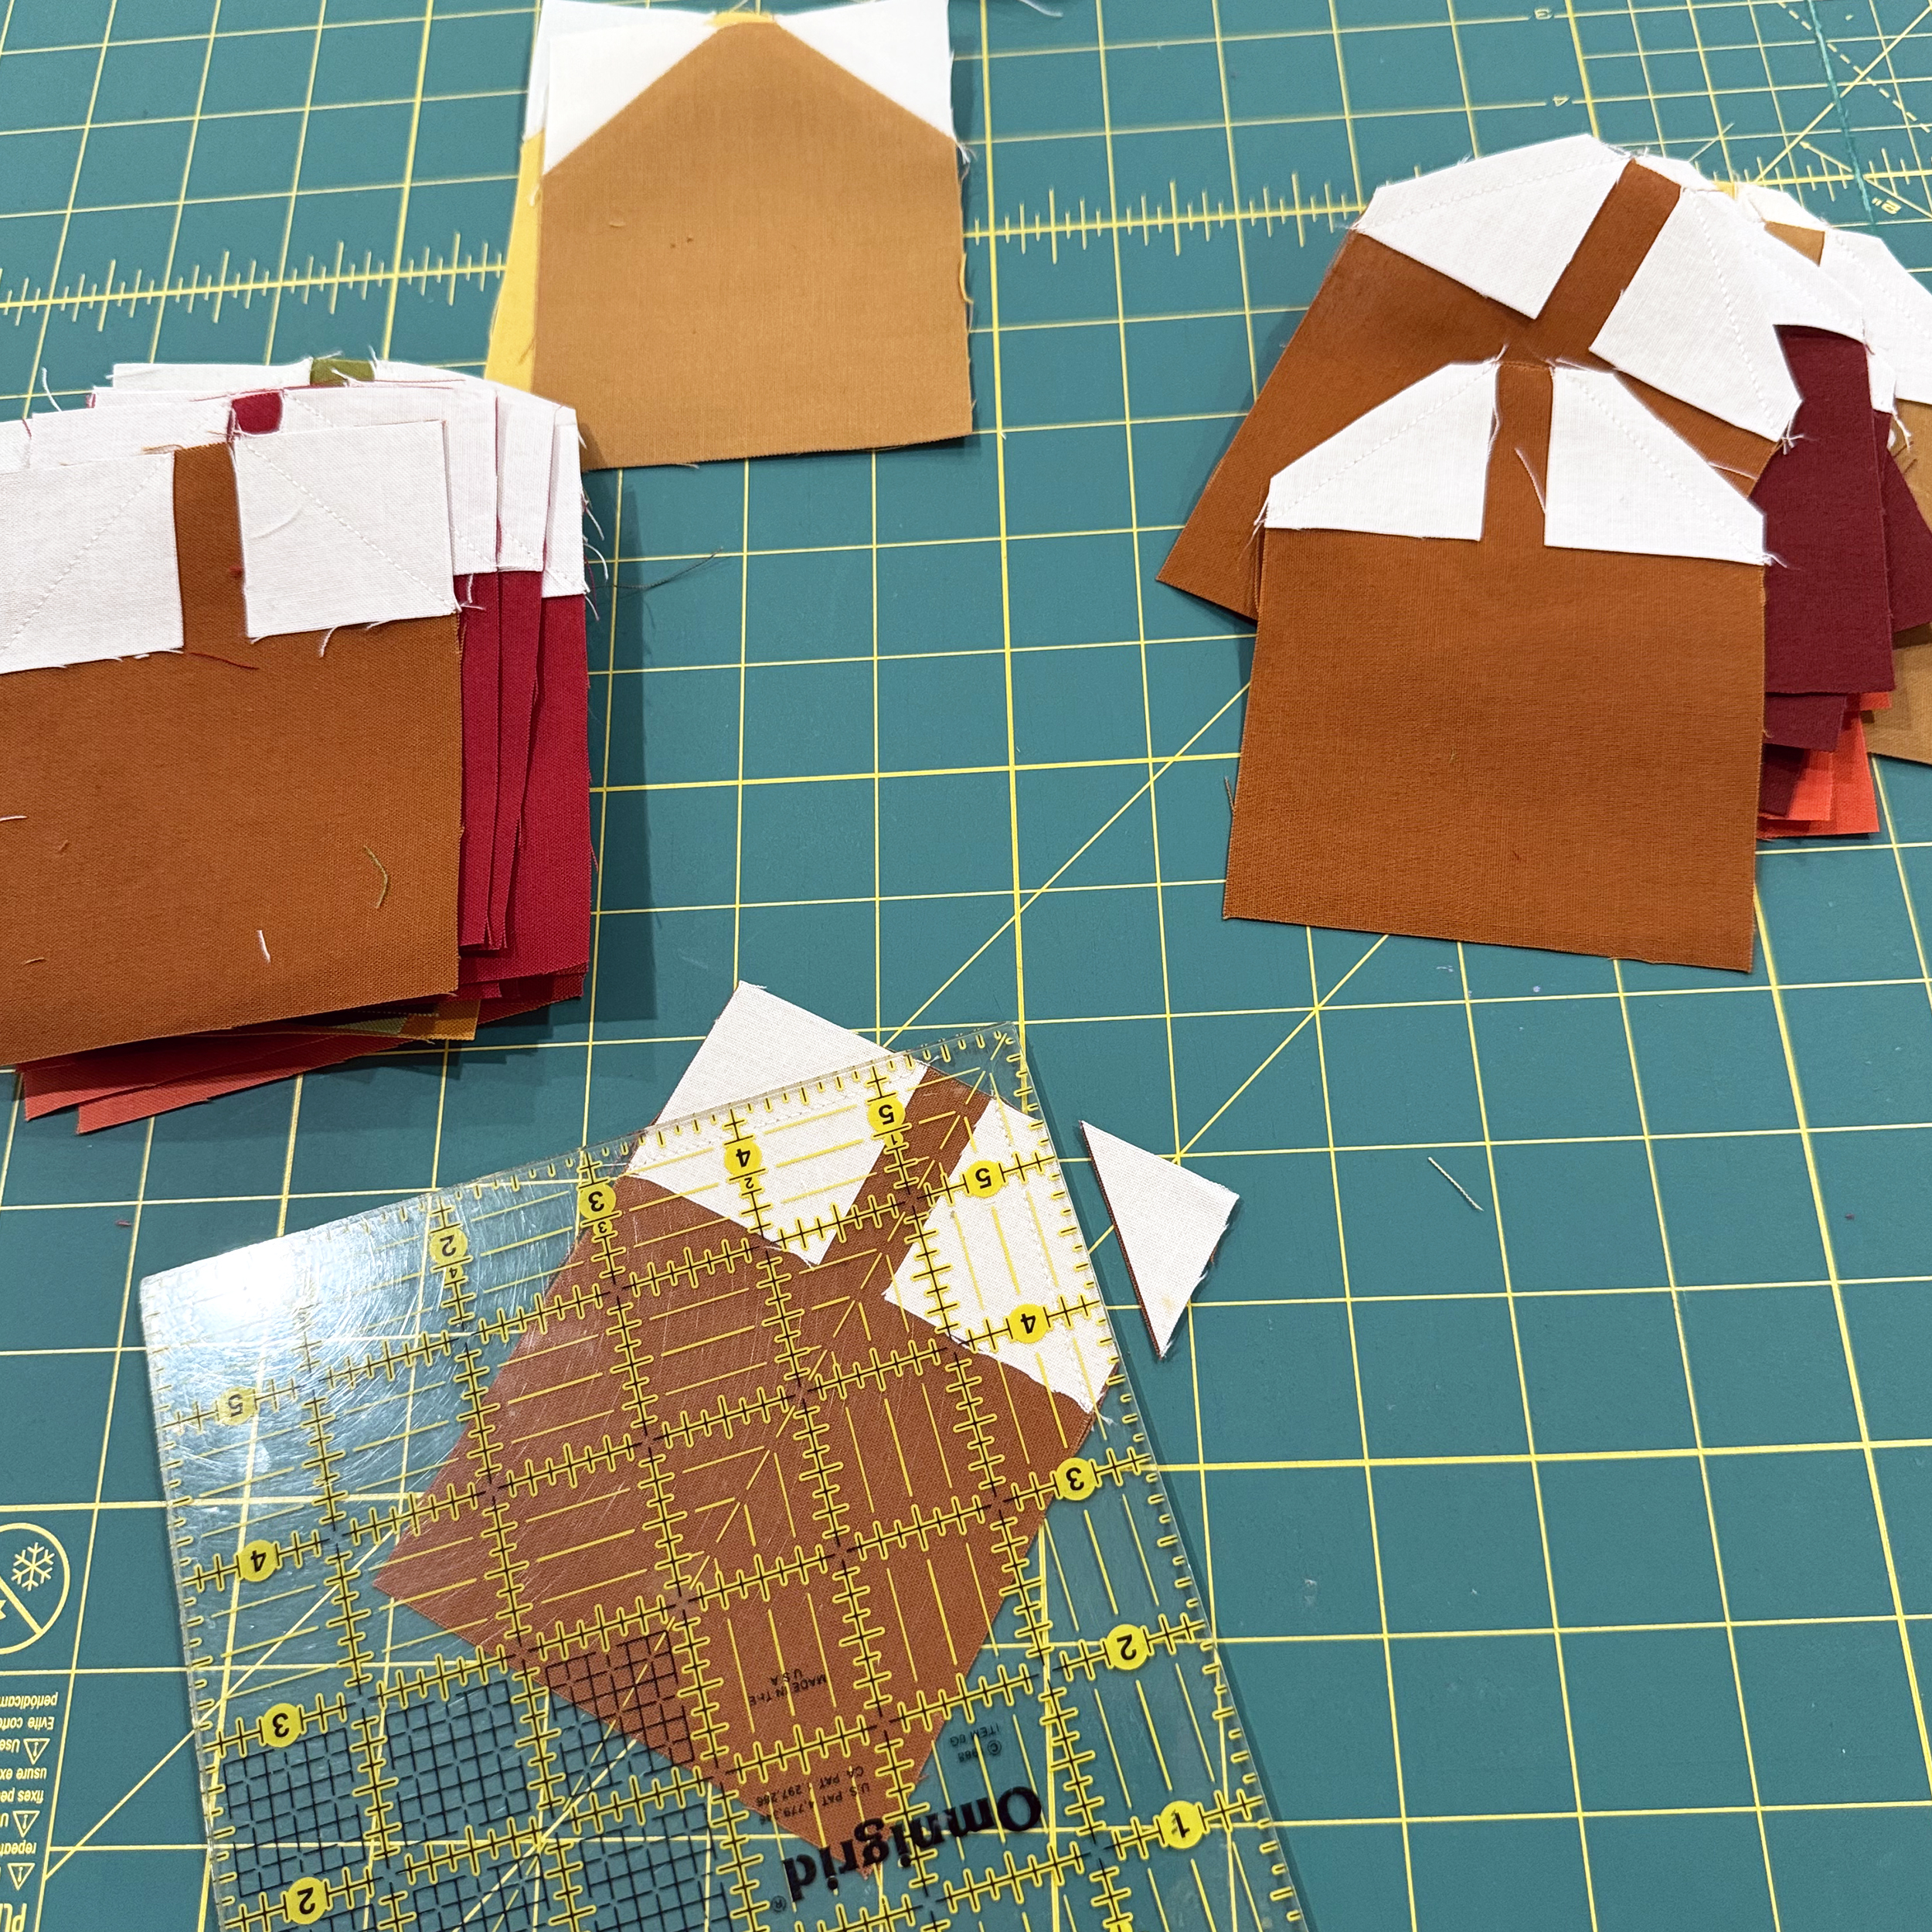
Once the petal units are sewn, you will be adding extra background strips to the square petal units to make them the correct size. I’ll stack all of the units up facing the same direction before adding the background strips. Notice that one background strip is shorter and one is longer. As long as you sew ALL units the same, you’ll be able to rotate them into position correctly.
I will continue to assembly line sew by laying out all of the units for each block and stack them on top of each other. The main flower parts are all the same color so it’s easy to keep track of what unit goes where. Then you can decide which color you want for each center flower.
One thing to notice is that 4 of the petals look a little pointier than the others and that’s correct. They will appear more rounded once the blocks are finished and sewn together due to the seam allowances.
Why Make 1 When You Can Make 2??
Here’s what it looked like when chain piecing the stitch-n-flip units for the second colorway I made.
And my units are all in position and ready to sew!
This Week’s Homework:
Finish all of your Daisy Blocks for the size you are making, and then post pics of your progress in my facebook group!
One of my favorite free-motion quilting techniques to do is combining two different designs for a unique stitch combination. That’s what I did in this week’s video. Combine spirals and pebbles to make Swirls & Pearls! Watch the video on my YouTube channel by clicking the image below:
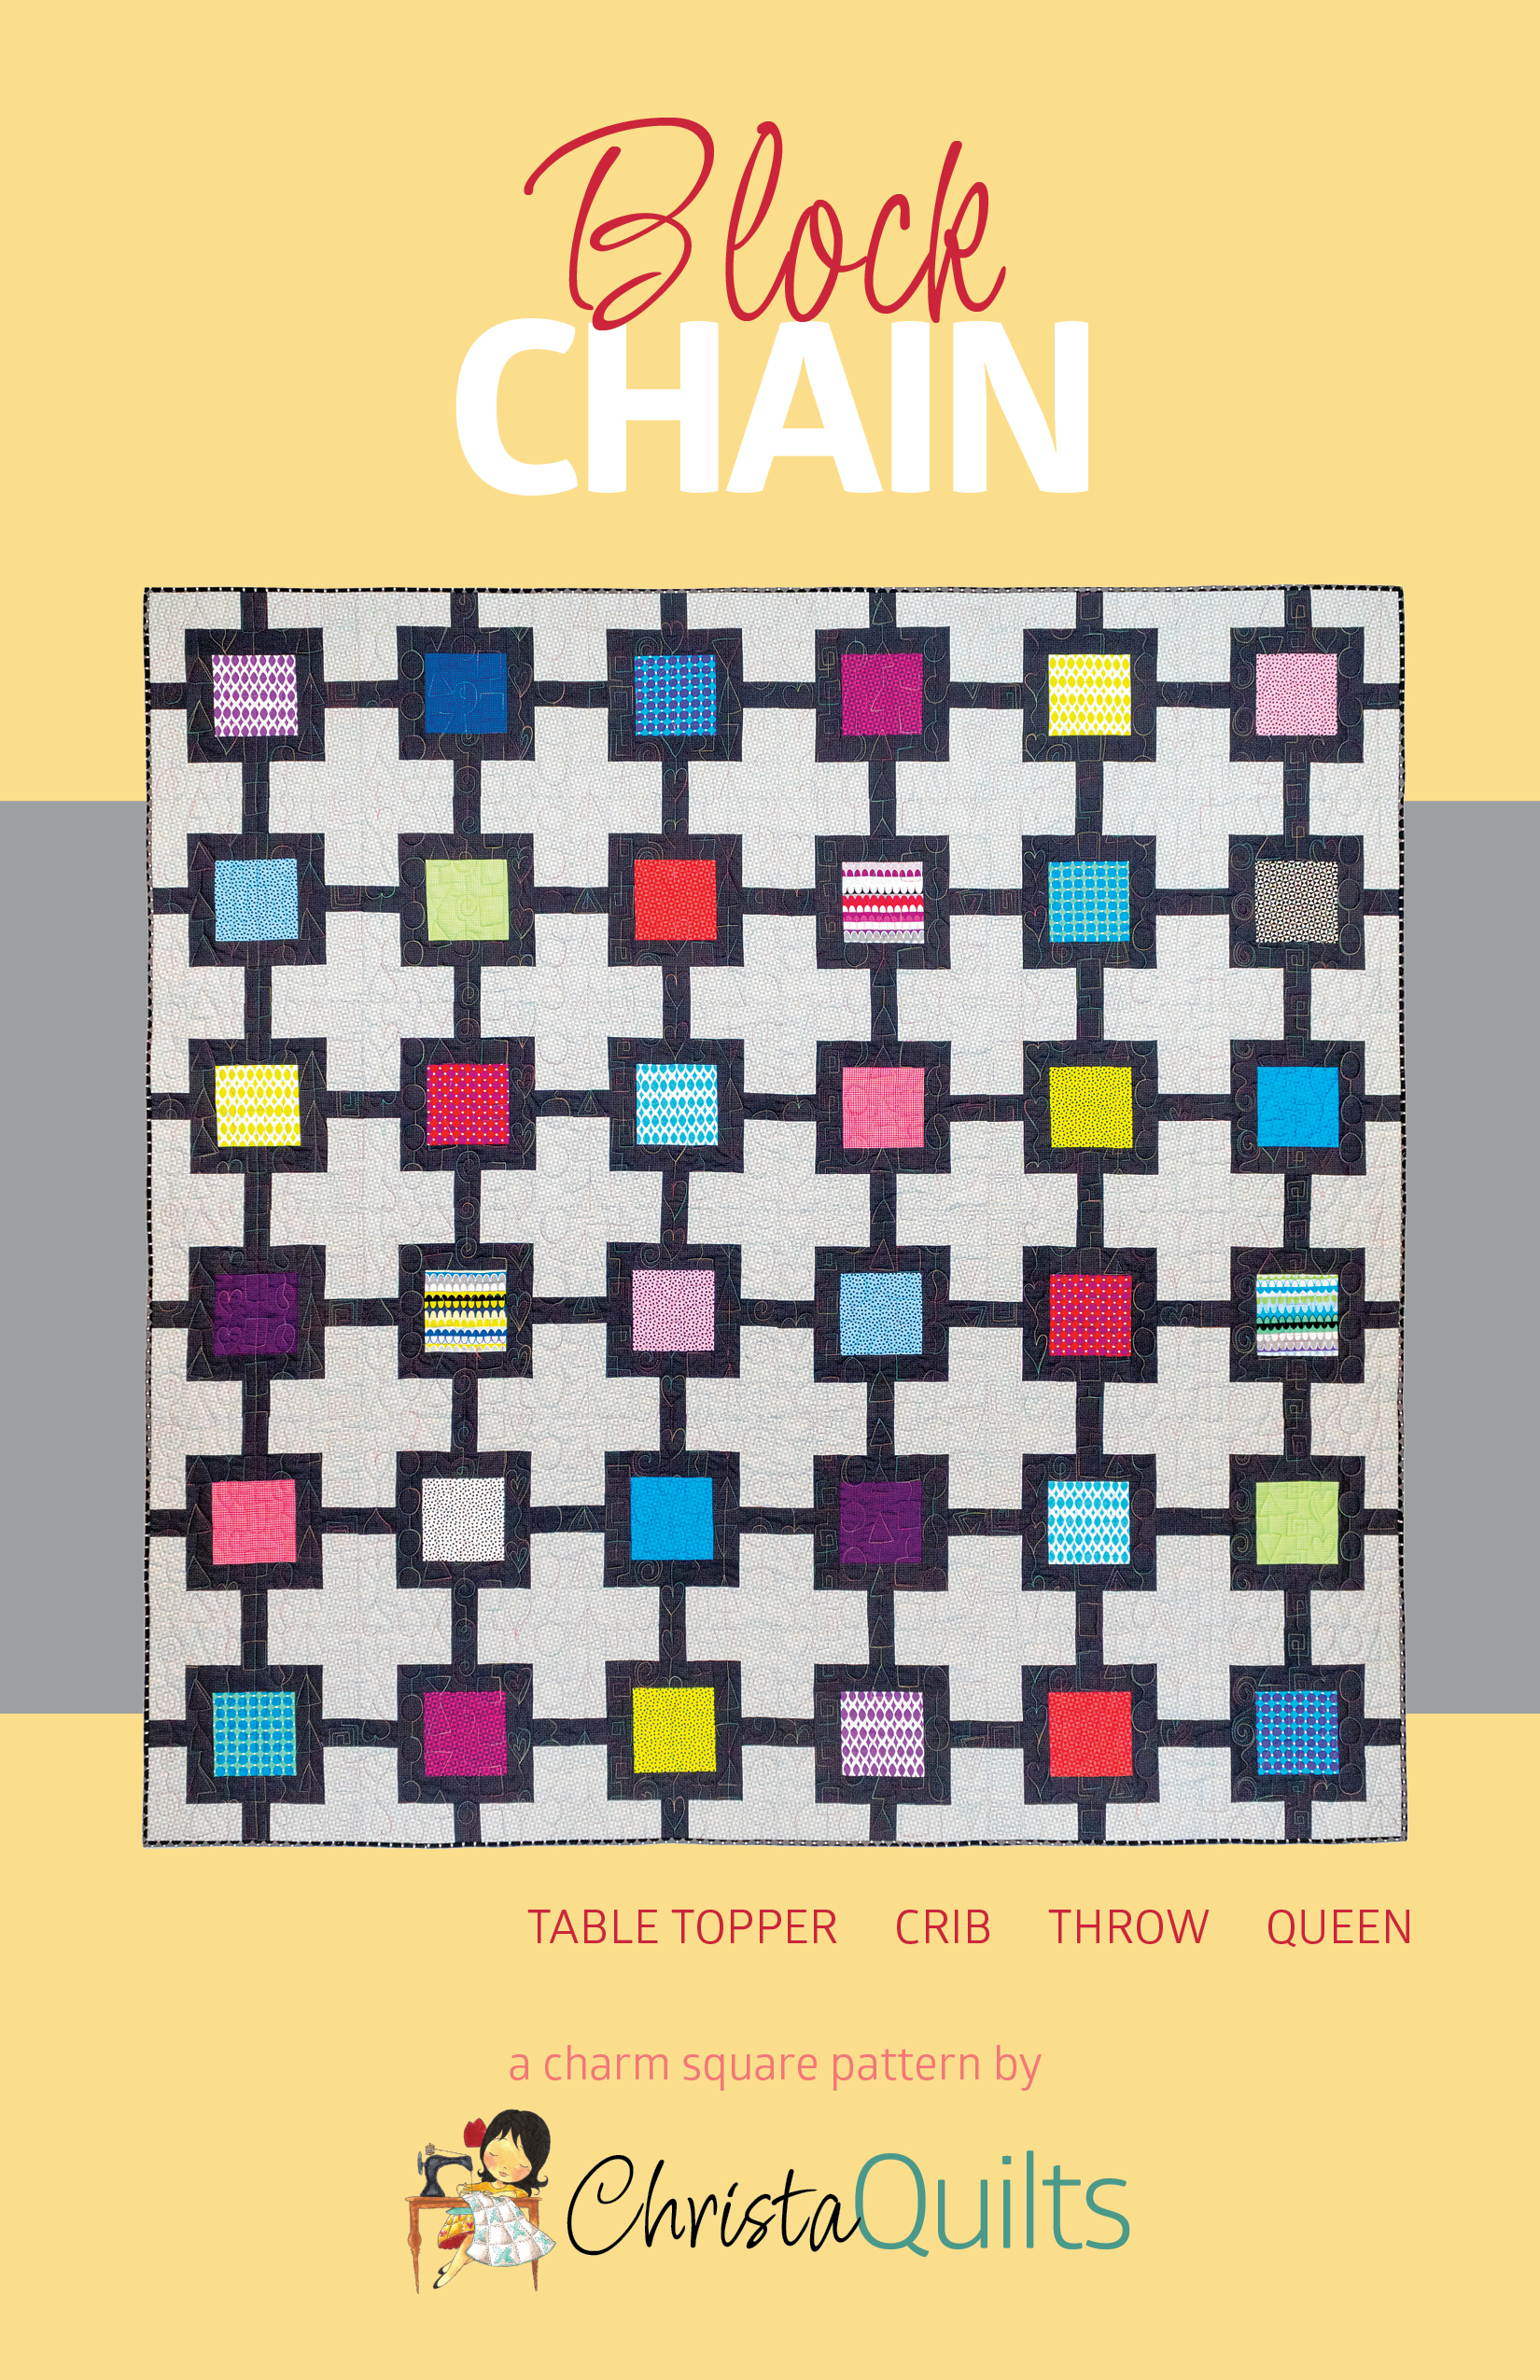
Make My Block Chain Quilt
This week’s featured quilt is called Block Chain. I’ve made it twice over the years and it’s the perfect pattern to showcase a set of charm packs. Pair them up with light and dark accent fabrics for a quick make! You can grab the quilt pattern to make this quilt either in print (while supplies last) or as a PDF digital download.
Can you believe this is the penultimate episode in this series? Stay tuned for next week for the final chapter in this series. Just remember, these free machine quilting videos will stay up indefinitely so you can watch them as many times as you wish!