Are you excited to make Daisy Chain along with me? See below for the complete quilt along schedule. Although this event will be quickly paced, I’ll leave these blog posts up indefinitely so you can work on your quilt any time you wish. I’m here to help you each step of the way!
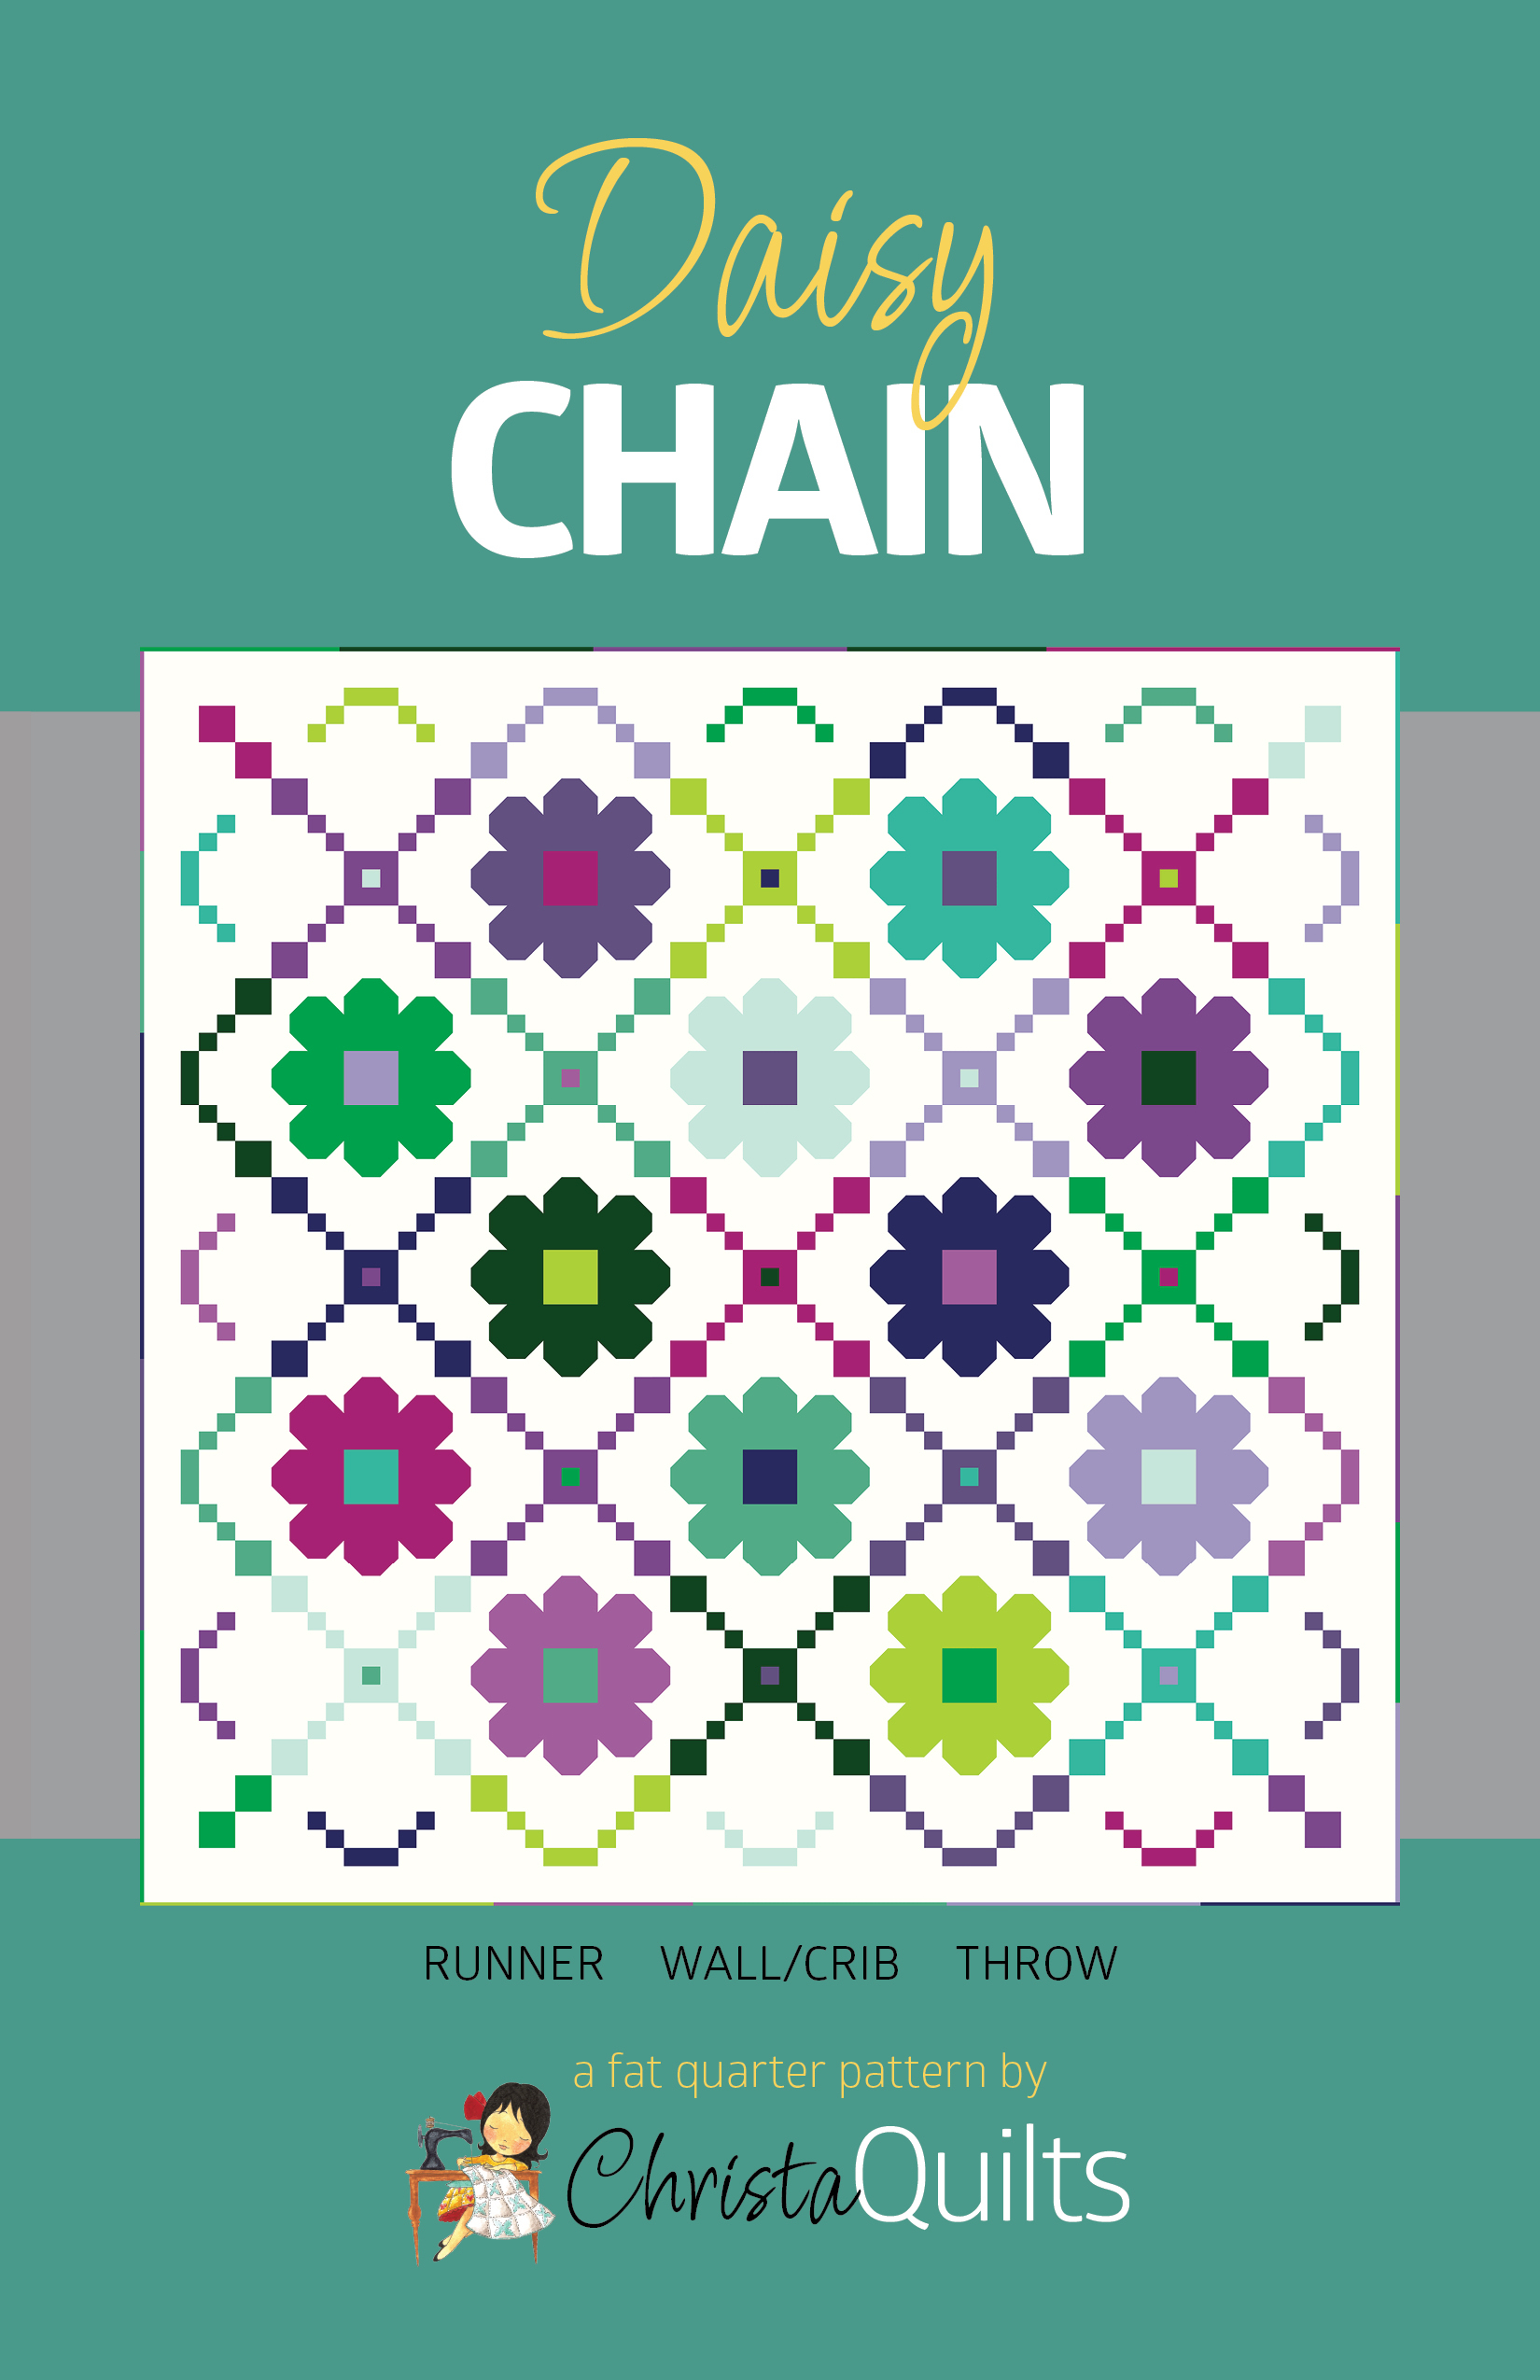
- Click here to get the Daisy Chain Quilt Pattern – Digital PDF Download
- Click here to get the Daisy Chain Quilt Pattern – Printed Hardcopy
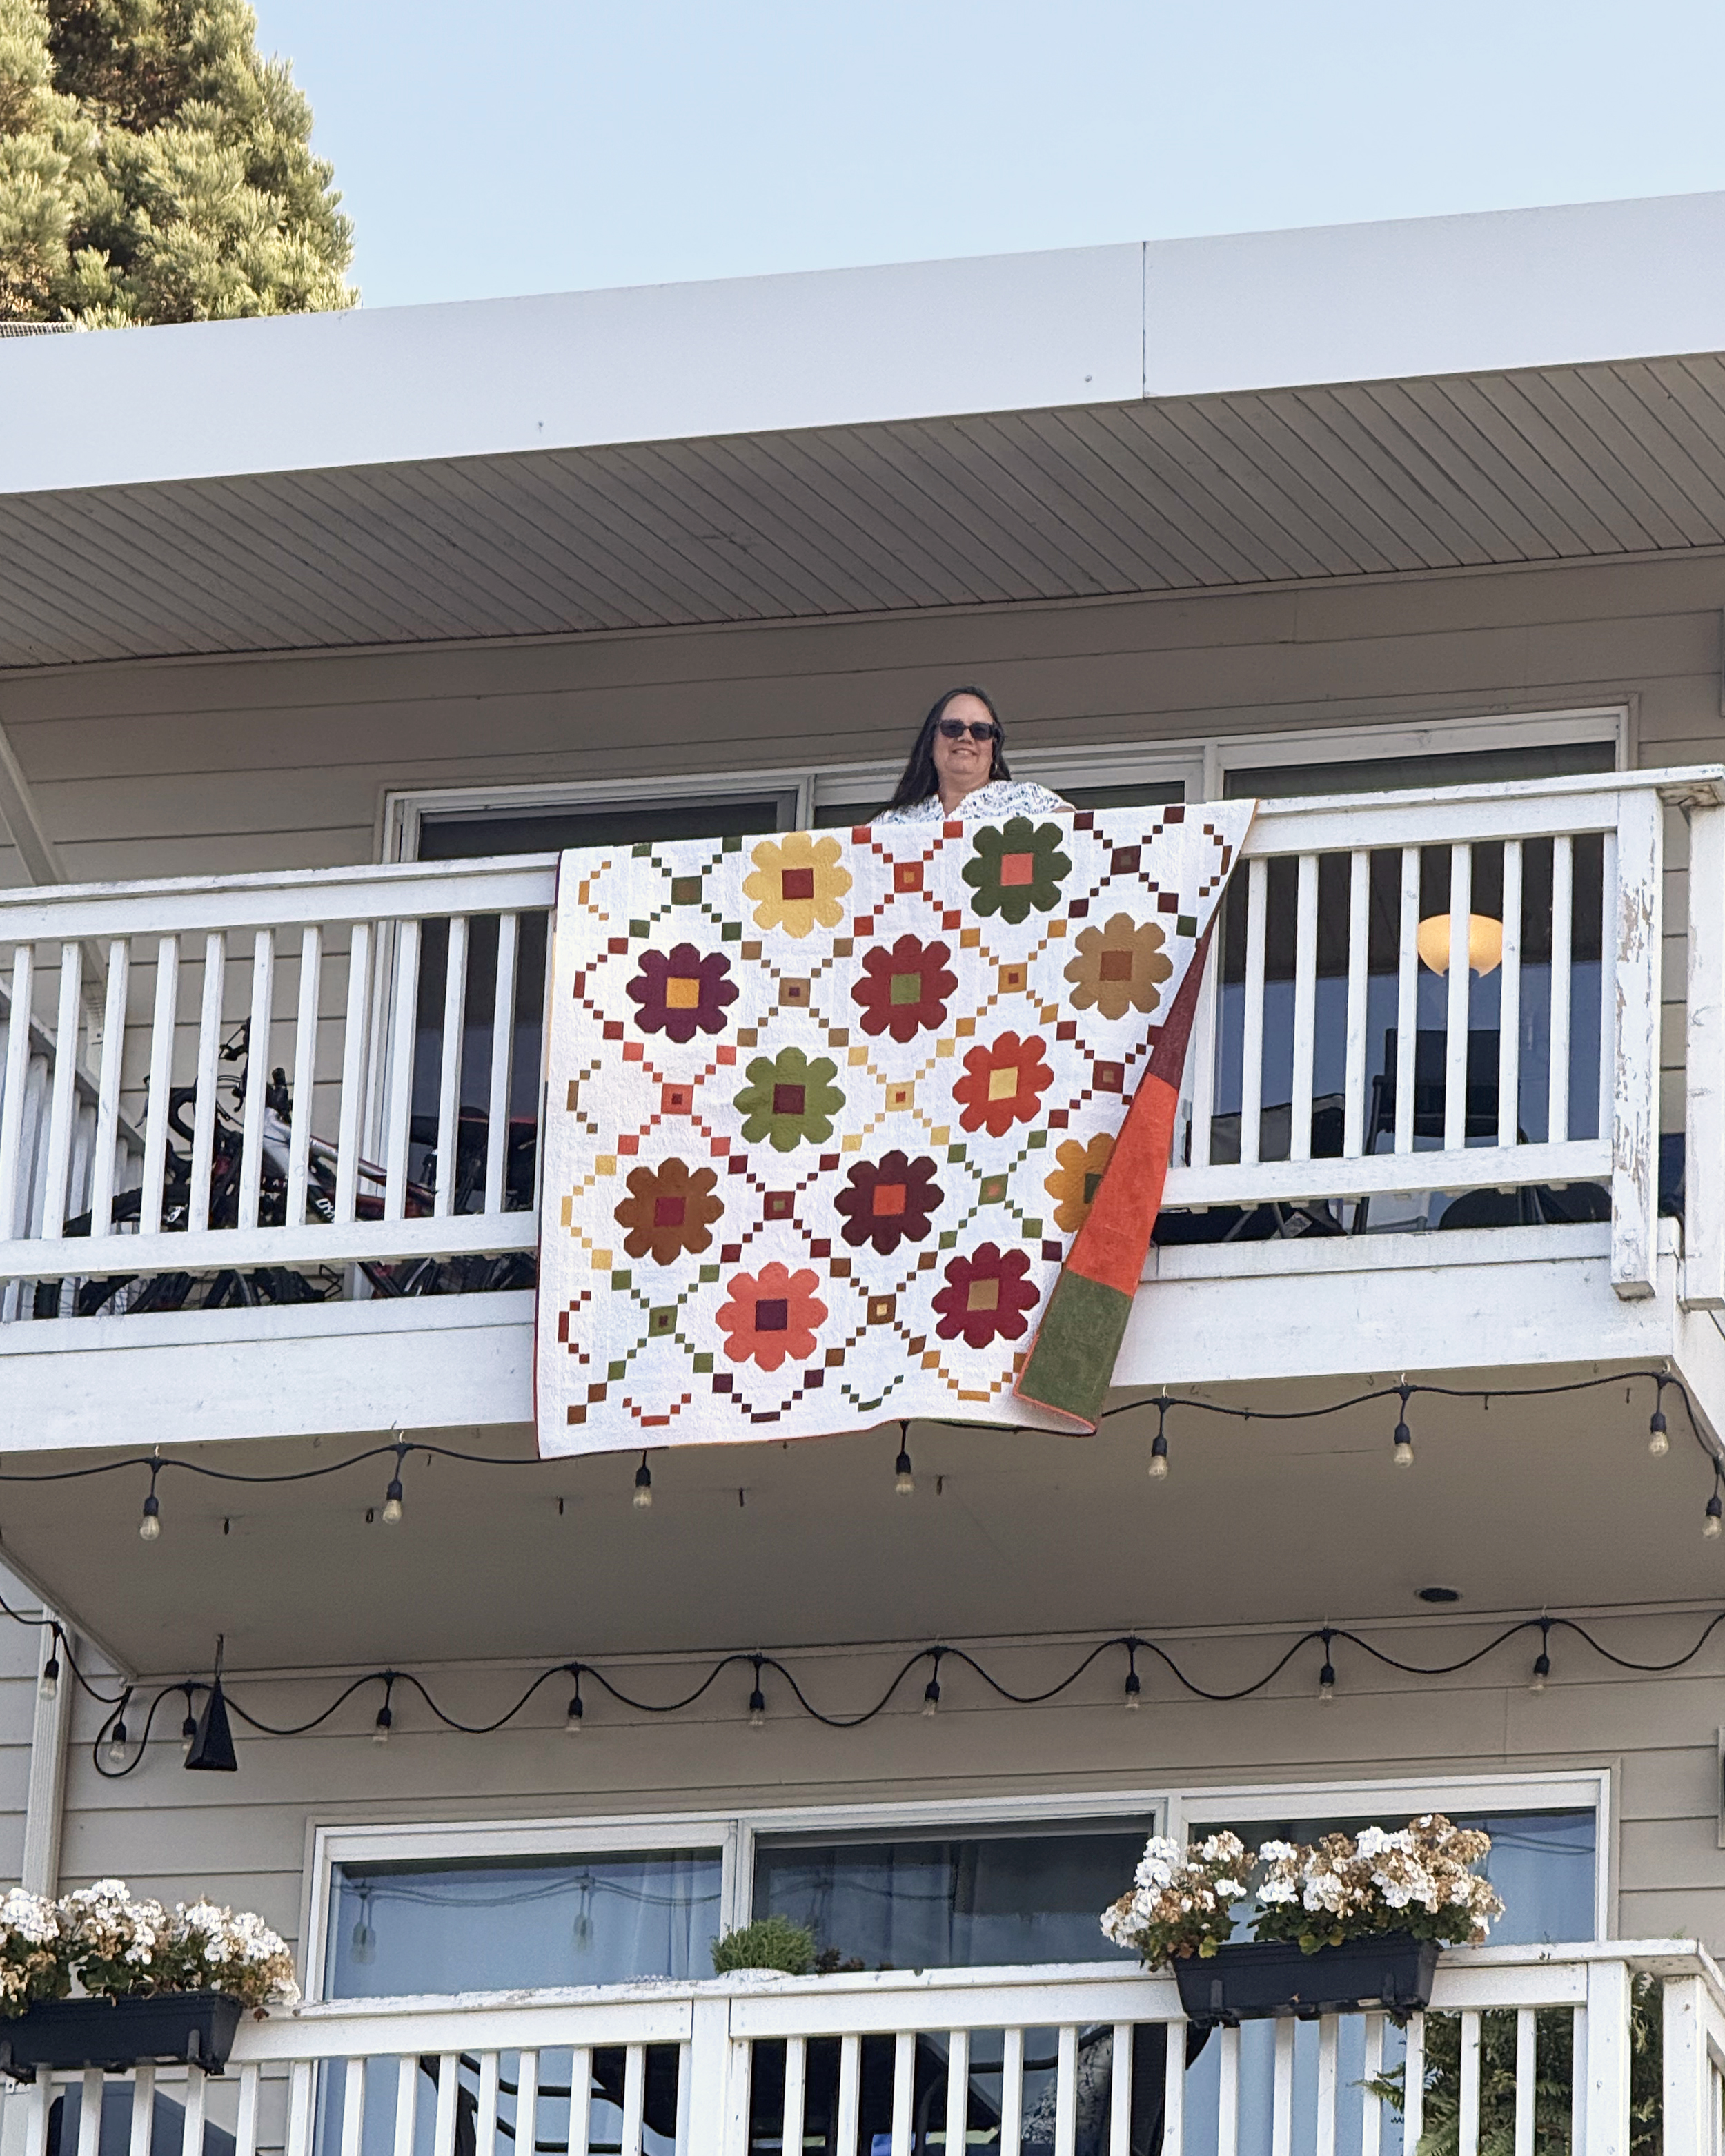
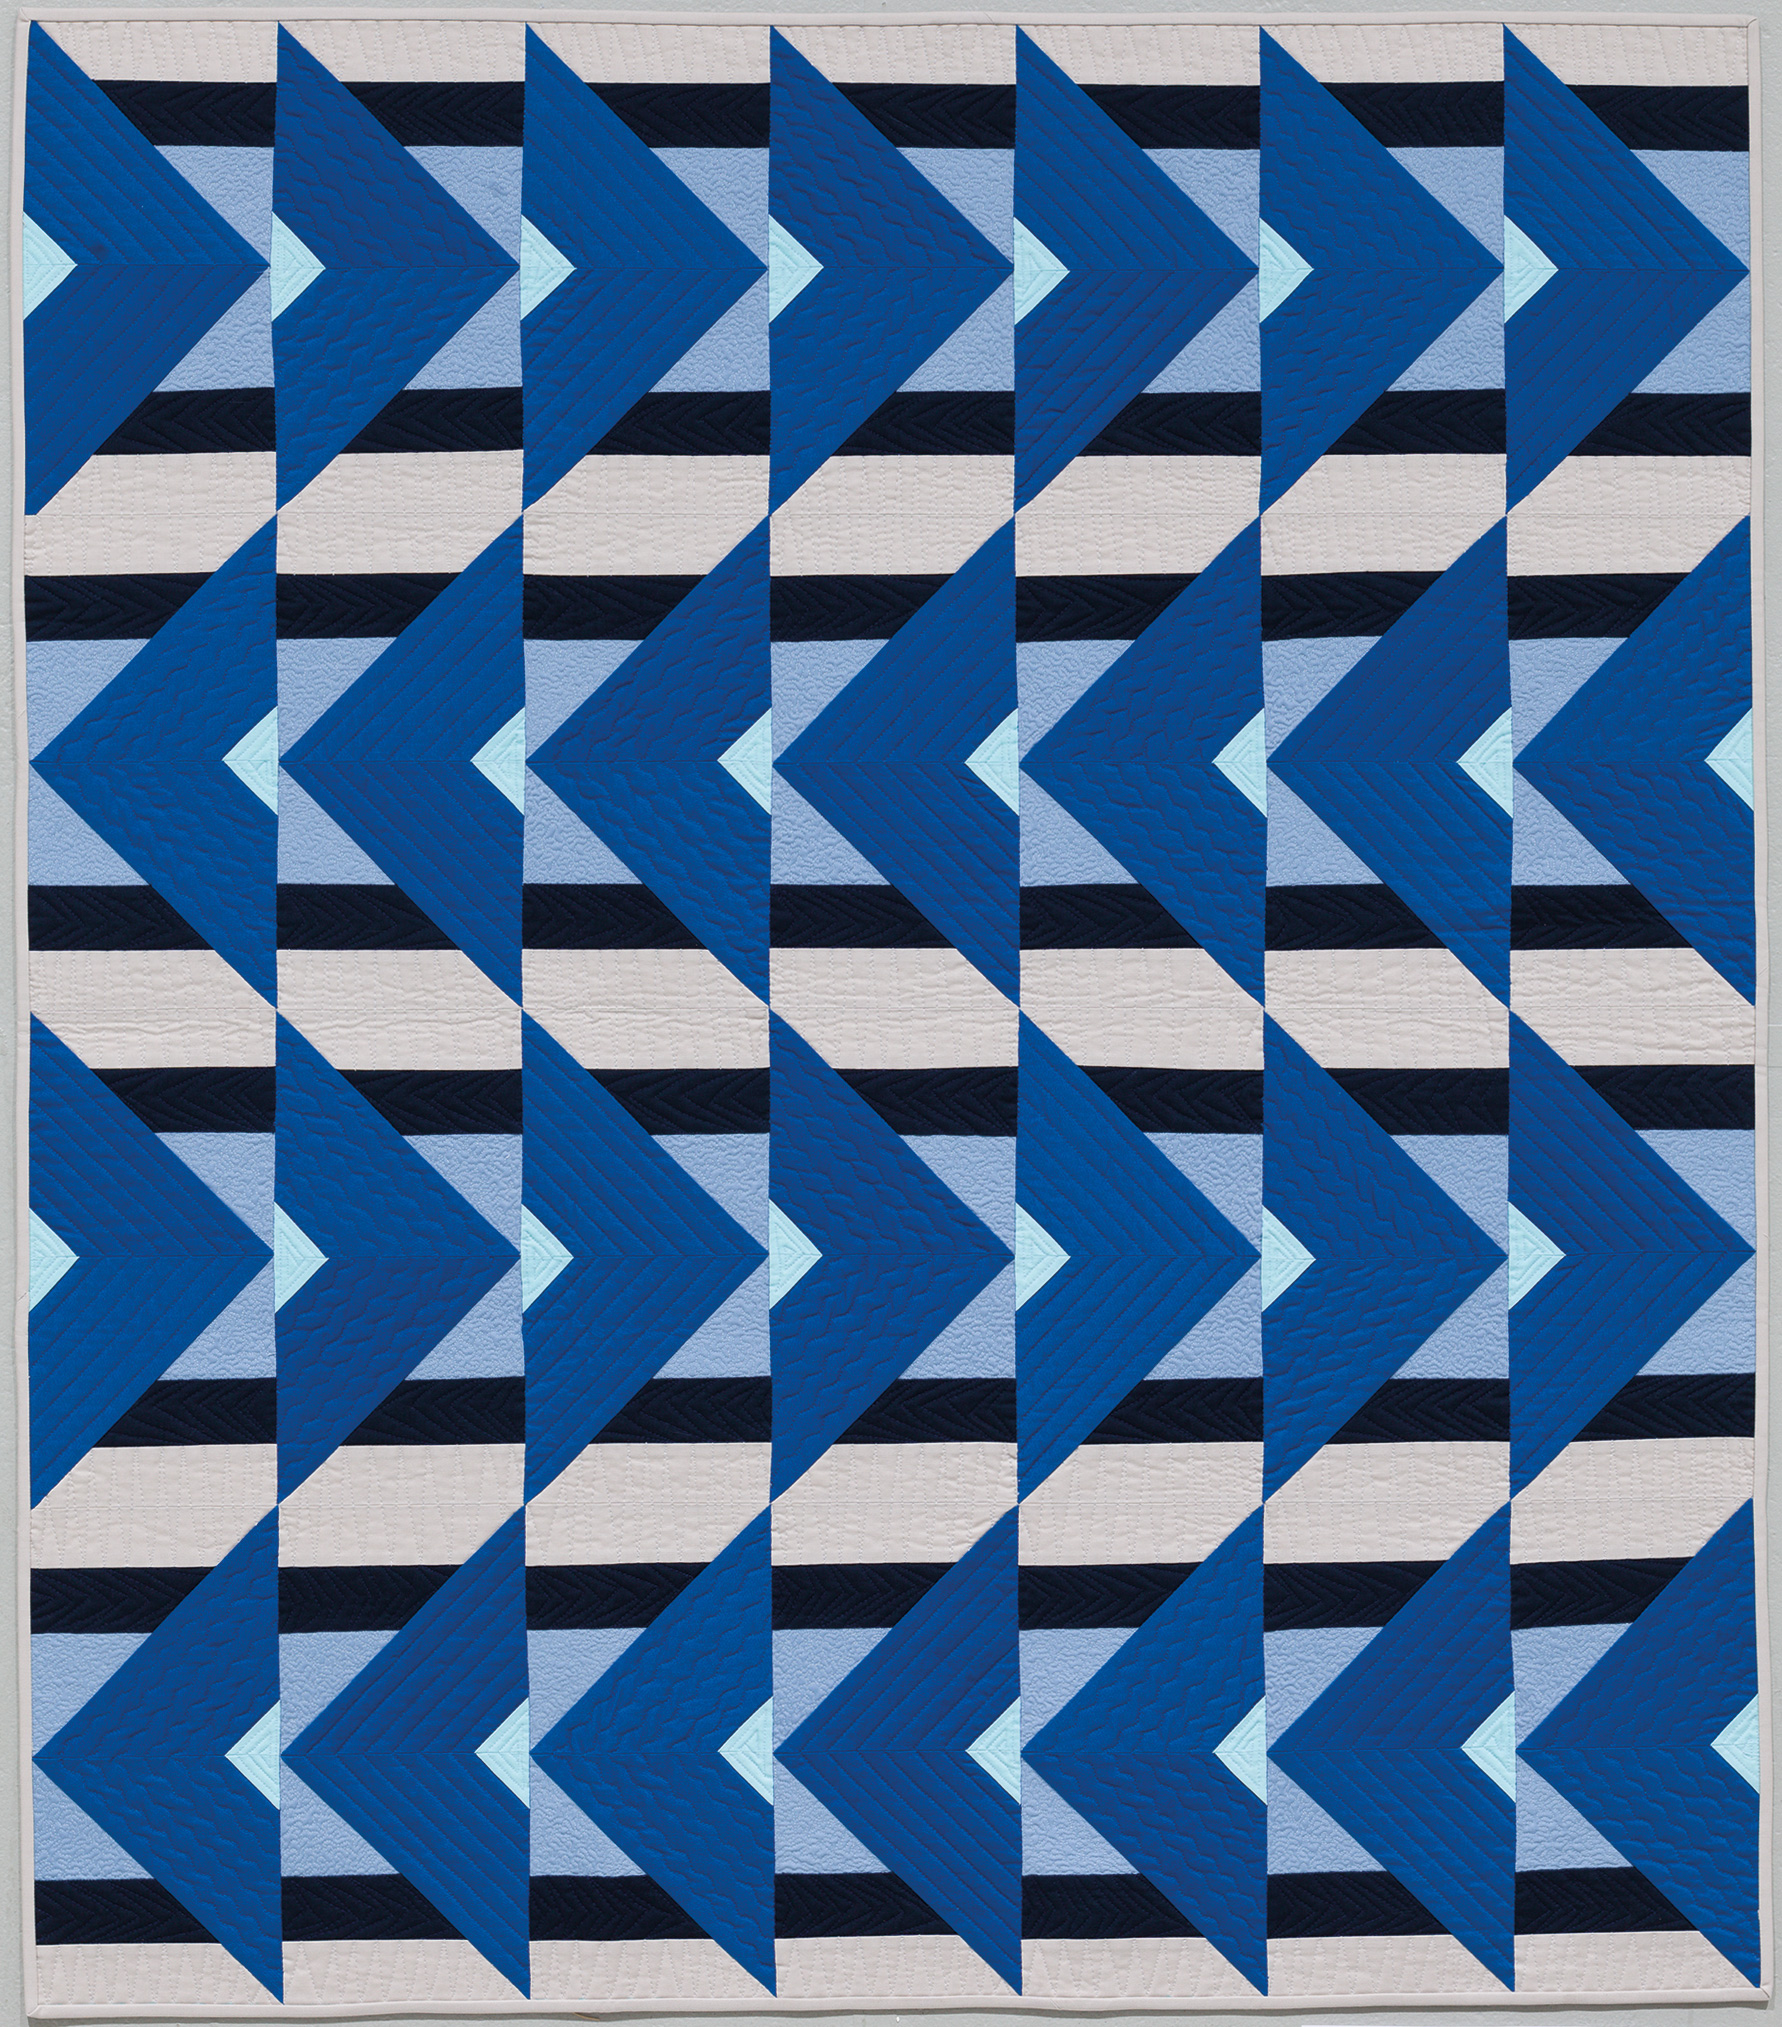
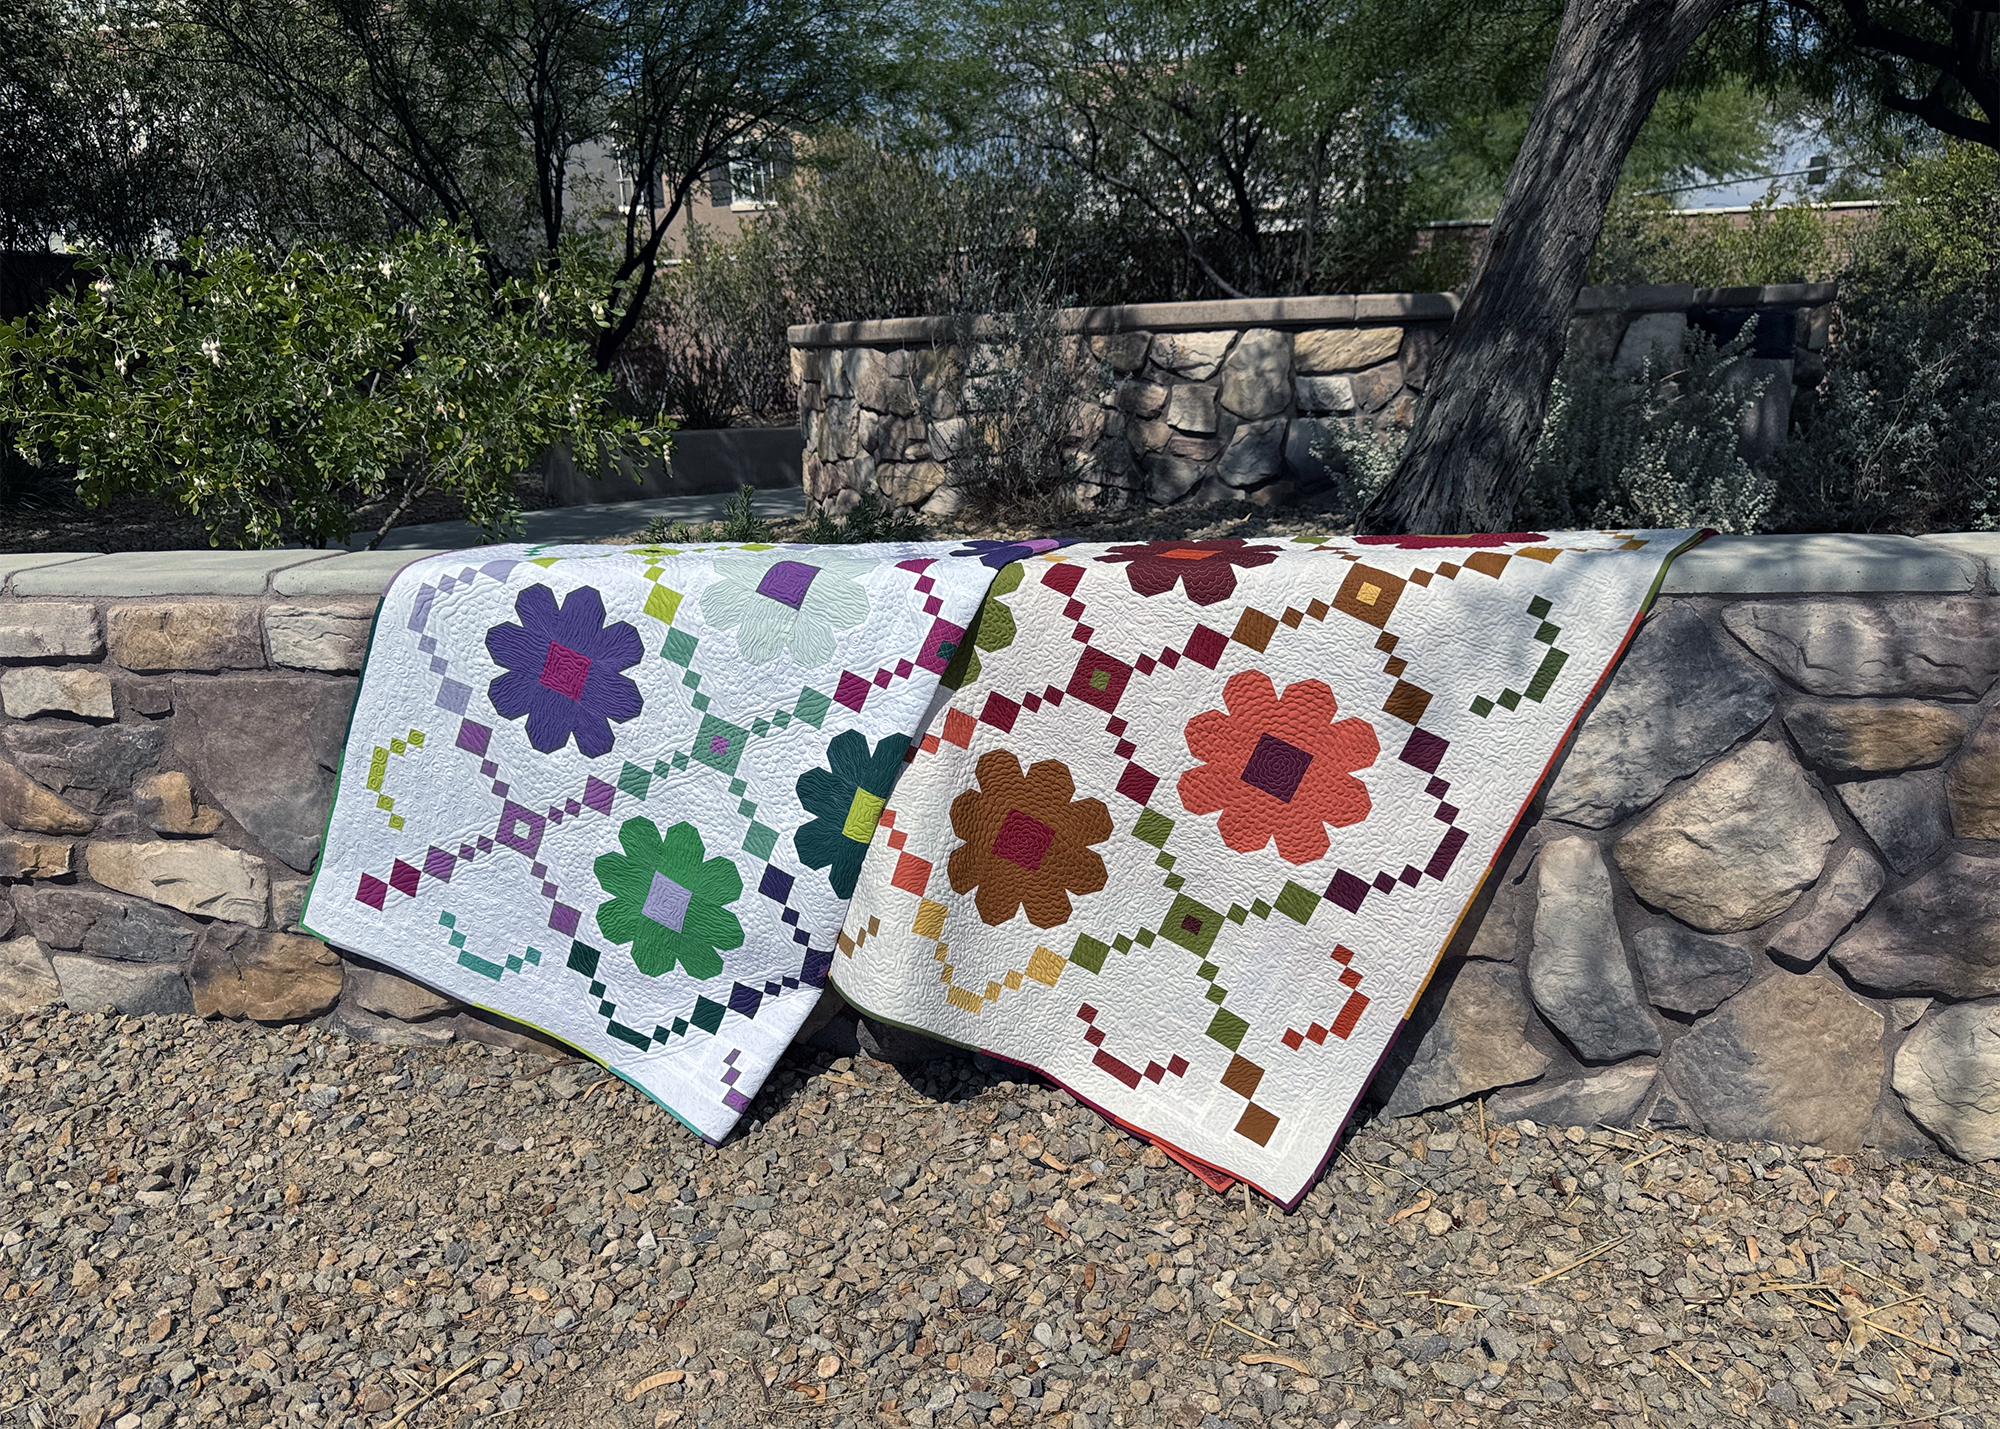
Daisy Chain – Autumn Colorway
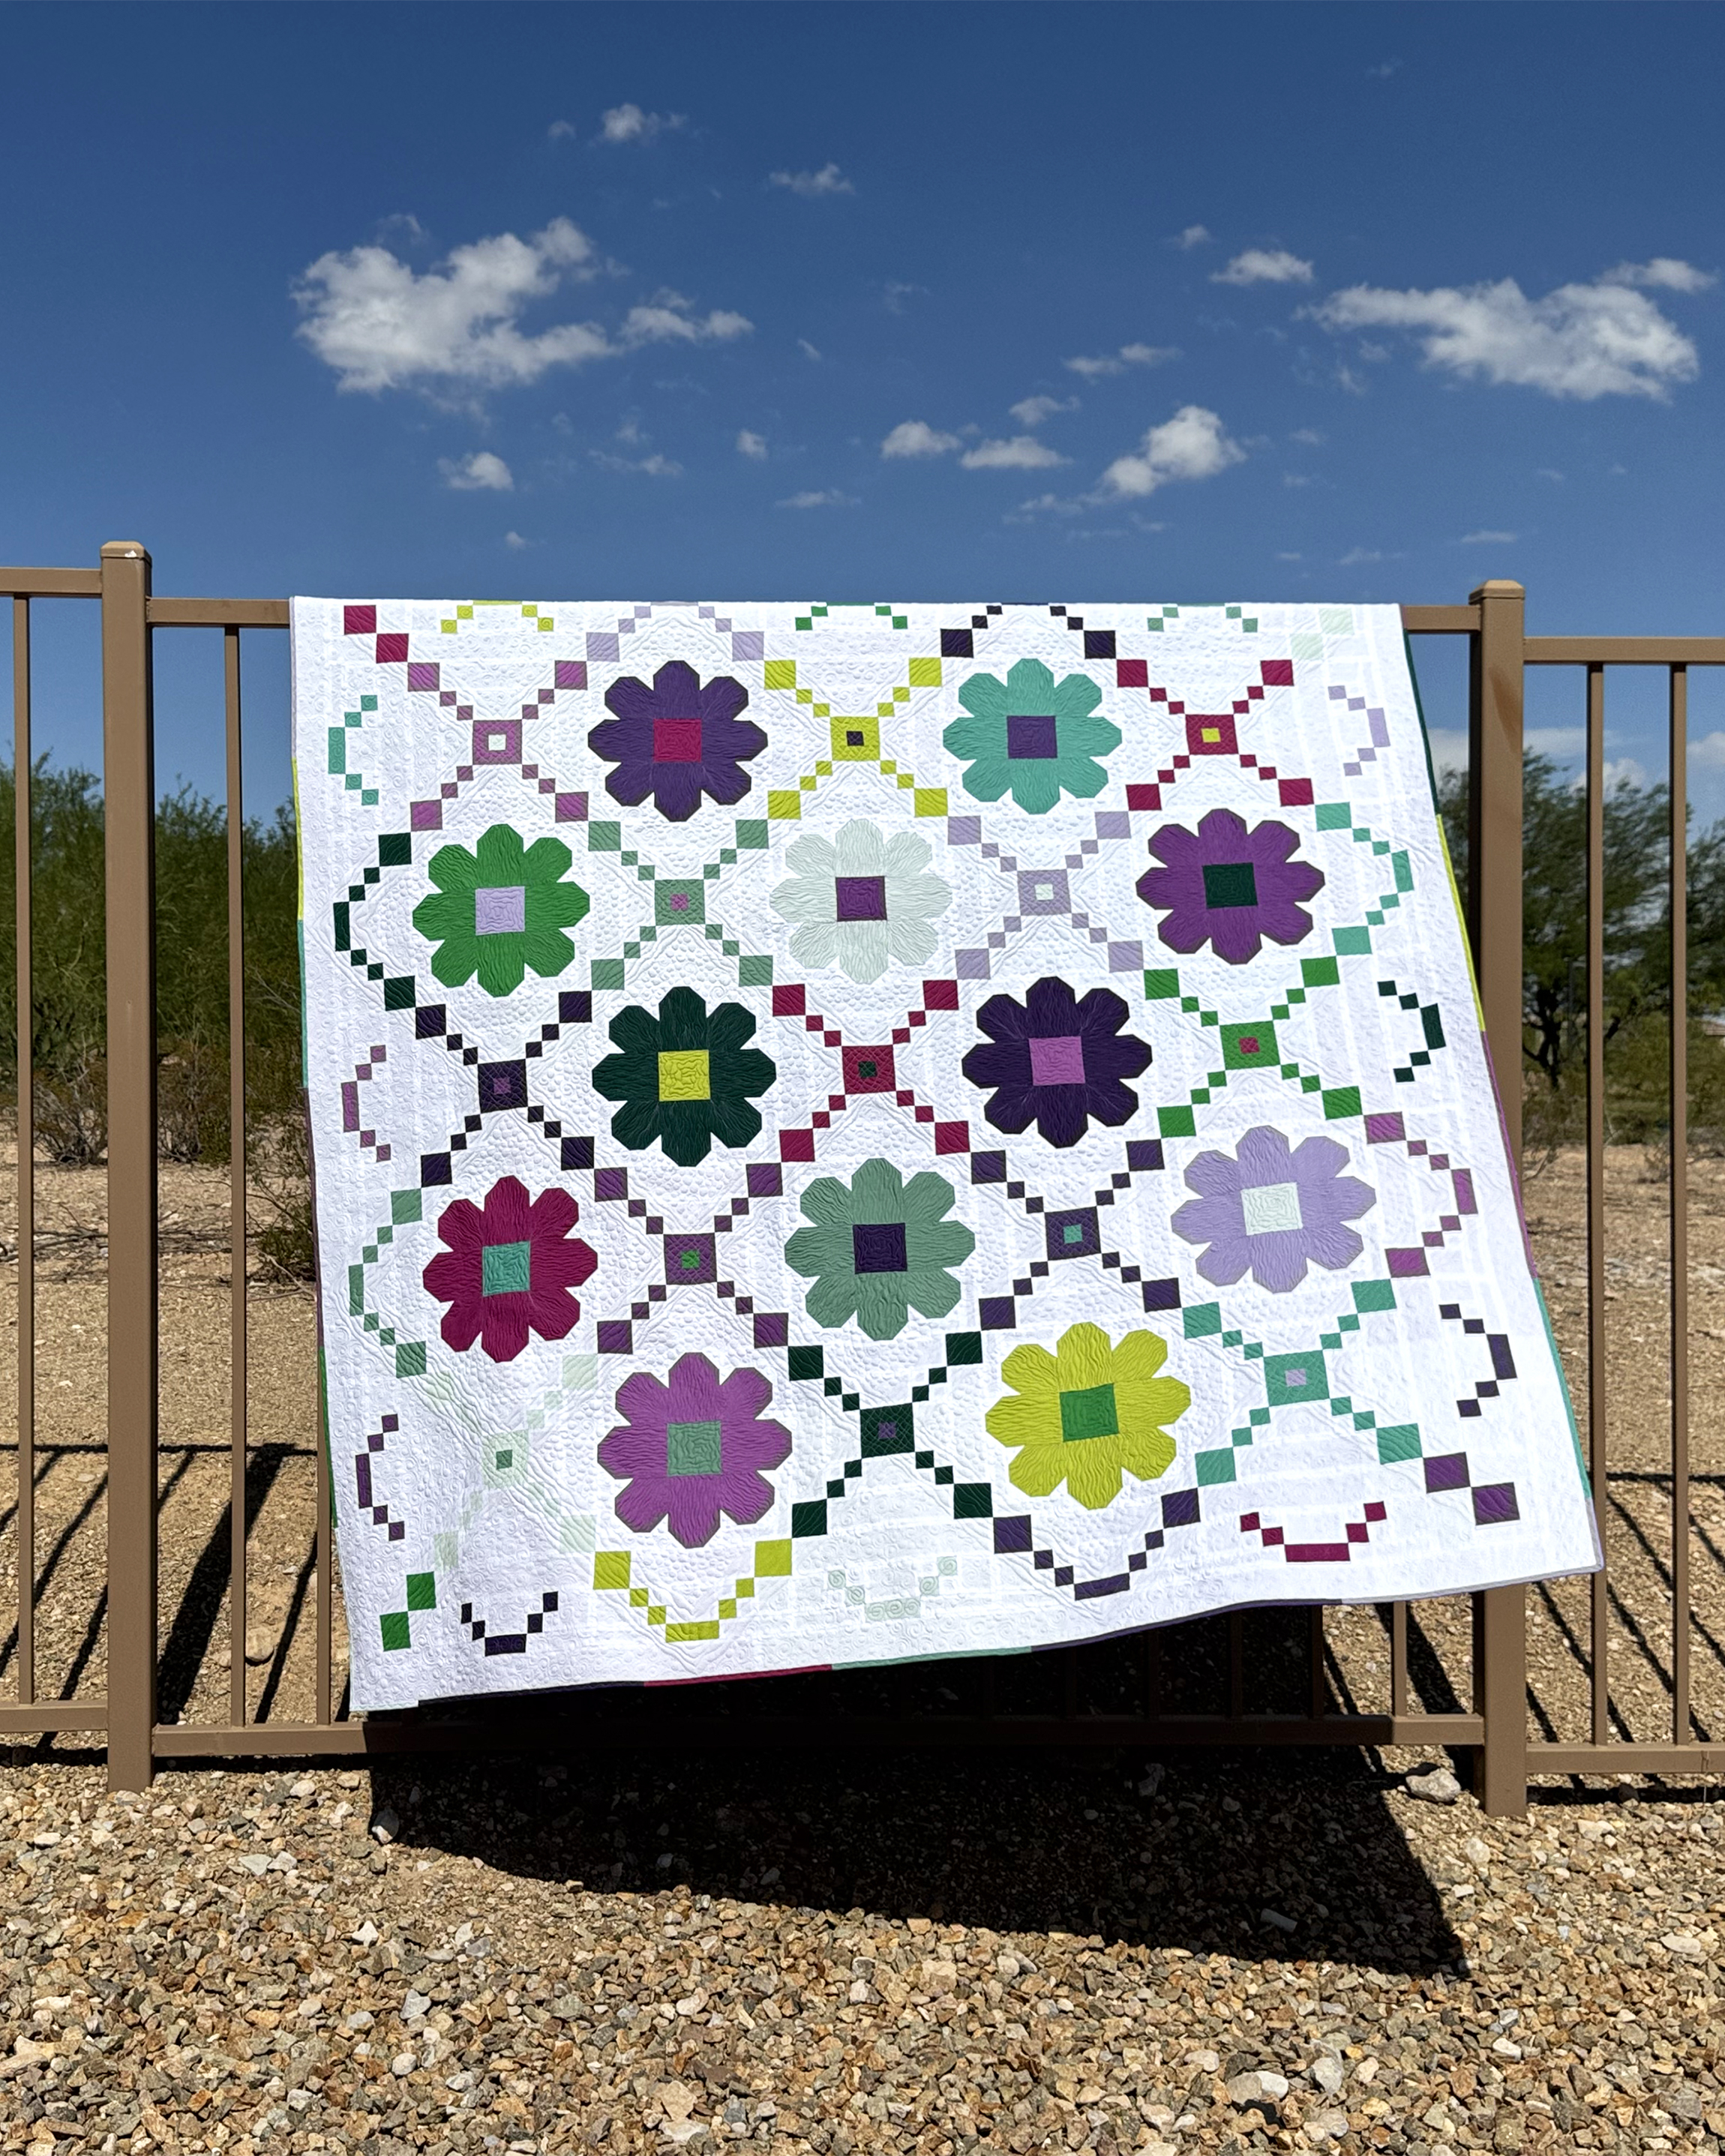
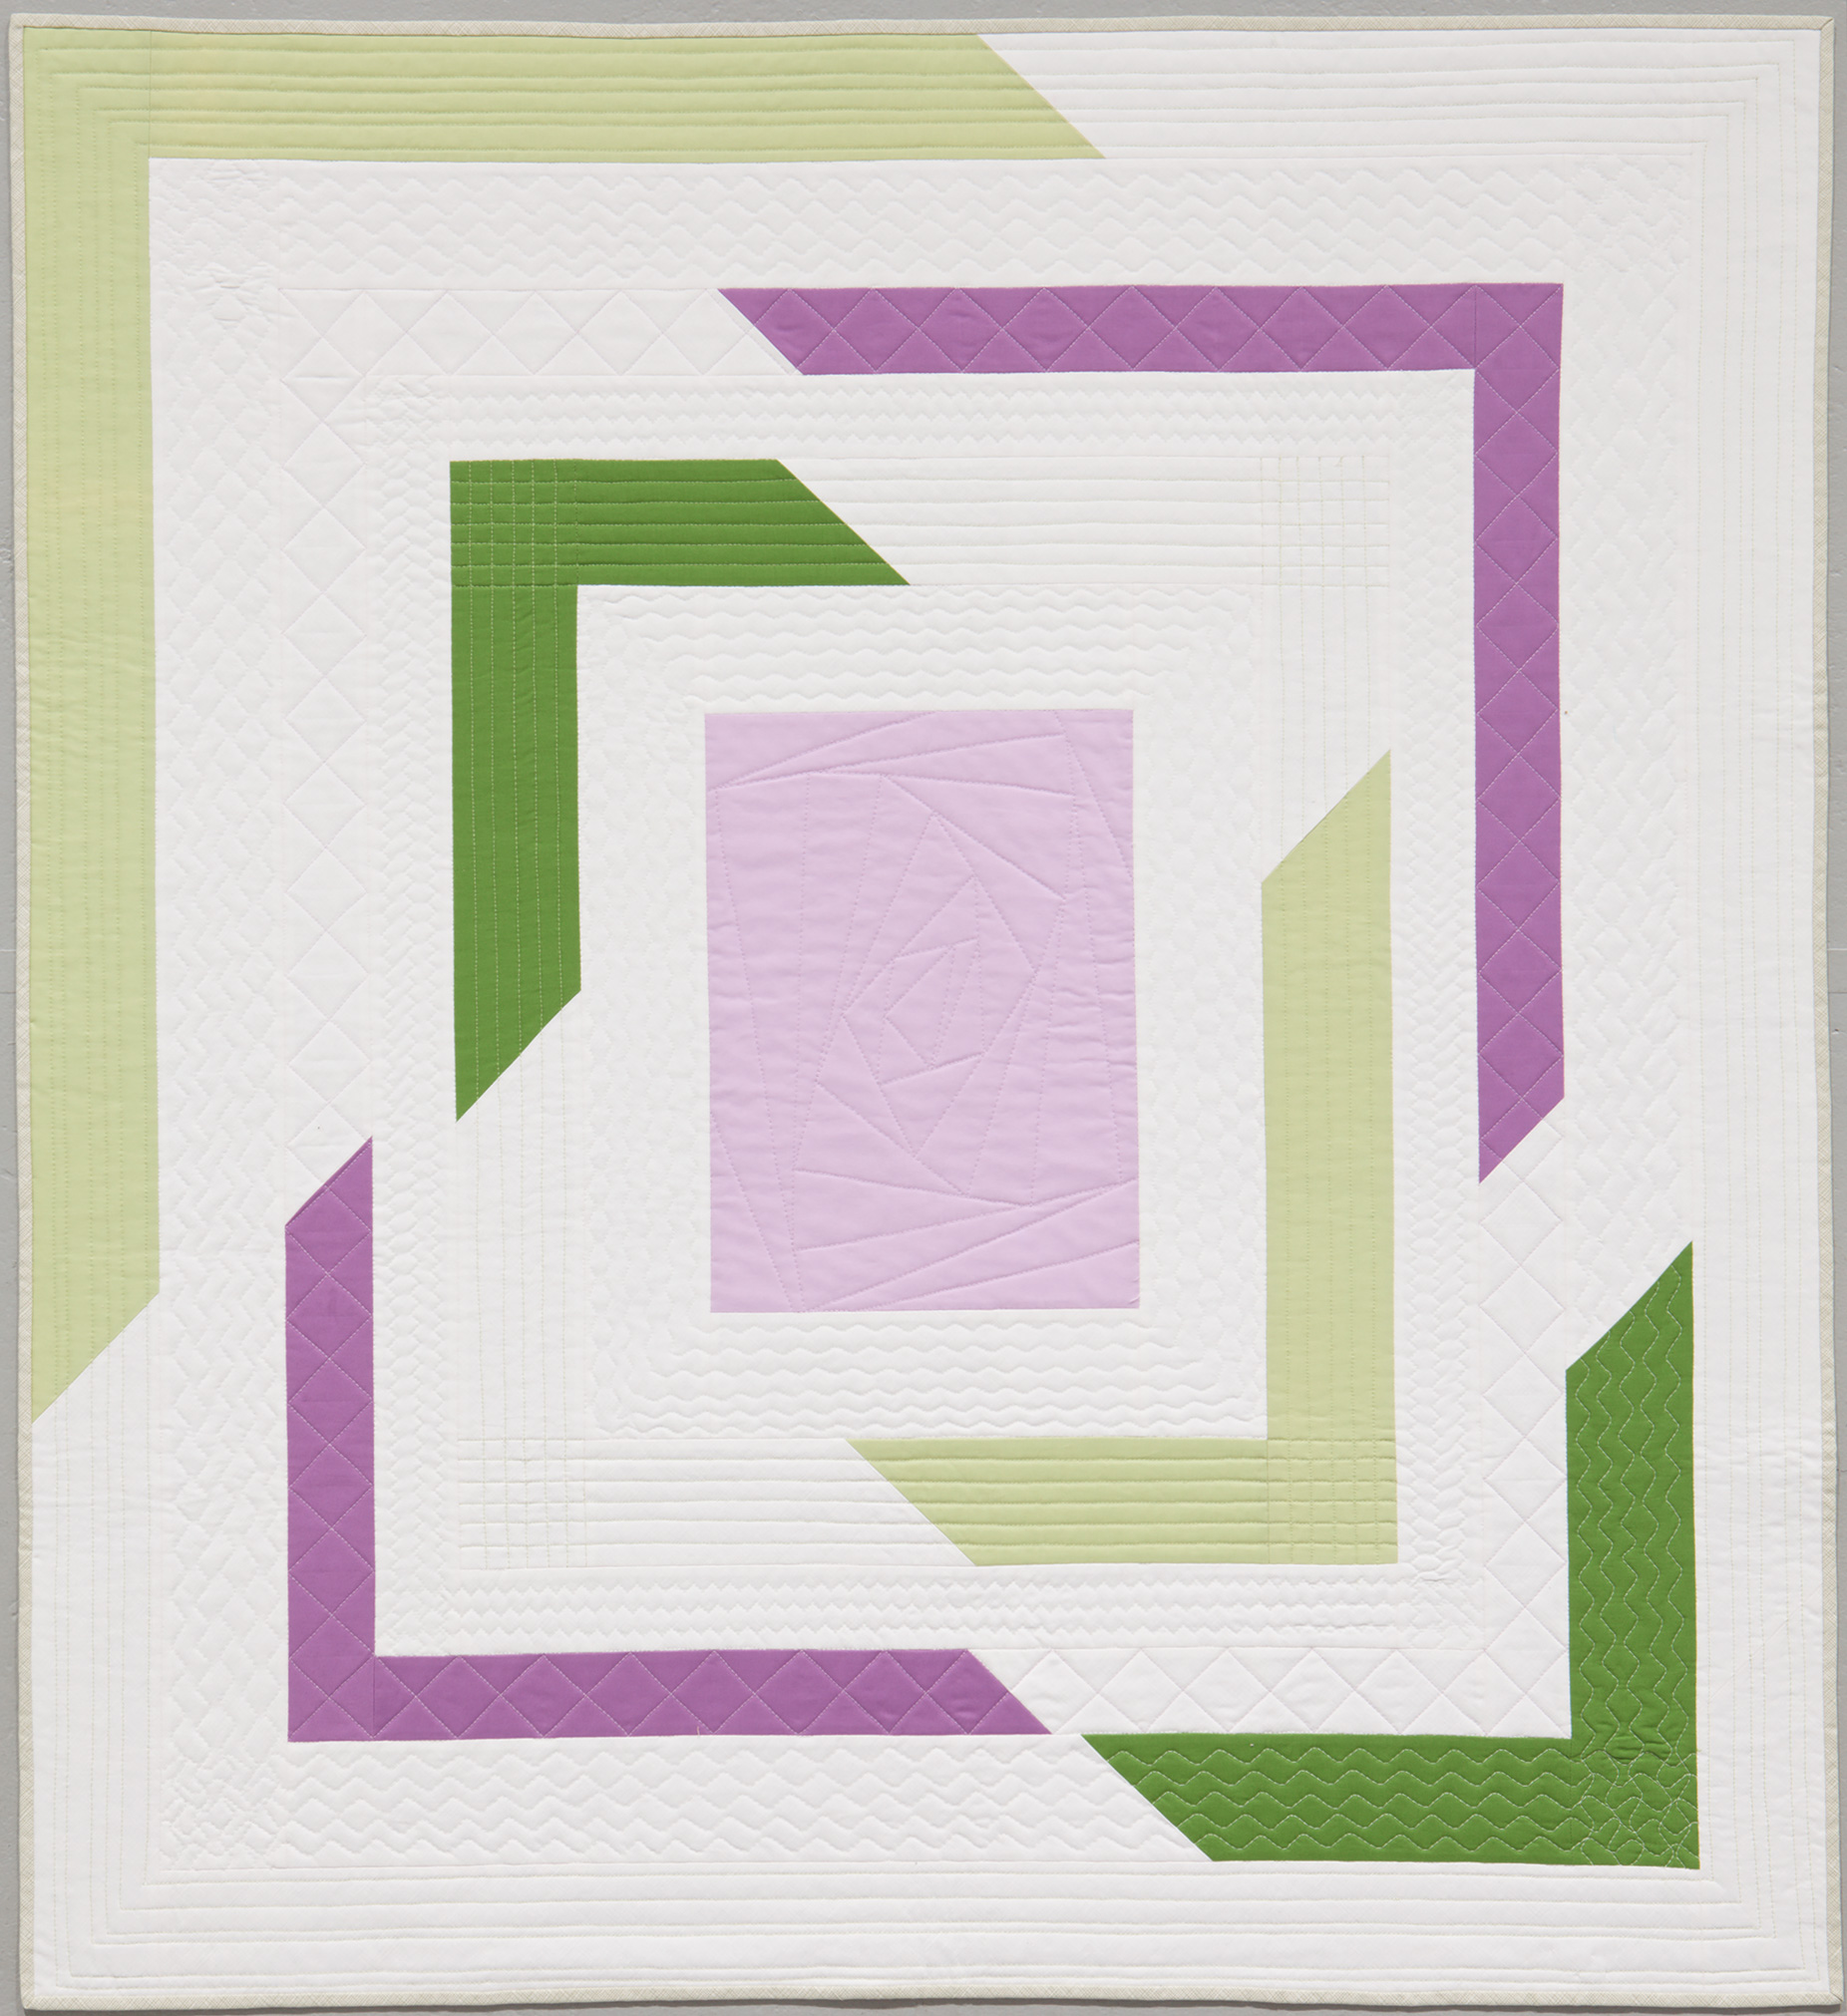
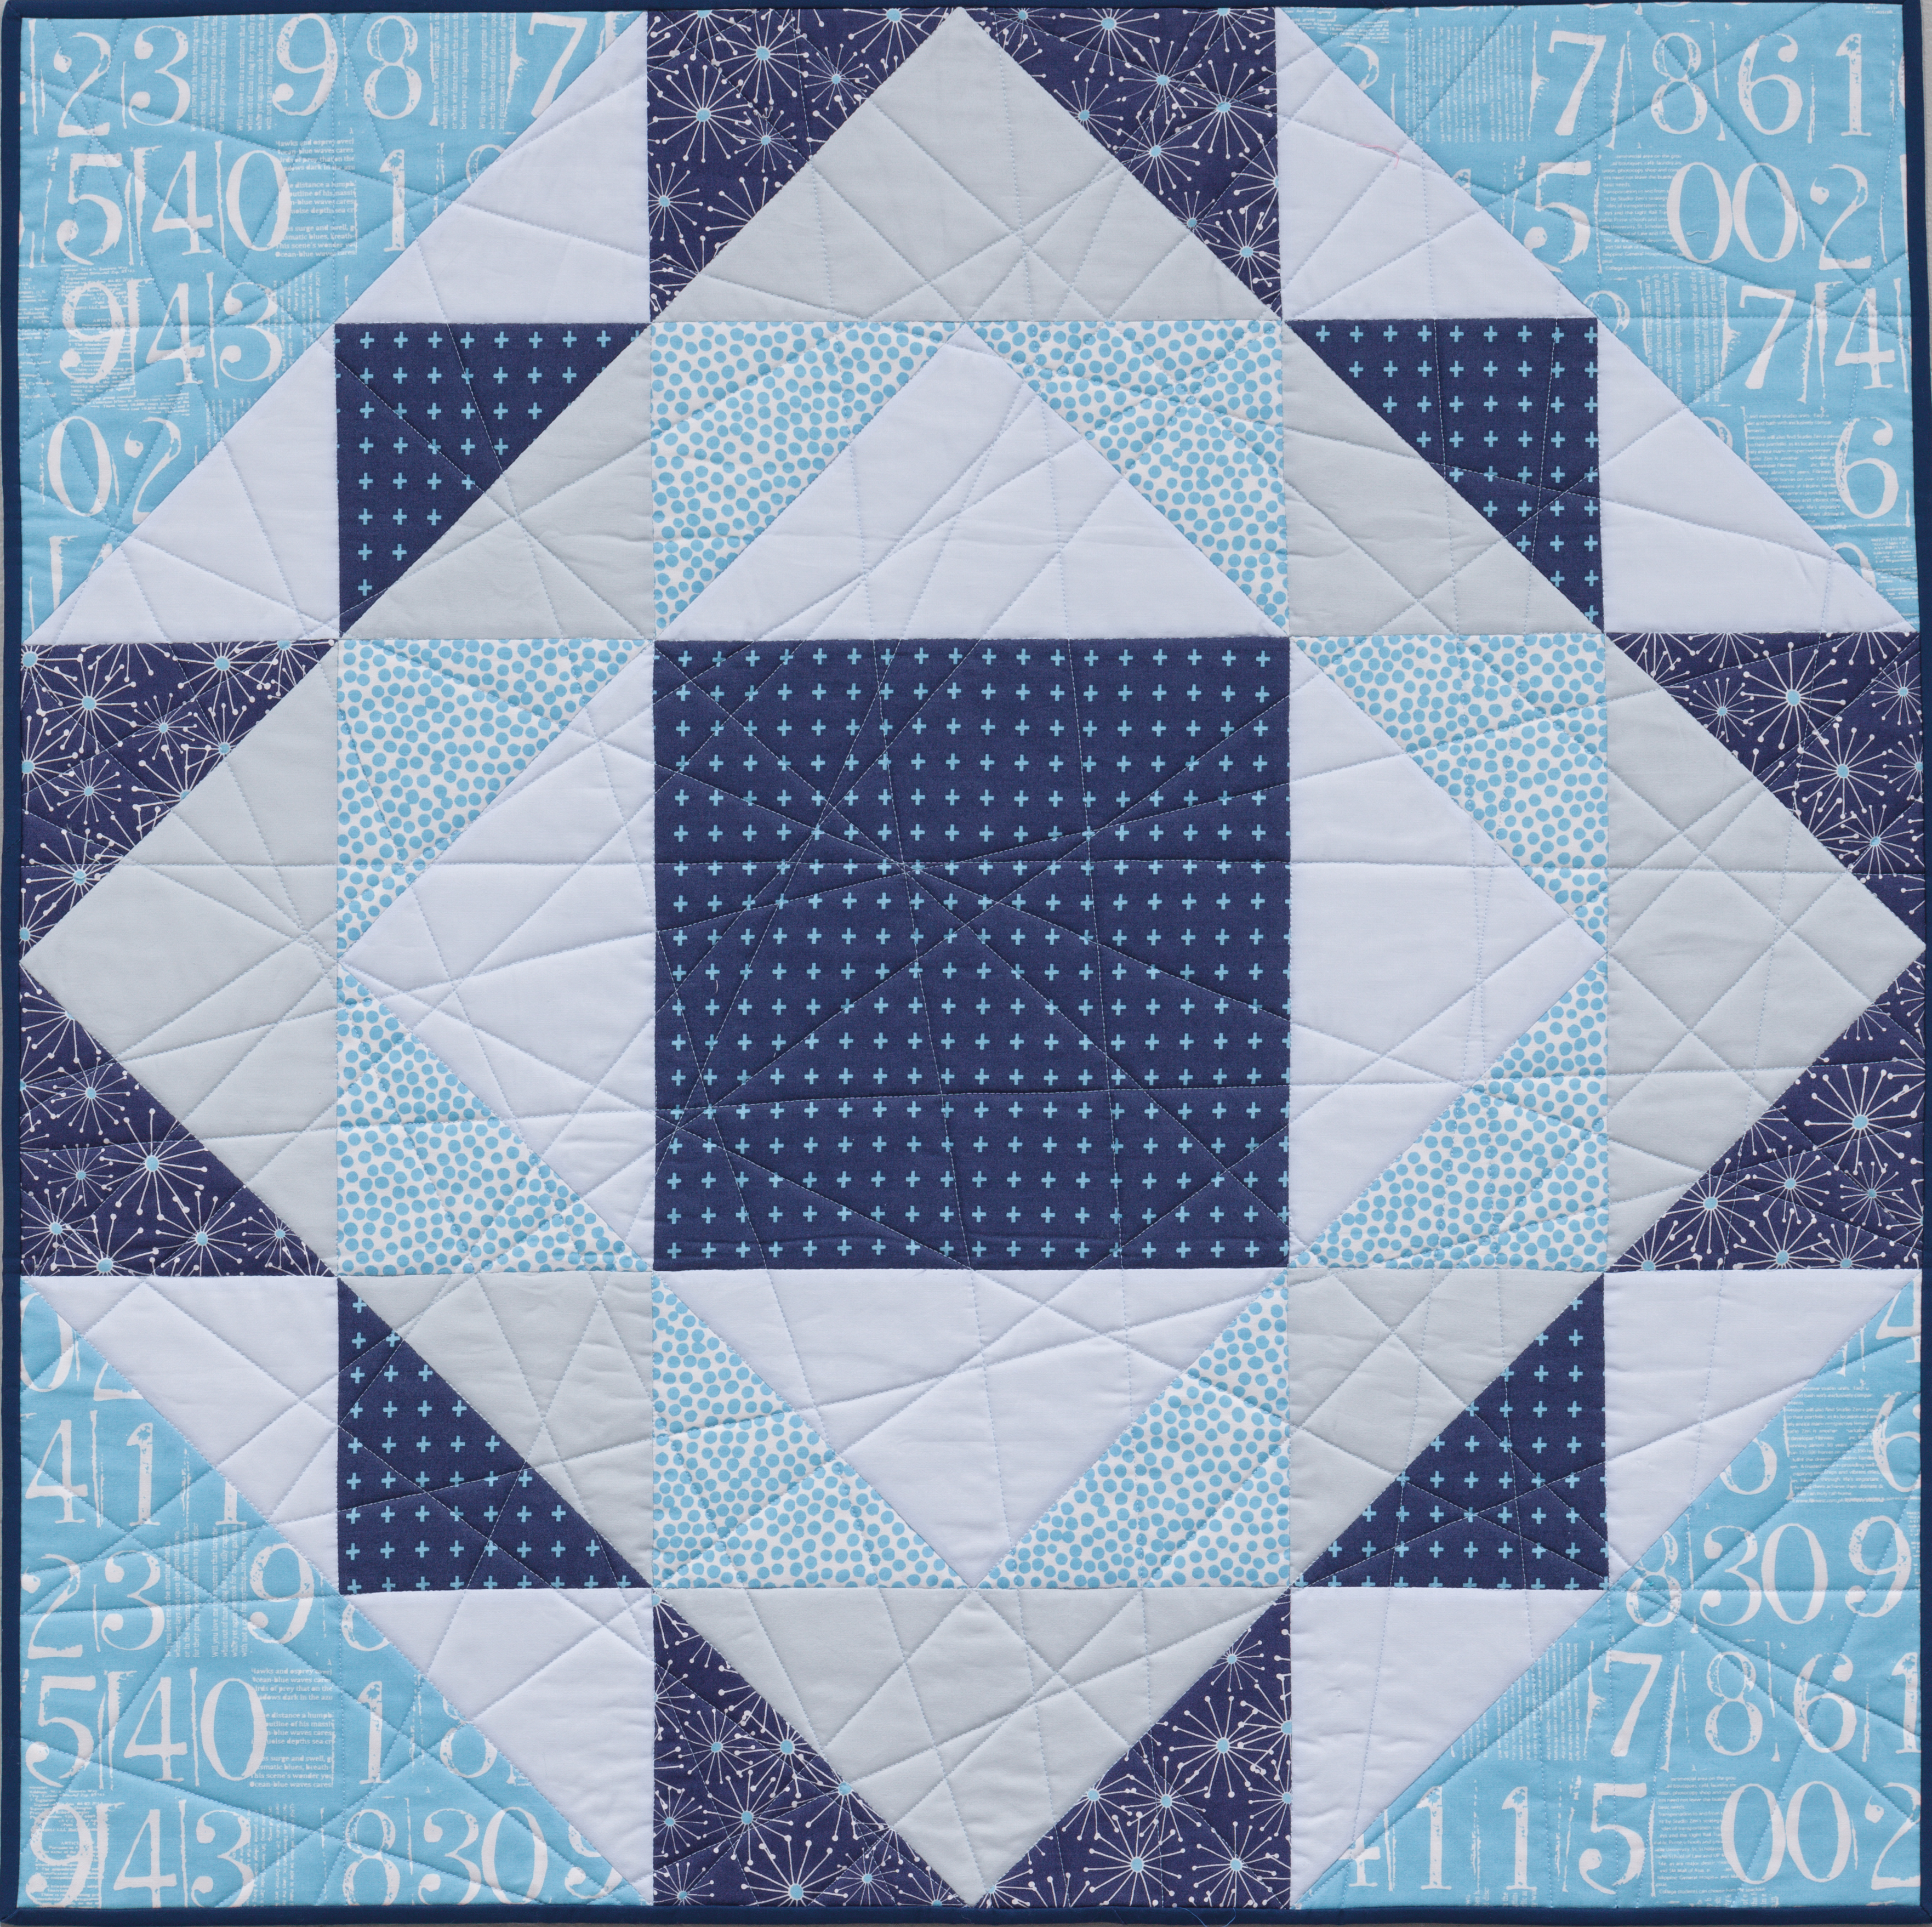
Daisy Chain – Purple Vibrations Colorway
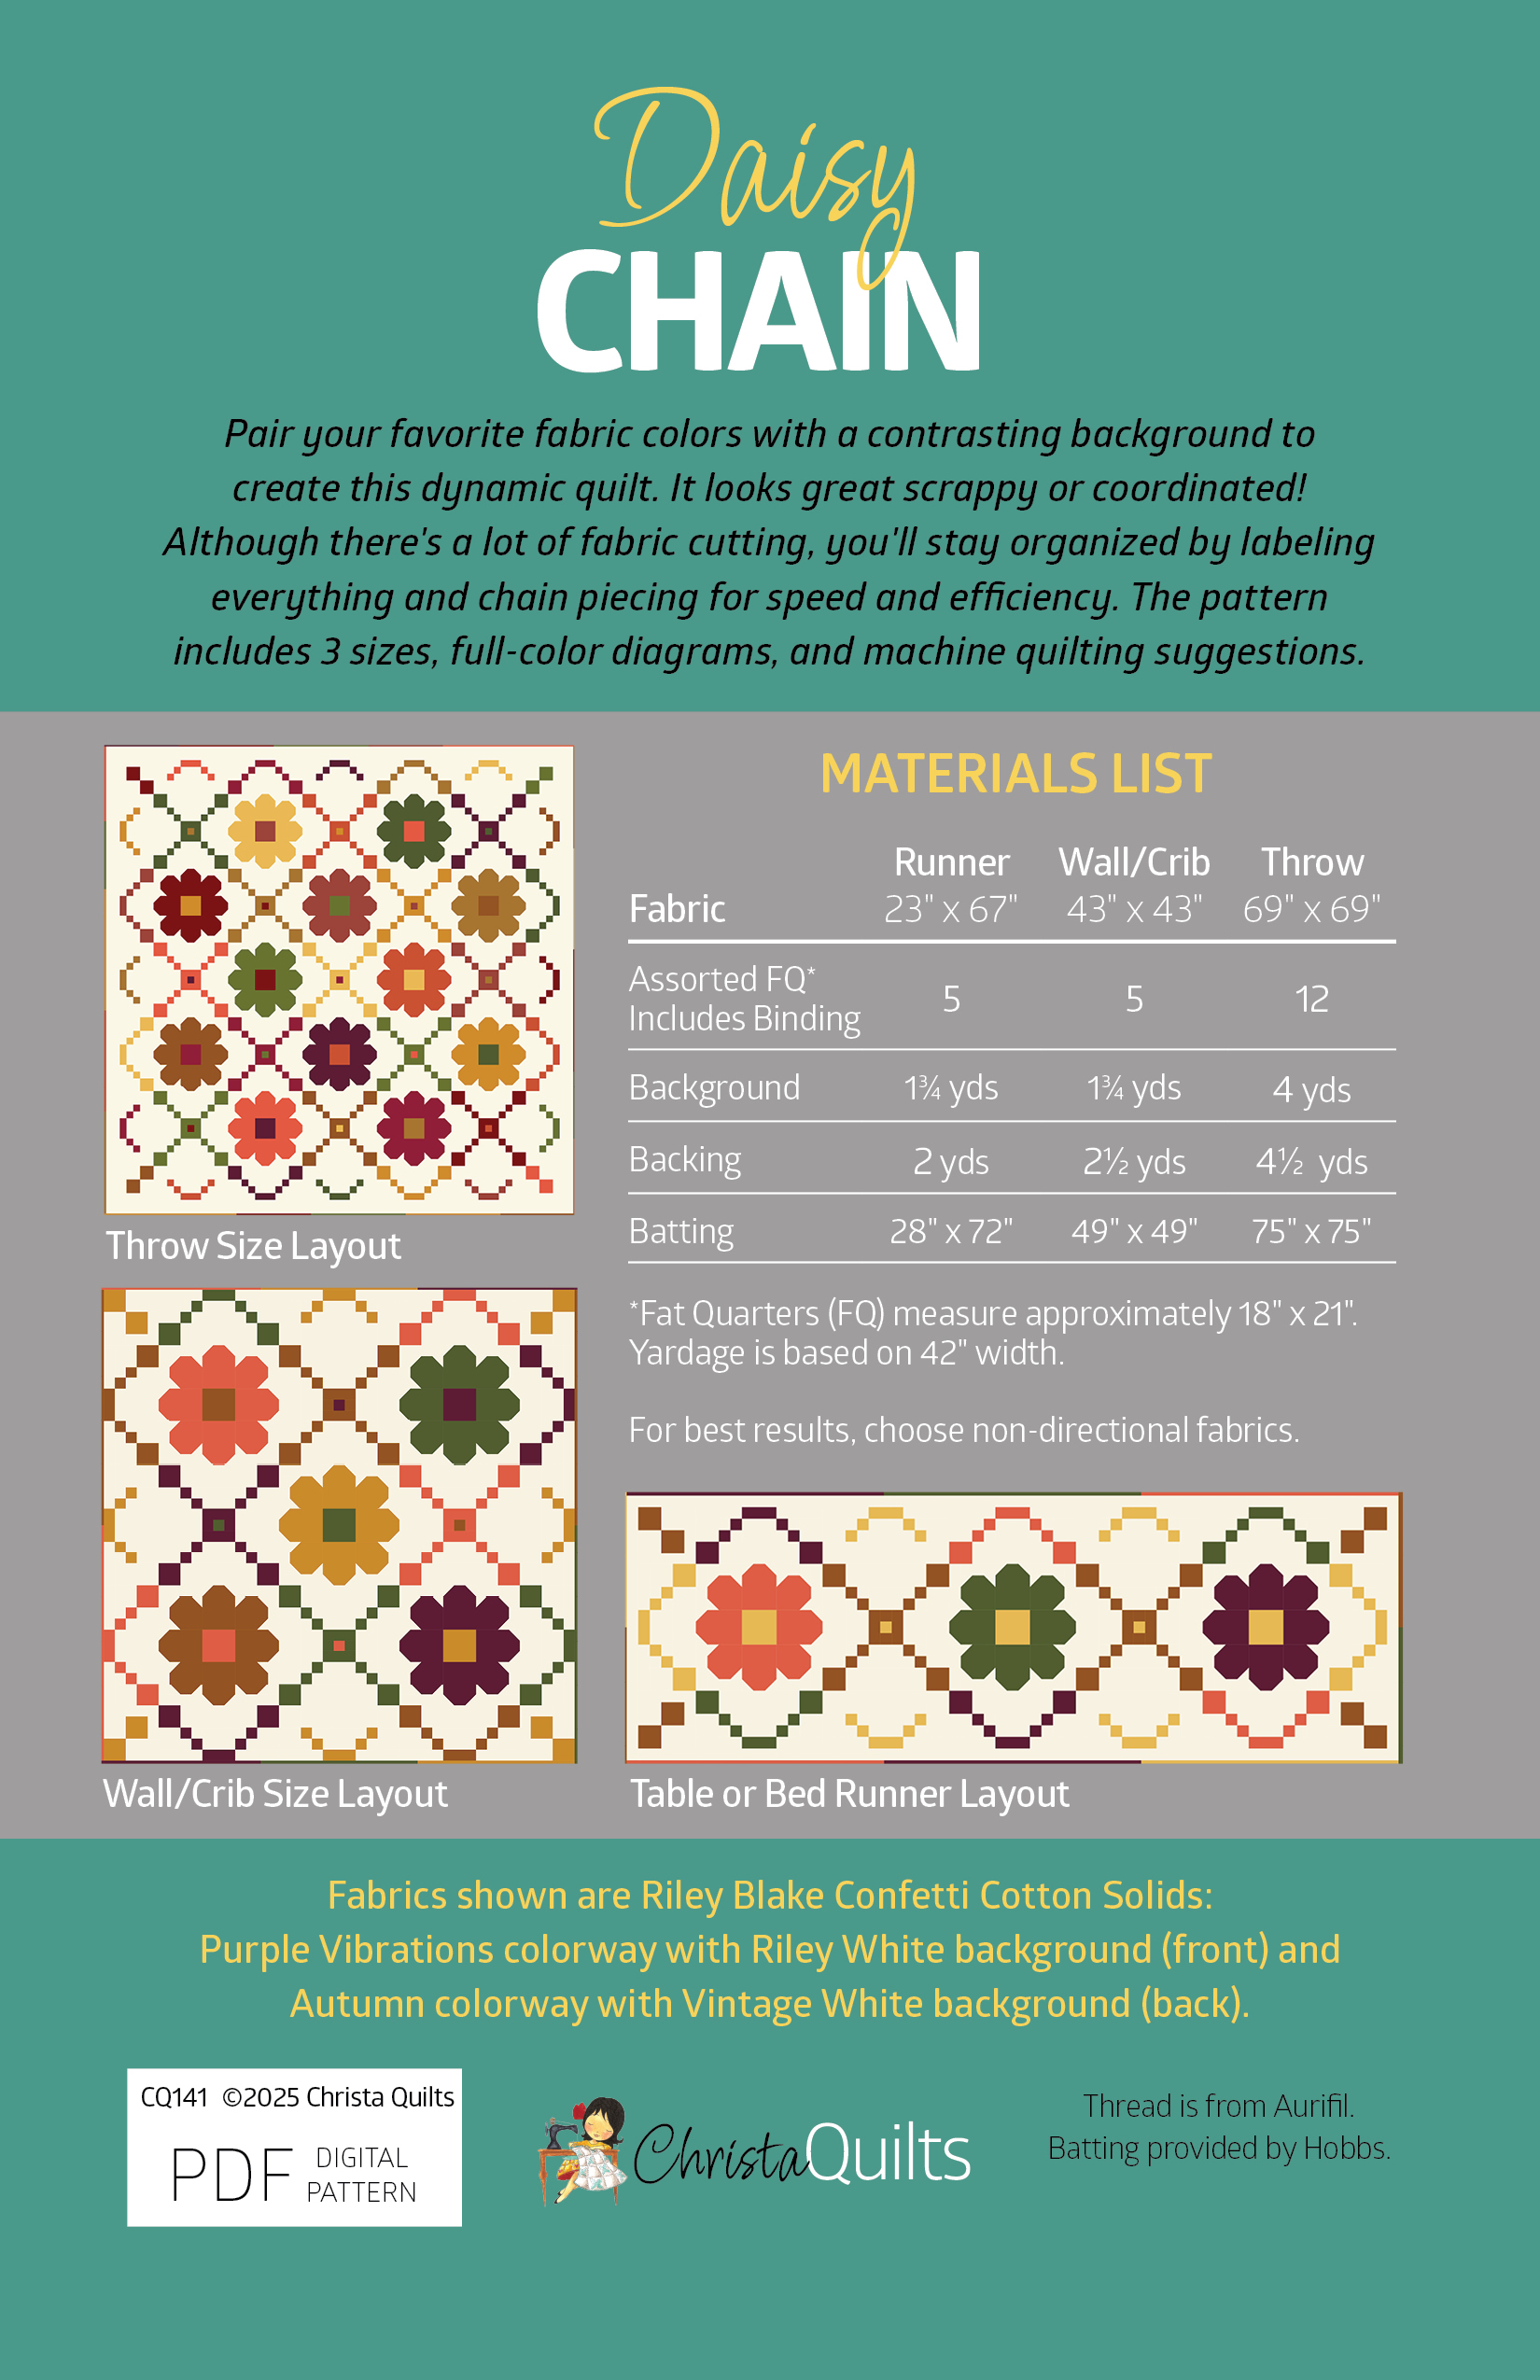
I made both versions of this quilt using fat quarters of Riley Blake Designs’ Confetti Cotton solids. The throw sizes shown here are made with 12 fat quarters plus 4 yards background, and the leftovers form a scrappy binding. Color selection is super easy for this quilt – just grab your favorite fabrics and pair them up with a highly contrasting background and you are good to go!!
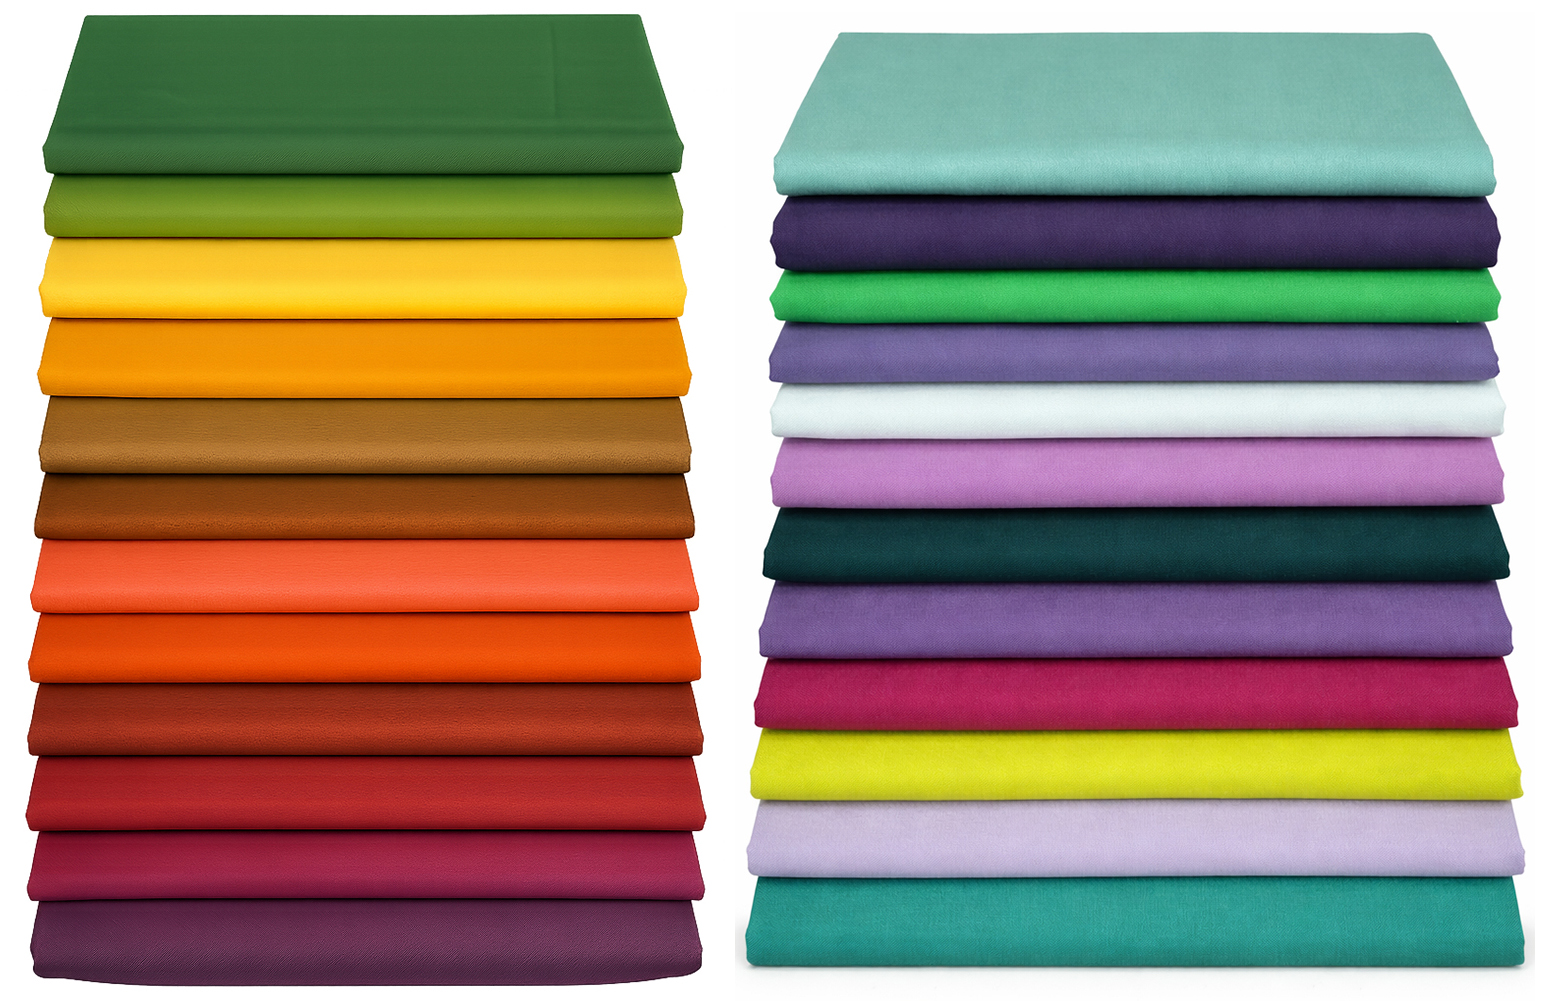
I used fat quarters in the Autumn & Purple Vibrations Colorways for my Quilts
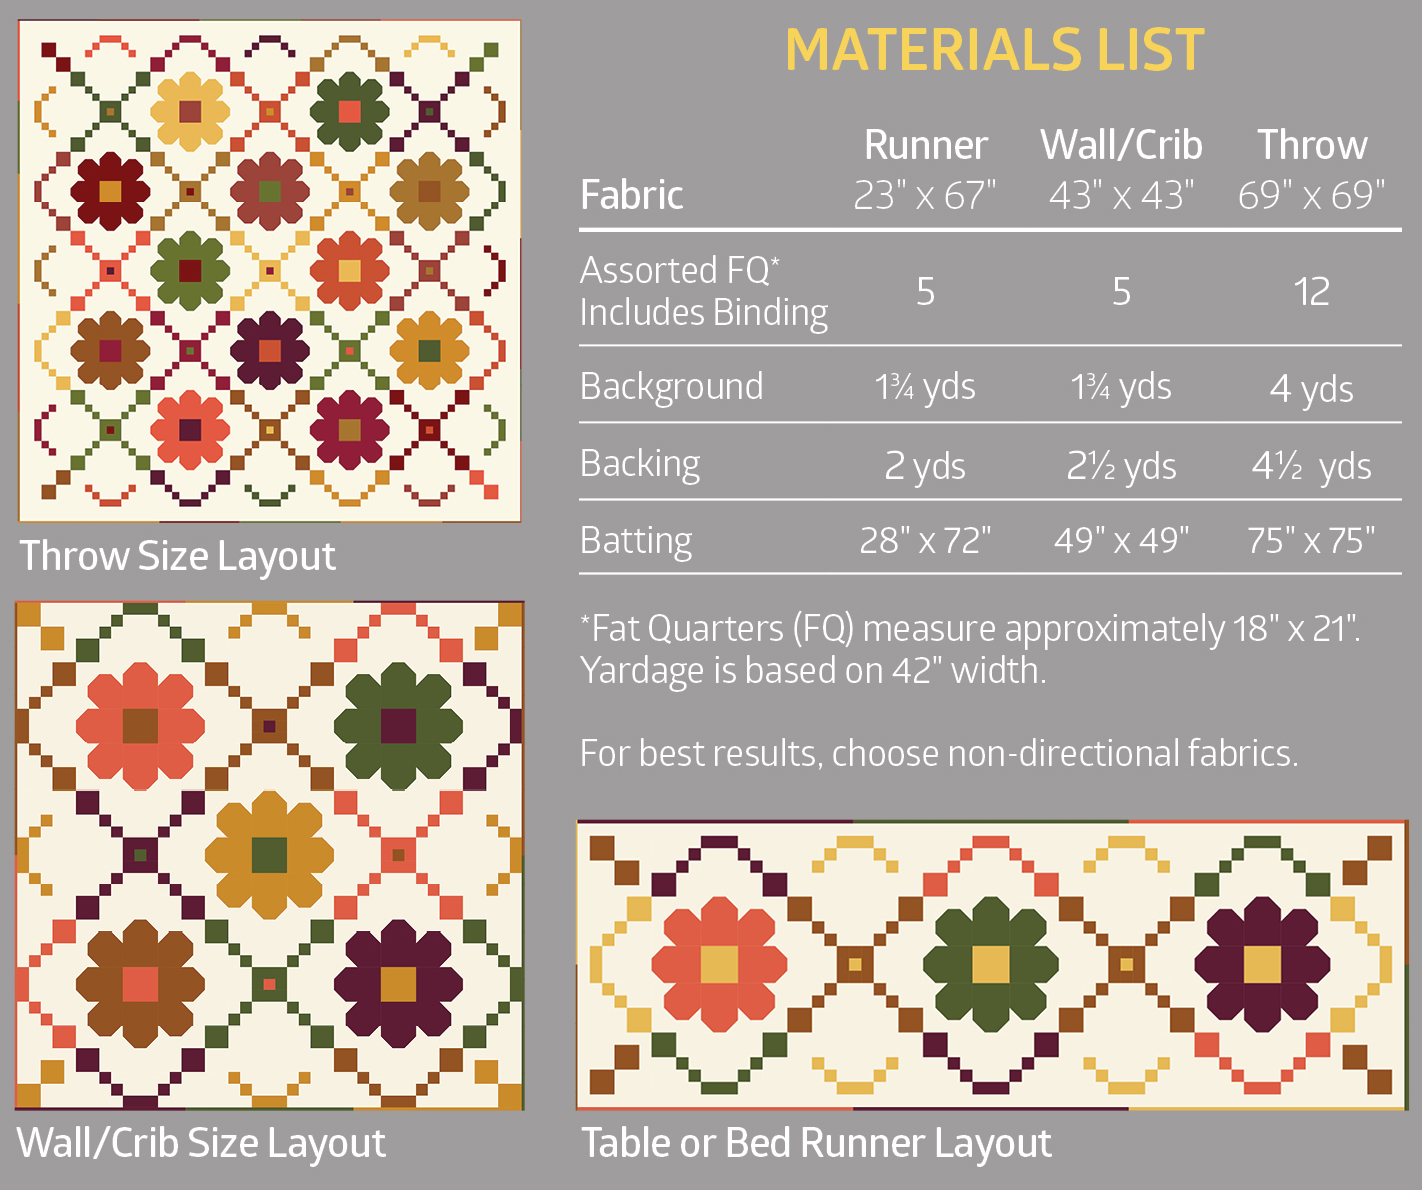
Here’s a the complete supply list so you can make this quilt in 3 different sizes. It’s a LOT of cutting, but it’s all just straight seams with traditional piecing techniques. So there’s no specialty rulers required. I do recommend getting some small label stickers though so you can label all your pieces to stay organized.
Quilt Along Schedule
Throughout the quilt along I will refer you to specific parts of the pattern and will share lots of in progress pics and bonus tips. When it’s time to machine quilt, I’m going to share 2 bonus videos showing how I quilted each version. Hopefully this will inspire you get it done!! After all, machine quilting is my favorite part of the entire process, and there’s lots of room for experimentation and play in this quilt.
- Feb 27 – Week 1: Cutting
- March 6 – Week 2: Sewing the Daisy Blocks
- March 13 – Week 3: Sewing the Chain Blocks
- March 20 – Week 4: Sewing the Quilt Top
- March 27 – Week 5: Backing & Basting
- April 3 – Week 6: Quilting Option #1 – With Bonus Video Tutorial!!
- April 10 – Week 7: Quilting Option #2 – With Bonus Video Tutorial!!
- April 17 – Week 8: Binding to Finish
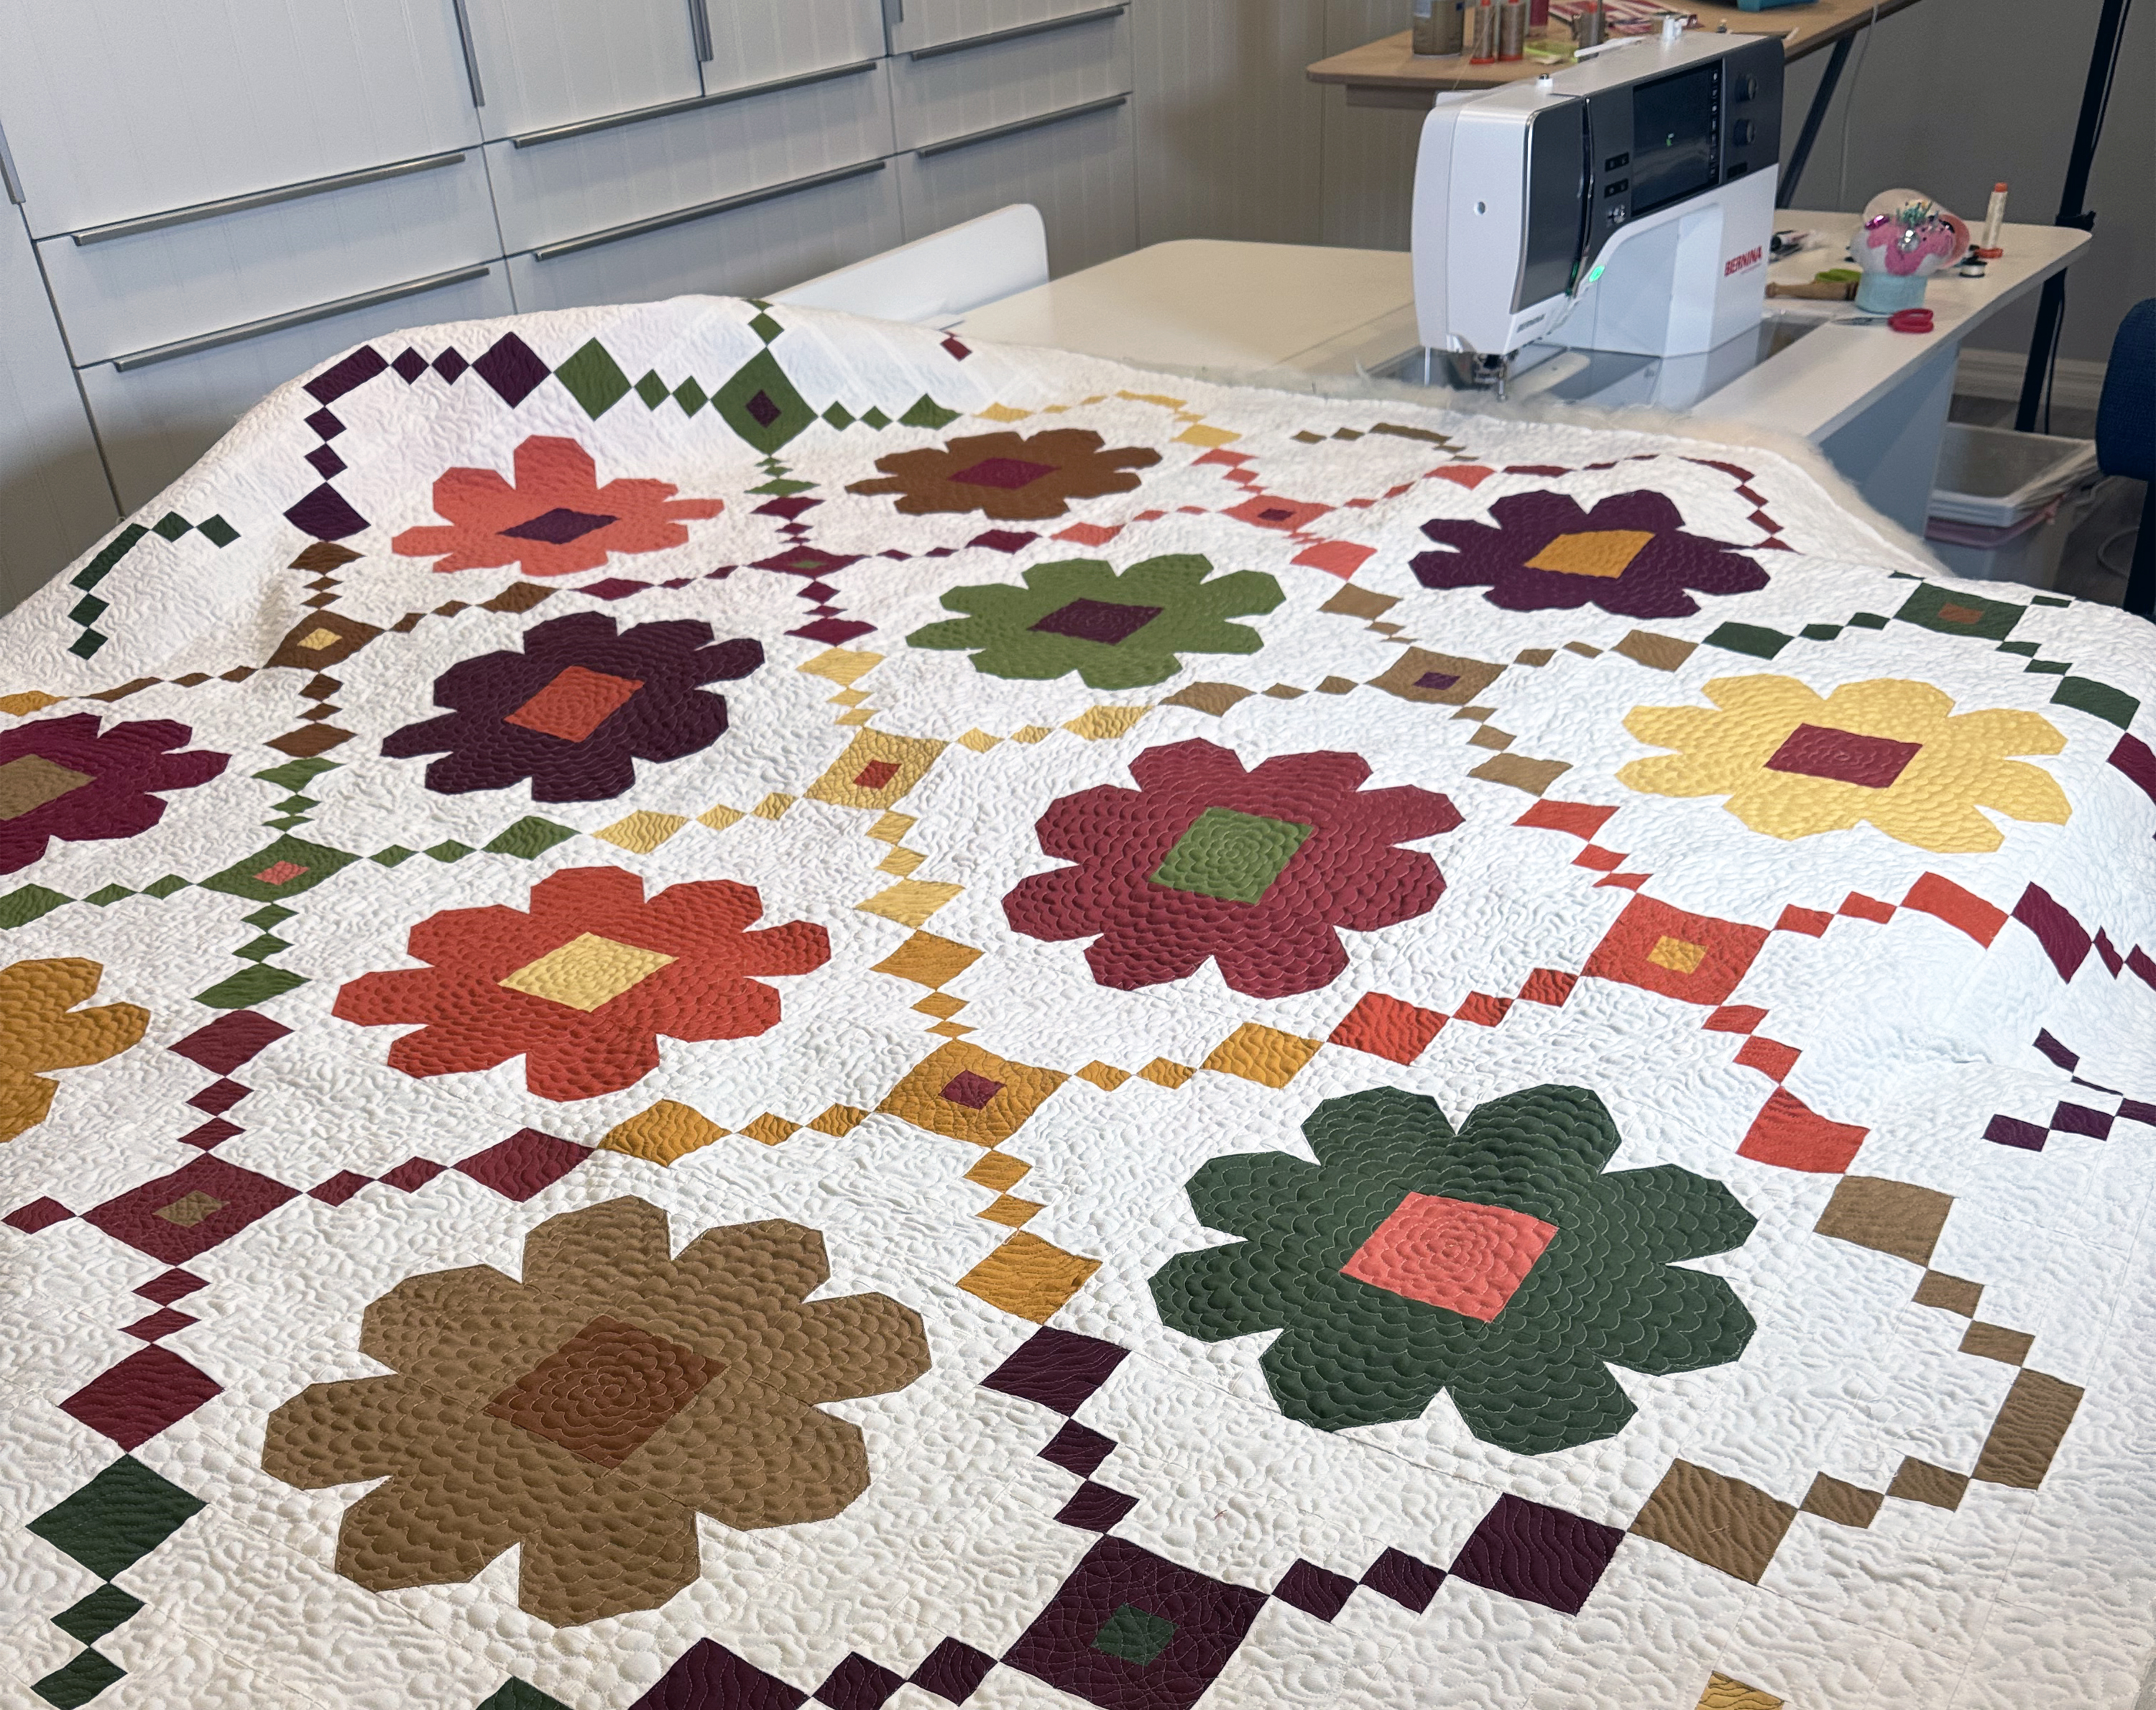
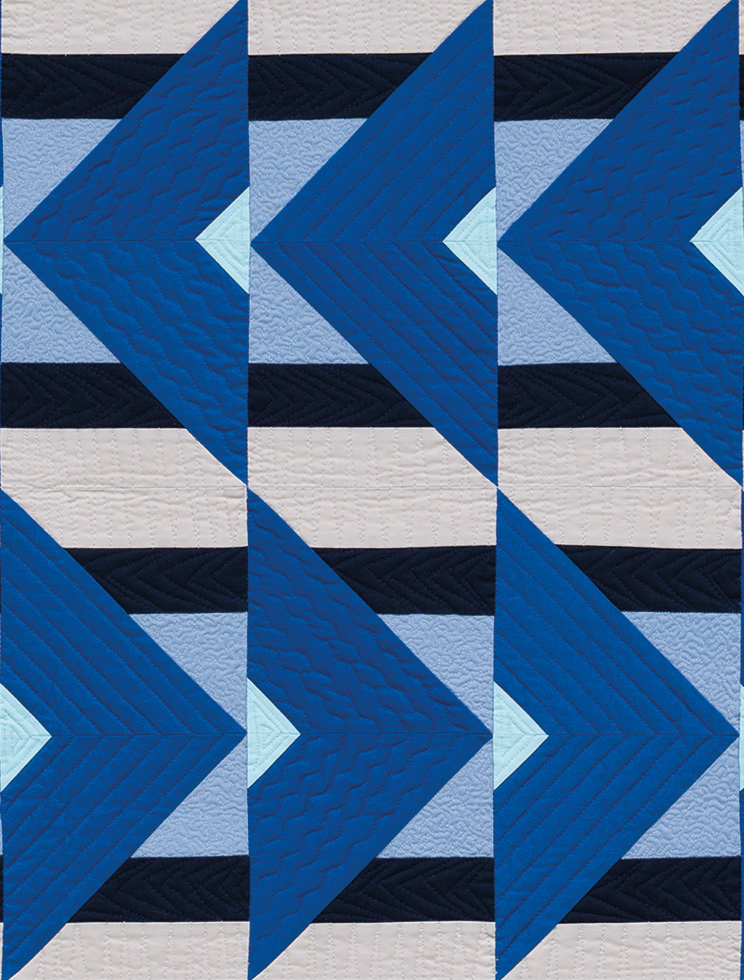
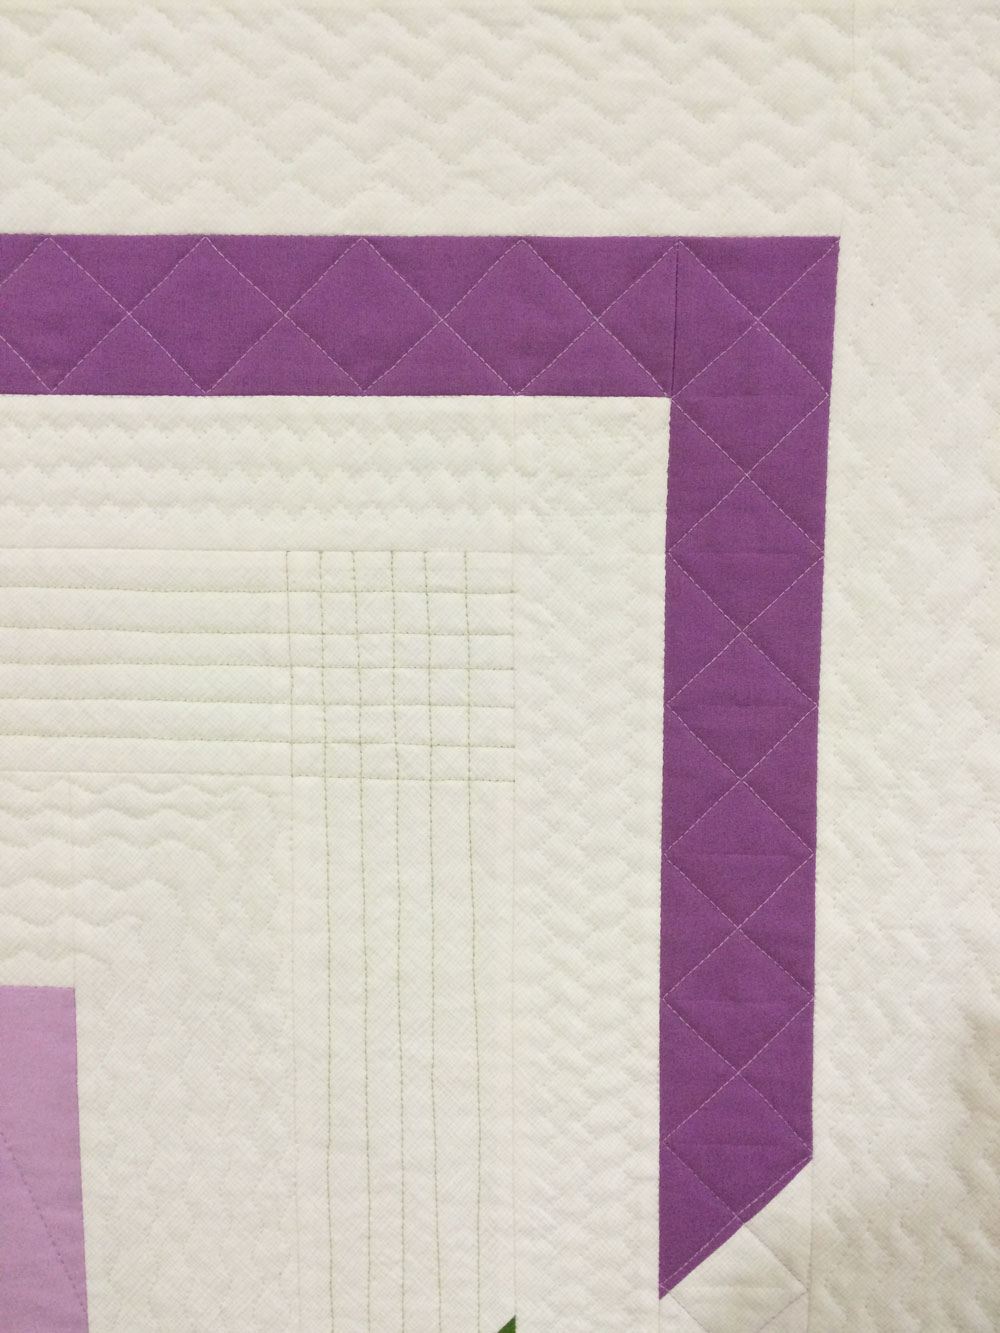
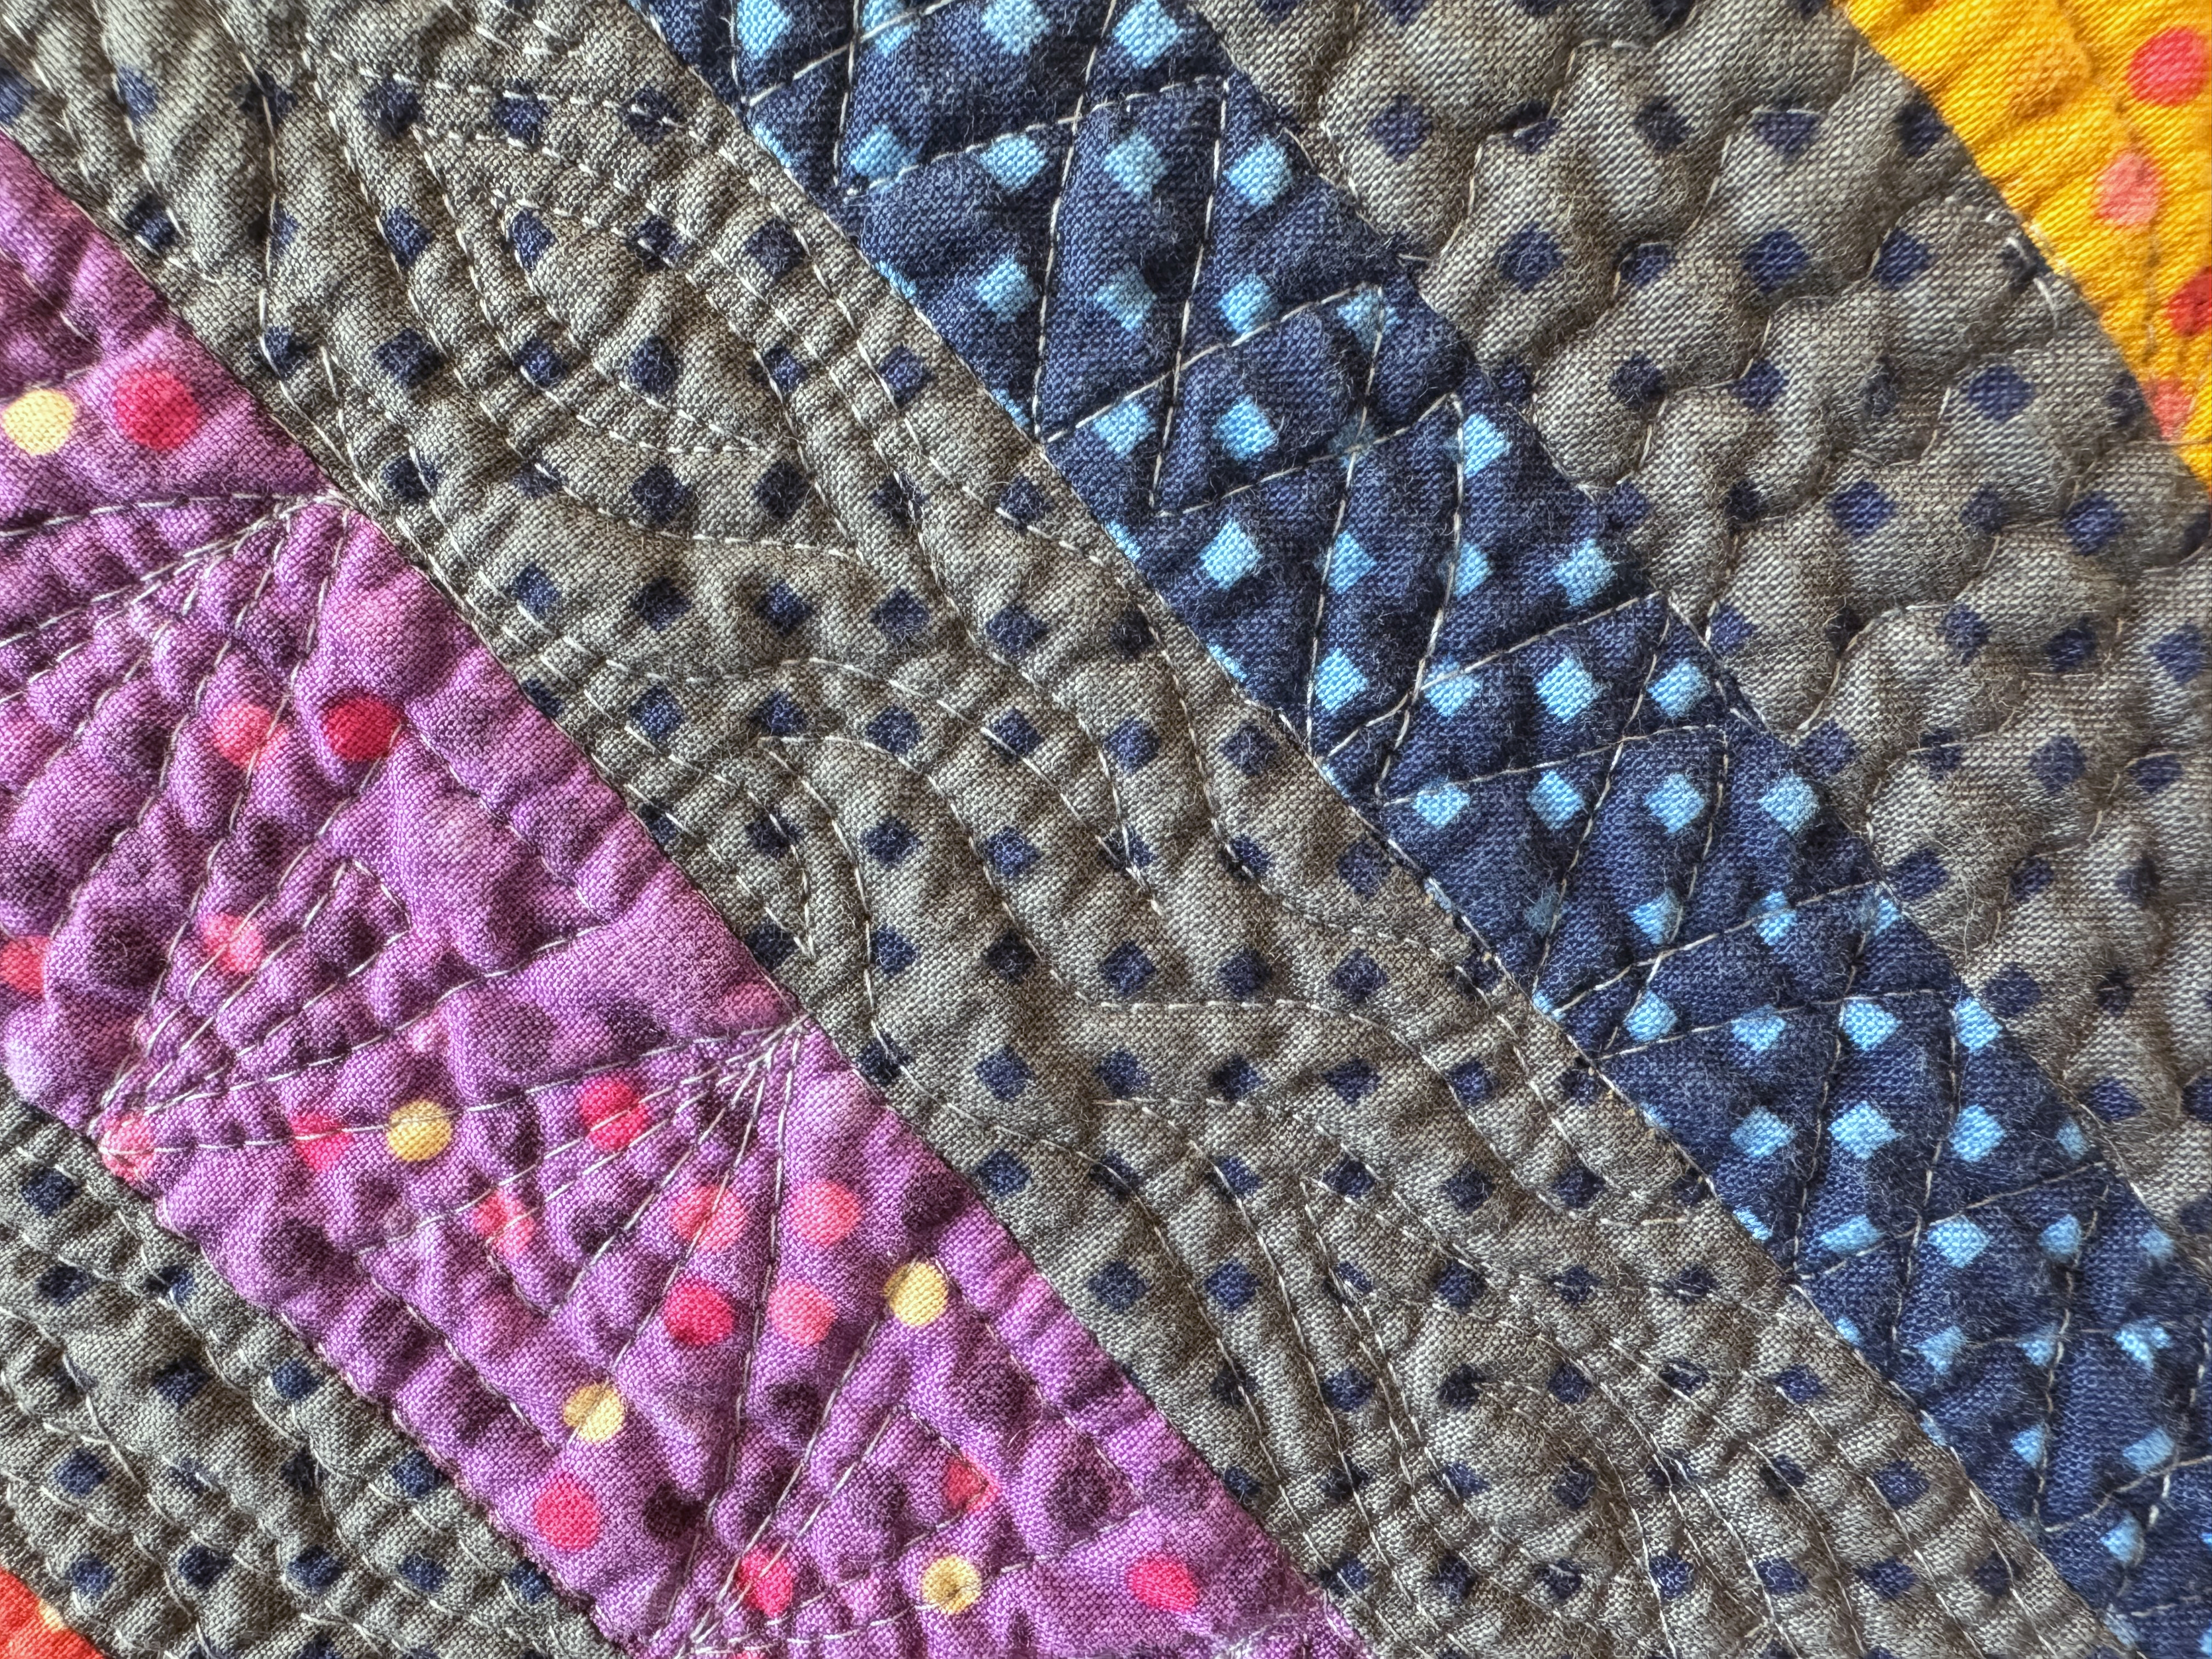
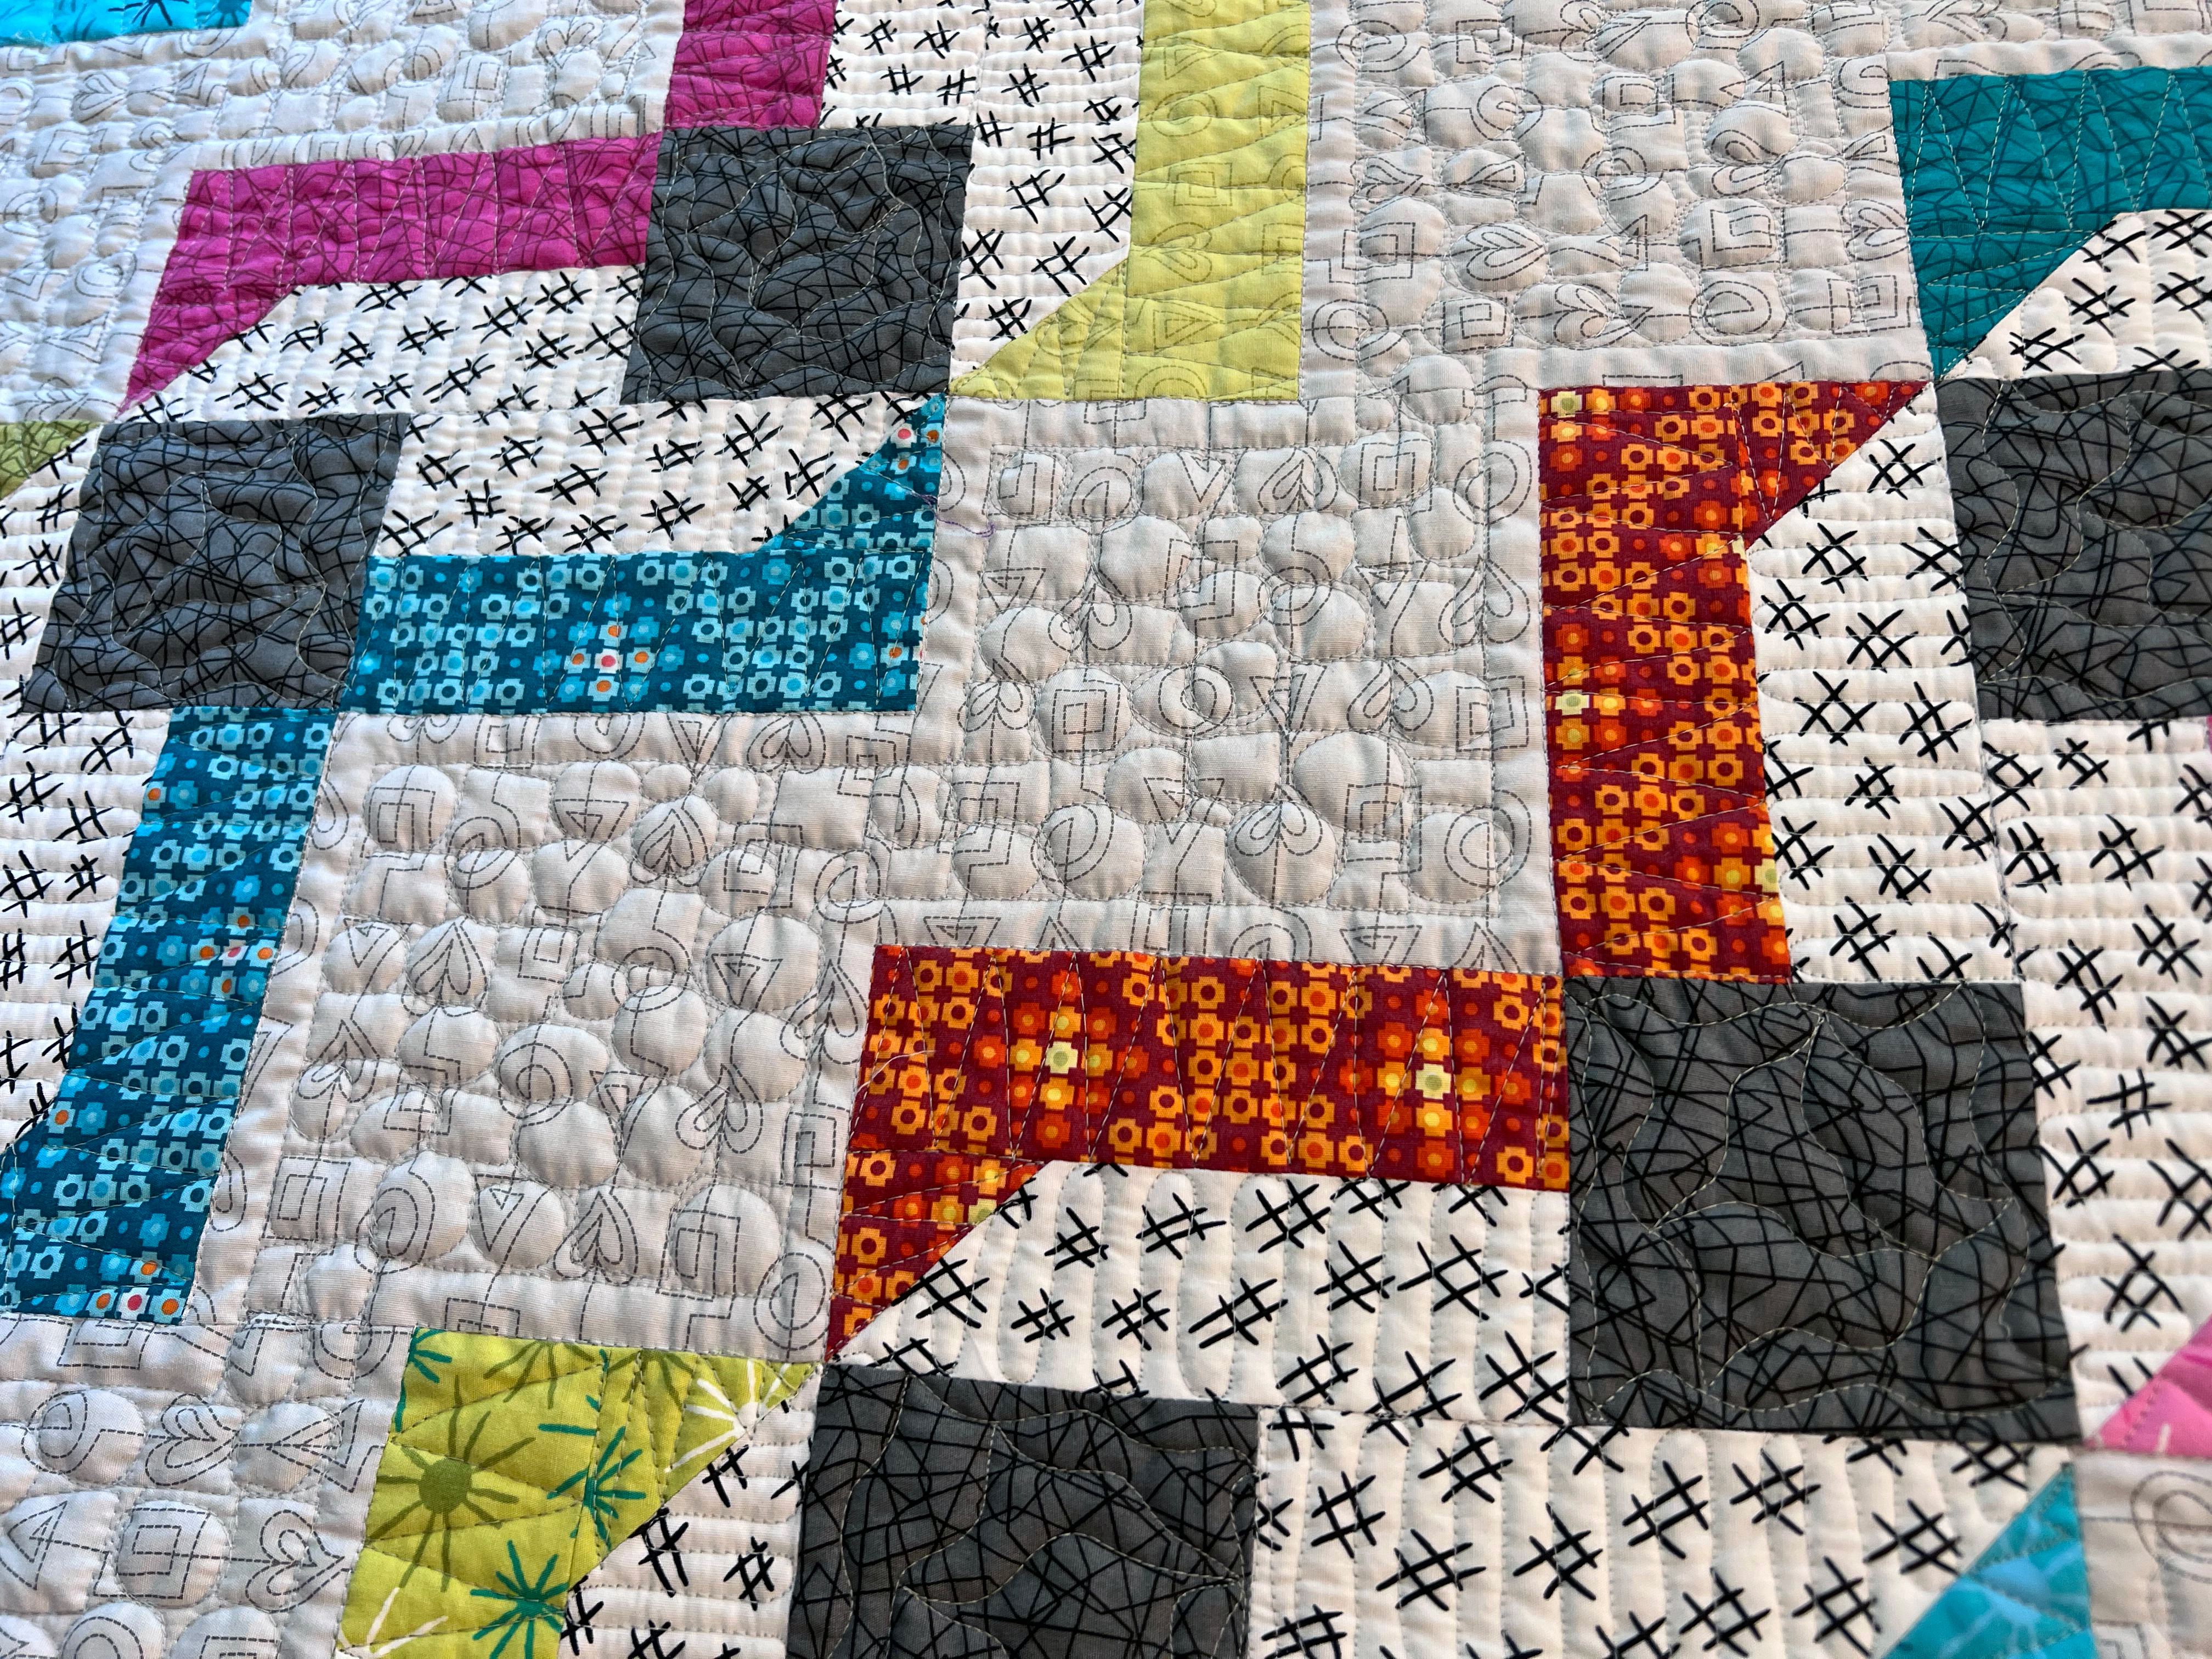
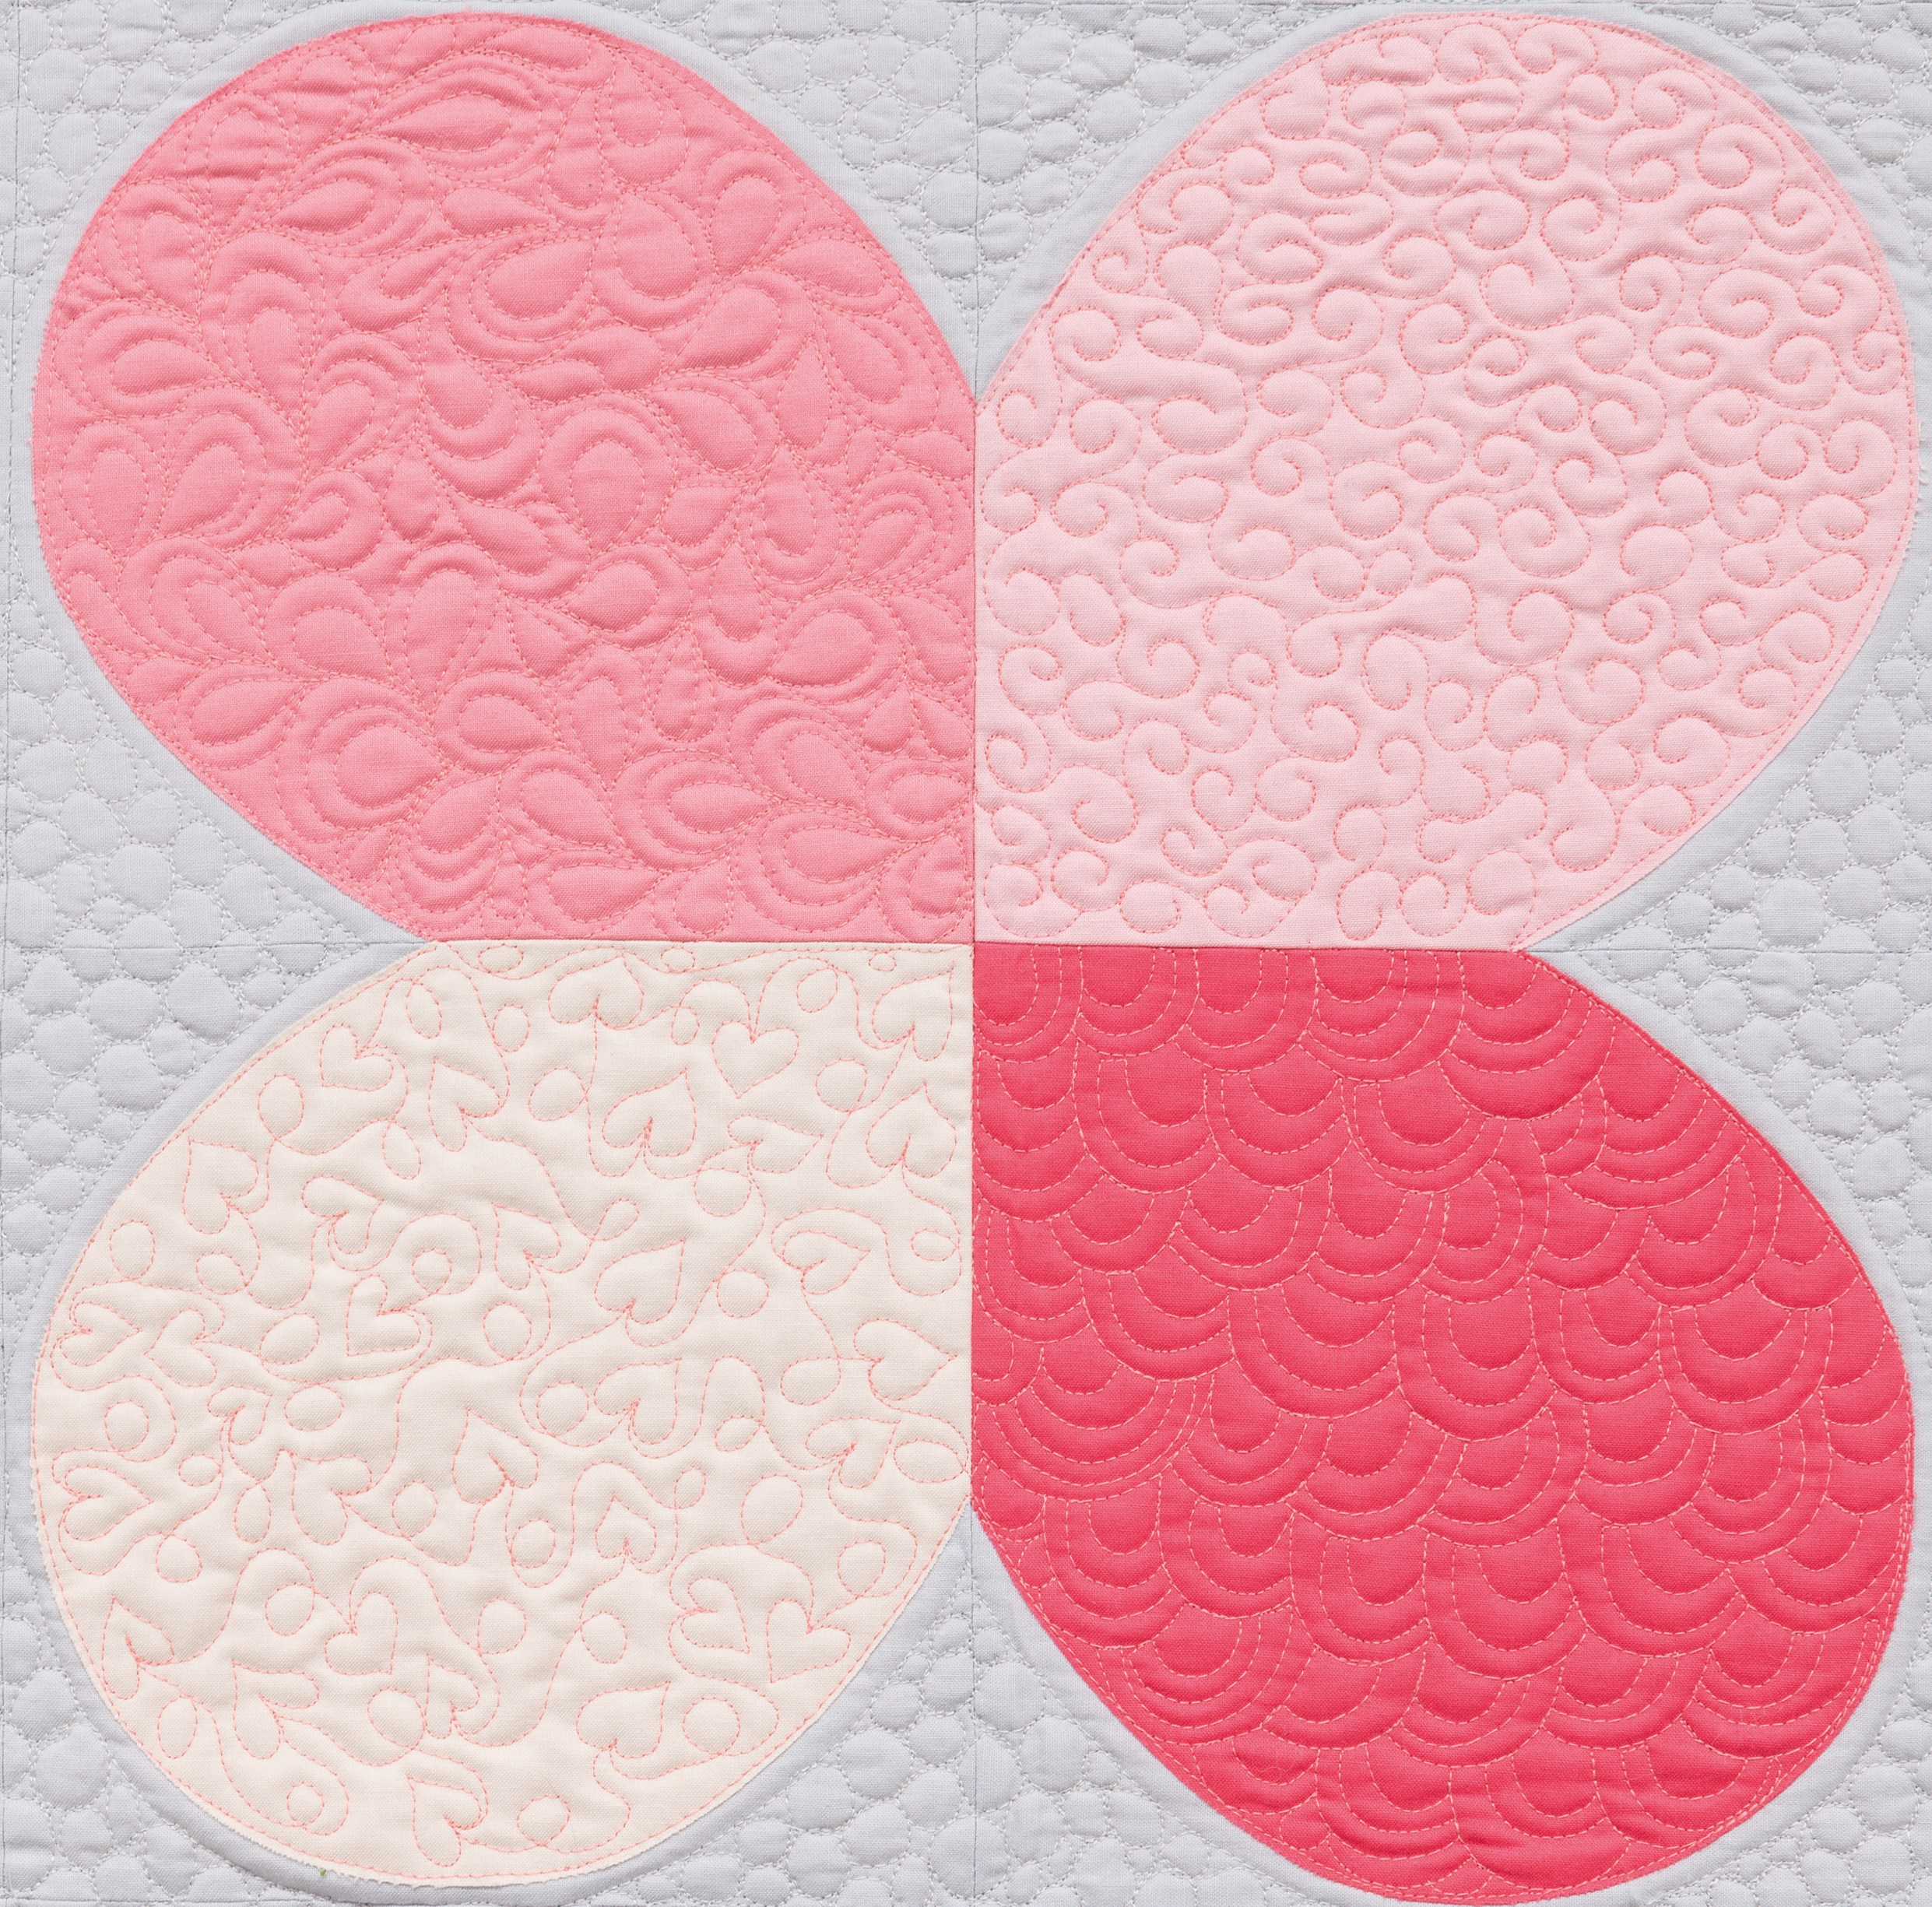
Machine Quilting in progress – can’t wait to share more details on how I quilted them!!
I’m happy to offer lots of support during this quilt along. You can share pics in my ChristaQuilts group on Facebook or leave a comment here on the blog with any questions you have. You can also share on social media using #daisychainquilt. I can’t wait to see how you make this your own!!