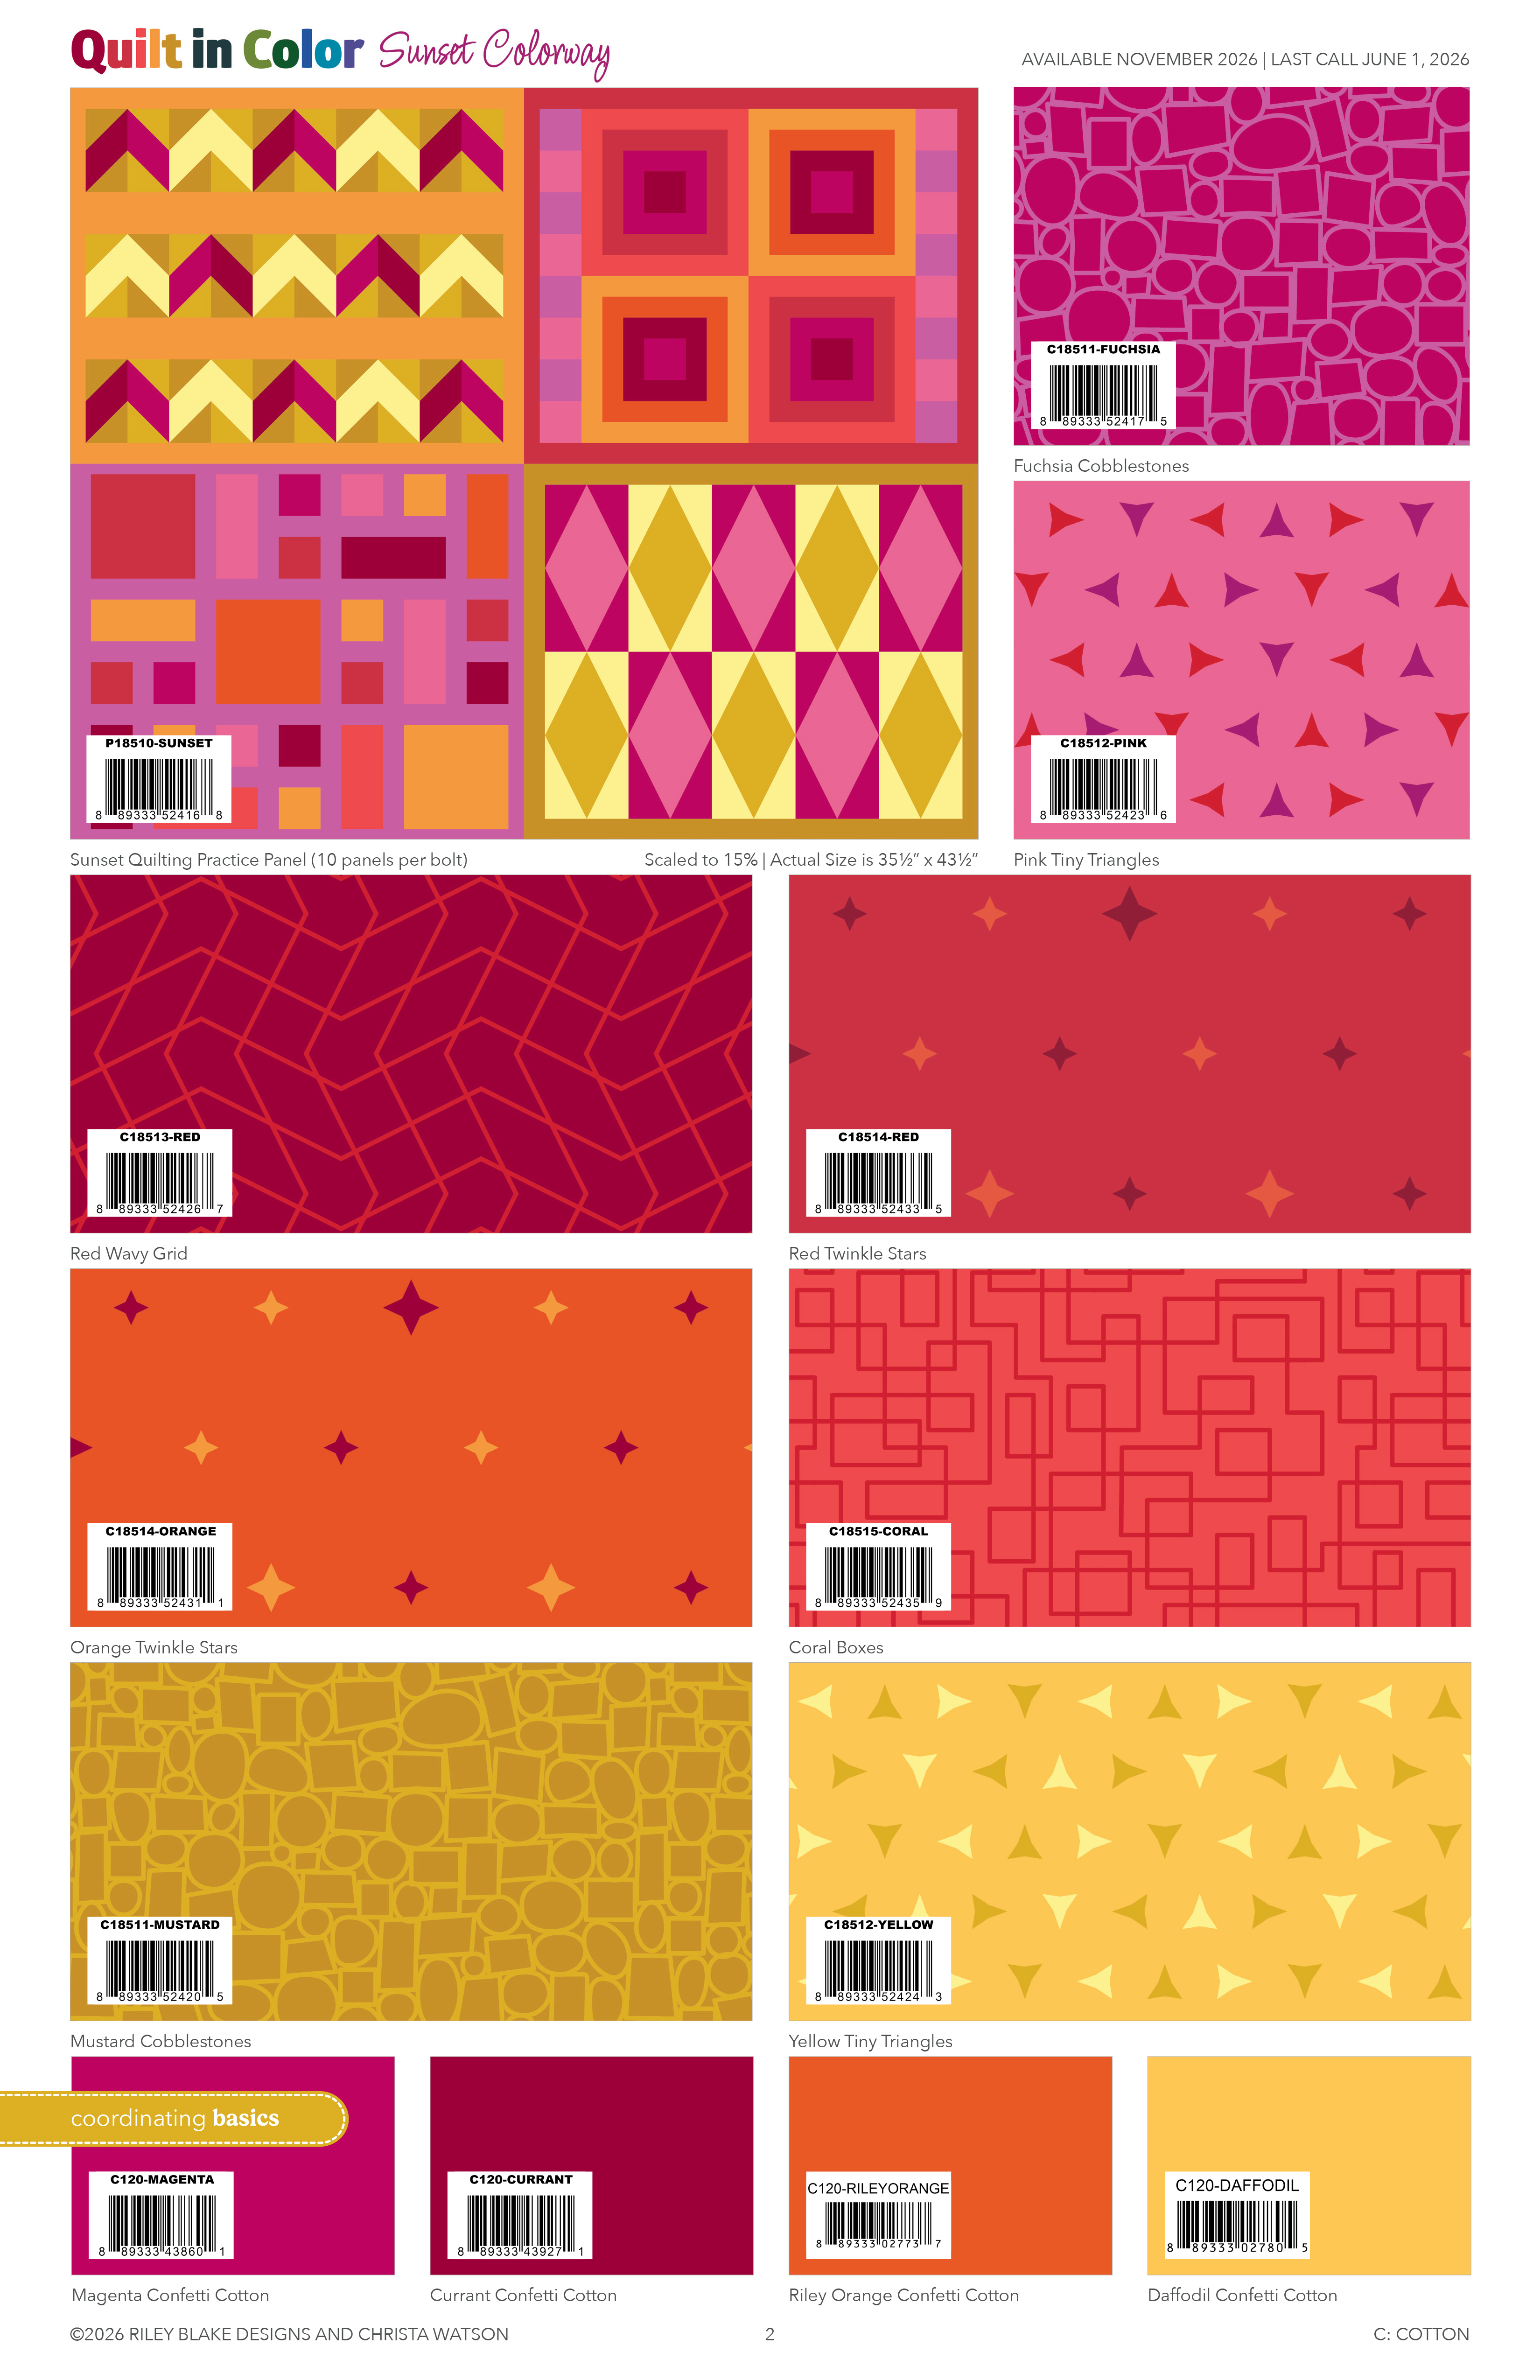
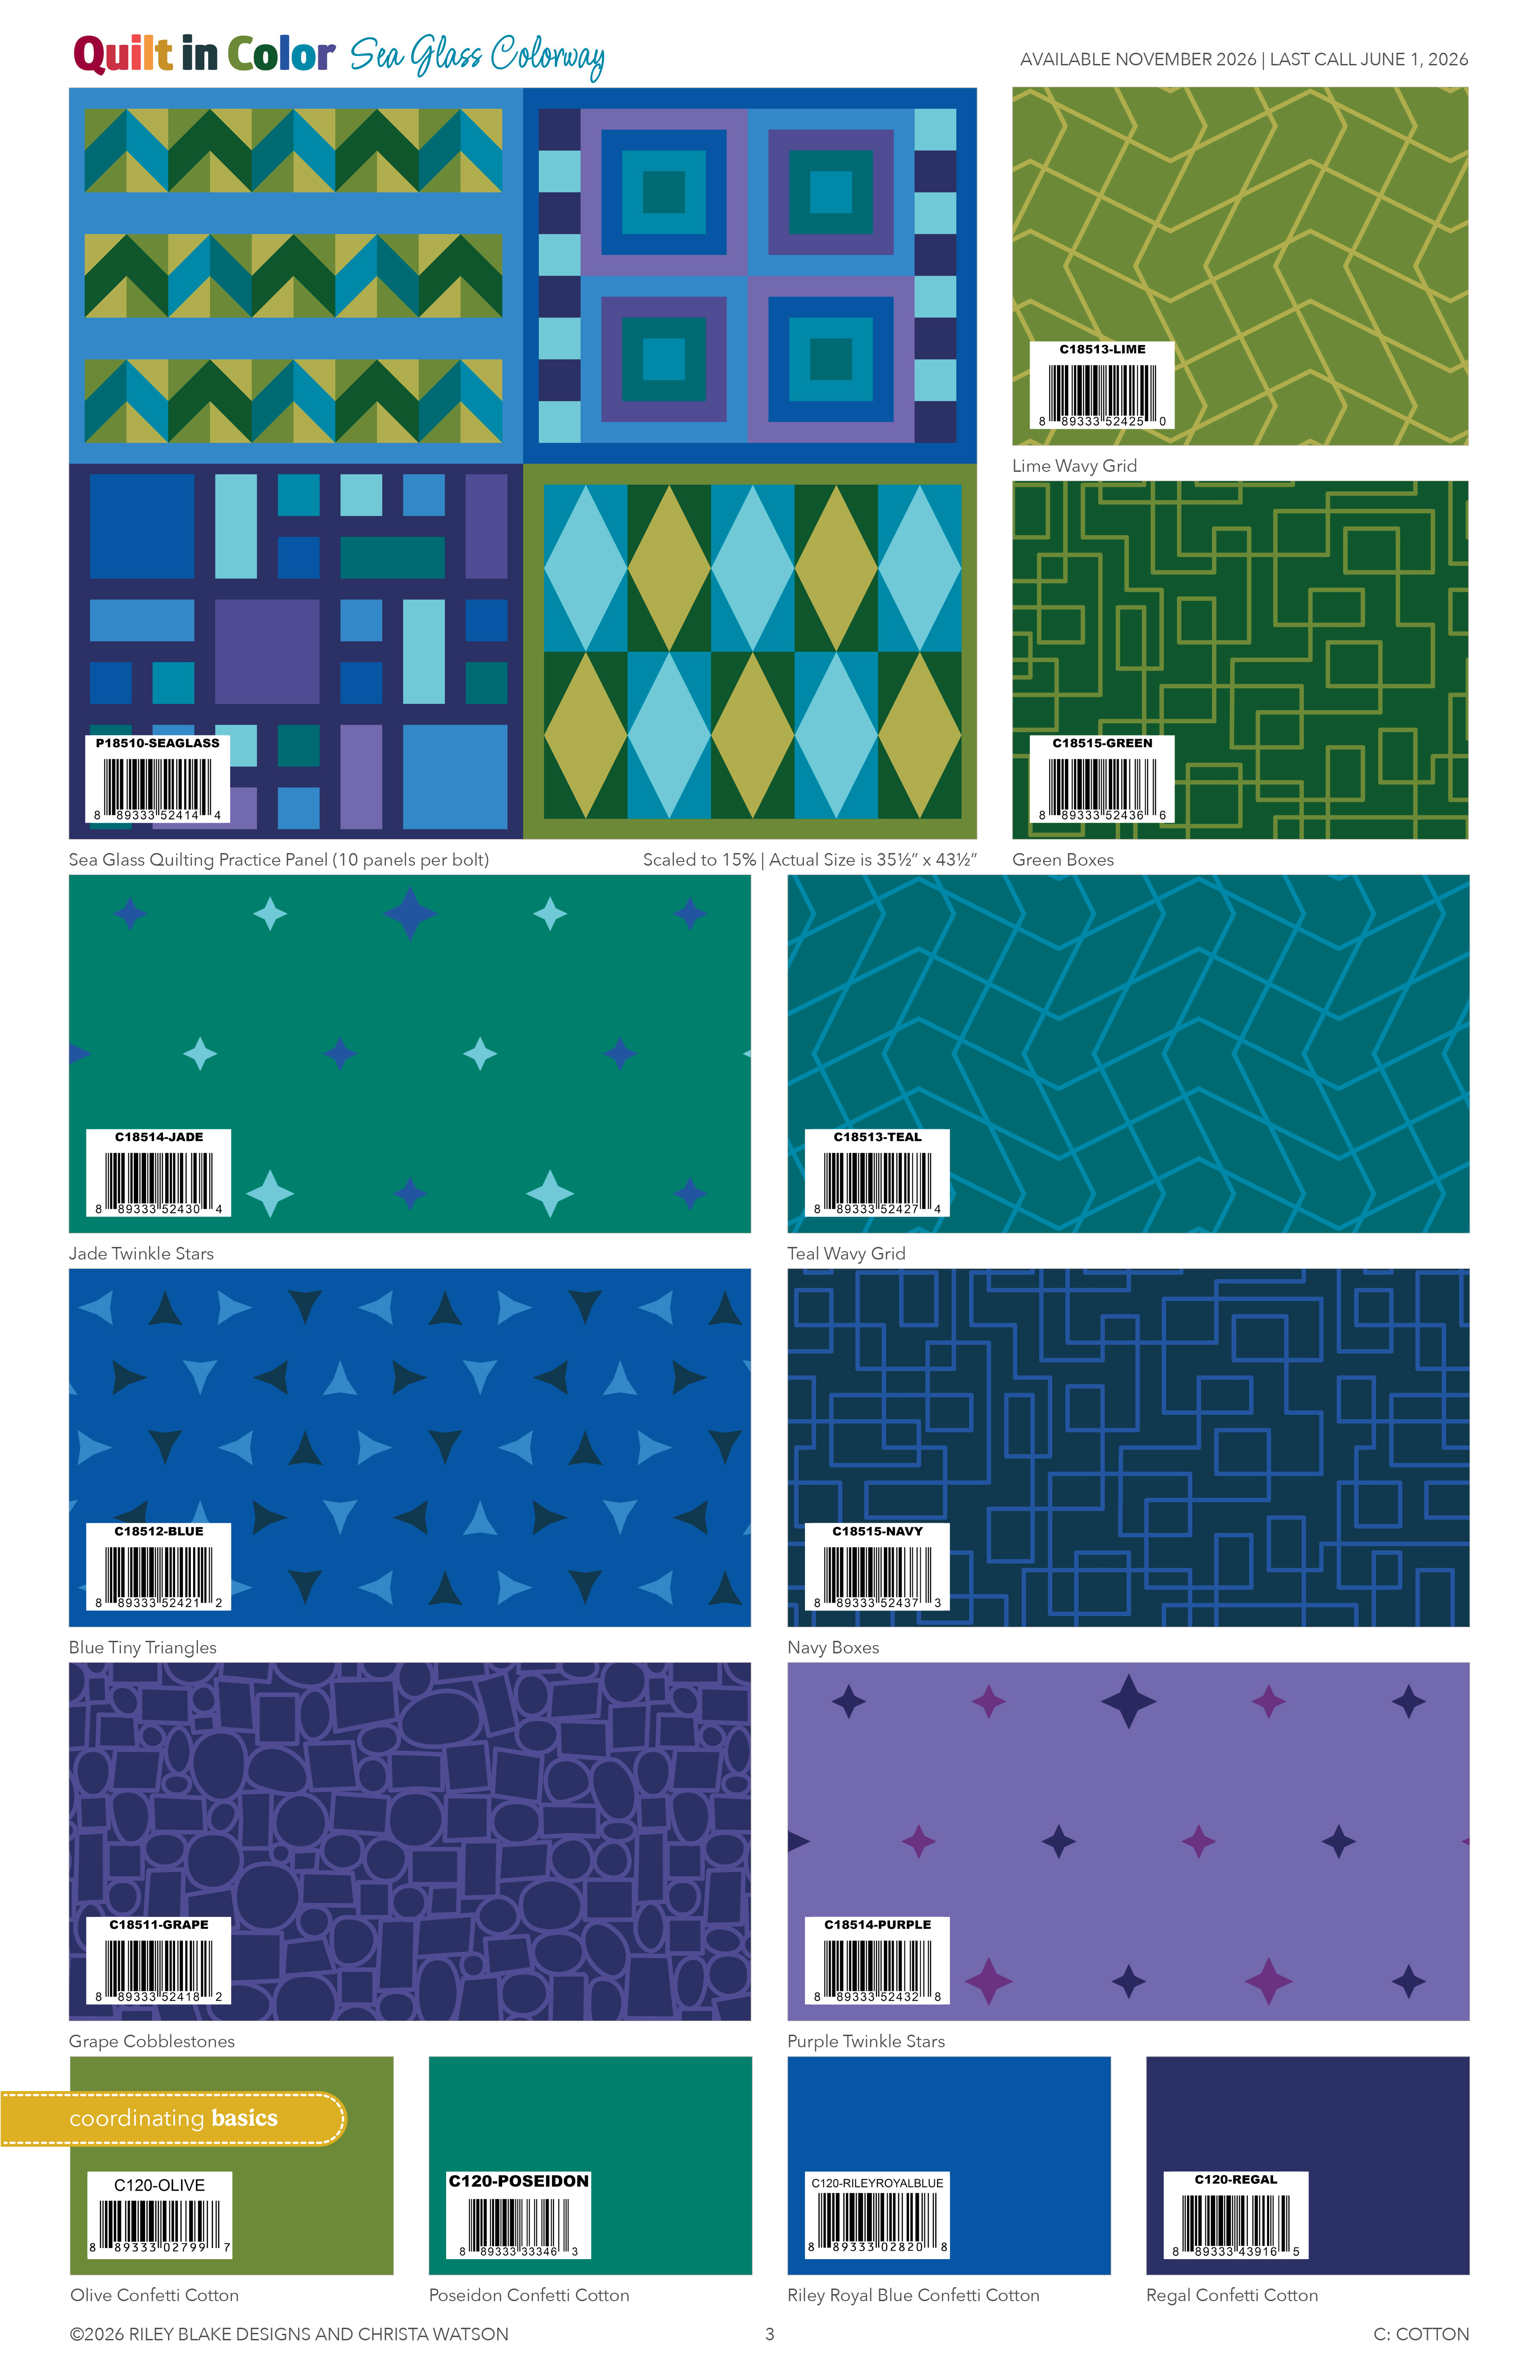
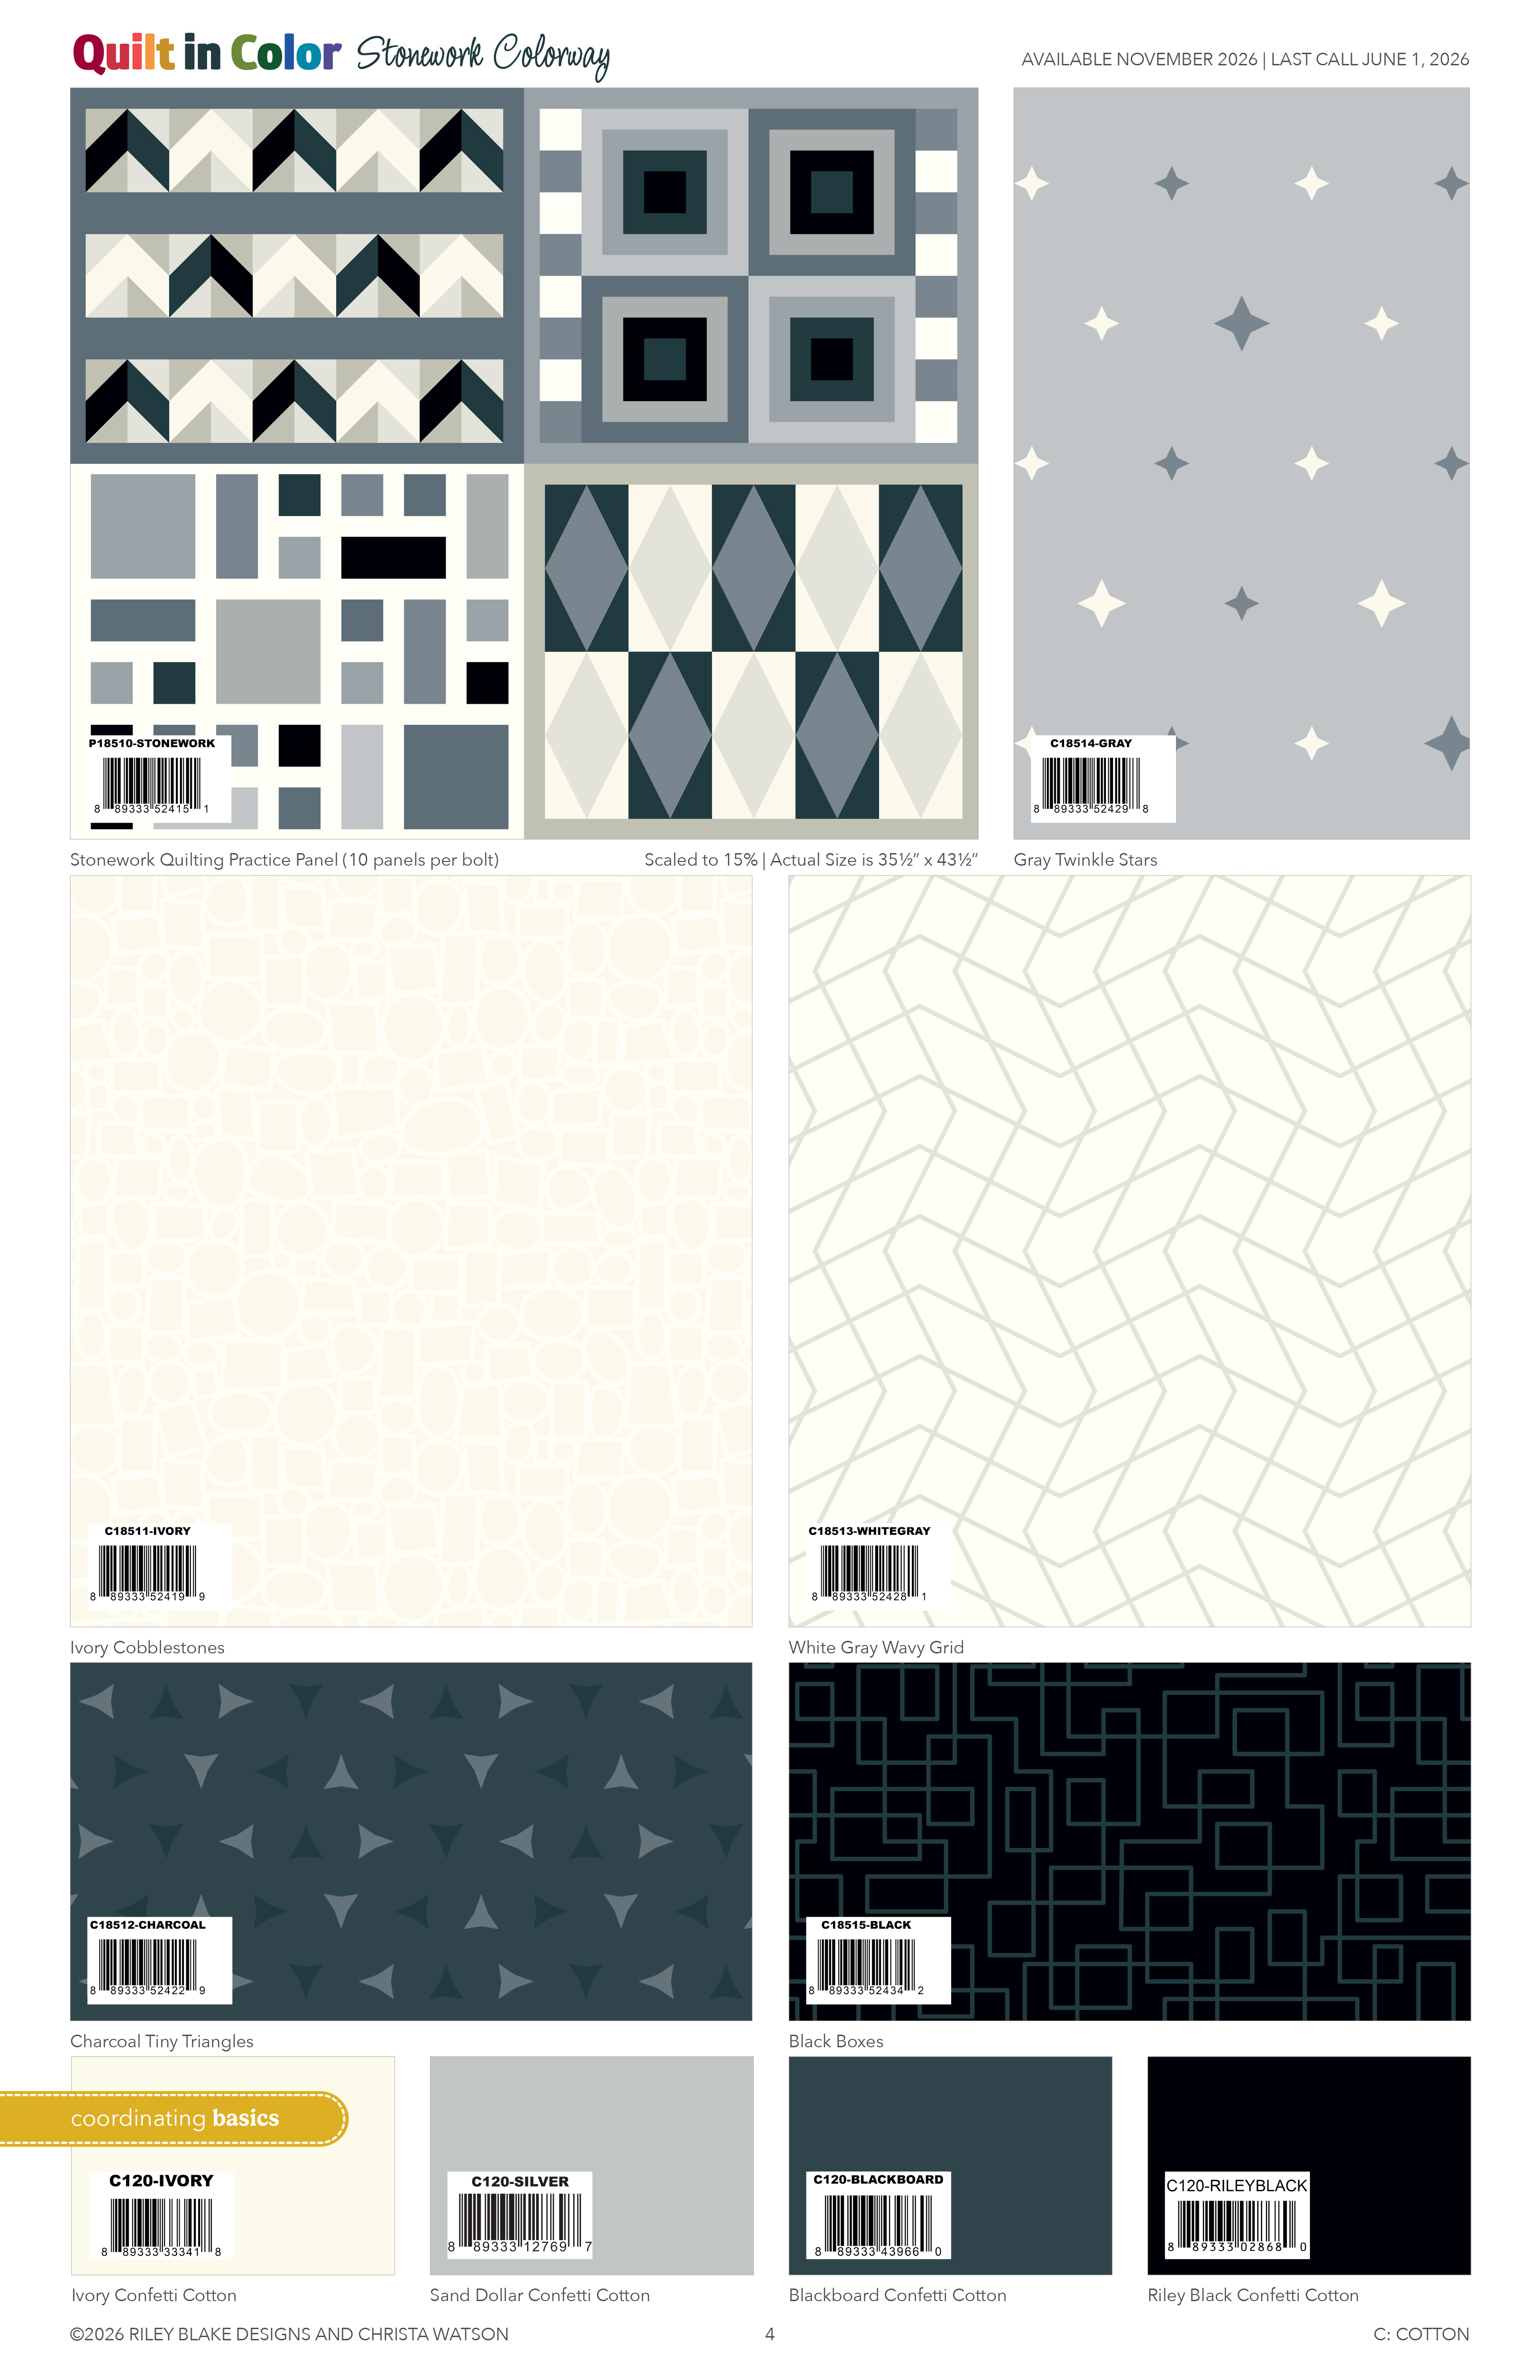
I’m so excited about my debut fabric line with Riley Blake called Quilt in Color. Now you may be wondering why I switched fabric companies? Simply put, it was time for me to stretch my wings and grow. In all of my previous 10 fabric collections, I had help with the technical aspects of design. But this one is ALL me and I couldn’t be more proud! Take a look at the color cards below:
What do you think? I poured my heart and soul into this collection. It includes 21 colorful prints + 3 machine quilting practice panels. Each of the 1 yard panels includes 4 different fat-quarter sized pieces that are perfect for free motion AND walking foot quilting.
Now I have a favor to ask – please ask your favorite quilt shops to pre-order this collection. It won’t be out until November, but sales reps are showing it to shops now so they can gauge how much they’ll need to print. This can really boost a collection and ensure that there will be more to come in the future.
So what do you think – would you want to add this to YOUR stash? I’ll be sharing more projects made from these over the next few months, so stay tuned!
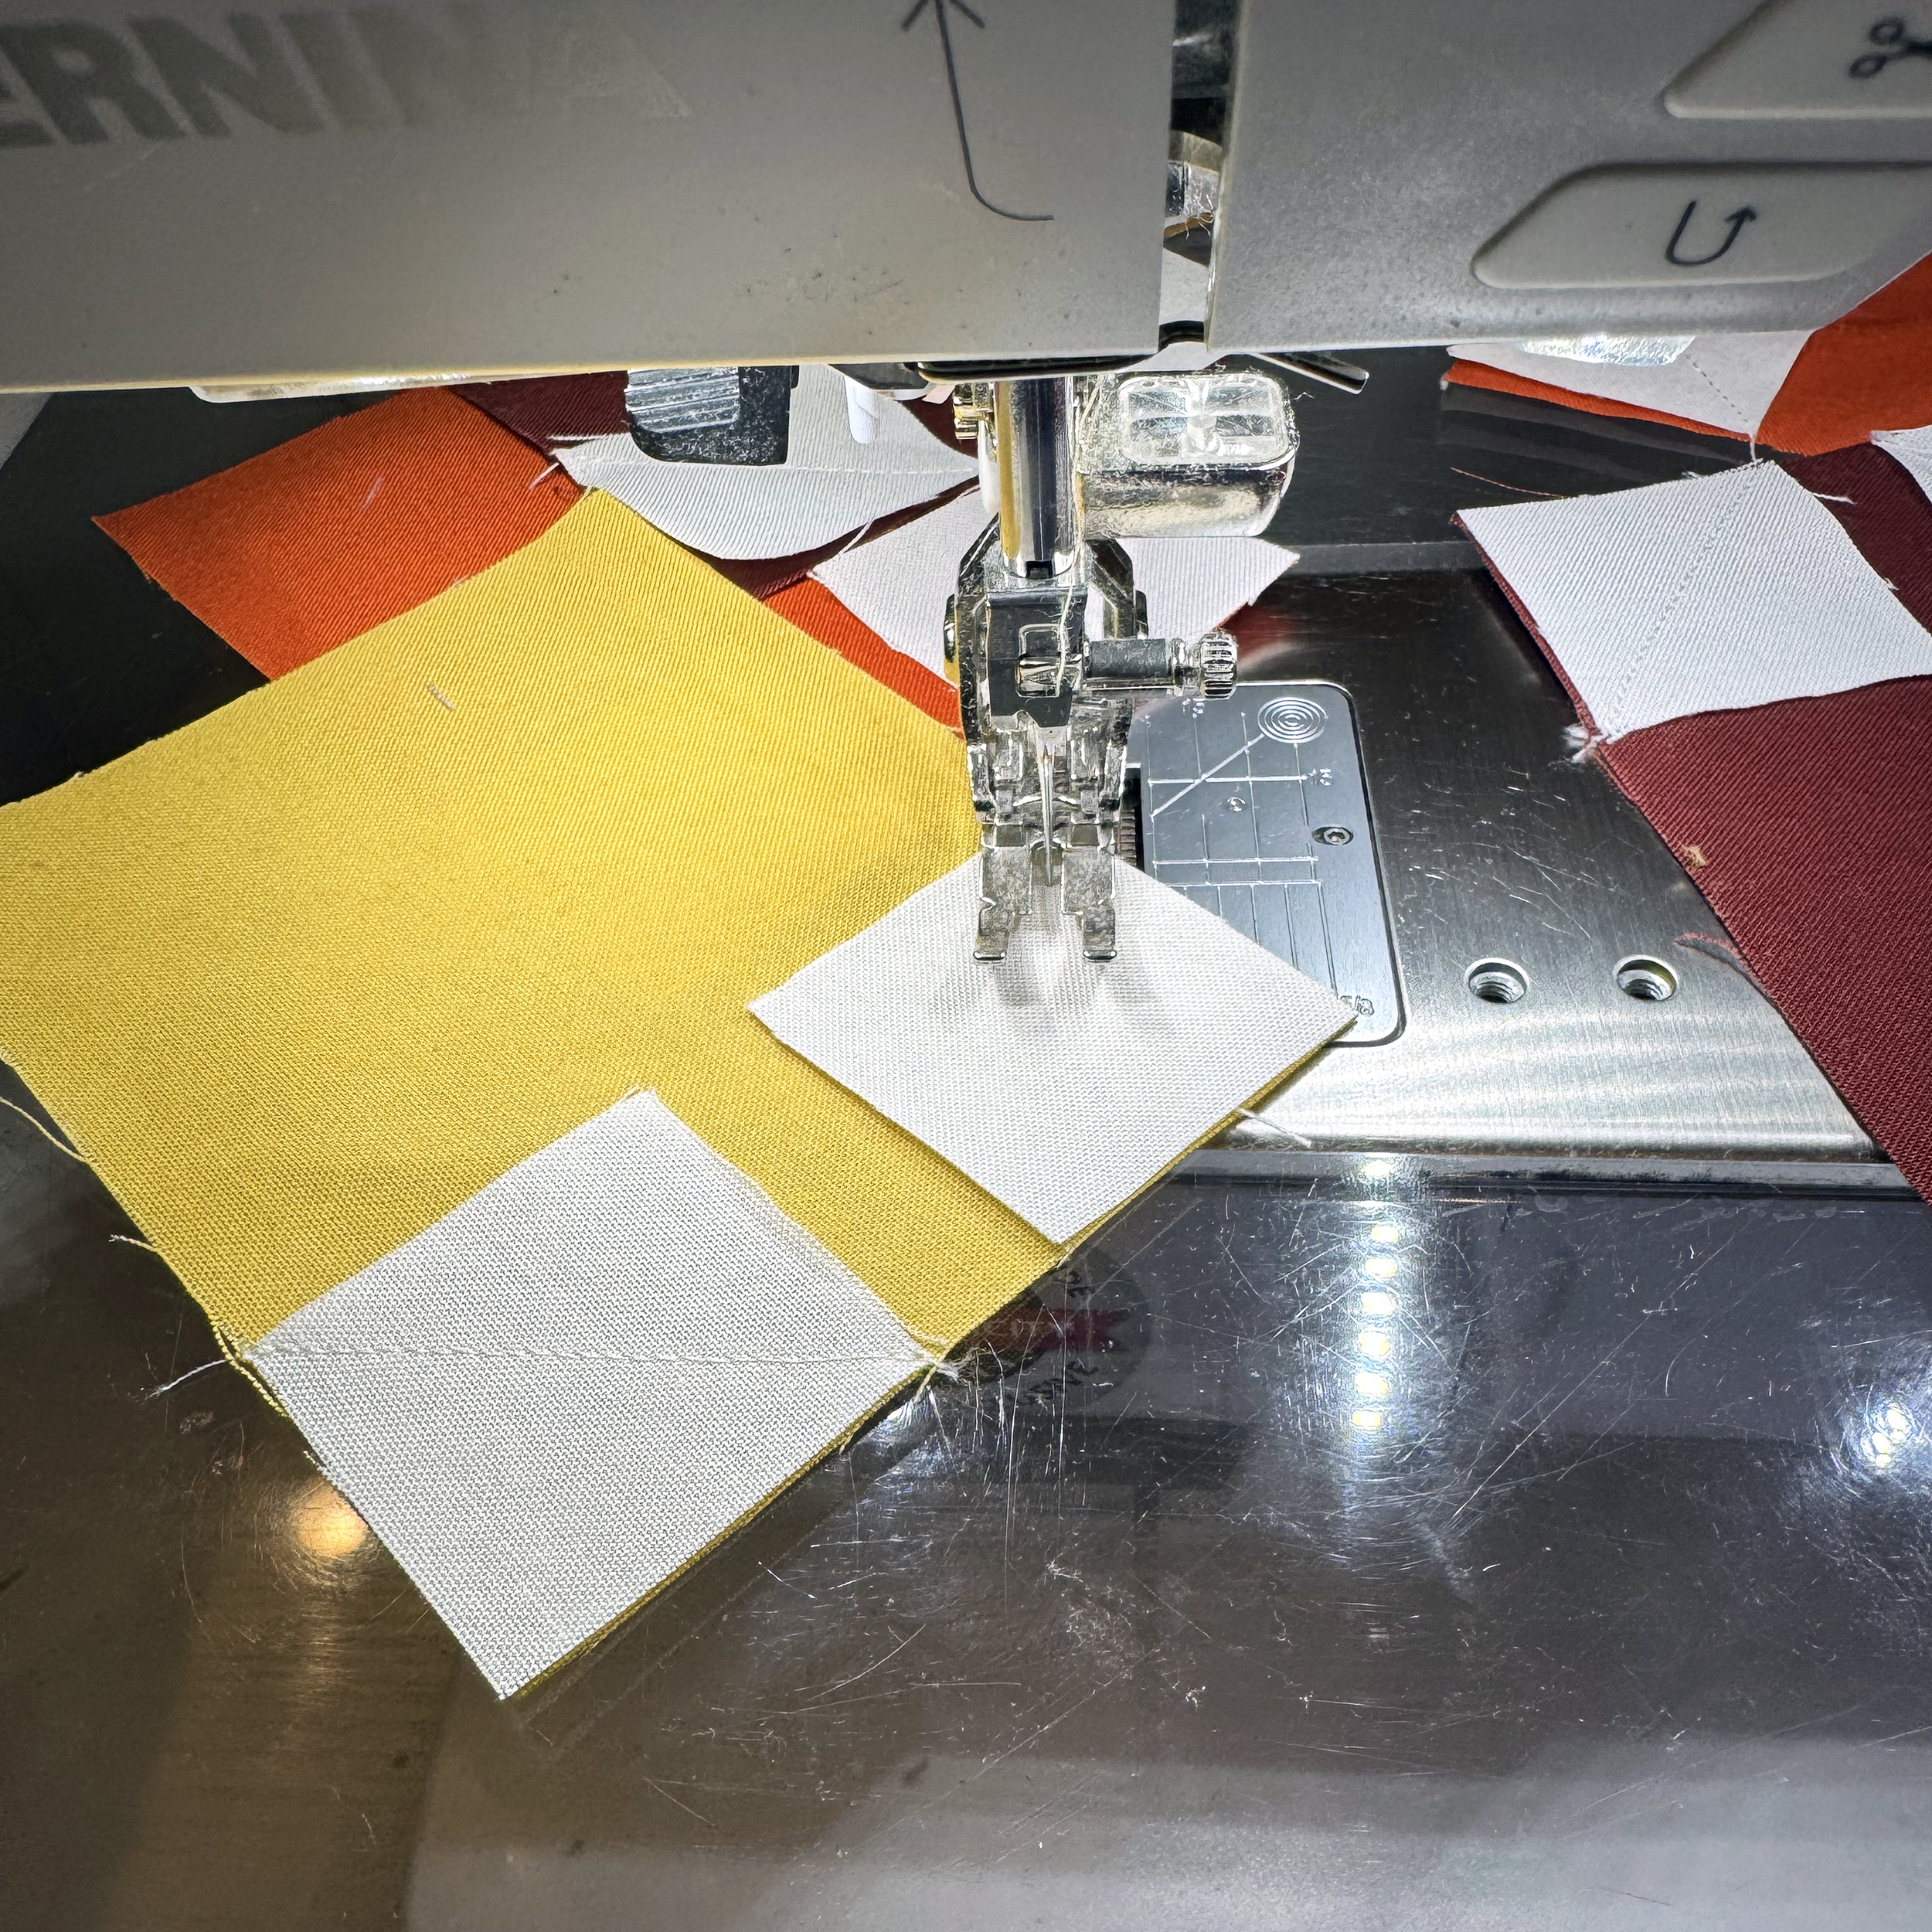
Whenever I’m sewing quilt blocks that have lots of pieces, I find it much easier to sew the smaller units of each block into larger units, then chain piece everything for speed and efficiency. Follow along in the Daisy Chain quilt pattern on page 6-7s for the images and tips shown below. I’m making two of these at the same time in 2 different colorways: Autumn & Purple Vibrations.
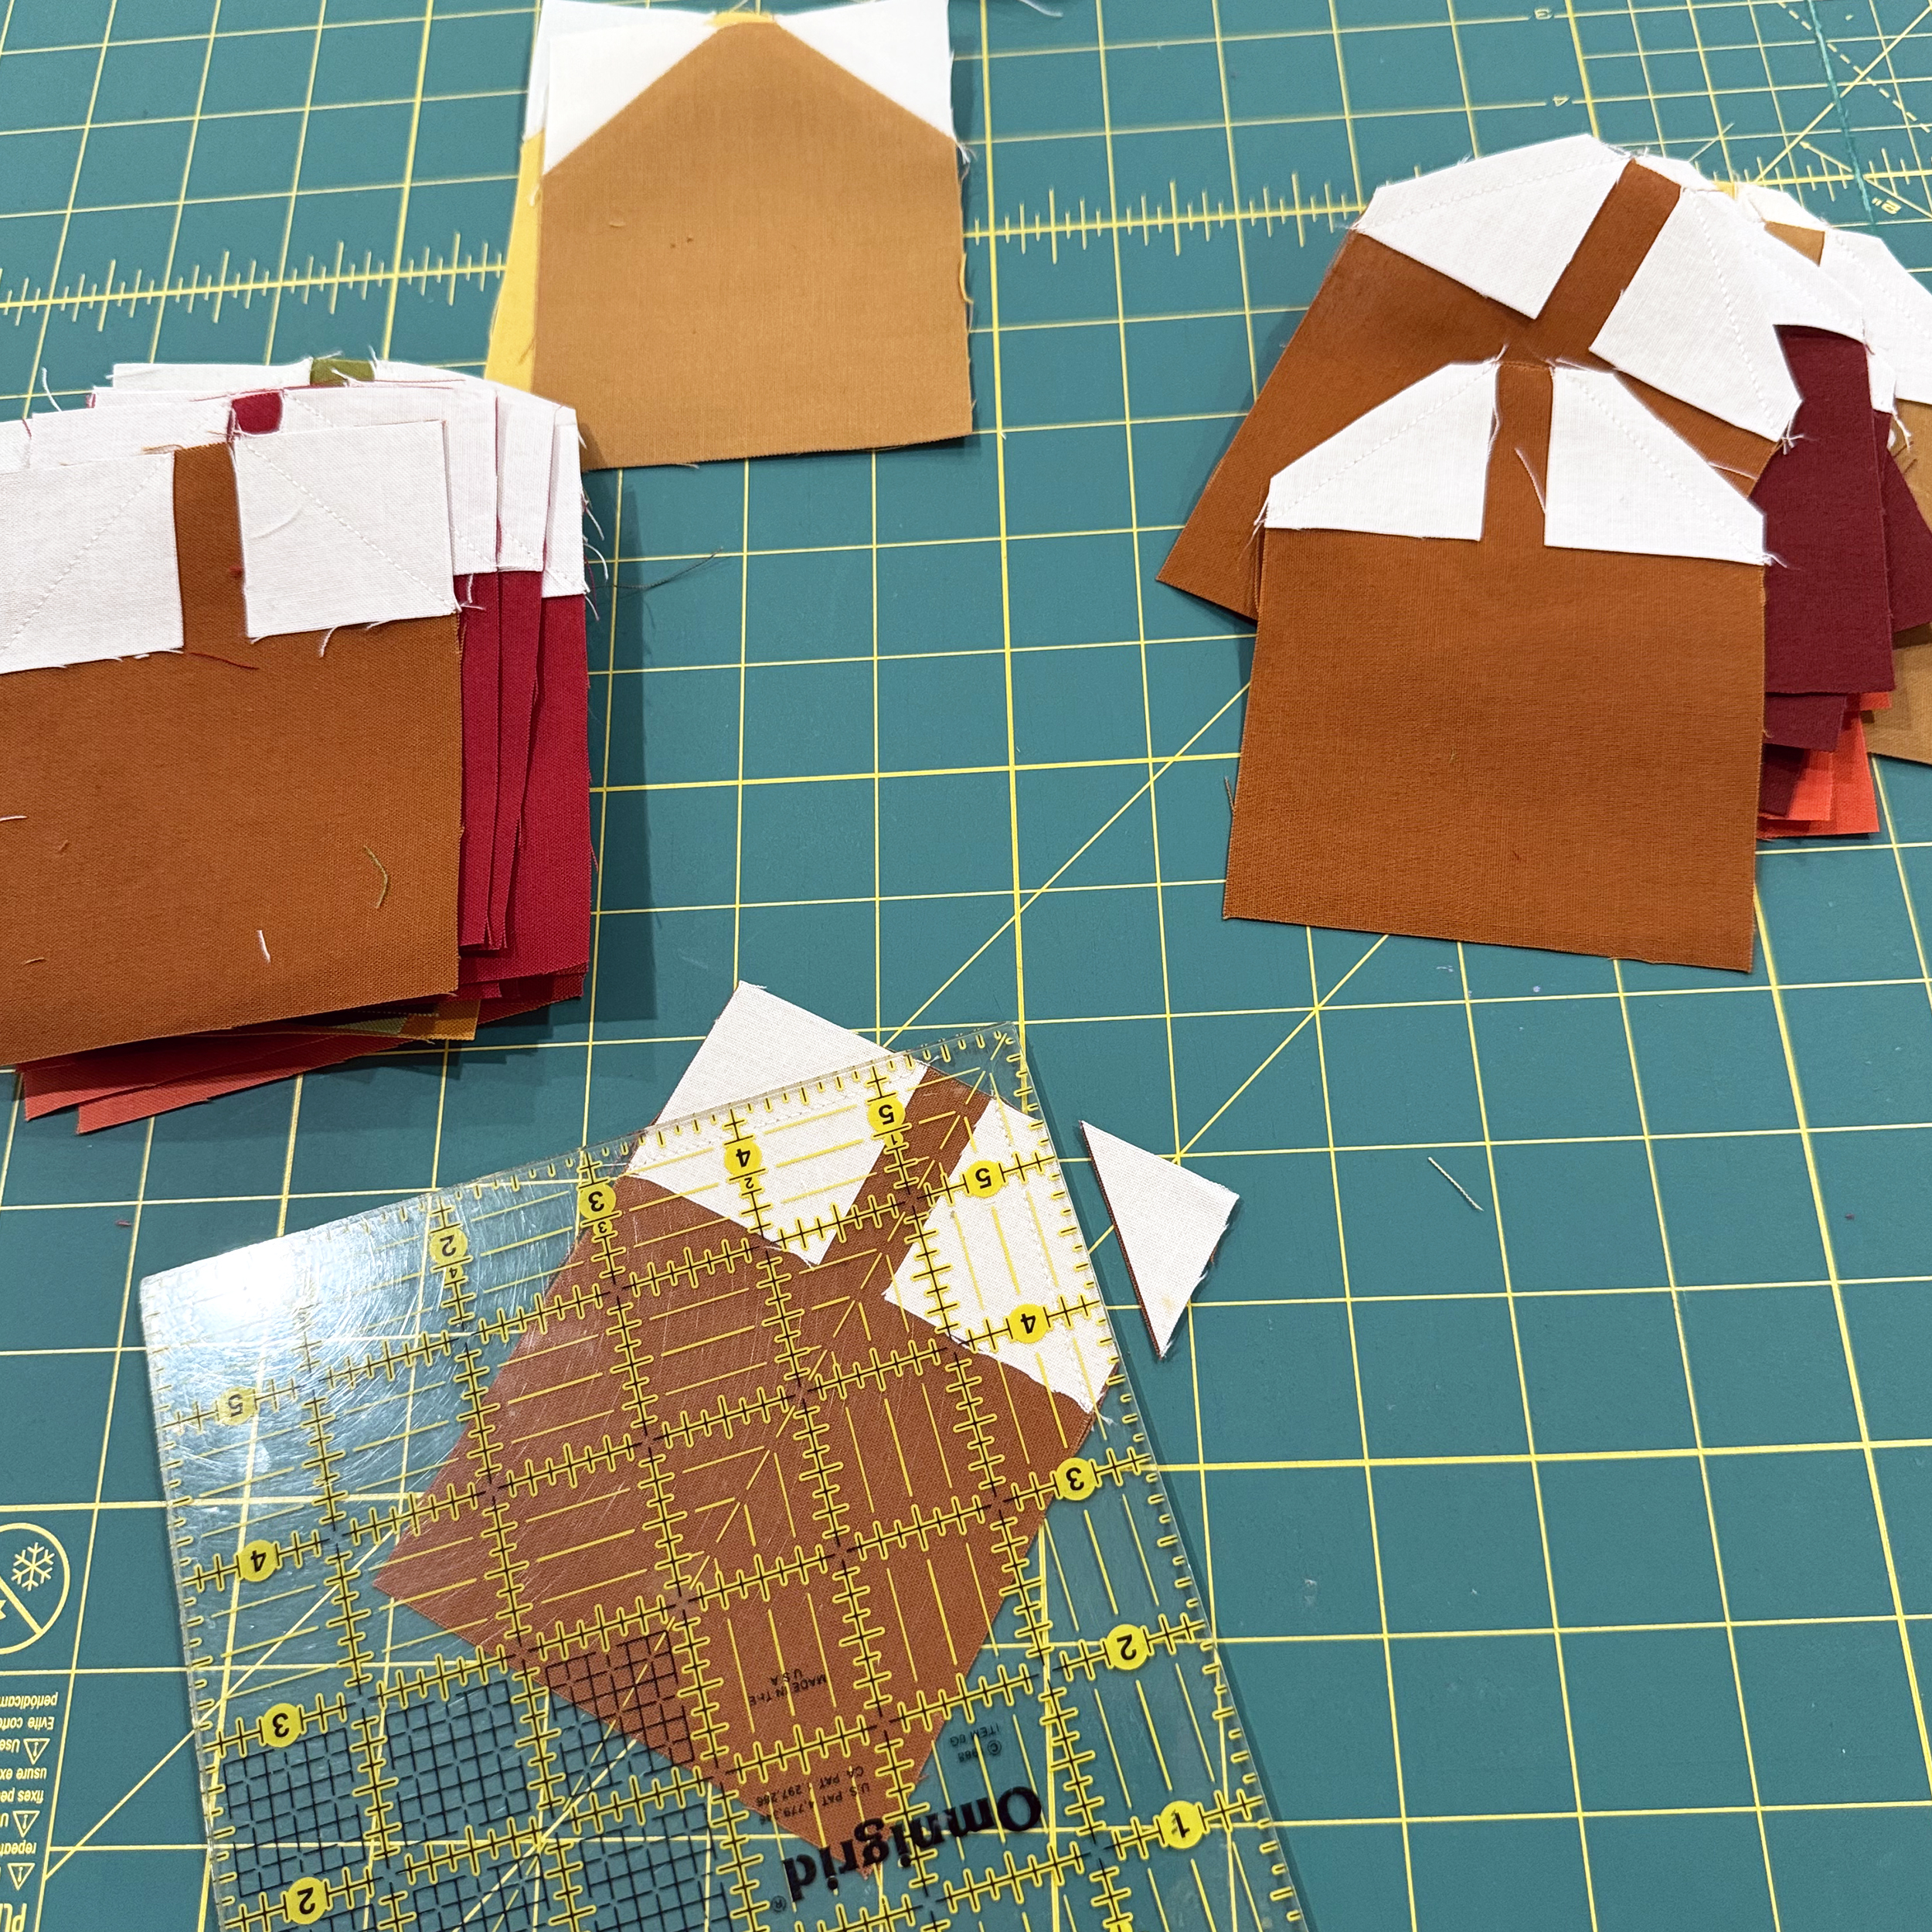
Making Stitch-N-Flip Units
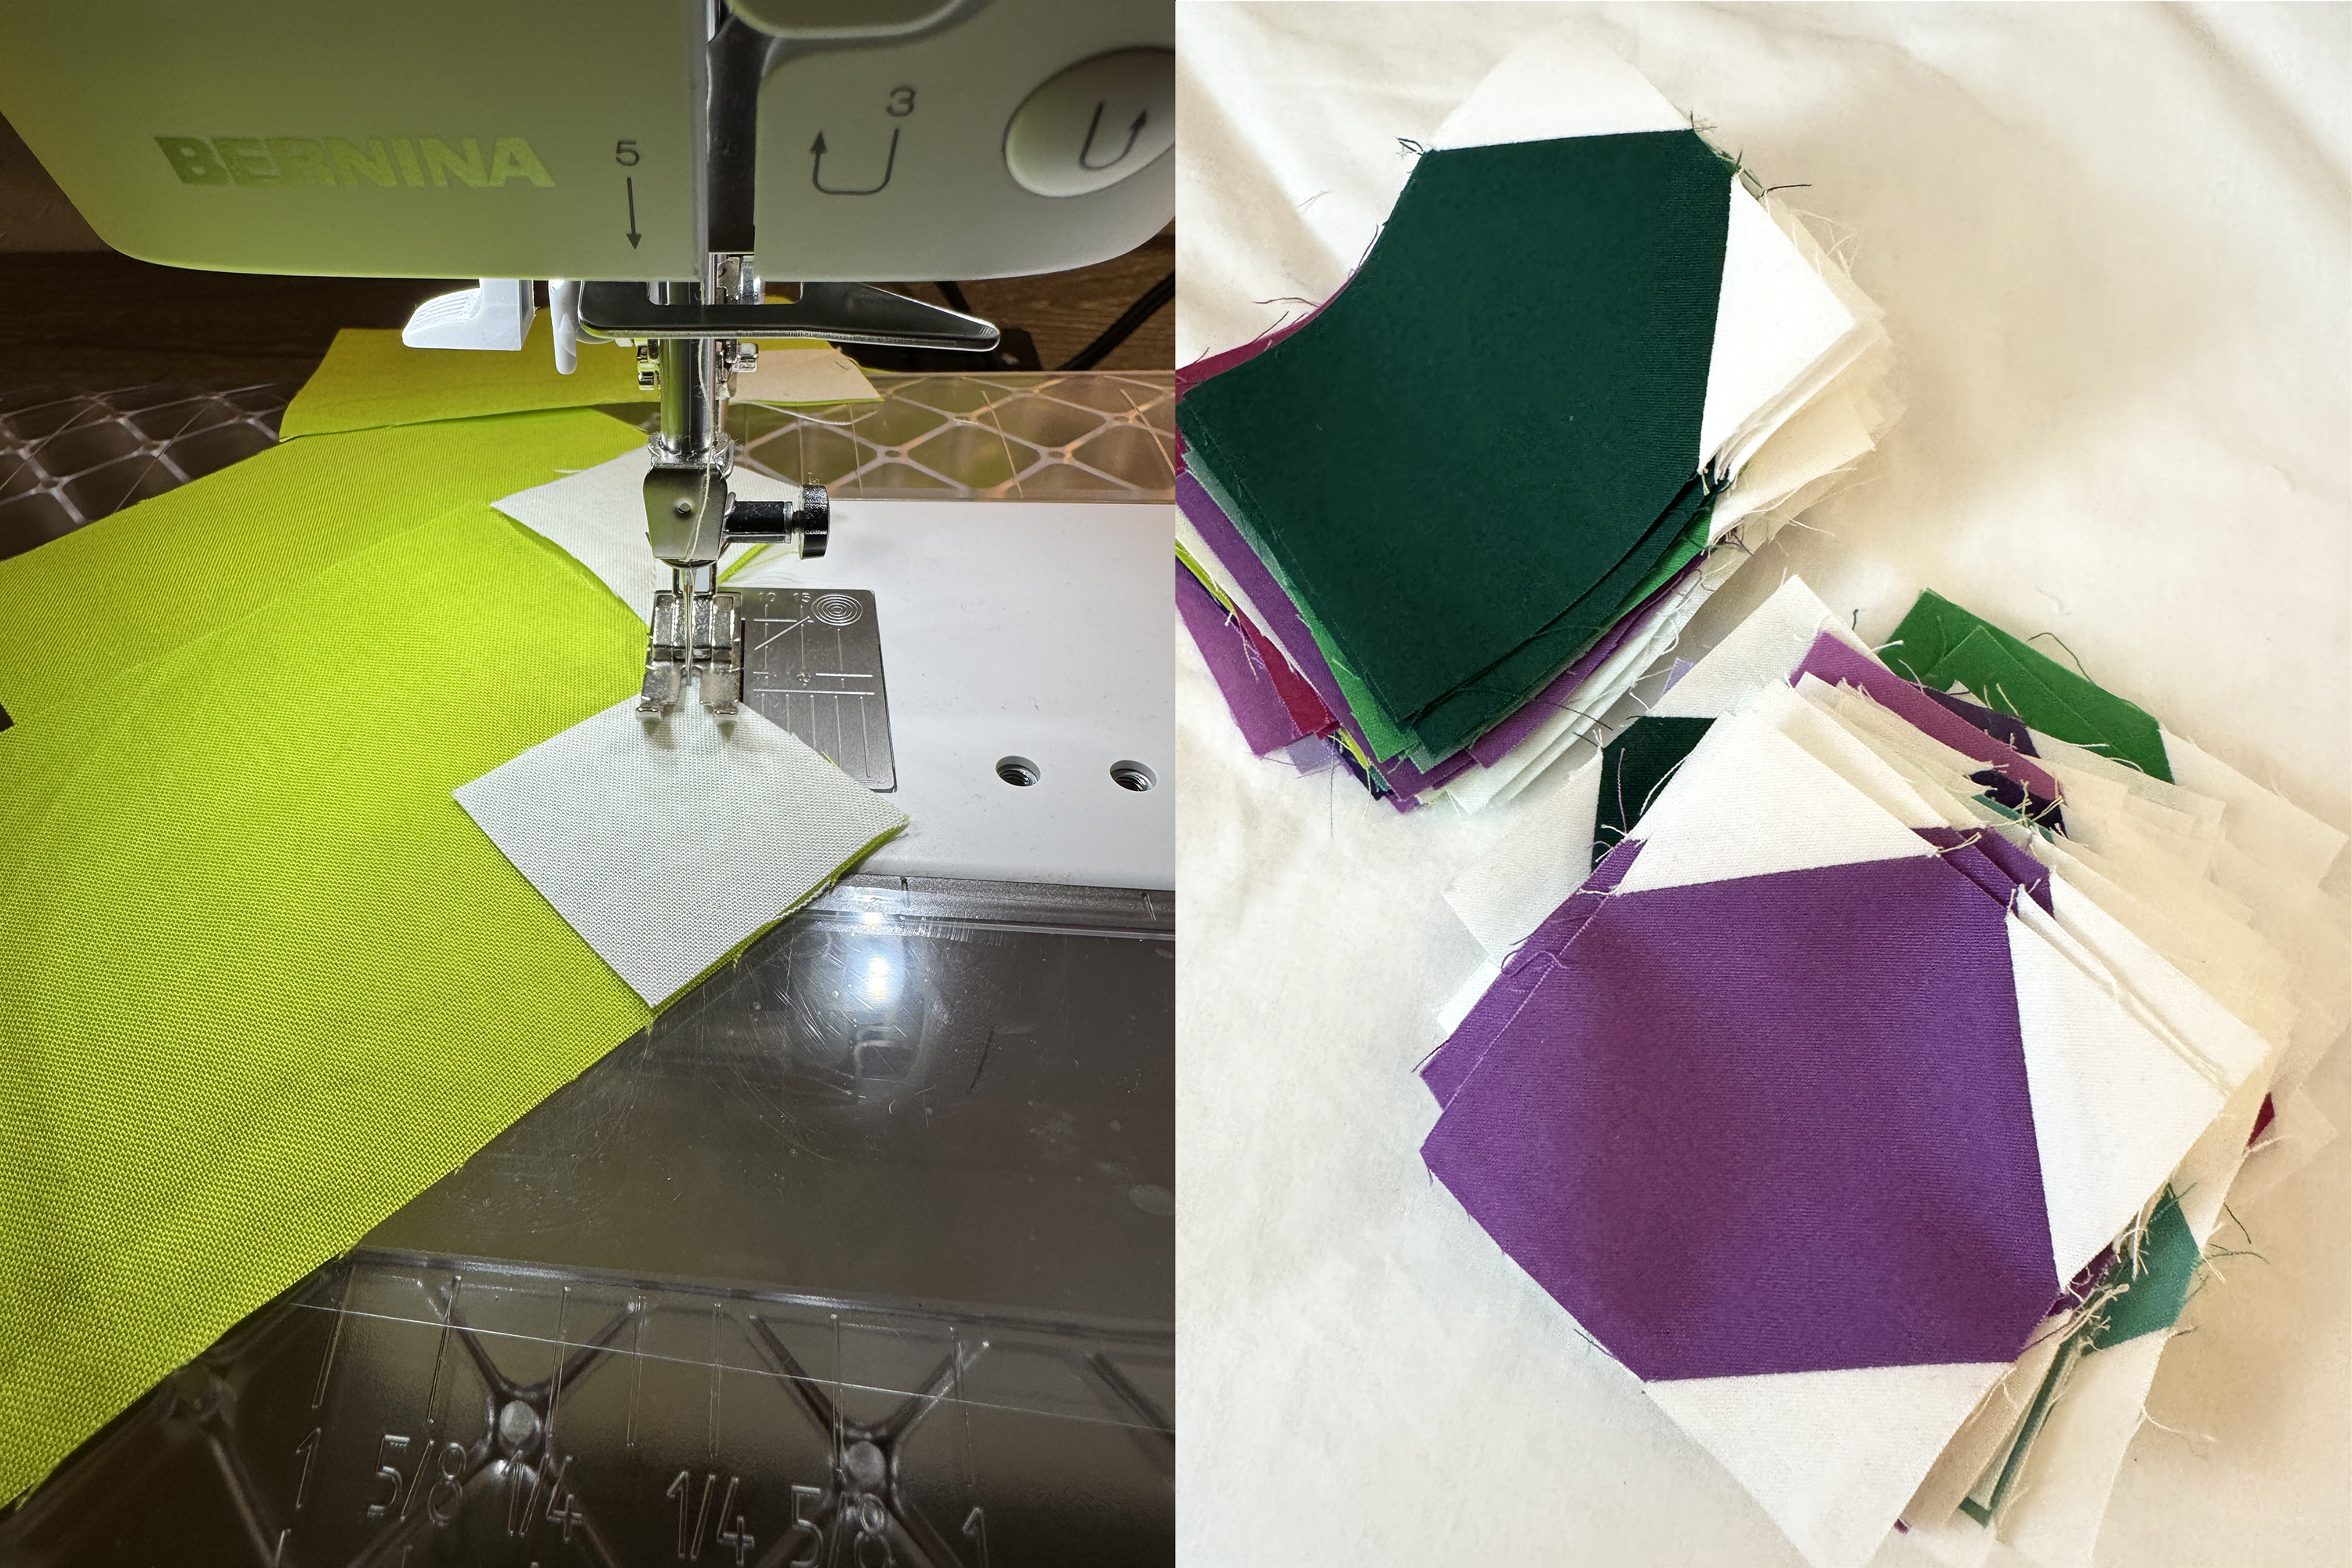
So the first thing we are doing is sewing all of the stitch-n-flip units which will make the petals of each daisy flower block. You can either mark lines down the center of each background unit, or you can eyeball since they are very small.
At each step in the pattern I give what the measurements should be so that you can closely follow along. It’s not that huge of a deal if your units aren’t the exact same size as mine, but you do want them to be all the same size for consistency.
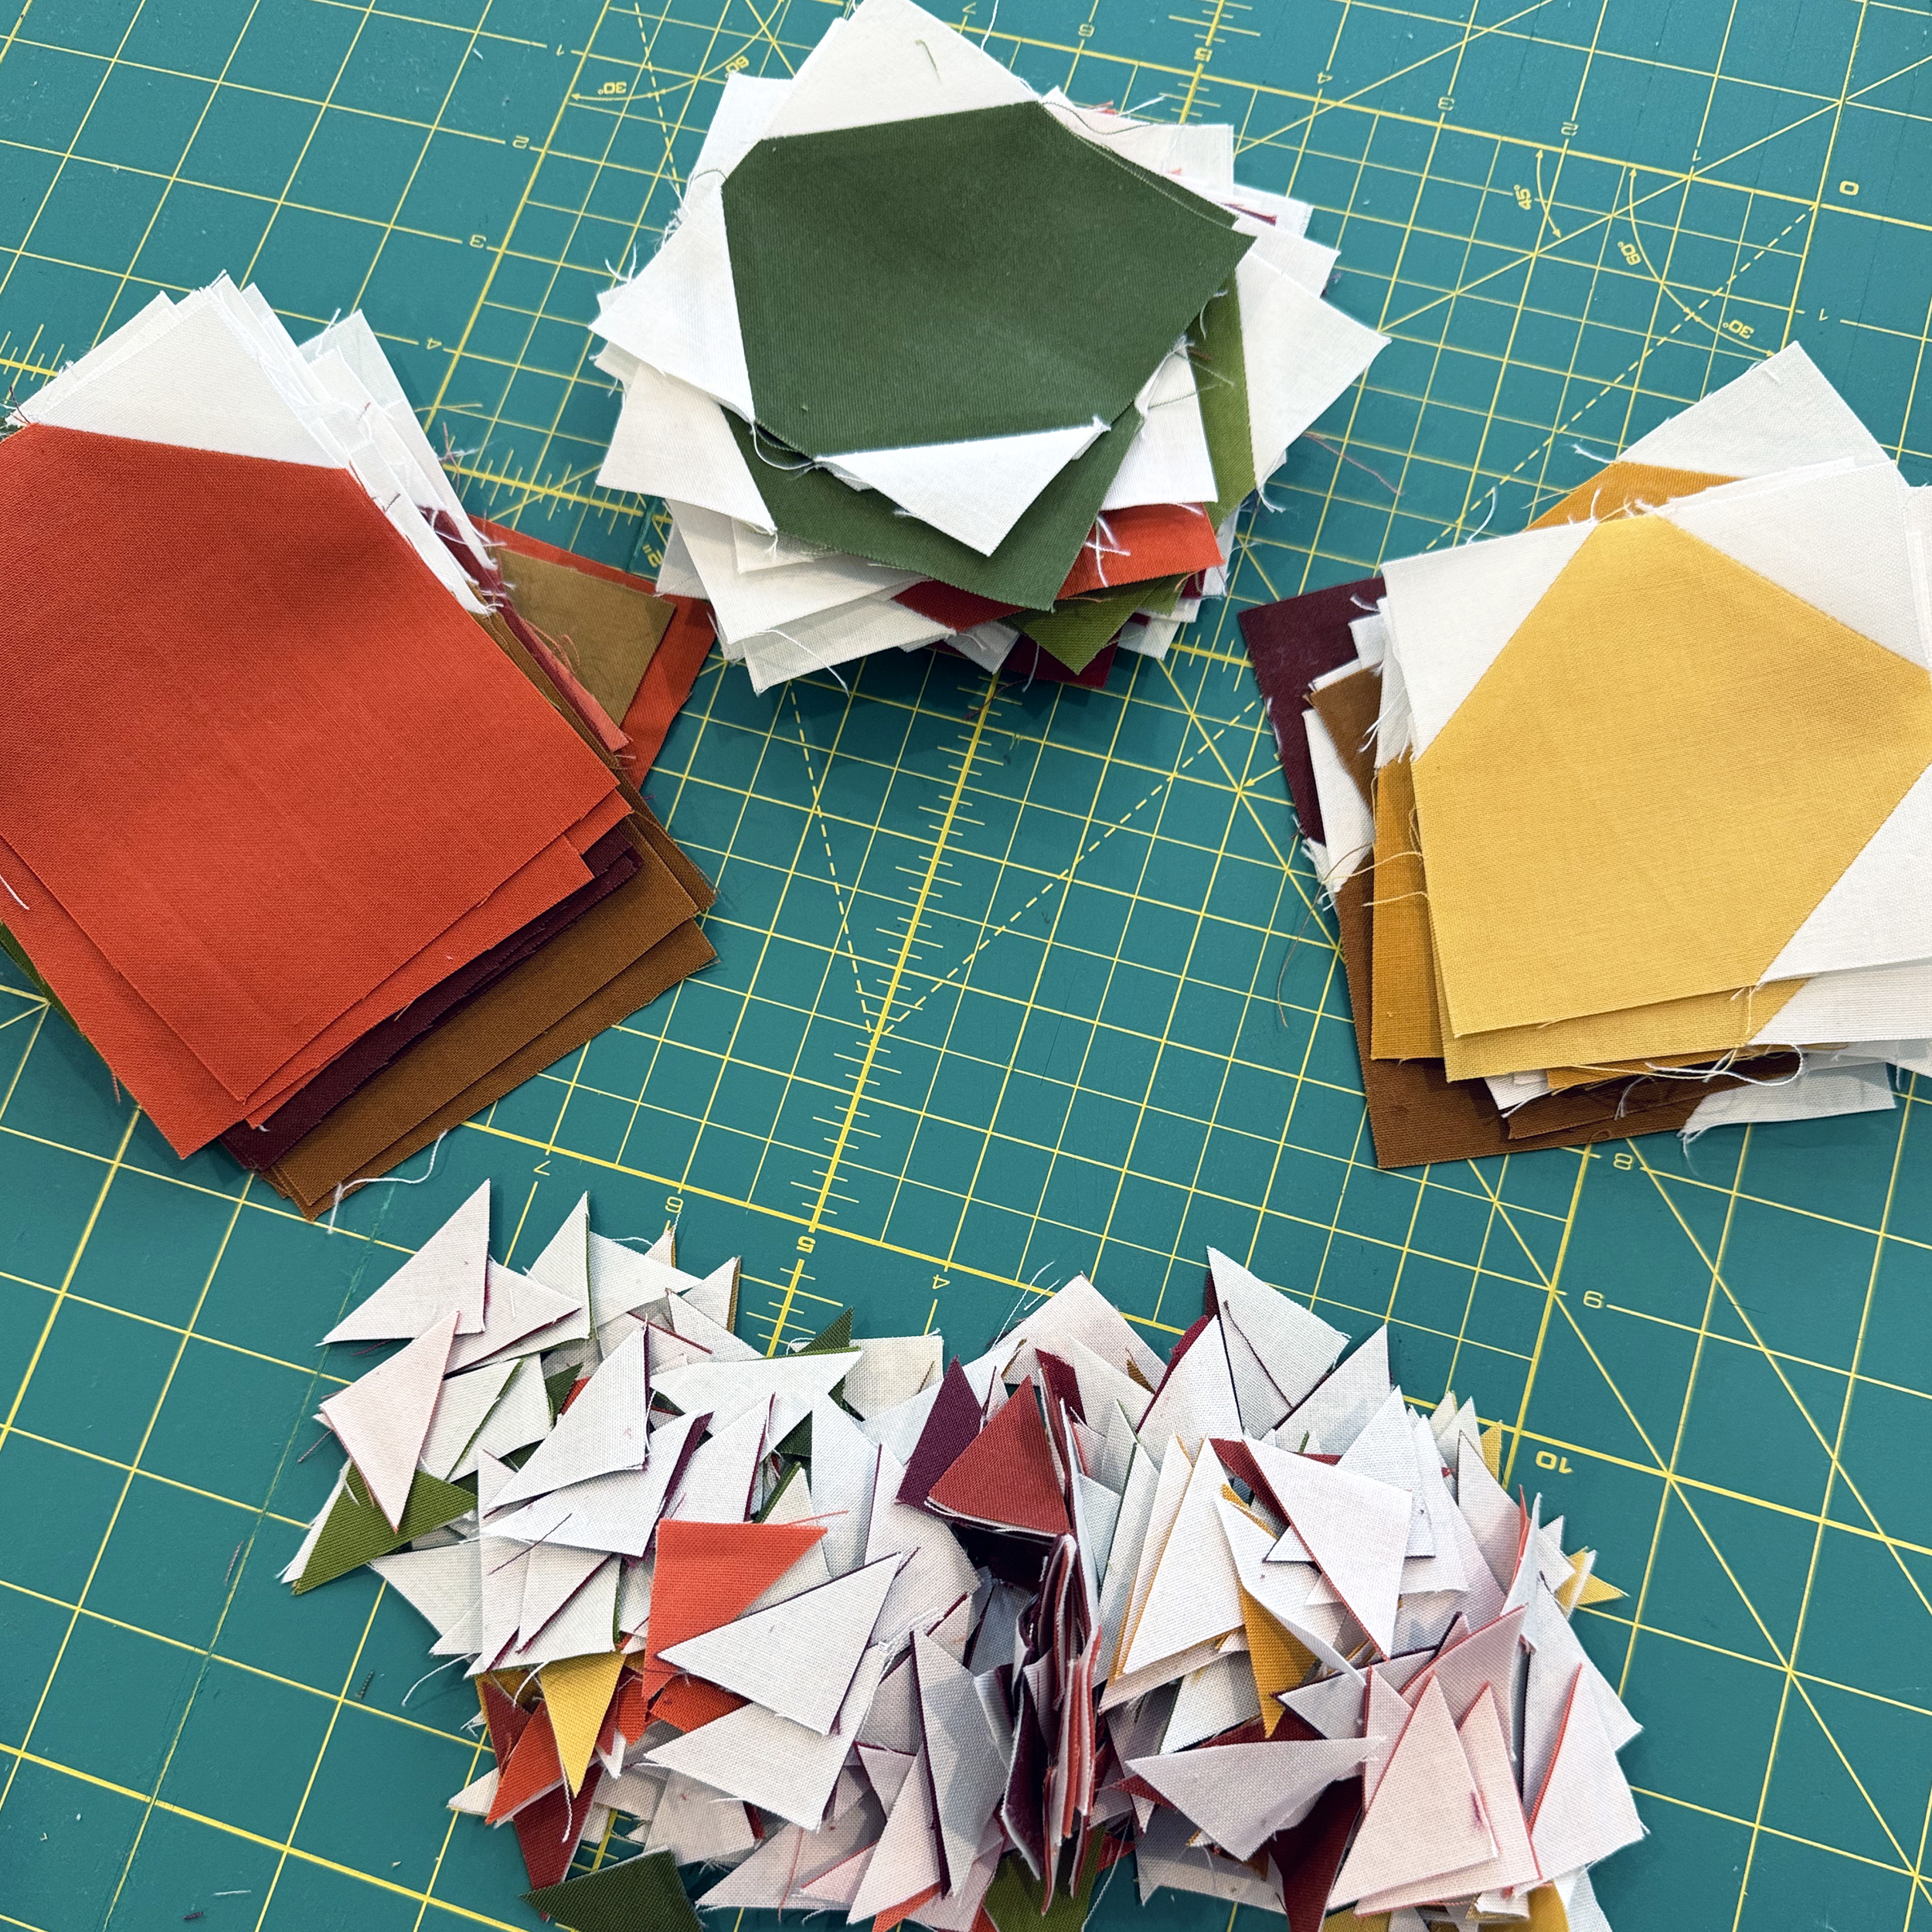
I prefer to sew all of the little stitch-n-flip squares on one side of each block so I can chain piece. That means assembly-line sewing a whole bunch without cutting threads in between. Then I will trim off all the corners at once and press my seams open.
I end up with a lot of leftover triangle tips at the end. You can totally save these for another project if you want to! You’ll also notice that some of the petals have 2 white corners and others have 3. Be sure you follow the pattern diagrams closely to sew them onto the correct corners.
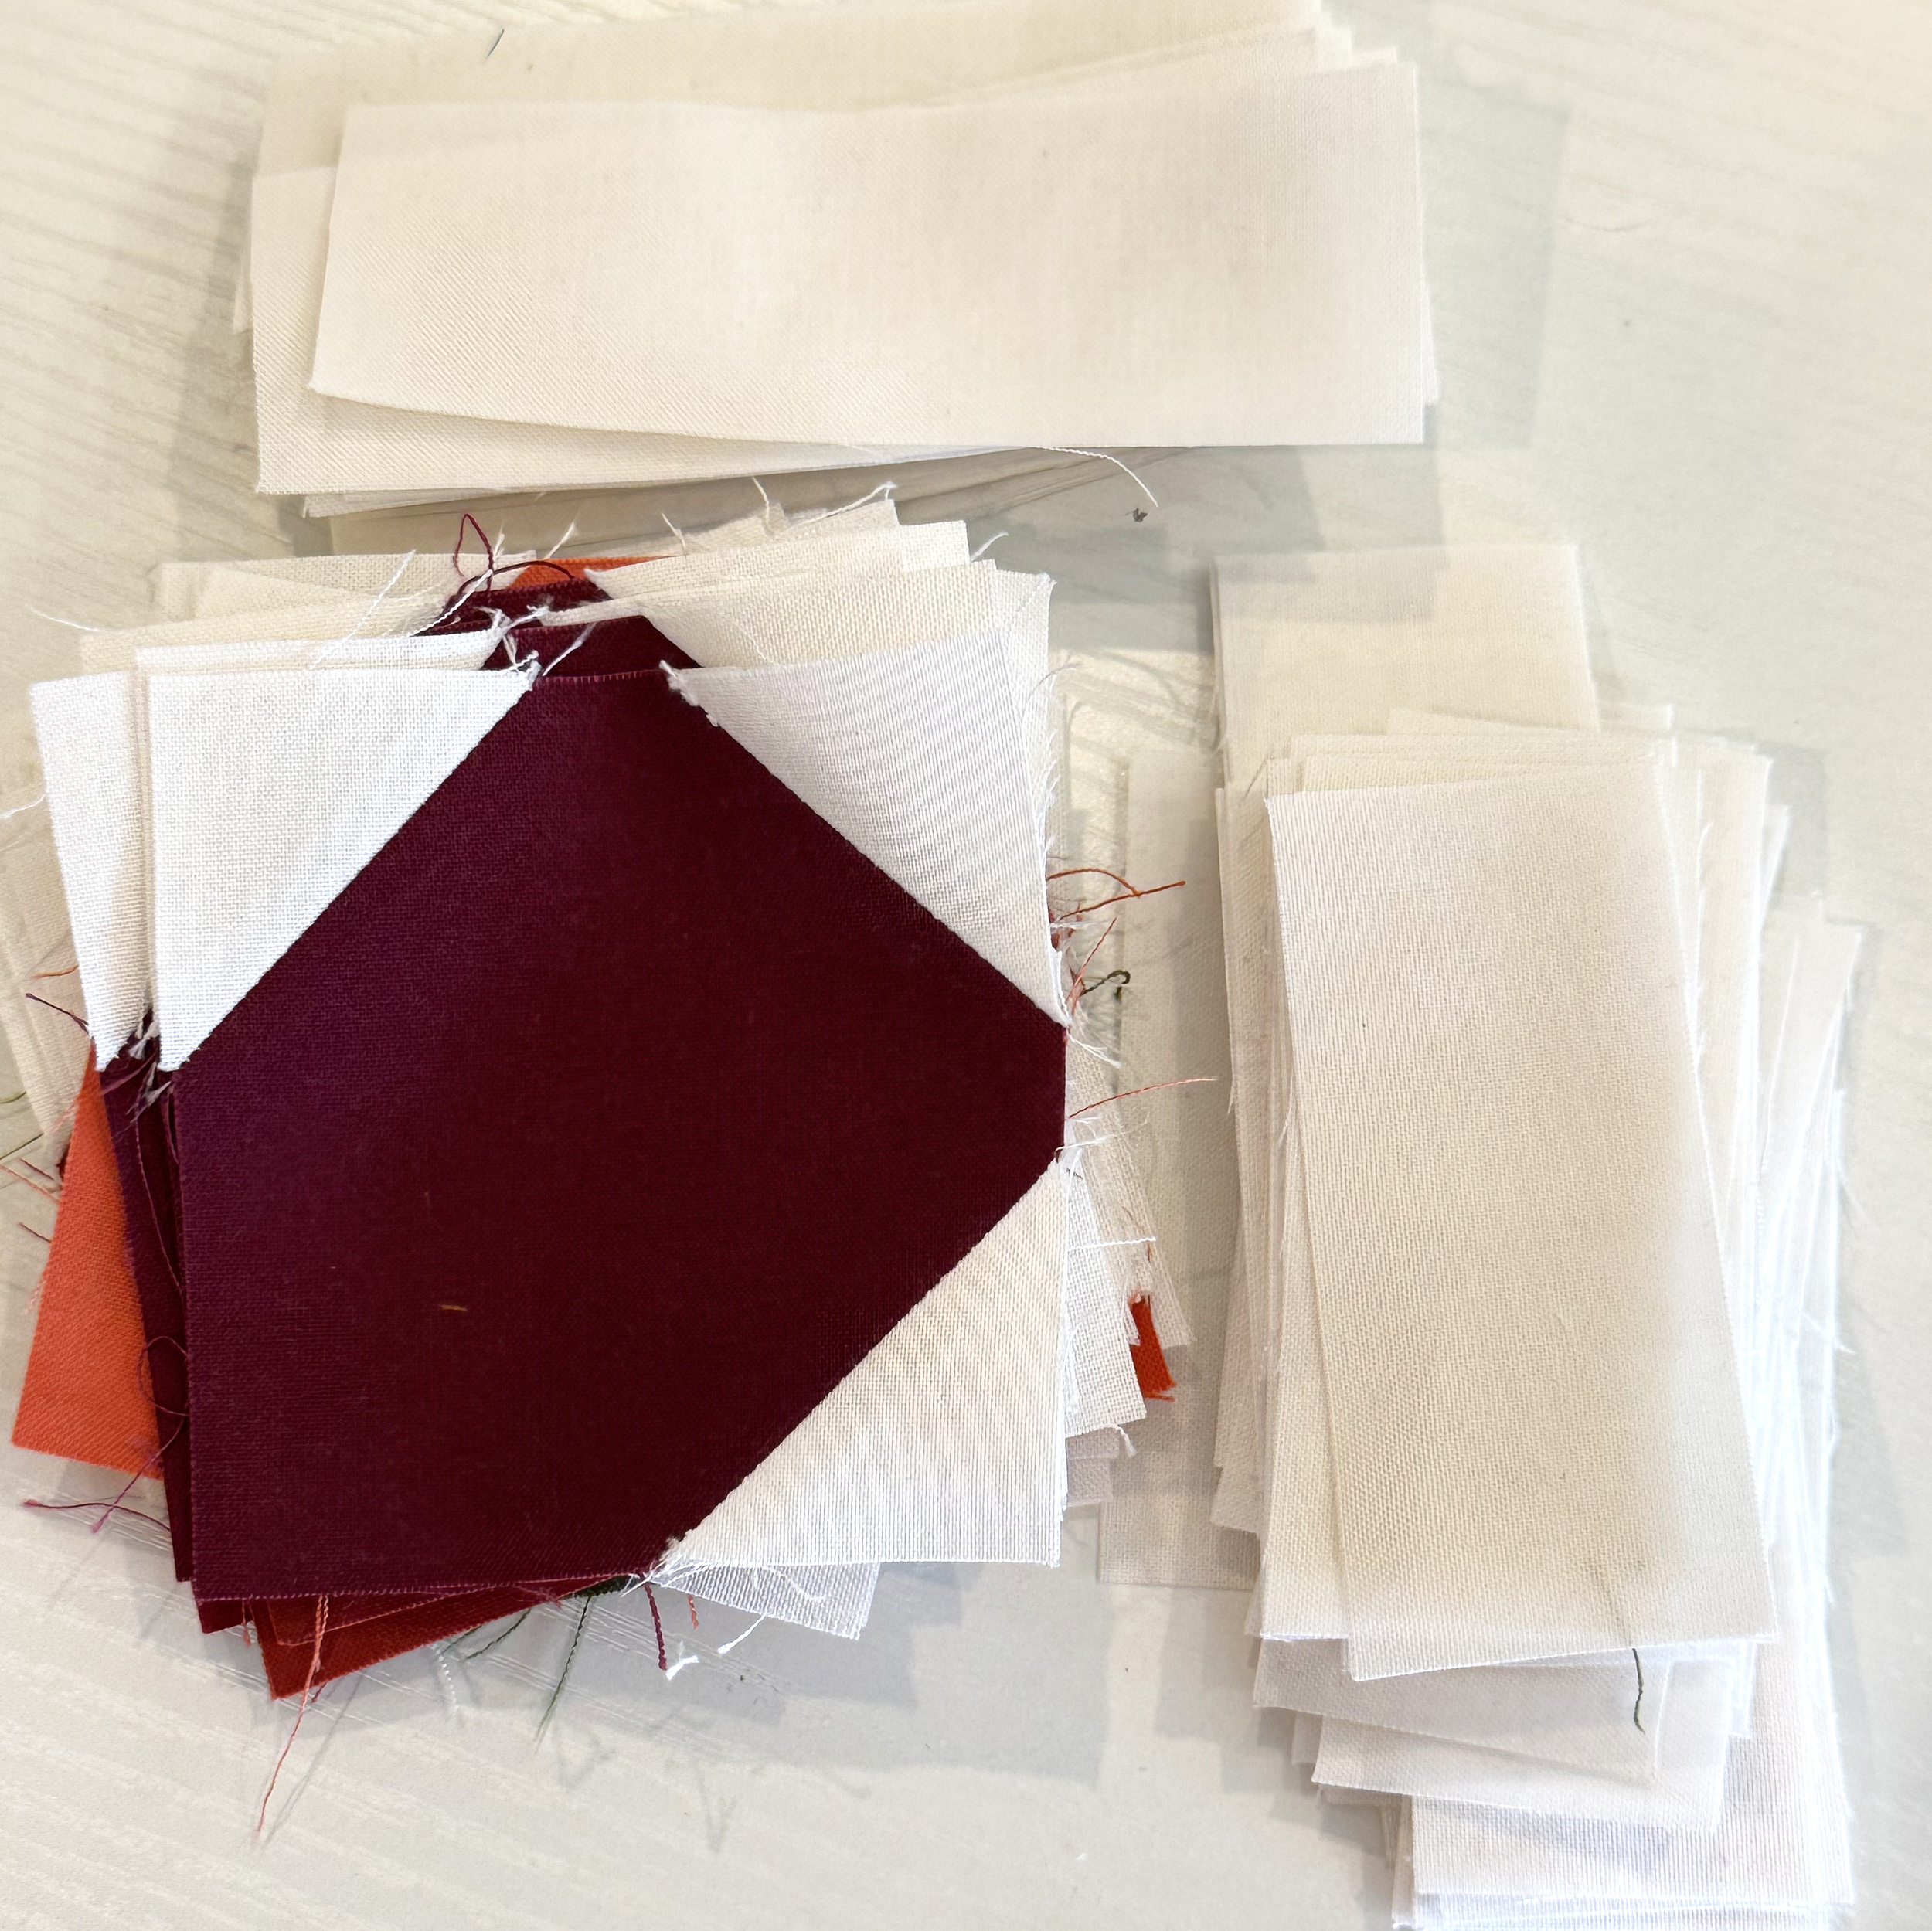
Once the petal units are sewn, you will be adding extra background strips to the square petal units to make them the correct size. I’ll stack all of the units up facing the same direction before adding the background strips. Notice that one background strip is shorter and one is longer. As long as you sew ALL units the same, you’ll be able to rotate them into position correctly.
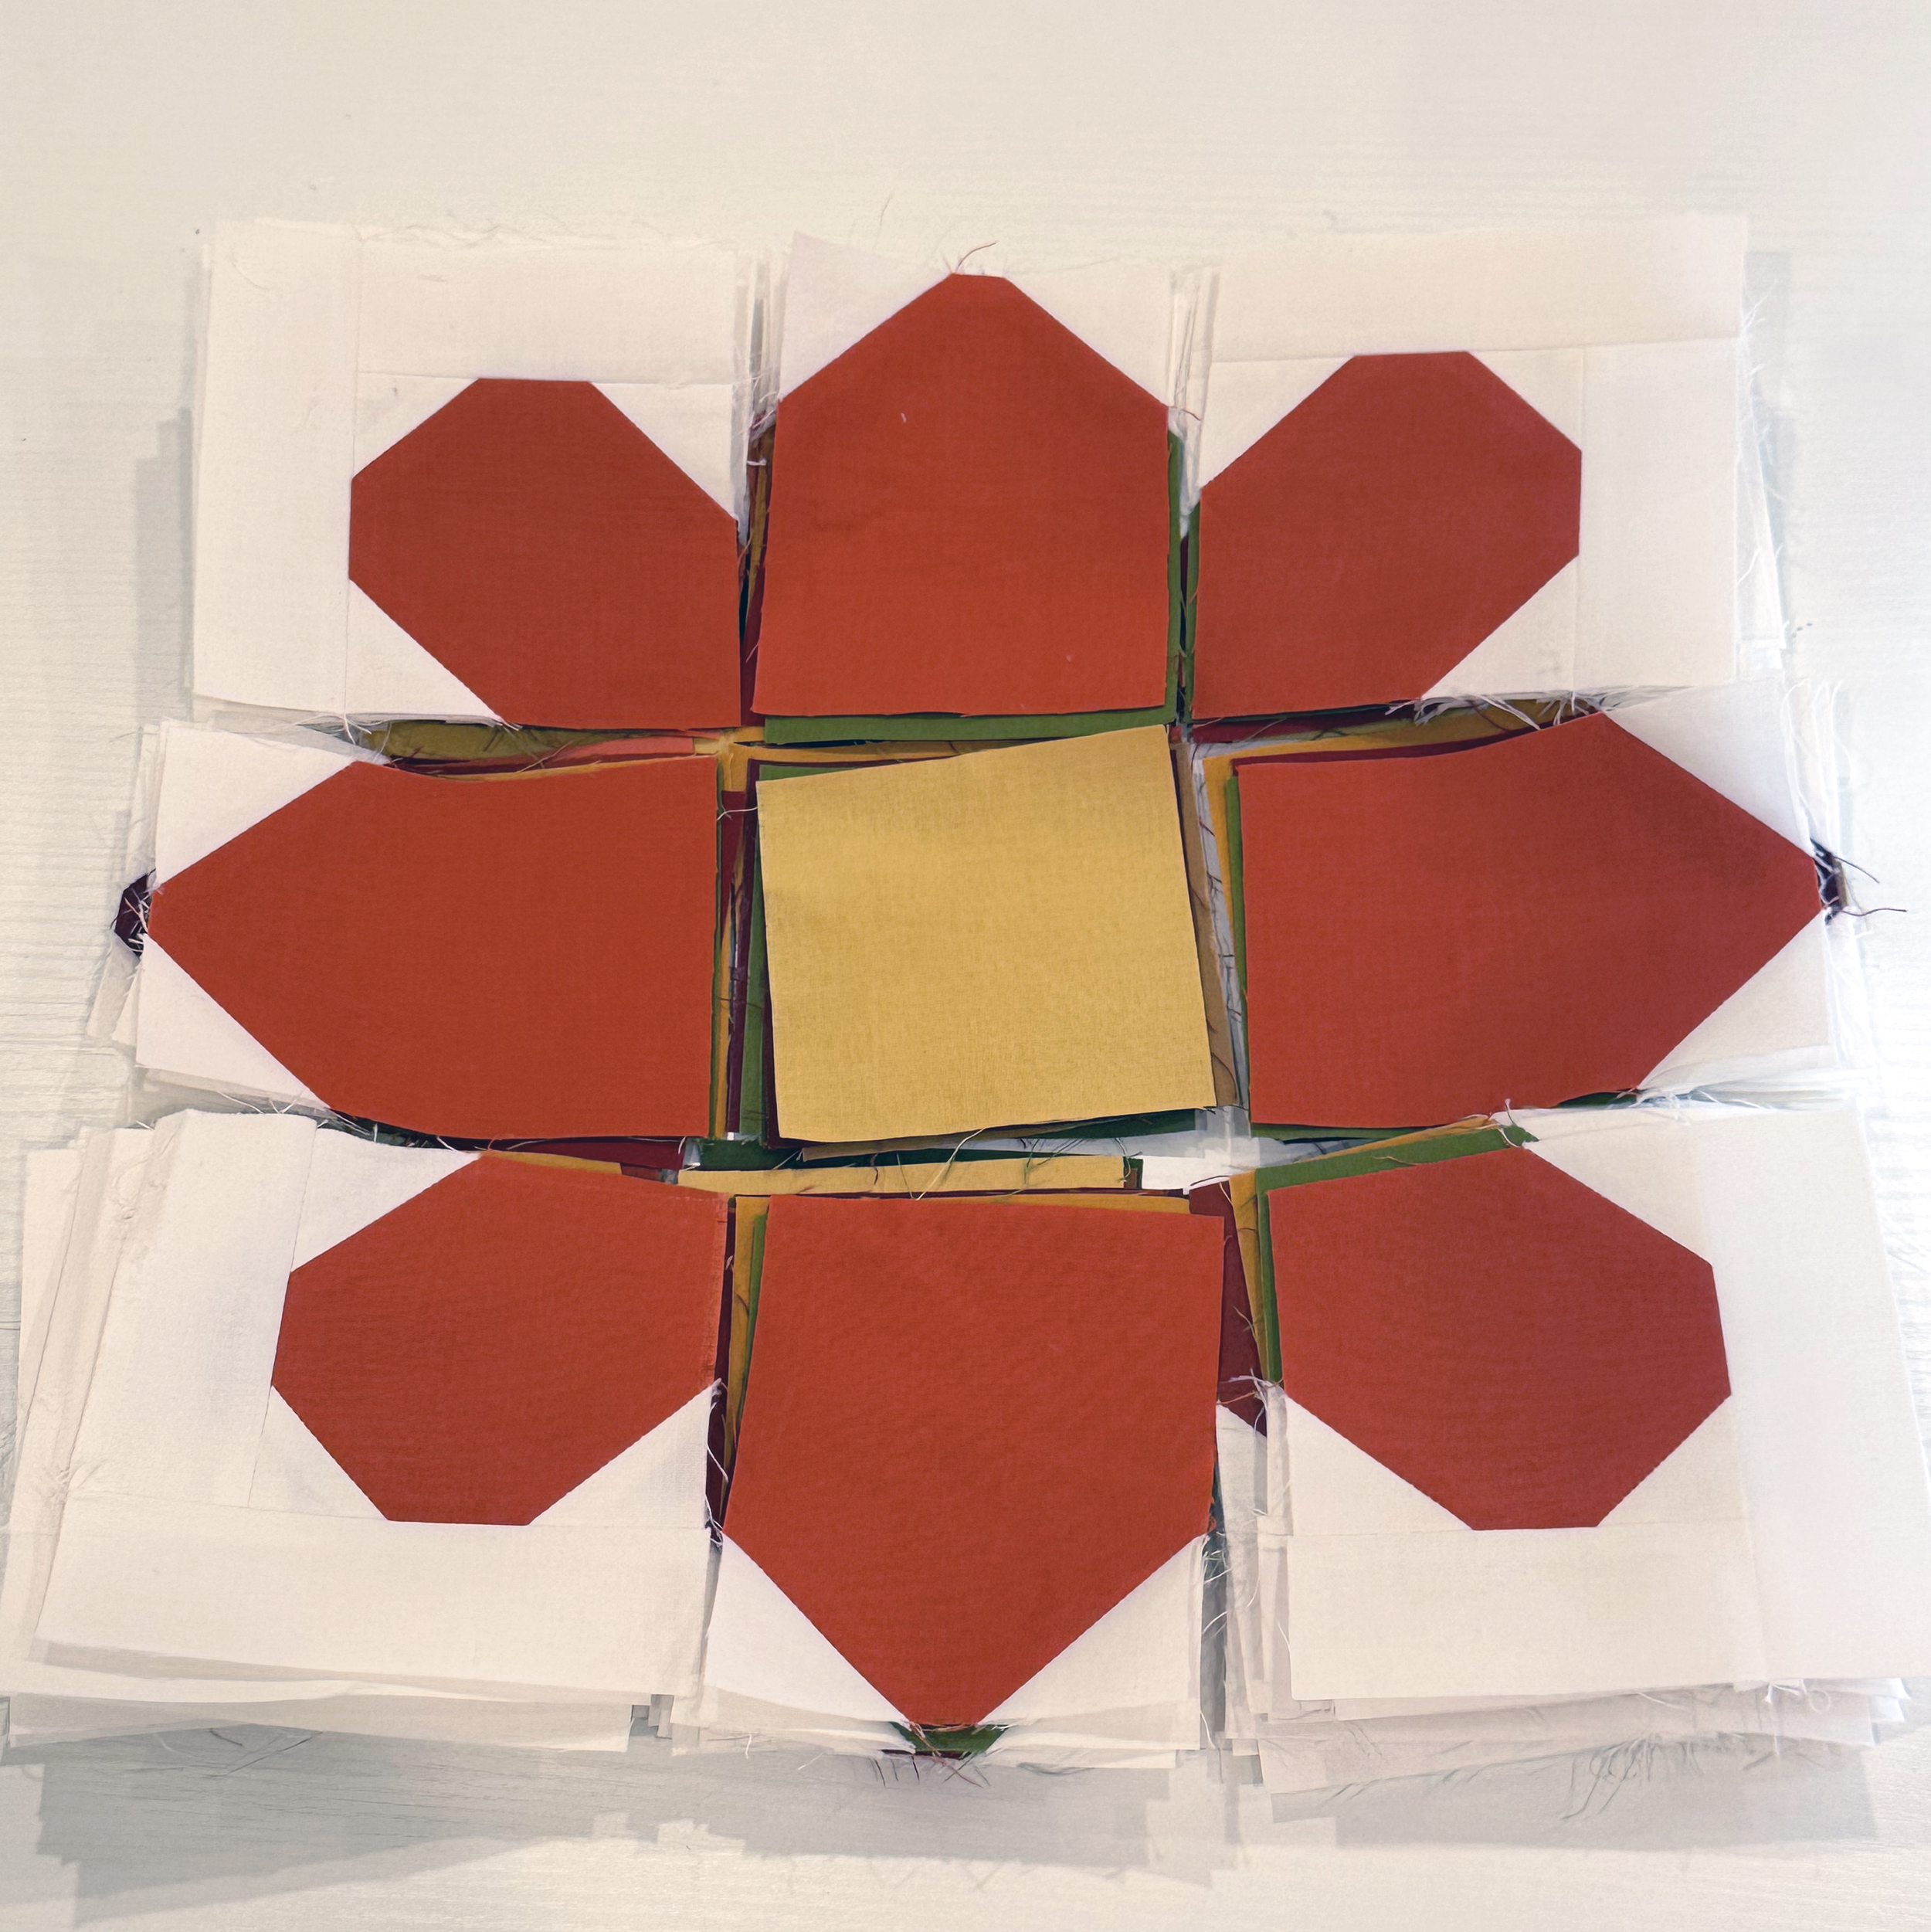
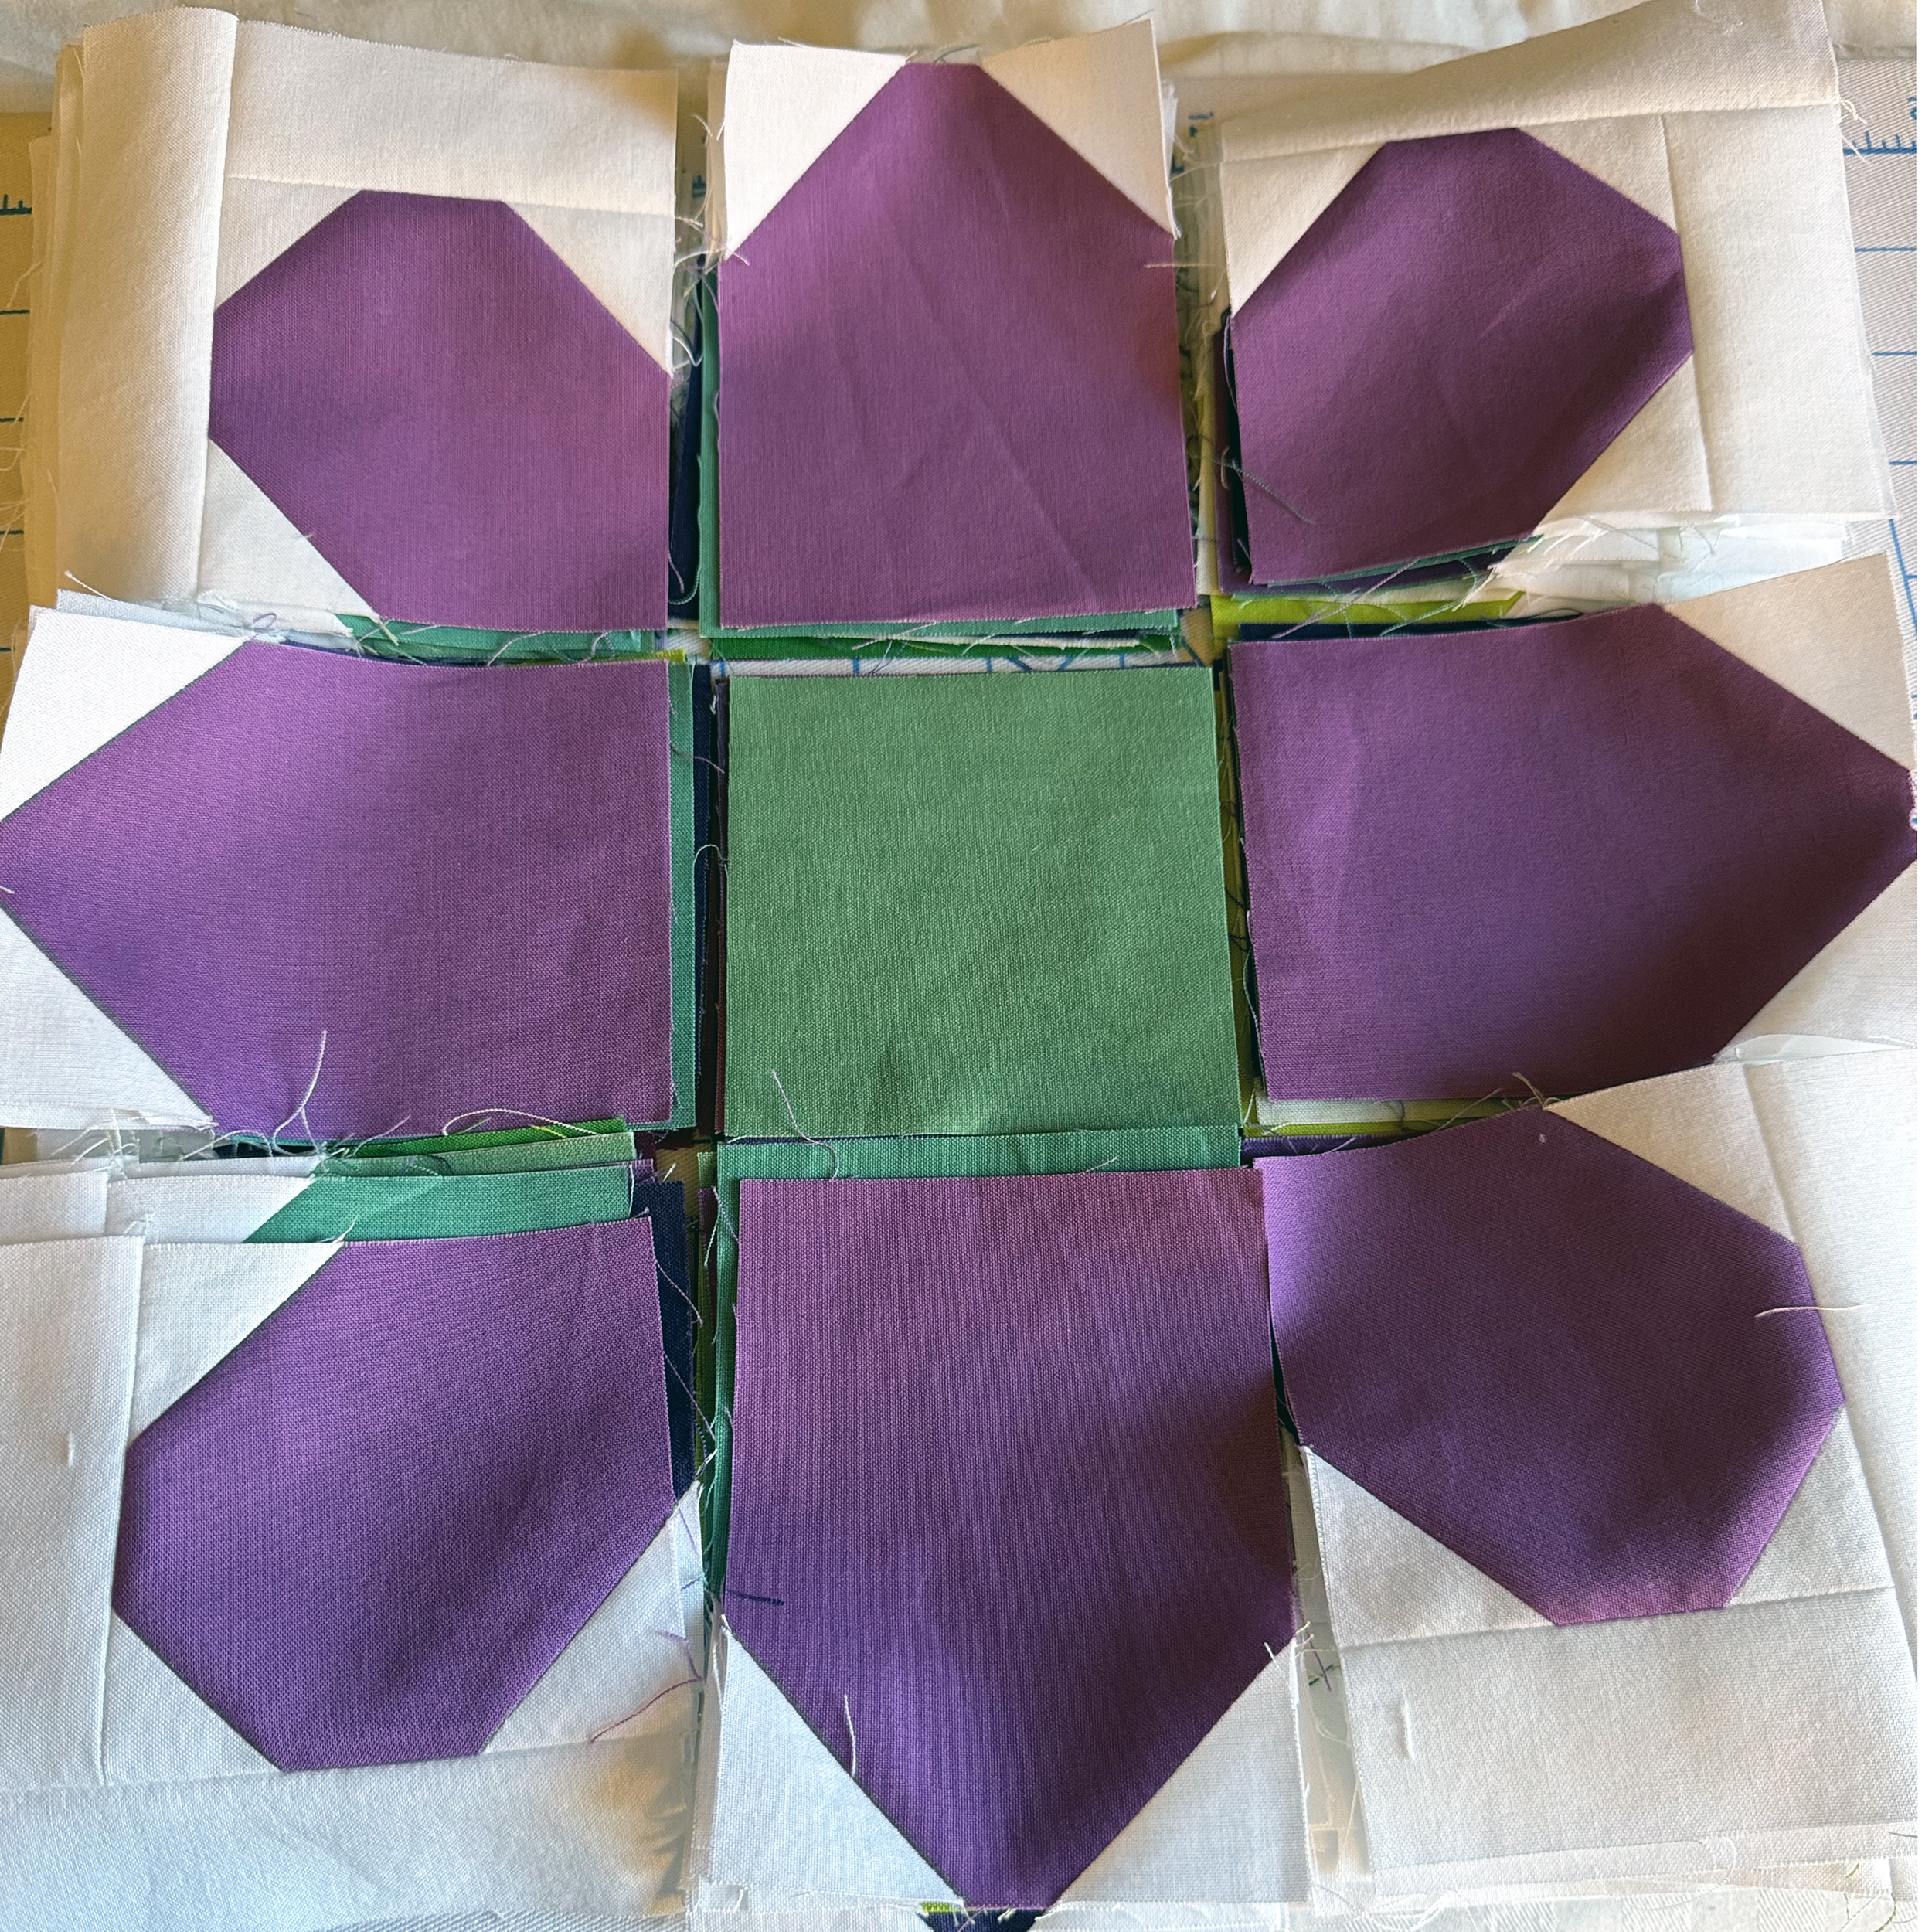
I will continue to assembly line sew by laying out all of the units for each block and stack them on top of each other. The main flower parts are all the same color so it’s easy to keep track of what unit goes where. Then you can decide which color you want for each center flower.
One thing to notice is that 4 of the petals look a little pointier than the others and that’s correct. They will appear more rounded once the blocks are finished and sewn together due to the seam allowances.
Why Make 1 When You Can Make 2??
Here’s what it looked like when chain piecing the stitch-n-flip units for the second colorway I made.
And my units are all in position and ready to sew!
This Week’s Homework:
Finish all of your Daisy Blocks for the size you are making, and then post pics of your progress in my facebook group!