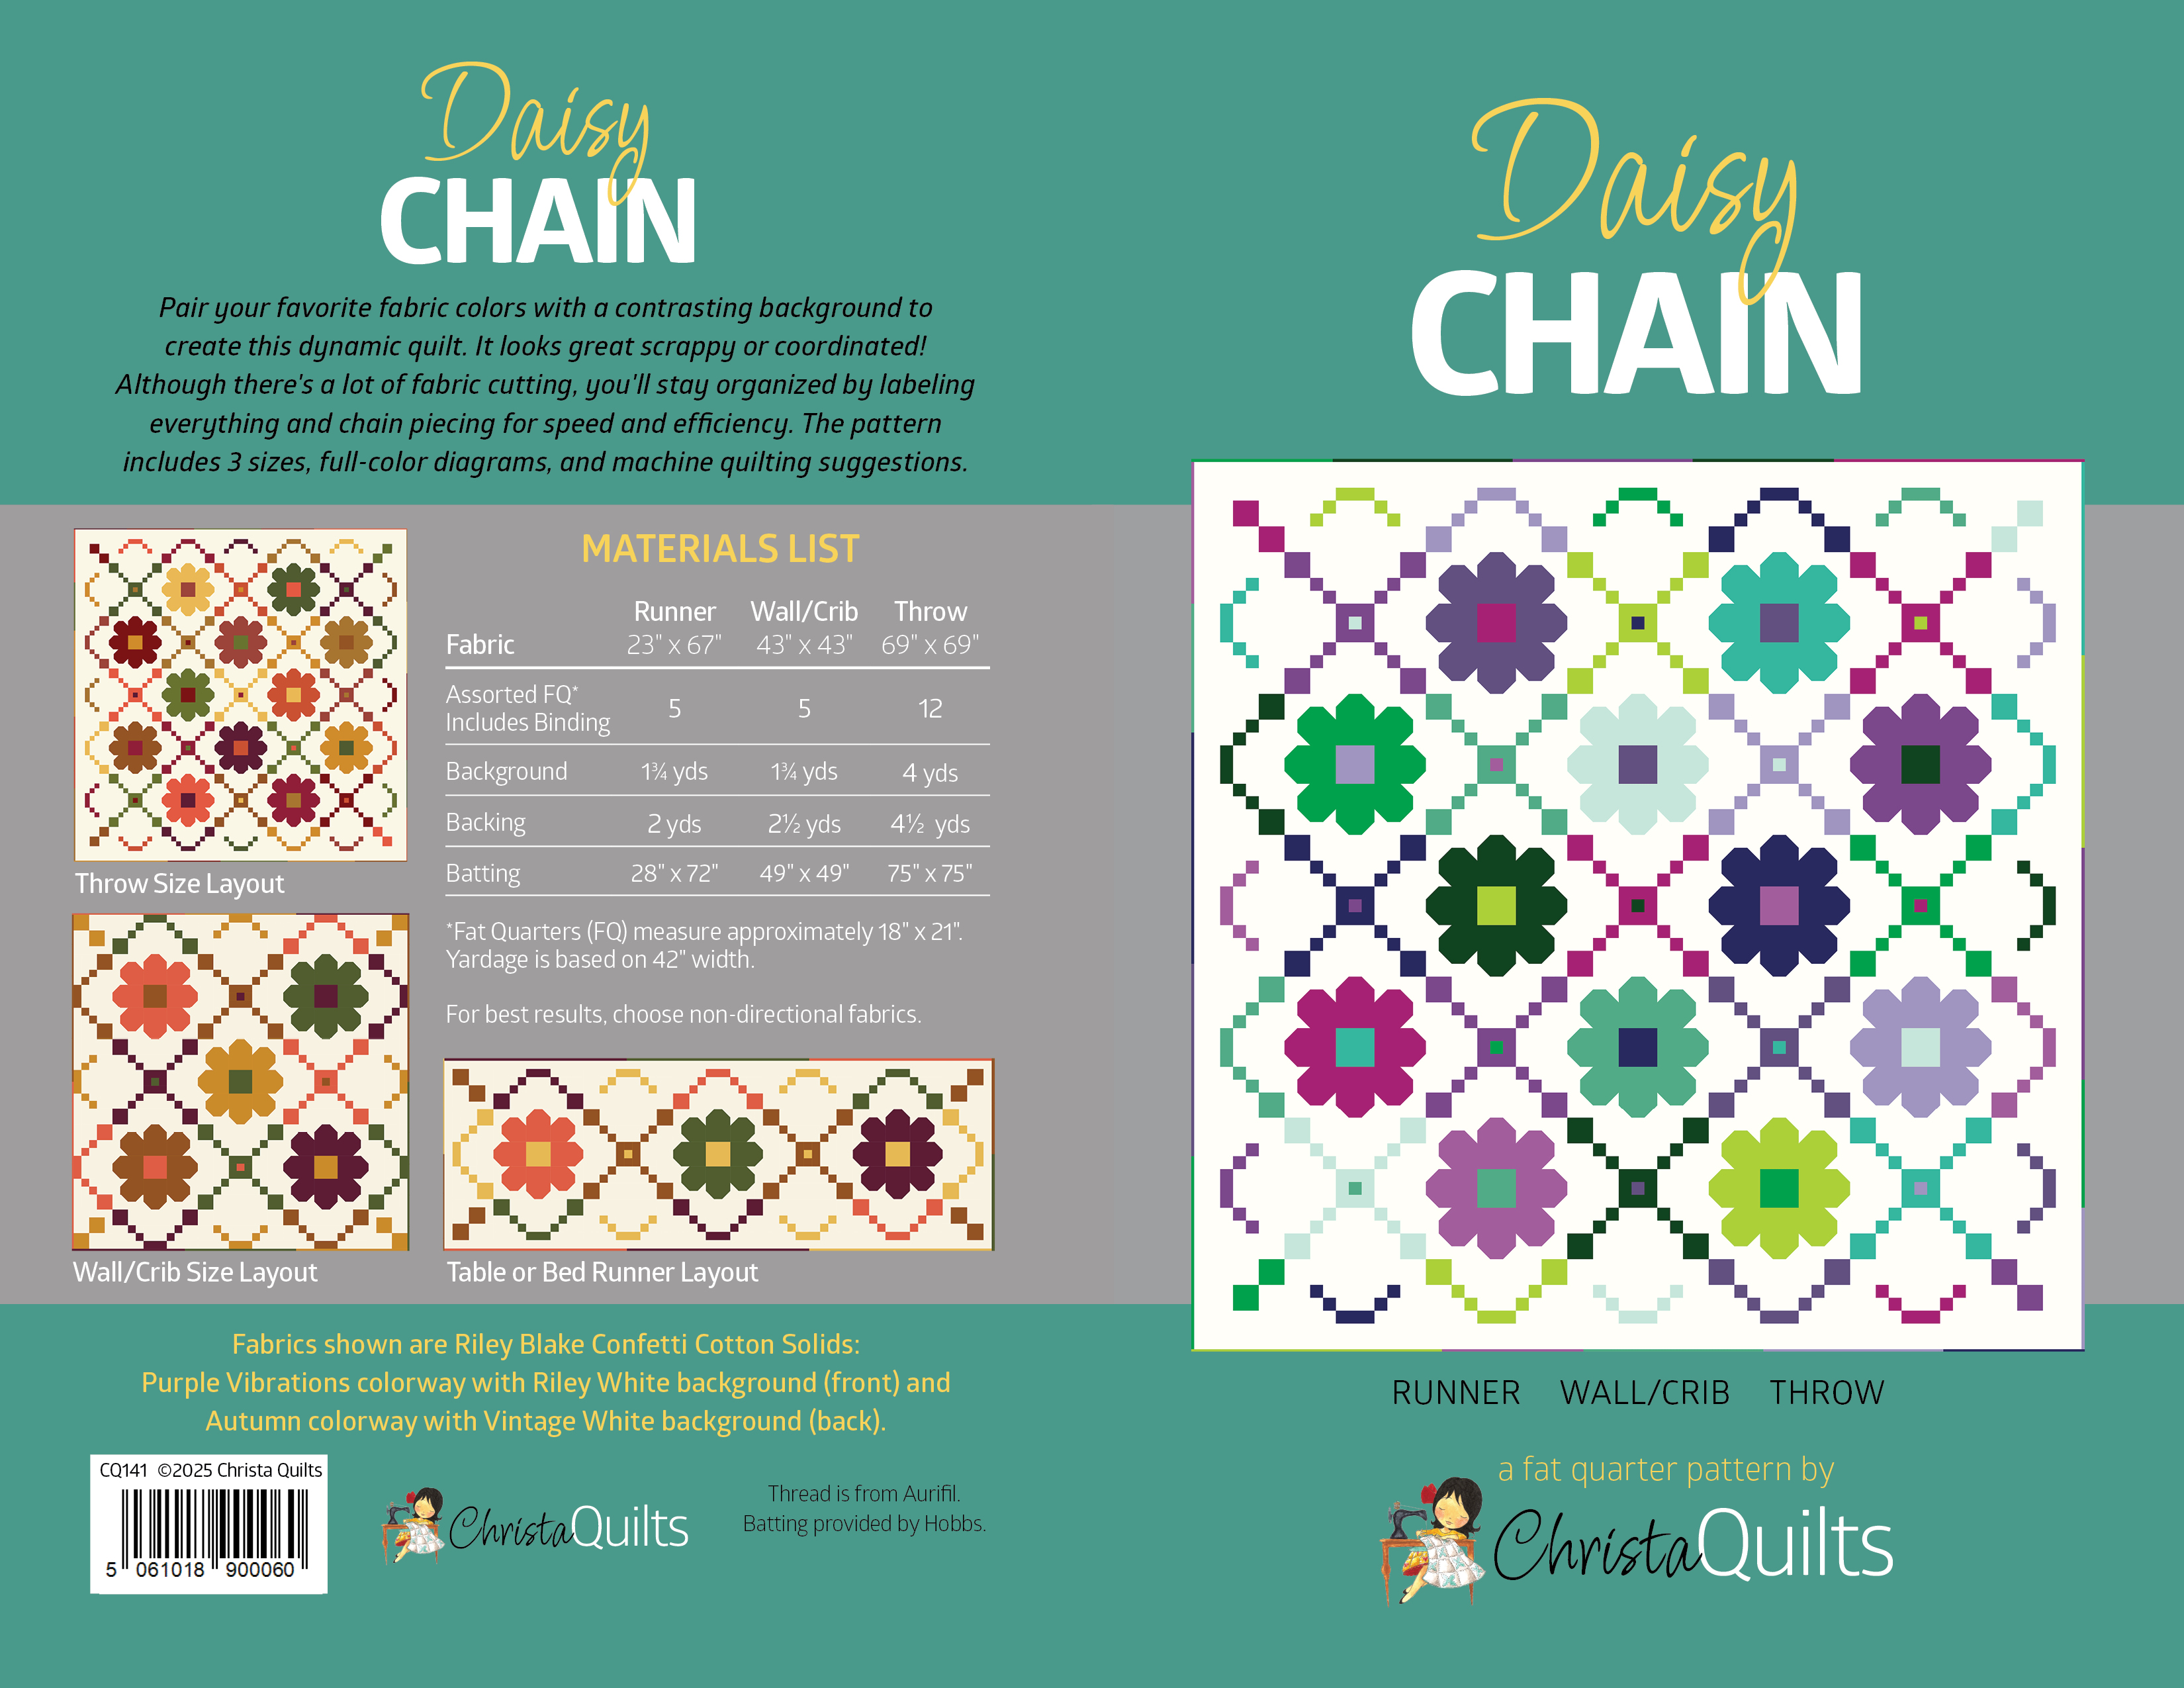
Welcome to Week 1 of Daisy Chain quilt along! We will dive right into cutting all of our pieces to make this quilt. I’m making 2 versions of the quilt in the throw size, but you can make any size you wish!
Click here to get the Daisy Chain Quilt Pattern PDF
Click here to get the Daisy Chain Printed Quilt Pattern
If you are just joining in, be sure to ask for the Daisy Chain quilt pattern from your favorite local quilt shop! (Shops can order it through Riley Blake, Checker, or EE Schenck.)
Stay Organized!
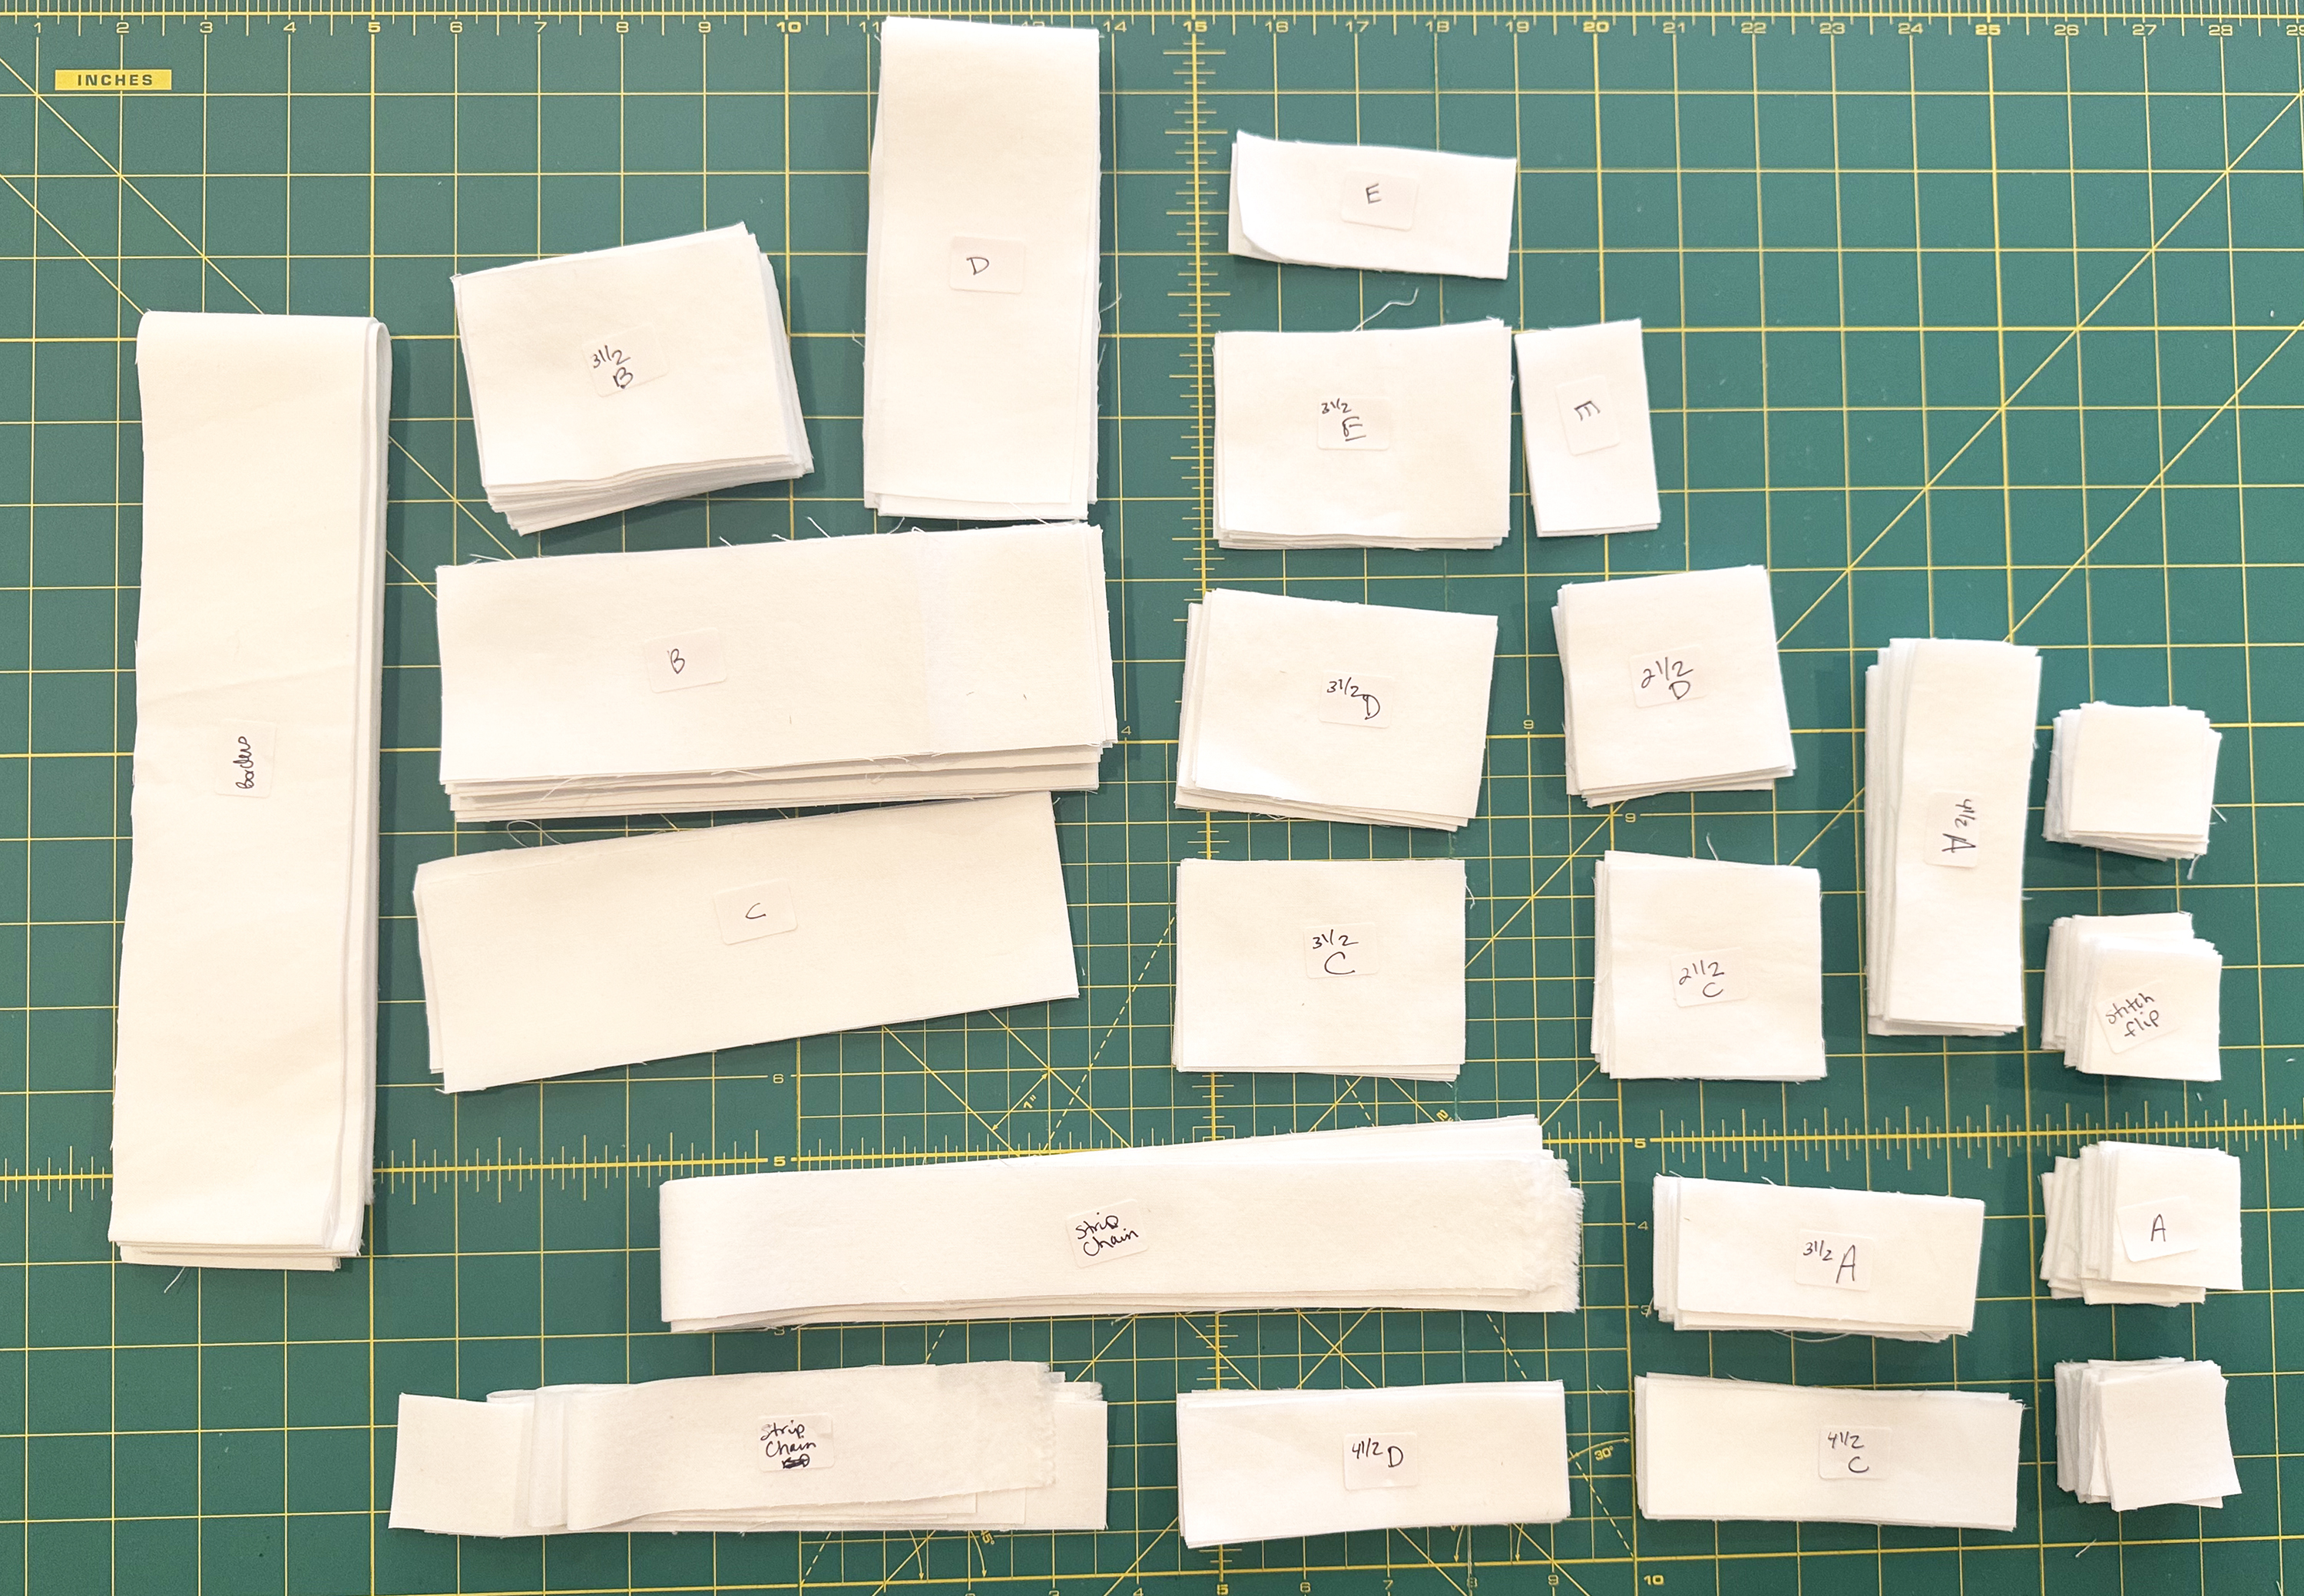
We will be working through the cutting charts on pages 2-6 of the quilt pattern. There is a LOT of cutting for this quilt, so I highly recommend labeling your units as you cut to stay organized. I created a bonus for you to go along with this pattern. It includes a coloring page plus 2 sheets of labels that you can print off and use to keep all of your units organized.
Click here to get the Daisy Chain extras: coloring page + fabric labels.
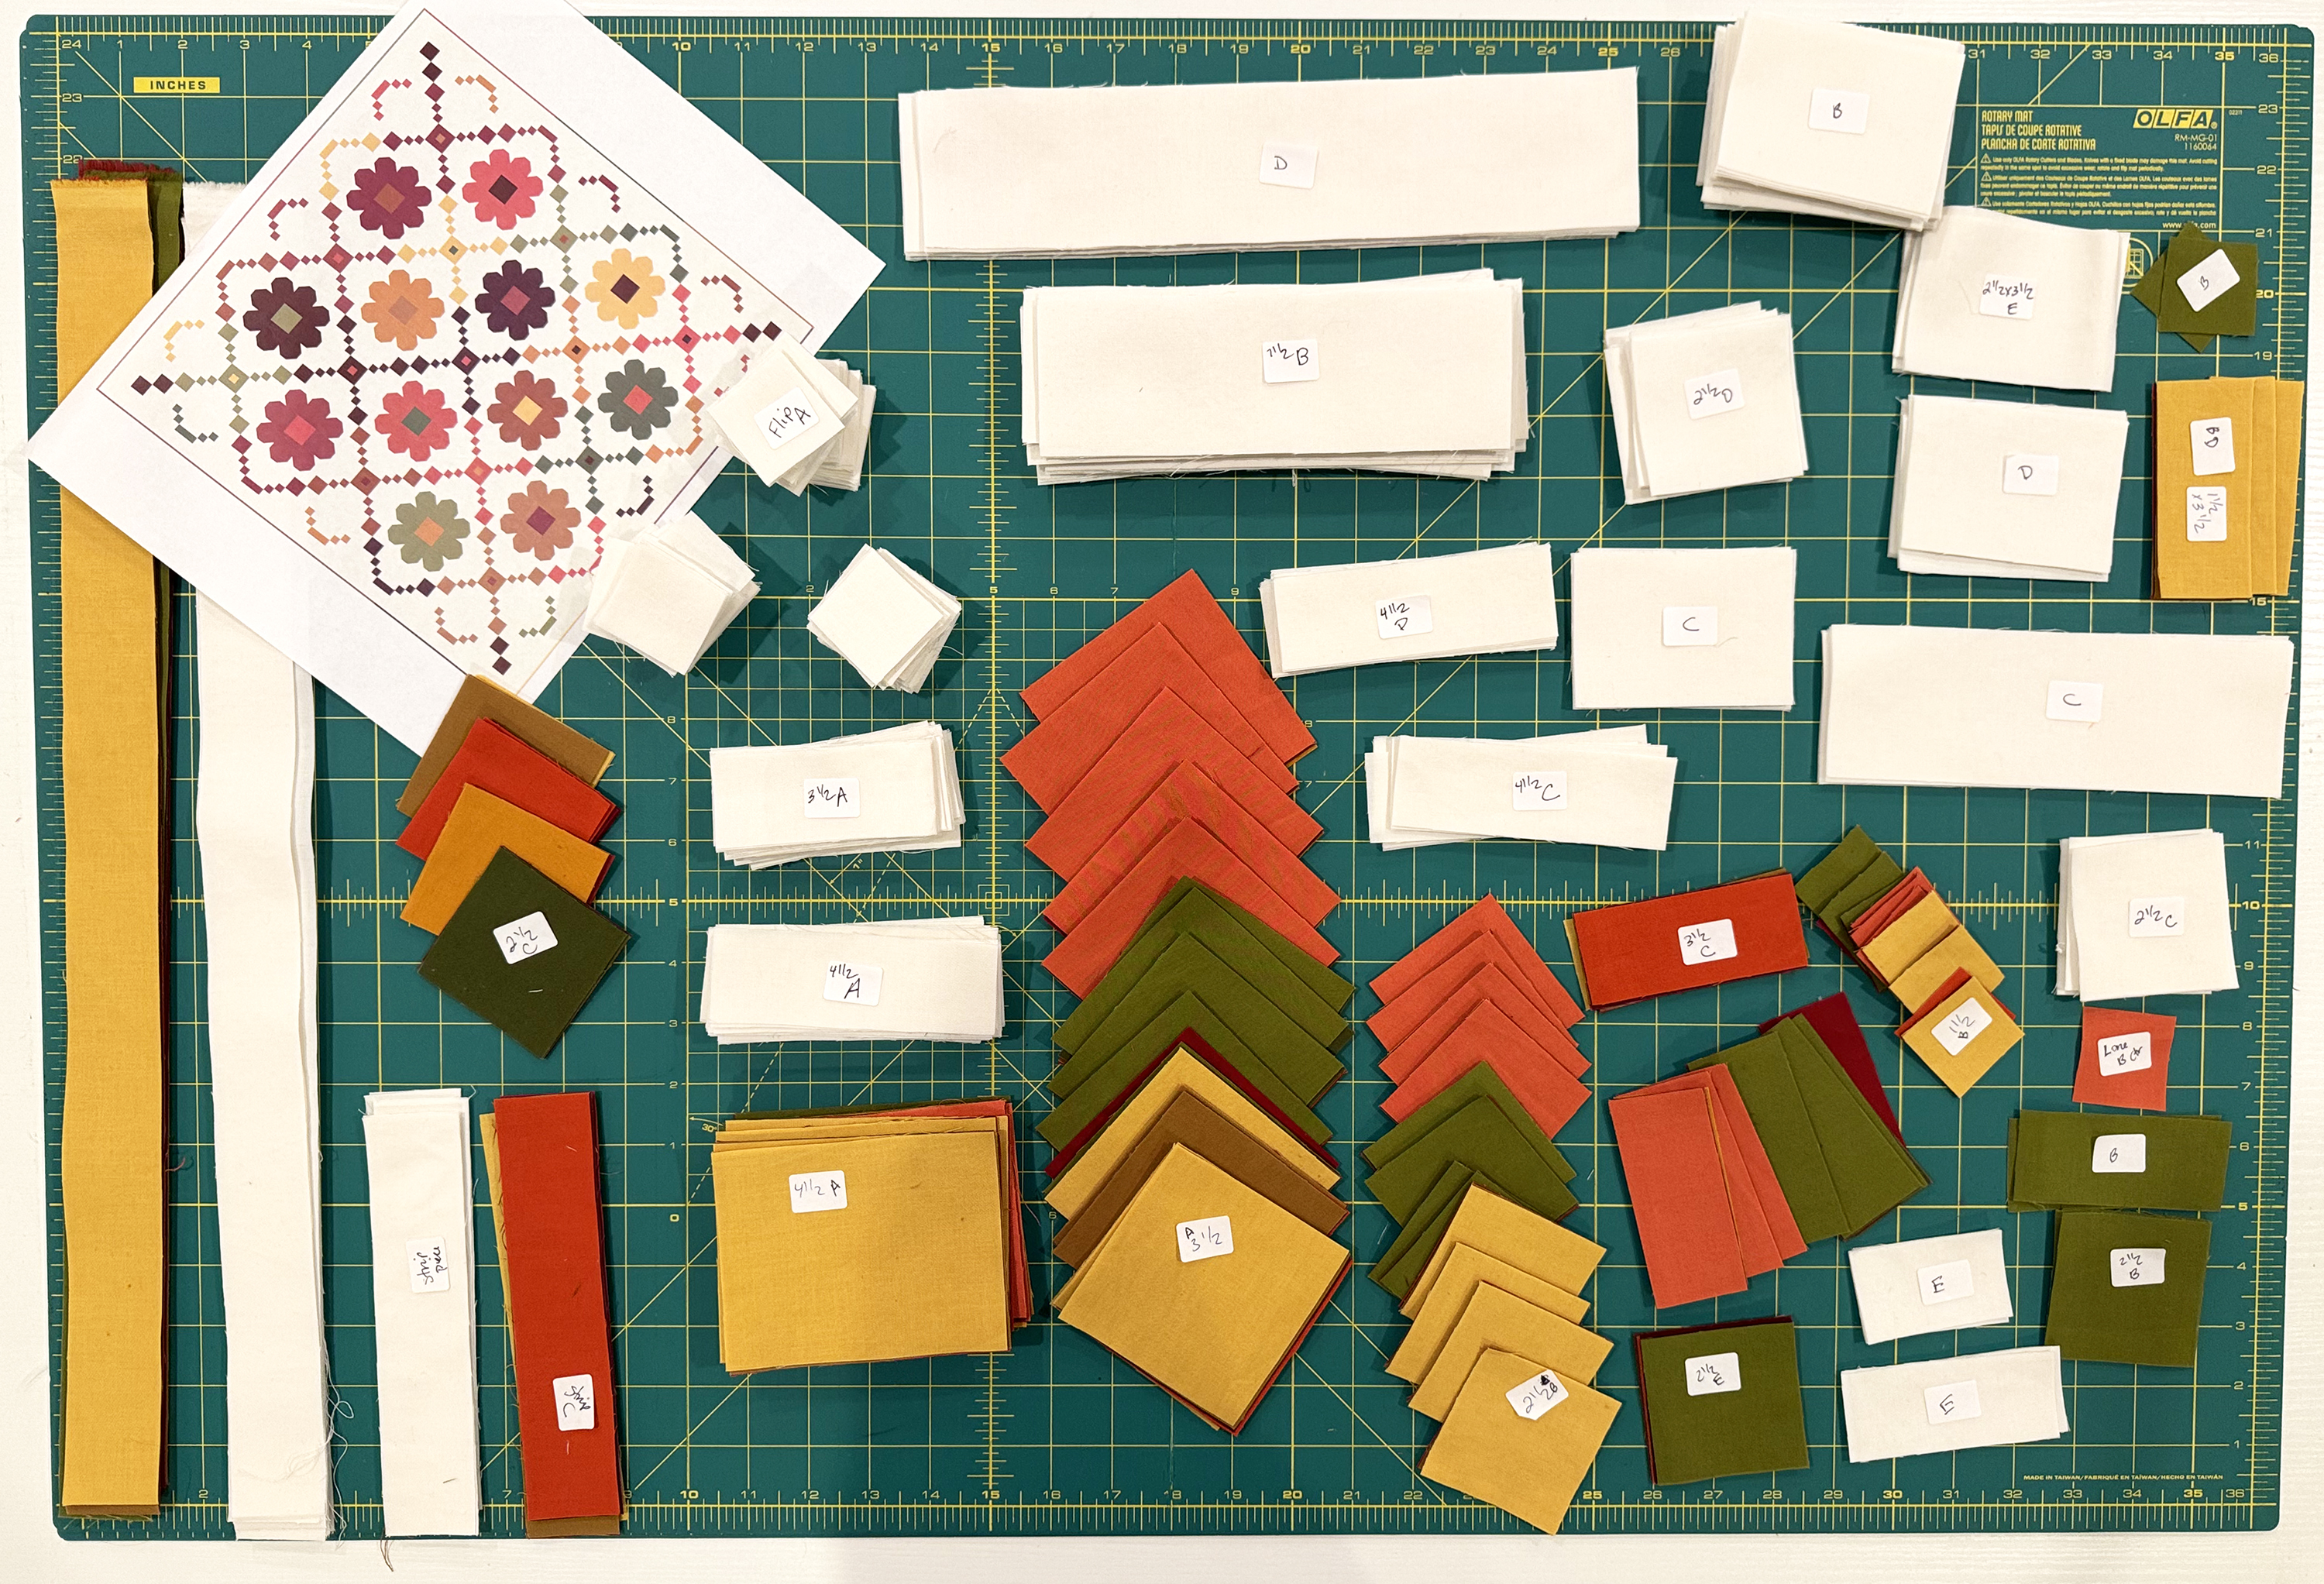
I’m using the Riley Blake Confetti Cotton solids Autumn FQ Bundle for this version.
For cutting speed and efficiency, I’ll stack my fabrics up to 4 layers thick and double check my measurements. I like to cut out all of my strips first, and then subcut those into squares and rectangles. Most of the blocks will be made from individually cut units. However, there are a couple of units that can be strip pieced, so follow the cutting charts carefully as indicated.
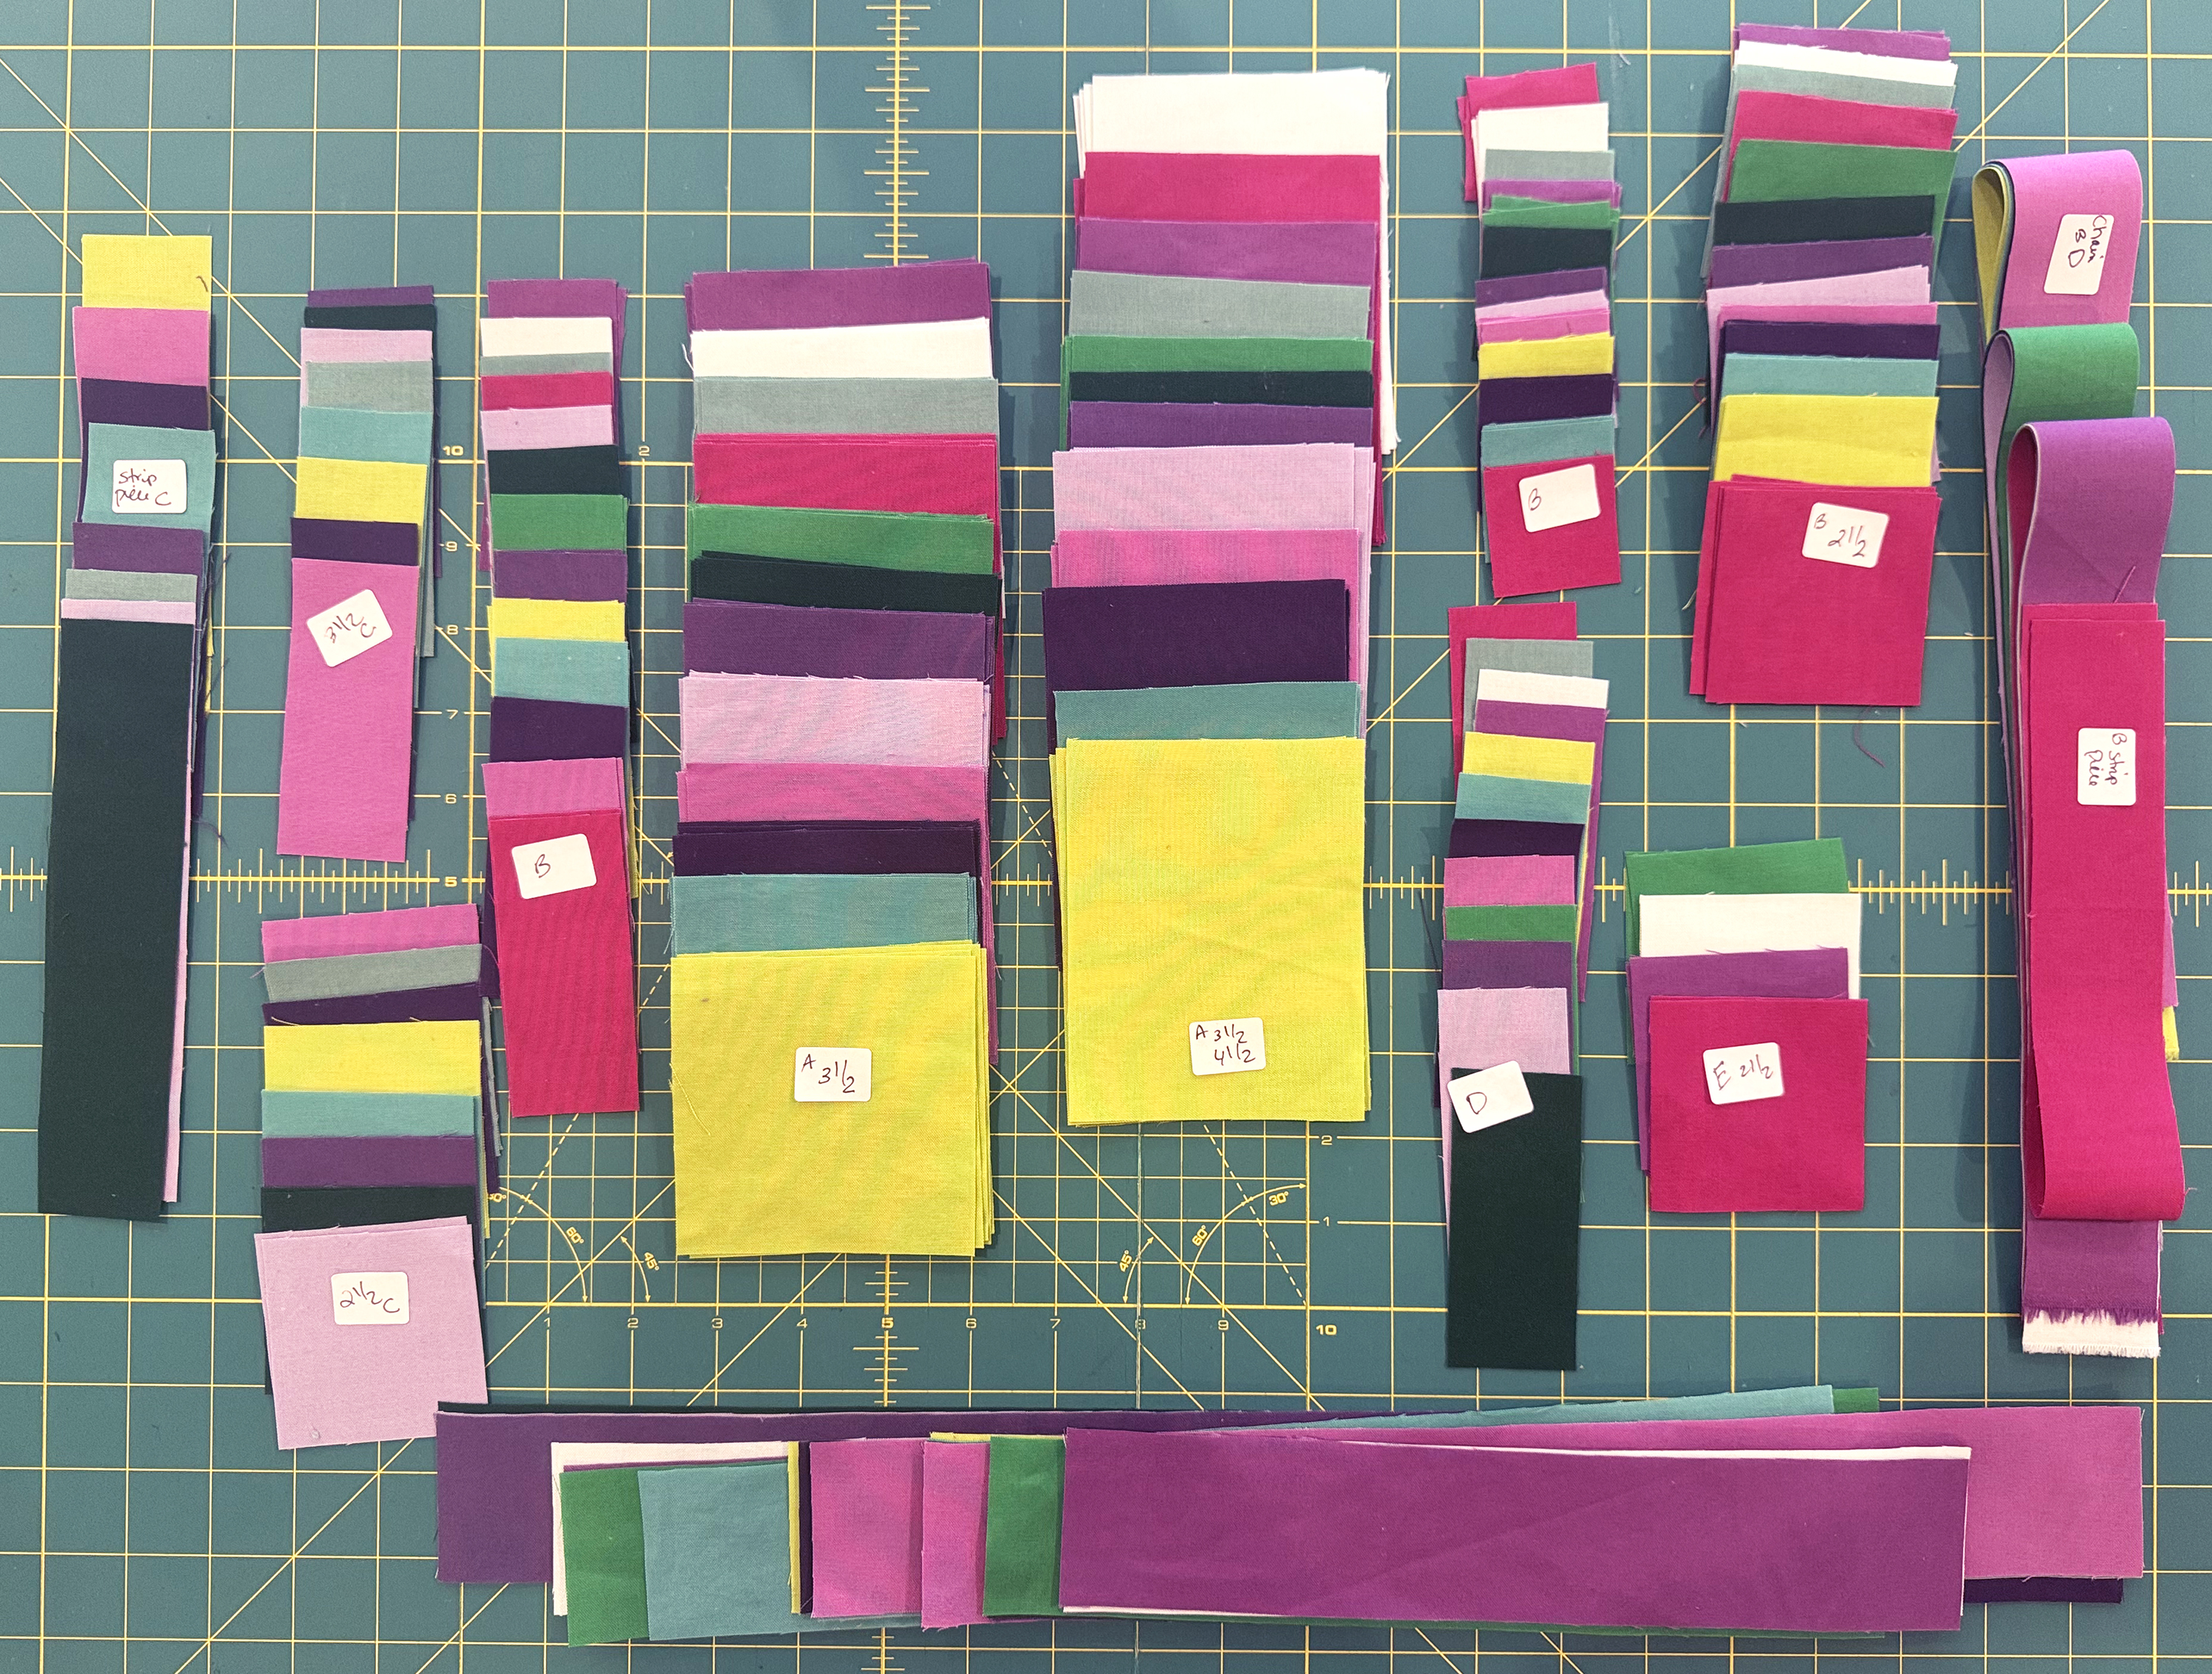
I’m using the Riley Blake Confetti Cotton solids Purple Vibrations FQ Bundle for this version.
I’m basing the instructions on 42″ wide fabric for the background with 40″ of usable length, and 17″ x 21″ usable area of the fat quarters. I recommend cutting out the fabric for the colorful units first, and then the background. The background goes much quicker since it’s all of one fabric.
I used Riley White background paired with the brighter colors, and Vintage white with the warmer tones. Yes, it’s a lot of cutting, so take it slow and work your way through, one stack at a time.
Leave a comment if you have any questions about this week’s “homework.” Remember, I’m here to cheer you on every step of the way!!
For all the Quilt Along tips, click here to go to the home page, and then scroll to find each week’s post.
