Christa’s Soapbox – QuiltCon 2016 is NOT Your Traditional Quilt Show

Today I will talk a little bit about the quilts from QuiltCon. I took a bazillion pictures on the last day of the show, as part of my preparation for a webinar on Modern Machine Quilting (which I’ll be presenting to members of The Modern Quilt Guild in April). However, rather than overloading this post with pics, I’ll just share a few of them here. For a complete list of winners visit The Modern Quilt Guild Blog.

Read my earlier post about why I think that QuiltCon is about more than just quilts.

Blog_bos

Best in Show Winner – Pieced and Quilted by Melissa Averinos – My Brother’s Jeans

First of all, QuiltCon is NOT like any other show out there. While I was at the show and perusing social media, I ran into comments somewhat disparaging the Best in Show Quilt for not being up to par with other national quilt show winners. I also remember some grumbling at QC 2015 and 2013 that some quilts that earned accolades at other traditional shows got nary a ribbon at QuiltCon. My answer is that QuiltCon is QuiltCon – it’s not trying to be like any other show, and for that I am grateful.

blog_best_hmq

Best Home Machine Quilting – Pieced by Members of the Albuquerque MQG, quilted by Renee Hoffman of Quilts of a Feather

I was so thrilled to see Renee win such a high honor. For me this truly is the epitome of a modern quilt. You can look closely to see that she combined many traditional quilting elements successfully into a modern design. I love it! Yes you CAN combine swirly motifs and feathers in a modern quilt. It’s not always just about straight line quilting! It’s all in how you do it.

blog_AMQG_detail

The details on this quilt are so fabulous! I’ll discuss it more as part of my upcoming webinar.

One of the things that excites me about the quilting community is that there truly is something for everyone. If you love to spend 500 hours machine quilting a quilt, you can – and I think that is fantastic! I’ll admire your breathtakingly beautiful workmanship and appreciate the skill, thought and precision that goes into each stitch.

If you pour your heart and soul into a design, and rather than spending a small fortune on having it professionally quilted to perfection, you decide to quilt it yourself so you can take ownership of the entire process, I’ll equally applaud your perfectly imperfect stitches.

In fact, I was able to have a very in-depth conversation about this topic with Annie Smith – host of Quilting Stash Podcast. Click here to listen to our hour long QuiltCon chat, or find it in Itunes.

quilting_stash_podcast

Annie and I discussed QuiltCon, my books, and my first ever BERNINA sighting!

Something unique about QuiltCon is that they hire 3 judges with 3 different areas of expertise to judge their shows. There’s a certified quilt judge, a modern quilter, and an artist outside the realm of quilting. So with these 3 combined voices, I think they are able to evaluate each quilt as a whole rather than the individual sum of its parts.

I truthfully do not know whether or not they take the artist’s statement into account when choosing their winners, but I’m pretty sure that overall design trumps workmanship when it comes to picking the winners and I’m okay with that. This is not to say that it’s a blanket excuse for shoddy workmanship, but I’d rather see someone be rewarded for their own best efforts rather than feel like they can’t even enter because their work isn’t “good enough.”

christopher_black_white

I love black and white quilts! This one was made by my good friend Christopher Thompson, aka The Tatooed Quilter. He nailed it on the machine quilting, too! He said he was inspired by the wavy lines from my book and created his own version of “organic matchstick quilting”. I love it!

christopher_quiltingdetail

Detail of machine quilting on Let’s Connect by Christopher Thompson

One of the things that I found particularly refreshing about QuiltCon was that there was so much originality in the quilts on display. As a designer, of course I’m flattered when someone purchases my patterns to make a quilt, but there’s something special about seeing a new work at a quilt show that I haven’t seen a hundred times before.

Paige_plus

I love the design and texture on this piece by Paige Alexander. Her work is always so fresh and inspiring! Both she and Christopher get bonus points from me for doing their own work.

blog_mod_mood

This was my favorite quilt from the show, Mod Mood by Debbie Jeske from A Quilter’s Table, made from Bee Sewcial bee blocks. I saw this one coming together on Instagram and thought it was something special. I love the retro vibe! It won a 1st place for group quilts.

It’s always thrilling to share my own quilts in any quilt show, whether they win ribbons or not. I was pleased to have two of my quilts from Machine Quilting with Style on display at QuiltCon. Of course I had to grab the obligatory “hey look at the quilts in my book” photo op! 🙂

rain

 “Rain” was in the minimalist category at QuiltCon. Thanks to Becca Bryan for photography!

focal_point

The title of “Focal Point” pays homage to Jacquie Gering who gave me the best piece of design advice when making modern quilts – “always have a focal point.”

One of the things I love about QuiltCon that truly sets it apart from other shows, is the beautiful display of charity quilts. Each local MQG chapter is invited to create a quilt with a specific theme that will be then donated to their local area after the show. You can see a snippet of my guild’s charity guilt – “Home is Where the Heart Is”  in the podcast picture collage earlier in this article.

blog_seattlemqg

These are the most beautiful charity quilts I’ve even seen, with beautiful details and amazing workmanship. The one is my favorite  – Flame of Inspiration by the Seattle MQG.

Jason is always pushing me to go more modern and I learn more about the aesthetic with each quilt I make. I’m sure there will be continuing discussion on what makes a quilt modern as well as what makes a quilt win a ribbon, and I love to be part of the dialogue! Feel free to add to the conversation below, but just remember, this is my space, so please be considerate and thoughtful when you comment.

For more inspiring modern quilts, check out #quiltcon and #quiltcon2016.

Read my other post from QuiltCon 2016 here.

Facets Quilt Along Week 4 – Complete The Quilt Top

This week’s assignment is super easy and will allow any newcomers a chance to catch up!

Simply follow the quilt assembly diagram on page 94 of Machine Quilting With Style and lay your blocks in a pleasing arrangement. Then sew them together – easy peasy. Be sure to take a “victory lap” around the quilt top when finished – sew around the perimeter 1/8″ in from the edge to secure the side seams.

EQ Facets

Take a look at my EQ7 drawing of Facets and see how closely it resembles my actual quilt.

Facets_Kona

Finished Facets quilt, Made from my Kona Designer Series Precut Palette

I love seeing how different and unique this quilt can look. Be sure to pop on over to my Facebook Group at Quilt With Christa to share your progress and see the other fabulous versions! You can also share on instagram – just hashtag #facetsqal and tag me @christaquilts so I can see!

Here’s just a sampling of the beautiful quilts being made by others who are following along:

G-teal

G has made more of my quilt patterns than anyone I know! Follow her on IG @blingnailsbyg

michelle

Michelle is G’s sister and it’s so fun to see them make it a family affair. Her scraps are so pretty!

AnnP

Ann is reversing her layout – with mostly plain blocks and a pieced focal row. I love it!

jocelyn

It’s been so fun watching Jocelyn’s version come together!

Remember – everyone who participates will win a prize  at the end. Click on the starting Facets QAL post for complete details, and to find links to all of the QAL posts.

Register Now for the Panguitch Quilt Walk Festival

Registration for the Panguitch Quilt Walk Festival is now open! The festival runs June 8-11 in Utah, and I will be teaching 4 of my most popular classes. Scroll down for my schedule.

panguitch_classes

my teaching schedule:

  • Charming Chevrons – Wednesday, June 8, 2-5 PM
  • Modern Logs – Thursday, June 9, 8:30-5 PM
  • Machine Quilting with Style – Friday, June 10, 8:30-5 PM
  • String of Pearls – Saturday, June 11, 8:30-11:30 AM

Registration fees are the cheapest rates I’ve ever seen for quilting classes. So even if you don’t live nearby, you could travel here and take my classes for less than it would cost you at some other venues.

Click here to register for the Panquitch Quilt Walk Festival

quiltwalk

I hope to see you there!

Facets Quilt Along Week 3 – Making the Triangle Blocks

I can’t tell you how much fun it is to watch your Facets progress. So many people are sharing their progress on Instagram and in my Facebook group. It makes me giddy!! If you are just joining us, you can catch up and get started on the Facets Quilt Along here. Be sure to grab a copy of Machine Quilting With Style, if you don’t already have it. We will be following the instructions found on pages 92-94 from the book.

triangles

This week’s assignment is to cut your “made fabric” into triangle shapes using the Triangle Squared Ruler and Perfect Rectangle Ruler from Creative Grids. If you don’t have these rulers, you can cut your shapes from the full-sized templates given on pages 96-97 of the book. You can either make templates from plastic or draw them onto paper and tape the paper to a ruler that’s wide enough to accommodate them.

creative_grids

You need both Creative Grids rulers for this method to work.

How to use the Creative Grids rulers:

step1

First, make sure there is fabric completely underneath the triangle shape you are cutting. Next, align the Triangle Squared Ruler so that the blunted triangle corner is on the top of the strip, and the measurement you need lines up evenly with the bottom of the strip. Trim on both sides of the triangle. There will be a little bit of waste, but you can just throw that in the scrap pile for more improv piecing!

step2

Once you have cut the triangle with the blunted tip at the top, rotate the ruler to cut a triangle with the blunted tip at the bottom.

step3

Don’t forget to cut triangles from you accent fabric, too! Hint: if you are using directional prints, you may need additional fabric to accommodate cutting your triangles in one direction only.

accent

You will need to cut the background triangles using the Perfect Rectangle Ruler. Remember to keep your strip folded so that you get a half rectangle for each side of the triangle in a square.

backgrounds

Don’t forget to cut angled tips indicated by the blunted end of the ruler. These will help line up your units correctly for sewing.

Using the picture below as a guide, line up the background rectangles so that the blunted ends align with the center triangle. The pointed tips will stick out. Trim the tips once the units are sewn.

alignment

I borrowed this image from a previous project using the same method with a smaller sized unit.

Sew the triangle blocks into diamonds where indicated in the book on page 94.

Eye Candy Inspiration

The best part of any quilt along is seeing how others make it their own. Here’s a roundup of blocks being made by followers in my Facebook group: Quilt With Christa and on instagram: #facetsqal. Remember – you can jump in at any time and work at your own pace. Some people have just started and others are nearly finished (which gives me plenty of pics to share for future posts)!

gina

I love the pop of orange that Gina from Gina’s Custom Creations chose to include!

sherri

Sherri (@snugbear2 on IG) is laying out her pretty purple blocks and sewing them together!

paula

I love Paula’s pretty piles!

jocelyn

I know I’m not supposed to have favorites but I really love Jocelyn’s triangles!!

Next week we will sew the blocks together to complete the quilt top.

Click here for the start of Facets Quilt Along

FacetsQAL

Facets Quilt Along Week 2 – Improv Piecing

Welcome to week two of Facets Quilt Along. Last week we gathered fabrics and started cutting. This week we will make our own crazy-pieced fabric. The fun thing about this is that even if you are using the same fabric as me (Kona Solids Christa Watson Palette), your quilt will still look different from mine!

kona_improv
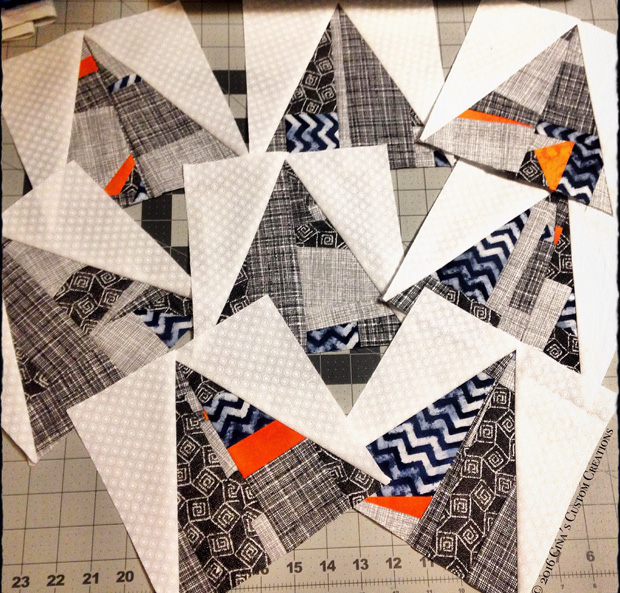
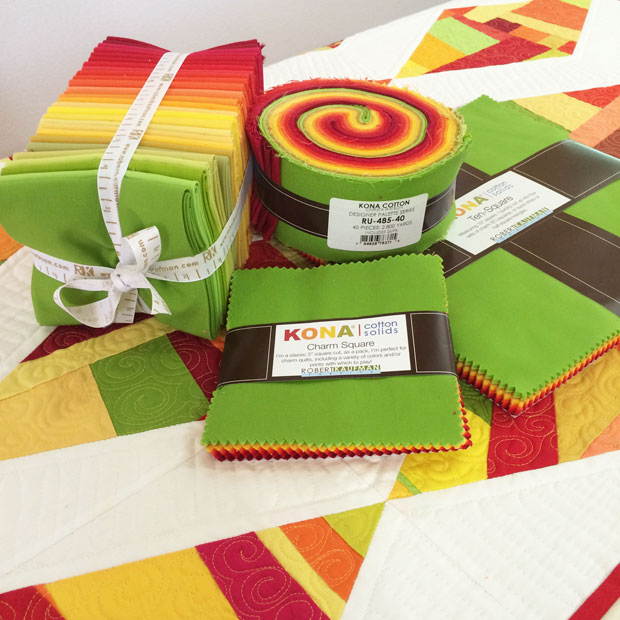
A piece of improv fabric made from my Kona Cotton Designer Palette

Follow the instructions page 93 of Machine Quilting With Style to make your fabric pieces. Then share your progress and ask questions in my facebook group Quilt With Christa.

Here are a couple more fun examples:

improv_prints

A sample piece I made using a bunch of scrappy prints. It looks great in any fabrics!

g's_chunks

This beautiful piece was made by G from my facebook group. She’s sewing along with her sisters!

jocelyn

Jocelyn from the facebook group chose a more muted, modern palette. I love it!

paula_p

Paula’s festive blue and green combo is so fun – perfect for a Seahawk’s fan!

Seeing everyone’s pictures is half the fun of a quilt along. It’s amazing how the different fabric combinations are coming together to create individual works of art. Be sure to pop over to my facebook group to see more amazing improv in process!

jan

Jan is using lots of leftover scrappy bits – no size is too small!

If you are sharing your progress via social media be sure to hashtag it #facetsqal. Remember, everyone who participates will be entered to win prizes. I just love seeing your progress!

Click here for the complete QAL schedule.

Facets Quilt Along Week 1 – Gather and Share Your Fabrics, Start Cutting

Thanks for joining me on a fun journey while we make the Facets quilt from my book Machine Quilting With Style. This QAL is broken into weekly steps which you can refer to in the introductory post. (If you are new to my blog – jump in at any time!)

FacetsQALbig

Gather and Share

This week’s assignment is to gather your fabrics (detailed materials list in the book on page 90), then share pictures of your fabric pull on instagram (#facetsqal), on your own blogs, or in my facebookgroup at Quilt with Christa.

Here are a few gorgeous bundles that some of my facebook group members have shared so far. It’s so fun to see all of the different variety and really, the sky’s the limit when it comes to fabric selection for the blocks. As long as you have a highly contrasting background fabric, you are good to go!

carol_b

I love Carol’s combo of prints, solids, and tone-on-tones. With the help of my facebook group, she was able to narrow down her choices!

Lind-B
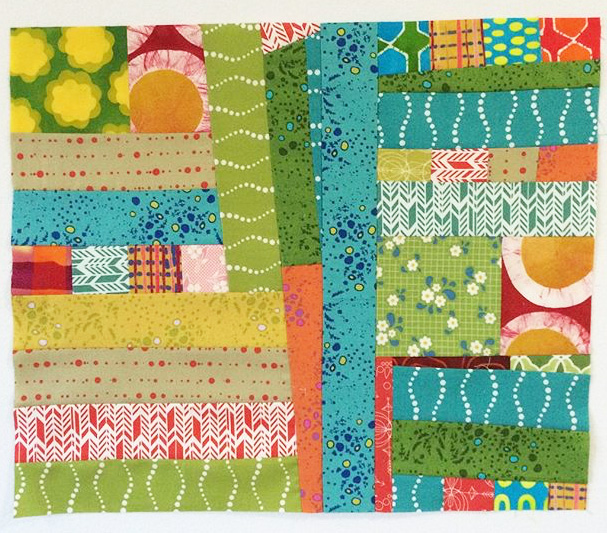
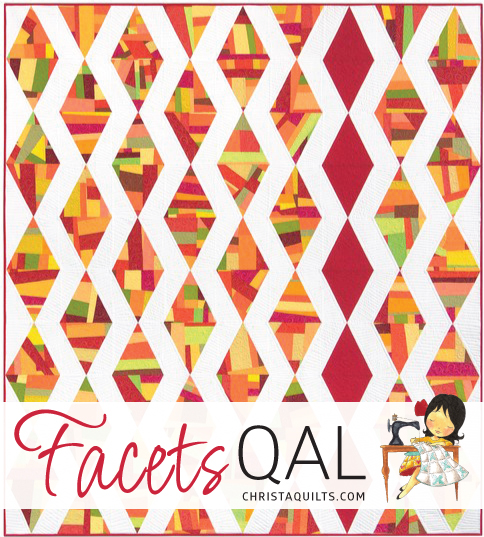
Linda is using these gorgeous gradations for her quilt. She gets bonus points for photographing it with the book!! 🙂

Daisy_f
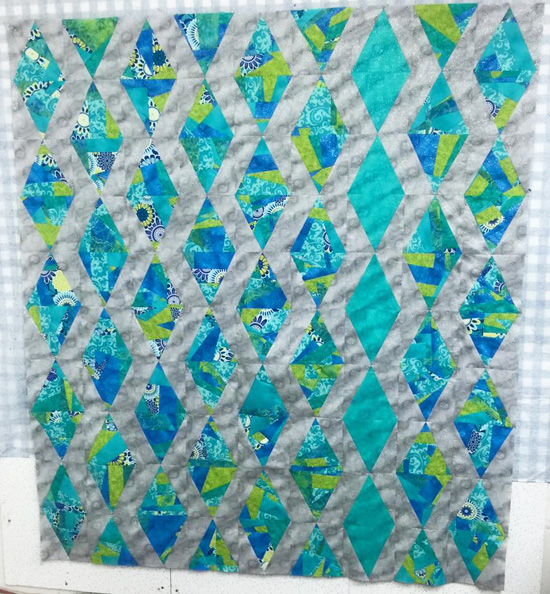
Daisy’s quilt will look stunning in batiks and scraps!

Homework – Start Cutting

Start cutting your block fabrics or scraps into random strips and chunks to prepare for improv piecing next week (see what we are working towards on page 93). Don’t be scared – just dive right in and cut. It will be very liberating, I promise!

facets_strips

I cut my pieces into various width strips and chunks with wonky angles.

Yes, you have my permission to make this quilt your way. Although I don’t have the math figured out for any other sizes or alterations, you are welcome to change things up if you like. This is your quilt so the choice is up to you! And yes, you can work ahead if you like, or take a little more time if needed.

sherri_s_scraps

Sherri is cutting her pretty purple pieces into hunks and chunks. It will be fun to sew the scrappy chaos into something pretty!

Questions?

I’m here to help! Be sure to share your progress in my Facebook group Quilt With Christa and ask for any trouble shooting help there. It’s a fun supportive bunch and we are all eager to cheer each other on!

The Quilts from My Book – All in One Place

I wanted to make it easy for you all to see all of the quilts from my book, together in one place.Here you can find pictures of all of the quilts from my book, Machine Quilting With Style.

If you have made one of the quilts from my book, or are currently making one, I’d love for you to share your progress in my facebook group: Quilt With Christa.

Machine Quilting With Style

13 friends each remade the 12 quilts + 1 of the backings. I have included their versions, too. Photography of my quilts courtesy of Martingale and Brent Kane. Here’s the order in which they are presented in the book:

ripplesRipples, made by me.

ripples_melissa

Ripples, made by Melissa Corry and her MIL Barbara

mqws_rainRain, made by me

rain_drizzle_cheryl

Drizzle, made by Cheryl Brickey

color crystals.
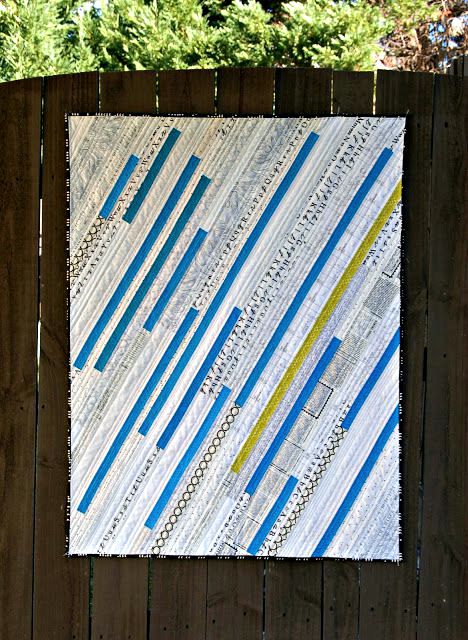
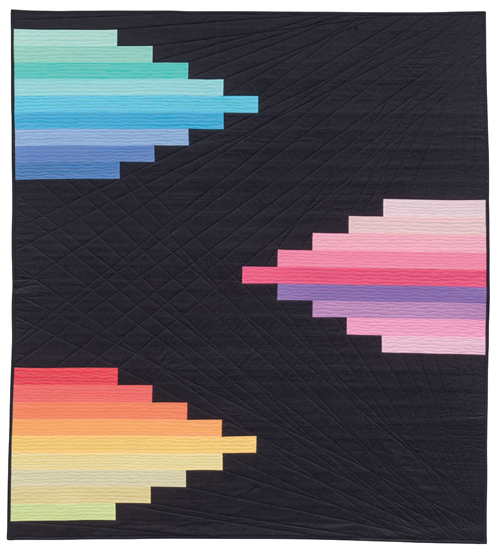
Color Crystals, made by me

colorcrystals_vicki

Color Crystals, made by Vicki Ruebel

technicolor_backing

Technicolor backing made by me

technicolorbacking_ida

Urban sunrise, made by Ida Ewing

Little Man's FancyLittle Man’s Fancy, made by me
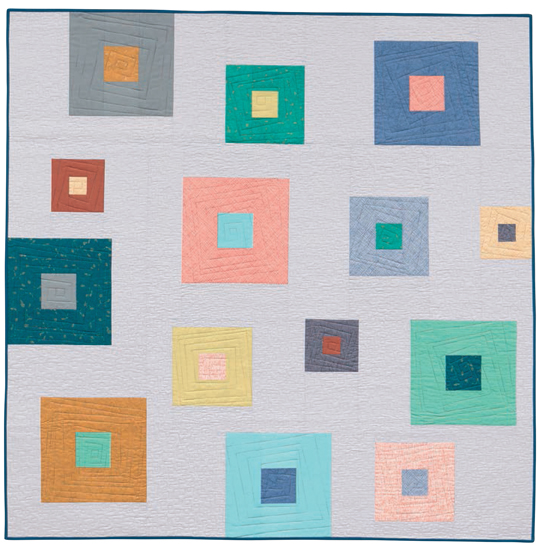
littlemansfancy_tina

Little Man’s Fancy, made by Tina Guthmann

staticStatic, made by me

static_quilt_lee

Static, made by Lee Heinrich

square in a square
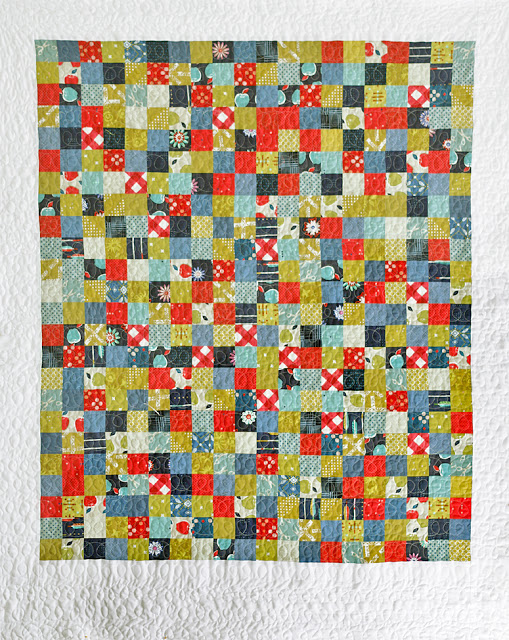
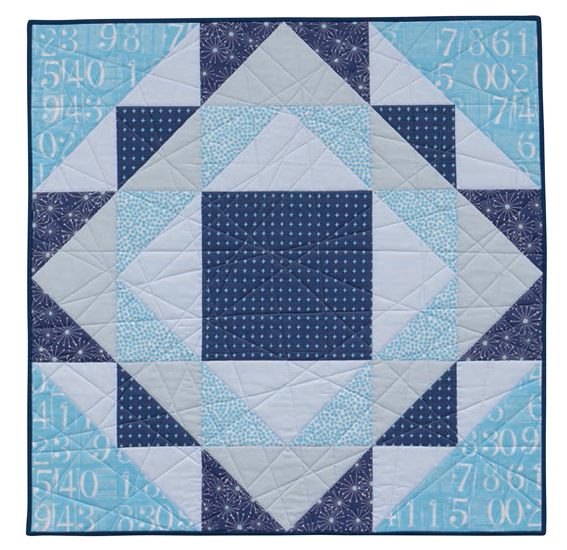
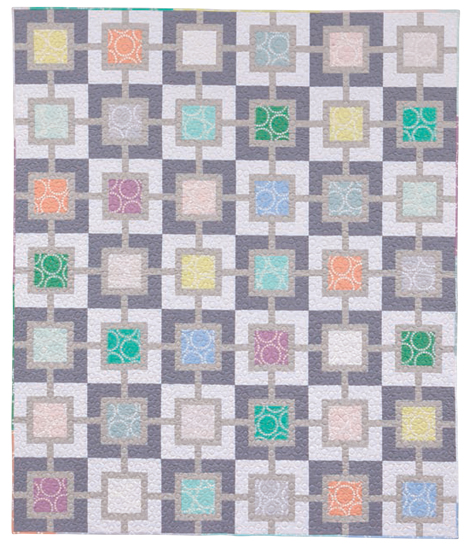
Square in a Square, made by me

squareinasquare_stacy

Square in a Square, made by Stacy Cooper

focal_point

Focal Point, made by me

Focal Point - Chic Neutrals no lines

Focal Point, recolored in EQ7 using Chic Neutrals fabric from Amy Ellis

focalpoint_amy

Focal Point, made by Amy Garro

Lightning and backing

Lightning, made by me, bonus backing tutorial from Martingale

lightning_leannePink, made by Leanne Chahley

Candy_PopCandy Pop, made by me

candypop_linda

Candy Pop, made by Linda Hungerford

BrokenV
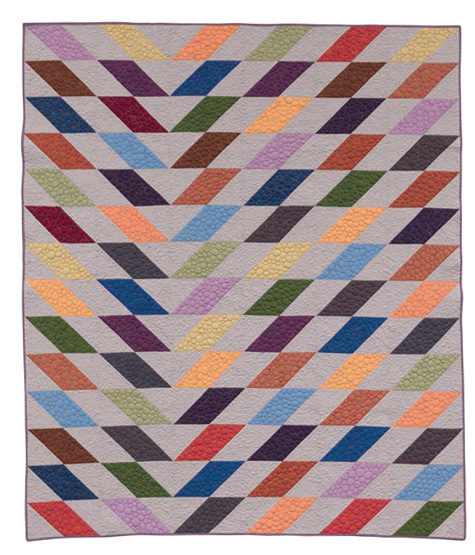
Broken V, made by me

brokenv_sharon

Broken V, made by Sharon McConnell

Facets_Kona

Facets, made by me

facets_kristy


Facets, made by Kristy Daum

Finals B1324.indd
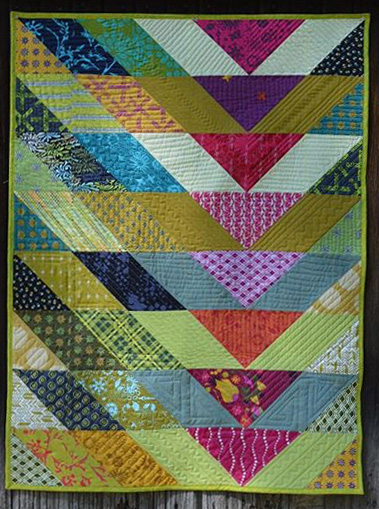
Pearl Gray, made by me

pearl_gray_alyce

Pearl Gray, made by Alyce Blyth

I hope you enjoyed looking at all the quilting eye candy presented here.

Quilt_montage

You can purchase your copy of Machine Quilting with style from these locations:


Facets Quilt Along – Intro and Fabric Requirements

I’m ready to start my next quilt along featuring Facets, from my book Machine Quilting With Style. This is the quilt you all voted that was your favorite, and I’m so excited because it’s my favorite, too!

Facets_Kona

Facets by Christa Watson 63″ x 70″

The quilt along is a little bit different than the other quilt alongs I have shared in the past. You will need a copy of my book to participate. But that’s no problem, because I know that many of you have purchased your copies already (or received them as Christmas gifts).

Where to Purchase My Book

Machine Quilting With Style

Those new to my blog can pick up a signed copy of Machine Quilting With Style directly from me, or grab it here on Amazon for a super low price! It’s starting to show up in many local quilt shops, too, so check yours for availability. If you’d like to get a combo e-book + hardcopy, my publisher has a great deal over on the Martingale website.

Materials Requirements

cwpalette_cropped


  • 28 Fat Eighths of your favorite fabrics (or grab a fat quarter bundle of the Christa Watson palette if you want to make yours in the same colors as mine!). Or 3 1/2 yards of scraps.
  • 2 7/8 yards of background fabric (white in my quilt)
  • 1 1/8 yards for accent and binding (red in my quilt)
  • 4 1/2 yards backing
  • Twin Size Batting
  • Your favorite thread for machine piecing and quilting (I prefer Aurifil 50 wt.)
  • Creative Grids Rulers – Triangle Squared and Perfect Rectangle rulers. (Be sure to get this brand as other rulers are not the right size.)

creative_gridsThe book includes templates if needed, but the rulers are easier to use!

Facets Quilt Along Schedule

Here’s how it will work: each Friday I will post an update with your “homework” here on the blog. You can share your progress anytime, in my Facebook group at Quilt With Christa. If you are not on Facebook but still want to share, you can email me a picture of your progress and I’ll share it in a roundup photo.

Because we are working through the book, no directions will be given here on the blog. However, I will share behind the scenes of the making of Facets and I’ll be your cheerleader to help you out as well as lay out your goals for completion week by week.

All links below will be clickable once that post has been published.

There Will be Prizes!

Each week you share your progress in my Fb group (or email pics to me), I’ll enter your name into one of three grand prize drawings at the end. So the more weeks you share, the more chances you have to win!

Three lucky participants will win the Grand Prize Pack – all three prizes per winner!

  1. A signed copy of my next book, The Ultimate Guide to Machine Quilting, which releases April 19th. (And yes, I’ll get my co-author Angela Walters to sign it for you, too!)
  2. A charm pack of my Kona Designer Palette.
  3. A 1300 meter spool of Aurifil 50 weight cotton thread, in the color of your choice!

Ultimate Guide to Machine Quilting

You don’t even have to finish your quilt to be entered into the grand prize. However, everyone who shares a picture of their finished quilt by March 31 will be entered to win the BONUS prize – a jelly roll of their choice from The Precut Store.

working

And because I don’t want to leave anyone out, all participants who share at least one picture will win a PDF pattern of their choice from my pattern shop!

Sharing is Caring

If you’d like, you can save and share this badge on your blog or other social media and spread the word about my quilt along! You can share the image only, or link it back to this post.

Share your work in progress on Instagram with the hashtag #facetsqal

FacetsQALbadge

So who’s ready to join the fun? Grab a copy of my book, your fabrics and start sharing your pics!

My MQG Fabric Challenge Quilt and Why It’s Important to go Out of Your Comfort Zone

I recently finished “Fractured Puzzle” which was my Modern Quilt Guild fabric challenge entry. All contestants were given samples of Michael Miller Glitz fabrics and we could add in additional Michael Miller fabrics as desired. My quilt is based on my Puzzle Box quilt design that’s a free download for newsletter subscribers.

fractured-puzzle_resize

Fractured Puzzle by Christa Watson, 56″ x 60″

This quilt was way, way out of my comfort zone for so many reasons! At first, I thought I would play it safe, and sew together the blocks in a standard, traditional grid format, shown below:

black_white_blocks

I really like the graphic quality of this layout, and the Glitz fabrics really play off of each other. Next, I thought it would be fun to add a pop of color with a red Cotton Couture solid:

with_red_sashing

By now, I’m really, really starting to like how this is turning out. I shared these pics in social media on instagram and facebook and received a lot of very positive feedback. But then a crazy idea popped into my head, and I couldn’t get rid of it:

What  would happen if if I slashed up the quilt top and then sewed it back together??

first_cut

Getting ready to take the first cut – this was so scary!!

Going this route scared me so much because I thought people would really think I’d gone off the deep end. But something in me said I had to try, and that was truly exciting. After all, this WAS a quilt challenge. It’s not for publication, nor is it for a class sample, and I really didn’t need anyone else’s approval to do this. I finally decided to just dive in and  see what happened. What a liberating feeling!!

slashed_blocks

Wanna go crazy? Slash up your quilt!!

After making the first cut, things got a little easier. Now I’m liking the fractured look and for a time, I considered adding white strips in between each of the sections, “slash-and-insert” style. I still may explore this idea in a future quilt. But with this one, I decided to sew the sections back together, creating a really fractured, disjointed look.

At this point I’m not quite sure if it’s a modern quilt, or really more of an art quilt, but I don’t care, as I’m truly loving the process!!

puzzle_pieced

Fractured Puzzle quilt top – a more dynamic design, don’t you think?

The hardest part was figuring how to sew the pieces back together. I felt like I was sewing a puzzle, joining sections back together to create larger units. I knew that I’d lose quite a bit around the edges once I squared it up, but that was totally okay with me.

quilting_in_progress

After the top came together, I had a really great vision for the quilting, even though I knew it would be a TON of work! With my new BERNINA 770  I quilted tons of straight lines, about 1/4″ apart in each of the fractured sections, following a different angle.

This meant lots of loose threads to tie off at the end, but it was important for me to go with what the quilt “wanted” rather than what was easy. After all, I realized this quilt was more about the process and the journey, rather than the finished product.

fractured-puzzle-detail

Quilting Detail – it’s all about the angular texture!

I truly enjoyed making this quilt from start to finish. It really pushed me out of my comfort zone and allowed me the freedom to explore the boundaries beyond traditional design.

I entered it into QuiltCon for 2016 and statistically the odds are slim that it will get in: there were over 1800 entries and only around 325 are accepted. But I’m an optimist and I’ll keep my fingers crossed. 🙂 Besides,  no matter what happens, this was a fabulous journey for me to complete, and I’m now emboldened to make other, “un-safe” choices when it comes to quilting!

fractured-puzzle_resize

What’s the most interesting, unique, or non-traditional quilt you’ve ever made?
Let me know in the comments, or post pictures over on my Facebook Group: Quilt With Christa.

Fabric Friday – The Christa Watson Designer Palette

My precuts are finally here! The Christa Watson Designer palette from Robert Kaufman comes in Fat Quarters, Ten Squares, Roll Ups and Charm packs.

Click here to purchase!

Christa Watson Designer Palette

Each bundle includes 28 shades of reds, orange, yellows, and greens. I chose these fresh citrus colors because they are warm and inviting. The pops of green cool it down a bit and the whole bundle sparks excitement (at least for me)!

christawatsonpalette_

Click here for a list of the color names that are included in my precut bundles.

I originally chose these colors to make Facets, my favorite quilt from my book Machine Quilting With Style. Just one fat quarter bundle will be plenty of fabric to make the quilt top. You can throw in an accent color like I did, or make all of the blocks from crazy pieced fabric. I used Kona Snow for the background, and it really sets off the bright colors!

Facets_Kona

Facets, from Machine Quilting With Style

Of course, I couldn’t just stop there! I really had an itch to tweak my Charming Chevrons pattern and see what it would look like with the new colors! All it takes is 4 charm packs (or one set of Ten-Squares) plus background fabric. This time I went darker with the background, opting for Kona Coal to make the colors pop.

feathered_chevrons_eq

I’m calling this version Feathered Chevrons – it’s my current WIP!

Finally, I thought it would be fun to design a quilt using nothing but roll-ups. Puzzle Box is available as a free PDF download when you sign up for my email newsletter.  It uses just one roll-up of my designer palette, plus one roll up of background. Of course, it would look great in your favorite precuts, too!

Click here to join my newsletter list and get your free pattern!

Puzzle Box Pattern

Puzzle Box, a Free Pattern made from Roll Ups (Jelly Rolls)

When you purchase your precuts and start sewing with them, please share what you make in my Facebook Group: Quilt With Christa.  You can also hashtag your work in progress on Instagram, using #christawatsonpalette. I love to see what you are making!