This week I’m back with a fun geometric design for you to stitch – Chevrons. Try out 2 different variations which are perfect for modern or traditional quilts. Watch and learn for free below:
If you are looking for fabric to practice these fun designs, be sure to check out my fabric sale over on my website at Shop.ChristaQuilts.com. I’m always adding new things to the mix! While supplies last, I’m clearing out my older 10″ square and 2 1/2″ strips from earlier fabric collections. This is to make room for my next fabric collection I’m working on now!
The regular price of these precuts range from $40-$45 but you can grab them for just $35 each – no minimum. And I’m happy to ship worldwide. So stock up now, while they last!
In this week’s episode of 99 Machine Quilting Designs, practice free motion quilting more “shapes on a stick” like Balloon Shapes and Shish Kebabs. Click below to watch and learn:
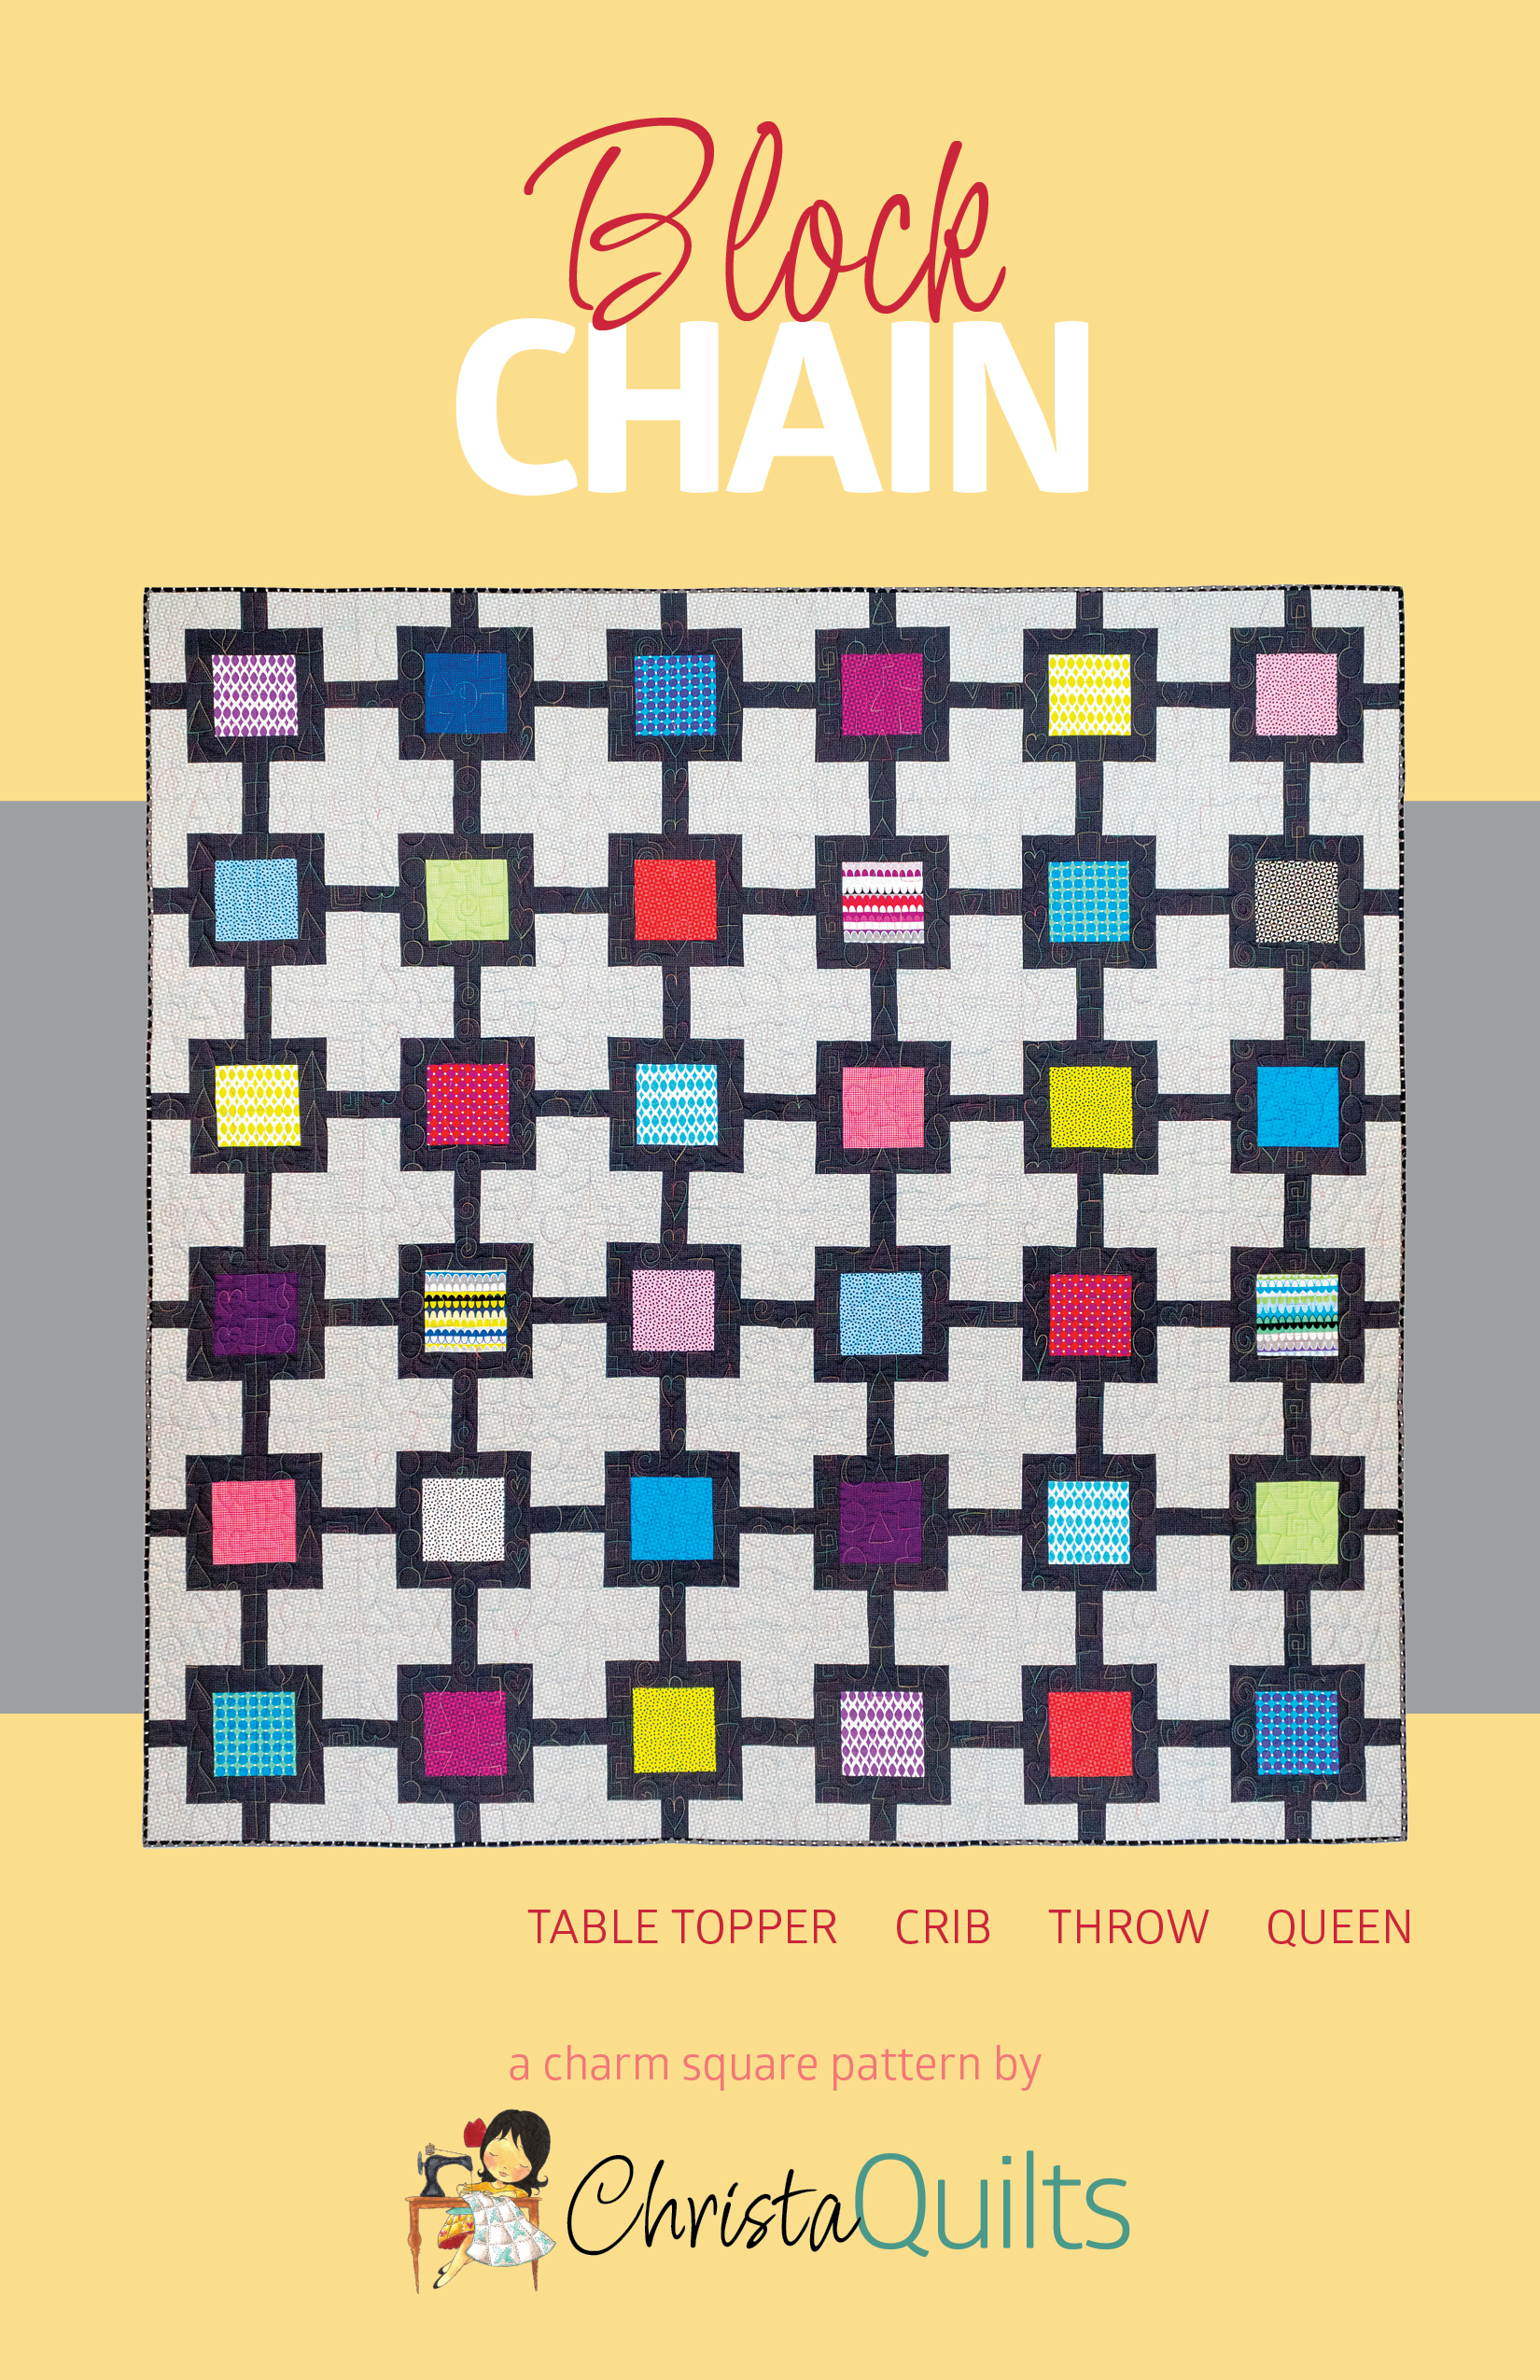
I made this quilt before I started making video tutorials, but it’s a great one to practice these designs! The Block Chain quilt pattern includes a quilting plan showing you how and it’s perfect for your favorite charm packs!
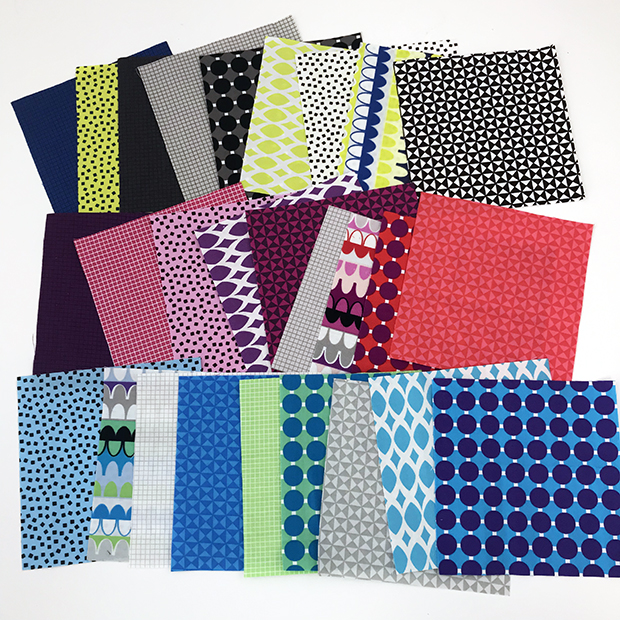
Right now, my Gridwork charm packs shown in the quilt above are on sale for way below the retail price. I’ve also reduced the price of many of my earlier fabric lines, and they are only available while supplies last!
As you practice your machine quilting designs on samples, or real quilts, be sure to share what you’ve made over in my Christa Quilts Group on Facebook. Fellow members and I would love to cheer you on!!
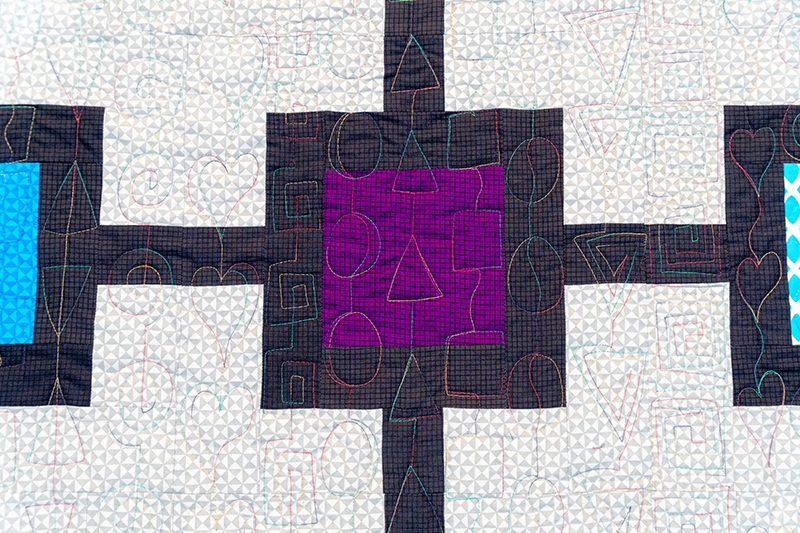
In my latest episode of 99 Machine Quilting Designs, practice more geometric shapes on a stick with Hearts and Triangles. Watch and learn below:
Quilt This Design on a Real Quilt!
Block Chain is the name of the quilt behind me shown in the video tutorial above. The pattern includes 4 sizes + detailed machine quilting suggestions. After all, I want you to actually finish your quilts, so you’ll never see “quilt as desired” in any of my pattern instructions!
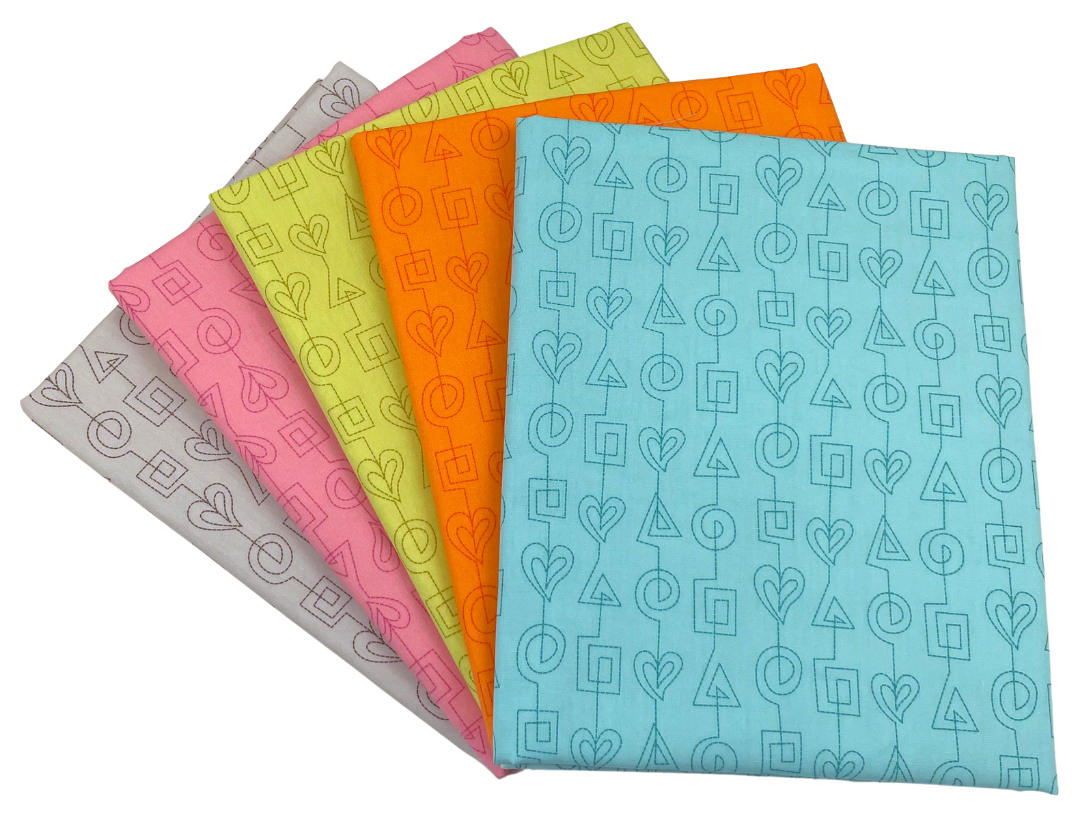
Did you know that one of the fabric prints in my Stitchy fabric line was inspired by these quilting motifs? The print below is called “Stitches” and would make a great practice sample for these fun designs. The full collection includes 5 fun prints in 5 different colorway, so be sure to stock up on your faves, while they last!
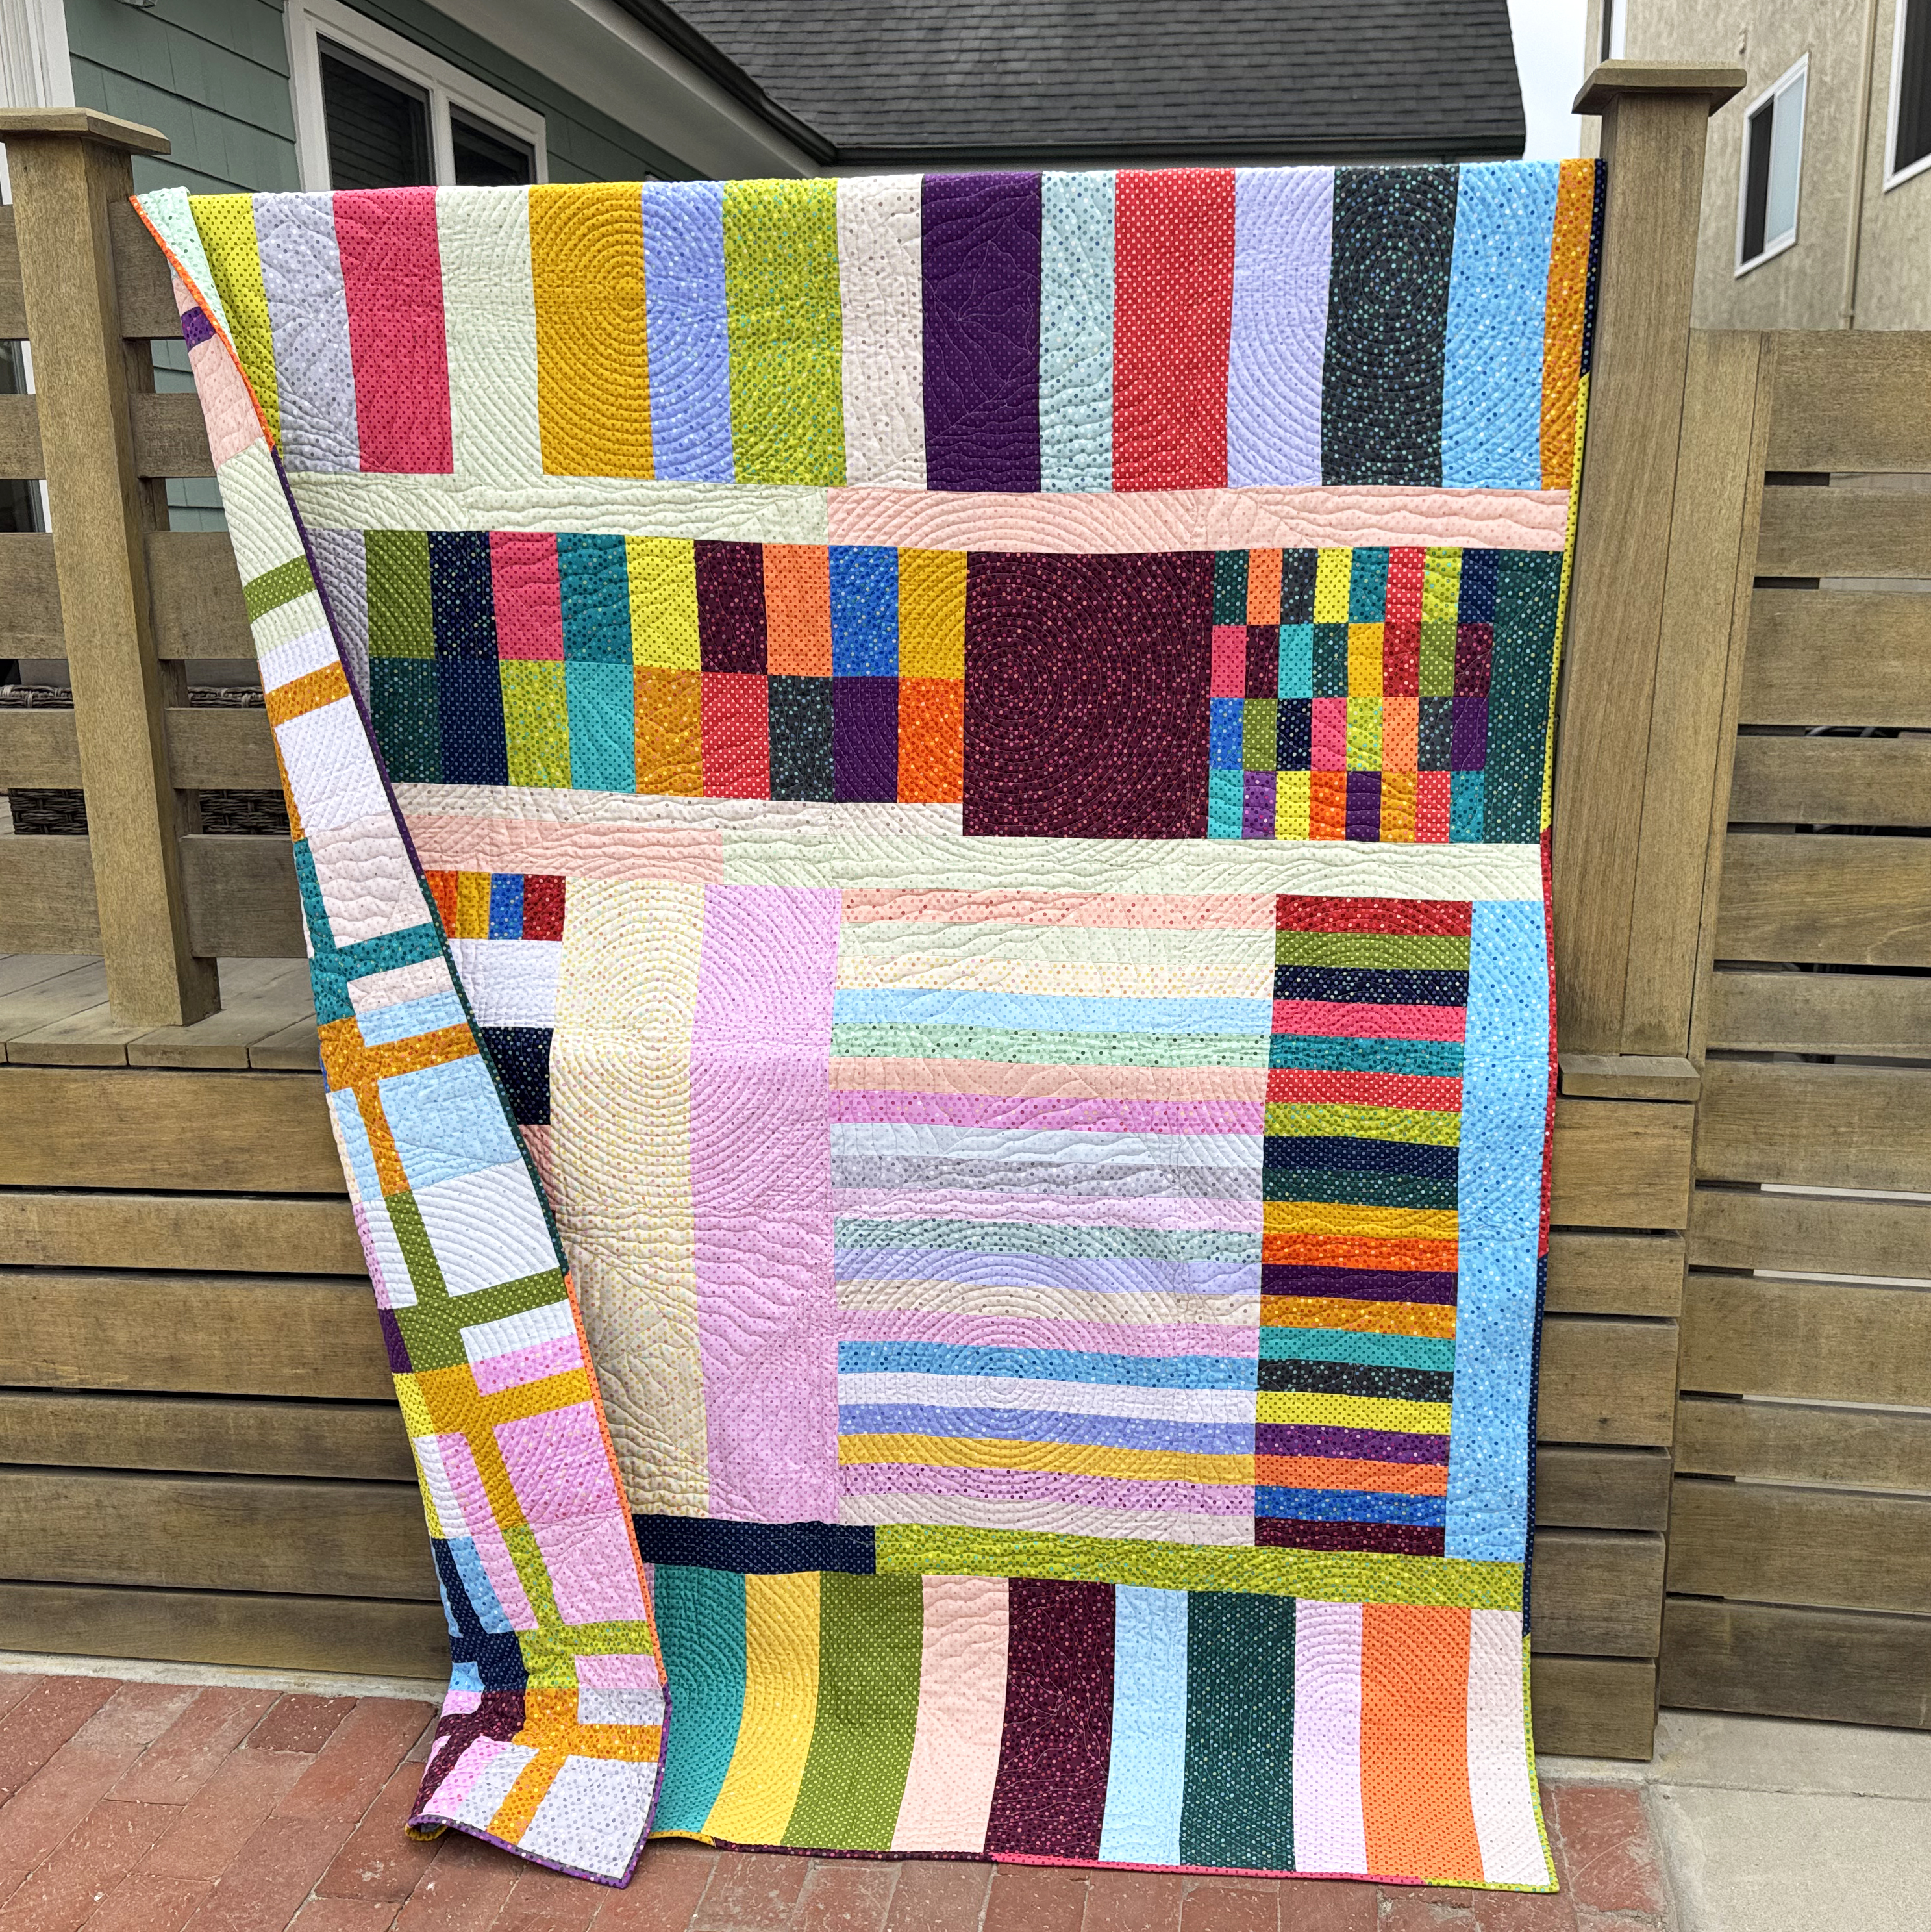
How are your Beaded Lanterns quilt blocks coming along? It’s time to sew them together to create the quilt top! If you are just now finding the quilt along, be sure to grab the Beaded Lanterns free quilt pattern to join the fun!
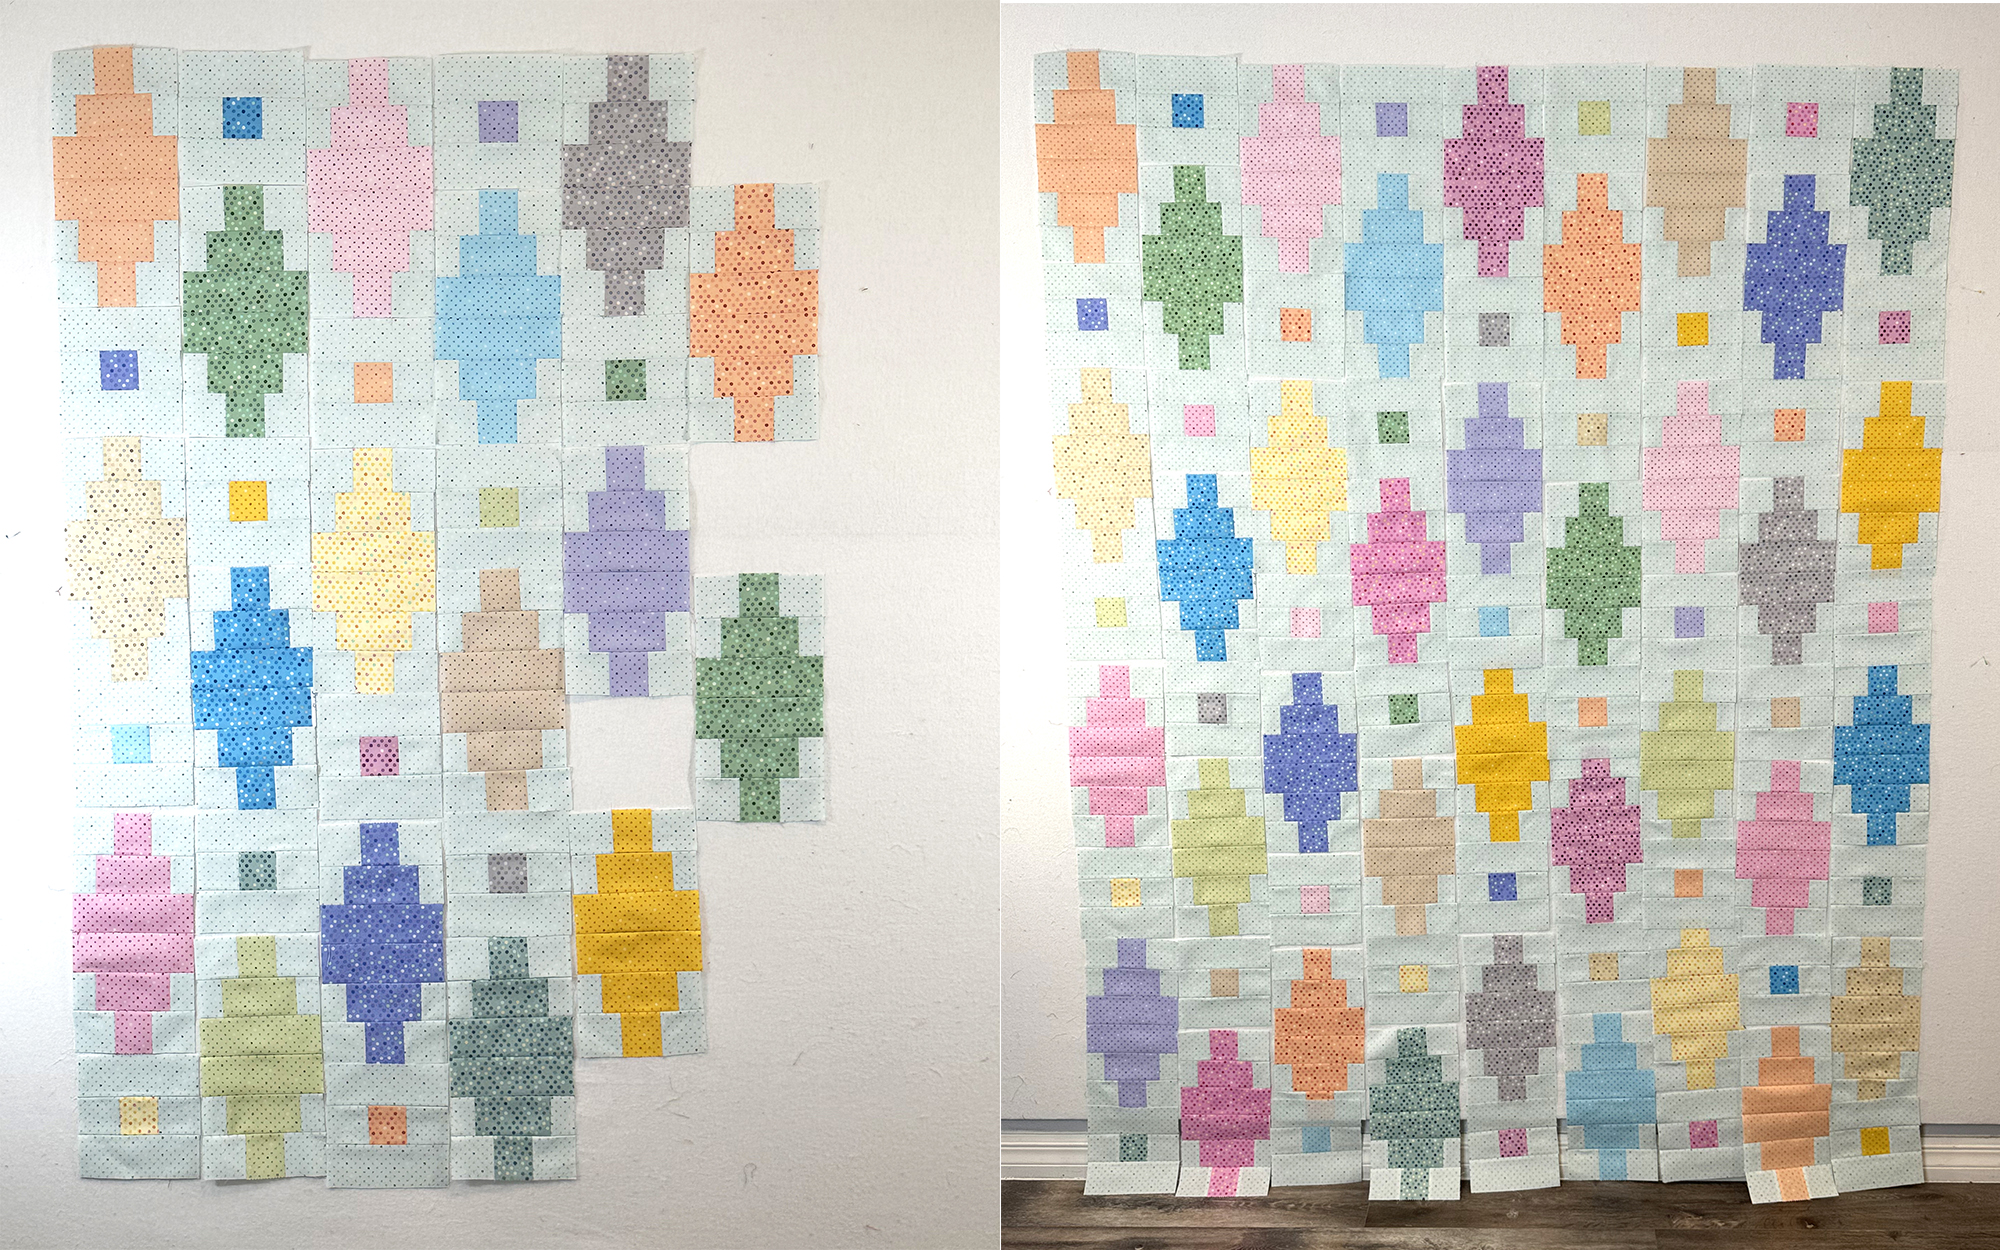
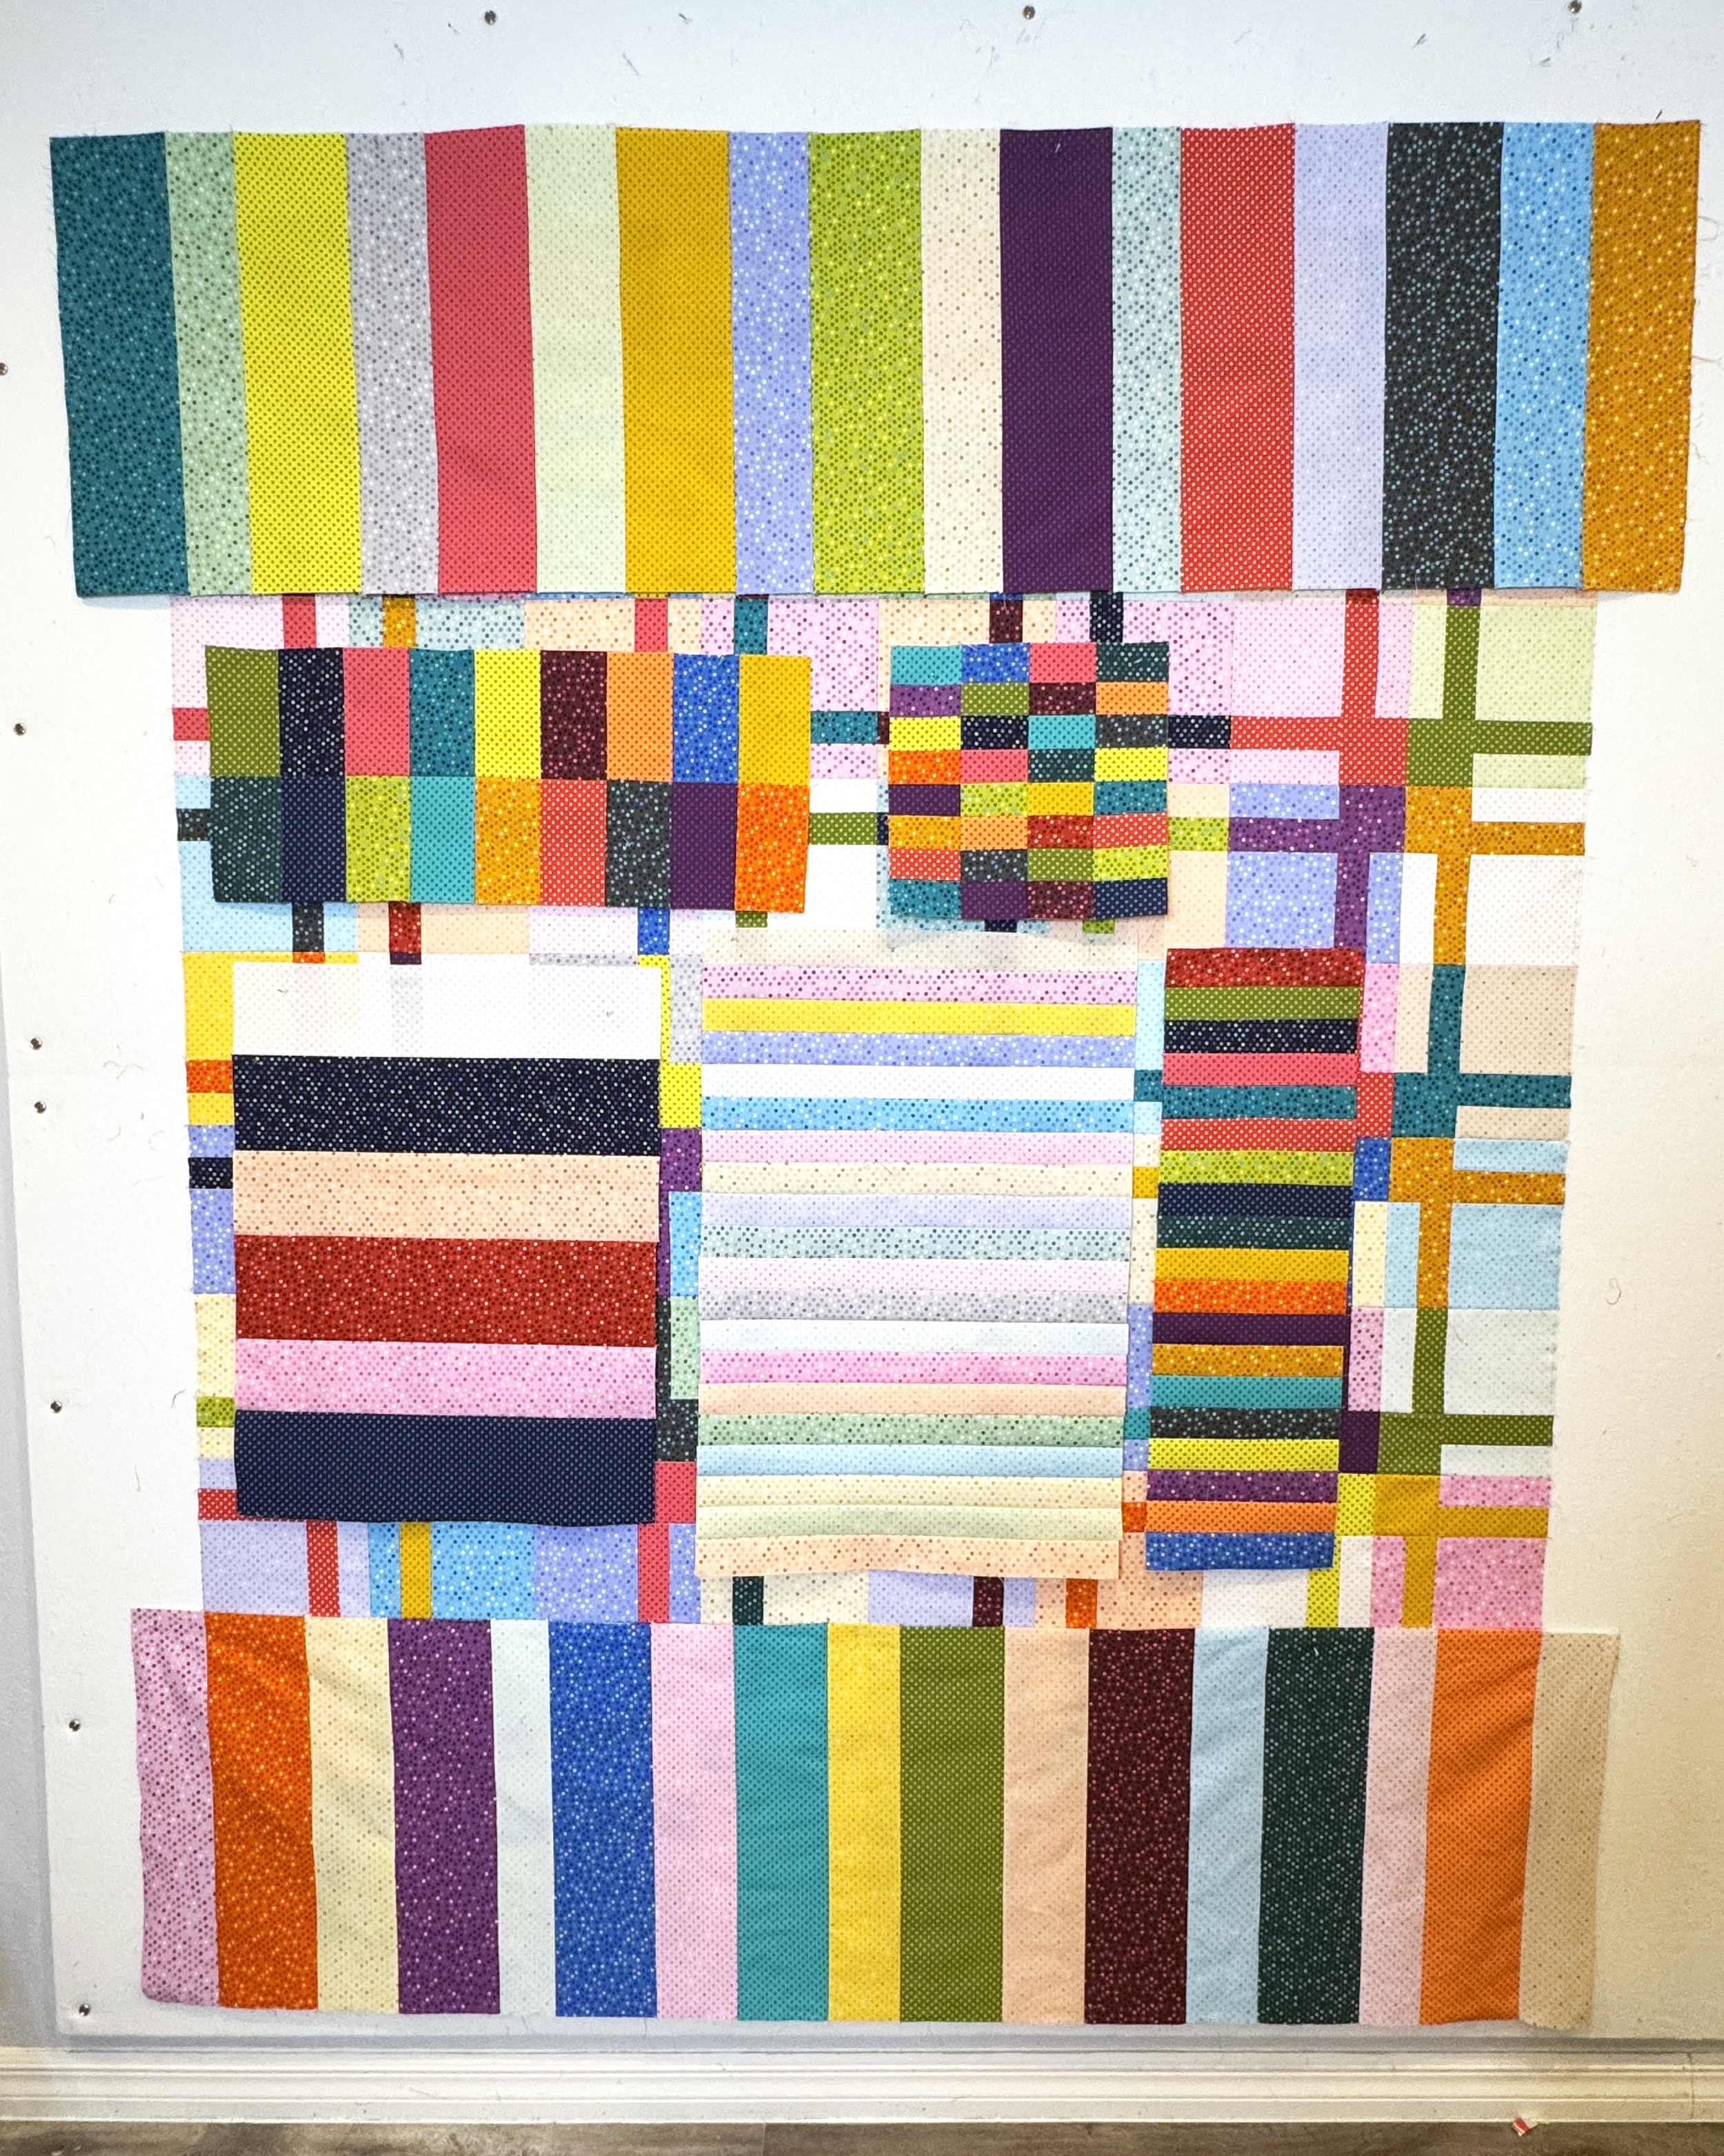
To start things off, I like to lay out my blocks on a design wall. Then I’ll spend time arranging them into a pleasing order. I usually take a picture with my camera phone to refer to while sewing.
Once that’s done, I’ll make a stack of blocks to sew in order and then chain piece, or assembly line sew them all at once. I always start sewing with a leader/ender piece of scrap fabric to catch my threads. This prevents them from knotting up when I start and stop.
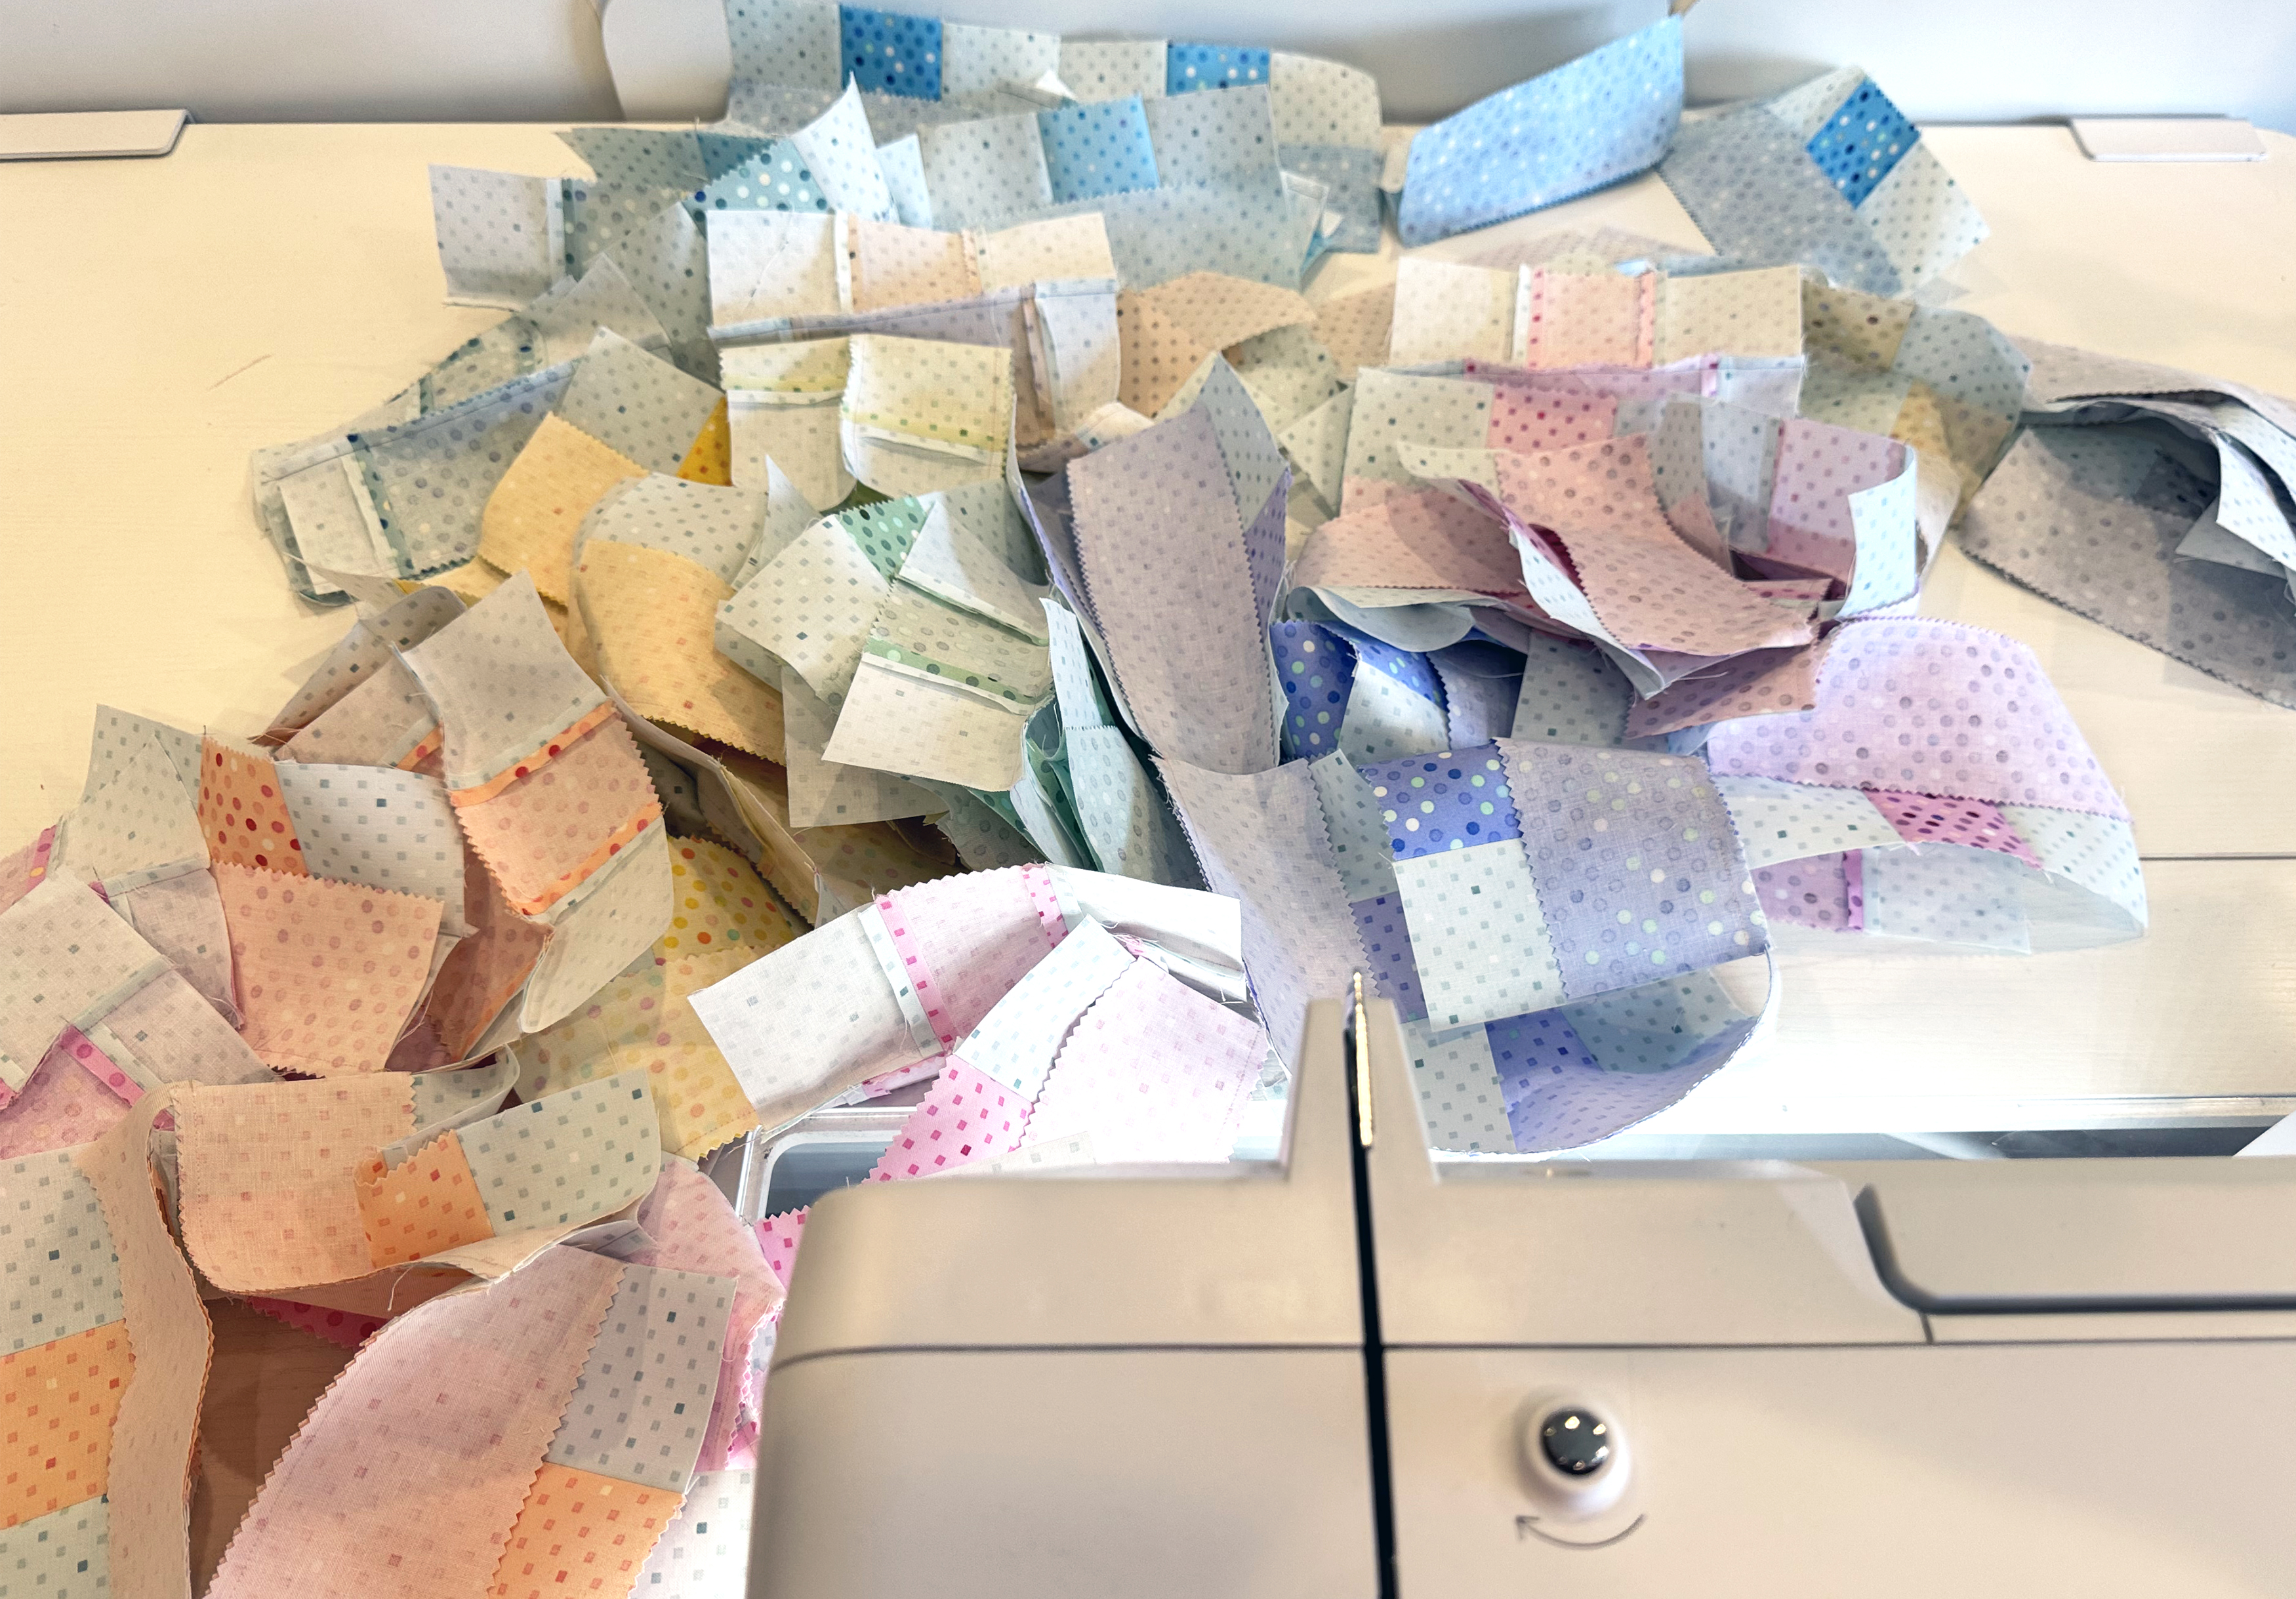
It makes a beautiful mess and I love the feeling of accomplishment!
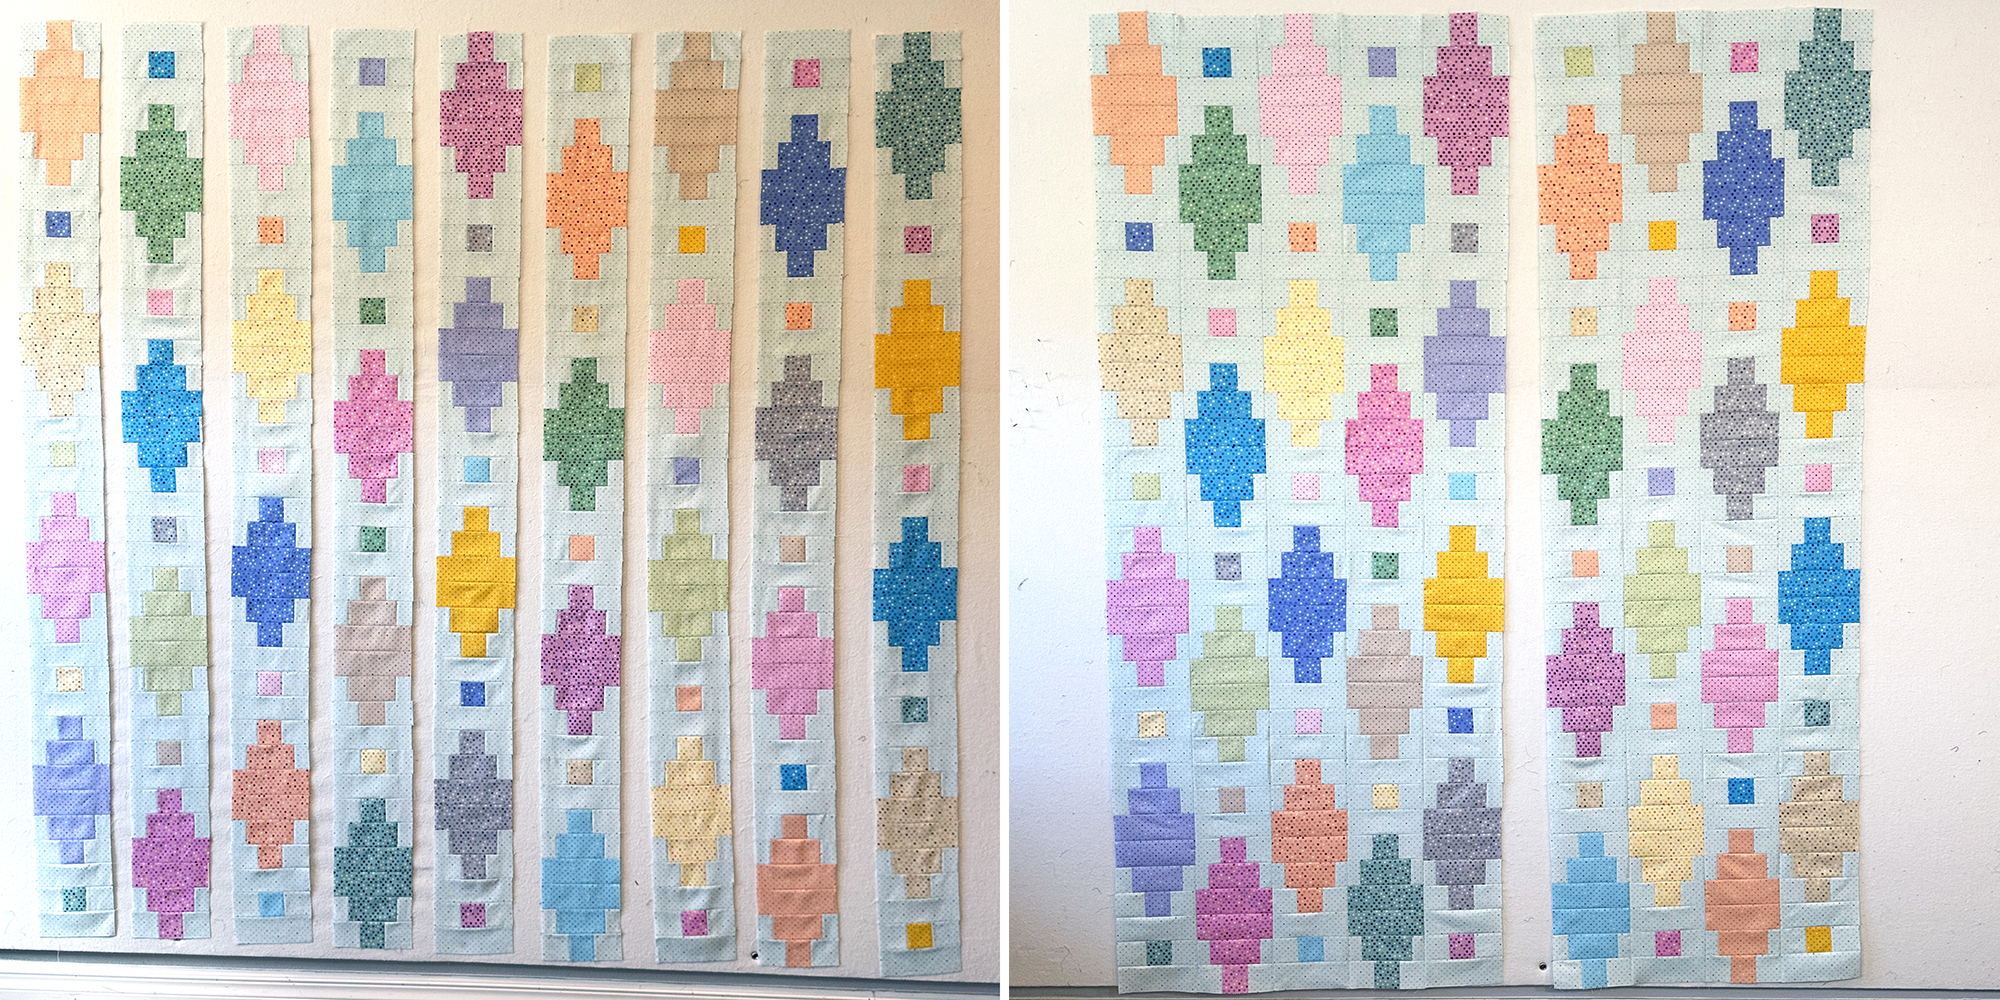
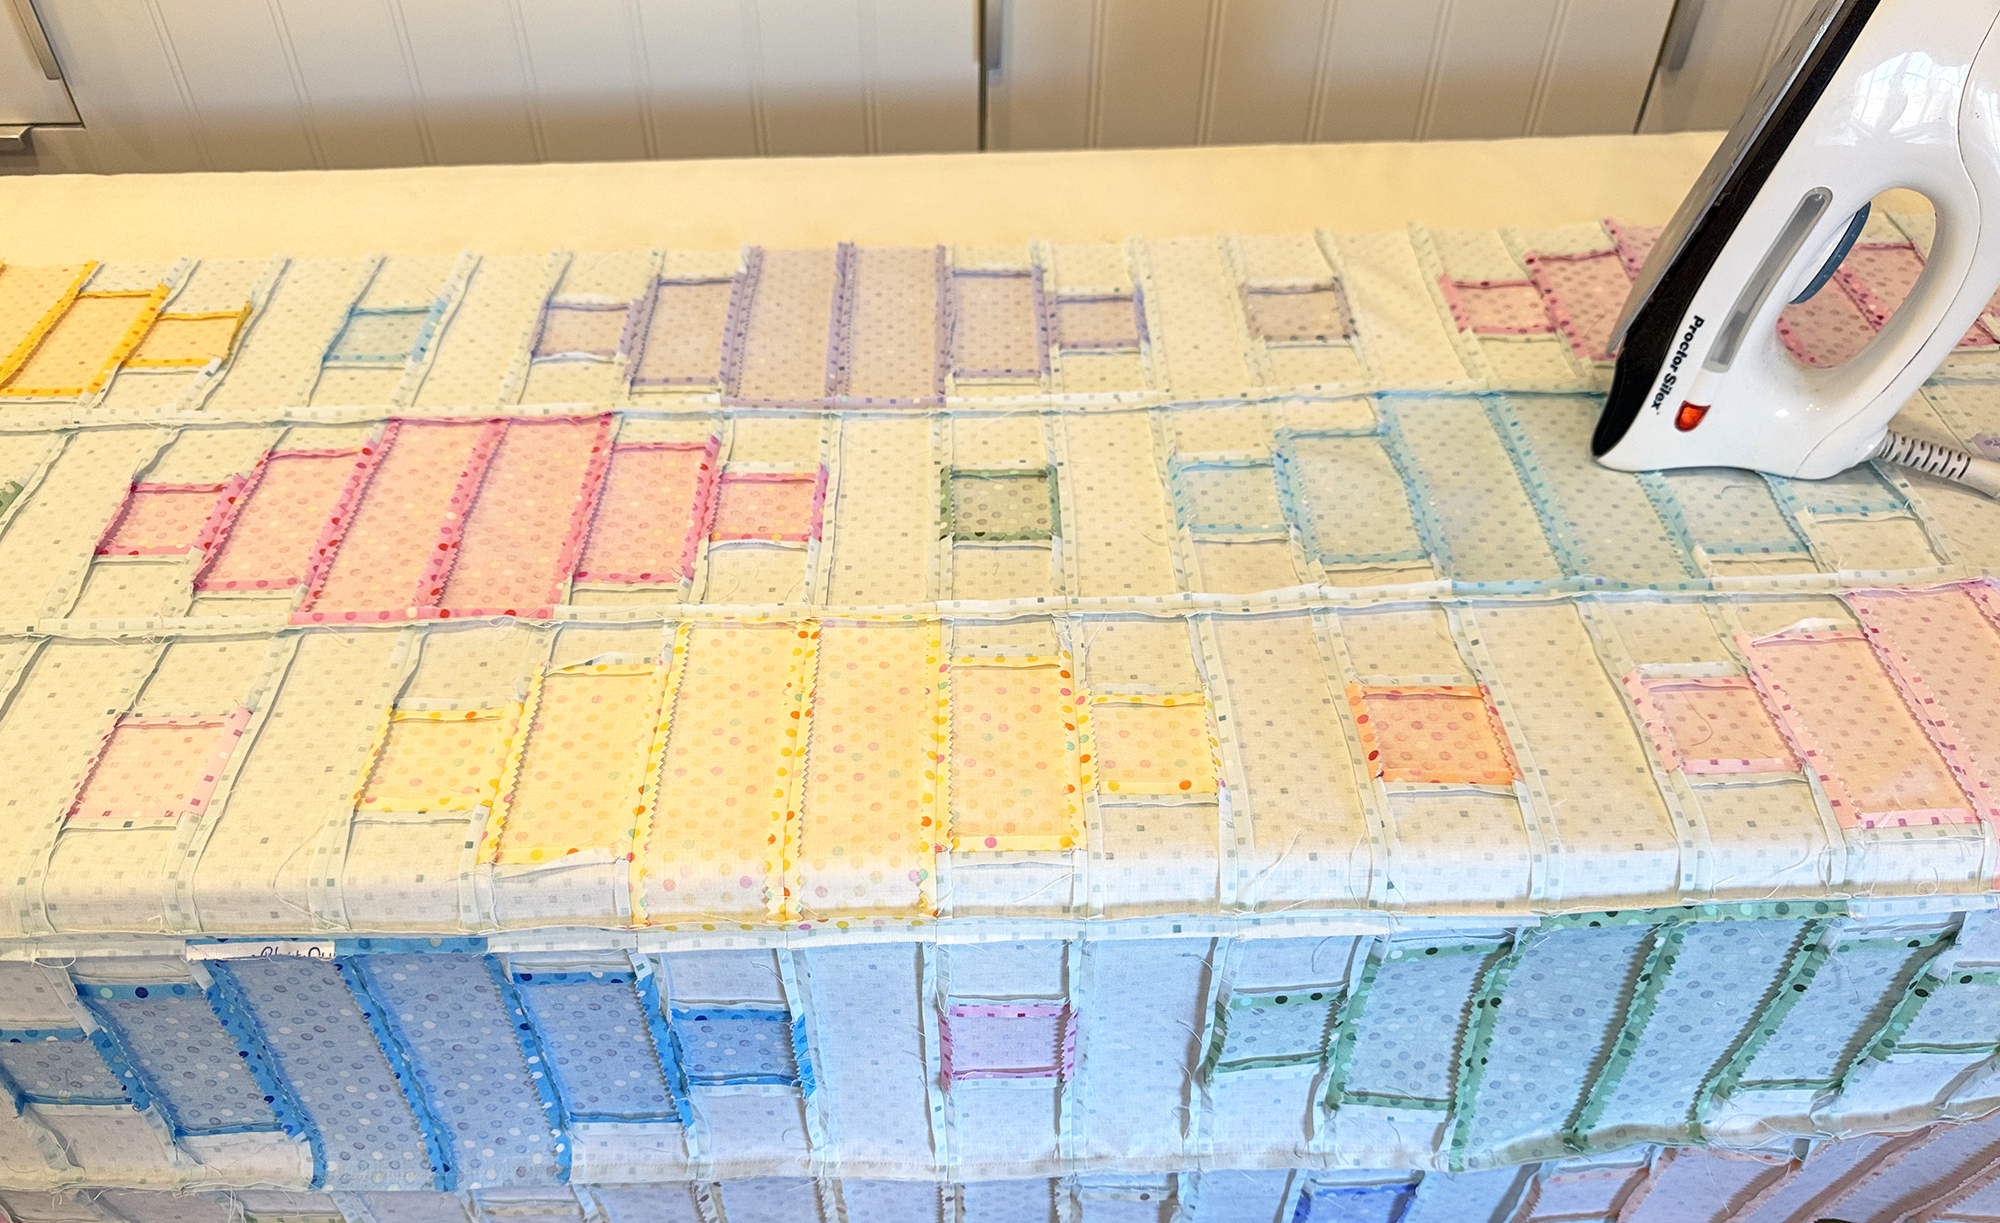
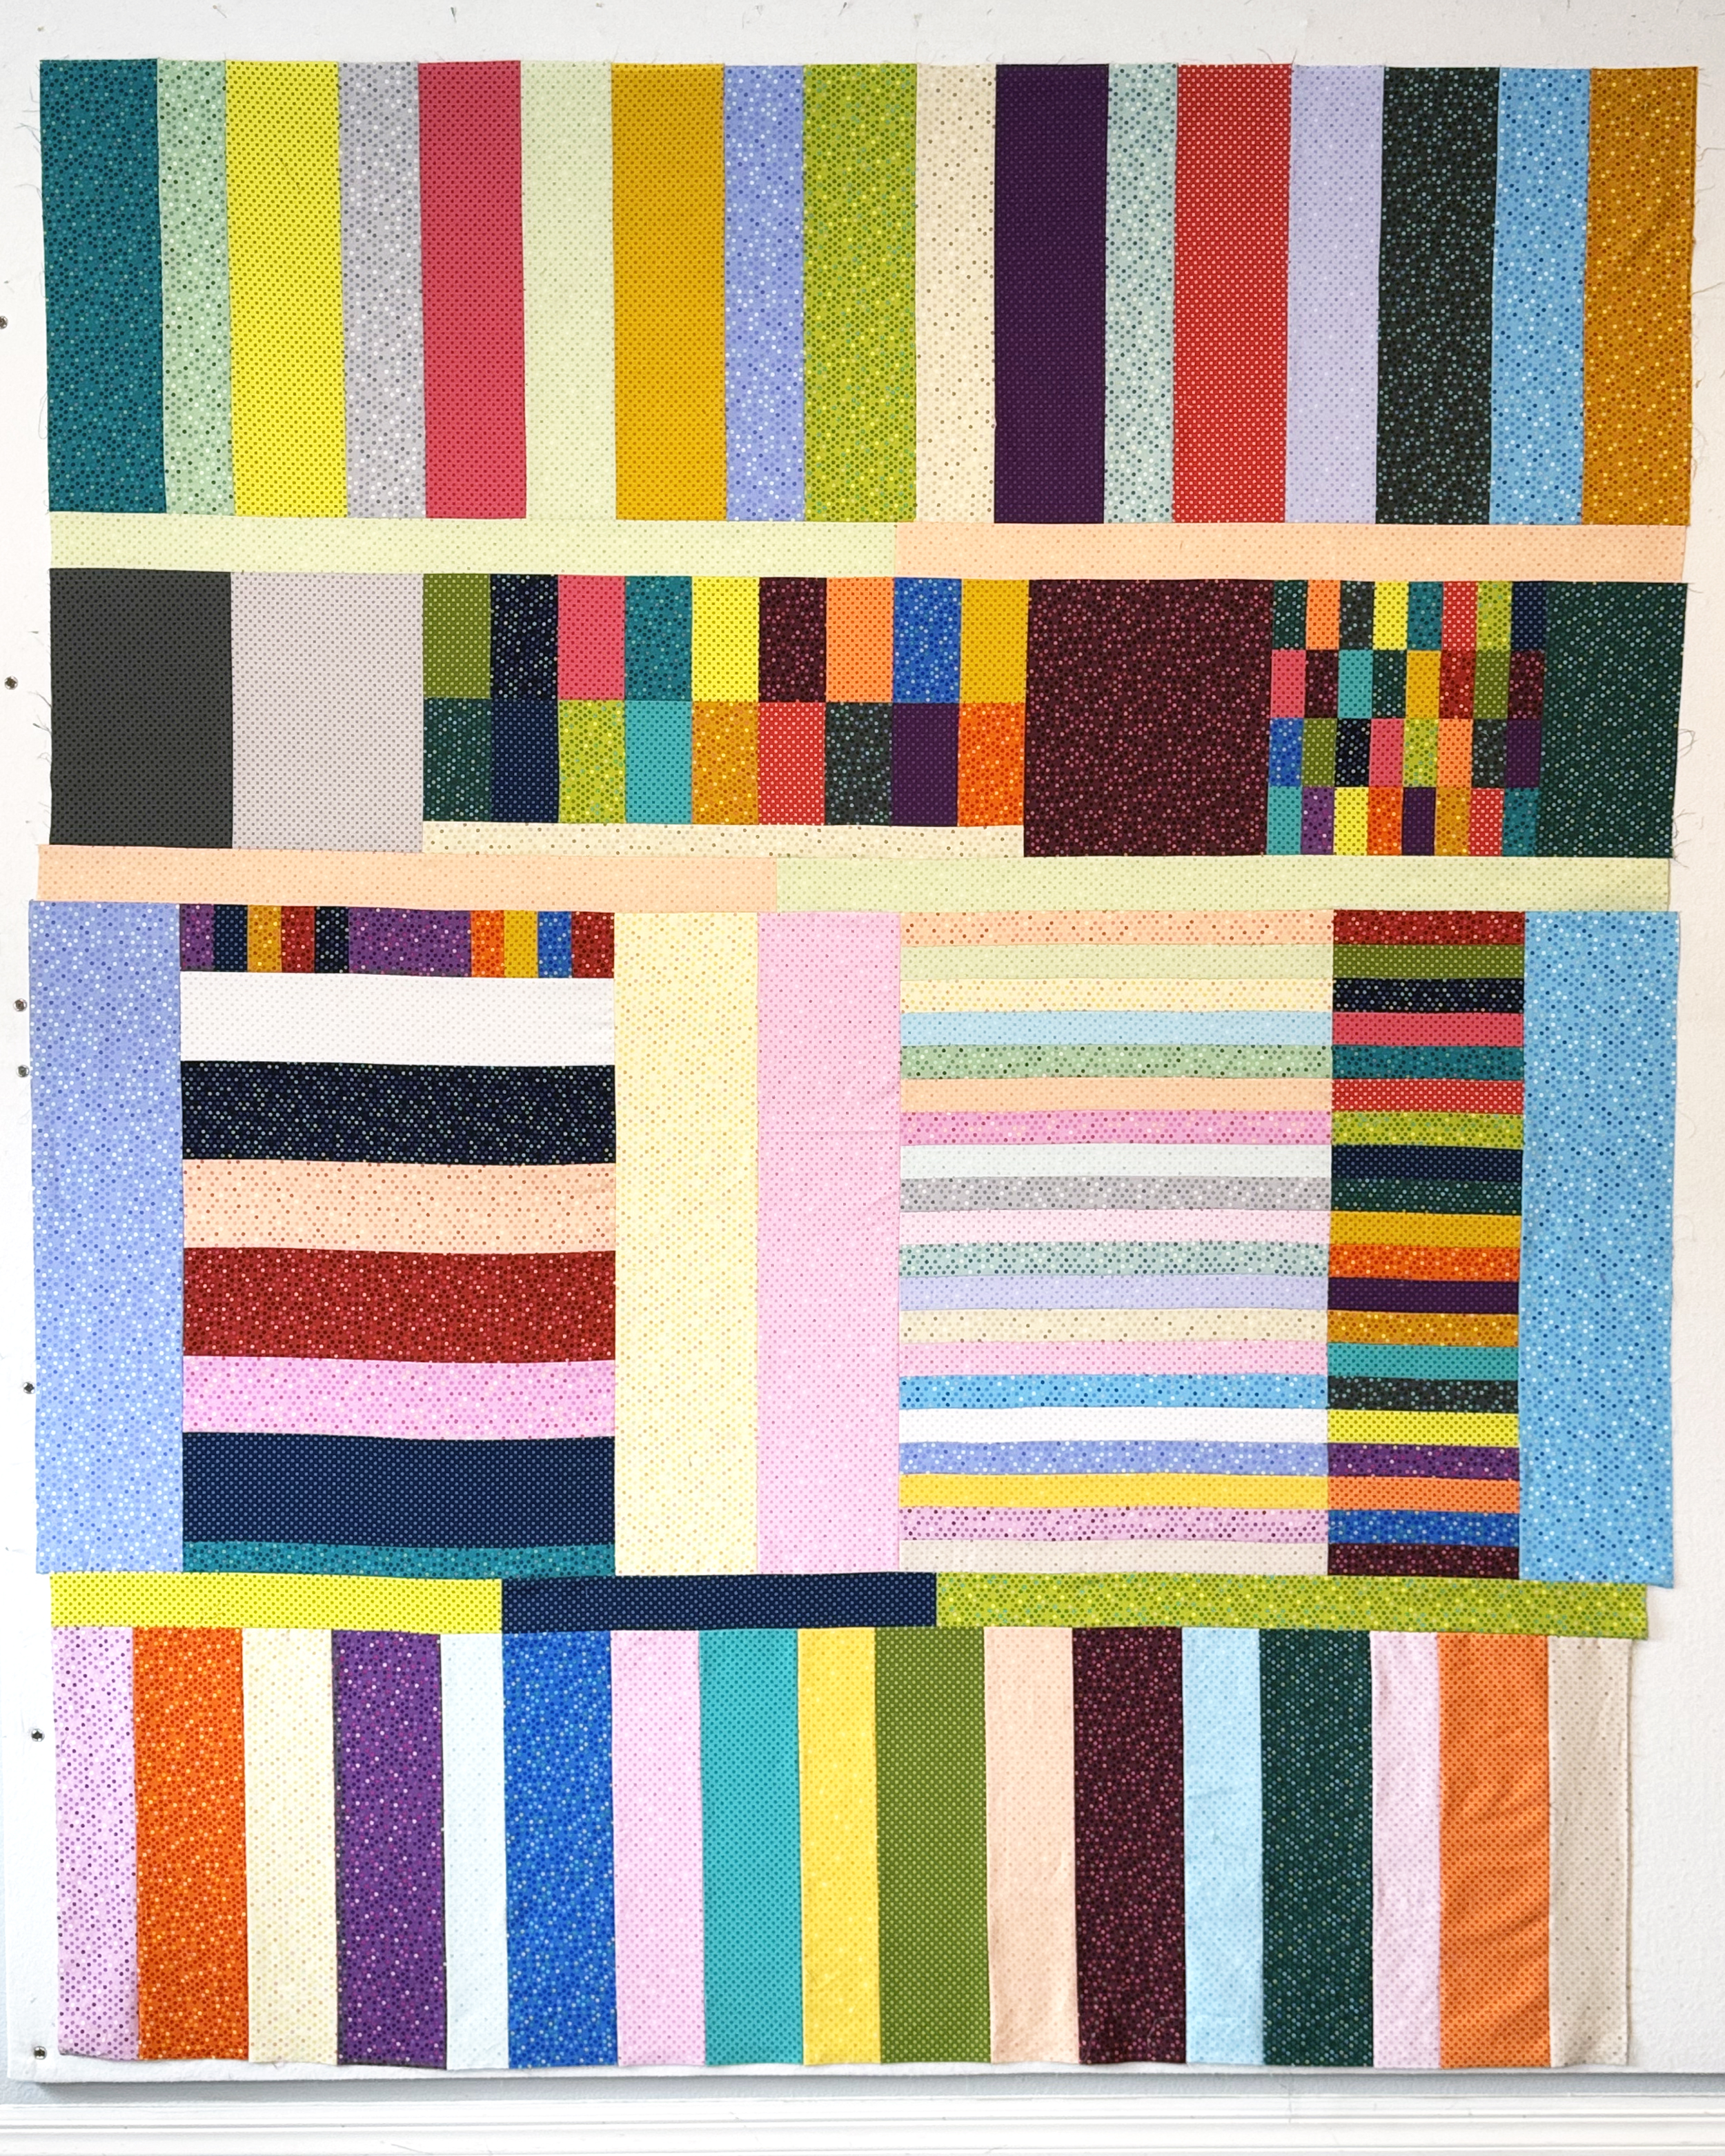
I’ll sew all of the blocks together into rows and then continue using my design wall to lay it out as I join the rows together. I press after every round of sewing to keep things nice and flat.
As you can sew I prefer to press all my seams open. This ensures flat blocks, flat rows, and a very flat quilt top which will make machine quilting so much easier! I sew with a short stitch length (2.0) so that nothing comes apart while handling.
I pin generously as I sew to keep things from shifting. Because my seams are pressed open, I’m not pinning right into the intersection. Instead I will pin on either side of the seams I want to match up and I get really clean joins and matching points this way.
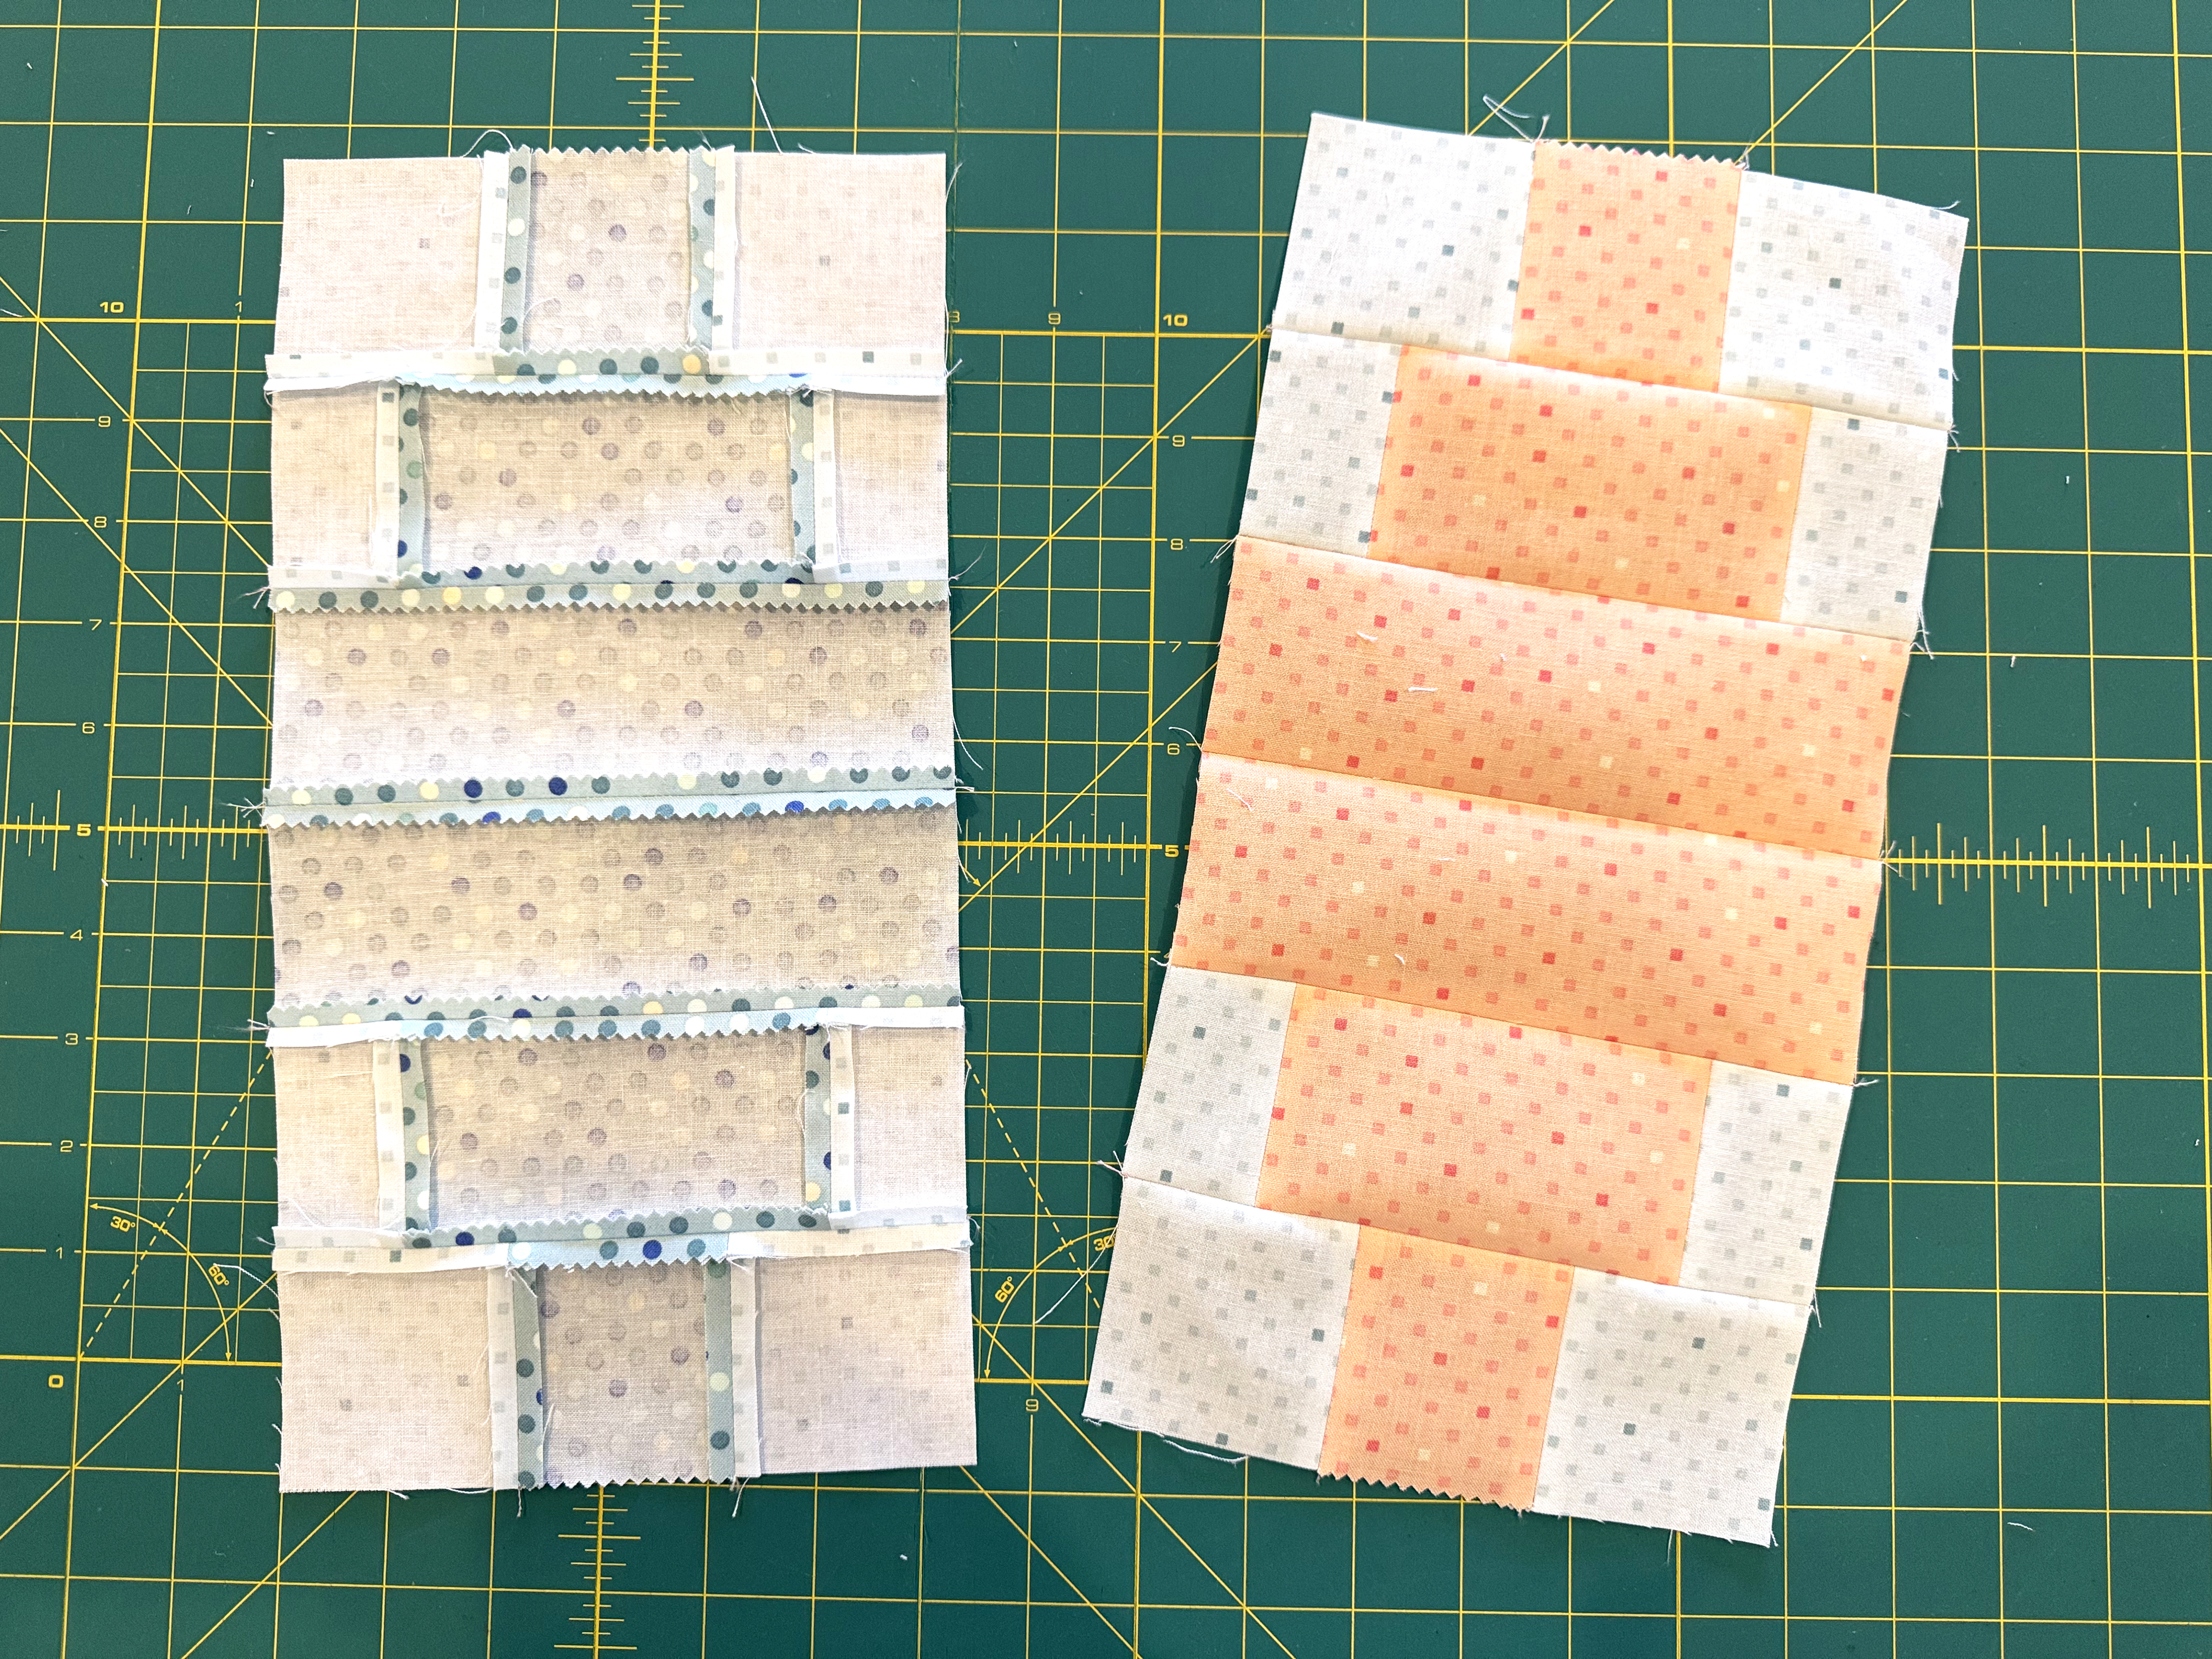
Finally, I add the borders and give the quilt top a final press! Notice the bit of patchwork on the design wall below. I sewed together some leftovers into strip units and I’ll start using those on the back.
Coming up next: I’ll need to piece the quilt backing, baste the layers and quilt the quilt, so stay tuned for more! Click the links below to catch up on any of the previous steps:
Read through the free quilt pattern for instructions on sewing everything together. To keep the blocks nice and straight I sewed with the light background fabric on top each time. I also sewed with a shorter stitch length (2.0) to strengthen the seams and then pressed them open for incredibly flat blocks.
I like to chain sew or assembly line stitch which means slipping each pair of units to sew under the machine and sewing continuously without breaking thread in between. Here’s my first run through after I added the lighter background to the sides of each lantern unit:
I sew as many units together as possible, then cut them all apart, press the units, then continue chain piecing until the entire block is sewn. It creates quite a beautiful mess by the time I’m done but it’s a quick and efficient way to sew!
This block is very simple because it’s two of the same halves sewn together. I used the same fabric for each Lantern unit. But you could absolutely go super scrappy if you wanted to! The trick is to make sure you are sewing with accurate 1/4″ seams so that each unit ends up the same size.
I press each seam as I go and then press the final block front and back when I’m finished. The reason I do this is so that the blocks and quilt top will lie flat for domestic machine quilting. I’m always thinking about how the piecing will affect the quilting and vice versa!
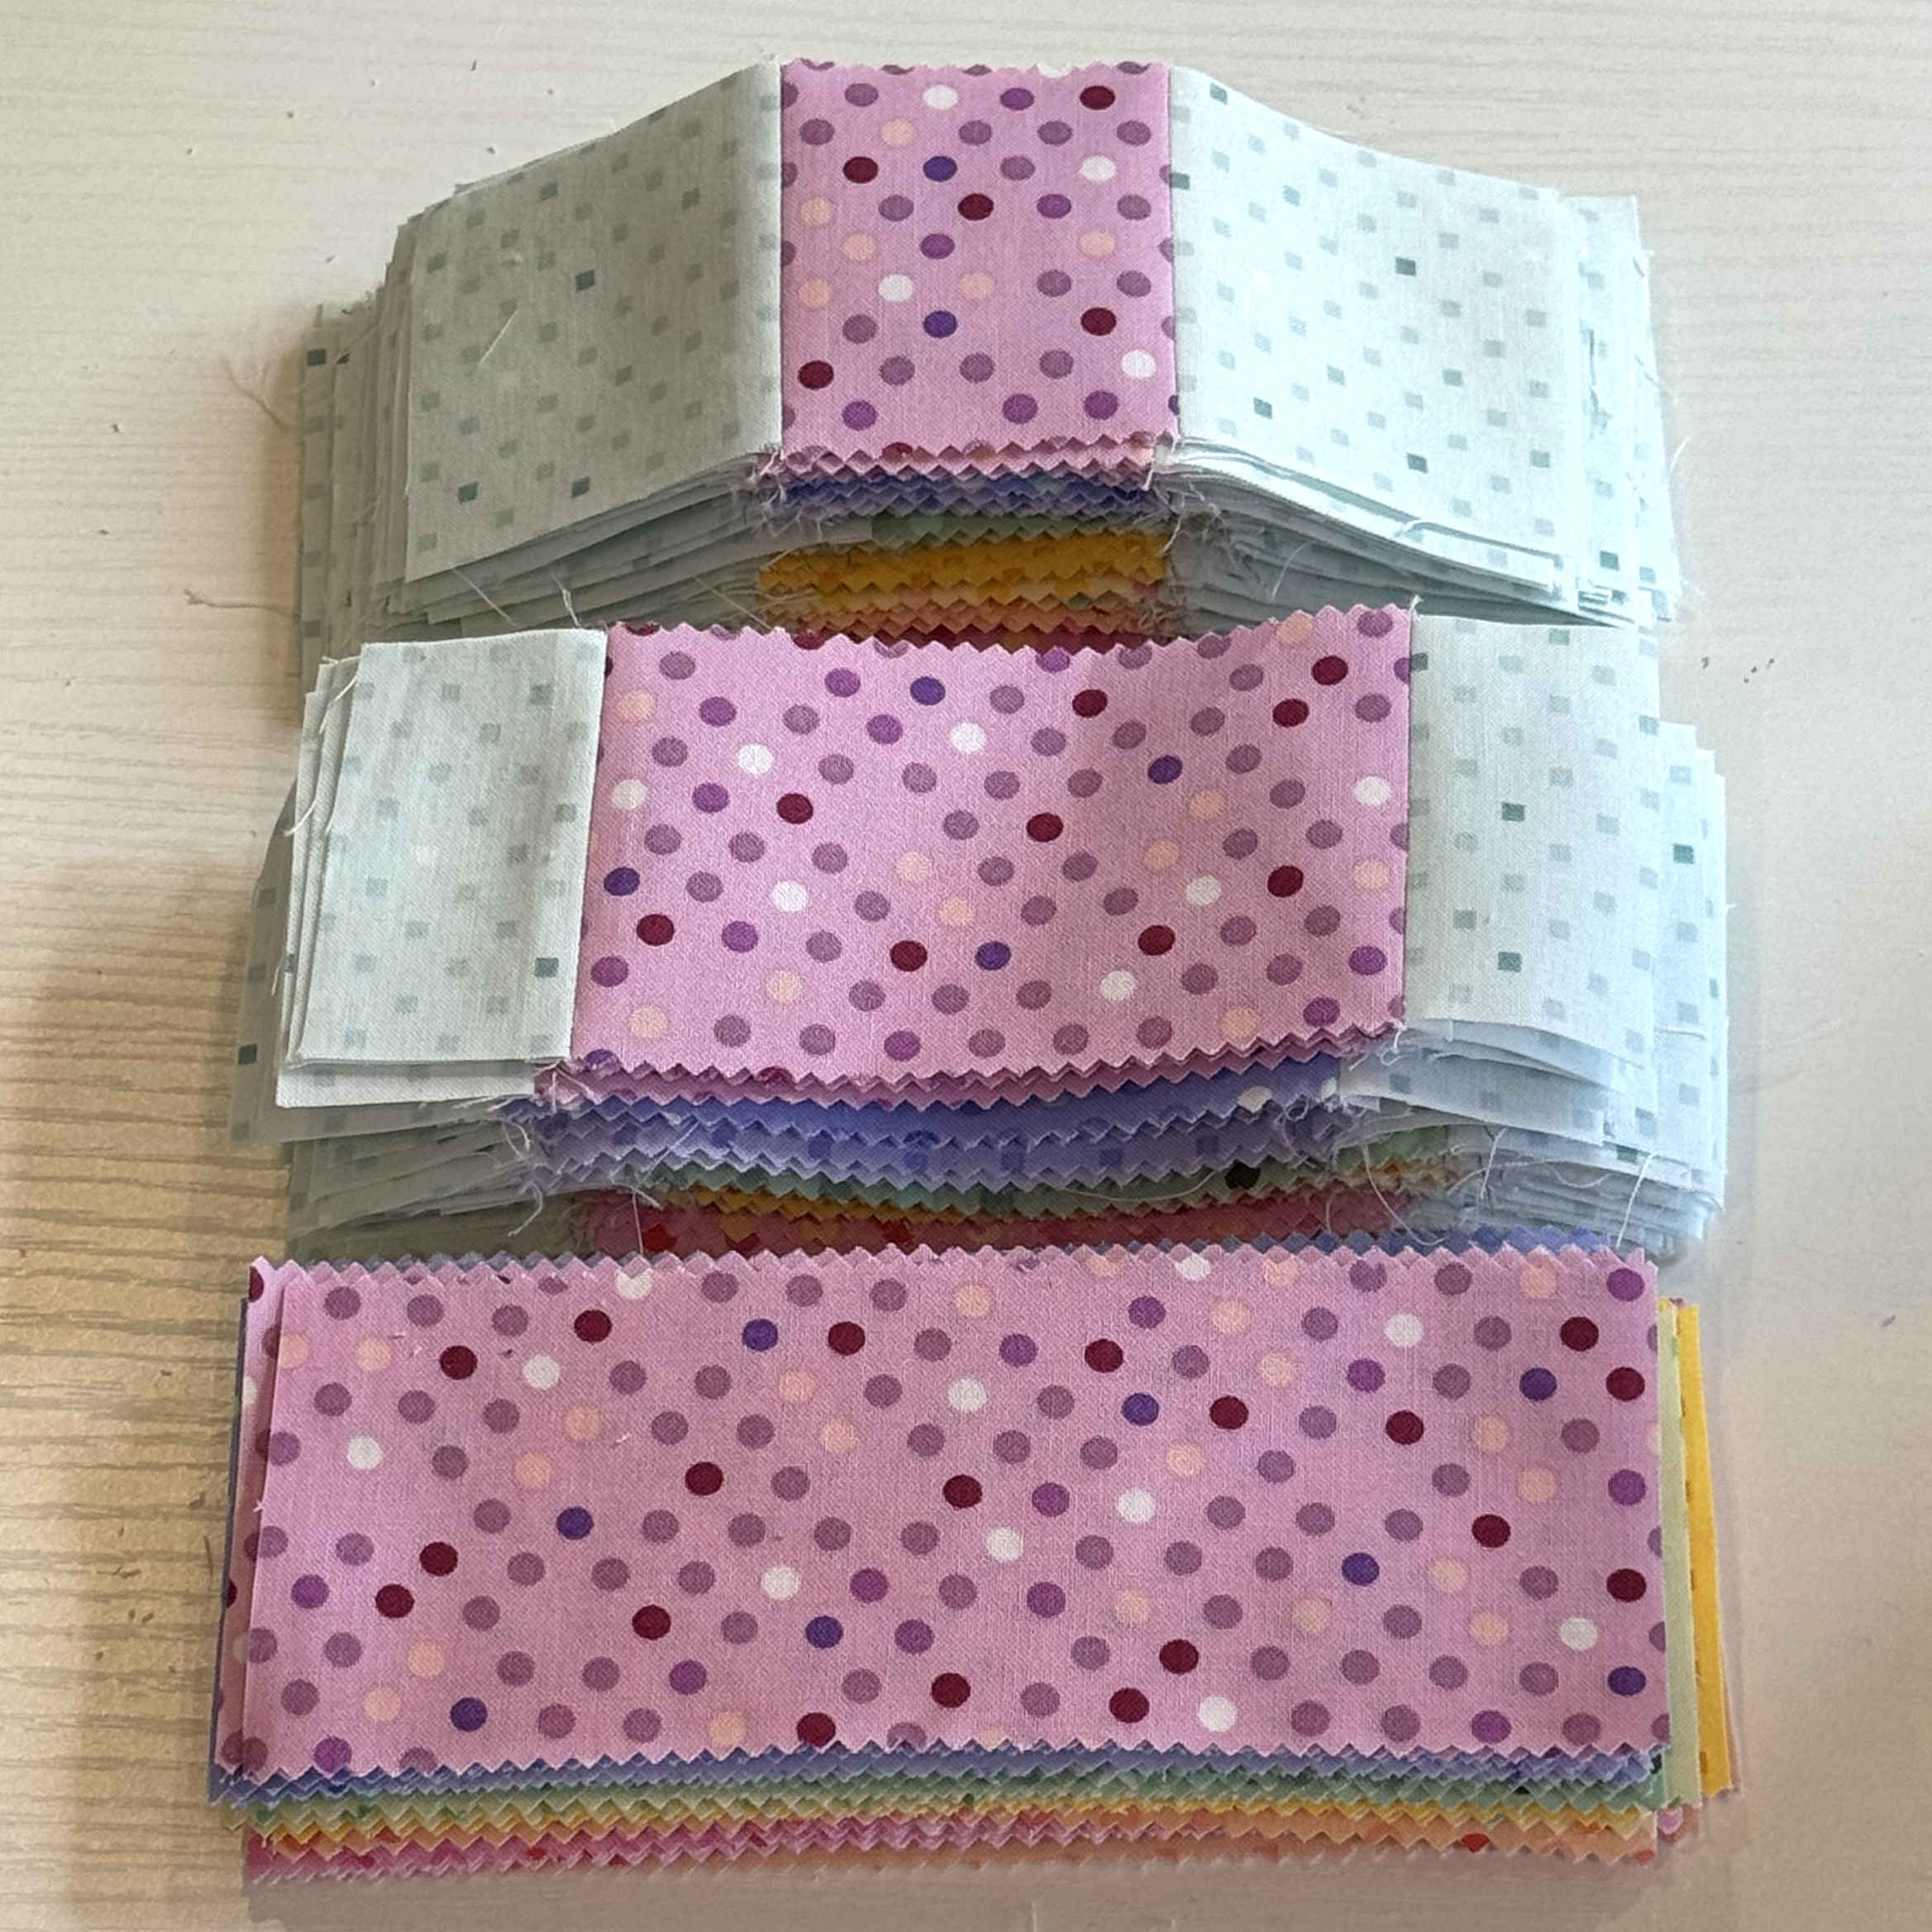
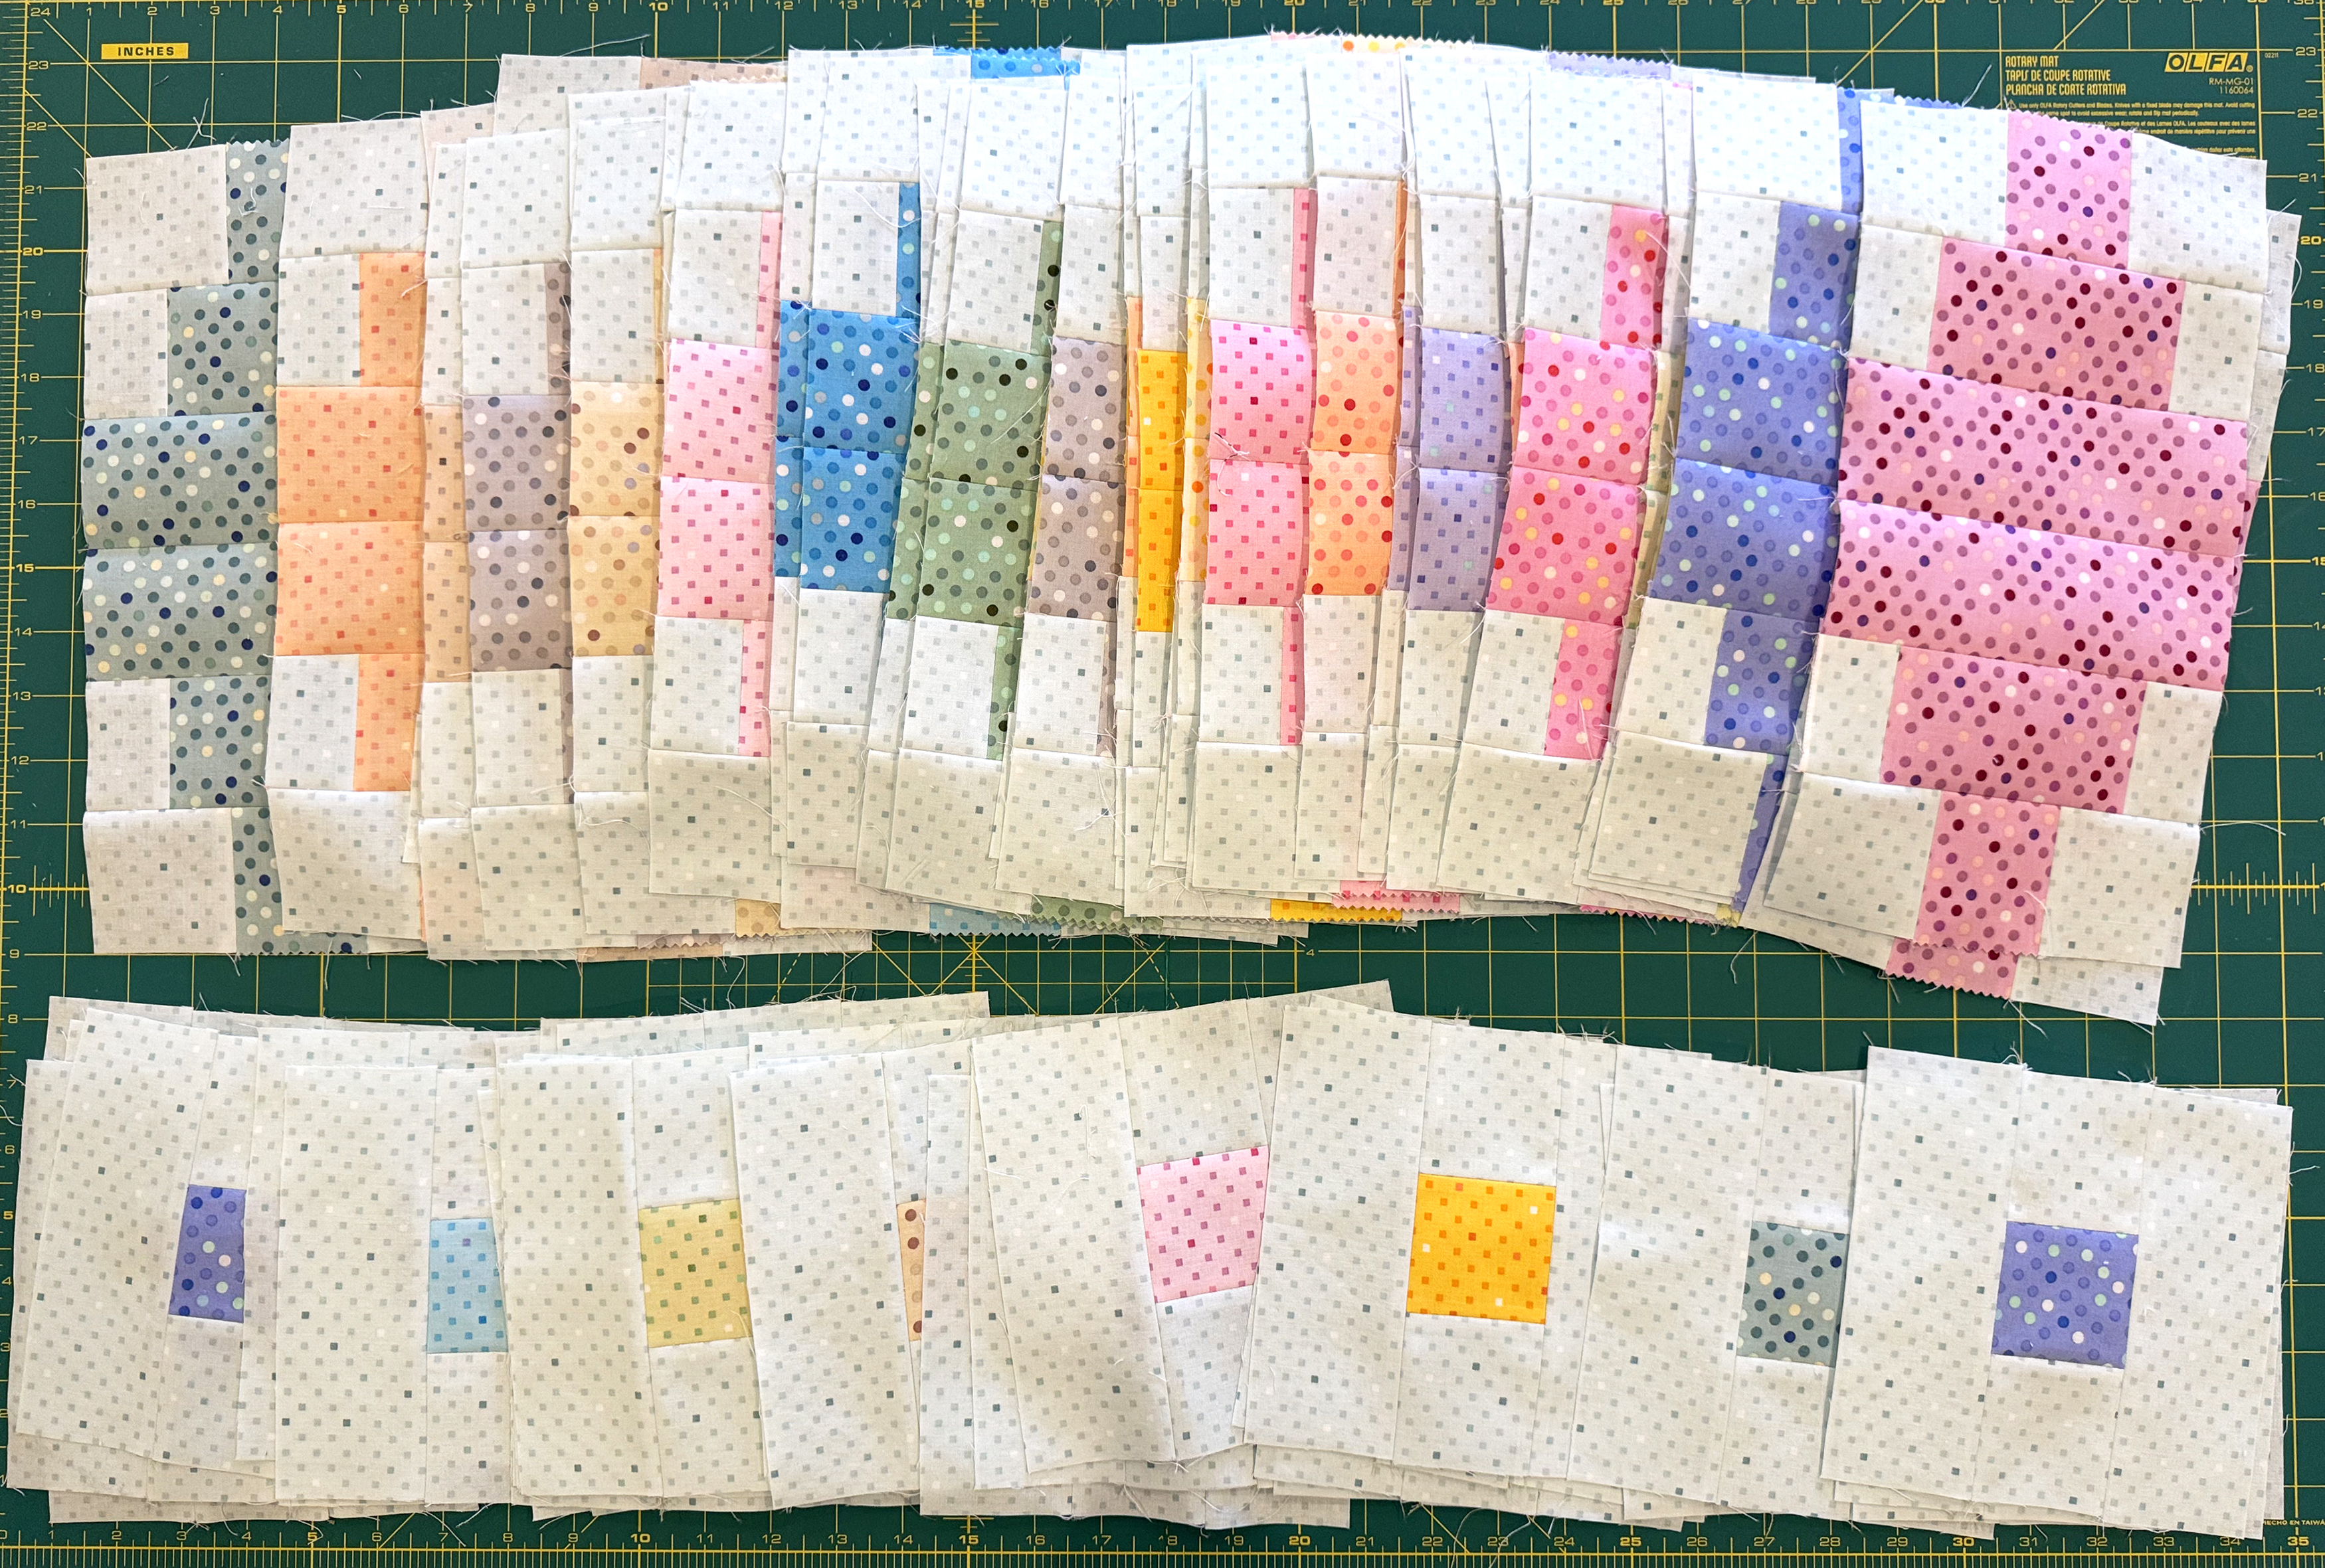
I love having a yummy pile of freshly sewn bocks! Aren’t they pretty?
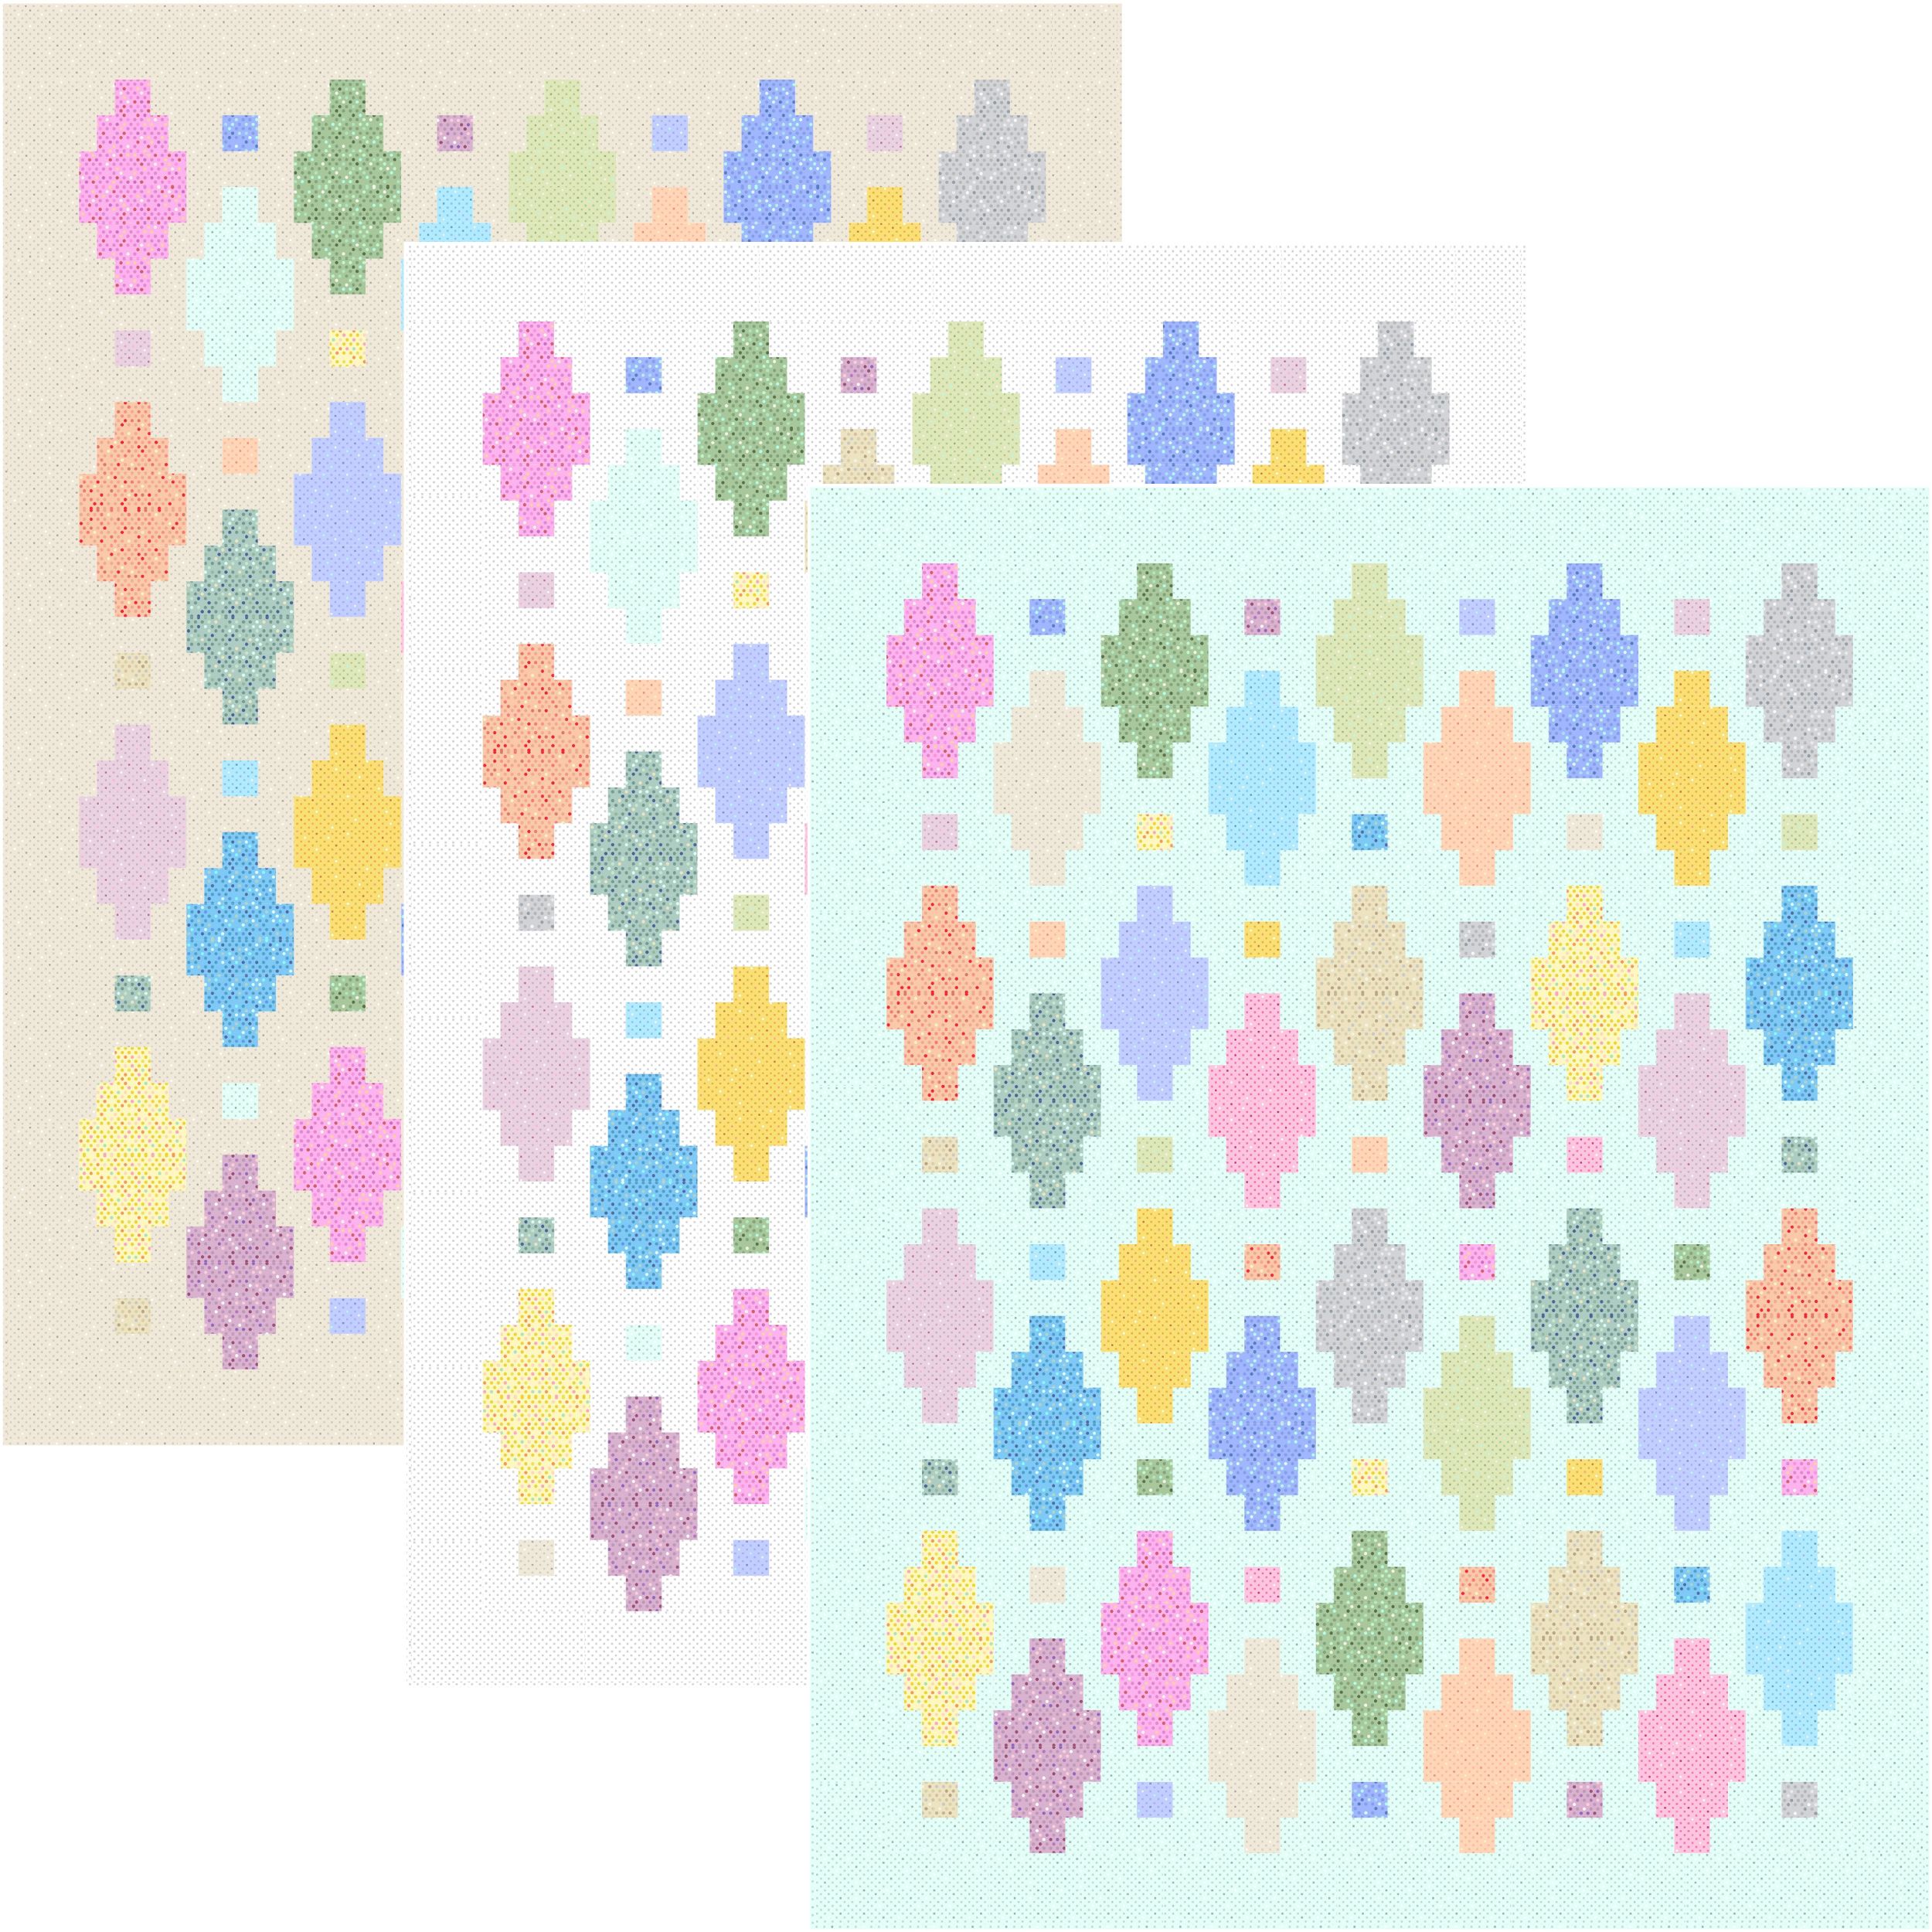
Don’t forget to make the square blocks in addition to the lantern blocks! If you don’t already have a copy of the free quilt pattern, you can grab it below, along with the optional kit in 3 colorways:
Sew all of the blocks so they are ready to make the quilt top. Share pics of your progress and feel free to ask for any help you need over in my Christa Quilts Group on Facebook!
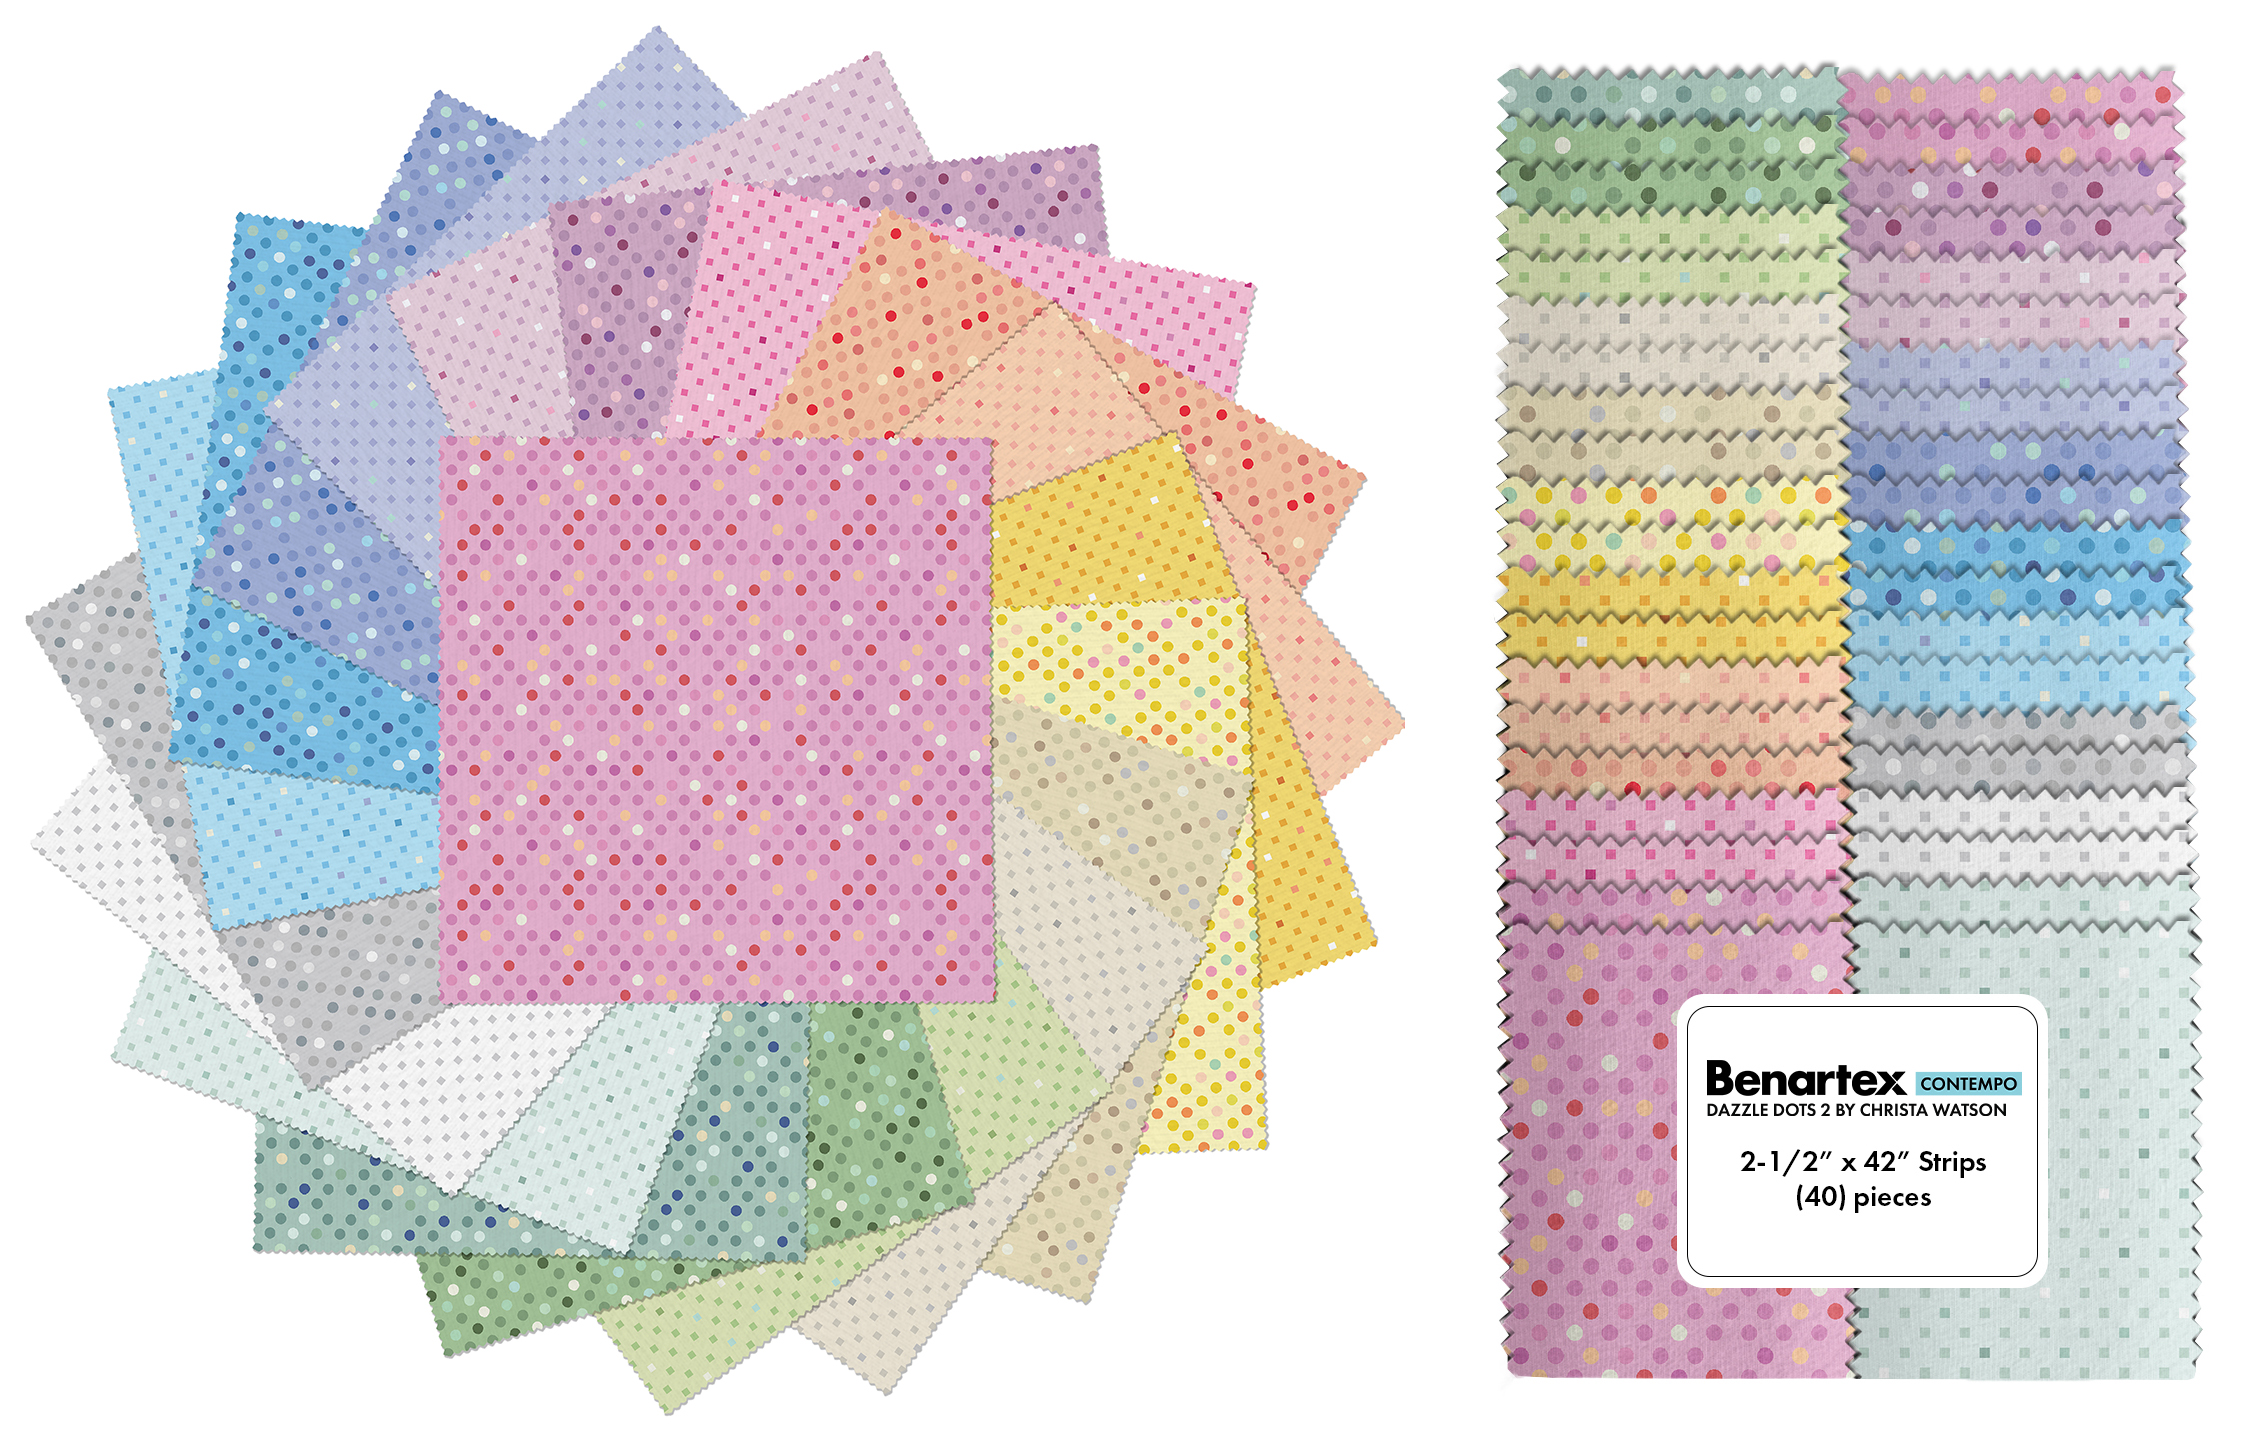
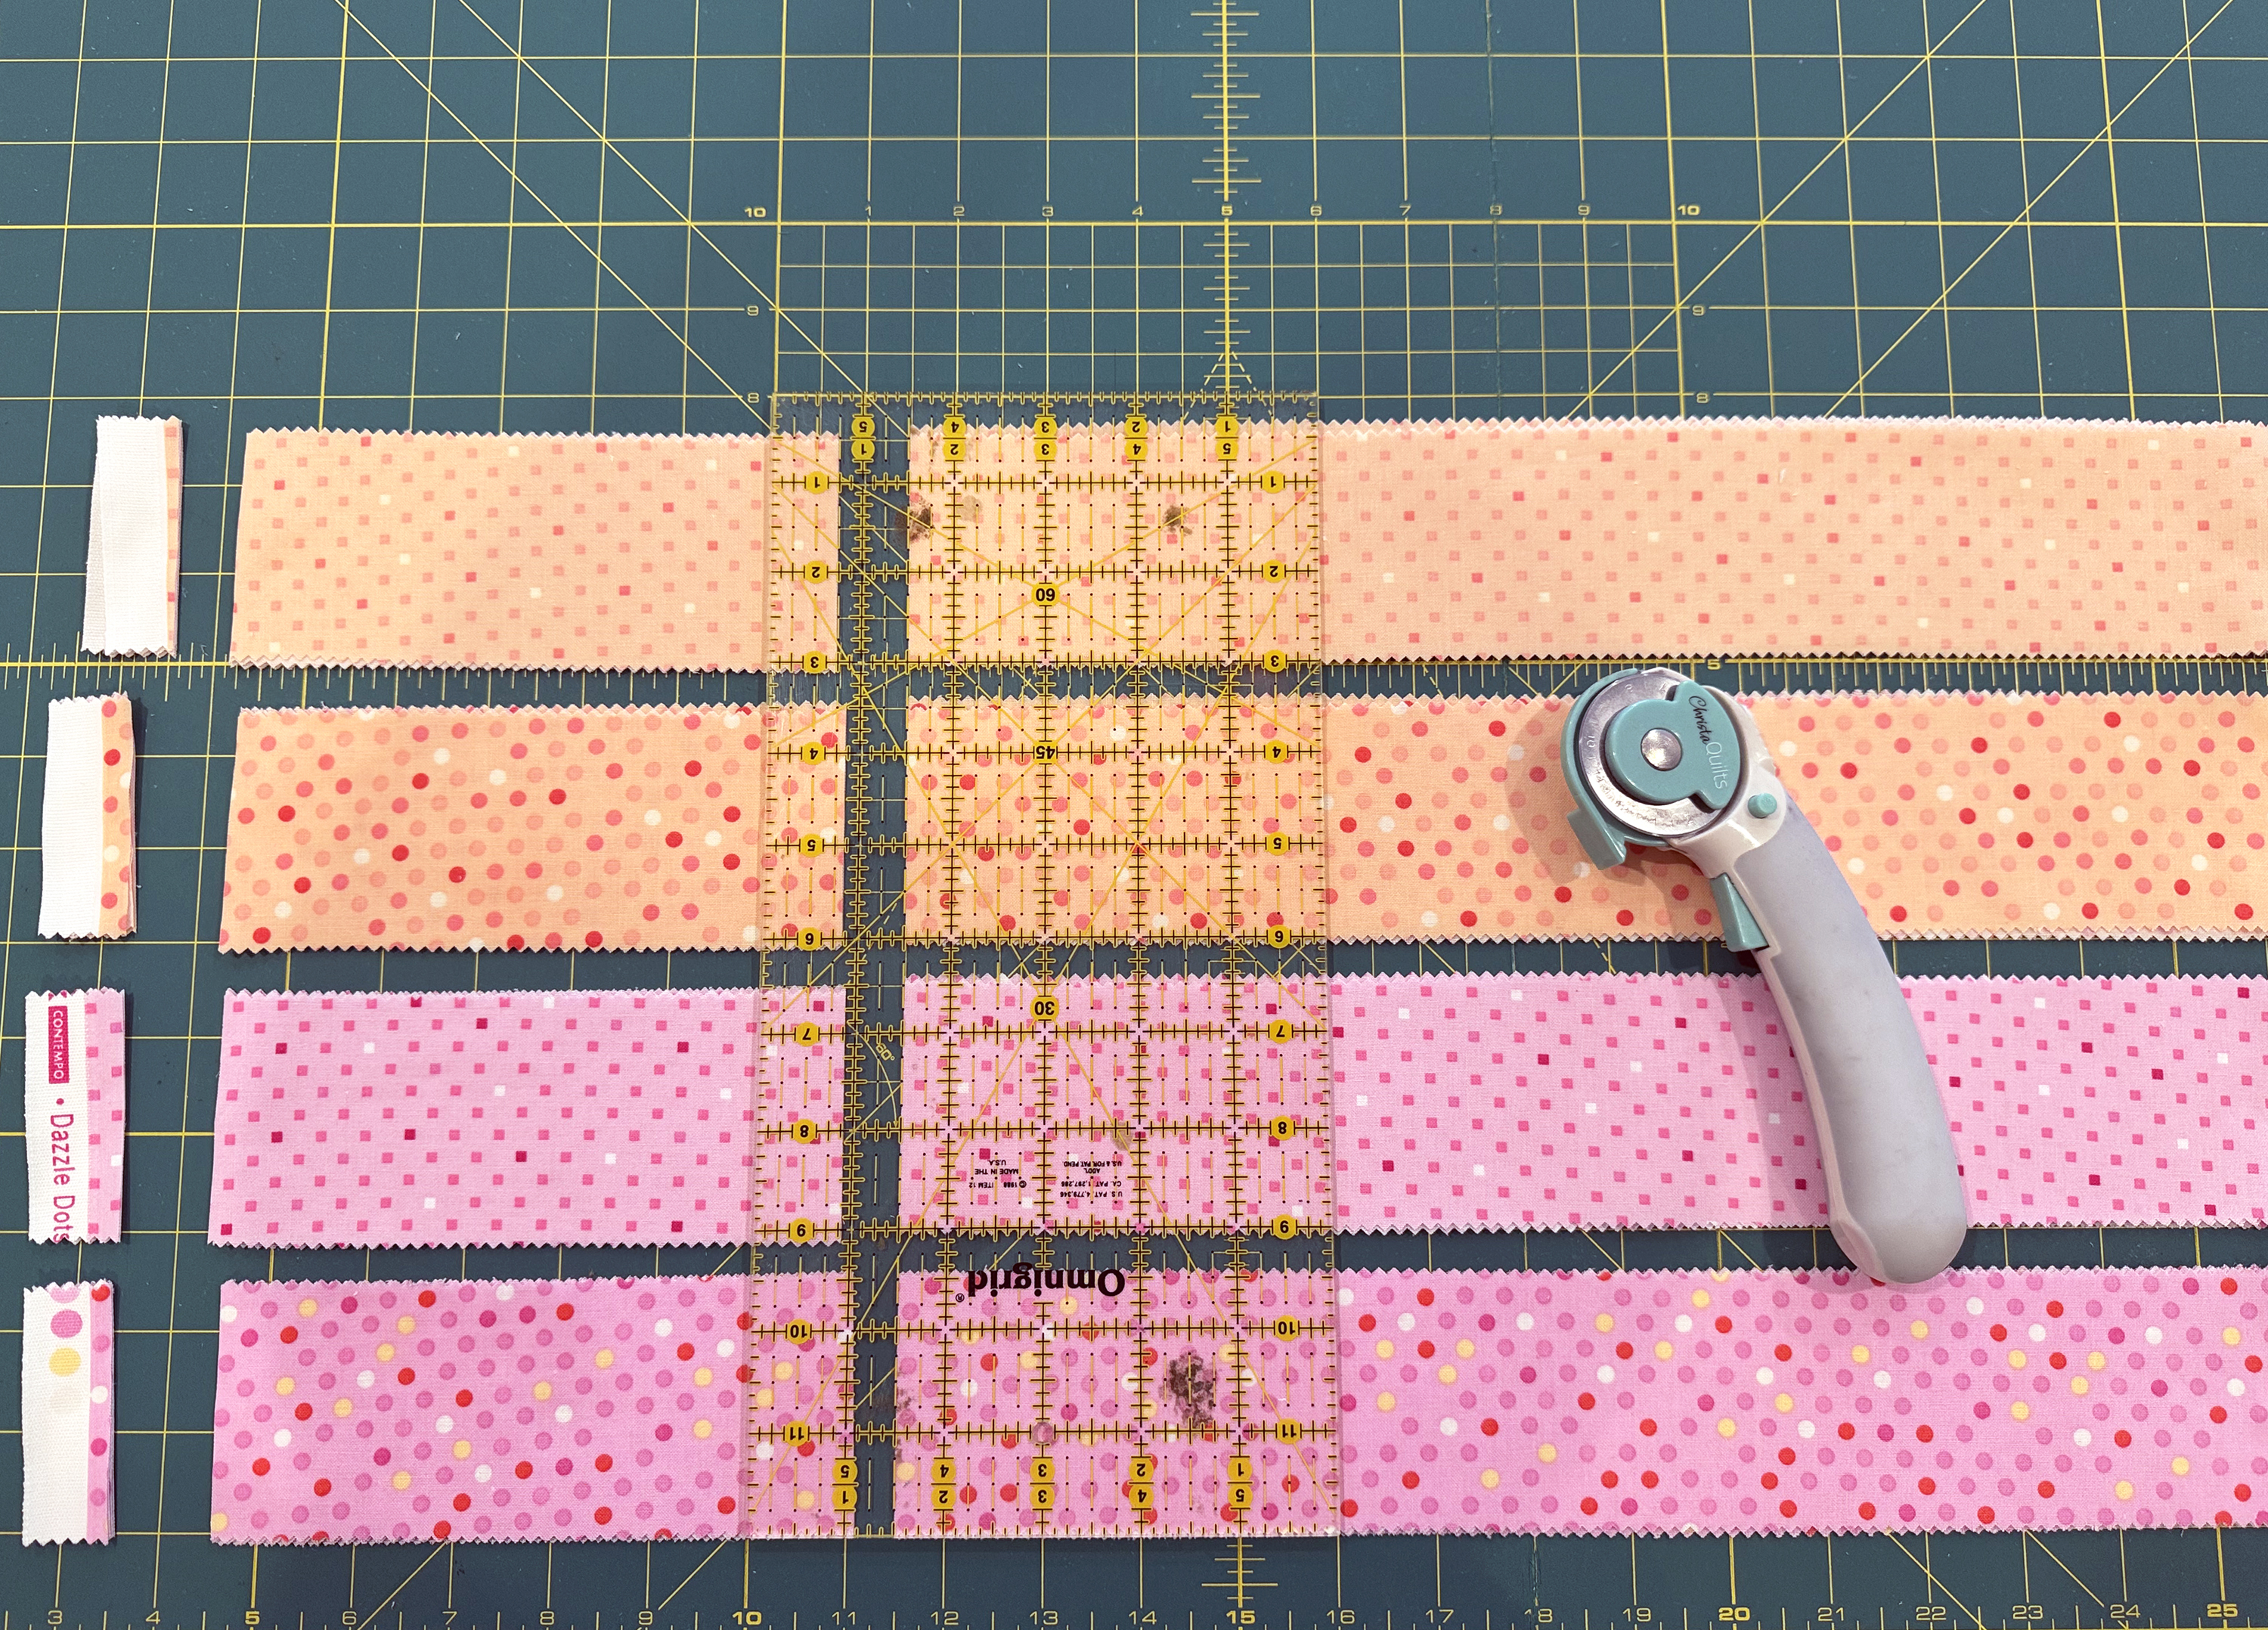
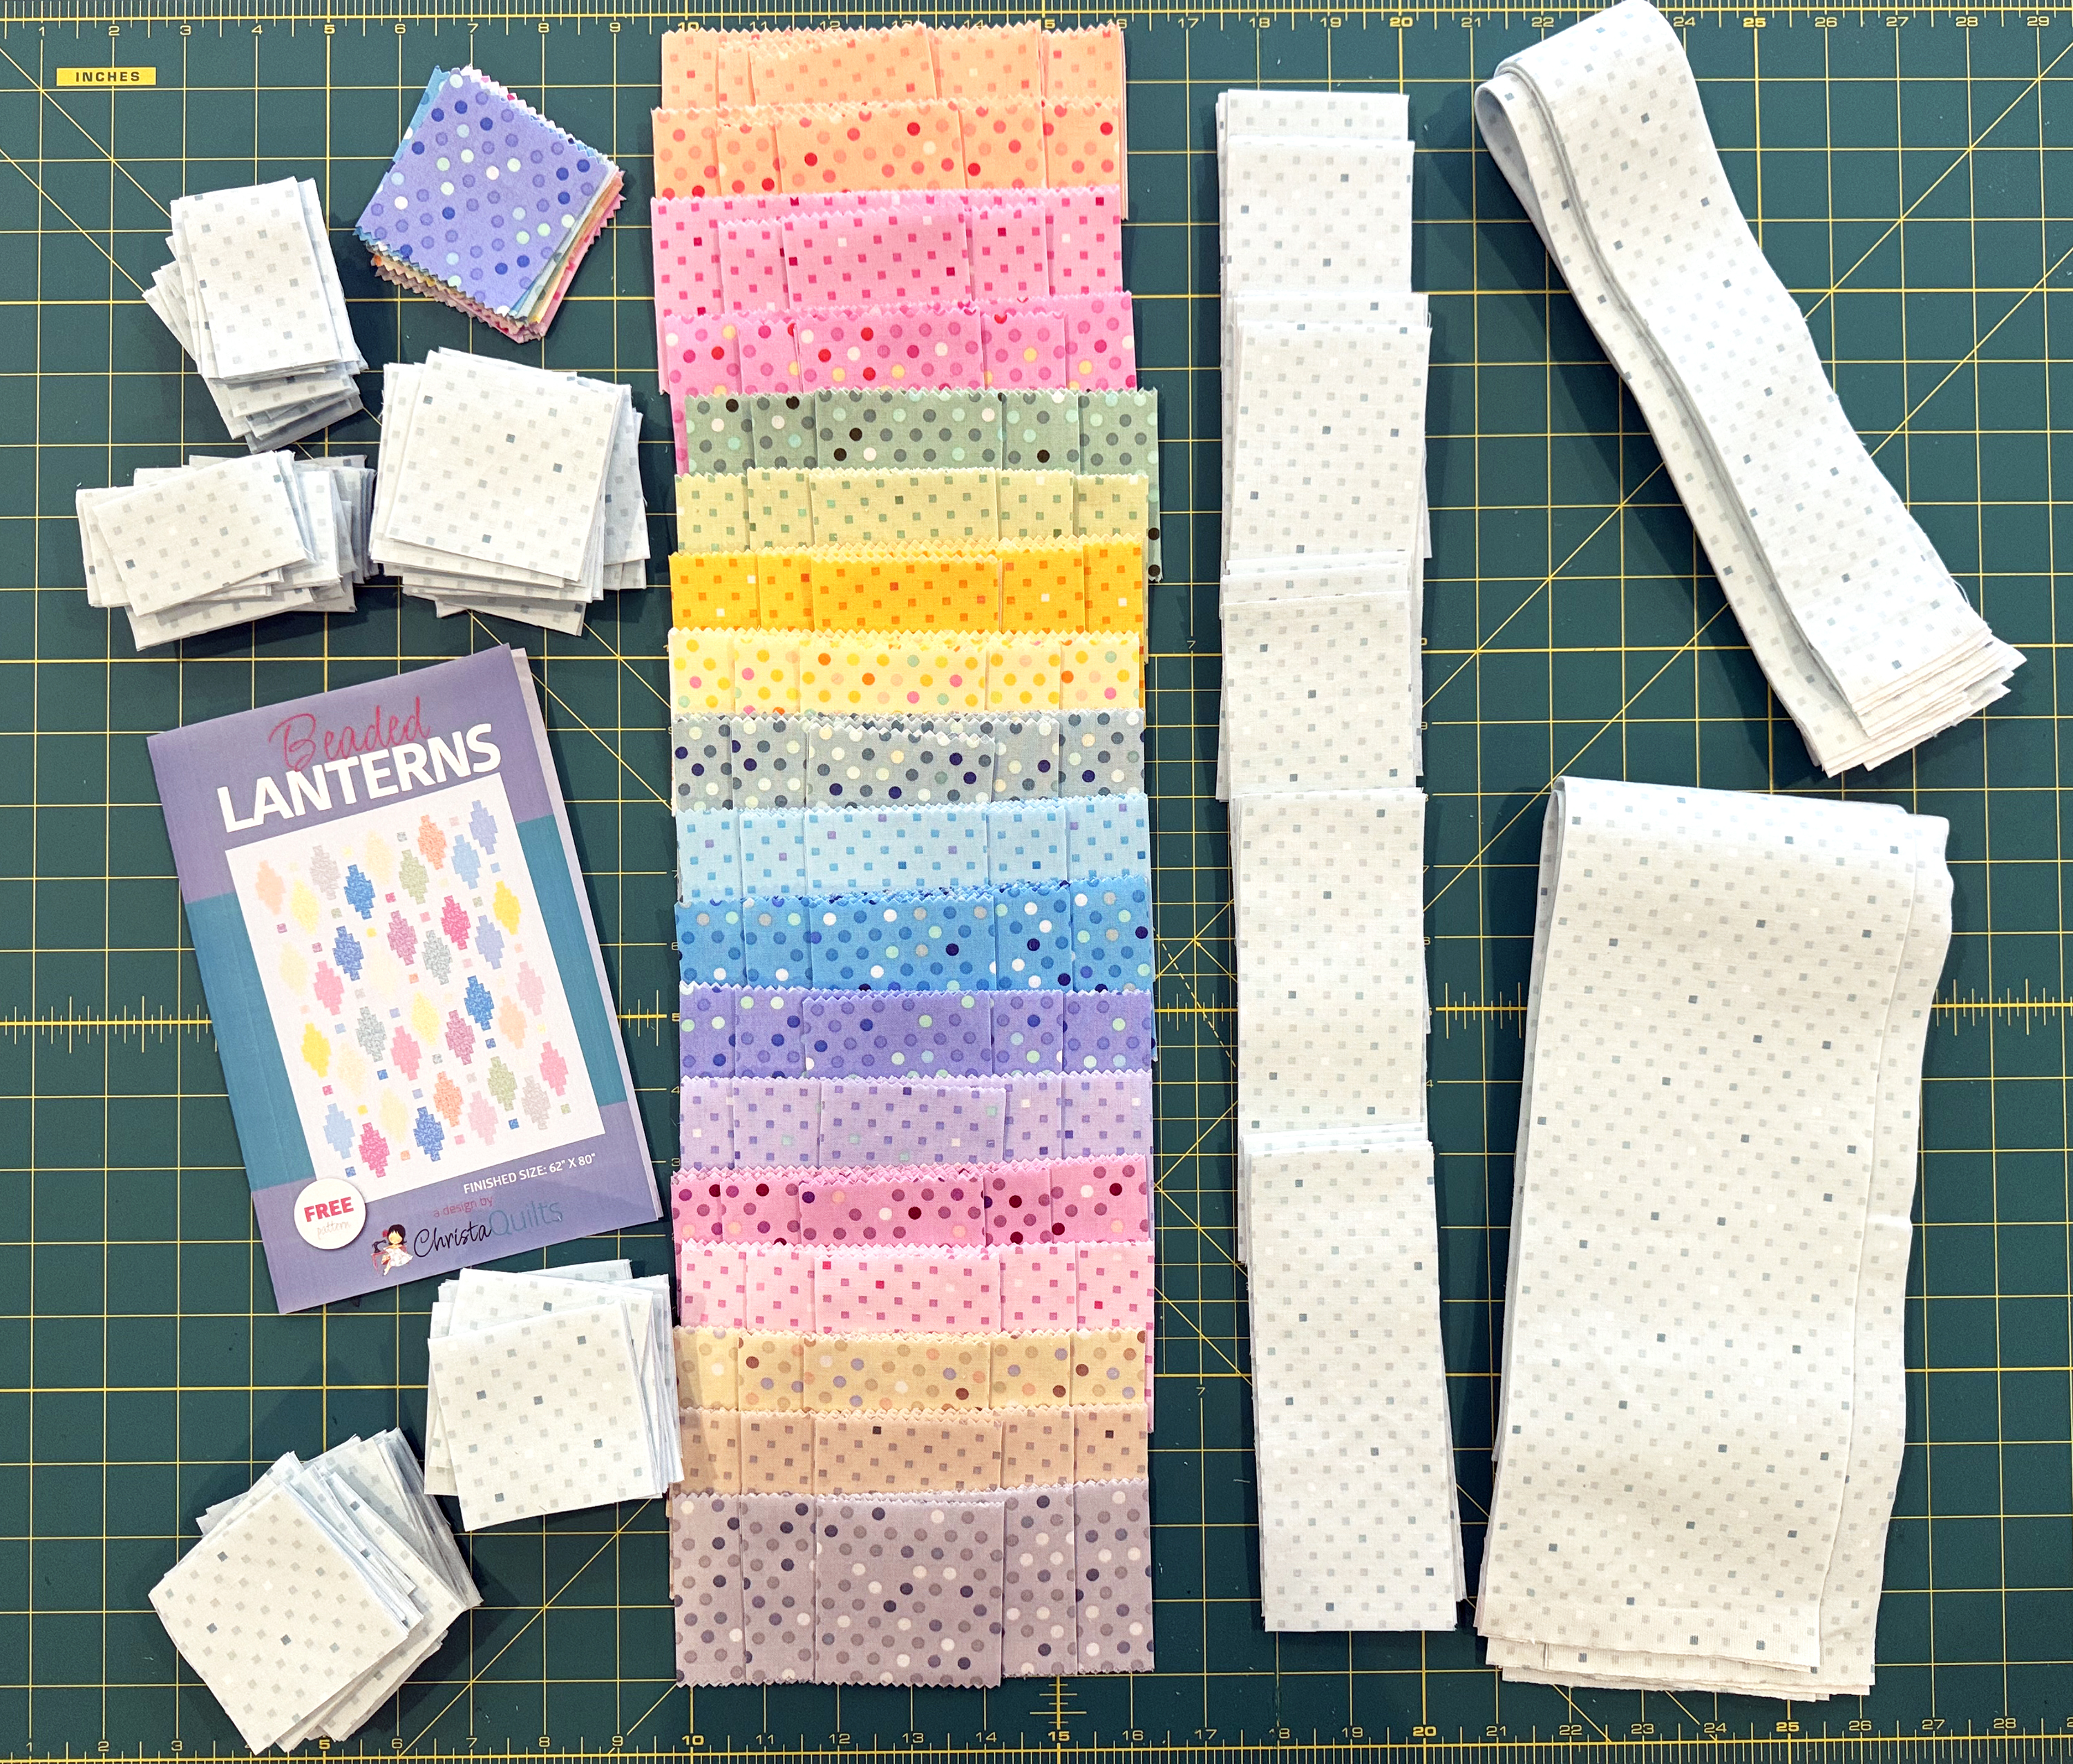
This week it’s time to cut into your yummy fabrics as we begin to make Beaded Lanterns. If you haven’t done so yet, be sure to download my free Beaded Lanterns Quilt pattern to follow along. Now, let’s get started!
You’ll need a total of 36 precut strips from a standard sized strip roll. Using my Dazzle Dots 2 roll shown above, I took out 2 strips of the ice blue color because it was the same as the background and I didn’t want a “hole” in my quilt. I also took out the 2 white strips since it had the least amount of contrast. That left me with a total of 18 colors, 2 strips of each. Perfect!
Follow the pattern instructions on page 2 to cut out your individual units for each block, plus cutting up the 4 yards of background fabric (which includes the binding). To speed up the cutting, I layered 2 strips of each color (4 layers of fabric), and cut through several stacks of strips at one time.
I prefer to cut out all of my units to the correct size first, before sewing. After many years of trial and error, I’ve found that my units are much more accurate this way.
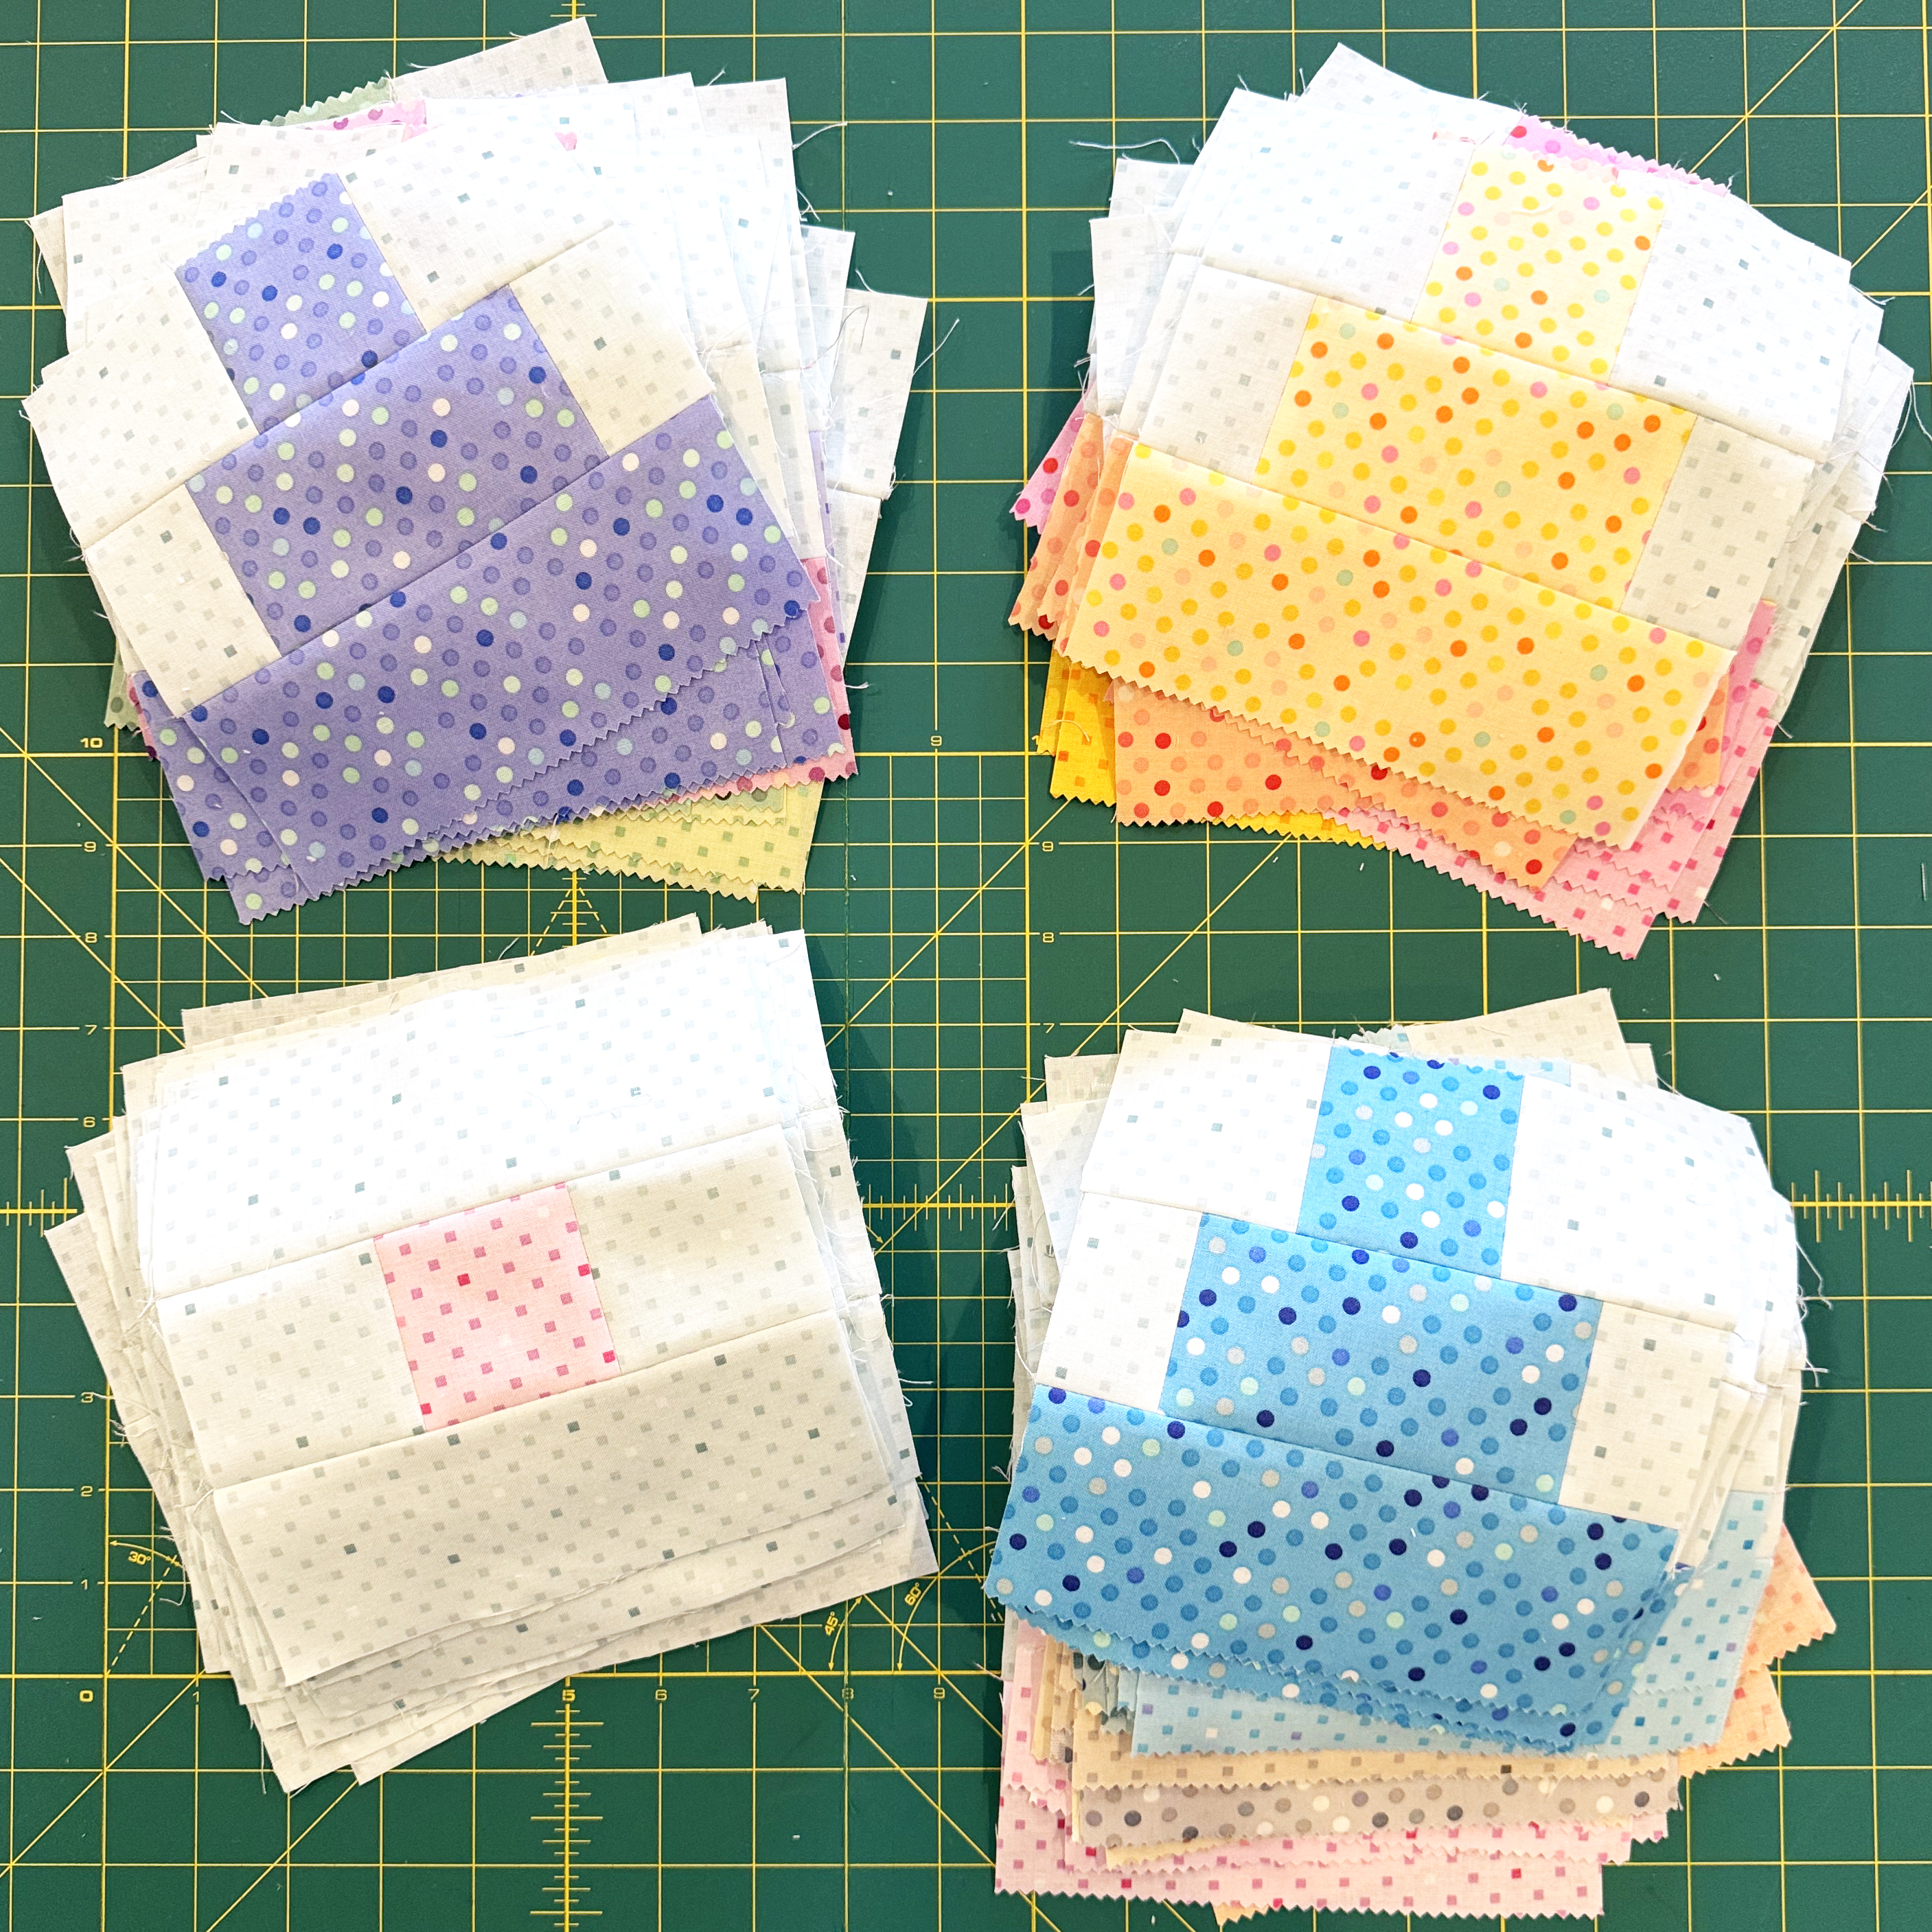
I plan to set aside the leftovers after cutting, and then piece them into the backing. This is totally optional, but it’s a fun way to personalize your quilt!
Ta-Da! All of my pieces are cut and ready to sew into blocks for next week!
Now it’s your turn to share. You can share your work in progress on social media using #beadedlanternsqal. Or you can post pics and ask questions over in my Christa Quilts Facebook group.
I’m excited to share my step-by-step process for quilting my latest iteration of Bling. This is one of my favorite patterns I’ve made over the years. Whenever I get a new idea for a fun colorscheme or quilting plan, I can’t help remaking some of my most popular patterns! Click below to watch and let me know what you think!
You can choose a similar color story and layout, or you can switch things up and make it your own! The last few times I’ve made this quilt, I chose scrappy backgrounds, but you can also use one fabric for the background and it looks just as good. Hmmm, maybe you’ll want to make more than one like I did??
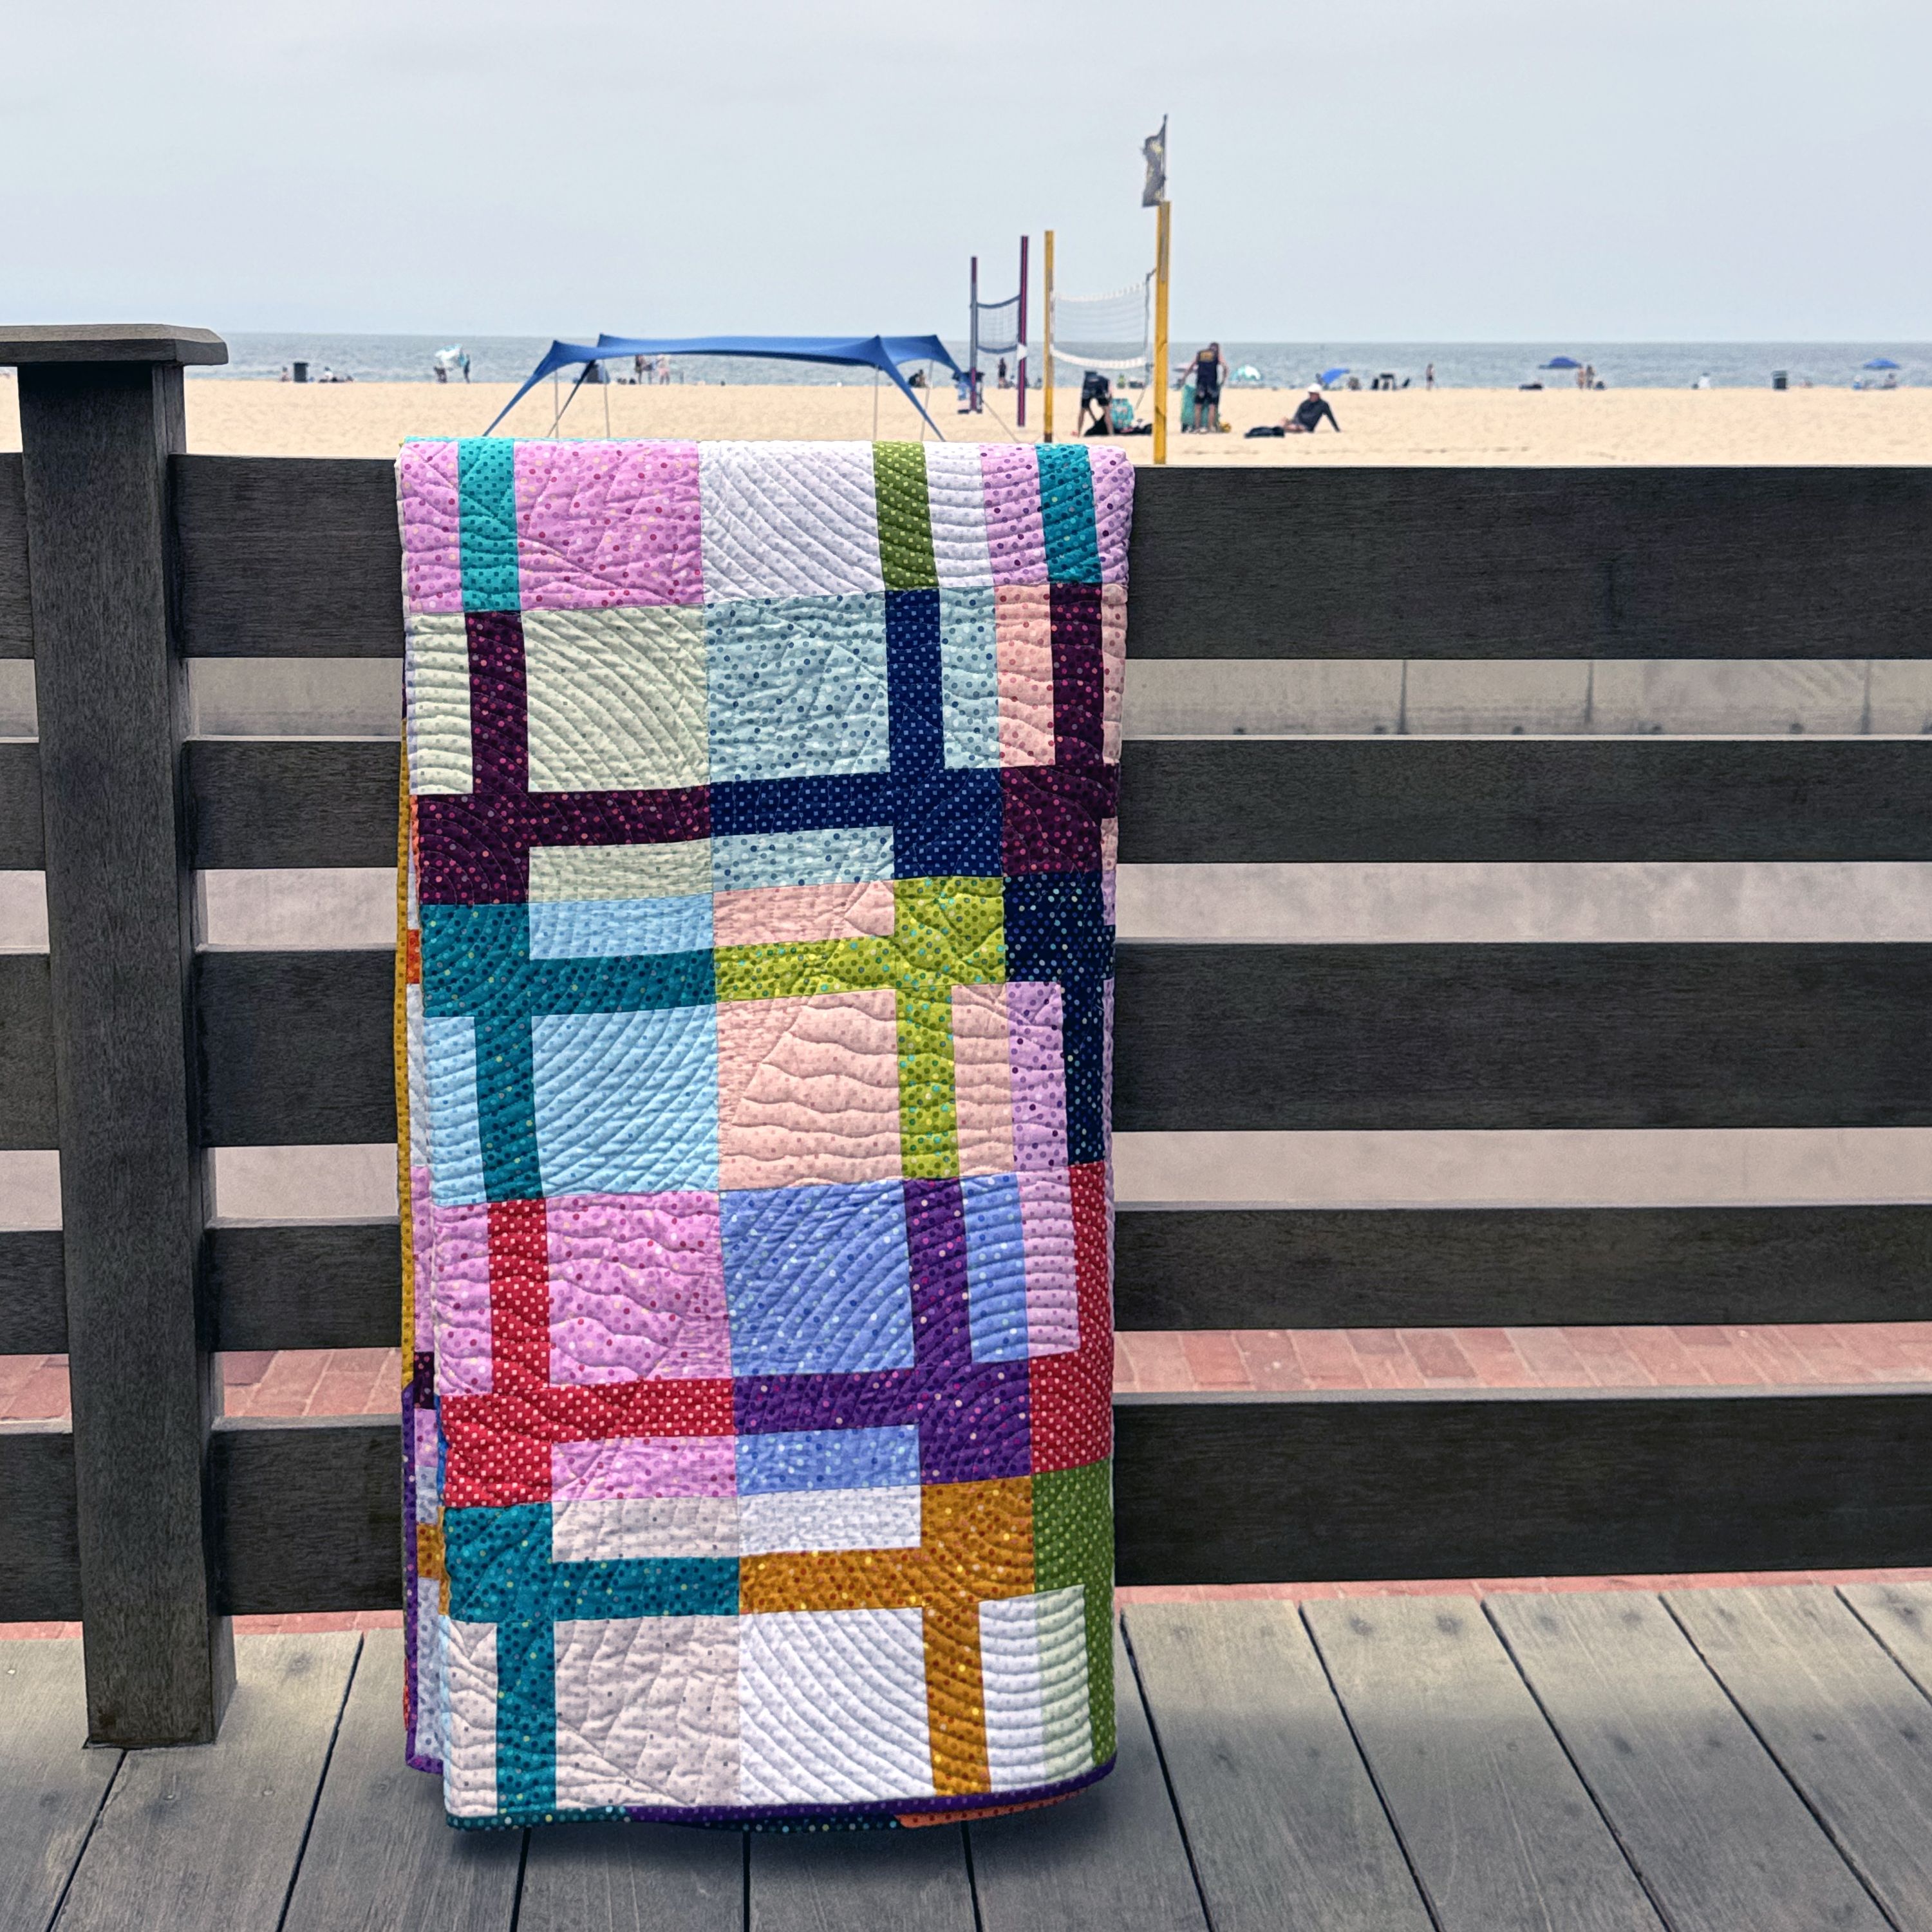
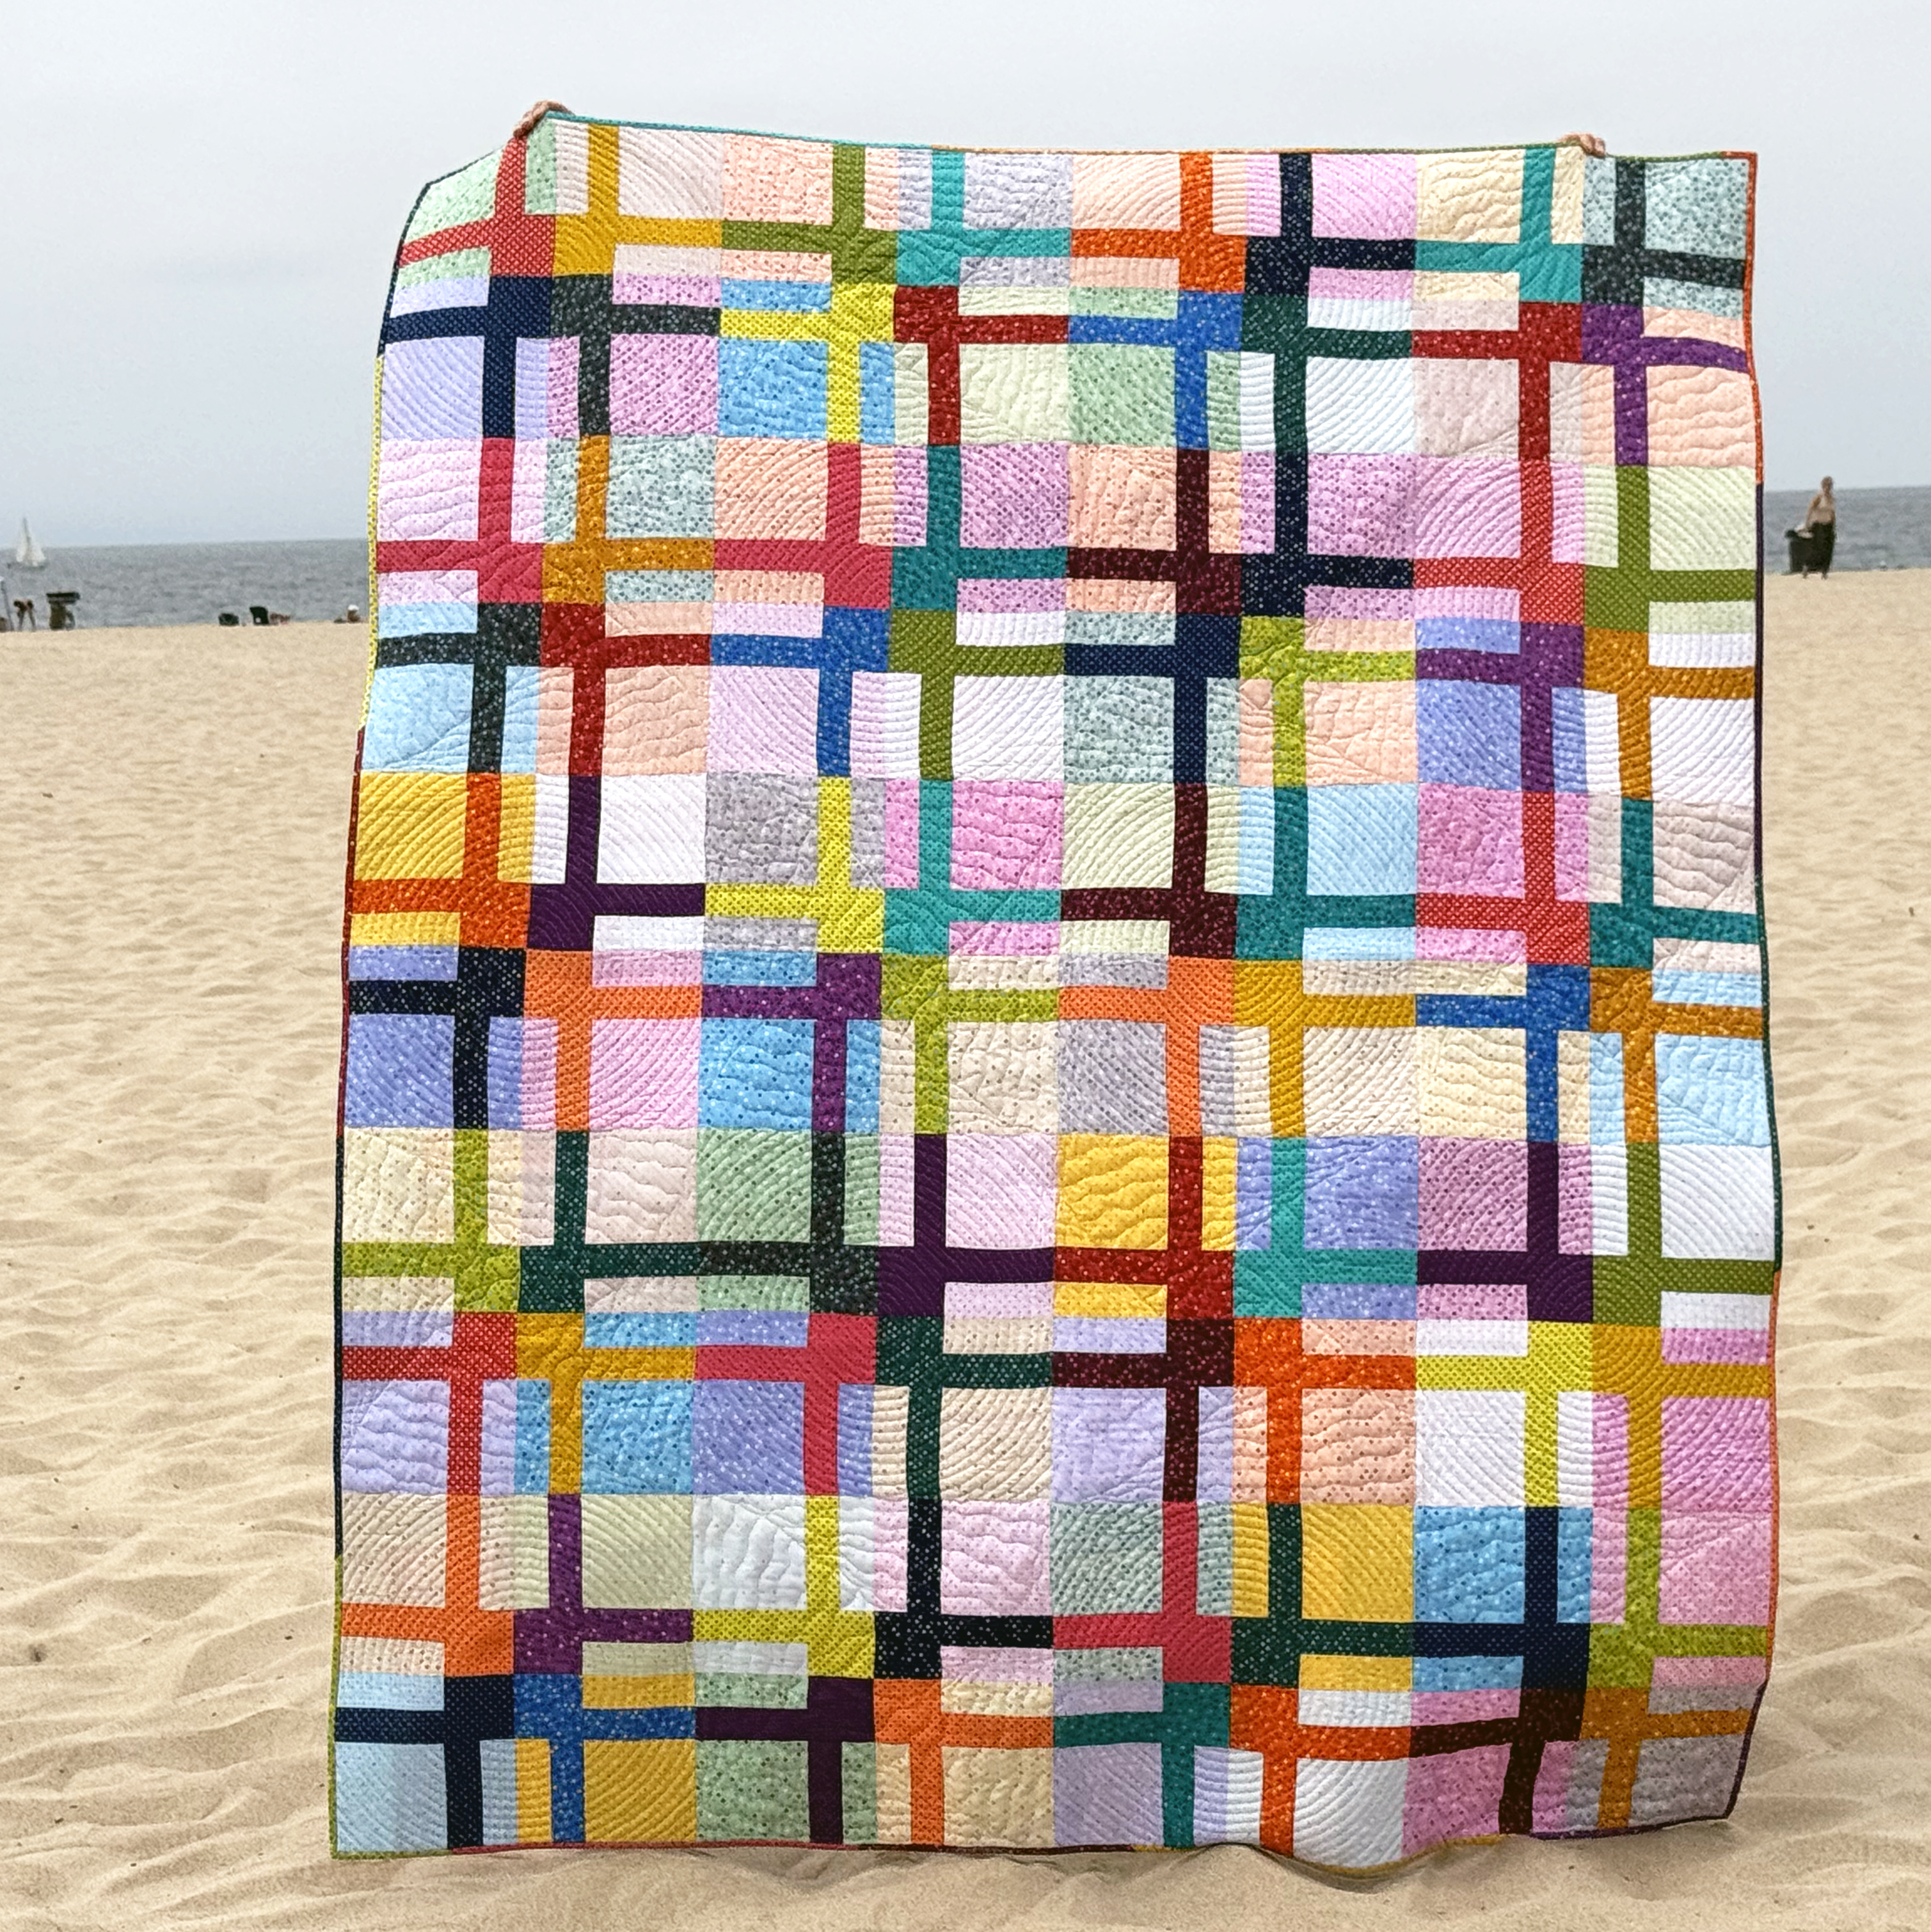
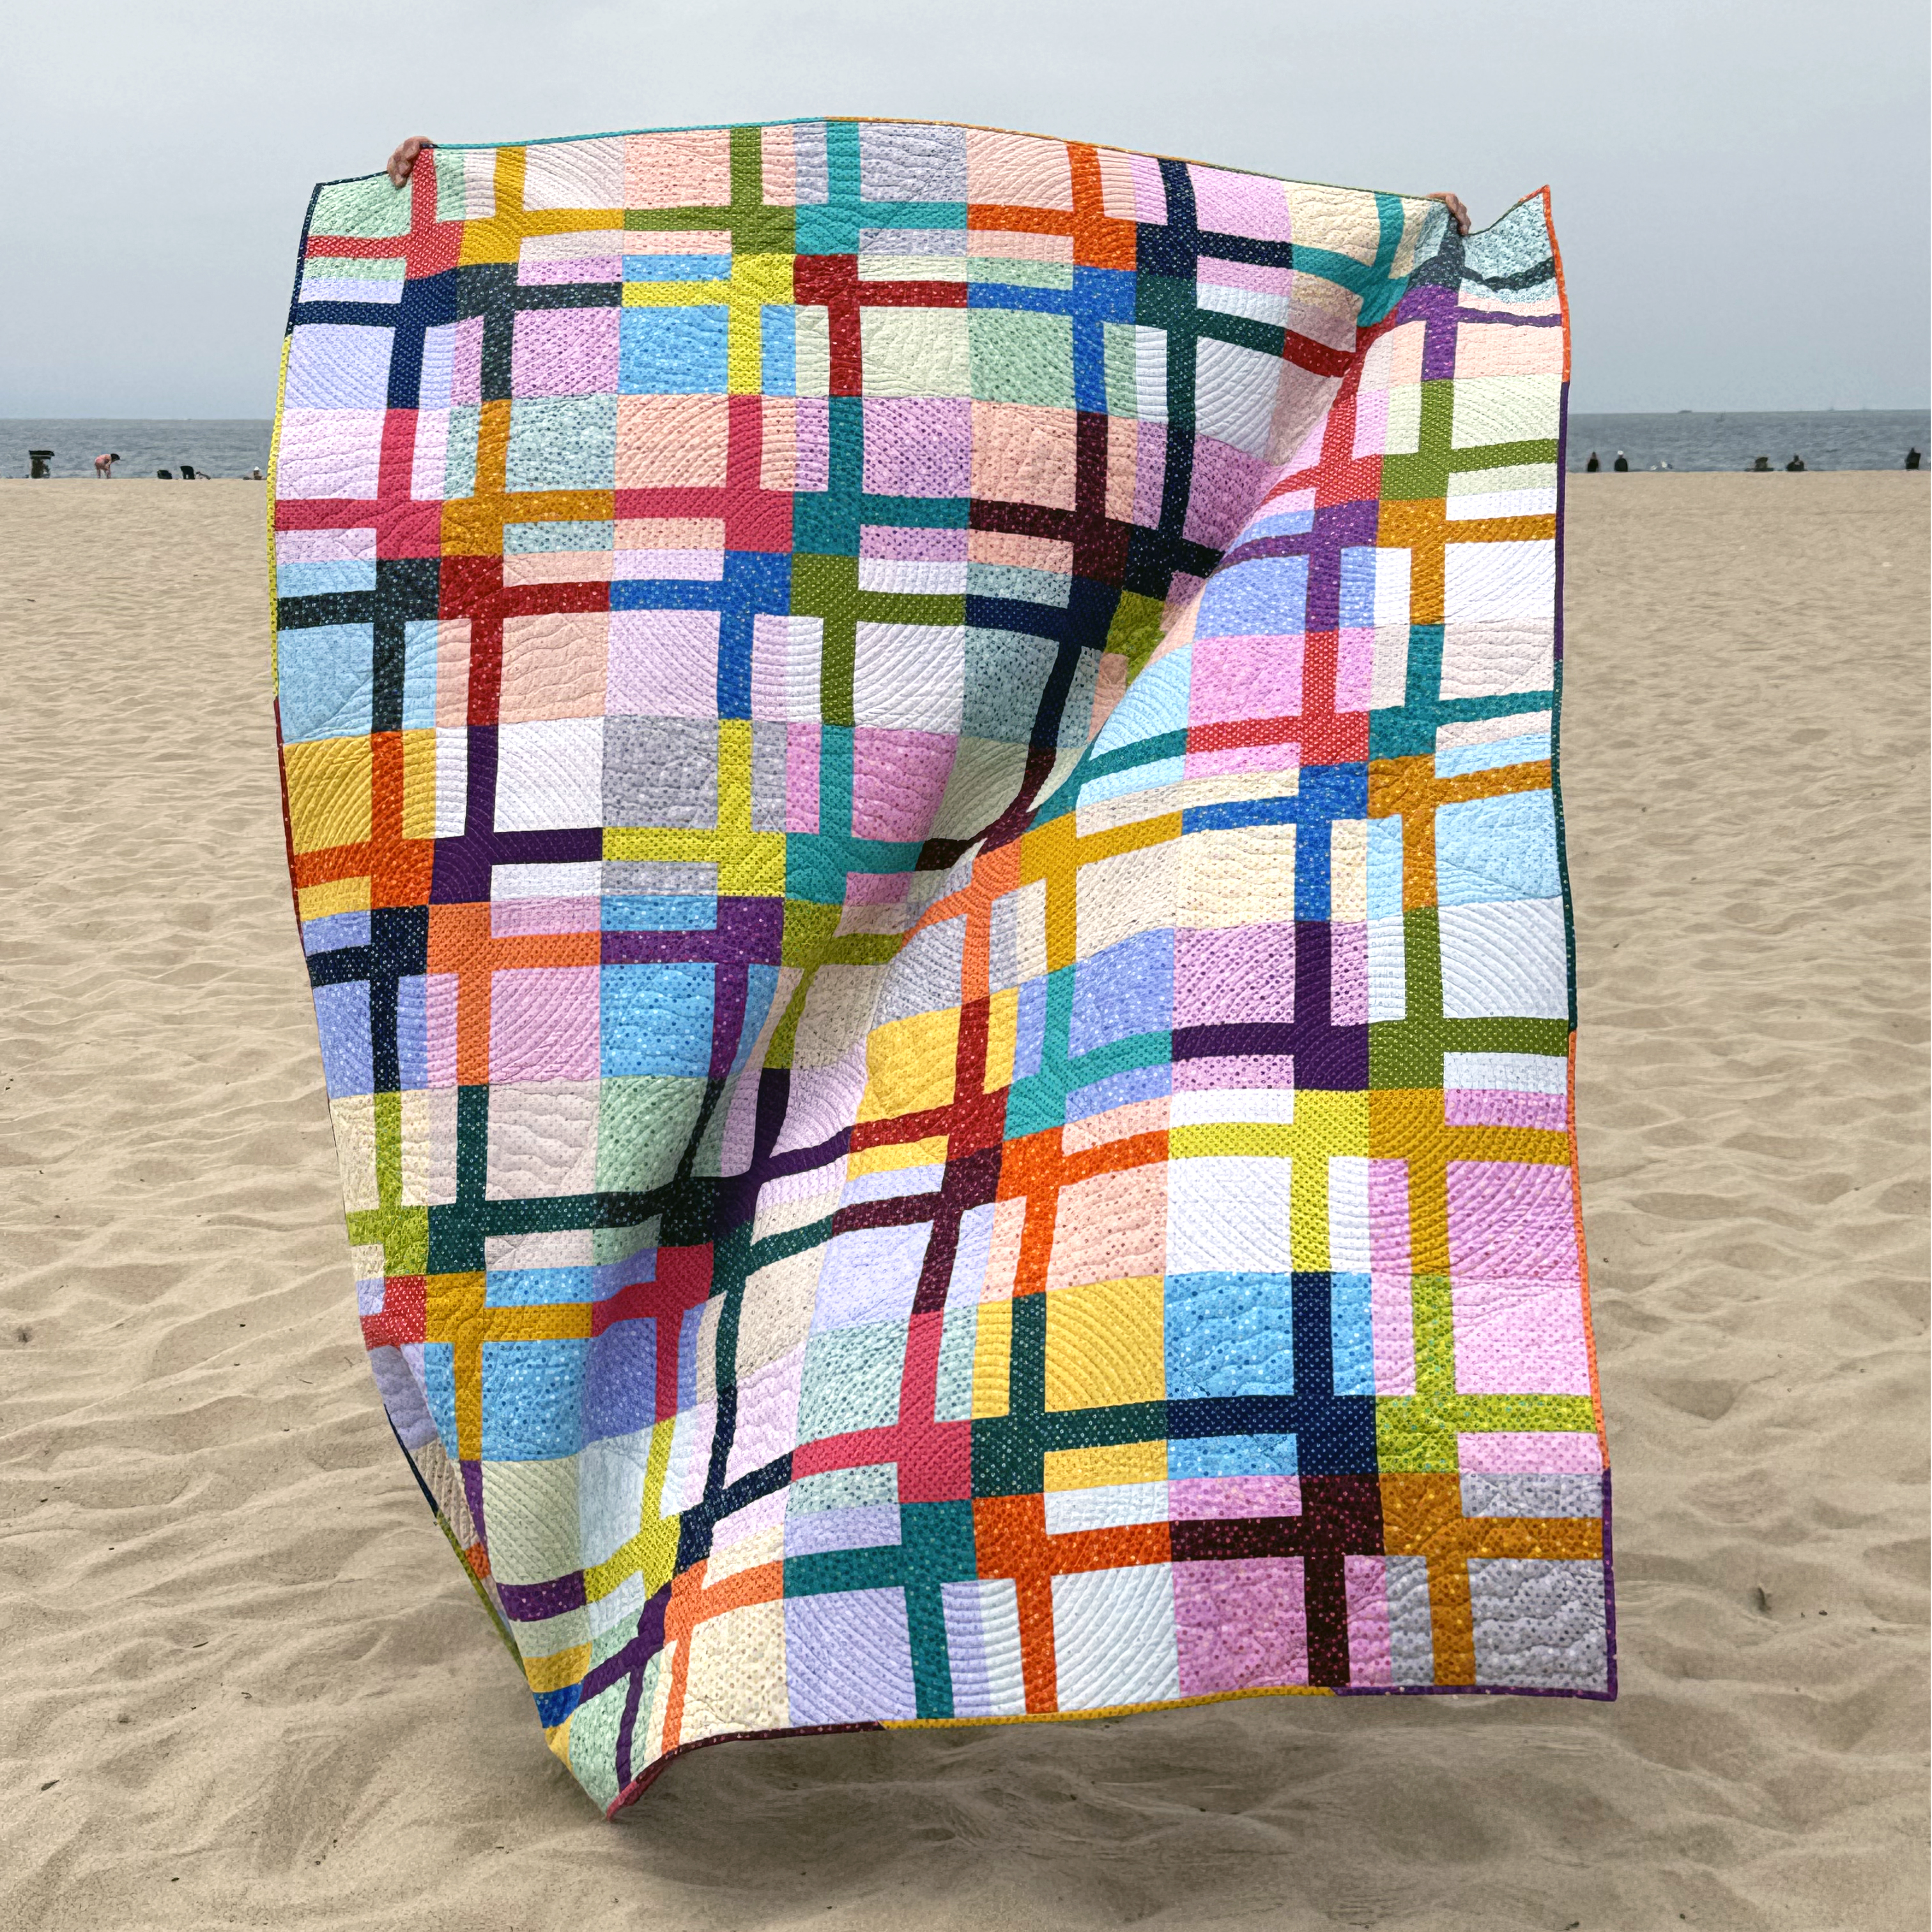
I always like to kit up a quilt when I make it because I know others will like it too. However, these are only available for a limited time, as long as the fabrics are in print. Enjoy some beauty shots of this quilt that I took while on a recent beach vacation. It was a nice cloudy day, and seeing these pics brings back great memories!
I had just as much fun making the pieced backing and using up a bunch of leftover Dazzle Dots!
Thanks to everyone who chimed in and let me know which quilt you wanted to make next! I’m excited to make Beaded Lanterns right along with you, from start to finish! Read below for details…
Each week I will guide you through one part of making the quilt. I will be making the icy blue version shown made from my Dazzle Dots 2 fabrics, but of course you can use any fabrics you wish! This quilt along is completely free to join – just sign up to get the free pattern sent to you and you are all set!
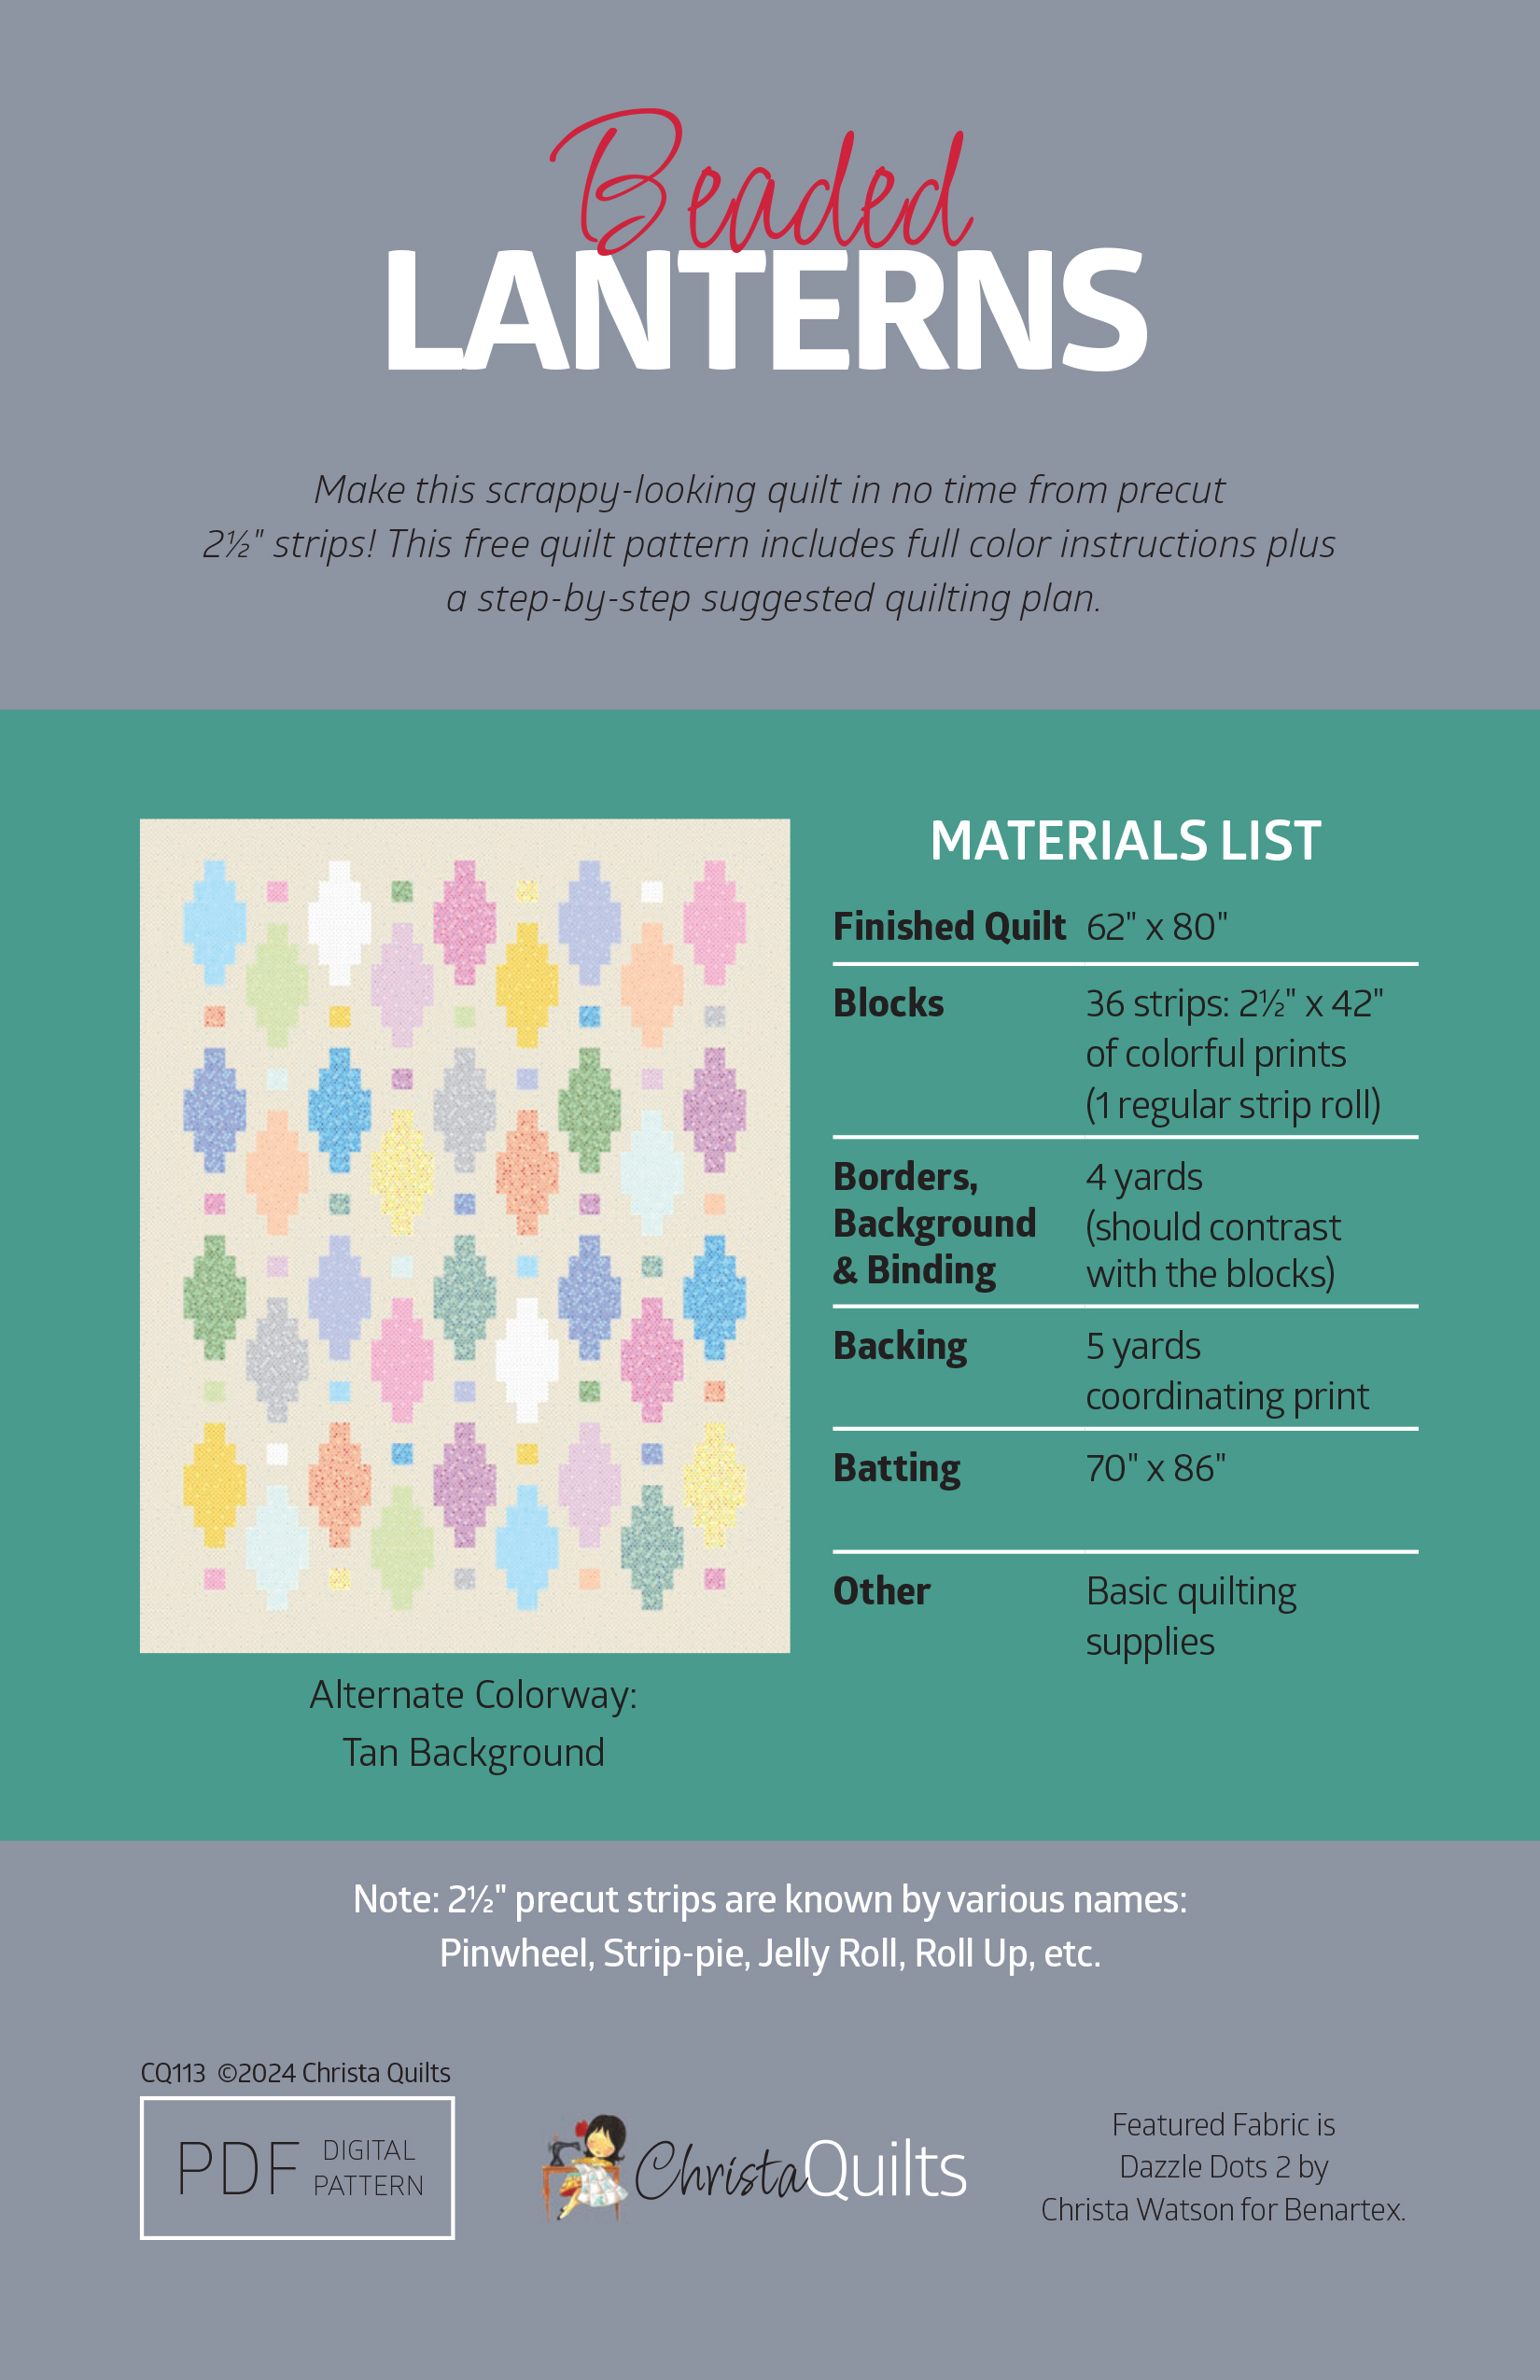
Beaded Lanterns Supply List
Each week of the quilt along, I will be sharing tips and tricks right here on my blog and will include a bonus video during the quilting and finishing week. Just remember, you can work at your own pace and the quilt along will stay up indefinitely so you can refer to it again and again, any time you wish!
I absolutely love making pieced backings for my quilts. It’s a great way to use up leftovers, and I love how it makes the quilt double sided! So this week I’ll share the fun backing I made for Bling, as well as my spray basting process, too!
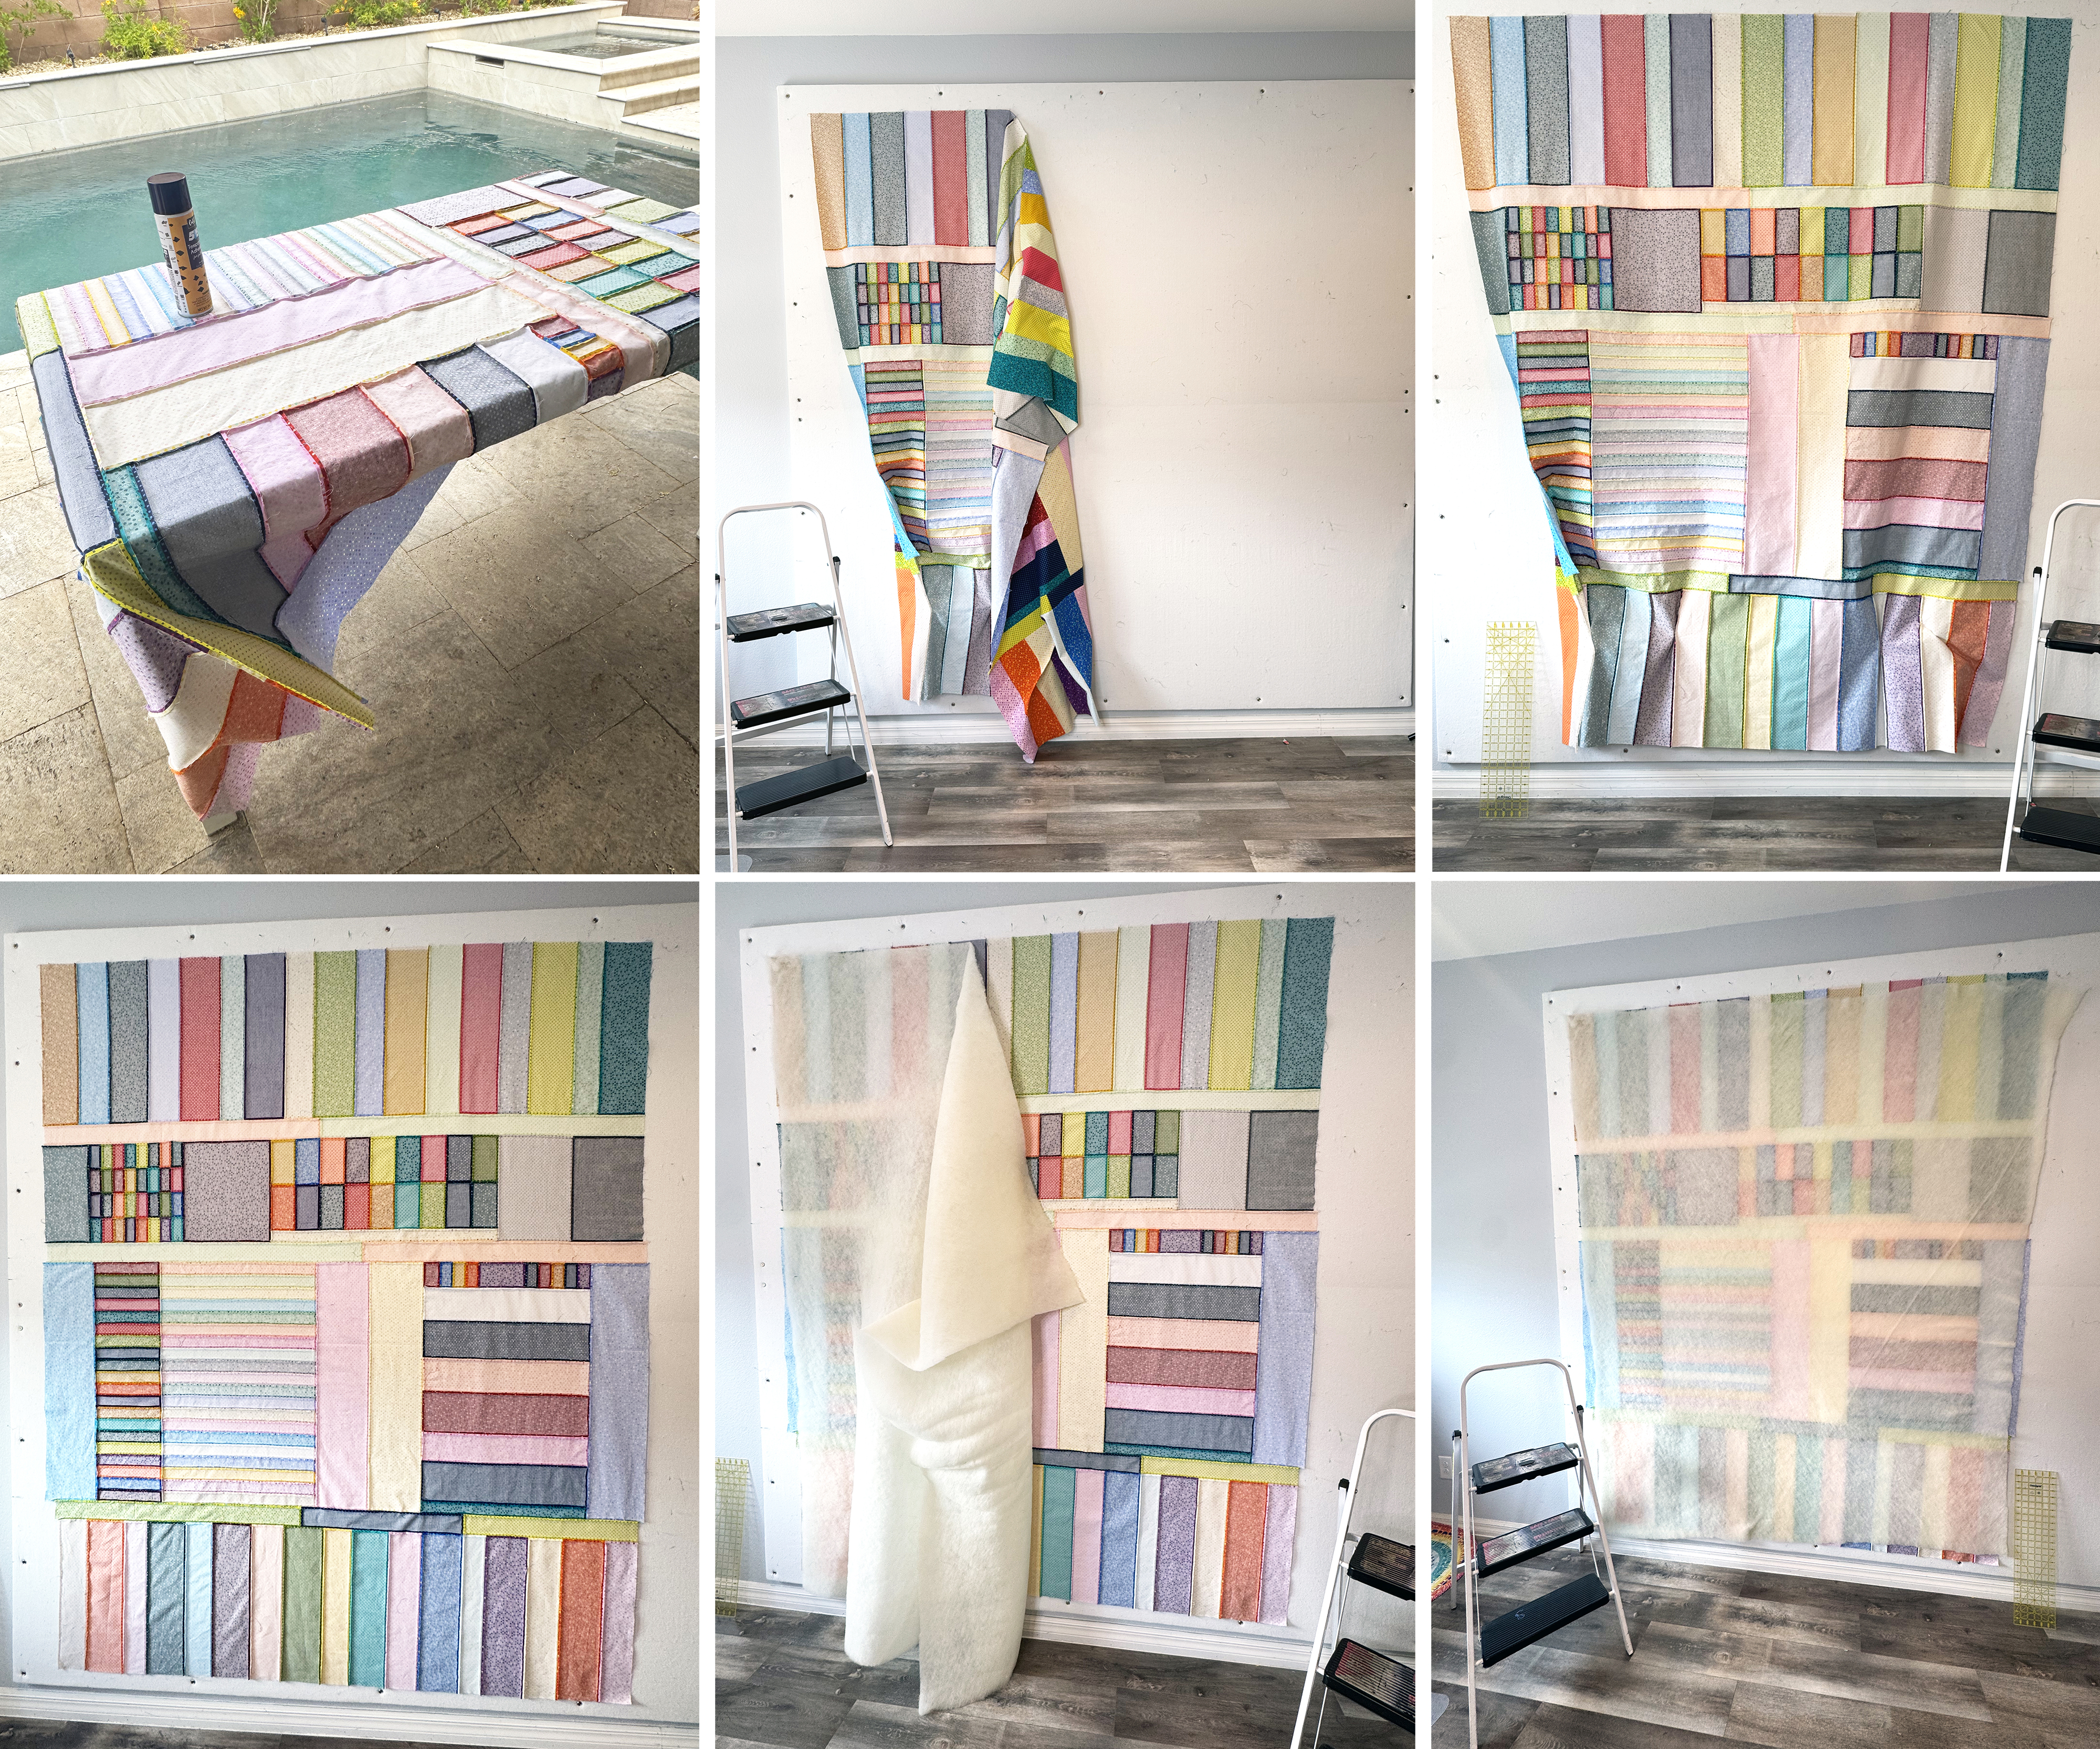
Whenever I have leftovers, I start by grouping them into similar sizes. Then I randomly sew the same sized units together to make bigger pieced panels. Below, I’ve pinned my quilt top to the design wall and am methodically covering it up with pieced leftover units. I’ll fill in the gaps with other fabrics as needed.
My biggest tip is to use the larger fabric pieces around the edges since those will get trimmed off the most. Then place the smaller pieced units inside the perimeter of the quilt so none of them go to waste. If needed, I will trim units to the same size so everything fits together. I call this the “puzzle” method and it’s quite fun to do!
Just remember to make your backing at least 3-4″ larger on all sides. As you can see above, I’ve completely covered my Bling quilt top! Now it’s time to baste…
Spray Basting Tutorial
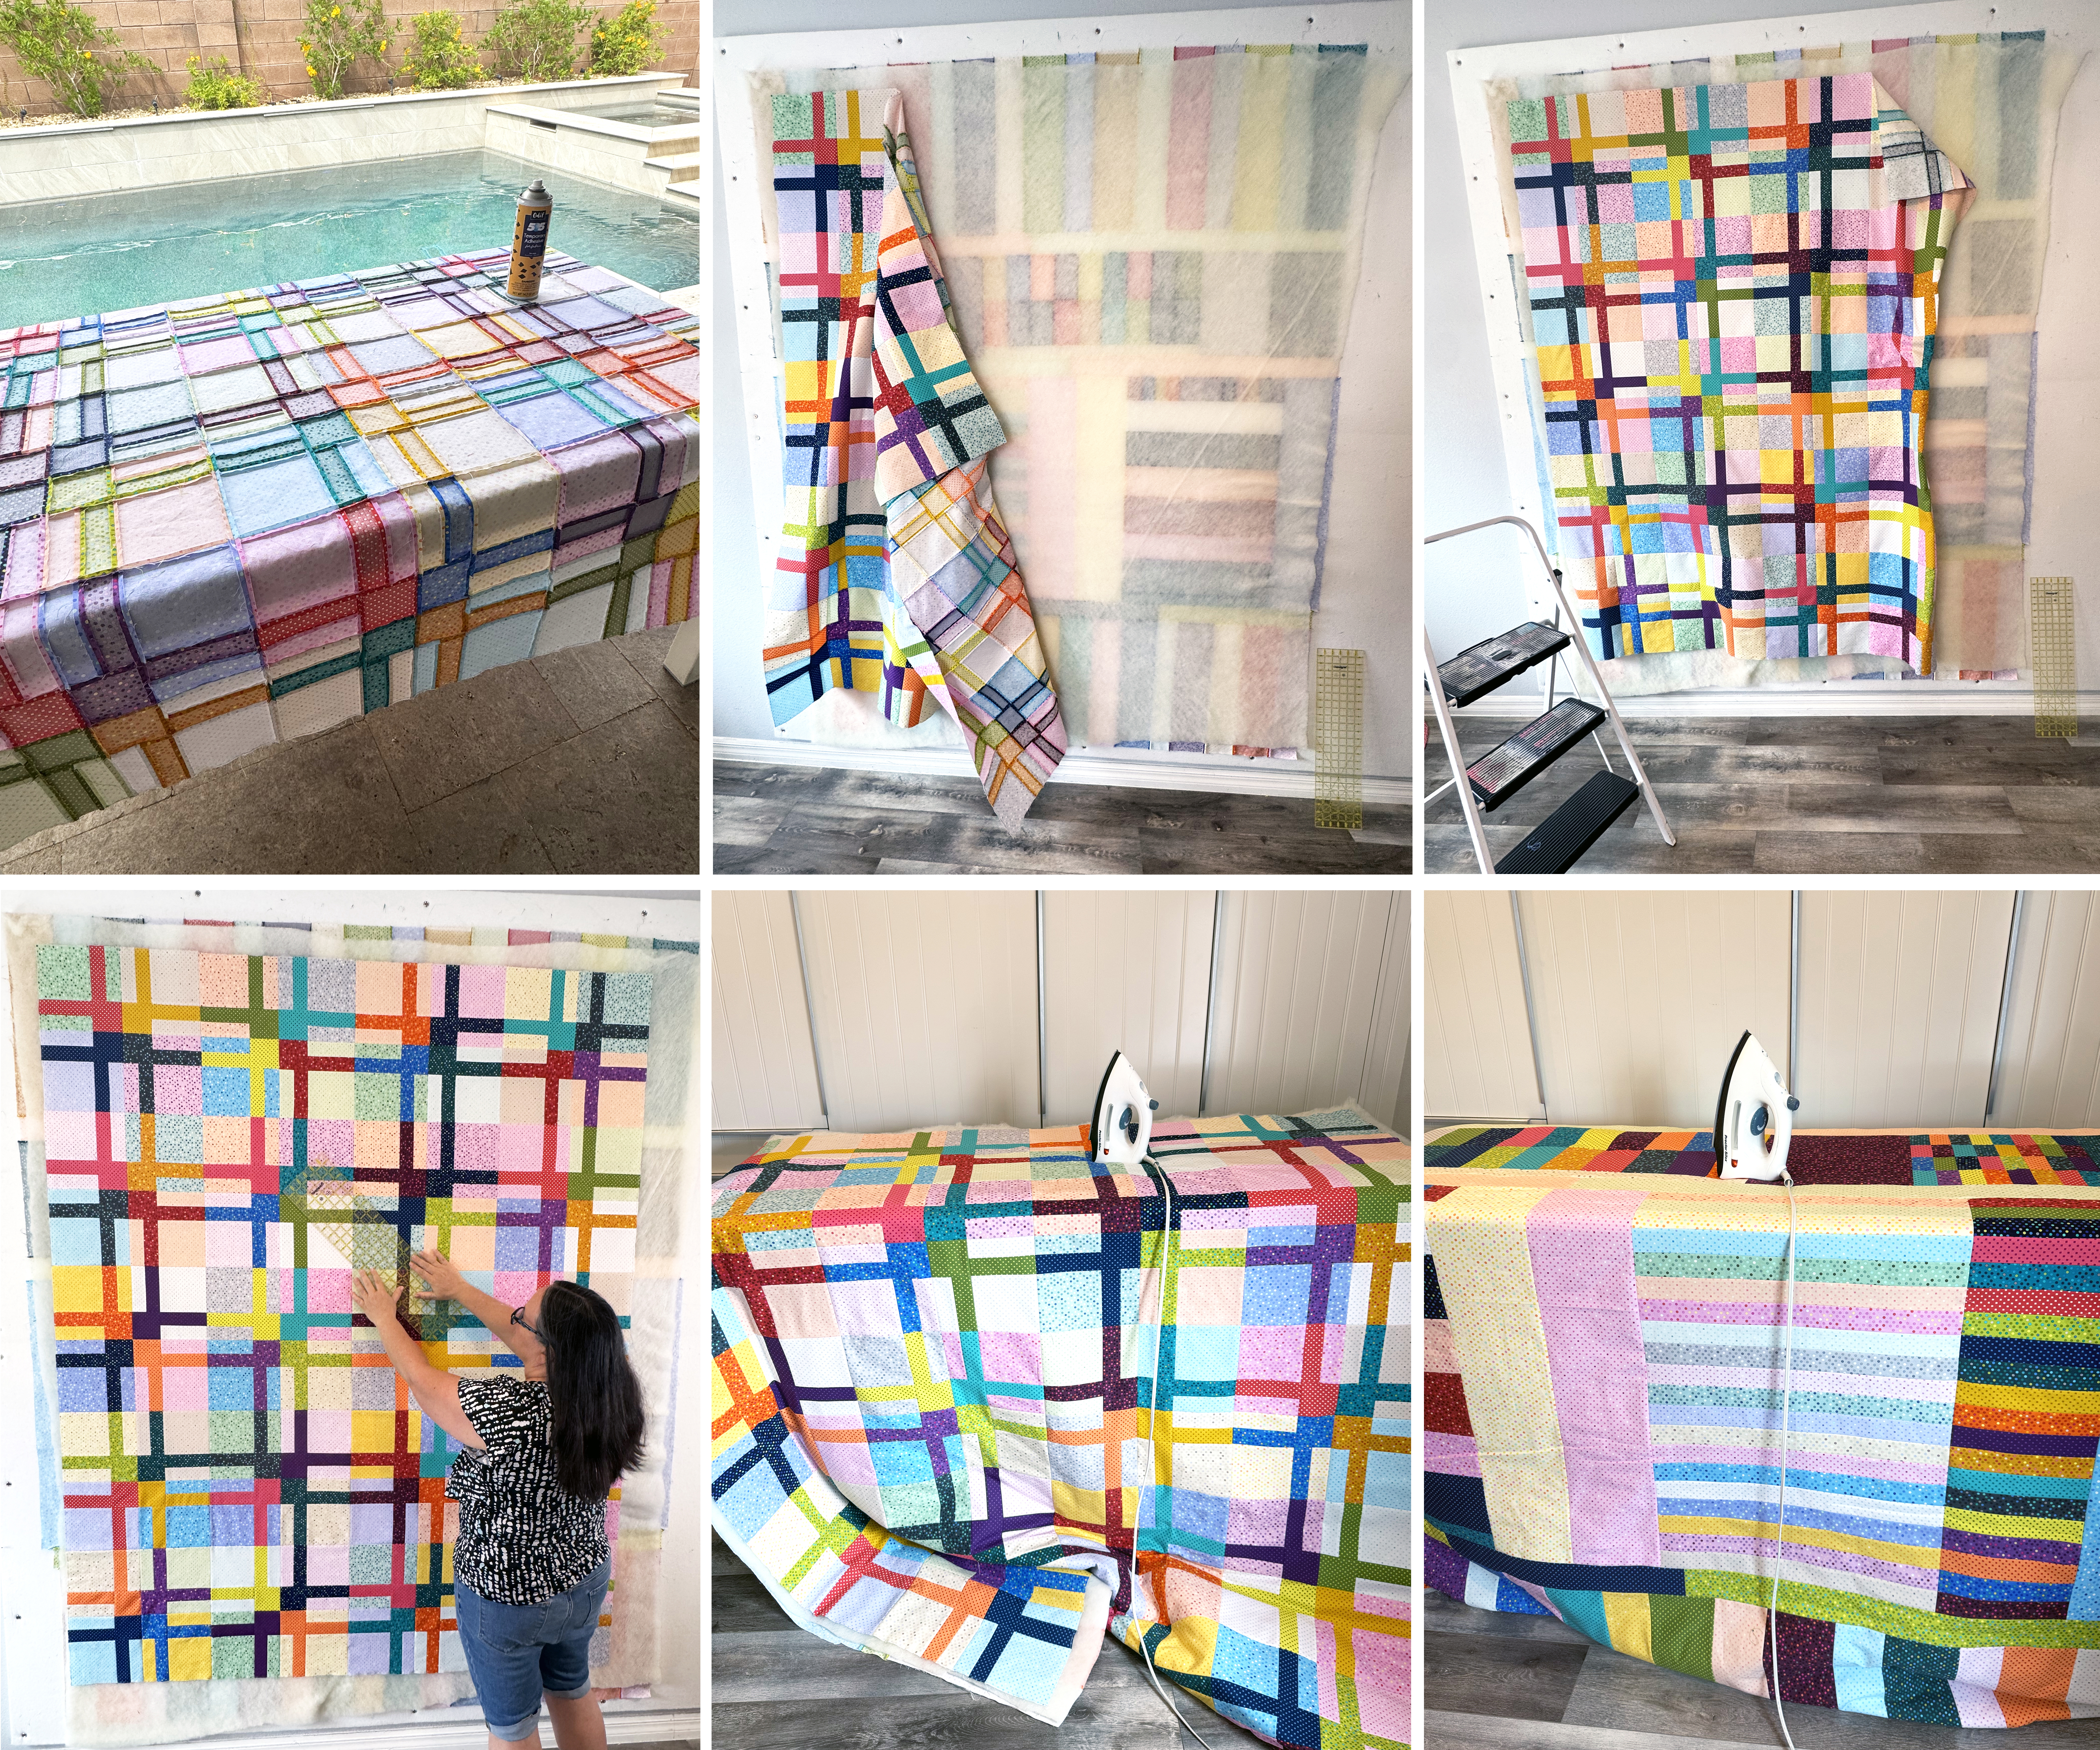
I use 505 Basting Spray and I spray the top and backing wrong side up outdoors. Then I assemble the layers inside on my design wall. This method works with any fabric/batting combo, but for this quilt, I chose Hobbs Tuscany Wool. It will give me lots of stitch definition and is very light weight and lofty.
Above: for this quilt, I sprayed the wrong side of the pieced backing and pinned it to my design wall. Gravity pulls on the weight of the quilt and I use a long acrylic ruler to help me smooth out each of the layers. The batting layer is next and I take as much time as I need to make sure it’s all nice and flat. As long as the backing and batting are larger than the quilt top, I’m in good shape.
Below: next I sprayed the wrong side of the quilt top and added that as the final layer, smoothing it again with the ruler. I can also smooth the quilt blocks and rows so that the quilt top is flat, smooth and squared up. Finally, I iron both sides of the quilt with a hot, dry iron to set the glue. It also gives me a chance to press out any wrinkles and smoosh all the layers together. Every inch of the quilt is sticking to itself which makes machine quilting a breeze. And there’s no pesky pins getting in my way!
Bonus: Watch My Spray Basting Video
Here’s a recent video I made, showing how I used thes exact steps to spray baste my Color Weave quilt. I know that it helps seeing the same idea presented more than once in a different way, so click the image below to watch!
For this week’s 99 Machine Quilting Designs video, tutorial, I’m demonstrating how to quilt one of my favorite free-motion designs called Switchbacks. It looks great when paired with other motifs. Click play below to watch:
Bonus Video – Quilting Switchbacks on a Real Quilt
I quilted switchbacks, combined with other motifs on the smaller version of my Charming Chevrons quilt. I quilted a second quilting plan on the larger version, and you can see how I quilted both below:
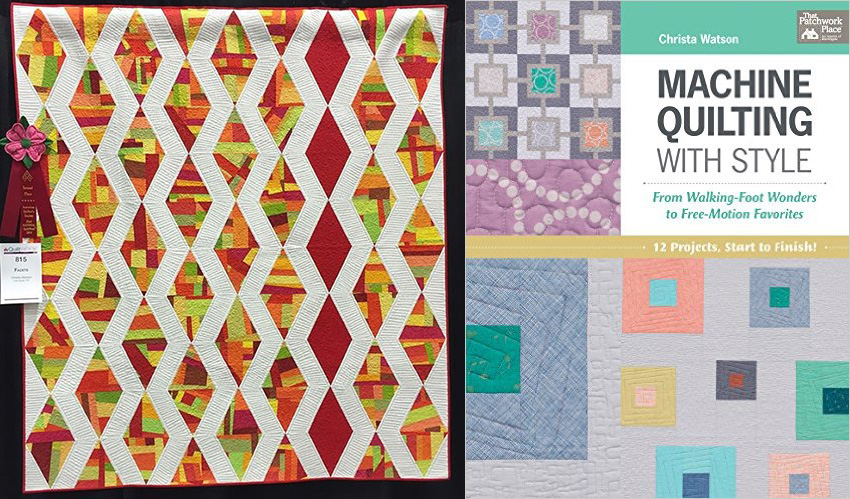
Each week I like to feature a quilt behind me that uses the designs I’m sharing. This week’s featured quilt is Facets, from my first book, Machine Quilting with Style. The book itself includes 12 start-to finish patterns. I take you from cutting, to quilt top assembly to a detailed quilting plan for each and every design. That way you can put what I’m teaching into practice!