I absolutely love making pieced backings for my quilts. It’s a great way to use up leftovers, and I love how it makes the quilt double sided! So this week I’ll share the fun backing I made for Bling, as well as my spray basting process, too!

Click here to get my Bling Quilt Pattern PDF
Click here to get the Bling Quilt Kit or Printed Pattern
Puzzle Piece the Backing
Whenever I have leftovers, I start by grouping them into similar sizes. Then I randomly sew the same sized units together to make bigger pieced panels. Below, I’ve pinned my quilt top to the design wall and am methodically covering it up with pieced leftover units. I’ll fill in the gaps with other fabrics as needed.
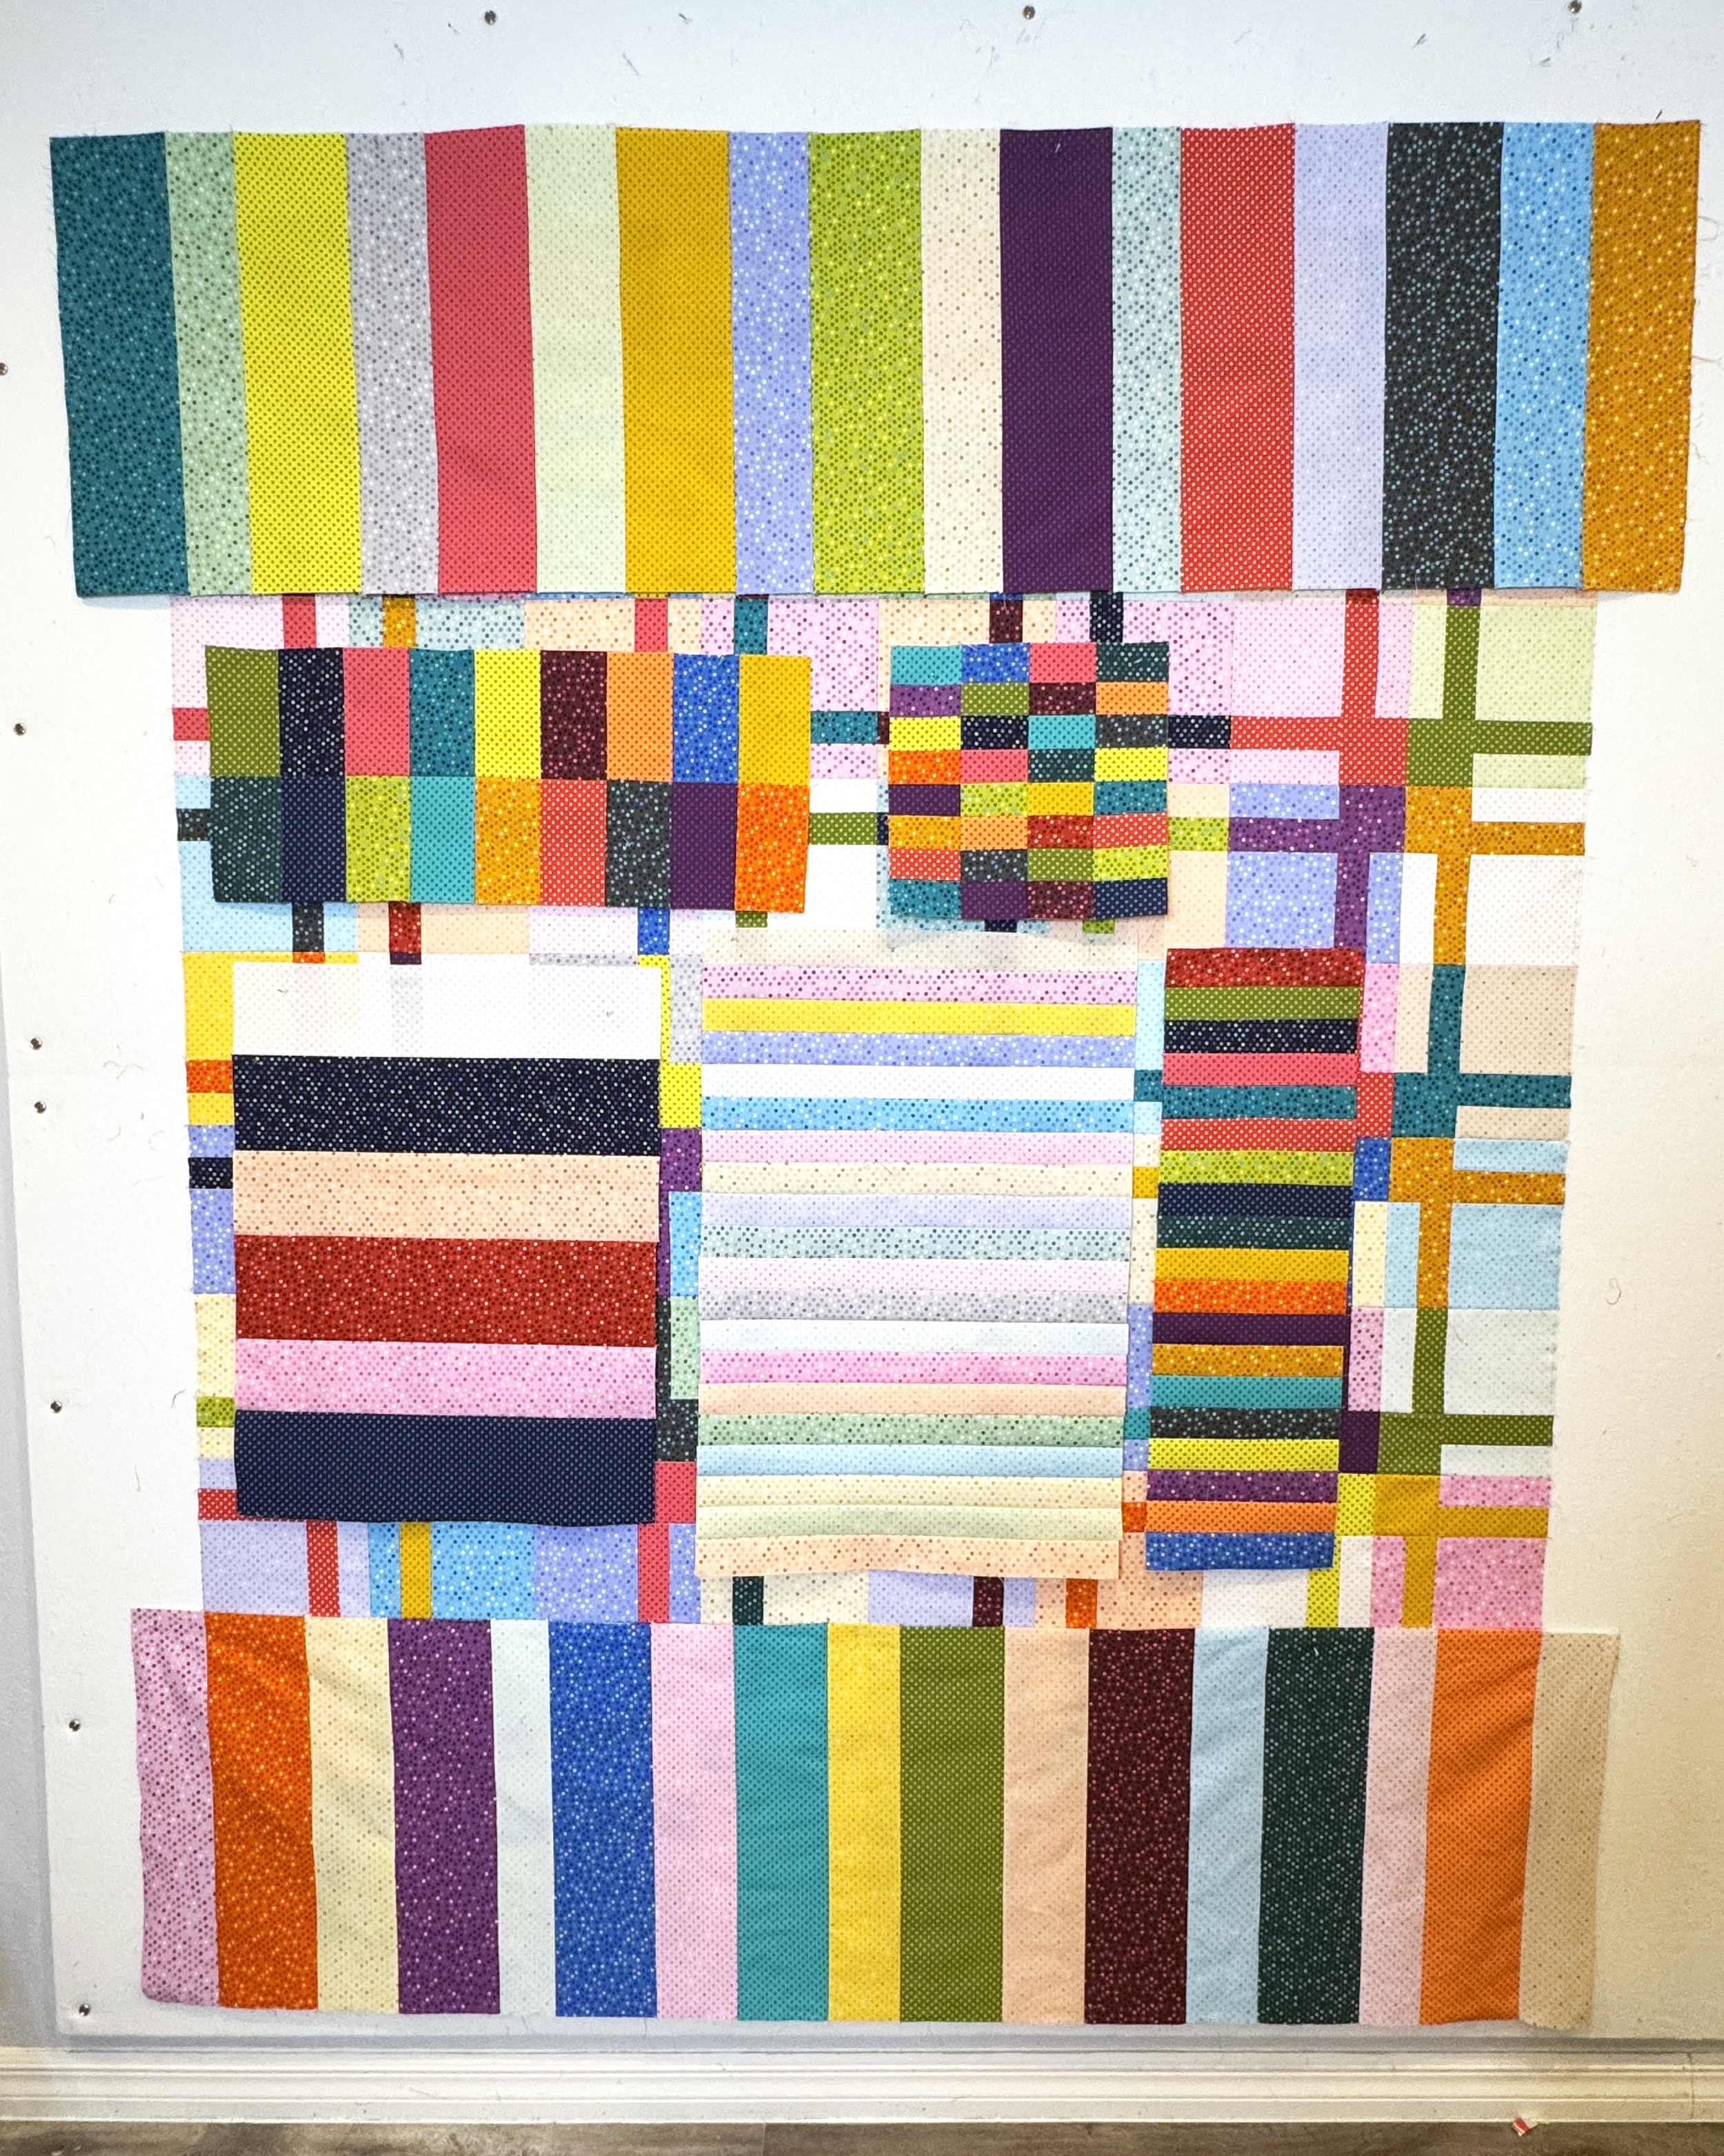
My biggest tip is to use the larger fabric pieces around the edges since those will get trimmed off the most. Then place the smaller pieced units inside the perimeter of the quilt so none of them go to waste. If needed, I will trim units to the same size so everything fits together. I call this the “puzzle” method and it’s quite fun to do!
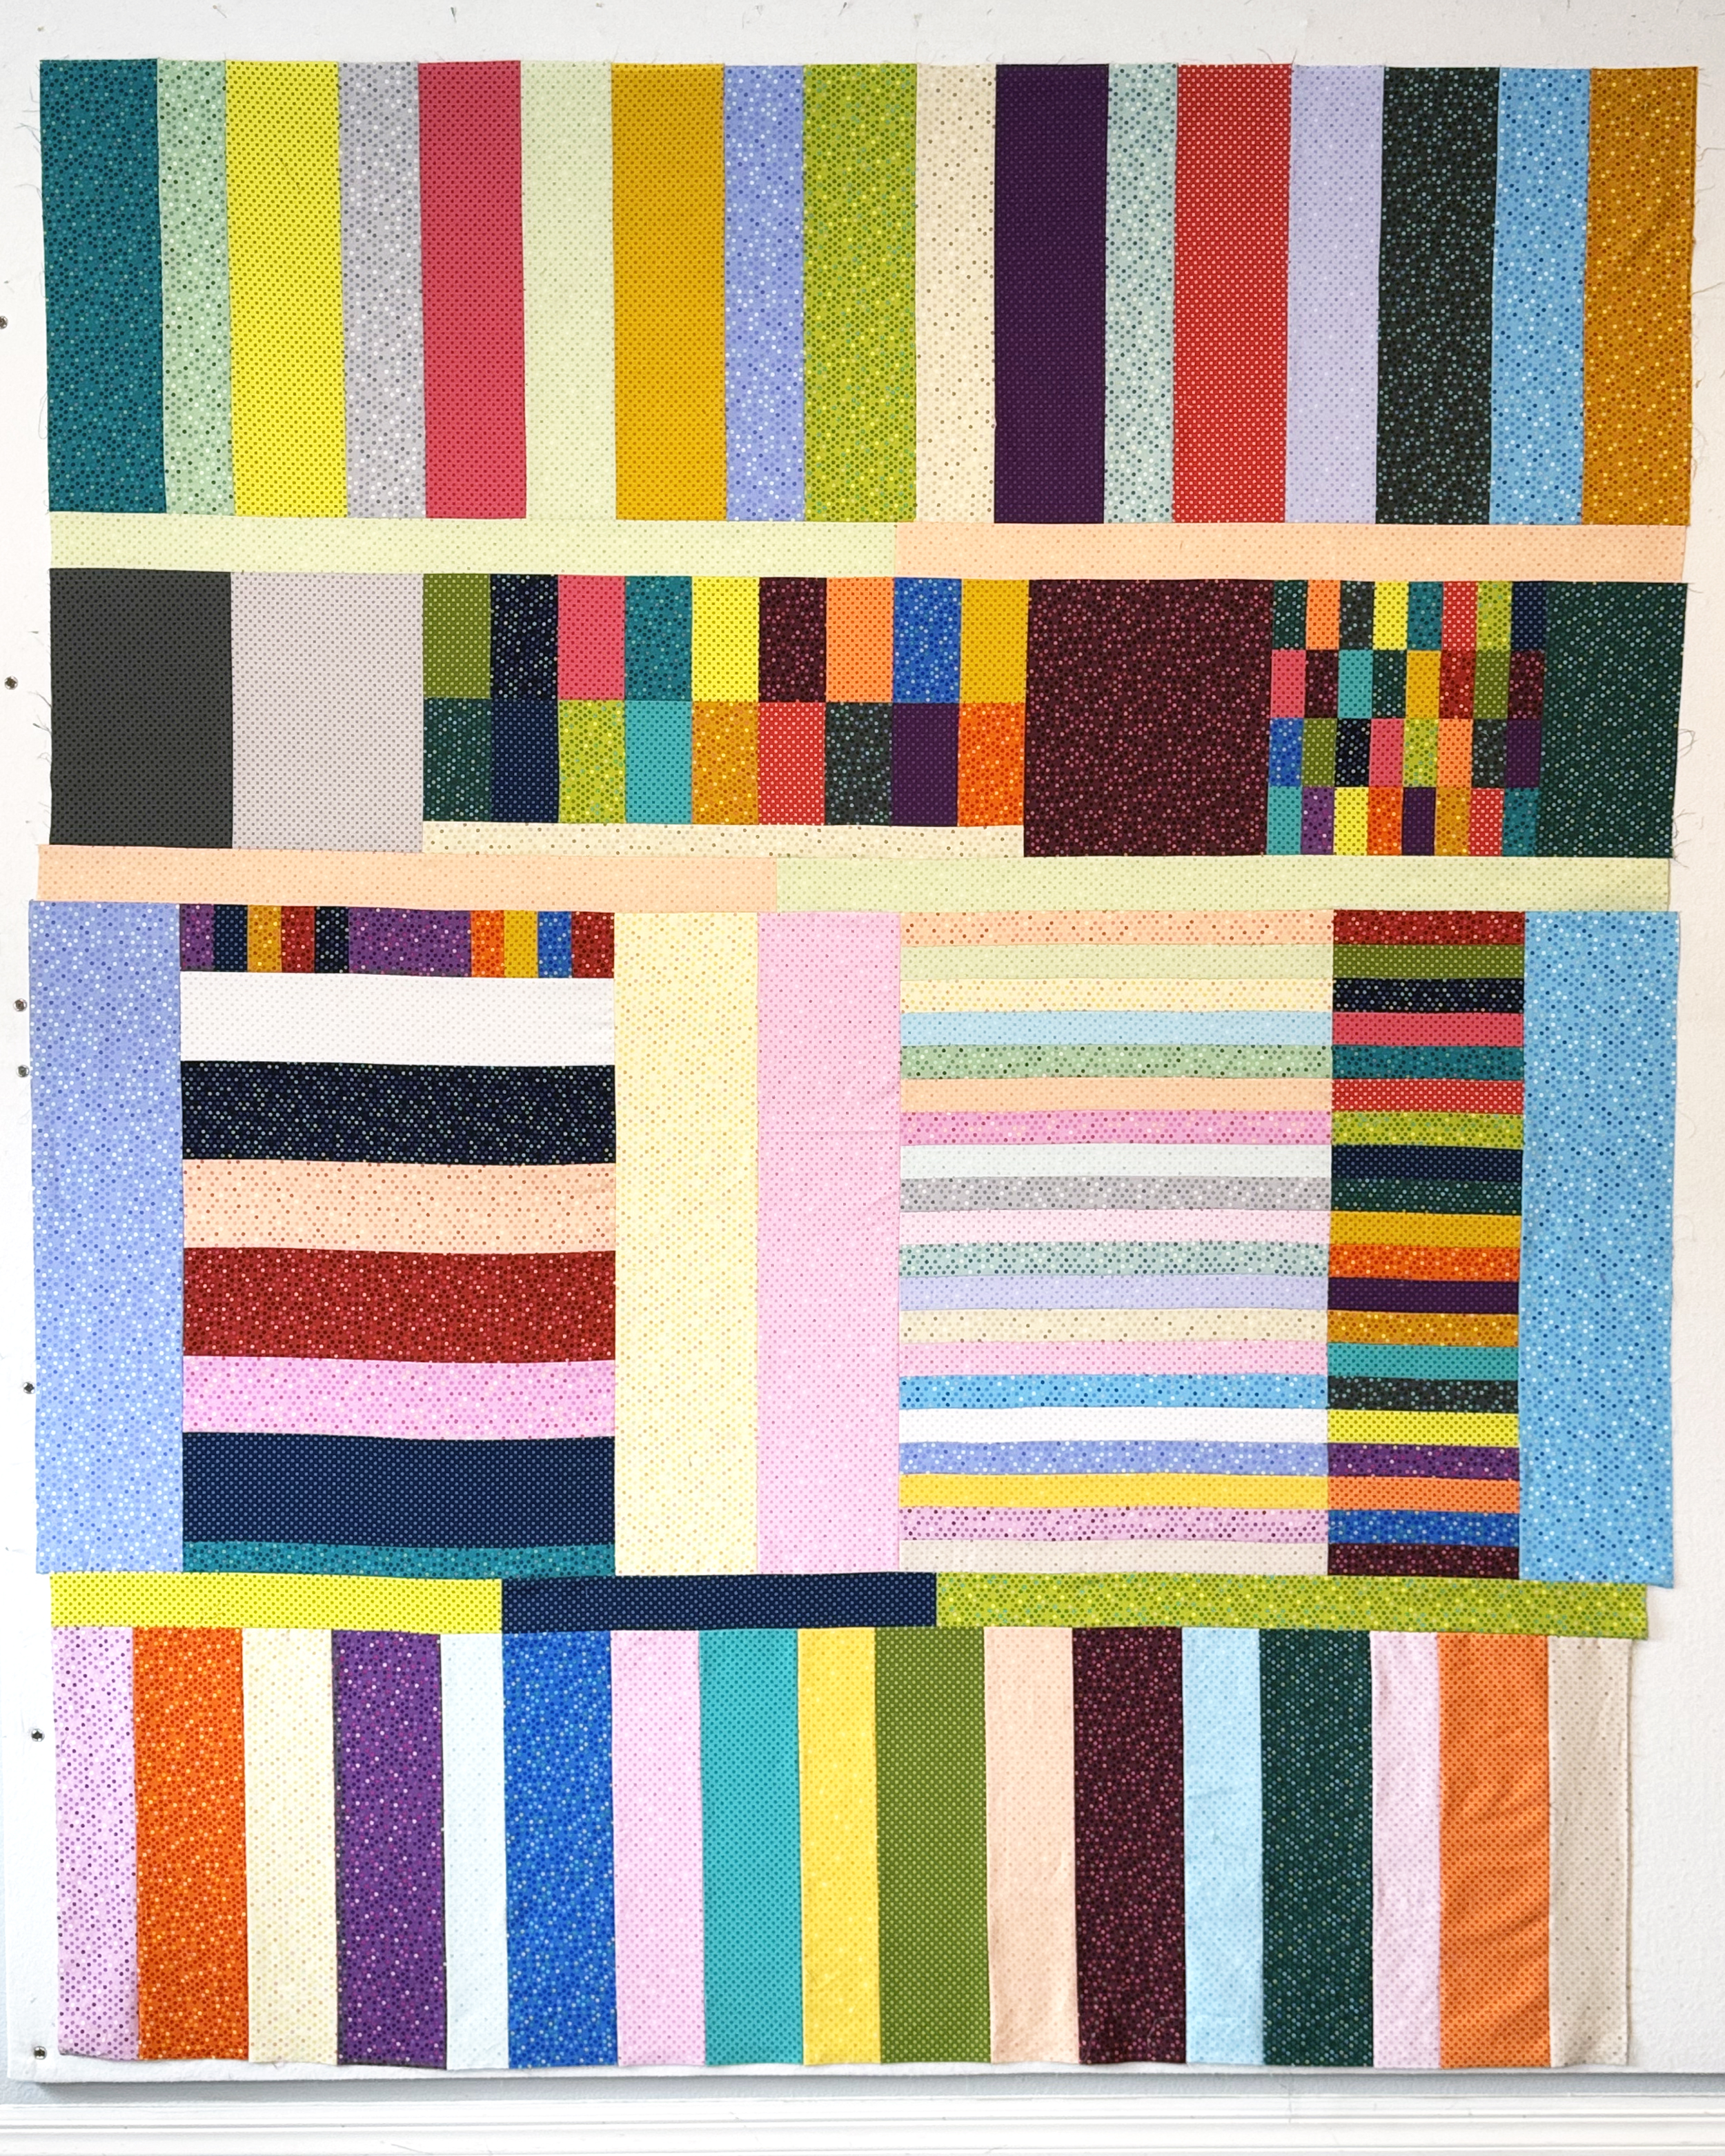
Just remember to make your backing at least 3-4″ larger on all sides. As you can see above, I’ve completely covered my Bling quilt top! Now it’s time to baste…
Spray Basting Tutorial
I use 505 Basting Spray and I spray the top and backing wrong side up outdoors. Then I assemble the layers inside on my design wall. This method works with any fabric/batting combo, but for this quilt, I chose Hobbs Tuscany Wool. It will give me lots of stitch definition and is very light weight and lofty.
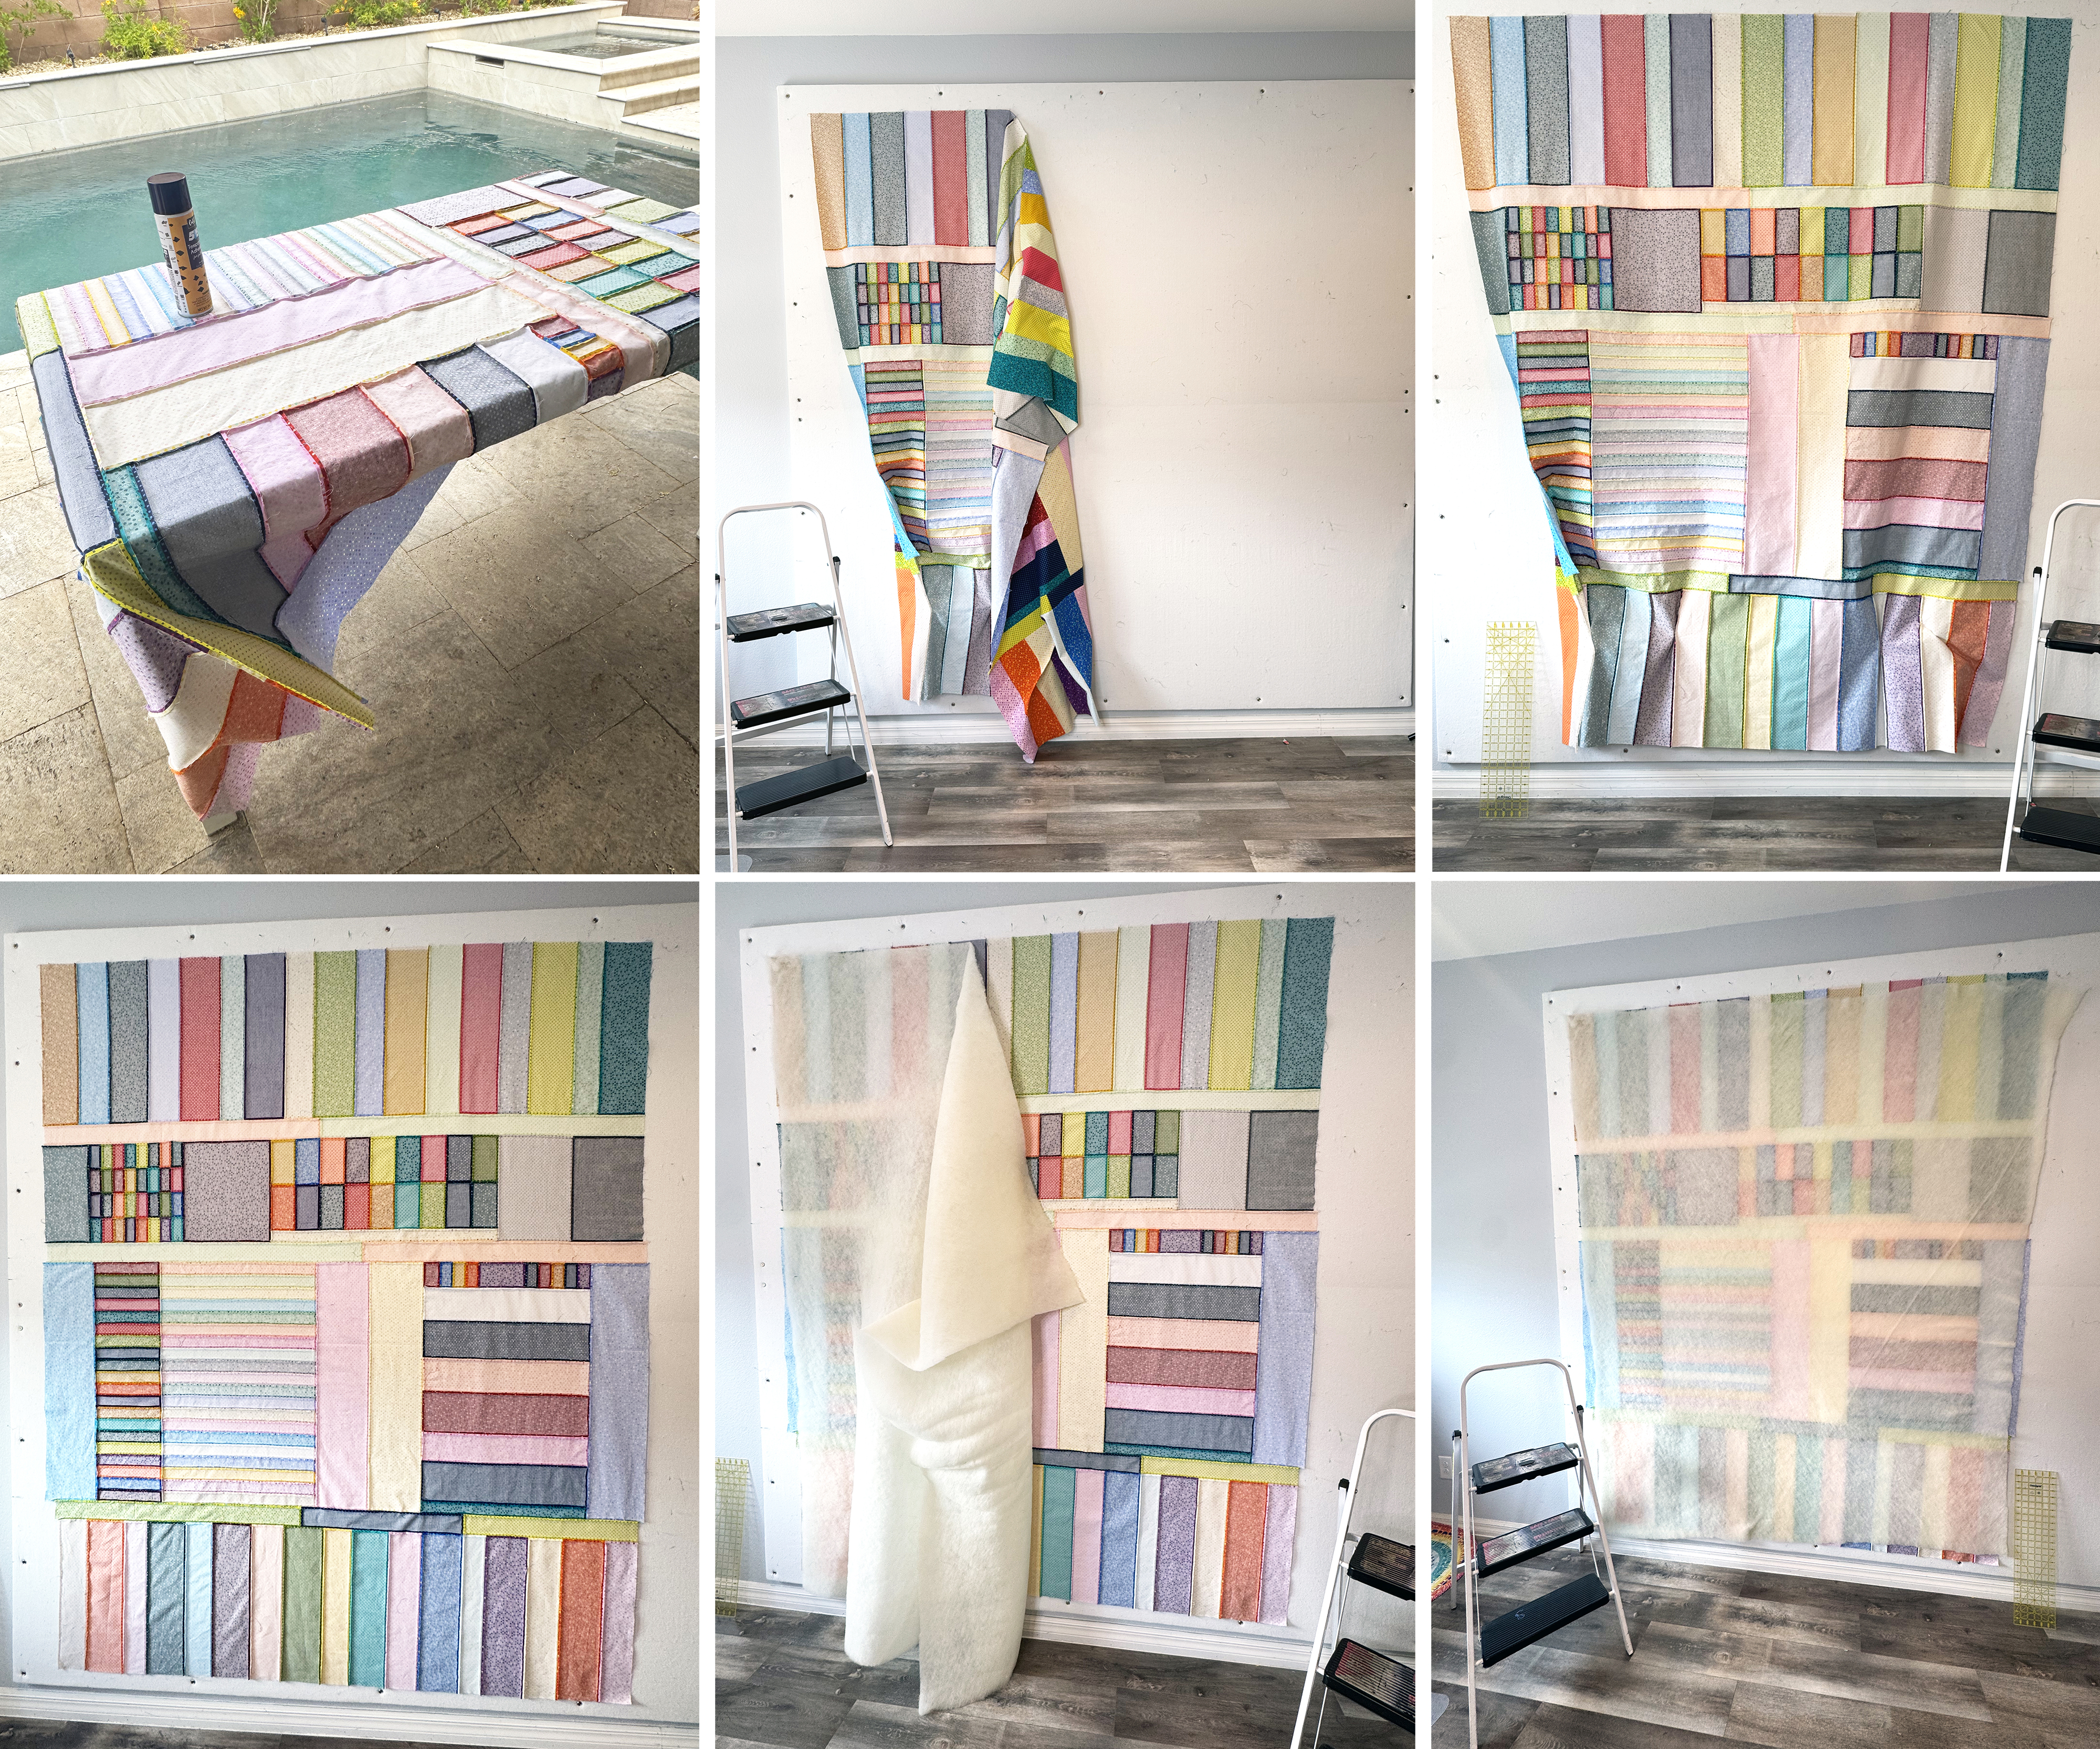
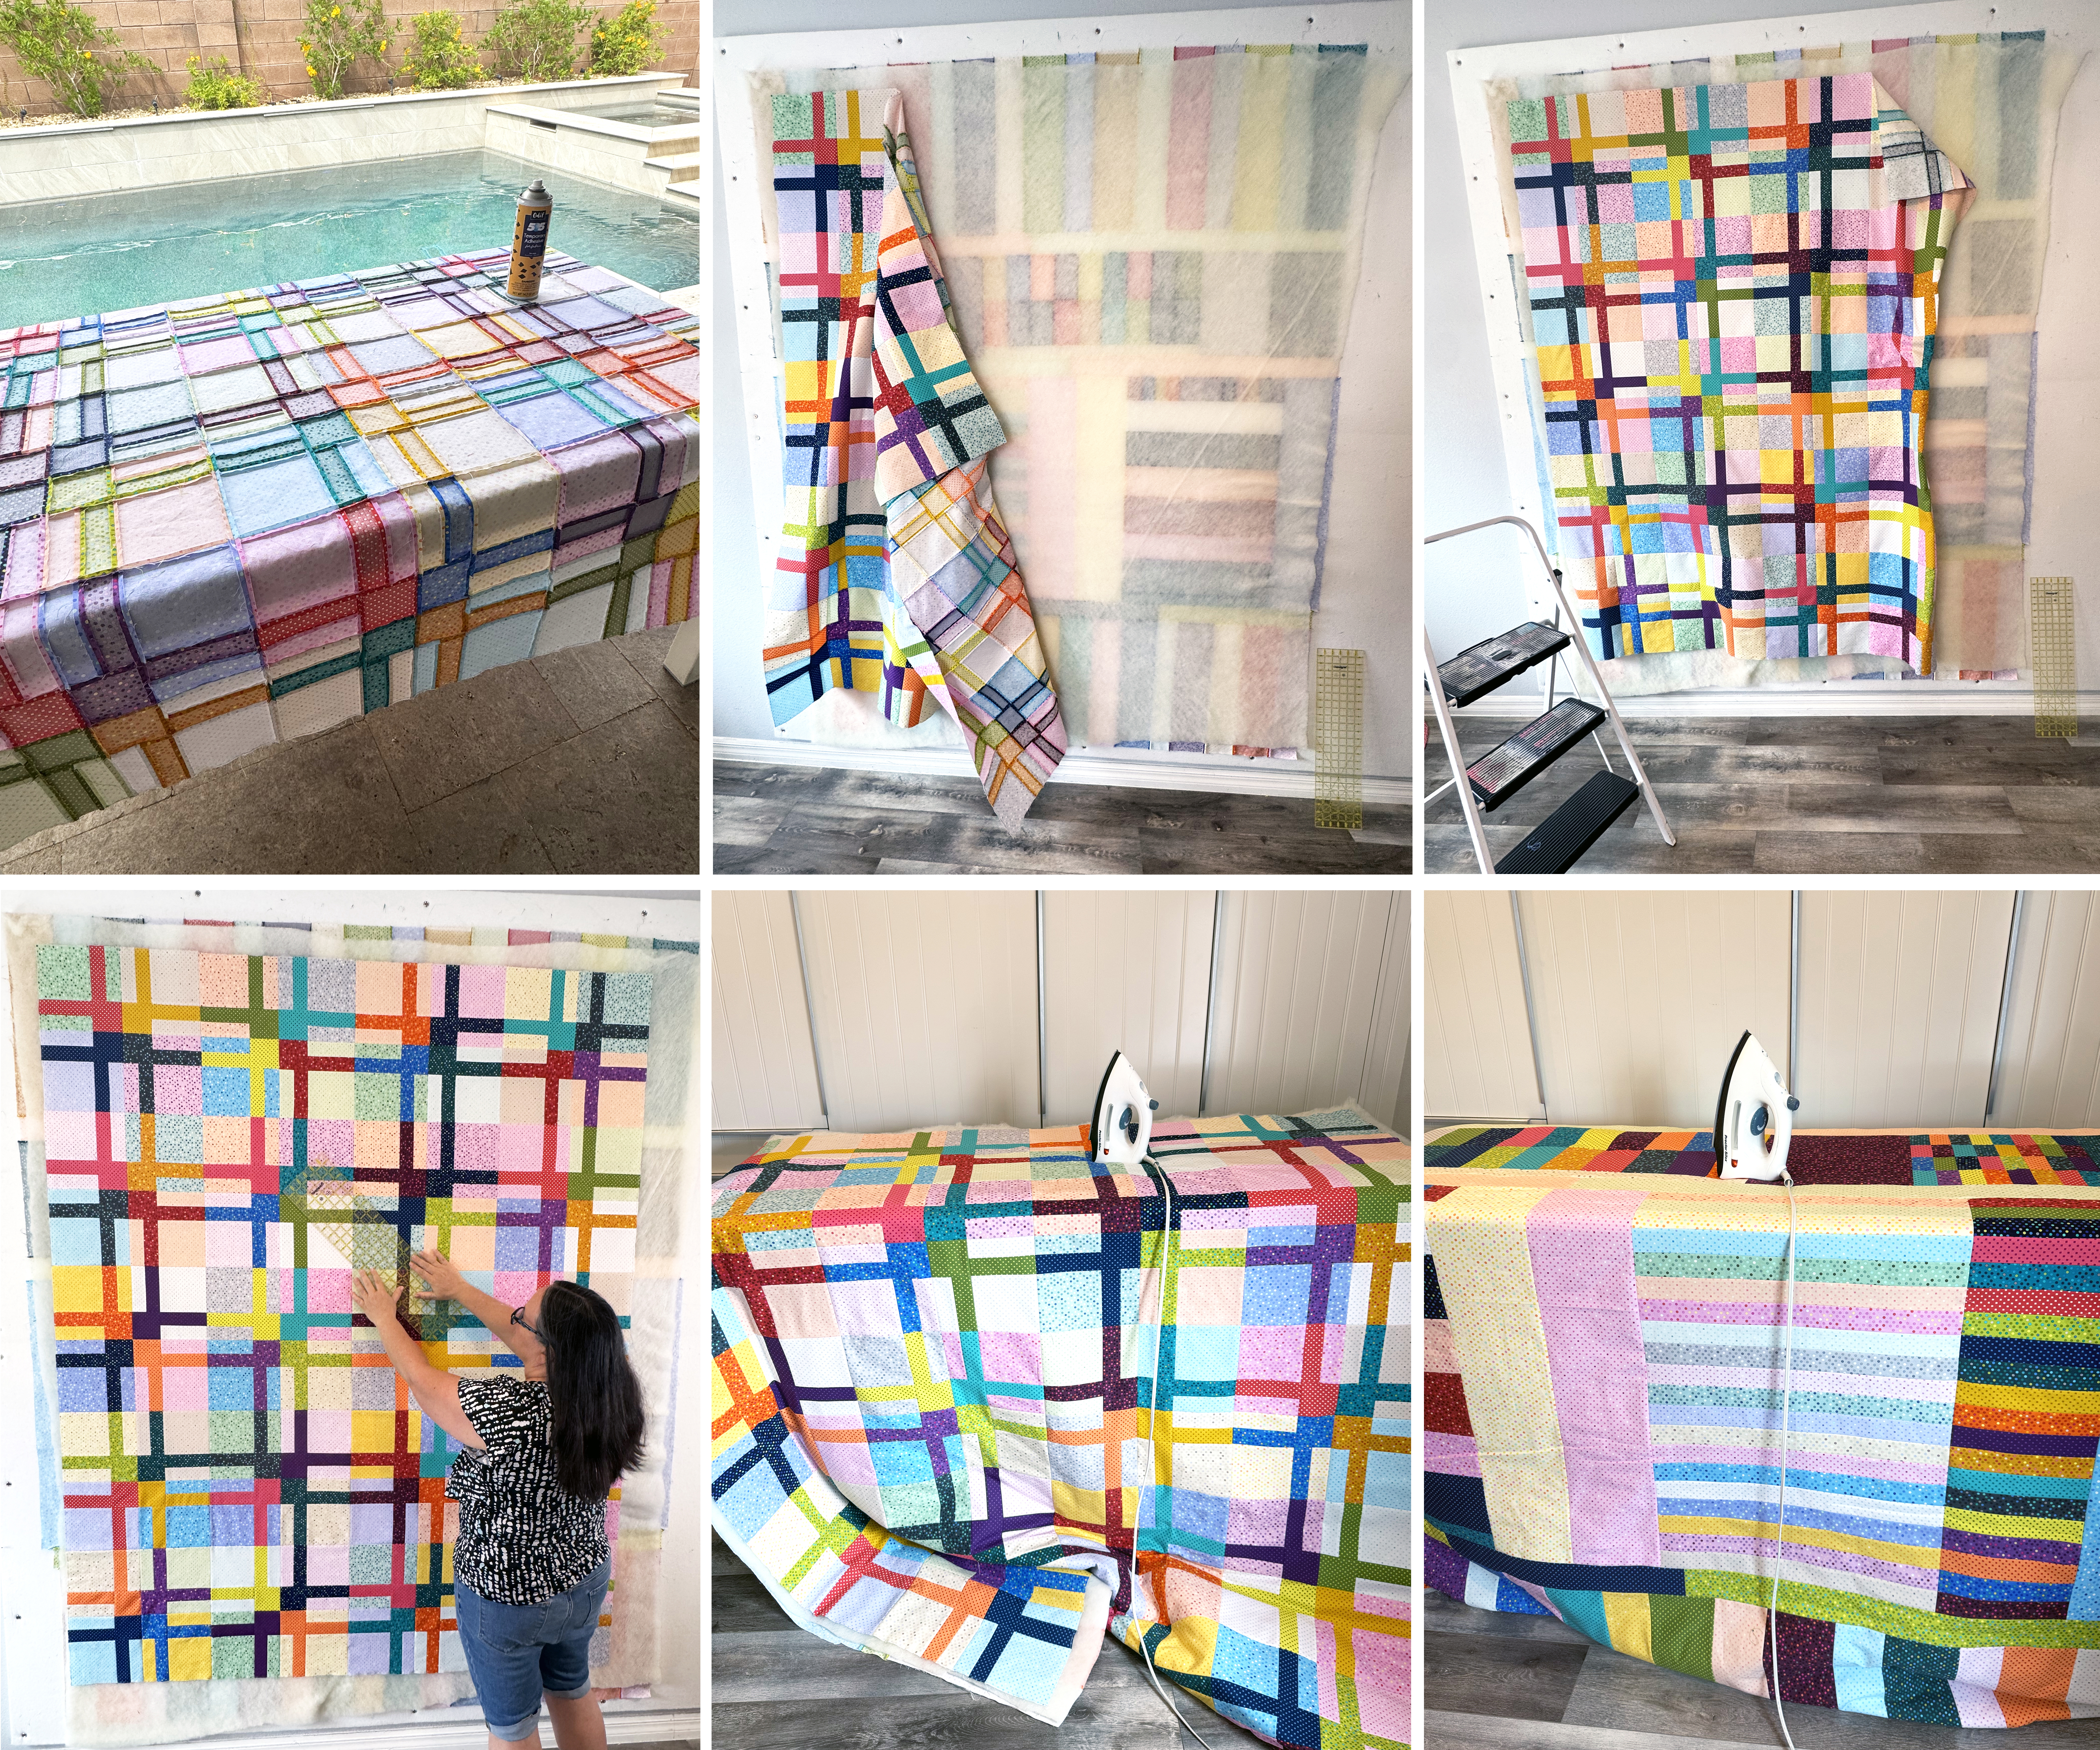
Above: for this quilt, I sprayed the wrong side of the pieced backing and pinned it to my design wall. Gravity pulls on the weight of the quilt and I use a long acrylic ruler to help me smooth out each of the layers. The batting layer is next and I take as much time as I need to make sure it’s all nice and flat. As long as the backing and batting are larger than the quilt top, I’m in good shape.
Below: next I sprayed the wrong side of the quilt top and added that as the final layer, smoothing it again with the ruler. I can also smooth the quilt blocks and rows so that the quilt top is flat, smooth and squared up. Finally, I iron both sides of the quilt with a hot, dry iron to set the glue. It also gives me a chance to press out any wrinkles and smoosh all the layers together. Every inch of the quilt is sticking to itself which makes machine quilting a breeze. And there’s no pesky pins getting in my way!
Bonus: Watch My Spray Basting Video
Here’s a recent video I made, showing how I used thes exact steps to spray baste my Color Weave quilt. I know that it helps seeing the same idea presented more than once in a different way, so click the image below to watch!
Click here to get my Color Weave quilt pattern
Click here to get my Color Weave quilt kit
Be sure to give this method and try and let me know what you think!!
