Spray Basting Tutorial – Using a Table

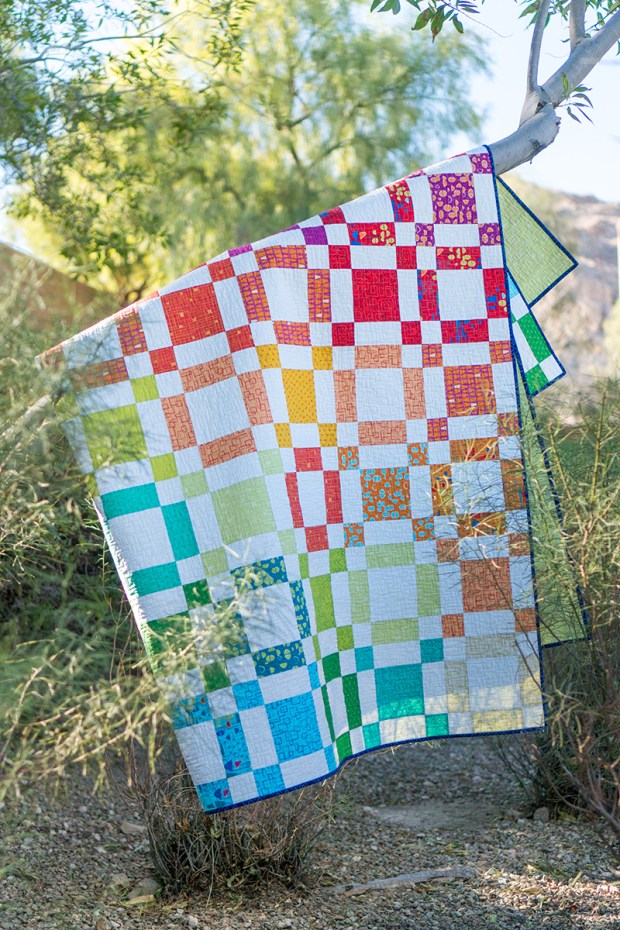
Recently I shared a tutorial on spray basting using a design wall. Today’s tutorial shows how to modify the spray basting process using a table instead. Note that my pictures are all taken outside but once the quilt layers have been sprayed outdoors,  you can assemble the quilt inside using any size table.

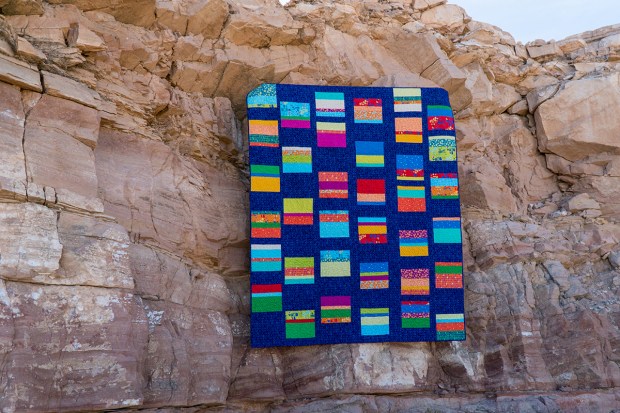
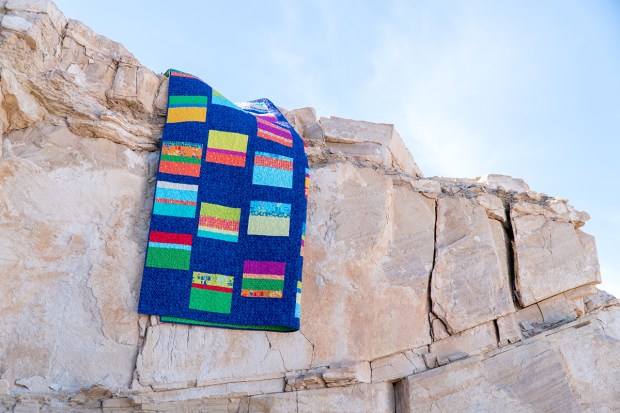
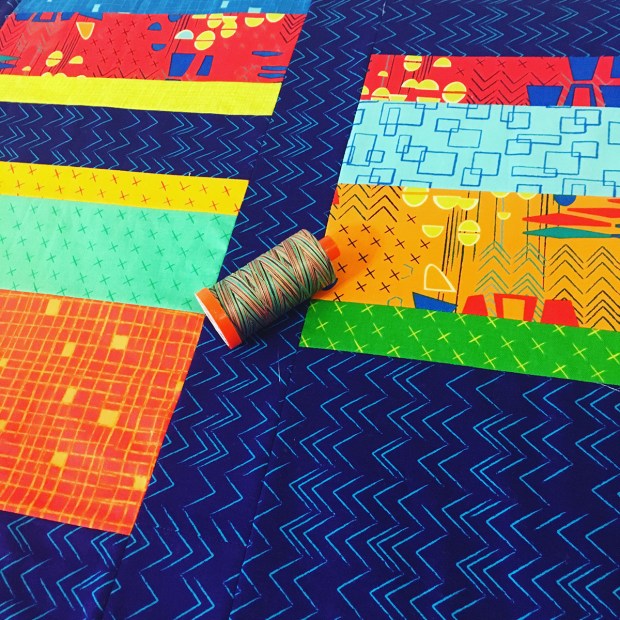
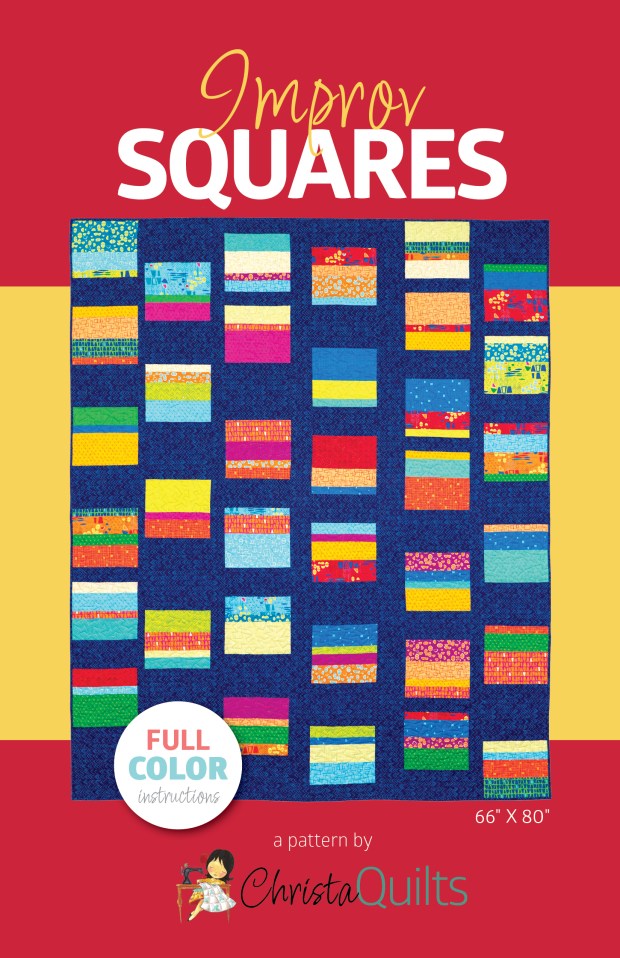
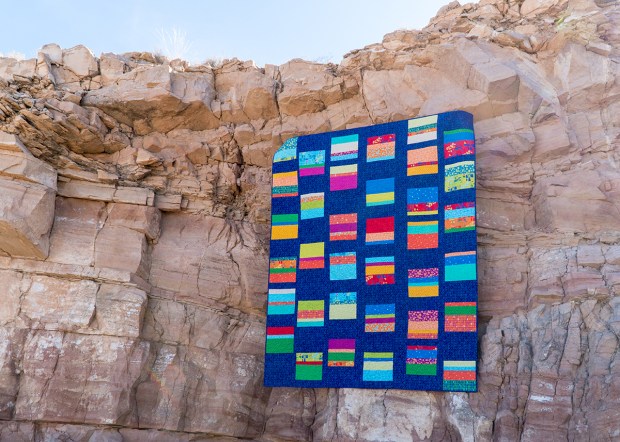
Improv Squares Quilt Using Modern Marks

Step 1 – Spray the back side of the backing and quilt top

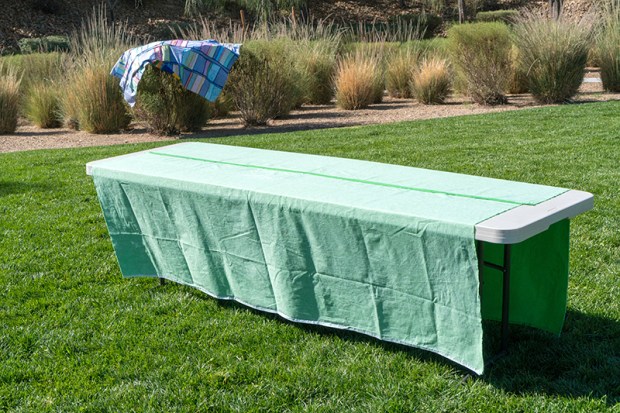
Be sure to spray the layers outside, or in a well ventilated area. If you have sensitivity to chemicals, I recommend wearing a dust mask. I use 505 basting spray and a large sheet to protect the surface I’m spraying on.

I’m using a lightweight folding plastic table, so it’s easy to move. I just store it out of the way in the garage when I’m not using it.

Spray Basting

The table you are using doesn’t have to be bigger than the quilt. When I’m spraying, I cover the center section of the quilt first, and then the sides. For this step, you don’t even need a table; you can lay out a sheet or dropcloth on the ground or wherever you have room.

I used a small park near my home so that I’d have plenty of room, and also nice scenery for photography!

Hold the can an arm’s length away and spray evenly and generously. Make sure to get good coverage on the quilt. To ensure the can is spraying consistently and doesn’t get clogged, spray a few squirts on your dropcloth before applying it to the quilt.

Spray Baste

Although I pressed the top and backing separately before I began, you can see some fold lines on both layers. But not to worry – this gets pressed out at the end. If you spray the top and backing separately, it uses less spray than spraying the batting, and it’s easier to manage.

Once both layers have been sprayed, you can fold them up and bring them inside to finish the assembly process (or stay outside and set the layers aside like I’m showing here.) The layers will be sticky, but not stuck, and you don’t have to assemble them right away – the adhesive doesn’t dry out.

Remove the drop cloth or sheet from the table and then lay out the backing wrong side up.

Spray Baste

Step 2 – Add the batting

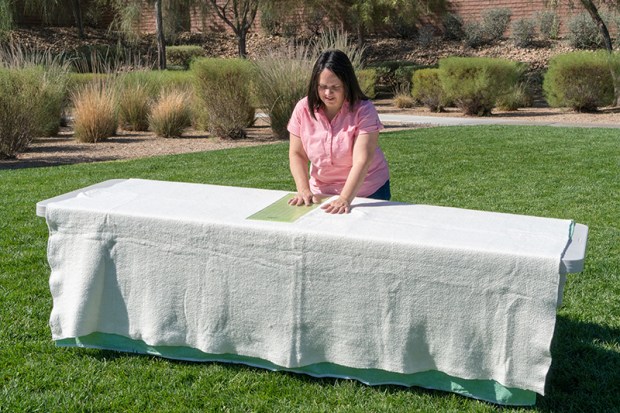
I like to fold the batting in half long ways so that I can put the fold line roughly in the center of the backing. You can see in the picture below that it’s not exactly even and that’s ok. As long as the batting and backing are bigger than the quilt top, you’ll have some wiggle room so that you don’t have to line things up perfectly.

In fact, my batting is actually a little longer than the backing so it’s easy enough to trim away the excess. Working on a table is great because it won’t hurt your back like the floor can.

Spray Baste

Open up the batting so you have coverage on all sides. Even if the sides hang down to the ground – that’s okay. The excess will get trimmed away.

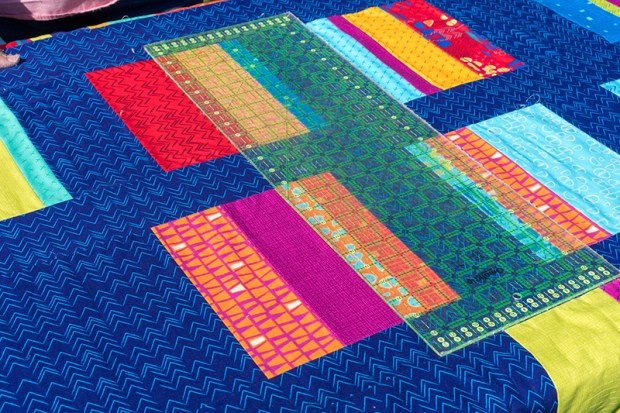
Spend time smoothing out the backing. You can lift and reposition it if needed. Work out any wrinkles or bubbles, using your hands and a long acrylic ruler.

I’m using Hobbs cotton batting for this quilt. I like natural fiber battings because they cling to the fabric and they aren’t slippery. (Polyester has a tendency to slip while you are shoving the quilt through the machine which can cause puckers.)

Spray Baste

Once you smooth out the center section, adjust the layers so that you can smooth out the sides, too. Take your time here to really get it nice and flat. Smoothing out the layers also smashes them together so that they stick together better and don’t shift.

You can also iron your batting before you baste to get it nice and flat. I use a spray bottle and a dry iron. With cotton batting, you can put the iron directly on the batting. With more delicate battings like wool, you can cover the area you press with a piece of fabric. Be sure to use a dry iron so that it doesn’t shrink up the batting.

Spray Baste

Step 3 – Add the Quilt Top

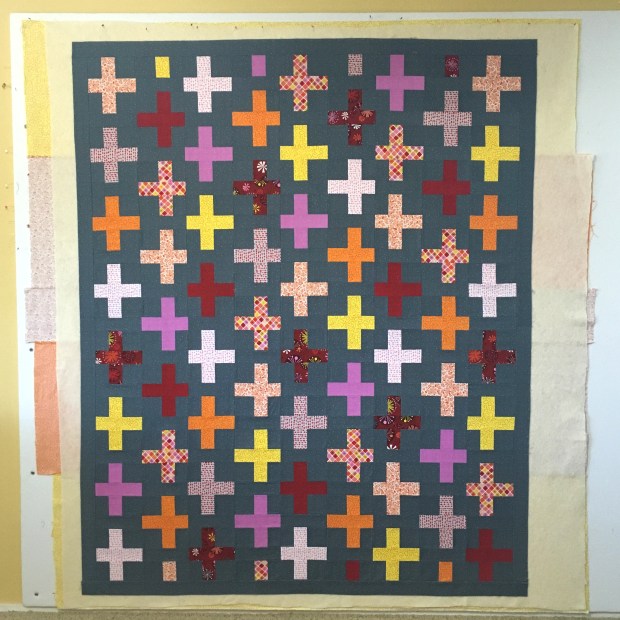
Add the top in the same way that you added the batting – get it roughly in the center and make sure there’s coverage all the way around the edges. You can see it’s still a bit wrinkly from handling and moving it around. That’s okay – you’ll iron it again at the end.

Spray Baste

Trim away the excess batting and backing so you’ll have less bulk to deal with. If you have a super large quilt that touches the ground, you can always place two tables side by side to give you more room to work.

I use specialty batting scissors – they cut through the layers like butter, and trimming goes super fast! I only leave about an inch or two on all sides when I trim. That way it’s less likely that I’ll flip the quilt under itself and accidentally quilt through the extra layers!!

Spray Baste

Step 4 – Smooth Out the Layers

Smoothing out each layer as you add it is such a critical step. When your quilt sandwich is flat and smooth, it makes the machine quilting process so much easier! The reason I love using basting spray is that every inch of the quilt is stuck to every other inch. This prevents shifting of the quilt and greatly reduces the chances that you’ll get a tuck or pucker while quilting.
Spray Baste

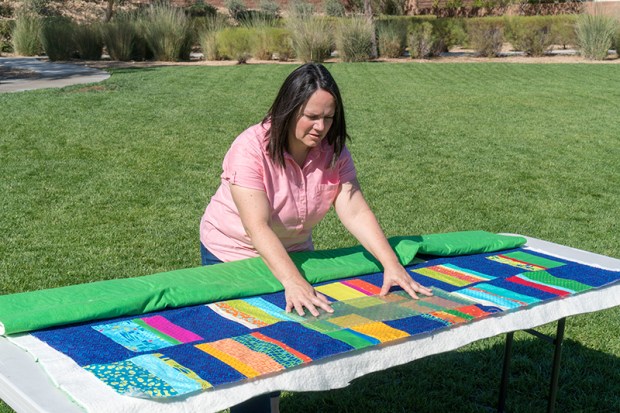
Use the long ruler again to smooth out the center of the quilt. You can also use it to help line up the pieced seams and nudge things back into place if needed. It’s almost like pre-blocking the quilt before you quilt it.

Spray Baste

Once you’ve smoothed out the center, you can work on the edges. Roll up the excess so that it doesn’t drag on the ground as you shift the quilt around.

It usually takes me a good 20 minutes to smooth out each layer of the quilt, but it’s time well spent!

Spray Baste

Step 5 – Press the Basted Quilt on Both Sides

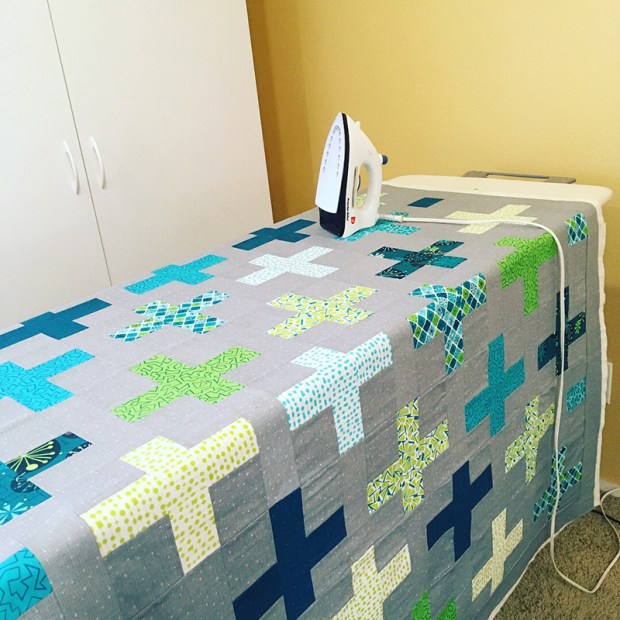
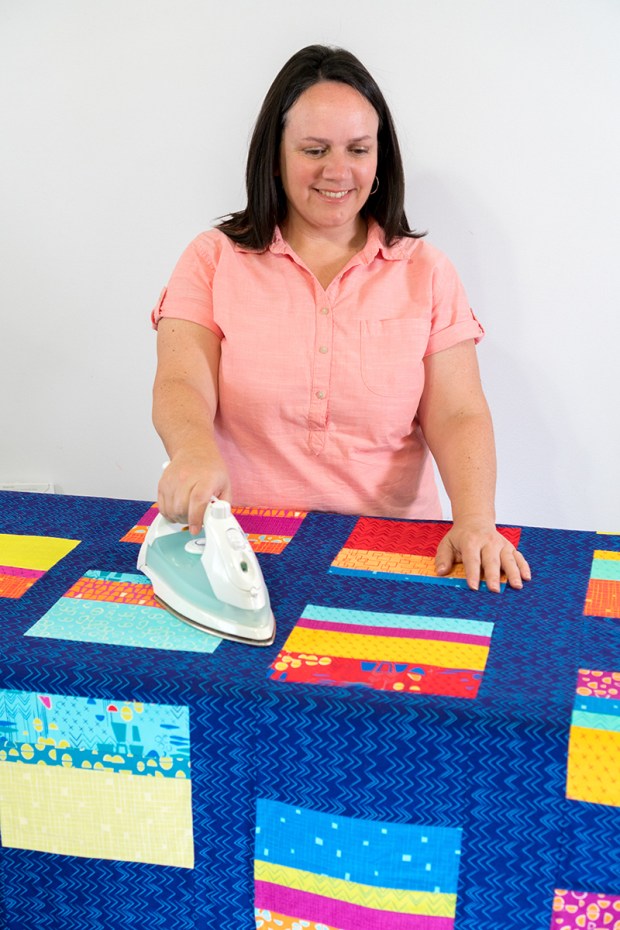
The secret to good spray basting is to press the quilt once it’s layered. The heat of the iron sets the glue and it smooshes the quilt together so it’s nice and flat. I press the back side first, working out any excess bubbles or wrinkles. Then I flip it over and press the front.

I use a big board which fits on top of my ironing board, giving me more room to work.

Spray Baste

I’ve developed this basting method over the last few years and I can honestly say it makes a huge difference in how my quilts turn out. Just remember, you are putting a lot of wear and tear on the quilt when you scrunch and smoosh it through the opening of your machine. But with this method, nothing shifts and it’s easy to just focus on one area of the quilt at a time.

Feel free to pin and share this tutorial with your friends. My goal is to get more people quilting their own quilts while enjoying the process from start to finish!

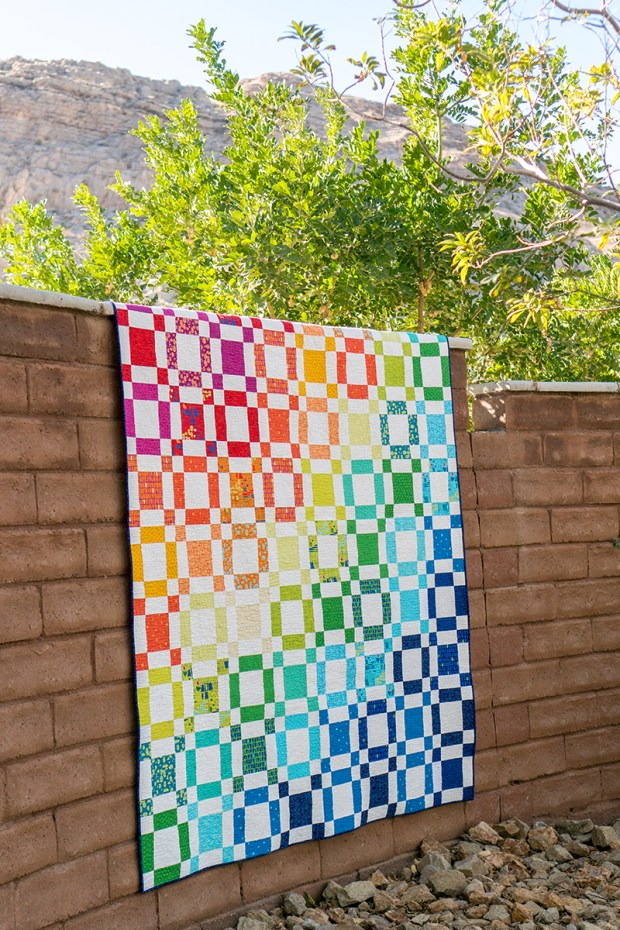
Your Chance to win a Rainbow Taffy Quilt Kit + Machine Quilting Tips

April Update!! My Quilt Won the Championship!!
Thanks for all your Votes!!

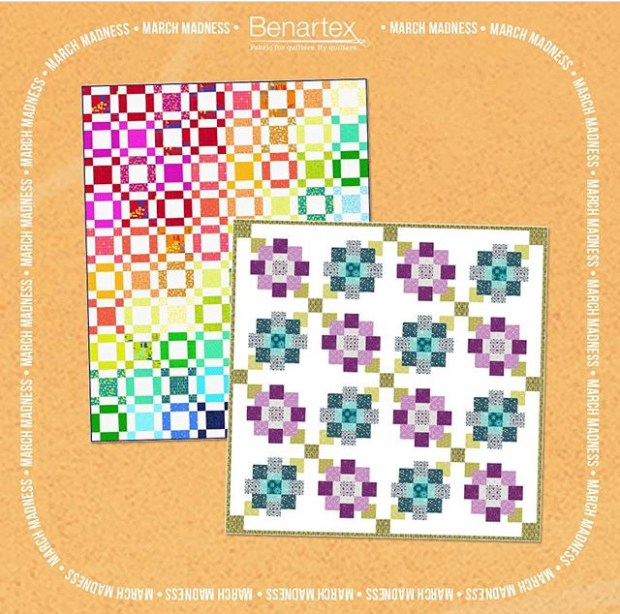
I know it’s a little silly to get all excited about a fun promotional contest, but it really means a lot to me that so many of you have picked Rainbow Taffy as your favorite free pattern from Benartex so far. Today is the last round of voting to determine the final fan favorite, and one lucky voter will take home a kit of the winning quilt! Will it be Rainbow Taffy?? See below for details:

Benartex March Madness Voting

Final matchup: Rainbow Taffy from Modern Marks versus Violette from Gloaming

Click here to cast your vote for Rainbow Taffy on Benartex’ blog: Sew In Love with Fabric.
Click here to vote a second time in their Sew Interesting Facebook group.

You can also vote over on their Instagram account @benartex_fabrics.

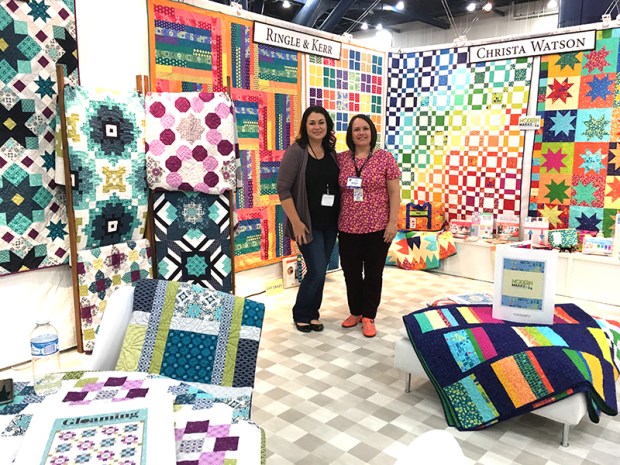
Well, it all comes down to today and the final matchup between my pattern and my friend Shelley Cavanna’s. I met Shelley last fall when her booth was near mine in the Contempo section of Benartex at Quilt Market. She, too was debuting her first line of fabric and we got to know each other as we chatted on the floor for 3 days. So I will be happy no matter which of us wins!

Shelley Cavanna and Christa Watson at Benartex

Half the fun of attending quilt market is getting to meet new designer friends!!

Rainbow Taffy Quilting Tips

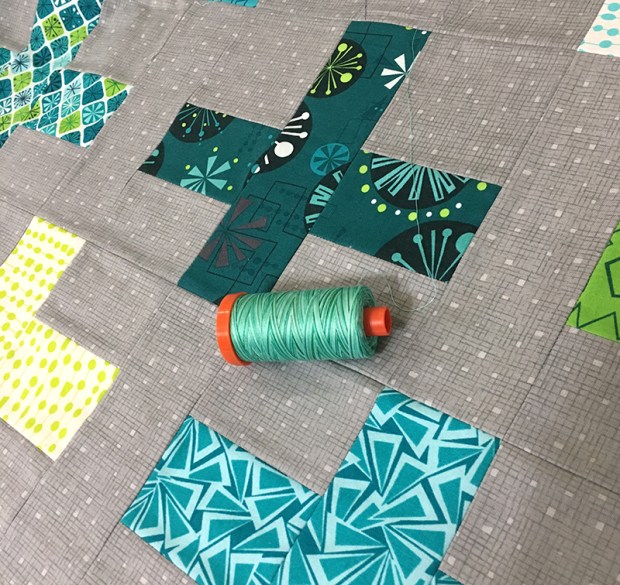
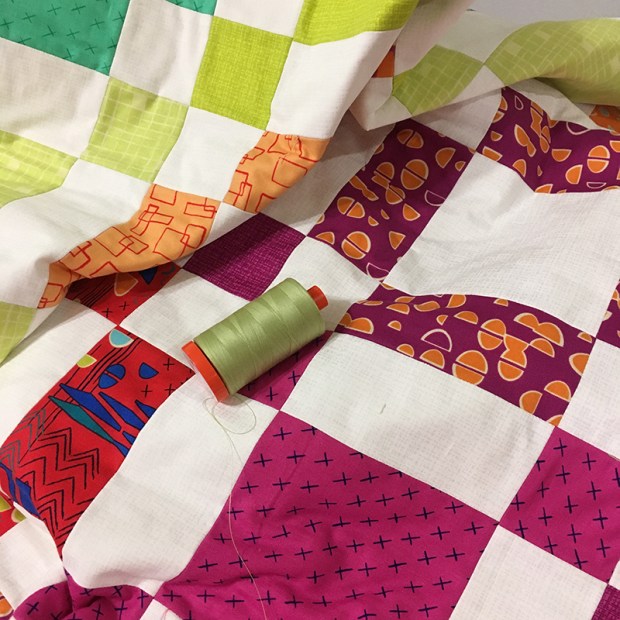
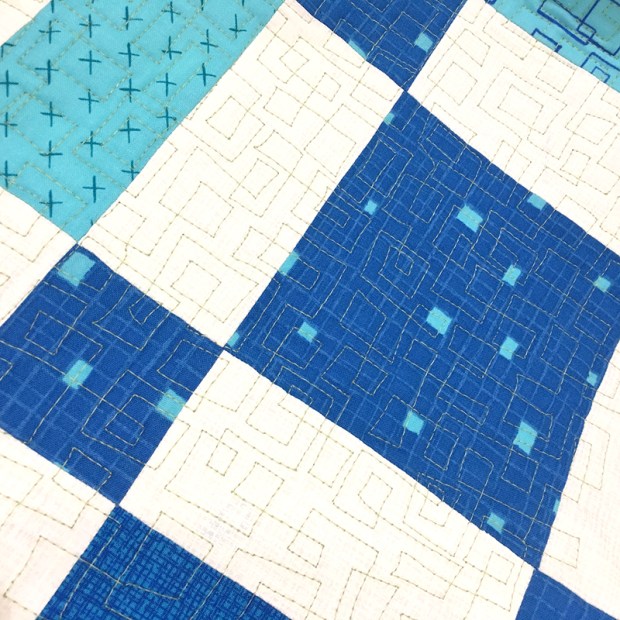
Here’s a tip for choosing thread: if you want your quilting to blend in, choose a thin, 50 weight thread in a color that is slightly lighter than the prints in the quilt. I chose a lime green Aurifil which actually acted as a neutral. It didn’t stand out too much on the white fabric and it added bit of sparkle to this colorful quilt!

Lime Green Aurifil Thread

Here’s another tip: the more quilting you add, the more the quilting design recedes into the background and becomes a textural element, rather than a focal point point motif. And rather than thinking you are quilting your quilt to death, you are really quilting the life into it by adding an extra layer of design!

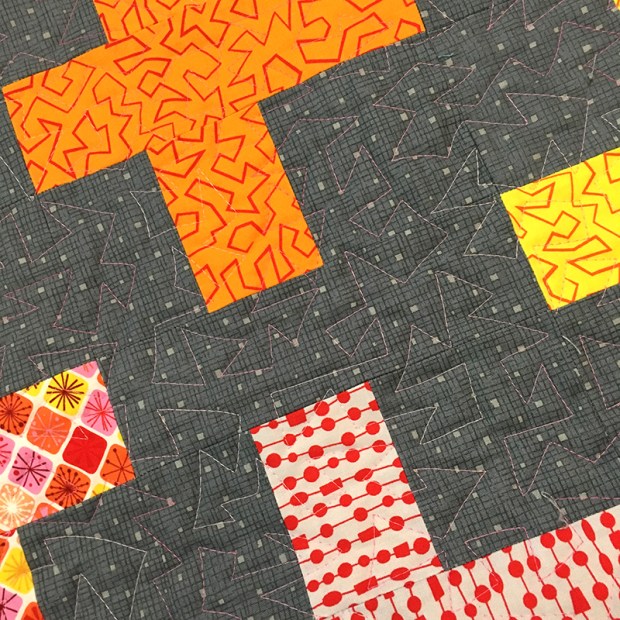
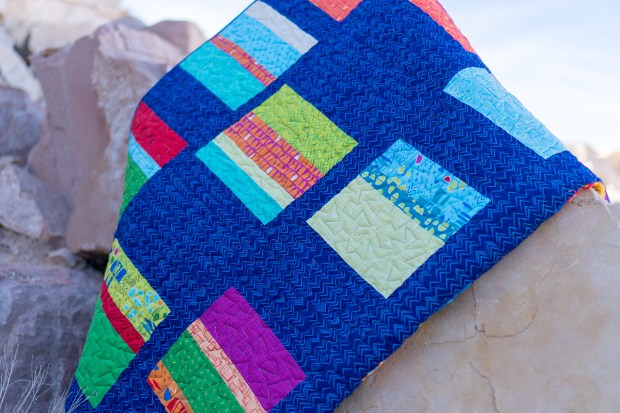
Boxes quilting Detail

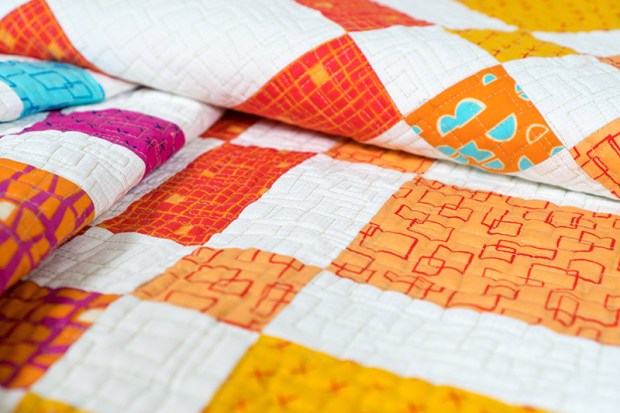
I quilted Rainbow Taffy using one of my favorite modern free motion motifs, “Boxes.”

In fact, I love this design so much, I included it as one of the prints in the line, seen in orange below. I thought it would be so “meta” to quilt boxes on boxes, LOL!!

Boxes print from Modern Marks

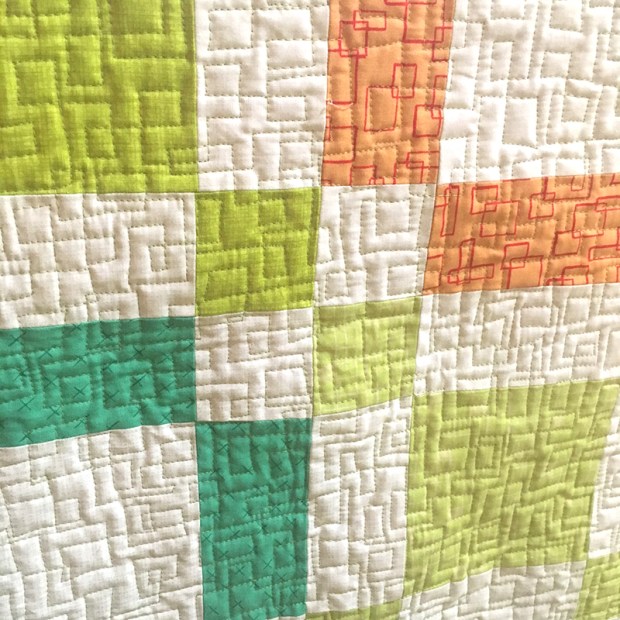
Here’s my tip for quilting an allover, or edge-to-edge design: start on one side of the quilt, and meander your way around the quilt, block by block. Allover designs are perfect for quilting a quilt in a hurry, since you don’t really have to worry about quilting different designs in different areas of the quilt.

Scrunch and Smoosh

I work my way from right to left across the quilt, rotating in the middle when it gets bulky.
To deal with the bulk – scrunch and smoosh it out of the way as you go.

Allover designs are also fantastic to hide any less than perfect seams. If they don’t match up perfectly, you can obscure this fact by adding a layer of texture right on top of the quilt.

Also, if there’s any fullness in your quilt, or it doesn’t lay quite flat, dense allover quilting can draw up some of that excess, and you can use your fingers to smooth out and problem areas while you quilt – just be careful that they don’t get in the way of the needle!

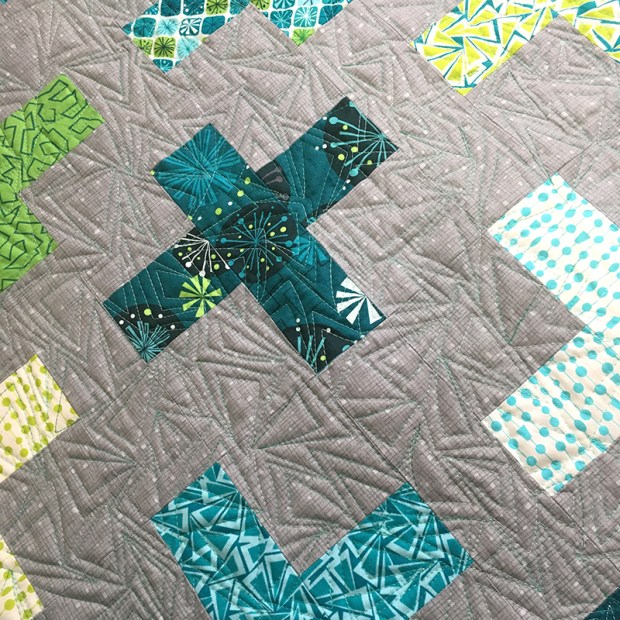
Machine Quilting Texture

See how that lime green thread blends in?? I love it!!

If you happen to run out of thread while you are quilting, you can just back up about 1/2 an inch and quilt a little bit on top of your previous quilting. Stitching on top will help secure the threads, and on a buys quilt, it’s hardly noticeable.

Rainbow Taffy by Christa Watson

One other tip – try not to play “bobbin chicken!” If you have a low bobbin indicator on your machine, try to stitch off the end of the quilt and put in a fresh bobbin. If you are quilting with cotton thread, you can always use that bit of leftover thread when piecing your next scrappy quilt!

Vote For Your Chance to Win a Rainbow Taffy Quilt Kit

Rainbow Taffy Quilt by Christa Watson. Made from Modern Marks.

To wrap up March Madness, Benartex is generously offering one lucky voter a chance to win a kit of the winning quilt! Voting closes Monday, April 2 at Noon EDT.

So head over to the Benartex blog now to cast your vote. The winner will be selected at random. You can also submit a bonus vote in their Facebook Group and Instagram @benartex_fabrics.

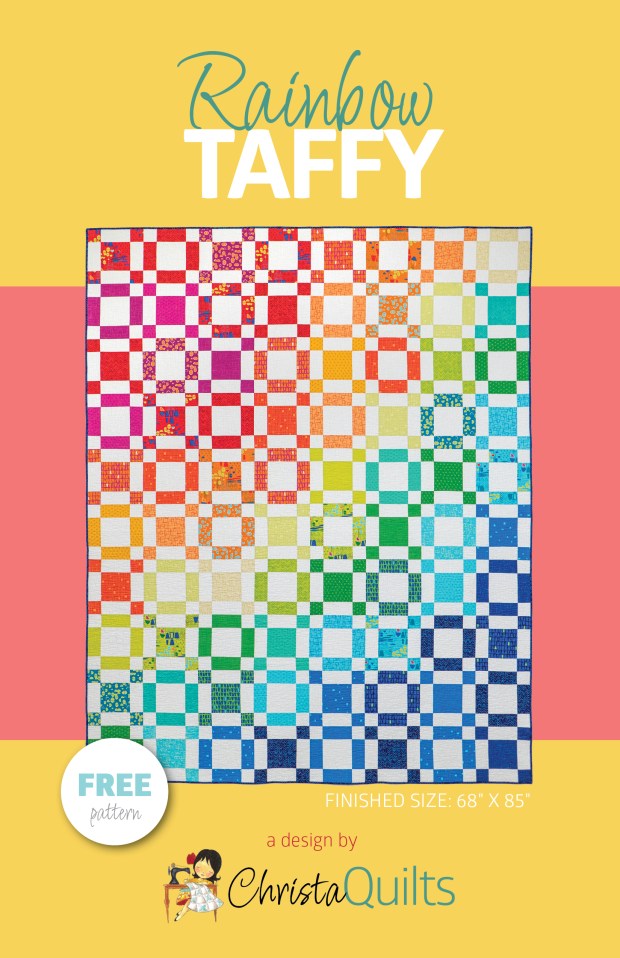
I sure loved making this quilt and I know you will, too. Click here to get the free pattern.
Good luck and thanks for playing!!

Vote for your Favorite “Final Four” and Stock up on Free Quilt Patterns from Benartex

Ok so I’m not much of a sports fan, but I am just a tiny bit competitive, LOL!! Benartex has been hosting a fun March Madness matchup to determine this year’s favorite free pattern. They started with 50, then voting narrowed it down to the Sweet Sixteen, the Elite Eight and now the Final Four. I’m pleased that my pattern, Rainbow Taffy has made it all the way so far and I’m keeping my fingers crossed that with your help, it will be voted #1 fan favorite!!

Rainbow Taffy by Christa Watson made from Modern Marks

Today is the semi final match and voting runs through 11:59 AM EDT tomorrow. Then voting for then final matchup starts at noon Eastern time on Friday. So if you want to join in the fun with me, here’s what you can do:

Click here to vote for Rainbow Taffy by leaving a comment on the Benartex Blog.
Click here to join the Benartex group on Facebook and vote again in their group poll.

There are some free fabric prizes to be won, and of course everyone who participates is a winner with access to dozens and dozens of fabulous free patterns!

Free Pattern Rainbow Taffy

Click here to get the free Rainbow Taffy Quilt Pattern + a Bonus Modern Marks Pattern
Click here to access the entire free pattern library from Benartex

On Fabric Design and Rejects – Those That Didn’t Make the Cut for Modern Marks

I’ve been getting a lot of positive support for the idea of sharing more of my behind-the-scenes work, so thank you for the enthusiasm!

Today I thought it would be fun to share something I don’t think many designers do – my fabric rejects, or those that didn’t make the cut when I designed my first fabric line, Modern Marks with Benartex/Contempo. I’m sure the reason designers don’t do this is because they know people would be clamoring for it, and be sad that they can’t buy the rejects LOL!!

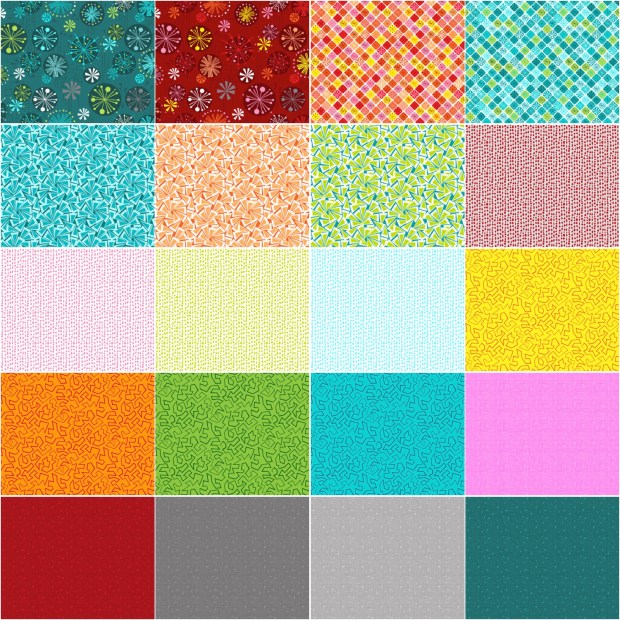
Modern Marks Bundle

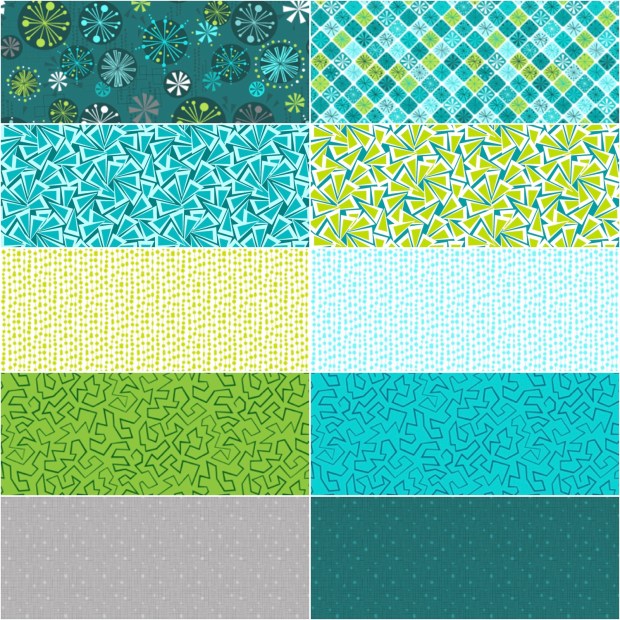
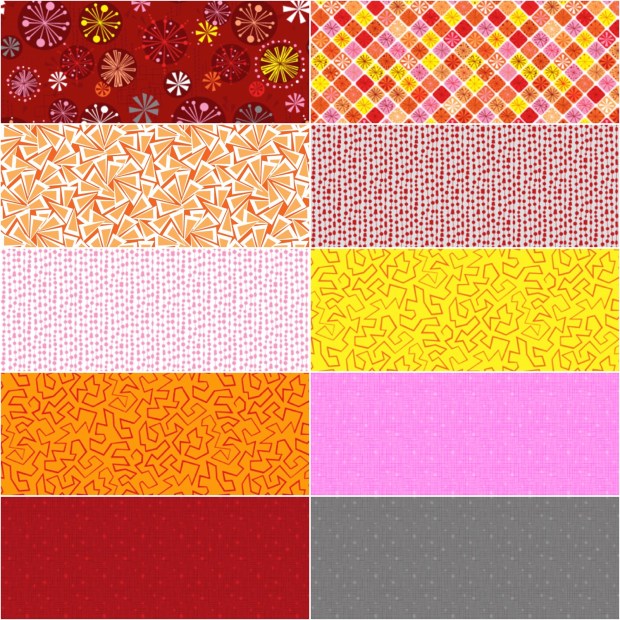
Modern Marks Swatches – It was hard to narrow it down to these final designs!
Contempo is Benartex’ modern/contemporary division.

Now before I get into it sharing some rejects, I’ll explain how I work with my fabric company since I’m sure many of you are curious about it. First – I create a mood board, with colors, ideas and styles I’m trying to achieve. I also draw out most of my designs by hand and select the colors I want to use.

Because I’m not computer savvy when it comes to creating repeats (the amount of distance between design elements so that a design can print continuously), I work with a fabric stylist and graphic designer at Benartex who help me with the technical work. Just as I utilize the services of a book publisher and graphic designer to make my books and patterns the best they can be, it’s been wonderful to collaborate with a fantastic company who has the same vision for fabric as I do.

Modern Marks Pinwheel from Benartex

I wanted Modern Marks precuts to be exciting and dynamic – and I love the results!

Since everything is finalized in the computer, it’s very easy to produce a LOT of different variations of the design in nearly unlimited colorways and print them out in color on paper before they go to the fabric mill for printing. However, because a fabric company is producing dozens of different lines each season, any particular designer is limited in the number of final designs that can actually be printed.

Hence the problem of narrowing things down. My rejects vastly outnumber those that I chose. Not only did several designs not make the cut, but I also had to narrow down which prints would be offered in what colorways. Those were some tough decisions to make, but I was pleased with the final result.

Fabric Design in Progress

Modern Marks fabric design in process – this group included too many lights, not enough mediums and several prints and colorways that I ultimately had to reject. You may see some of these ideas revisited in future fabric lines in a different way… so stay tuned!

You’ll notice many designs in the photo above that didn’t make the cut – including those super light boxes prints and the tossed triangles on the right. Although I loved the boxes, these versions were too light for the rest of the group. I ended up adding color to the backgrounds to make them read as a light-medium so that they could mix better with the other prints when using them all in the same quilt. But not to worry, I’ll be re-visiting the idea of adding more background prints in future fabric  lines.

Although the triangles above were very close to my original vision for them, once I saw them in repeat, the style didn’t fit with the rest of the group. They were a bit too whimsical and not quite the retro-modern look I was going for. Fortunately, since then I’ve been able to tweak the triangles into something I like better, and they’ll be appearing in a totally different way in my next fabric line coming out later this summer. So it just goes to show an idea is never wasted!!

Modern Marks

Finalizing the Modern Marks print selections on my design wall and grouping them by colorway. I numbered them and made a bunch of notes for the fabric company so we’d both be on the same page when it came time to print them. Needless to say, I was thrilled with the end result.

So now that you’ve had a bit of a sneak peek into my process, here are a few more examples of certain prints that I loved and why I ultimately rejected them. I’ve grouped the images below into the “reject” and the final versions and explained why I made each decision.

Modern Marks Design in Progress

Heartbeat vs. Herringbone

I really, really liked both of these – Heartbeat and Herringbone. They both started from the same original concept – a zig-zag line on a saturated background. However, I felt that the image on the right was more versatile and dynamic.

I design fabric in much the same way that I design quilt patterns – I start with one basic idea (zig zags, triangles, lines, etc.) and then brainstorm all the different ways that I can explore that concept. It’s a fun way to work and it ensures I’ll never run out of ideas!!

Modern Marks Design in Process

Plus vs. X

The two designs above were the hardest to finalize. If I’d had room in the collection I would have included them both. While I actually like the Plus design more than the X design, I ultimately decided to go with the simpler and more versatile X design, which I named “Crossmarks.” By this point, I already have enough directional prints and needed something that could act as more of a blender print. So Crossmarks it is!

In a well-rounded collection, you need a good ratio of dynamic vs simple designs; directional versus allover/tossed prints, with a nice variety of color and scale. Although each fabric line is limited to about 18-25 prints and has to stand on its own, I’m actually taking the long view and making sure that each fabric line that comes next will still work with the one before.

Modern Marks Half Ovals

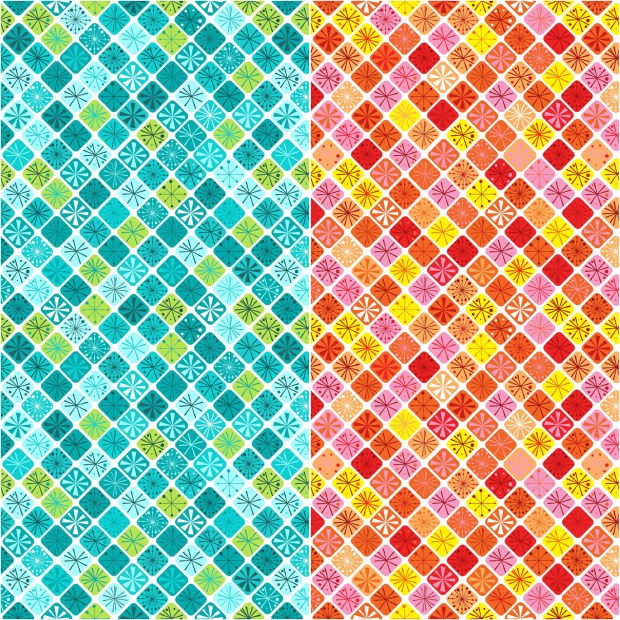
Half Ovals – Reject colorways on top, final versions underneath.

The Half Ovals is probably my favorite print of the group. I knew I wanted to include a circle or dot print and so we mocked up this design in All. The. Colors! It was very difficult to narrow them down to the final 4 above.

Although I really really loved the lime green/blue versions on top, this is another case where less is more. Besides, by this point I knew that the one of the colorways of the main print would use similar colors, so I chose the more tone-downed blue on blue half-ovals to round out the collection and add another “blender” print to the mix.

Circles and Triangles in Modern Marks

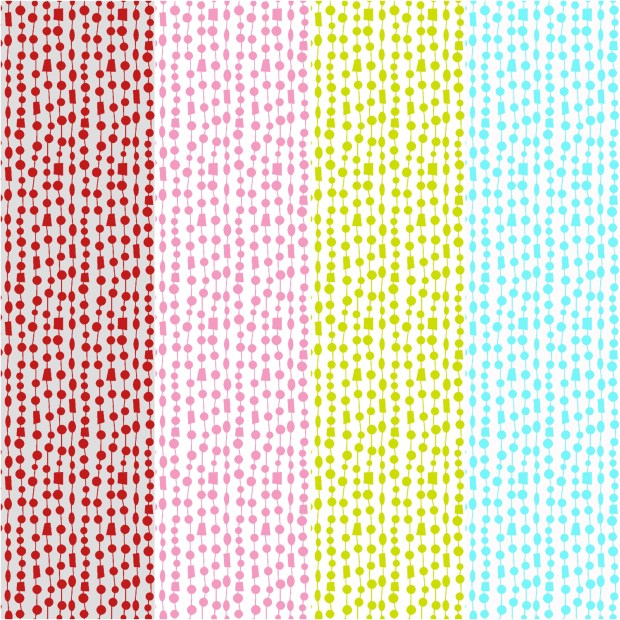
Donuts vs. Quirky Triangles

When trying to brainstorm the “dot” or “circle” print for the line, I also came up with “donuts” above, left. I may or may not have been hungry when it came time to name this design, LOL!!

But… since I knew that I wanted to include the half-ovals instead, this one had to get the axe. However, I kept the color combo of orange and fuchsia and applied it to one of the Quirky Triangles prints instead.

I hope you’ve enjoyed this behind the scenes look at how I made some of these decisions to design Modern Marks. With this being my first fabric line, it was a huge learning curve but a fun and educational experience for sure!

Modern Marks by Christa Watson for Benartex

I so enjoyed having my first booth at Quilt Market last fall.

If you can’t find Modern Marks in your local quilt shop, click here for a list of shops that also sell it online. Please leave a comment if you know of any other stores that carry it. My list is very  small so far, but based on the sales data, it’s in many more stores than I know about, so please help me update my list.

I’m excited that Modern Marks has been well received so far, and that I get to design more collections for Benartex. In fact, as soon as I returned from Fall Quilt Market last year, I got right to work on the next fabric line that comes out this summer. My sample yardage should be here soon, and then I’ll get right to work making quilts and finalzing patterns in time for Spring Market. Based on the kind feedback you all have been sending me, I’ll be happy to share more about that too – so stay tuned!

Finished Quilt – Squiggles Made from Modern Marks Fabric

At long last, I’m excited to show you the finished version of Squiggles, made from my first fabric line with Benartex, Modern Marks that released late last year.

Squiggles by Christa Watson

Squiggles version made from Modern Marks with black background

You may remember that the original version, shown below was made from precut squares with a cream background and overlapping wavy line quilting using a walking foot. The step-by-step instructions for both piecing and machine quilting this version are included in my third book, Piece and Quilt with Precuts.

Squiggles Quilt from Piece and Quilt with Precuts

Squiggles, original version from Piece and Quilt with Precuts

When I got my fabric samples last year, this was the first (of many) quilts that I wanted to remake using my fabric. It just goes to show how different a quilt can look using the same pattern, but different fabrics.

Squiggles Quilt Top

I love the bold bright colors against the black!

With the updated version I really wanted the modern fabrics to pop, which is why I paired them with the deep black. I think it gives the quilt a more contemporary/modern vibe which I really like.

Aurifil Thread Squiggles

Choosing thread color was the hardest part of this quilt! I knew that any colorful thread would work, but I opted to go with the bolder Turquoise Aurifil to really give it some punch.

Quilting Random Crosshatch

Although I love to piece, machine quilting is still my favorite part of the process. I absolutely loved adding an extra layer of texture to this quilt using random crosshatch quilting, which is really just quilting parallel straight lines in random intervals across the quilt in both directions.

Machine Quilting Squiggles

Here are some pretty “scenic” shots, taken in the desert behind our house. My husband Jason really enjoys doing photography and capturing photos in interesting spots.

Squiggles Quilting Detail

I love how the bright colors contrast with the softer, muted desert background.

Squiggles in the Desert

This is my favorite picture: showing the Las Vegas skyline behind the quilt:

Squiggles by Christa Watson

Squiggles Finished Quilt Stats

Click here for a list of shops that carry Modern Marks fabric.

Modern Plus Sign Quilts Book Hop – Transparency Chains in Modern Marks

I’m excited to be a part of my friends Cheryl Brickey & Paige Alexander’s blog hop for their brand new book, Modern Plus Sign Quilts!

Modern Plus Sign Quilts

Modern Plus Sign Quilts is published by Stash books, a division of C&T Publishing.

Not only is it a fabulous book, but it was my turn to help share the love since Cheryl has been an active participant on both of my previous book blog hops. (Check those out here and here.) And maybe the three of us just might have had a conversation at QuiltCon about them doing something fun with my next fabric line…so stay tuned for more awesome Cheryl & Paige inspiration!!

But back to their book…

I chose their pattern, Transparency Chains to work on, because I love a good Irish Chain design!! I chose to go with a modernized Americana color scheme for this quilt, because I’m sorely lacking in red/white and blue quilts for 4th of July!! (Not that I actually need to cuddle up under one in the heat, but I love to add accent colors in my home for the holidays year ’round.)

Transpareny Chains in Modern Marks

My version of Transparency Chains, made with Modern Marks fabric

So far, I’ve only completed the quilt top shown above, but now I’m really excited to quilt it and will share more about the quilting process once I get to it.

Here’s a little bit more about the process of making the quilt top. I couldn’t resist the chance to sew with my own fabric, and after making a ton of rainbow colored quilts lately, it was fun to go with a more limited palette of red, creamy yellow, and shades of blue.

Modern Marks Fabric Red Blue

I chose Modern Marks in blues, with a pop of red contrast and the light yellow boxes print for the background. It was fun to work with a limited palette rather than every color!

The instructions were well written and easy to follow. I love getting everything cut out ahead of time and I love it when a well-written pattern makes that easy to do. I especially liked not having to think about how much to cut, or do any of the math.

Modern Marks Fabric Pieces

I love looking at a stack of yummy fabric strips that are ready to sew!

I’ve realized that I love the process of making a quilt as long as I’m not rushed. So here’s a tip: try not to “binge” sew if you can help it. I spread out the making of the top over several weeks so I never felt rushed.

I washed the fabrics one day, ironed them a different day, cut them later and then took several days to sew the individual units below. I took pics along the way and shared them in real time on instagram so I never felt rushed or bored with the project.

Modern Marks Transparency Chains in Progress

The stacks are starting to turn into something fun!!

Plus blocks with modern Marks

Aren’t these the cutest little plus blocks ever??

At first, I was worried that the main Modern Marks print wouldn’t show well enough because the light blue pieces were so small, but I love the effect you get when you chop up an interesting overall print. It’s fun to see lots of pops of color all over the quilt!

Sewing in Progress

I love pressing seams open so that the blocks will lie rally flat.

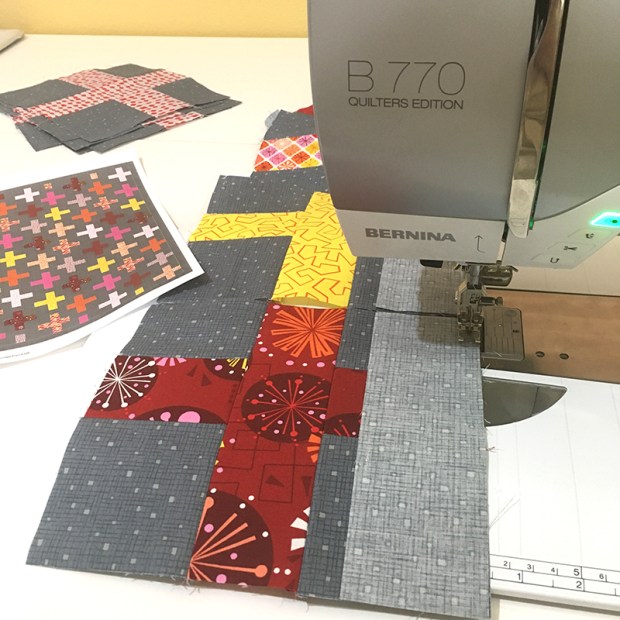
I printed off a copy of just the Transparency Chains pattern from the book so I could keep it right by my sewing machine as I sewed. I could also make notes on the printout and check off each step as I completed it. I love the feeling of accomplishment each time I sit down to sew!

Pressing the quilt

I have a “big board” that I use for pressing my quilts. Once I press from the back side, I always press again from the front to keep the quilt as flat and crisp as possible.

Here’s a pressing tip: sew several of the rows together into chunks and then press the long seams before you join the two halves together. Then you only have one more seam to press once the quilt top is complete, rather than wrestling with the entire quilt for each long seam.

Modern Marks Transparency Chains

I’m really pleased with this combination of fabrics and love the fun geometric texture that the modern, geometric prints provide.

Transparency Chains alternate version

Alternate colorway, re-colored in EQ8

When I was figuring out which fabrics to choose, I drew up the design in Electric Quilt software and auditioned several variations. The greener version above was a very close second, but ultimately I liked the high contrast of the red chains instead.

Red and Blue Transparency Chains

Modern, geometric prints are definitely my favorite – and it was fun to sew with my own fabric!

Now I have to decide how to quilt it – do I go with a simple allover design, or do I highlight the plus blocks and emphasize the chain structure? Choices, choices!! What would you do?

To see the original version that Cheryl made, plus link to other bloggers who remade this quilt in other colorways, head over to her blog at Meadow Mist Designs and Paige’s blog at Quilted Blooms. While you are there, check out all of the fun giveaways that are happening, and enter for your chance to win.

Click here for the complete list of bloggers and links to their site – plus tons of giveaways.

Click here to get your copy of Modern Plus Sign Quilts.


Squiggles Quilt Along Week 7 – Quilt Binding Tutorial

I’ve been thrilled to see all of the fabulous versions of Squiggles that you all are making. Some of you have already finished, others have made more than one version, while others are just beginning. Just remember – I’ll leave the blog posts up indefinitely, so you can make this fun quilt on your own schedule!

Piece and Quilt with Precuts

Step by Step Binding Tutorial

This is the same method I use for all of my quilts.

Step 1: Trim the Quilt

Trim the extra batting and backing flush with the edge of the quilt top.

Binding Square up the Corners

I like to use a large square ruler for the corners, and a long acrylic ruler for the sides.

Binding Trim the Sides

Step 2 – Make the Binding

Lay out two binding strips so that they overlap at a 90 degree angle. Mark a diagonal line on the top strip from corner to corner, where the corners overlap. Pin in place if needed.

To figure out how many binding strips you need to cut, add 10″ to the perimeter of the quilt (length of all 4 sides of the quilt). Then divide that number by 40″ to get the number of strips to cut. For the Squiggles quilt, the number of strips to cut is listed on page 15 of the book.

Tip: most patterns suggest to cut the binding strips 2 1/4″ to 2 1/2″ wide. However, I’ve recently began using 2″ strips and I like it much better. The narrower strips allow me to get a tighter finish, and both sides of the binding end up the same size.

Sewing the Binding

Sew on the drawn line and trim excess to 1/4″. Trim off the “dog ears” – the triangle tips, too. Join all of the strips the same way and press seams open. This will distribute the bulk of the seam when it’s attached to the quilt.

Join Binding Strips

Trim the beginning of the binding strip at a a 45 degree angle and press the entire length of binding in half, wrong sides together. Be sure to trim the starting edge first, before you press it in half.

Finished binding, ready to sew

If desired, fold up the binding, or roll it up until it’s ready to attach to the quilt.

Step 3 – Attach the Binding to the Quilt

Attaching the binding

Start attaching the binding on the side of the quilt, not at the corners. Line up the open edges of the binding to the trimmed edge of the quilt and leave about 8″-10″ of the tail hanging off. This will allow plenty of room for attaching the two ends later.

Place a pin in the binding and quickly “walk” it around the quilt’s perimeter to ensure that none of the pieced seams will land in the corners. Adjust the binding as needed and start sewing at the pin, using 1/4″ seams.

Binding 1/4" mark

When you reach the corner, stop sewing 1/4″ away from the corner. Mark a line if needed to get an exact measurement. Then sew off the side or corner of the quilt.

Folding the binding corner

To get a perfect miter in the corners, fold the binding up and away from the corner. Ensure that the right side of the binding aligns with the edge of the quilt.

Mitering the binding

Fold the binding back down, leaving the excess in the corner. Make sure the top of the fold lines up evenly with the top edge of the quilt. I called this the “funky fold.”

Grasp the top and bobbin threads and carefully sew down the next side of the binding. It will be thick at the corner where all of the bulk is.

Binding Corner

Once you sew a little ways, check the front of the quilt. It should form a nice crisp miter at the corner if you’ve lined everything up correctly.

Attaching the binding

Continue sewing down all 4 sides of the binding, taking care to get nice crisp miters at the corners. When you get close to the starting point, leave several inches between the starting and ending point of the binding, so you have room to attach the two ends of the binding.

Step 4 – Secure the Ends

Open up the end of the binding and place the start of the binding (the angled cut end) on top of it. Be careful that the strips don’t shift.

Matching up the binding

Open up the beginning binding “tail” (below), and notice that the angled end runs in the opposite diagonal direction in which it was folded. Mark a line on the uncut strip, following the direction of the cut end.

Matching up the binding ends

Measure and cut 1/2″ away from the marked line. This will add the amount needed for seam allowances on both ends of the binding.

Trimming the ending tail

Match up the binding right sides together and make sure it doesn’t get twisted. Pin the binding, offsetting the triangle tips by about 1/4″ and sew with 1/4″ seams to close the binding. This will create a hidden join that is smooth, with no bumps.

Join the binding ends.

Finger press this final seam open (it’s hard to get an iron in there at this point), and pin the un-sewn binding to the quilt, easing in any fullness. Attach this last bit of binding to the quilt, overlapping the starting and ending stitches.

Pin the binding in place

If desired, press the binding away from the quilt with a hot dry, iron. This will help the binding wrap around to the back of the quilt much easier.

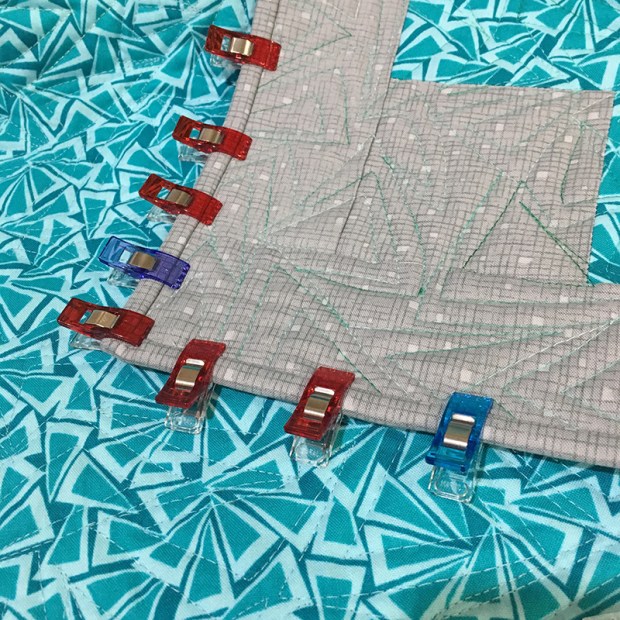
Secure the binding to the back of the quilt with pins or binding clips. When you get to the corners, fold them in opposite directions and clip in place.

Secure the binding with Wonder Clips

Finish with small hand stitches on the back side. I use a single  16″ – 18″ length of Aurifil thread in a color that matches the binding. I use a thimble to push the needle through and sew from right to left, with the bulk of the quilt away from me. I’ve noticed that some quilters prefer to sew the oppoiste direction with the quilt toward them, and that’s okay, too – whatever works for you!

Of course, you can finish the binding by machine if you prefer, but I love the slow pace of hand stitching while I relax and cuddle with the quilt.

Binding by hand

Here’s a quick bonus video of me hand-stitching  the binding on another quilt:

Step 5 – Share, Share Share!

I hope you enjoyed this tutorial! You are welcome to share on pinterest or your favorite social media (with attribution). I hope that binding doesn’t seem so scary and feel free to mix it up with your favorite binding method.

This concludes the quilt along tutorials – next week I’ll share some finished pics of Squiggles, taken in the desert behind my neighborhood. Be sure and share your progress and finishes with me on instagram #squigglesqal or in my ChristaQuilts Facebook group. I love seeing them!!

Squiggles Quilt by Christa Watson

Click here to get an autographed copy of Piece and Quilt with Precuts.

Click here for links to all of the Squiggles Quilt Along blog posts.

Christa’s Soap Box – Life After Social Media

A couple of months ago, I decided to decrease the amount of time I spent on social media. You can read that post here. This ties into my words for the year which are “simply and focus.”

I’m back with a quick update to let you know how it’s going. Now, just to reiterate, I’m not giving it all up, obviously since I’m still writing on my blog. But I did give up a lot. I paired my social media presence down to 3 places: the blog, instagram, and my facebook group. That’s still a lot for some, but it’s less than half the social media venues I used to keep up with.

In a word – it’s fabulous!

Boundless Bundle

Here are pretty pictures of fabric I’m currently working with so it’s not all just words!

At first I was having withdrawals, which quickly subsided after I finally allowed myself more time to contemplate and think. I was in several business Facebook groups that I had joined for networking purposes. It was a little hard to give them up in the beginning because I missed the daily interactions.

However, by getting in to the habit of checking them every day, multiple times a day, it pulled me into a constant timesuck because I didn’t have the fortitude to get in and get out. Now that I only have one place to go on Facebook, it’s a quick check in the morning, a couple pop-ins throughout the day to reply to comments, and I can focus on GETTING THINGS DONE!

Fat Quarters in Blues and Greens

I love organizing these fat quarters from light to dark  to see how they sparkle.

I also have so much less FOMO (Fear of Missing Out)!! When I don’t know what I don’t know, it’s so liberating to not constantly be comparing myself to what others are doing. I was worried that I’d miss out on opportunities to do great things, by not being “out there” as much, but let me tell you – the work has NOT slowed down. I’m currently working on my 4th book proposal, my 3rd Craftsy class and my 2nd fabric line, not to mention preparing for a slew of in-person workshops.

Now it’s kinda nice when I get an email from someone wanting to collaborate on something. Yes, email is still a great way to communicate! For me, it’s so much more effective than trying to keep up with direct messages on Instagram or Facebook that I sometimes don’t even know are there!  I’m also not on a strict time schedule on my blog. Sometimes I’ll blog three times a week, sometimes just once and it feels great to have that flexibility.

Cut and labeled fabric pieces

Here’s a tip – label the pieces of fabric you are working with to stay organized. I use a “big board” to iron my fabrics and stay organized when piecing. It gives me a huge surface on top of my ironing board. Now I need to work on getting prettier furniture that matches in my sewing room…

By not being constantly sucked into social media, I have a more realistic time frame for how long it takes me to actually make a quilt. I think the constant barrage of New!New!New! on social media can give us unrealistic expectations of how much we need to accomplish or how fast we need to get it done. I prefer a slow and steady pace so that I can enjoy each step of the process, and by stepping back I’ve been able to enjoy more making without feeling like I have to crank out  a new project or tutorial each week. I’m definitely a person who prefers quality over quantity.

And now, so as not to spend all day writing this post, I’ll sign off with huge hugs to you, my readers who make this all possible. By continuing to support me,  you allow me to pursue my passion full time and I can’t thank you enough!! Now I’m off to continue working on the project I shared a few sneak peeks of above. More about that in a couple of months….

Squiggles Quilt Along Week 3 – Assembling the quilt top

How are you doing on the Squiggles Quilt Along? Some of you may have just started while others of you have already finished the quilt top, and that’s totally fine. With all of my quilt alongs I encourage you to work at your own pace and share progress. Share on instagram with the hashtag #squigglesqal and see the other amazing versions everyone is creating. Or join my Christa Quilts facebook group to post pics and get additional support!

This week it’s time to assemble the quilt top!

See the diagram and instructions. page 18 of Piece and Quilt with Precuts for the quilt top assembly. Here’s a tip from one of the members of my facebook group who recently completed her top:

“Try sewing the rows together vertically instead of horizontally – it’s easier to line things up that way.”

And a bonus tip from me: notice that when you sew the rows together it looks like the background triangles don’t match up and that’s correct. This gives the design a slightly more interesting look and makes it faster and easier to go together. I also recommend pinning generously for best results.

Squiggles Blocks

The centers of the Squiggles blocks don’t intersect. That’s correct.

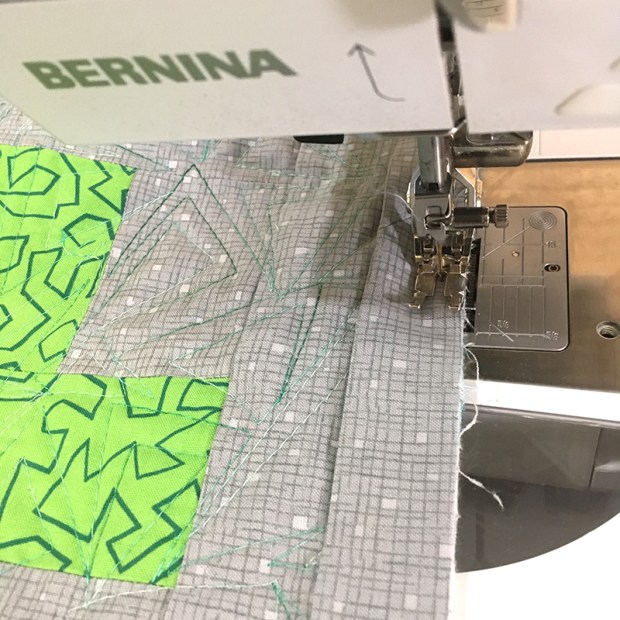
Once the quilt top is complete, take a “victory lap!” Sew approximately 1/8″ in from the edge of the quilt to keep the seams from splitting open as you handle the quilt. I usually do this with a longer stitch length so it goes faster.

My Work in Progress

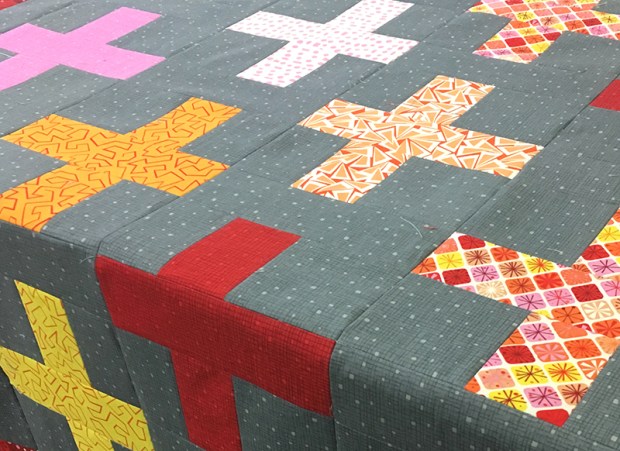
My mom helped me put together the quilt top earlier this summer so that I could display it along with the fabric at a company trade show. I only had a few days to complete the top, so my in-progress pics aren’t great. But here are the rows going up on my design wall. The rows were sewn together randomly and then I spent time arranging them until I was happy with the overall composition

Squiggles work in Progress

I called in the reinforcements to help me put together 5 quilt tops in 4 days! You can see one of my quilting buddies pressing Squiggles amidst all of the sewing chaos!

Sewing Party at Christa's

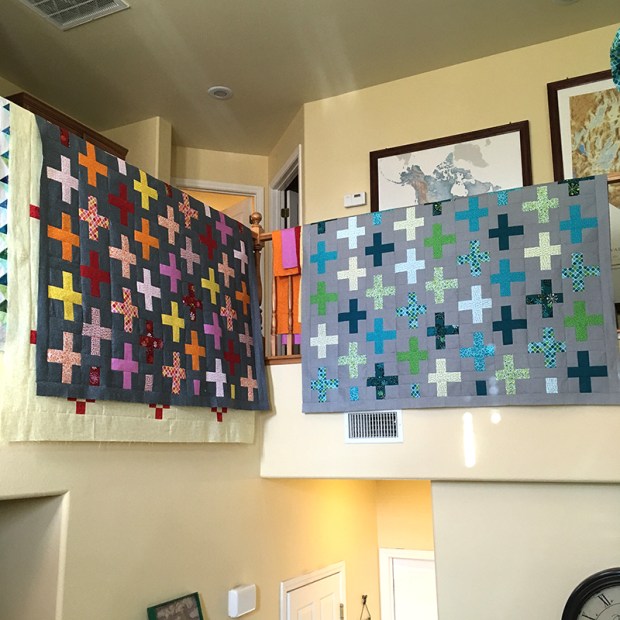
(Notice the other quilt going up on the design wall? You can get that free pattern here.)

Bonus Inspiration

Here are a few quilt tops in progress shared by some members of my facebook group. I’m just blown away by the creativity!!

Yellow and Gray Squiggles

Karen T. is working on this lovely yellow and gray combo. She’s currently deciding on her final layout, so you can pop over to the Facebook group and lend your suggestions!

Squiggles Gradation

I love this fabulous color gradated design that Maritza F is working on. It’s so clever and a great way to use up some of her older charm pack stash!

Modern Marks Squiggles

Marcia D recently finished her quilt top from one of the Squiggles Modern Marks kits. Because of the color placement, even kitted versions of Squiggles will each be unique!

Kits and books still available

Pick up a signed copy of Piece and Quilt with Precuts from me book here.
Click here to grab a Squiggles quilt kit or Modern Marks Fat Quarter bundle.

(As of this writing I have 7 fat quarter bundles and 3 kits left – two with a white background/red binding, and one with a black background/blue binding. But of course you can use any fabric you like!)

Squiggles from Piece and Quilt with Precuts

Click here for the complete Quilt Along Schedule with links to all of the previous posts.

Finished Quilt: Modern Puzzle + Quilting Tips

Meet Modern Puzzle – one of the quilts I made for quilt market this past fall. The quilt pattern is a free PDF download and it’s made from one Pinwheel (aka Jellyroll) of Modern Marks + one pinwheel of white/gray neutrals from Benartex.

Modern Puzzle Free Qult patter by Christa Watson

Click here to download my Modern Puzzle quilt pattern for free.
Click here to get the precuts to make this quilt.

I recently wrote up a spray basting tutorial using my design wall using Modern Puzzle as my example. Now I’m ready to share more about the quilting process. Because I was in a hurry to get this quilt done, AND I really wanted to show off the fabrics rather than the quilting, I used a simple wavy line design that I teach in my book Piece and Quilt with Precuts.

Click the image below to enlarge it so you can see the quilting detail:

Machine Quilting detail - wavy lines

Making a Quilting Plan

Whenever I’m quilting an allover design using my walking foot (or dual feed system), I use a method I call “divide and conquer.” The basic idea is that I make one pass across the quilt, stitching near the ditch rather than IN the ditch.

This allows me to use my seam lines as a guideline for spacing so that I don’t have to mark anything. Once the quilt is stabilized, or “anchored,” then I’ll add additional wavy lines, one pass across the quilt at a time.

Quilting Plan for Modern Puzzle

Quilting plan for Modern Puzzle – I’ll fill in more lines on the quilt until it feels finished.

I introduced my audience to the concept of making a “quilting plan” in my first book, Machine Quilting with Style, and my first Craftsy class, The Quilter’s Path.  Now I love to seeing that so many have embraced this concept with their own quilts!

Quilting Modern Puzzle

Each time I quilt a set of wavy lines across the quilt, the space to fill gets smaller and smaller.

Whenever I quilt any quilt, I “scrunch and smoosh” it under the machine however I can. Having a wide area between the needle and the side of the machine is really nice, but not absolutely necessary. As long as you shove the quilt out of the way and only focus on one area at a time, it’s easy  to do!

Overlapping wavy lines

Once the lines got close enough, I overlapped a few of them for extra texture.

My philosophy when it comes to machine quilting is, “more is more.” For example, one individual line of stitching will stand out like a sore thumb. However, when you surround that line with additional quilting lines on both sides, all of a sudden, you notice the overall texture before you see the individual stitches.

Modern Puzzle Quilt by Christa Watson

When it comes to choosing thread color for a highly contrasting quilt such as this one, it’s best to use a lighter color thread rather than a darker one. A lighter thread will blend in more on darker fabrics, rather than the reverse.

Aurifil Cotton Thread

For Modern Puzzle, I chose a light gray/blue from my Piece and Quilt Collection – Neutrals from Aurifil. Even with dense quilting, one large spool was plenty of thread, and I like to use the same color in top and bobbin to help hide any tension issues.

Quilting Detail on Modern Puzzle

Dense quilting is my favorite way to hide quilting imperfections!

Behind the Scenes

Fun fact: when I got my fabric samples for Modern Marks back in July, I had about 4 days to whip up 5 quilt tops to display at a special event for BERNINA dealers taking place here in my hometown of Las Vegas. Because BERNINA owns Benartex, the dealers got to see sneak peeks of the fabric before it was debuted at quilt market in October.

Quilts in Progress

Honest sewing room and quilt top making frenzy: notice the fabric samples in the left corner rolled on a tube – this is how fabric comes from the factory before it’s folded onto bolts!!

This was my chance to introduce myself to shop owners who hadn’t heard of me yet, so it was a huge opportunity if I could finish the samples in time. So I called in the reinforcements – my mom and a few friends – and we sewed non-stop to get them done! It was a fun impromptu retreat and I’m thankful to say, the fabric was well received. Thank goodness I only needed to finish the tops and was able to quilt them over the next 3 months at a more leisurely pace!

Modern Puzzle Quilt by Christa Watson

I love how the bright pops of color in in Modern Marks contrast against my desert surroundings. This is one of my favorite quilts, and the dense quilting makes it so snuggly!!

Remember, if you make Modern Puzzle, (or anything else from my books, patterns, or fabric) I’d love to see your progress! Please share in my ChristaQuilts Facebook community. I’d love to cheer you on!!

Modern Puzzle Stats:

Modern Puzzle by Christa Watson

All outdoor photogrophy taken by my husband, Jason Watson. (C) 2017