Work In Progress – HST Remix

I am so excited that things have finally slowed down enough this summer that I can get back to working on some quilts that don’t have any set deadline! I originally made my HST quilt shown below a couple of years ago, then it got ruined in the wash when the “mild” wash powder I used bleached out some of the squares. (Note to self- stick with liquid detergent only!!)

HST Quilt

The original HST quilt – I still fits on my bed and is very warm and usable!!

The Remake – Improv Triangles

However, I loved the design so much that I had to remake it. I’m calling the new one HST Remix. I’m using the same Alison Glass batik fabrics as I had in the original, but the background fabrics are different and the fabric arrangement will be slightly different. One of the problems with the original is that I used a “textured” background fabric that had a lot of stretch. I never could get the quilt to hang straight. I do much better sticking with regular cotton fabrics, but it’s always fun to try something new, even if it doesn’t work out so well!

HST Remix in Progress

Because I’m working with leftovers from the first quilt, I didn’t have enough yardage to cut the squares large enough to make the half-square triangles so I improvised. And honestly I like the new blocks even better! I cut the yardage I had into straight strips with no wonky angles, then sewed them together randomly and cut them into the squares I needed. So many of them now have an improv look which I just love!

I also decided to make the blocks slightly larger the 2nd time around so that the overall quilt would be a few inches bigger.

Improv HST's

Some of my improv HST blocks in progress.

If this quilt turns out well, my plan is to enter it into a few upcoming quilt shows. That’s the one weird thing about me. It’s hard to make a quilt just for the sake of making a quilt. My quilts need a purpose, even if that purpose is just to delight a viewer at a quilt show!

Seams Pressed Open

Pressing Tips

Because the construction of this quilt includes a lot of bulky seams, I’ve pressed them open to help the quilt top lie flat. Contrary to popular myth, this will NOT weaken the seams. My tip for pressing seams open is to press with a hot dry iron so you don’t burn your fingers. First I open up the seams with my fingers or using a handy device called a wooden seam roller. (This is a device made for other applications but is one of my favorite tools for quilting!!)

I also use a shorter stitch length (2.0 rather than 2.5) when sewing the seams together to ensure they won’t split apart while handling.

Seams pressed open and pinned

The biggest question I get asked is how do I get the seams to align when they are pressed open? I use lots of pins and pin right through the intersections where the points are supposed to match. The nice thing about pressing seams open is that I never have to worry about which way they need to go! I also like to press seams open to prevent shadowing – which is what happens when you can see a darker fabric underneath a light one.

I’m also a pressing maniac. Pressing a lot (without steam) helps me keep the quilt top flat as I make it. I will usually sew 3-4 rows together and then press a section before sewing all the rows together. That way I’m dealing with less bulk under the iron at one time. When I press, I press from both sides – back and front. I want a nice, super flat quilt top!

Pressing Quilt Top

Pressing is very meditative for me – I listen to an audio book or podcast while I work.

Victory Lap!

Whenever I’m working on a quilt without borders (which is most of my modern quilts), there’s lots of seams along the edges. To secure them from splitting open, I take a “victory lap” around the quilt by stitching about 1/8″ in from the edges of the quilt. I’ll use a longer stitch length here which then gets covered up by the binding.

Victory lap around the quilt to secure the edges

Victory Lap – aka “topstitching” around the edges to secure the seams.

Now that the quilt top is finished it’s time to make a pieced backing and start thinking about how I want to quilt it. In the original, I quilted lots of straight lines and some fun spirals and pebbles as shown below.

Machine Quilting HST

Original HST Quilting Motifs

For HST remix, I still want to utilize straight lines and create a woven effect with the quilting, but I might change up the design a bit. In the original, I quilted straight lines vertically through the HST blocks and that was a lot of starting and stopping!! So this time around I’m thinking of quilting them diagonally instead so I can start and end off the quilt.

Whenever I’m trying to figure out how to quilt, I’ll print out a copy of my EQ7 design (or a photo of the finished quilt top) and I simply draw on top of it. I might come up with several different ideas, and it can look like a hot mess. So it may take a few tries until I come up with something I like. This is the method I teach in my Craftsy class, The Quilter’s Path – if I can create a pathway for myself to follow, the quilting doesn’t seem so overwhelming, even on a larger quilt!

Possible Quilting Plan for HST Remix

Here’s the finished quilt top. The picture isn’t so great because I just took it with my iphone and it’s actually larger than my design wall, so it’s wrinkling up a bit at the bottom. That’s my next note to self – make quilts that are smaller than my 8′ x 7′ design wall, LOL!! Jason will help me photograph it when the quilt is finished, so I’ll leave it to him to help me figure out how to take prettier pictures!!

HST Finished Quilt Top

I’ll post again when I’m ready to baste the quilt. Since I don’t have a deadline to complete this quilt, it may be a few more weeks (or months) before I can get back to it, but I sure do enjoy sharing my process. Hopefully you’ve been able to pick up a tip or two!

Save

Save

Save

Save

Save

Save

Save

Save

My Next Craftsy Class – Win It Before You Can Buy It!

So I have three huge projects releasing this year. #1 is my third book which comes out next month. #2 is a new thing I’ve never done before which will be shown at fall market (sorry for the tease!), and #3 is my second Craftsy class which goes live next week – Startup Library: Quilting.

To say it’s been a busy year is a bit of an understatement, but now that most of the work has been done comes the fun part – I get to tell you all about it!

Startup Library Quilting

In class, I’ll teach you how to make the colorful Friendship Stars quilt from start to finish!

Startup Library: Quilting is different from the first class I released earlier this year (The Quilter’s Path) and it’s much more in-depth. Whereas the first class focused on machine quilting and included a free quilt pattern for you to make on your own, Startup Library: Quilting takes you step-by-step through the entire process of making a quilt, while working your way through the colorful Friendship Star quilt that I designed above. It also includes the free pattern plus bonus machine quilting diagrams.

The class is geared toward those who are just discovering quilt-making for the first time, or for other crafters who are adept in their own hobby, but want to give quilting a try.

Christa Quitls - Craftsy Class Startup Library Quilting

I love sharing tips and tricks that make piecing easier and more fun!

I was really excited to teach this class because I often lament the fact that I can’t teach everything in a one-day quilting workshop! This class covers all the basics: cutting, piecing, basting, quilting and binding in an in-depth set of 14 lessons.

Although aimed at beginners, I think it’s a great resource for more experienced quilters who want to freshen up their binding skills, or learn how to baste and prevent puckers while quilting! Plus I’ve thrown in tons of tips throughout the class including how and why I starch my fabrics, how to cut and piece efficiently, and many more.

Friendship Stars Quilt Assembly by Christa Watson from Startup Library Quilting

The pattern to make the quilt is included in the class!

When I filmed my first class, the number one feedback I got was how nice it was that students could actually watch me manipulate a “real” quilt under the machine. Well in this class, you’ll get to watch me perform every step of the process, on an even larger quilt! I compare it to watching someone cook rather than simply reading a recipe – you’ll be able to learn all the little tricks that I do, that I don’t even realize I’m doing!!

Machine Quilting with Christa on Craftsy

The class includes all the finishing steps – basting, quilting and binding.

Giveaway – Win it Before You Can Buy It!

I’ll chat a bit more about the class next week when it launches, but in the meantime, I want to award TWO (yes 2!!) lucky winners with a free copy of the class! To enter, just leave me a comment letting me know what’s the one aspect of quilting you need a little bit more practice with. Chances are, I’ve covered it in class! I’ll choose the winners next Monday morning, before the class goes live on the site.

Of course, you are all winners in my book!! So if you haven’t yet signed up for my first class, click here to get 50% off The Quilter’s Path. Both of my classes work nicely together, as well as standing on their own individually. And the best part is, you can watch them over and over again!

Finsihed Quilt - Startup Library Quilting - Craftsy class by Christa Watson

I just love cuddling up with a freshly made quilt – don’t you??


Save

Save

Save

Save

Save

Save

Save

Save

Save

Save

Save

What it’s Like to Judge a Quilt Show – My Experience at Vermont Quilt Festival

Now that I’m back and rested from my week at Vermont Quilt Festival, I thought I would tell you a little bit more about my experience judging the show with three other fabulous award winning quilters: Kathie Beltz, Kimberly Einmo, and David Taylor.

Judges at Vermont Quilt Festival

Kathie, Kimberly, Me and David – and no we didn’t match on purpose!!

This was my first time judging a large national show, although I’ve judged locally and online (checkout the Pantone Greenery 2017 winners here). I’ve also volunteered in the judging room of my local quilt guild’s show for many years, and I’m currently serving on the QuiltCon judging and jurying task force which is in the process of finalizing entry rules for next year’s show.

Each quilt show is unique with different rules, number of judges and methods, but they all have one thing in common: they are there to showcase a wide variety of quilts. Judges are instructed to give positive praise as well as helpful encouragement, and judges follow the rules given to them by the show.

Best Hand Quilting VQF

Best Hand Quilting – Cauterskill Rising by Janet Atkins of Athens, NY

VQF Judging

VQF is a non-juried show, which means that entries are selected by mailed in entry postmark, on a first-come first served basis until the number of quilts the show can accept has been met. (By contrast, a juried show means that you submit photos of your quilt and a small pool of jurors selects those that will be accepted for entry and judging.) For all quilt shows, judging is blind, which means that the judges have no idea who’s quilt they are judging. They may or may not have access to the name of the quilt, and the artists’ statement, but that’s it.

Best Machine Quilting VQF

Best Stationary Machine Quilting – Sapphires on Snow by Norma Ippolito of Chester, VT

For VQF, they hired 4 judges and each quilt (except for a couple of special categories) was judged by 3 of the four judges. So one person’s quilt was evaluated by judge A,B,C and another person’s quilt could have been examined by judge B, C, D etc. The entrants were not informed of which judges looked at their quilts, but each quilt received a total of 3 written judging sheets.

Example Judging Sheet for VQF

Example Judging Sheet for VQF

In this show, each quilt was given a numerical score with a total possible score of 100 points. Those that scored within a certain number were then giving a corresponding ribbon: 85-89 points – yellow (third place); 90-93 points – red (second place); 94-97 points – blue (first place); 98-100 points – purple (exceptional merit). What is unique about this show is that quilts were judged on their own merits rather than against other quilt. So this means that some categories could have multiple ribbons of the same color, while it’s possible that other categories may not receive any blues or purples, etc.

Best Mixed Techniques, VQF

Best Outside of USA – Flower Pots by Frances Firn Ceriko of Quebec, Canada

Each judge took a look at each quilt independently of the other judges, and 2 scribes were assigned to each judge to record their scores and comments. The entrant’s final score was based on the average of all 3 scores for the final point total. On the rare occasion that the three scores varied by more than 10 points from high to low, we judges got together – called a “conference” – to discuss why the variation occurred and then decided whether or not to adjust our scores. With hundreds of quilts to score and 4 judges with different voices, it was amazing how few times that happened!

Best Modern Quilt at VQF

Best Modern Quilt – It’s Universal by Anya Byam of Burlington, VT

Once we concluded judging each category, then it was time to move onto the special awards and “best of.” Some of the categories such as best applique, best use of theme, etc. were chosen based on their numerical score. Others such as best home machine quilting, best hand quilting, best piecing, etc. were chosen at our discretion. We were also able to choose 6-7 special additional awards and name those ourselves, such as  “best bling, best graphic quilt” etc. And of course each of us got to choose our own “judges’ choice” which was super fun – and hard to narrow down!

Best Vermont Quilt VQF

Best Vermont Quilt – Whiteout by Mara Novak, Norma Ippolito, Dona McKenzie, Carolyn Niesuchouski, and Lynn Way of Chester, VT

Throughout the judging, we each took notes on which quilts to consider for the special awards. Other than judges’ choice, we conferred with the other judges to make our final decision. It was quite surprising how many quilts overlapped on each of our lists.

Christa Watson judges choice at VQF

Christa’s Judges Choice – Going on a Trip II by G. Wong of Wellesley, MA

Then the best part was at the awards ceremony when each winners’ name was revealed. It felt like Christmas morning, eagerly anticipating the excitement of the recipients as their names were called. Many of them were actually there at the show and there’s nothing like seeing an excited quilter run up on stage to claim his/her award!

Overall, it was a fabulous experience, and I’d definitely do it again! Here’s a couple of general tips if you are considering entering your work at a local or national show:

Quilt Show Tips

  • Read the rules completely and do your best to put your quilt in the appropriate category.
  • Pay attention to details such as stray threads and fabric markings.
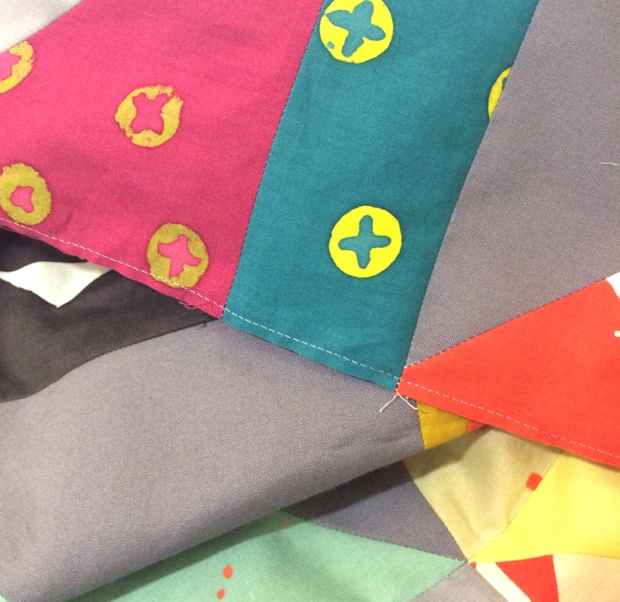
  • Stitch the corners of your binding closed (both sides), and take extra care to ensure the quilt hangs flat and straight.
  • Make sure the density of quilting is even across the entire quilt.

But above all, have fun with it and realize that although judges to their best to judge a quilt without bias, it’s human nature to be drawn to a quilt that is more in line with their style. So enter a variety of shows, knowing you will receive a variety of different opinions!

Best Scrap Quilt at VQF

Best Scrap Quilt – On the Fly by Timna Tarr of S. Hadley, MA

Quilt Show Venues

The number one question I get asked is how do I find out about which shows to enter? Start with your local friends, quilt shops and guilds and start asking around. There’s no one all-encompassing listing of shows to enter, but you can start by creating a list of shows you hear about and then get on their mailing lists so you’ll get notified when it’s time to enter. Then pay attention on social media to which shows other people are entering. You can google “quilt show competition entry” for lots of great info, too.

Here’s just a small list of shows I enter regularly, or like to encourage others to enter (in no particular order):

Feel free to add additional shows that you know of in the comments for all to see. If you have any questions about entering shows, feel free to ask them in the comments and I”ll be glad to answer them to the best of my abilities!

Save

Save

Save

Save

Save

Save

Save

Save

Save

Save

Lanterns Quilt – My Contribution to Rock Solid

Have you seen the awesome new collaborative book from Martingale/That Patchwork Place and Robert Kaufman? It’s called Rock Solid, featuring 13 different quilt designs made from Kona Solids. My contribution, Lanterns, made the cover, so I thought it would be fun to tell you a little bit more about my quilt. But first, look at all that yummy solid goodness on the cover!

Rock Solid Cover

My quilt, Lanterns, was made from one roll-up (jelly roll) of my Christa Watson designer palette for Robert Kaufman, along with one roll-up of Kona coal. Aren’t they a smashing combination??

Lanterns by Christa Watson

I came up with the design while I was playing around in EQ7 (Electric Quilt software) on my Mac. I’m always designing and playing around with shapes and colors. I’ll usually start with a seed of an idea and then it branches off into a design on its own. The fun thing about my process is that I usually end up with at least 4-5 different variations in different stages of completion. Whenever I’m ready to finalize a new design, I start by looking through my “virtual sketchbook” first!

EQ7 design sketch for lanterns

As you can see, my virtual EQ7 sketch is very similar to the final quilt. Usually when I’m playing around, I’ll randomly color the quilt but I don’t worry about whether or not the colors end up in the exact same spot as designed. Just using the same swatches of color is good enough for me to get an idea of how the quilt will look.

Lanterns Quilt Path step 1

Step 1 – Stitch in the Ditch

When it’s time to plan out the quilting, I’ll print off the EQ7 sketch on paper and then start drawing possible quilting ideas. I know that you can actually draw quilting designs in the program, but it’s usually just faster and easier for me to draw it out by hand. 🙂

Lanterns Quilt Path step 2

Step 2 – Echo the Ditch

I usually make a quilting plan for each quilt I make because it’s much faster to draw out several ideas on paper, than try to dive into the quilt with no plan and then not like the results! I finally put a name to this process of  “finding your path” when my first Craftsy class came out earlier this year.

Lanterns Quilt Path step 3

Step 3 – quilt one design in the background between the blocks.

For the actual quilting I use another process I call “divide and conquer” where I break up the quilting into different segments and just attack one segment at a time. I teach this in my in-person workshops and I love seeing other students get it and start applying it to their own quilts!

Lanterns Quilt Path step 4

Step 4 – quilt a contrasting design in the blocks.

As you can see, my drawing lines are pretty wonky, but that’s okay – it’s the actual stitching that counts! Of course, I draw the designs on paper with contrasting ink so I can see them, but when I do the actual quilting, I use a blending 50 wt. Aurifil cotton thread. For this quilt I used just two thread colors – yellow for the blocks and gray for the background (both from my Piece and Quilt Collection).

Machine Quilting Detail from Lanterns by Christa Watson

Machine quilting detail – I can quilt better than I can draw!

I sure had a great time making my solid colored quilt.
Click here to see all of the quilts from the book and grab your copy!

Giveaway!! If you’d like to win an e-copy of this book, just leave me a comment letting me know if you’ve ever made a completely solid quilt before. If so – how did you like it? I’ll choose a random winner at 6 PM Pacific Time on Saturday, June 17th

Save

Save

Save

Save

Save

Save

Save

Save

Save

Save

Save

Save

My Week at Craftsy – May 2017

It’s been a little bit quieter around here the last few weeks, because I’ve been hard at work getting ready to bring you some new exciting things coming this year! The first sneak peek I can share is that I just wrapped up filming on my next Craftsy class that will debut later this summer.

Christa on Set at Craftsy

This was my last day of filming and I got to cuddle up with the quilt I made on set once we finished. I’ll tell you more about this quilt when the class  is ready – it was so fun and fast to make!!

My new class is part of Craftsy’s debut “Startup Library” which consists of longer, in-depth courses across all of their major craft topics. They are aimed at beginners or those who may be involved in one craft, but want to try their hand at something new. I was so pleased to represent quilting!

Startup Library: Quilting with Christa Watson

I was there filming for a total of 5 days, and prior to that I worked with their great editorial team for months, honing in on the content that I’ll be presenting. In a nutshell, I got to focus on my favorite topic: teaching new students how to make a complete quilt from start to finish!

Christa with the Craftsy Crew

Christa and the Craftsy crew – we made a great team! And yes, there were smoothies….

On Set at Craftsy

My fabulous  content editor, Linda Permann helped me baste on camera. I wanted to make sure I included this important step, and I love that she got to cameo as my “helper!”

Returning to Craftsy for a second time was much less stressful because I knew a little bit more about what to expect this time around, such as getting my hair and makeup professionally done each day, and knowing that we would put in long hours of work which would get edited down to just a few minutes. I love the magic of television!!

Christa Watson and Angela Walters at Craftsy

Angela Walters and I took turns in the hot seat getting professionally made up each day by the lovely and talented Danica. This is was my favorite way to start each day!

While I was there, I got to mingle with a couple of others on set who were also filming their next projects. Angela Walters happened to be there at the beginning of the week, filming the next season of The Midnight Quilt Show.

Joshusa John Russell: Man About Cake

And Joshua John Russell from Make About Cake was there at the end of the week, gearing up for the next series of episodes for his popular YouTube show. Behind the scenes fact: I asked him how much cake he ate in each episode and he told me he never touches the stuff. True story!!

Now that I’ve written three books and filmed two classes, I can really appreciate the similarities and differences between both types of delivery. A book is a longer, slower sort of project, while a video class has a much quicker turnaround, but is also more intense. I’ve realized that I love creating both types of products, and I’m so grateful work with people who have a knack for editing and polishing my content so that I can look my best!

Stay tuned for more, and in the meantime, if you haven’t purchased my first class yet, you can click here to get 50% off of The Quilter’s Path. (Be sure to add the class to your cart to see the discount.)

The Quilter's Path by Christa Watson

Save

Save

Save

Save

Save

Save

Save

Machine Quilting Blog Hop – Week 4

Have you been following along with the Machine Quilting Blog Hop? Four friends, (Kristin, Jenny, Vicki and HollyAnne) are working their way through mine and Angela Walters’ book The Ultimate Guide to Machine Quilting. They are sharing their amazing practice week by week.

The Original Inspiration

This week they are practicing motifs from Fractured Squares in the book. In my version of the quilt shown below, I quilted straight and wavy lines using a walking foot for the whole quilt.

In Angela’s version, she free-motion quilted quilted fun, geometric motifs on her long arm.

Machine quilting practice

Now let’s take a look to see how the amazing blog hoppers interpreted these designs in their own way.

HollyAnne chose to quilt Angela’s chevron designs, but rather than doing them free motion, she used some of my tips for walking foot quilting. Don’t these look great?

Machine Quilting practice from HollyAnne

Click here to see more of HollyAnne’s practice samples.
She’s included a video on her progress, and has shown how to quilt some of these designs on a real quilt!

Kristin focused on the center motif in my version of Fractured Squares for one of her designs. She also embraced one of my other tips: if you want your machine quilting to stand out, use a highly contrasting thread. If you want it to blend in, use a matching thread.

Kristin Machine Quilting practice.

Be sure to check out Kristin’s blog post to see what she did with the wavy lines!

Vicki also chose to quilt the chevron motifs, and combined them with some of the other free-motion designs from the book. I really love it when others take these ideas and change them up to create new combinations.

Machine Quilting practic with Vicki

Click here to check out some of the other motifs Vicki tried, plus watch her video for more inspiration!

Finally, Jenny combined several of the designs in the same block and I really like how it turned out, don’t you?

Jenny's quilting practice

Click here to read more details of Jenny’s progress on her blog.

Be sure to continue to follow all 4 of them and watch their progress. I think they are doing such an amazing job, don’t you?

Ultimate Guide to Machine Quilting

Click here to pick up your copy of The Ultimate Guide to Machine Quilting, signed by me and Angela Walters.

Save

Save

And Sew it Begins – The Machine Quilting Blog Hop

Hi all – I’m just popping in to let you know the Machine Quilting Blog Hop kicks off today!
Here are all the links to the bloggers who have coordinated this fun event. Visit each of their blogs for the next 10 Mondays to see how they are learning to improve their skills using mine and Angela’s book, The Ultimate Guide to Machine Quilting:

Ultimate Guide to Machine Quilting

Click here to get the Ultimate Guide to Machine Quilting, signed by me and Angela.
As a special bonus, I’ll throw in a free pattern with your order of ANY of my books!

Quiltin’ Jenny is working her way through the book using some UFO’s to practice her skills. Check out her blog to see details of how she quilted this pretty piece:

Machin Quilting Practice

Head over to Vicki’s blog, My Creative Corner 3 to see a video on how she’s started quilting this lovely modern sampler, plus other tips she’s learned from the book. Do you recognize that improv star block in the upper right?

Machine Quilting Blog Hop Practice

HollyAnne gets bonus points for doing what I recommend in all my classes: sketch it, then stitch it! Be sure to check out her blog to see how well she turned her doodles into actual quilting!

Sketch It, Then Stitch It

Kristin is a natural when it comes to quilting. I love how she used high contrast thread so she can really see what’s she’s doing. Visit her blog to see the other motifs she’s practiced this week, plus some of her favorite tools:

Kristin's machine quilting practice

I’m really impressed with how well they are doing so far. They’ll be working their way through the book, one chapter at a time over the next 10 weeks. I’m excited to watch their progress!

If you are quilting along, you can post comments on any of their blogs and interact with them. You are also welcome to join my Facebook group:  Quilt with Christa and share your progress.

Happy quilting, friends!!

Save

Save

Save

Pre-Order Piece and Quilt with Precuts – My Next Book!

You guys! I wrote another book!! Piece and Quilt with Precuts will be published this August and I’m now taking pre-orders for signed copies through my site at shop.christaquilts.com.

Piece and Quilt with Precuts by Christa WatsonYou can see lots of sneak peeks here on the cover!! But wait, there’s more…

Now first things first. I’m totally happy for you to purchase the book where you like. However, when you purchase it directly from me, I earn more on each book since I’m the one selling them. Also, when you order from me, you’ll be guaranteed to get them as soon as they ship! The estimated shipping date is August 17, which just happens to be my birthday so that’s super exciting!! I’ll have a grand time, eating cake and signing your books! But don’t worry, I’ll be careful not to spill any, LOL!!

Sneak Peek of Piece and Quilt with Precuts
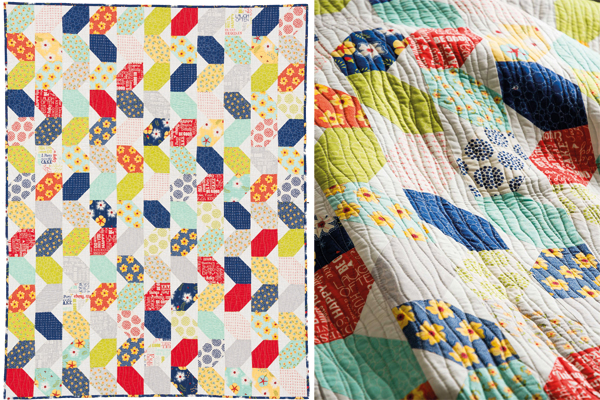
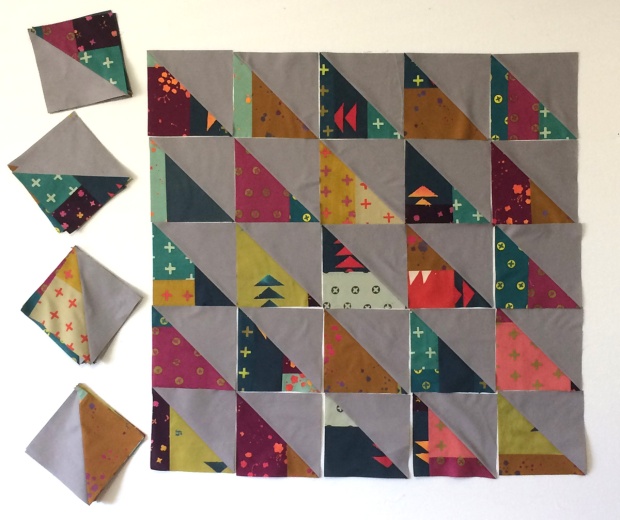
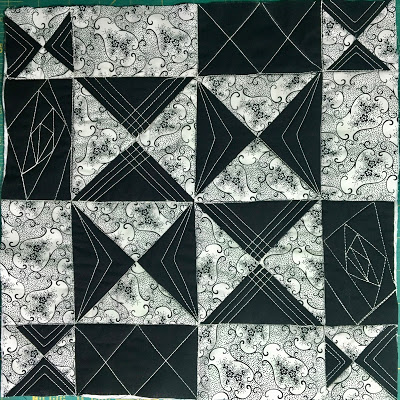
Sneak Peek #1 from Piece and Quilt with Precuts – are you excited?

So FYI, another reason I’m pushing preorders this time around is based on the demand of my last two books. When people preordered them on Amazon, there was a delay in customers getting them because Amazon had to first get them from the publisher, and then fulfill the orders.

Although the publisher knows how many to ship to Amazon, it always takes Amazon several days to process and they get a little bogged down. So when you pre-order your signed copy from me, it’s a win-win for us both and you don’t have to wait!! (Ahem.. plus my preorder price is actually lower than the current price on Amazon as of this writing…)

Sneak Peek of Piece and Quilt with Precuts
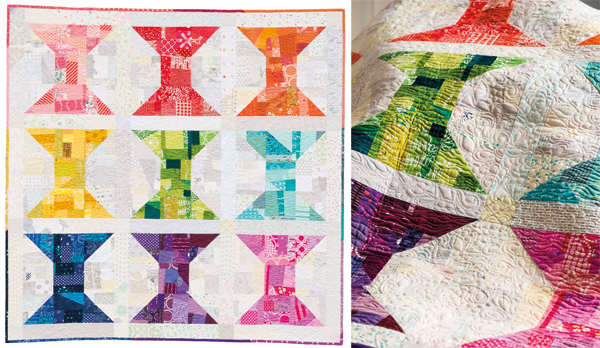
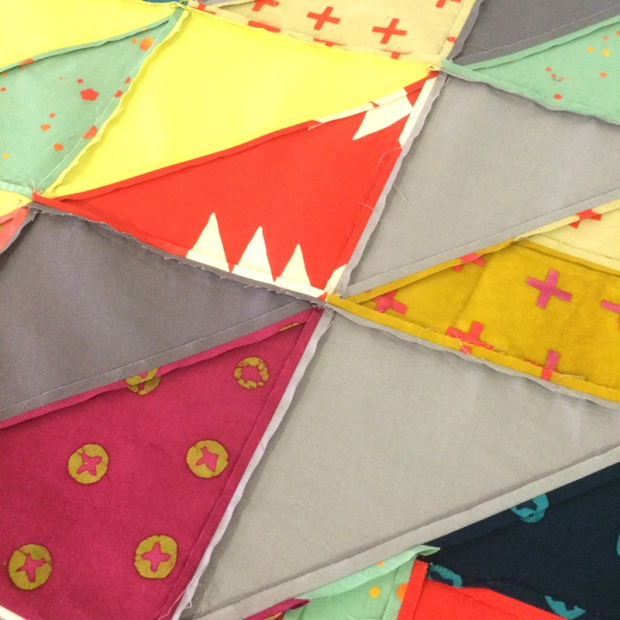
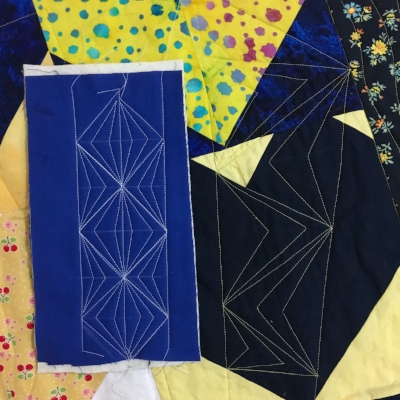
Sneak Peek #2  from Piece and Quilt with Precuts – one of my favorite motifs to quilt!!

And just to sweeten the deal, with every pre-order of Piece and Quilt with Precuts placed directly through me  before June 30th, I’m going to throw in a bonus pattern from my pattern shop for free!! When you check out, you can let me know which pattern you prefer in the comments. Or just leave it blank and I’ll surprise you. (For anyone who has already pre-ordered, you’ll get a free pattern too – but it will be a surprise!! I don’t want you to feel left out!!)

And did I mention the books will be personally signed by me??? (Wink wink!)

Sneak Peek #1 from Piece and Quilt with Precut

Sneak Peek #3 from Piece and Quilt with Precuts – Alison Glass fabric is so good, it’s in here twice!

Writing this book was such a joy but there’s a crazy story to go along with it. Just after I had turned in my manuscript for my first book, Machine Quilting with Style, I immediately came up with the idea for Piece and Quilt with Precuts – easy to piece patterns made from precuts along with step-by-step machine quilting instructions for each quilt.

So I set to work designing the patterns, fleshing out the details, and submitting a detailed proposal to the publisher. No sooner had I begun work on the book when the folks at Martingale contacted me and said “we love this book and want you to write it. However, can you wait just a bit? We have another idea we’d like you to do instead.” And then I proceeded to write my second book, The Ultimate Guide to Machine Quilting with Angela Walters.  So needless to say once that book was finished, it was time to get back to this one! So in essence, I wrote three books in 3 years, one right after another. Crazy huh??

Sneak Peek #1 from Piece and Quilt with Precuts

Sneak Peek #4 from Piece and Quilt with Precuts – Improv piecing AND quilting in the same quilt!!

Martingale was sooo awesome and supportive during this crazy time. They even offered to help me piece or bind the quilts if needed. But being the control freak that I am, I politely declined. I have this crazy obsession that when it comes to quilting, I must do all my own “stunts”, LOL!! For me, there’s something personally satisfying in taking ownership of every stitch. 🙂

So later on this summer once the book publishes, I’ll share details of all 11 quilts and 18 machine quilting motifs that are included in the book. I’ll also do a blog hop with some friends who will be trying out their own versions of some of the designs.

Sneak Peek #3 from Piece and Quilt with Precuts - Alison Glass fabric is so good, it's in here twice!

Sneak Peek #5 from Piece and Quilt with Precuts – Why quilt straight lines when you can go wavy?

One other thing I wanted to tell you that’s special about Piece and Quilt with Precuts is that the name is all mine. For those that don’t know, whenever you publish a book or magazine pattern, the editor reserves the right to re-name it, or work with you to come up with a name they think they will sell. The first 2 book names came straight from Martingale, and I think they did a fantastic job, since I was totally clueless as to what to choose LOL!! However, when writing this book, the name was all me, baby and I’m so proud that they chose to keep it!!

And now, I know what you are wondering…. have I already started on book #4?? No, not quite yet. I decided I needed a little breather before jumping into my next book idea or 3. And some other big opportunites have come my way that I’ll get to tell you about just after this book launches. So stay tuned, it’s never a dull moment around here!

Click here to preorder your copy of Piece and Quilt with Precuts.

As always, thanks for your support that allows me to do this crazy quilting thing full time!!

Save

Save

Save

Save

Save

Save

Save

Save

Save

Save

Save

Save

Save

The Ultimate Guide to Machine Quilting – 1 Year Anniversary!

Today is a very special day. It marks the one year anniversary of the book that changed my life!
Writing The Ultimate Guide to Machine Quilting with Angela Walters was not only an amazing experience, but it has led to so many more life changing events! Since the book came out, I’ve taught at QuiltCon, released my first Craftsy class, won awards on 3 quilts from the book, traveled around the country meeting so many of you, and I’ll be sharing a couple new huge things, later on this year.

If you’ll indulge me, I thought it would be fun to share a little yearbook recap of mine and Angela’s encounters since we first met at QuiltCon in 2013.

Christa Watson and Angela Walters

First time we met, in her class at QuiltCon in 2013. We bonded over machine quilting!

Angela Walters and Christa Watson, Spring 2015

Meeting up at Spring Quilt Market 2015 to finalize the details of our book. We had to be stealthy so no one would know what was going on!!

Christa Watson, Jennifer Keltner, Angela Walters

Jennifer Keltner, CVO of Martingale/That Patchwork Place met us at QuiltCon 2016 to give us the first copies of our book before it published that spring. We were so thrilled!!

Angela and Christa at Schoolhouse

Presenting our book to shop owners at Quilt Market in Spring 2016. It was a packed room!

We also collaborated with Patchwork Threads to produce T-Shirts to go along with the book!
Click here to get Angela’s shirt.
Click here to get my shirt.

To help promote the book, our publisher hosted meet and greets and quilting demos at both spring and fall market in 2016. Everyone we met was sooo kind!!

At fall market 2016. We planned out more book publicity and joked about how she had written 6 books by the time I had written 2. I don’t think I can keep up LOL!!

Angela Walters and Christa Watson

Angela paid a visit to my hometown guild in Jan 2017 which happened just after I had injured my arm. Although busy with teaching and lecturing, she made sure I was well taken care of!!

Angela Walters, Christa Watson, Tula Pink at QuiltCon 2017

Most fun photo bomb ever: during our QuiltCon 2017 booksigning, Tula Pink joined in the fun! After all, the “I wrote a  book with Angela” club is pretty small so far!

It’s been an amazing ride and neither one of us is ready to slow down yet! We’ve been very pleased with the reception that The Ultimate Guide to Machine Quilting has been getting. We each made the same 10 quilts from start to finish, showing different fabrics and quilting designs. So it’s really like 2 books in one. Whether you like to piece, or quilt, or both – we’ve got you covered!!

Ultimate Guide to Machine Quilting

Click here to view all of the quilts from The Ultimate Guide to Machine Quilting

Upcoming Machine Quilting Blog Hop Starts May 1

A fun group of bloggers recently hatched together an idea to do a 10 week-long blog hop, working their way through the book one chapter at a time.

The group consists of HollyAnne, Vicki, Kristin, and Jen. Starting May 1, you can follow them on their blogs (click each of their names) and follow the instagram hashtag #machinequiltingbloghop as they share their real world experiences while improving their machine quilting skills. The best part is, they’ve invited you to join their journey.

Christa HollyAnne Angela

HollyAnne telling us all about their plans for the Machine Quilting Blog Hop at QuiltCon 2017

So grab a signed copy of the book (if you don’t have it already) and join the fun. I I can’t wait to see everyone’s progress! You can check out HollyAnne’s blog here for more complete info.

One more thing, if you’ve made a quilt from the book, or if you’ve tried some of the quilting motifs on your own quilts, please share pics with me in my Facebook Group: Quilt with Christa. I’d love to see how you are doing!

Now it’s time to go put the finishing touches on my next book. Watch for pre-order details about that later this week!!

Save

Save

Save

Save

Save

Save

Save

Save

Save

Save

Save

Save

Save

Quilt Las Vegas 2017 – A Recap and a New Milestone

Quilt Las Vegas is the annual quilt show put on by my local traditional guild here in Las Vegas, Desert Quilters of Nevada. I’ve been a member of the guild for over 20 years, and I’ve been entering their show for nearly as long. It’s the show that gave me the confidence to start competing nationally. I’ve also learned a lot about what goes on in the judging room as a volunteer. As my quilting skills increased, it’s been reflected in the number of times I’ve gotten a ribbon. However, the show this weekend was a new milestone for me. It’s the first time that everything I entered received a ribbon.

Machine Quilting demo by Christa Watson

One of the show highlights for me was getting to share a machine quilting demo and book signing for one of the local quilt shops vending at the show, Sew Yeah Quilting.

Most of the quilts I make nowadays are usually for a book, magazine, or individual pattern, so I think it’s really helped me focus on doing the best quality work I can. Today, I thought I’d share pics of my quilts hanging in the show, include the judges’ comments, and let you know where the patterns can be found, if you are inspired to make on of your own. Plus there are a couple more that my friends made that I thought were super cool. Enjoy the mini-show!

My Quilts in the Show

Churn Dash Slide from I Love Churn Dashes

Churn Dash Slide, 1st Place, Pieced Large – Single Entrant Category

 I was actually surprised that this one got a ribbon, let alone first place because the quilting on it is really simple. It’s just an allover swirl design. But the the fabrics really make it and I had a fun time taking a traditional design and freshening it up a bit.

Machine Quilting Detail by Christa Watson

Machine Quilting Detail on Churn Dash Slide

Here’s what the judge had to say about Churn Dash Slide:

  • Excellent piecing technique
  • Well balanced tension in machine quilting
  • Appropriate overall quilting design
  • Binding is securely and neatly attached
  • A crisp, clean and fresh approach to a traditional quilt pattern

The pattern for Churn Dash Slide can be found in  I Love Churn Dashes, a compilation published by Martingale/That Patchwork Place (my awesome publisher). I enjoy submitting ideas for their books where they usually feature 14-16 different designers’ patterns all in one collection.

A block from my quilt made the cover of I Love Churn Dashes – so fun!!

Quatrefoil Applique by Christa Watson

Quatrefoil Applique, 1st Place Applique

I made Quatrefoil Applique as a machine quilting sampler to show what some of my favorite quilting motifs would look like stitched out. I’m actually teaching how to make this quilt for the guild’s workshop this May, so it was cool to get a ribbon on it so the students could see it in the show. 🙂

Here’s what the judge had to say about Quatrefoil Applique:

  • Piecing and applique are neatly and precisely executed
  • Excellent quilting technique and multiple patterns elevate simple piecing and applique to a higher level
  • Very good binding technique
  • Well balanced colors and values

The patterns and machine quilting instructions for Quatrefoil Applique, and Swirling Butterflies shown below, are both included in the book I wrote with Angela Walters, The Ultimate Guide to Machine Quilting. I’m extra proud of that book now that some of the quilts are getting a bit more bling! (Last year another quilt from the book, Plumb Lines, got a ribbon at HMQS.)

The Ultimate Guide to Machine Quilting by Christa Watson and Angela Walters

Signed copies of this book are available from me, with both of our signatures.

Swirling Butterflies by Christa Watson

Swirling Butterflies, 2nd Place Open Category (Wholecloth, misc., etc.)

Swirling Butterflies is the only wholecloth quilt I’ve ever made, and it was pretty risky using such a high contrasting thread for the butterflies. But it also pushed me technically, and was super fun and meditative to quilt! The lighting at the show wasn’t super great, so you can see a better detailed closeup of the quilting below. I explored one of my favorite techniques – free motion improv – in the background areas of this quilt.

Detail free-motion_quilting

Free motion improv quilting detail.

Here’s what the judge had to say about Swirling Butterflies:

  • Very good binding technique
  • Excellent machine quilting with precise backtracking
  • An elegant presentation

Fractured Puzzle by Christa Watson

Fractured Puzzle, 2nd Place Modern

This is the second time Fractured Puzzle has been shown in a show and the second 2nd place ribbon! (It got a 2nd place in modern last year at MQX). I love how the red ribbon matches the quilt!

Here’s what the judge had to say about Fractured Puzzle:

  • Very good piecing technique
  • Well balanced machine tension but strive for consistently even stitch length
  • Quilting motifs fill the spaces evenly
  • Binding is securely and neatly applied
  • Strong visual impact

Fractured puzzle is my ultra modern take on the free Puzzle Box quilt pattern I offer for newsletter subscribers. I really pushed myself and went way out of the box by cutting it up and sewing it back together again. But it was a really fun exercise in “what if…??”

Puzzle Box Pattern

Remember – you can always take a pattern and make it your own!

Other Favorite Quilts from the Show

I was bummed that I had very little time to spend at the show, due to other obligations at the same time, but I was thrilled to see ribbons on many of my friends’ quilts. These two quilts really resonated with me:

Vicki Ruebel Machine Quilting

Argyle Gone Wild by Vicki Ruebel of Orchid Owl Quilts. She won 1st Place Pieced Small, AND Best Machine Quilting. I was so excited and proud of her! Click here to see more details of the quilting and making of this quilt. She does amazing work!

Viva Las Vegas by Melissa Curley

My friend Melissa Curley won 1st place Show Theme for her quilt “Lucky.” She names all of her quilts with first names which I think is pretty cool. Lucky was the name of Elvis’ character in the movie Viva Las Vegas. I love how she showed the iconic neon of Vegas, mixed with the more subtle side of “Sin City”

Machine quilting students

In addition to catching up with local quilting friends, it was a thrill to run into some former local students while I was demoing. Kathy and Ofelia shown above were some of my first students way back in 1999. It was fun to connect with them again at the show, and know that they are still prolific quilters! I told them thanks for being great students that allowed me to learn how to become an effective teacher. 🙂

Now it’s time to go make (and enter) more quilts!

Save

Save

Save

Save

Save

Save

Save

Save

Save

Save

Save

Save

Save

Save