The Early Days… My First Quilt!

Today I have to blame Kristy Daum from St. Louis Folk Victorian for inspiring me to write this. She wrote a post awhile back showing her first quilt from back in 1994. Well, here’s mine in all it’s flannel and polyester glory:

My First Quilt

My First Quilt – It was love at first stitch!

I also started quilting in ’94 and finished my first full-size quilt in ’95 at the ripe young age of 22 (feel free to do the math now). I was so glad to be sewing that I didn’t even care how the end result turned out – it was just a thrill to create. I remember making each 9 patch block, one at a time and I felt so proud of myself each time a new one came off the machine.

deer blockTrends cycle every 20 years right? Deer fabrics have been hot again this year, LOL!!

I used a bunch of flannels I got for cheap at the discount store and knew nothing about seam allowances. I wanted 4″ squares so I cut a bunch of 4″ squares, not realizing they’d shrink up after sewing, LOL!

tied blocks

I was able to “hide” the seam intersections by tying at the corners. I don’t know what possessed me to think that sports fabric & flowers went together??

I hadn’t tried machine quilting yet so I just tied it together with yarn using a flannel sheet for the backing. From the get-go I was determined to finish my quilts myself! I had no clue how to bind so I just folded over the back to the front and sewed it down with WHITE thread and felt a grand sense of accomplishment.

quilt labelI put the label on the back at the TOP of the quilt, even! My title was very original, too – “Jason’s Quilt.” It’s worn and faded over time, but every stitch was made with love.

I gave this first (ghastly) quilt to my husband, and he’s been a great supporter of my hobby ever since. We still use the quilt to this day and it’s held up pretty well. 🙂

When did you make your first quilt? I’d love to hear all about it!

Quilt Stats:

  • Size: 62″ x 82″
  • Block Design: 10 1/2″ nine-patches set 6 x 8
  • Materials: cotton flannel, polyester flannel, polyester batting, flannel sheet for the back
  • Finishing touches: tied with yarn, machine binding

How to Make Quilting Your Business #11 – Getting Published

Today’s business of quilting topic, getting published, is probably one of the more “glamorous” aspects of making quilting your business. It’s the goal of many quilting bloggers and can be exciting for both the amateur and professional quilter. I’ve been published several times in magazines, and I’m currently working on a book with Martingale, so I will be happy to share a few of my experiences.

christa_quiltcon_chaming_chevronsAt QuiltCon in 2013 with Charming Chevrons – the start of my modern quilting career. And yes – I do own more than one shirt, this one just happens to be my favorite!

Background Inspiration

I came back from QuiltCon in 2013 on fire and ready to take on the modern quilting world! Although it has always been one of my goals to write about and publish my work, it wasn’t until I was inspired by the success of other modern quilters, that I actually took the necessary steps to make my goals become a reality. This is what I constantly ask myself, “What actions would you take today if you weren’t afraid of rejection or failure?”

Trust me, for every success I’ve shared publicly, there are plenty of failures and mishaps along the way! I think the key to long-lasting success is to get up, dust yourself off, and keep going. It’s worked for me so far. 🙂

So, how do you go about getting published?

Honestly, it’s as easy (or as hard) as contacting the publishing company and finding out what their submissions guidelines are, then following the steps. You need to come up with a good idea, be flexible, work well with deadlines, and be patient!

Quilty Chevrons
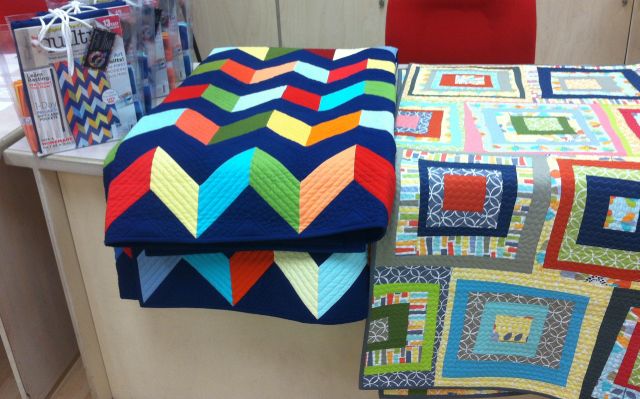
Colorful Chevrons, inspired by my original quilt, Charming Chevrons

When I submitted my first design idea to Quilty magazine, I included a picture of my Charming Chevrons quilt just to show an example of my work. Well, guess what – they weren’t interested in my design submission, but they loved the chevron quilt! So I reworked it into a larger size with a fresh color scheme, and it ended up making the cover. All because I was willing to adapt. 🙂

Did I Say Be Patient?

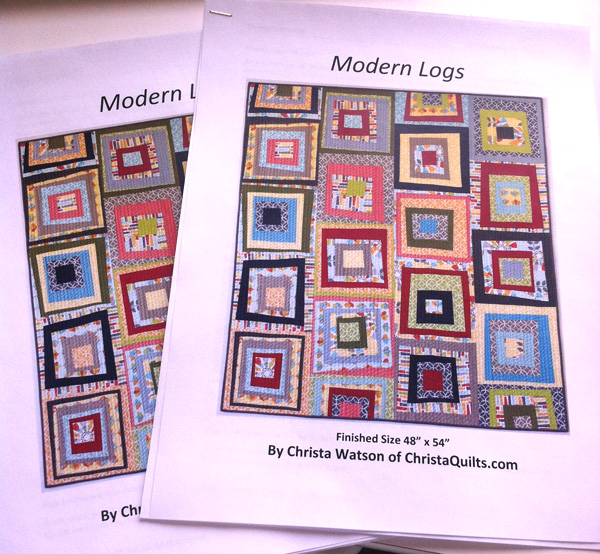
It took me 6 months to narrow my focus and come up with a really good book proposal to submit to Martingale. Then it took another 5 months to get approval and receive the book contract. It won’t even be published until next summer, so no spoilers yet – you’ll just have to wait!

For the magazine, I first contacted them in March of 2013, received the contract in April, sent the quilt off in June, and it was published in the November 2013 issue. So yes, patience is a virtue when comes to writing a book or a magazine pattern. And my best advice? Don’t send anything without a contract. I’m speaking from experience here. 🙂

What About the Money?

The amount of payment and ownership rights vary depending on each publishing company and the length of the article/book/pattern/topic. Magazines and most compilations usually pay each contributor a one-time fee whereas book royalties are usually tied to the volume of sales. Also, some fabric companies may provide free fabrics for the projects in exchange for a mention which I think is cool.

Another perk I have discovered, is that the more I get published, the more my name gets out there, leading to further opportunities to teach, write and design. I have to admit, it is quite the ego boost to see my name in print. That’s worth it’s weight in gold, right?

herrinbone_quiltingGetting my name out there led to making my Herringbone quilt on commission for Camelot Fabrics, plus a pattern designing gig, teaching invitations, and extra publicity!

I also love the fact that once my book is published, I’ll be able to teach from it and have plenty of show and tell, not to mention at least a year’s worth of quilt show entries. 🙂

Some authors choose to go the self-publishing route, but for me that just seems like too much work. I’d rather let the professionals handle the layout, editing and distribution, so I can spend my time on the fun parts – pattern writing and quilt-making! (If you are interested in writing and publishing your own stand-alone patterns, I covered that in an earlier topic here.)

A Winning Submission

If you are wanting to get published, I would recommend starting with a magazine. There are so many of them out there, and one of them is bound to like your original design! One word of caution though – it’s bad form to submit the same idea to several different magazines at the same time, so don’t do it!

201406010_eq_artist

I design all of my quilts in EQ7, both personally and professionally.

Most designers use some sort of design software like EQ7, or Adobe Illustrator, but hand drawn sketches are also usually okay, too. Magazines prefer to start with drawings and sketches rather than actual physical quilts. If it’s your first submission, it’s great idea if you can include a picture of a finished sample of your work. Try to brainstorm a couple of different designs and match up each idea with the magazine that seems like it would be the best fit. For example, you wouldn’t submit a traditional quilt design to a modern magazine, etc. Then send off your idea(s) and forget about them for awhile.

20140610_martingaleI recently asked Karen Burns, the acquisitions editor for Martingale,  her best advice on writing a winning book proposal. Here’s what she had to say:

“Put a lot of thought into the ‘hook’ of the book, and the designs. Having 14-16 pretty quilts alone doesn’t work anymore. What makes them special? What makes people want to buy your book? What are you teaching them that they just “need” to know? Is there a technique that is used that is new and exciting? What would make the consumer want/need this book? What is different about the book, than what is out there?

 “Contact the acquisitions editor of the publisher, and work with them.  The acquisitions editors are always happy to help, encourage, and coach. Also, it is important to realize that writing a book takes a lot of work, but the end result, (a great book!) is totally worth it.”

Thanks Karen! Wise words indeed. I hope this encourages you to jump in and give it a try if you want to get published. The worst they can do is say no, and they may just say yes. 🙂

When I was doing research and talking to others about their publishing experiences, quilting instructor and author Deb Karasik said to me, “writing a book will change your life!” That statement both encourages me and scares me at the same time. But I’ve jumped on the bandwagon now, and I have a feeling it’s going to be a wild ride!

Additional Reading

Check out these additional informative blog posts about getting published:

Insider Tips on Magazine Publishing by Abby Glassenberg

Is it Worth it to Write a Craft Book? by Diane Gilleland

Click here for the start of this series.

Listen to My Interview Today on American Patchwork and Quilting Radio

Today’s the day!

I will interviewed live on Pat Sloan’s American Patchwork and Quilting Radio podcast today at 4PM Eastern Time. Wish me luck and be sure to tune in! 🙂

APQR_2013

Click here to listen live at 4PM Eastern time. It should be fun! You can also listen to past episodes of the show and subscribe via Itunes (search American Patchwork & Quilting).

Fun Features – Sew Mama Sew, NQA, American Patchwork & Quilting Radio

It’s been a whirlwind couple of weeks as I’ve been preparing not only more quilts for publication and more samples for teaching, but I’ve been invited to share a little bit more about myself and my quilts in a few different places. Here’s a list of what’s currently happening along with what’s coming up. 🙂

20140601_favorite_quilt

This week my Modern Logs quilt was featured on Sew Mama Sew as part of their month-long series, “My Favorite Quilt” curated by Jessica Skultety from Quilty Habit. And yes, for those of you who asked, I do have the pattern available here.

patternModern Logs is now available as a PDF pattern through my Craftsy store.

Jessica asked me a series of really thought-provoking questions about my quilt which was fun to think about and answer. Plus she wrote a really nice intro which made me blush (thank goodness you can’t see that online)! My favorite part of the whole series, in addition to the fabulous quilts that are being shared, is the chance for you to participate!

Sew Mama Sew is running a month-long linkup where you can share your favorite quilts, too! Just write a new blog post and answer the same set of questions I did, then click here and scroll to the end of the page to add your link. There’s even a giveaway as part of the series, so how cool is that?

20150615_naqI’m also in the member spotlight on the National Quilting Association’s website for the entire month of June. It includes a little background of my quilting, a picture (that’s a little too large for my tastes, LOL!!), as well as 17 pictures of my recent finishes, all done in the last couple of years. So I invite you to pop on over and take a look. Most of you who have followed me for awhile may have seen all or most of the quilts already, but it was fun to share them all in one place. 🙂

APQR_2013

And finally – pinch me please – the always lovely and talented Pat Sloan has invited me to be a guest on her podcast, American Patchwork and Quilting Radio, next Monday June 23rd at 4PM Eastern Time. We will be chatting about quilting (of course) and go a little more indepth into how my own quilting has changed over time. It should be fun!

Click here to listen to the podcast live as it happens.

You can also listen to past episodes of the show or subscribe via Itunes.

Christa’s Soap Box – I Love Teaching Quilting!

I love teaching quilting. I mean, I really, really love it! I just wrapped up a couple of modern quilting classes last week at Quiltique and I am feeling such a sense of satisfaction that teaching is a regular part of my life once again.

Quiltique_preview_dayA couple of my samples were on display during class preview day at Quiltique.

I first began teaching quilting about 17 years ago when my oldest was just 7 months old! My mom, whom I taught to quilt, had walked into a local shop at the time (which is now out of business) and the owner asked her if she had any suggestions for quilting teachers. Mom recommended me and the rest as they say is history. 🙂

Mom and MeLike mother, like daughter – we both love to sew!

The fact that I could get paid for sharing something that I would gladly do for free was just icing on the cake! I developed a series of beginner’s basics classes and outlined methods for teaching how to make an entire quilt from start to finish. As the local shop was beginning to go out of business, I moved my teaching to a nearby Joann’s where I quickly developed a loyal following.

I would get a new set of students each summer and most of them would take classes from me all year long until I cycled through my entire curriculum. It was such fun to see them not only grow as quilters, but to watch as they developed friendships with other students in the class. They were with me through the births of my last 2 children and we would joke about how I liked to sew barefoot (and pregnant).

jenna_quilt

My daughter’s baby quilt, made by former students in 2003. She still uses it!

I had just started my online fabric shop in 2003 right before I had my daughter (who is now nearly 11) and I knew then that I would have to take a break from regular weekly teaching. On the last night of class, my students surprised with an impromptu baby shower complete with a quilt for my daughter. I was so touched it made me cry. No one had ever made me a quilt before!

Over the last 11 years I’ve kept up my teaching skills by sharing with friends, developing tutorials online, and offering occasional classes through my guild and at retreats. However, I’ve missed the interaction that regularly scheduled classes affords. Now that I’m back, it feels like old times! 🙂

log_cabinsA former student of mine, Ofelia with her first quilt – a traditional log cabin!

A highlight of my most recent class is that one of my original students (whom I hadn’t seen in about 14 years) came to join us. When she heard I was teaching again, she quickly signed up for my Modern Logs class. Just for fun, she brought in her first quilt that I had taught her to make all those years ago. And guess what – it was a log cabin. 🙂

sara_fussy_logsSara is showing off her fussy cut centers – aren’t they just adorable?

Although my methods have changed over the years along with my style, what hasn’t changed is the sense of satisfaction I get from interacting with my students. Seeing the smiles on their faces, and feeling their pride with a job well done is just priceless.

I don’t plan to take a break from teaching anytime soon. In fact, I’m expanding my reach and have already started booking traveling gigs for next year. It’s just too much fun to pass up! (And for those of you that are interested, I do sell my Modern Logs pattern here.)

modern_logs_student

Barb is excited to baste and quilt her version of Modern Logs.

What’s the most fun class you’ve ever taken?

My Son, The Aspiring Anime Artist

We love to encourage creativity around here. So it makes me happy when I see my kids exploring their artistic sides. My 14 year old son has really taken to the Japanese style of cartoon drawing, usually called Manga or Anime.

20140603_anime_1It’s fun to see him sketch and watch the pictures develop as he draws. He sketches with pencil, draws the outline in ink, then colors and shades with professional markers.

It started off with his fascination with Yugioh, an animated Japanese cartoon and card game. He would make up his own cards and draw detailed diagrams of the game playing equipment.

Several months ago, he got a drawing book from the craft store and he’s been going to town with his drawings ever since, enjoying the coloring and shading just as much as sketching the outlines of the characters. He’s studied proportions in detail and isn’t afraid to draw a line and erase, over and over again, until he gets it just right.

anime_2Ryan’s Drawing of a Character from Legend of Zelda

Being the supportive mom that I am, I wanted to incorporate some of his favorite things into a quilt I’m making for him. I’ve recently finished a quilt top that matches the colors in his bedroom. The double chevron design is purely for my own aesthetic pleasure.

double_chevrons_topI then let him pick out the backing, which I’m sure will get displayed more than the front! The sheet we are using isn’t quite wide enough so I will add some extra fabric to the sides.

double_chevrons_backingAs I have been working on his quilt, he has been improving his drawing skills and learning all about the best tools and supplies to use for the job (wonder where he gets that from?)

He has a healthy collection of Copic markers, which are not cheap! I’ve been very proud of him though – he works for us, and uses the money he earns to buy his own supplies.

markersEach hobby has its own set of tools and supplies!

In this drawing, I love how he added a swatch chart, so he knows which colors he’s using when adding ink to his drawings.

anime_1

I really like this one, too. It’s a character from another show he watches (in Japanese with English subtitles), called Naruto. Just look at all that detail and expression! I really don’t mind that he enjoys TV and plays video games for inspiration (in moderation of course), especially when it leads to such creativity!

anime_3He’s very good at adding details and shading to make the characters really come alive. He’s also becoming fascinated with Japanese culture and even longs to go there on his church mission when he gets older (though of course you don’t really get to pick).

anime_4A current WIP – we all have them!

Although he’s never really said he wants to do this as a career when he gets older, he’s always had a knack for drawing detailed diagrams and schematics, and he’s really good with math. So who knows – maybe he has a future as an architect or an engineer some day. Whatever path he chooses, we know from experience that the joy is in the journey. 🙂


Sew and Tell – A Class with J. Michelle Watts

A few weeks ago, my traditional guild brought in guest speaker J. Michelle Watts to lecture and present a series of classes. I was fortunate enough to take a super fun day-long applique class with her.

20140601_michelle_1Quilting students watching J. Michelle Watts’ machine applique demo.

Michelle’s focus is on machine applique with a southwest theme and it was very interesting to me how many Southwest designs have a little bit of a geometric modern vibe to them.

20140601_michelle_2Some of Michelle’s beautiful class samples.

As any well prepared teacher would do, Michelle offered kits available for our class and many of the students took her up on that offer. The medallion piece was a great exercise to practice stitching angular shapes, sharp points, and tight curves.

20140601_michelle_3My friend Cory stitched her practice sample on a striking black background.

Of course, I had to go my own way and try something completely different! 🙂 I may not actually do anything with this piece, but it was fun to try out the teacher’s methods and pick up a few tips and tricks along the way.

20140601_michelle_4My version – it’s such fun to play!

No matter how much I think I know about a particular subject, I always learn something new whenever I take a class. The best tip I picked up from Michelle’s class was to use a dotted outline when tracing shapes for fusible applique. It’s much quicker than drawing the whole line!

20140601_michelle_5Drawing dotted lines rather than a full outline of the shape is much faster!

Thanks, Michelle, for a great day – and a fun class!


Sew and Tell Fabric Trade Show – Like a “Mini” Quilt Market

I’m not attending Spring Quilt Market this weekend like many of my peers. I had too many other commitments this time around. However, I do want to share a few “behind-the-scenes” pictures of a recent fabric show I attended locally. One of the things I love about living in Las Vegas (other than the fabulous weather) is the fact that we are a destination city, so smaller, regional fabric trade shows come here a couple of times a year, in between the big ones.

20140510_trade1One of the most fun thing about attending trade shows, (besides the free lunch) is running into friends of mine who do what I do. From left to right are Linda from The Stitch Sanctuary, Stacy from Farm Road Quilts, and me. (Jason is kindly taking the picture!)

We swap stories and compare notes about which vendors we are going to see and who has the best stuff. Rather than viewing each other as competition, we network and encourage each other to succeed. Besides, there’s plenty of room for all of us in this business! 🙂

Christa Meeting with Michael Miller Sales Rep

 This picture is actually from the previous local trade show, but I forgot to get some “action shots” this time around, LOL!!

Meeting with my fabric sales reps in person gives me a chance to not only check out the upcoming lines, it also allows me to get to know them on a more personal basis. Now that our reps all know that we are dealing with precuts exclusively, they can tailor their appointments to show me what I’m truly interested in.

20140510_tradeqtSeeing the precuts in person, rather than simply ordering them from our vendors online allows me to get a really good sense of the colors and see how big each bundle is. Plus, it’s always nice to touch them and play with the pretty ribbons!

 20140510_trade_modern_quilt

The vendor booths also feature tons of scrumptious eye candy – lots of  fabulous quilts to show off their latest fabrics and patterns. This quilt was in the EE Schenck booth (they distribute Maywood Studio fabrics, among others). I don’t know which line it was featuring or what pattern, but I sure thought it was striking, and I love the quilting!

20140510_trade_patternFabric companies also include plenty of inspiration images to go along with their fabrics and many of them will direct their customers (with stores like me) to their free patterns to help promote the new lines. Now that I’m getting to know more quilt designers, it was fun to see this pattern by my friend Kristy featured as I was shopping Windham’s fabrics.

If you ever get a chance to go to a fabric trade show, whether for your own business or as the guest of another company, it sure is a fun and inspiring place to be! I will be eagerly watching many of the blogs I follow over the next week or so for their spring quilt market reports. It will almost be like being there. 🙂


Modern Quilts at HMQS 2014

This weekend I got a chance to attend the Home Machine Quilting Show in Sandy, Utah (near SLC). I attended this particular show for the first time last year and was excited to return again this year. Although I didn’t take any classes, and there was a little too much “bling” for my tastes, they had a very well-represented modern category.

hmqs logoIn fact, this was probably the best selection of modern quilts I’ve seen in the last few shows I’ve attended. I think more and more people are starting to “get” modern quilting, which I, for one, am thrilled about! I present these beauties now for your viewing pleasure. 🙂

modern_1st_maryModern Dots with a Passion, 1st Place Modern by Mary Buckeyene, Las Vegas, NV

Mary is a member of our local traditional guild. I was thrilled to see a ribbon hanging on her fabulous quilt, and pleased to see she’s made the modern switch!

modern_2nd_lindaModern Mojo 2nd Place Modern by Linda Thielfolt, Troy, MI

If I remember correctly, this quilt also got a ribbon at MQX in 2013. Nicely done, Linda! 🙂

modern_3rd_candaceFloating on a Lazy River, 3rd Place Modern by Candace West, Floral City, FL

It was fun to see a ribbon on this quilt. I remember seeing it hanging at Road to Ca earlier this year (ribbonless). It just goes to show that different judges have different tastes, so if you enter your quilts into a variety of shows, who knows – you just may hit the jackpot!

dandelion_clockDandelion Clock by Linda Hungerford, Honorable Mention, Conventional Machine

I just love this cheery quilt! It was made by my friend Linda and it just goes to show that turnabout is fair play. Linda photographed my quilt at Paducah for me a few weeks ago, and I was happy to return the favor at this show where she was unable to attend!

string_of_pearlsMy String of Pearls quilt at HMQS. I love entering my quilts in shows because the most fun part of finishing a quilt, is the sharing that comes after!

The rest of the quilts below earn my seal of approval for “awesomeness in modern quilting.” Most of the modern quilts at HMQS were pieced and quilted by the same person which thrills me to no end! Yes, you really can make show quality quilts on your own. 🙂

threes_a_charmThree’s a Charm by Sue Mariotti, Seattle, WA

zephyrVarigated by Paige Alexander, Easley, SC (pattern design by Debbie Grifka)

love_prayLove, Pray, Hope, Give by Kristin Barrus, Lehi, UT

greenTiki by Mary Eldredge, Murray, UT

gray_starsGray Stars by Corinna Weir, Salt Lake City, UT

alphabetModern Alphabet by Gerrie Thompson, Happy Valley, OR

green_trianglesSpring Frenzy by DeAnn Oliekan, Kaysville, UT

I hope you enjoyed the virtual show!

Herringbone Finish and Tips for Better Binding

Today I get to share the big reveal: Herringbone is finished!

herringbone_finishedHerringbone, 63″ x 73″ designed and made by Christa Watson for Camelot Fabrics

You can click the links below to read my WIP process posts as I worked on this quilt:

Herringbone took a total of 25 hours to complete (13 hours to cut, sew and press the top; 12 hours to baste, quilt and bind by hand.)

I wanted to share a few tips for better binding that I practiced while finishing this quilt:

binding_cornerWhen attaching the binding, I marked my stopping point with a water soluble pen so that I know exactly where to stop stitching at the corners. Whenever I “fudge” this part of the process, it always gives me problems.

binding_ironAfter the binding is attached by machine, I will iron it away from the quilt so that it’s easier to pull over to the back for hand sewing. (By the way, this is another reason I prefer to quilt with cotton thread and natural fiber batting, so I don’t have to worry about melting anything with the iron!)

binding_clips1When I get to the corners, I fold them so that they match up evenly and use Clover Wonder Clips to secure the binding in place. I fold over the corners opposite from how they are folded on the front to reduce bulk. I also prefer to add clips so that the clear side of the clip is showing on the back. It seems less bumpy that way.

binding_clips2I use a liberal amount of clips and space them pretty close together. So far, I’ve invested in two 100 clip packs and am ready to order another set. I prefer to clip all the way around the perimeter of my quilt so that I can sew continuously without having to adjust the clips!

For more step by step pictures, click here for my indepth tutorial on binding by hand.

Herringbone is on it’s way to the Camelot Fabrics quilt booth at Spring Market. I won’t be there, so if any of you go – be sure to snap a picture of it for me, will you?