New to my blog?
Be sure to sign up for my email newsletter and get a free PDF pattern to make my Puzzle Box Quilt shown at the end of this post.
INtroduction
I’m excited to share my Log Cabin Wreath mini with you today! I wrote my tutorial so it can be sewn as a Christmas wall-hanging, but you can make it into a pillow, a table topper, or piece more blocks for a larger quilt.

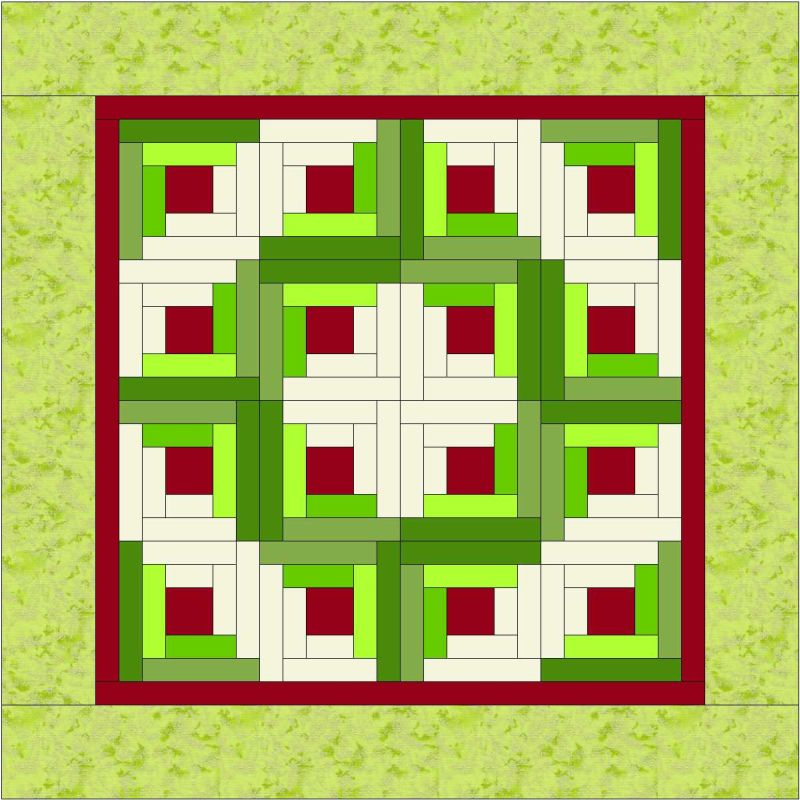
Log Cabin Wreath, by Christa Watson 18″ x 18″
The blocks are pretty small, finishing at 3″ finished so this is a great exercise in sewing tiny pieces for minis. 🙂 If you choose to make one for yourself, please share pictures of your progress at Christa’s Quilt Along on flickr.
Step 1 – Gather Your Supplies
- 1/2 yard red for log centers, borders and binding
- 1/4 yard cream for light half of the logs
- 1/4 yard total assorted green scraps for dark half of the logs
- 1/4 yard of green for outer border
- 20″ square of batting
- 20″ square of fabric for quilt backing
- cotton thread to match fabrics
- basic sewing supplies and sewing machine
Step 2 – Cutting the Fabric
From the red fabric cut:
- 16 – 1.5″ squares for centers (berries)
- 4 – 1.25 ” x 16″ strips for inner borders (to trim down later)
- 4 – 2 .25″ x 42″ strips for binding
From white fabric, cut 5 – 1″ wide  strips. Cross-cut into:
- 16 – 1″ x 1.5″ rectangles
- 16 – 1″ x 2″ rectangles
- 16 – 1″ x 2.5″ rectangles
- 16 – 1″ x 3″ rectangles
From assorted green scraps, cut 6 – 1″ wide strips. Cross-cut into: 
- 16 – 1″ x 2″ rectangles
- 16 – 1″ x 2.5″ rectangles
- 16 – 1″ x 3″ rectangles
- 16 – 1″ x 3.5″ rectangles
From green border fabric, cut 4 – 2.25″ x 22″ strips (trim later).
Step 3 – Sew 16 Log Cabin Blocks
Starting with the center square (the berry), add the smallest white log to one side, right sides together. (It doesn’t matter which side.) Chain piece all 16 white units to each of the red squares. Cut them apart, press toward the outside log and add the next largest white log to the right of your unit, forming an “L” shape. Repeat again for all 16 logs.
Add two green logs in the same way on the opposite side of the block. Repeat for a second round of white logs and a second round of green logs. Your 16 completed blocks should look like this:

Step 4 – Join the Blocks into Rows
Lay out your blocks so that they form a wreath shape. I like to think of each block rotation as an “L” or “7” or “backwards L” or “backwards 7”. 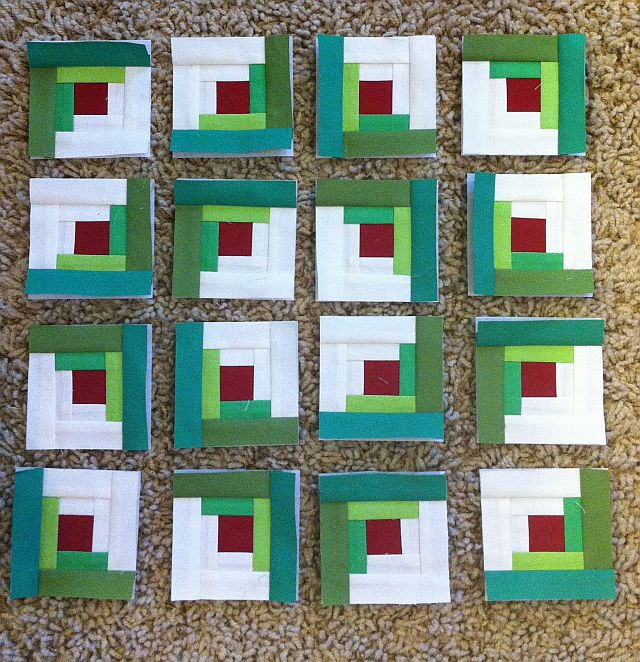
Sew 4 blocks into a total of 4 rows. Sew the rows together to create the inner quilt top. I like to press my major seams open to help keep things nice and flat.

Step 5 – Add the Borders
Measure two sides of your quilt top and trim your red border strips to this measurement. Sew them to either side of the quilt and measure again with the added red borders. Trim the top and bottom red borders, sew to the opposite sides to complete the first border.
 Repeat this process for the green border to complete your finished quilt top.
Step 5 – Finish It up
Baste your quilt with pins or safety pins and have fun with the quilting! I sewed a series of straight lines in the green areas with matching thread using my walking foot.

I added double loops to the outside borders in matching green thread with a darning foot (free-motion foot) and my feed-dogs dropped.
 I filled in the white background areas with smaller, tighter loopy stipples in white thread to match.
Note: I had previously written this tutorial as an introduction to paper piecing. (The main difference is you need to cut slightly larger pieces.)
 I have also made this file available for Electric Quilt users.
Click here for the Log Cabin Wreath EQ7 download.
For more fun quilting tutorials including steps for basting and binding, please visit my Quilt Along page on my blog. 🙂
Free Quilt Pattern
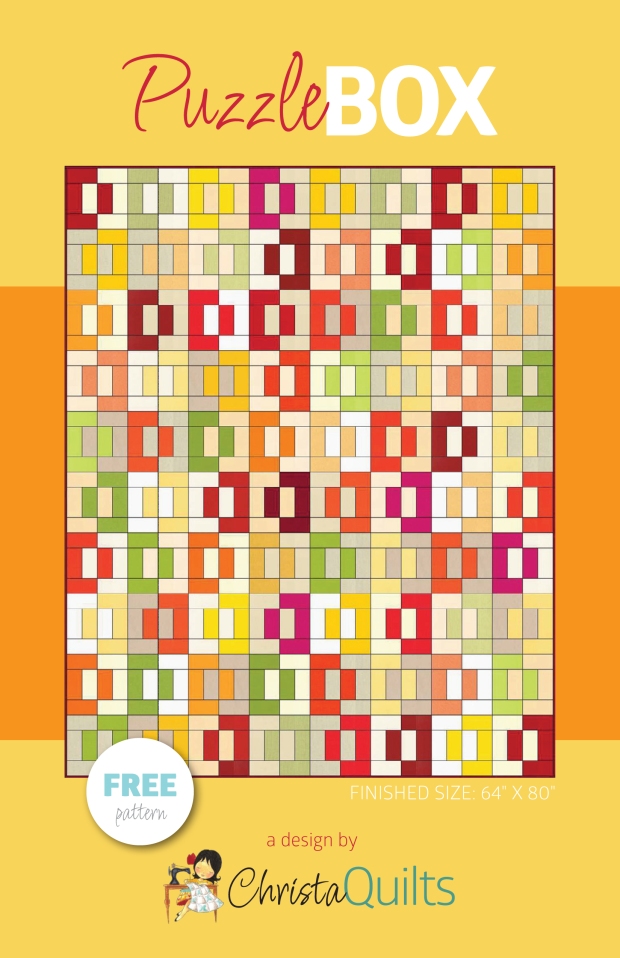
Click here to get a free PDF download of my Puzzle Box Quilt Pattern

Cute, but so small! I have to think about going that tiny. =) I like your new-to-me header.
Oh what a great idea! I’m really bad at “tiny piecing”, partly because my machine eats small pieces for lunch. But tiny piecing is one of my 2014 goals, and I’m looking forward to practising!
Beautiful work Christa and a great tutorial!! Log cabins are always great blocks! Thanks for sharing.
Freemotion by the River Linky Party Tuesday
I just love this! I have yet to try free motion quilting.
I plan to take my machine into the shop and asking for instructions. I did buy a darning foot with the machine. They never gave me my free lessons so they owe me 🙂
I may commented too as I remember seeing your quilt and because I was thinking how wonderful it was. Love the colors and your quilting!
Really neat! Nice work.
I think I may have already commented, but in case I didn’t, this is great! Thanks 🙂