Herringbone WIP – Simple Stipples and FMQ Tips

Today I’ll share with you how I’m quilting my Herringbone quilt. Just call me the stipple queen. 🙂 I did all piecing and quilting on my Bernina 710 without a stitch regulator.

stippling
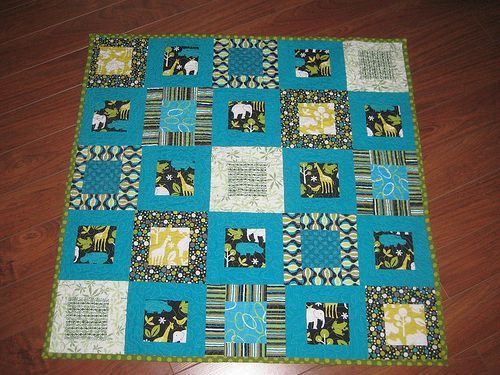
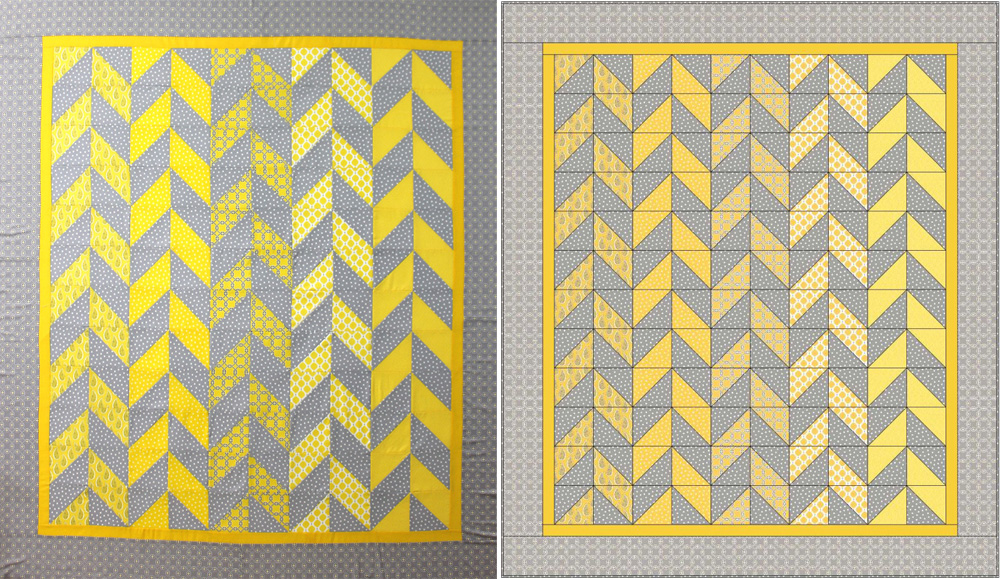
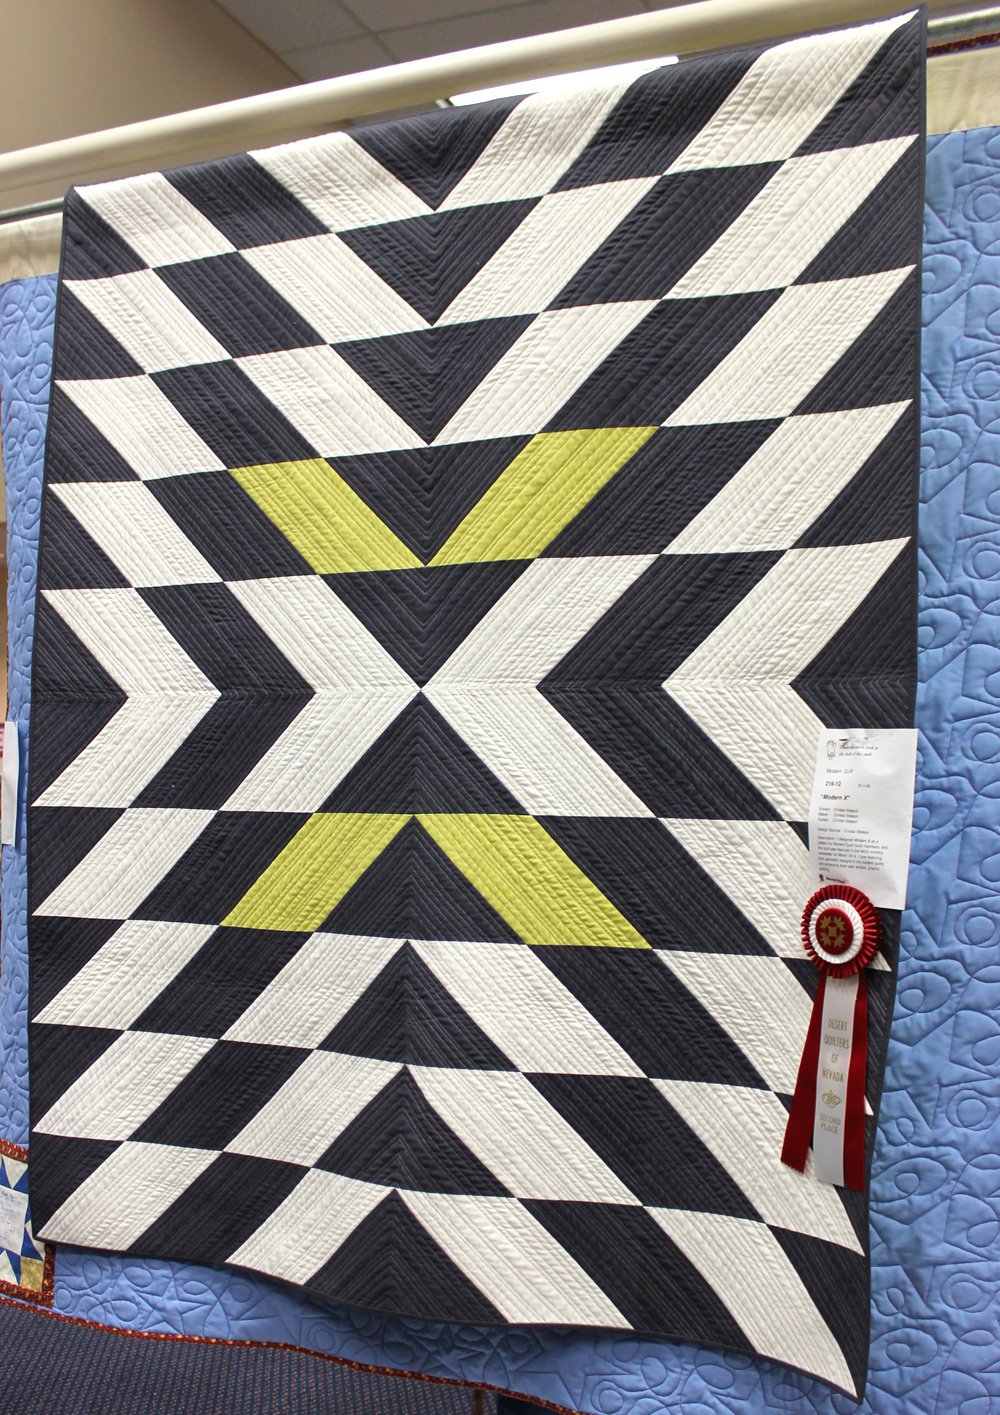
Herringbone by Christa Watson; free quilt pattern designed for Camelot Fabrics

I spent the first 10 years of my quilting career stippling everything I could get my hands and needle on! Then I took a break due to stipple burnout and starting spending way too much time quilting more labor intensive custom designs on my quilts. However, for Herringbone, I returned to my favorite go-to allover motif: stippling!

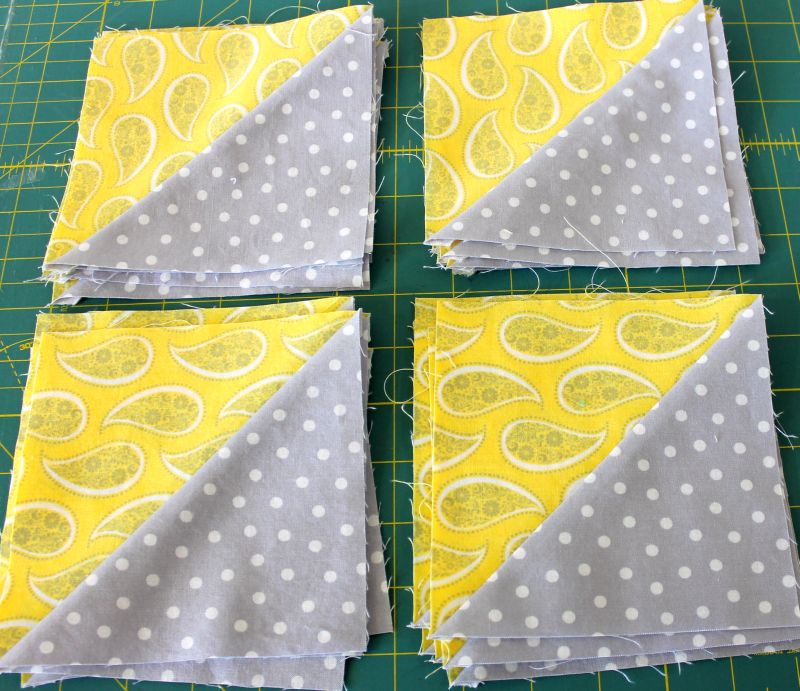
Since I wanted the quilting to enhance the graphic nature of the design rather than steal the show, I chose to go with a thin, 50 weight Aurifil thread in both top and bobbin. I tried out several colors to see which would blend in the most with both the yellow and grey fabrics.

aurifil_thread_choicesTip: audition thread colors before you begin quilting. The grey blends best!

I ended up going with Aurifil #2600-Dove which I think is just the perfect shade of light grey! It surprised me how well it seemed to disappear into the yellow fabric – providing scrumptious texture, rather than a heavy, “thready” appearance.

For this quilt, I practiced on a few scraps first (like I always do) and tested my machine’s tension. Here’s a quick tip: if your machine has really nice tension when you are sewing regular seams, it shouldn’t need to be adjusted too much for free-motion quilting.

herrinbone_quilting_glovesI usually quilt with flat hands forming a hoop – gotta love those Machingers!

Don’t be afraid to experiment a little until you get a pretty stitch! For some reason, the day I quilted it, I was able to achieve more consistent stitches with the feed dogs engaged, but covered with a Supreme Slider. I didn’t fret about why, I just went for it. I’m very pleased with the consistency of my stitching on this quilt and I think slowing down just a little helped, too.

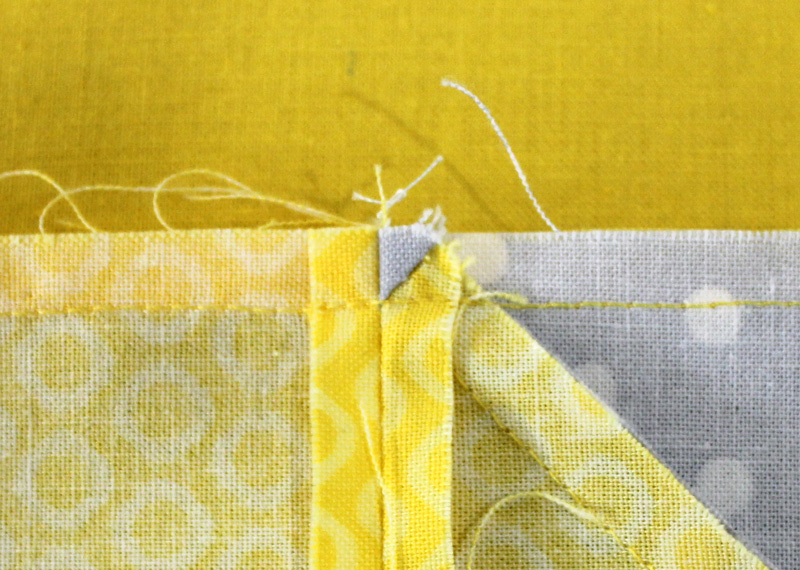
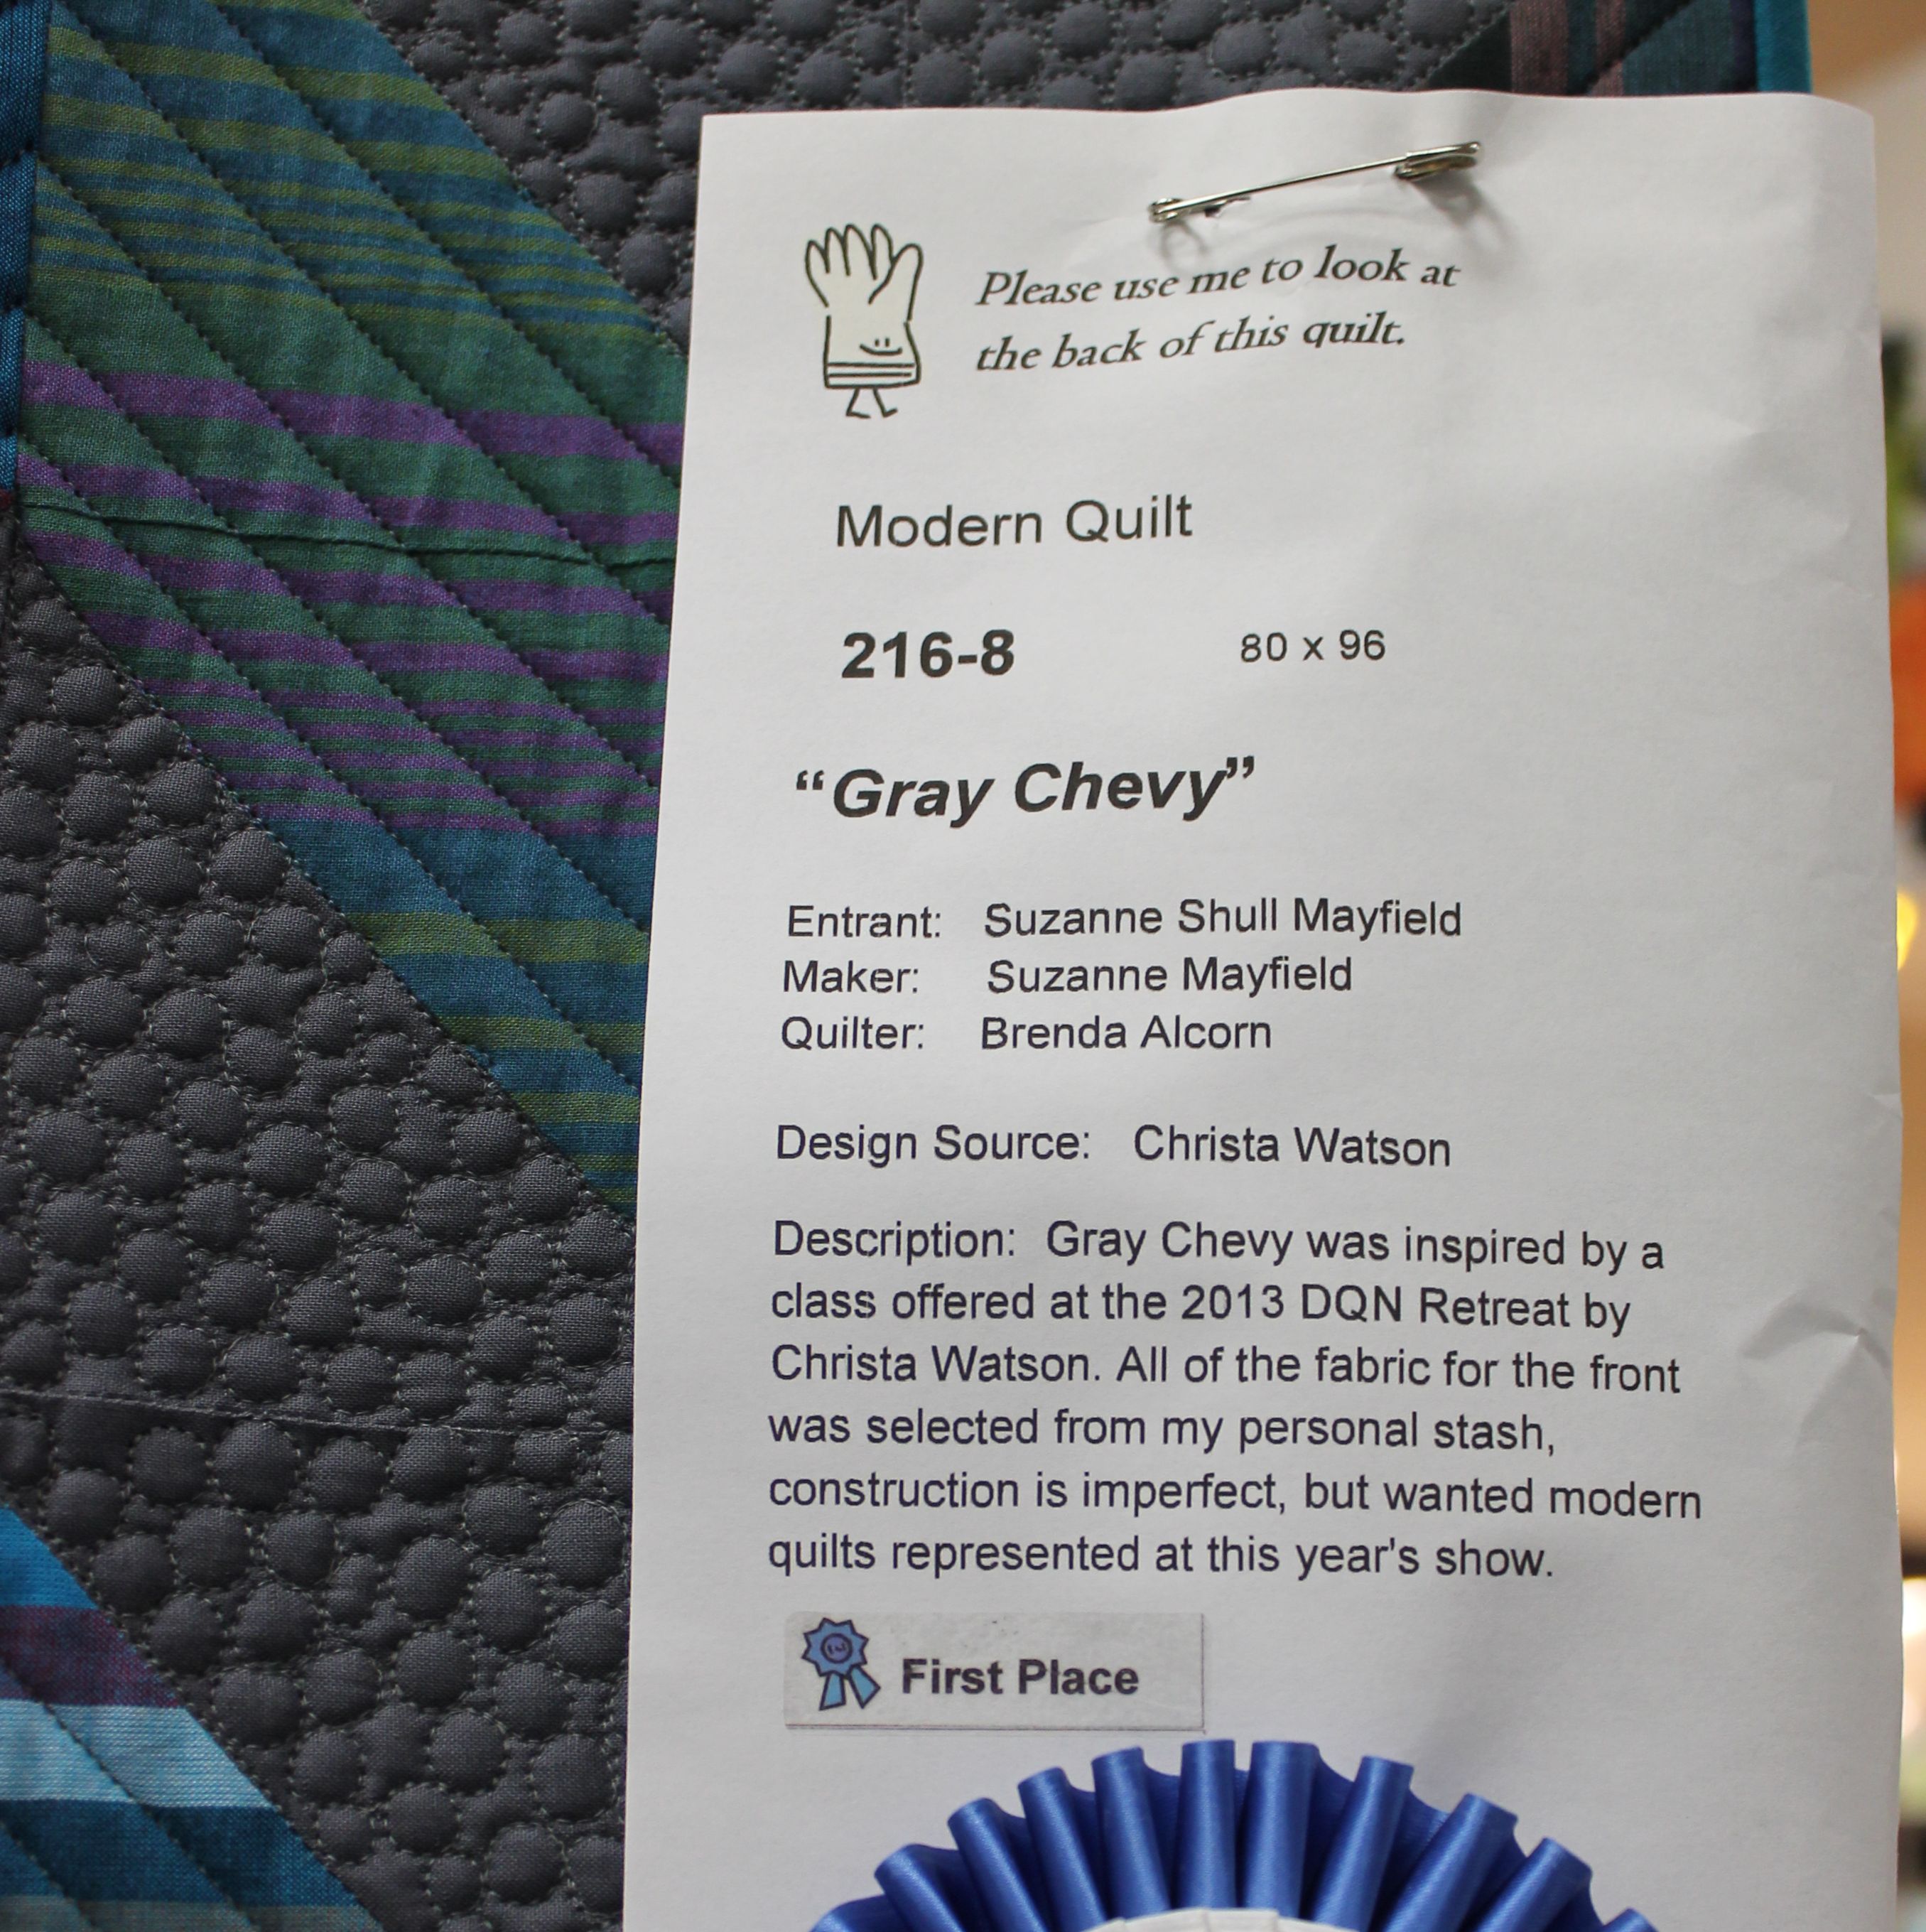
I made a label ahead of time and ironed it to the backing fabric with fusible web before I quilted it. Because I am using a thin blending thread, the quilting stitches will hold the label in place nicely without too much distortion of the writing.

herringbone_label

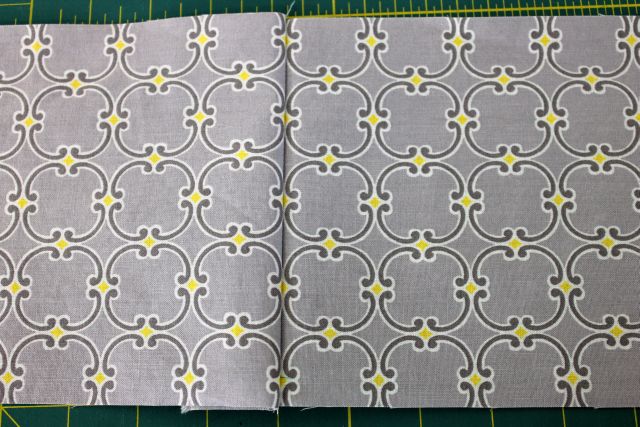
I chose to use a coordinating chevron print from the line for the backing – “sew” fun!

I also tried Soy batting for the first time with this quilt and I really like it. It stuck really well to the quilt while spray basting, and I like the drape and heft of it. I reminds me most of quilting with a nice cotton batting (like Warm ‘N Natural) but with a little more loft to it. Now I need to see how it washes up!

bamboo_batting
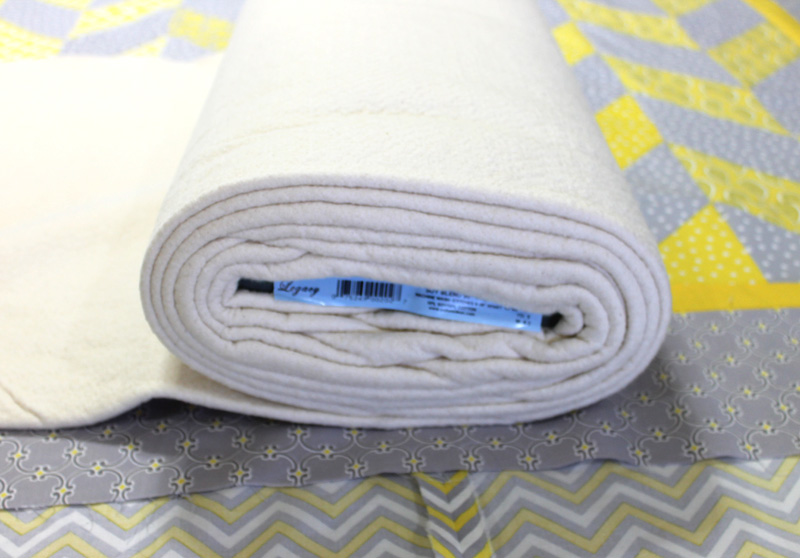
Soy Blend batting given to me by my friend Cory. It was fun to try!

I timed myself like I usually do, and it took less than 4 hours to completely stipple this baby. After spending over 40 hours intricately quilting my last quilt, that was like a speed record for me! (Hmm – I need to seriously quilt more quick and fun allover motifs for the next few quilts….)

Now I’ll go get the binding put on and share the final reveal next time!

Roundup of Machine Quilting Blog Posts I’ve Written:

I’d like to leave you with links to several blog posts I’ve written about machine quilting, both here on my blog and for Craftsy. Some of my tools and techniques have changed slightly and a few things may be repeated, but I’ve covered a lot of basics:


Christa’s Soap Box – Learning a New Skill

I think it’s great to learn new skills, especially when it comes to quilting. After all, how do you know whether you will like something or not unless you give it a try? I recently had the chance to try painting on fabric, and even though I ultimately decided it wasn’t my “style,” it was still fun to learn a new technique!

20140401_cory_paintingChrista and Cory painting away!

My friend Cory came over recently and showed me how to use Setacolor paints to add a little life to this wallhanging I made a couple of years back (before I found modern quilting).

hearts_feathers_wholeclothHearts and Feathers Wholecloth. Free pattern courtesy of Leah Day.

It’s a gorgeous free-motion quilting design from Leah Day. As you can see in the “before” picture above, you can hardly see the quilting. This is where my “matching threads” philosophy perhaps went a little too far.

The mottled batik fabric I used was so busy that you can’t really see the stitching. I thought about going over the quilting again with a contrasting metallic thread to make it stand out, but Cory suggested paint instead. So I figured, what they heck, I’ll give it a try. 🙂

hearts_paintingFabric Painting in Progress

It took a few coats to get a nice even application of color and it about drove me crazy trying to keep the painting inside the stitching lines, but overall, I’m pleased with how it turned out. The only thing I don’t like about fabric painting is how it makes the surface rough and scratchy rather than soft and supple (leading to my preference for modern utility quilts).

hearts_feathers_finishedAnd not to be outdone, here’s a shot of a gorgeous piece that Cory’s currently working on:

20140331_cory_paintingHave you ever tried painting on fabric? If so, what are your thoughts about it?


Craftsy Class Review – Elizabeth Dackson’s Start Free-Motion Quilting

I’m excited to review another fantastic Craftsy class with you today! It’s Elizabeth Dackson’s “Start Free-Motion Quilting” and I love it on so many levels! Although machine quilting is one of my favorite subjects to teach, I cannot get enough free-motion quilting education myself. 🙂

ed_fmqEveryone has their own different ways of teaching which is why I highly recommend taking as many classes as you can from as many different instructors as you can. When it comes to free-motion quilting, it really helps to learn those techniques over and over again so they really sink in.

Elizabeth’s class is broken down into a series of 9 easily digestible lessons for a total of just over 3 hours of class time. After traveling far and wide to take classes from well-known instructors, I think this class is quite a bargain indeed. 🙂

Specific quilting motifs taught in class include stipple patterns, loopy flowers, woodgrain, circuit board, wishbones, mock clamshells and more. Once you get the hang of how these designs are formed, you’ll be adding them to your quilts in no time!

20140411_fmq_elizabethAll images courtesy of Elizabeth Dackson and Craftsy; shared with permission.

Elizabeth prefers many of the same tools and supplies that I do: she encourages the use of quilting gloves (on larger sized quilts), enjoys quilting with an open-toe free-motion foot for visibility, and enjoys machine quilting with Aurifil thread.

I don’t know about you, but it makes me feel great as a quilter knowing that I’m doing at least a few things right, LOL!! I really like Elizabeth’s “golden rules of quilting” which I think everyone should have posted in their sewing rooms.

The Golden Rules of Quilting

  1. Practice, practice, practice!
  2. Give yourself permission for things not to be perfect right away.
  3. Walk away and take a break if you feel that you’re getting frustrated.

Throughout the lessons, Elizabeth sprinkles in other techniques for you to learn such as how to start and stop, burying your threads, tips on batting, and how to baste. Rather than hitting you over the head with all of the material at one time, it’s presented in smaller snippets that are easier to understand and remember.

To keep it real, Elizabeth shows images her first very first quilt. It’s quite amazing to see how far she’s come by simply diving in there and quilting her own quilts. She’s great at encouraging beginners that they’ll get better in time. 🙂

20140411_elizabeth_1st_quilt

Elizabeth’s first quilt – isn’t it great? Check out the class for quilting closeups.

My favorite part of any Craftsy class is reading through the questions that are asked by students, along with the instructor’s responses. Usually when I’m watching a lesson, I’ll read through all the questions first, then go on and watch the lesson. It makes me feel like I haven’t missed anything and it helps give me a really thorough understanding of the material presented.

One of my favorite tips that I read in the Q&A is Elizabeth’s emphasis on experimentation as a great way to find out what settings and tools work best for your particular machine.

I hope that this gives you just a taste of Start Free-Motion Quilting. Whether you are an absolute beginner or more experienced with free-motion quilting, I hope you’ll enjoy it as much as I have!

Herringbone WIP – Tips on Working With Directional Fabric

I finished sewing my Herringbone quilt top this week and I wanted to share with you a few new things that I tried while making it.

herringbone_top_closeupHerringbone quilt top, using the free pattern I designed for Camelot Fabrics.

Herringbone is made from a plethora of HST’s (half-square triangles). Usually, the fabric direction doesn’t matter, but in this case, I wanted to figure out how to line up the directional fabrics I was using so that they all went the same way.

herringbone_cut_fabric_squaresI used Gray Matters More fabrics in yellow and gray – so yummy!

I started out by cutting all of the squares like I normally do. My favorite method of making HST’s is to draw a line down the middle on the wrong side of my background fabric, match it up right sides together with the main print, and sew on either side of the line. Cutting the squares apart on the lines will then yield 2 half-square triangles each.

herringbone_hst_stackDon’t you just love a stack of yummy HST’s? They look like little triangle sandwiches!

For my “experiment,” I flipped the background squares so that half of the lines were left-diagonals, and half were right-diagonals. I then matched up each background square with a print square, keeping the print squares oriented in the same direction.

herringbone_diagonal_lines

After sewing and cutting apart, I ended up with 4 stacks of HST’s with the prints running in 4 different directions, exactly what I wanted for this pattern. Each half of the squares shown above produced two different orientations below.

hst_paisleyI’m very visual, so I had to constantly refer back to my pattern to line up all the pieces in the correct block position. (I’m not sure how the directional shift will look with other HST configurations, but you can test it out and see.)

herringbone_block_diagramThe fabric shown below is one-way directional rather than two, so I just needed to separate them into 2 different directional stacks, rather than 4. Do any of you math geniuses out there remember what type of asymmetry that’s called? I forget!

hst_directional_fabricI still had to mark and sew diagonal lines going left and right for these 2 piles!

Since I decided to get carried away with lining up the prints in my blocks, I decided to match up my border seams as well. To do this, I cut out strips that were the exact same width, following the same design repeat. I then sewed a seam between the motifs, trying to match up the design as best I could. I trimmed the seam allowance down later.

border_match_seamsThe picture below is how it looks on the front. The key is to match the print where it will be less noticeable, like in between rows of design motifs.

border_motifMy final top tip is for joining seams that cross over your triangle points. Sew on the side where you can see the tiny triangle in the seam below. This will help you achieve nice, crisp triangle points. 🙂

seam_intersectionIt feels great to have a finished top – or as some would call it, a “flimsy.” I love how it looks exactly like my original EQ7 design (minus the design wall wrinkles and bad lighting). Next time I will share with you how I quilted it.

herringbone_combinedOn the left is my finished top. On the right is my EQ7 sketch. I love it when they match!


Giveaway Winners and Free Patterns for All

I usually don’t post a separate entry for the winners of my giveaways, but since it was the grand finale last week with lots of prizes, I felt like it deserved a mention. And don’t worry, I’m sure I will be doing more giveaways in the future; they will just be more sporadic. 🙂

christas-giveawaysI was actually able to award 14 winners this week instead of 12. I had an overflowing bundle of scraps and an extra layer cake. So congrats to all these fabulous people (I’ve also emailed each of you separately):

  1. Michael Miller Charm PackCarole H.
  2. Robert Kaufman Jelly RollDiana (imsewbusy)
  3. Kona Solids Layer CakeSandra W.
  4. Quilting Treasures Fat QuartersElizabeth O.
  5. Aurifil ThreadCarolyn (cjtrez)
  6. Kwik ClipJanet M.
  7. Signed Quilty MagazineElizabeth W.
  8. ChristaQuilt.com Gift Certificate – Jacqueline in Canada
  9. Charming Chevrons PatternJennifer in Australia
  10. Modern X PatternSuzanne (goldwing)
  11. Fabric Scraps – Vicki P.
  12. Magazine Stack – Chris (Jmike)
  13. Extra Layer Cake – Kathy B.
  14. Extra Scraps – Megan V.

And now, for those of you who didn’t win, I wanted to share some free quilt patterns from Craftsy, just in case you didn’t know they existed. Part of my “job” of being a freelance blogger is that I get to do occasional “pattern roundups” featuring fun patterns from the Craftsy community.

20140301_starFree pattern on Craftsy, courtesy of During Quiet Time and shared with permission.

I recently picked 5 free paper pieced patterns to showcase in a recent Craftsy blog post. This was hard work as there are literally hundreds to choose from!

It’s easy to find the rest of the free patterns. Simply go to patterns on Craftsy and then sort by “lowest price.” All of the free ones will then be shown first. You can literally spend hours combing through them all. Happy hunting!

Very Important – Copyright Infringement Problem (Has Been Fixed!)

Updated – A Victory for the Good Guys!

I’m pleased to announce that through the combined efforts of hundreds of bloggers, the site mentioned below has been shut down. Hip, hip hooray! Hopefully this is a permanent fix to this awful infringement problem!


Original blog post starts here:

Now, you guys know I’m all about sharing with others. In fact, I often share some of my content with other bloggers, or on other pattern sites when they have asked my permission to do so.

However it has come to my attention that the website QuiltPatternsPro.com has stolen a large chunk of my blog content and reposted it on their site as their own. And I’m not the only one. They have also stolen content from many bloggers out there that you know.

We are starting to band together to get the word out. Here’s how you can help. Go to their site by typing it into google. I’m certainly not going to provide a link here. Then search your name or blog title into their search box and see if you come up.

If you do find that your blog content has been stolen, please go here and read the section about “copyright claims” and report it to godaddy.com. Hopefully with enough reports, we can get this problem taken care of!


Final Updated Comments:

As stated at the top of this page, this problem has been swiftly taken care of and the website has been shut down. Hopefully the same company will not just set up shop on another server. But if they do, we will keep a watchful eye out!!

For tomorrow’s post, I’ll return you back to my regularly scheduled friendly blog persona….. 🙂

Podcast Review – Modern Sewciety

Today I’m pleased to share the newest quilting podcast I just started listening to. It’s called Modern Sewciety and is hosted by Stephanie Kendron. I first heard about this delightful show during a previous podcast review when one of you shared a list of quilting podcasts you listen to. So thanks for that!

20140401_modern_sewcietyModern Sewciety podcast. All images courtesy of Stephanie Kendron.

Modern Sewciety is all about sharing what other modern creative bloggers are up to. Stephanie interviews a different talented blogger each week from the world of sewing, quilting and crafting. Many of them are names I recognize, while several of her guests have been new to me (but are on my list to follow now!)

Stephanie’s sweet southern drawl combined with her positive attitude makes for a pleasant listening experience! I think her show is unique in that she doesn’t follow an outline or a script as she talks to her guests. Instead, she lets the conversation happen naturally and the show sounds more like a lively chat than a formal interview.

20140401_ms_arApril Rhodes was recently on the show, chatting it up about her new fabric line and all kinds of fun sewing inspiration!

Stephanie really knows her priorities and strikes me as one of those people that knows how to makes things happen. On her podcast, she’s mentioned how she just puts herself out there, emails people to come on the show, and for the most part, they say yes.

carolynfriedlanderOne of my favorite recent episodes was when she had Carolyn Friedlander on the show. The banter between the two of them was genuine and so refreshing to listen to. Stephanie seems to put all of her guests at ease, whether she’s known them for a long time, or has just barely met them.

I was also delighted to hear Amy Ellis come on the show. I’m a big fan of Amy’s podcast as well, so it was really fun to listen to her being the interview-ee as well as an interview-er. 🙂 I’m telling you guys, for those of you who may not have a vibrant (modern) quilting community nearby, this show really makes you feel like you are a part of that community!

20140401_ms_aeAnother unique aspect of the show is the inclusion of the Downton Abbey dish, co-hosted by the ever adorable Jennifer Mathis (of Ellison Lane and Sew South)! There are 7 “dish” episodes this year and they plan to do it again next season when the show returns.

I recently asked Jennifer for her take on it and she said, “Stephanie and I found we could chat forever about DA and all the characters. Really it was just a great excuse for us to watch it carefully and analyze it further. It was a lot of fun!” Each Downton Abbey podcast is clearly marked so you can listen (or skip) at your leisure!

20140401_ms_ddWhen I asked Stephanie her reasons for deciding to host a podcast all about the “Modern Sewciety” she had this to say:

“My goal is to allow others to hear those they admire so much in this community speak about their passions, their projects, their love for creating. I hope to spark creativity in those listening. I feel like so often we think everyone is doing so many things and creating all of the time when in reality they are just like us. They have doubts and fears too. I really hope the podcast helps connect and inspire our community.”

20140402_stephanie_modernsewcietyStephanie Kendron, host of Modern Sewciety

I think she’s nailed it! Modern Sewciety runs an average of 45 minutes to an hour, and new episodes are posted weekly, usually on Wednesday or Thursday. You can subscribe via your usual podcast stations like Itunes, Stitcher etc. Or you can listen to them right on Stephanie’s blog at Modern Sewciety. I hope you listen and enjoy. I can’t wait for the next one!


Christa’s Soap Box – Modern Quilting Validation

It’s no secret I’ve fallen head over heels for modern quilting and the community that surrounds it. Because of this vibrant movement, I’ve probably made more meaningful quilts in the last year than I have in the previous ten years combined! This weekend my tastes were validated when 3 of my modern quilts took 1st, 2nd and 3rd place ribbons in my traditional guild’s annual quilt show. 🙂

20140404_ribbon_buttonsRibbon winners got to wear these buttons of pride while walking around the show!

I’ve been a member of the Desert Quilters of Nevada going on 18 years now. It’s a lively group, full of encouragement and support. Even though I’m one of the youngest of the 400+ member group (and have been ever since I joined nearly 2 decades ago), the guild has offered me a place to share my quilts, practice my teaching skills, and attend amazing workshops and events.

20140404_stringofpearls_dqnString of Pearls by Christa Watson, 1st Place – DQN Pieced Category 2014

DQN is very open minded when it comes to the latest happenings in the quilt world. They have a very healthy art quilt subgroup and they’ve even recently started a modern “circle.”

I’m super excited that they’ve invited me to teach String of Pearls at this year’s annual quilting retreat. But I’m even more jazzed that the theme of the retreat is going to be “It’s a Modern World.” I mean, how cool is that??

20140404_dqn_modern_x_2ndModern X by Christa Watson, 2nd Place – DQN Modern Category 2014

At the show it was fun to see people walk by Modern X and do a double take. One gentleman I spoke to, a long-arm quilter by trade, couldn’t figure out where I started and stopped my lines of stitching.

When I told him I quilted long lines from one edge of the quilt to the other on my Bernina, he said you couldn’t really do that type of uninterrupted straight-line quilting on a long arm. (Score one for the domestic quilters!)

20140404_dqn_spiralling_3rdSpiraling Out of Control by Christa Watson, 3rd Place – DQN Modern Category

And I have to admit, it was super validating when Spiraling Out of Control took a 3rd place ribbon. This is probably my most favorite quilt to date and one where I really stretched myself doing stuff I’d never tried before. I always try to remind everyone (including myself) that I don’t enter my quilts in shows to win ribbons, but it sure is like icing on the cake when they do!

I have to give a final shout out to this fabulous quilt below which is NOT mine. It was made by one of my students who began it in my Charming Chevrons class last year. I couldn’t have been more proud to see that ribbon hanging on it!

20140404_dqn_grey_chevy_stuGray Chevy by Suzanne Mayfield, quilted by Brenda Alcorn, 1st Place – DQN Modern Category

Suzanne kindly credited me in her description as the pattern designer, so in some small way, I even got to be a part of this award-winning quilt, too!

20140404_chevy_tagWell, now you know what this means – it’s time to go make more quilts!

Fabric Friday – Featuring Riley Blake Yardage Bundles

I’m really excited about today’s Fabric Friday Feature. You know, I’m still clearing out all of my bolt fabrics and notions on my ChristaQuilts website. When we made the switch to selling precuts, I thought I wouldn’t sell any more yardage, but I’m pleased to say that’s not the case!

20140401_riley_modstudioMod Studio yardage bundle by Riley Blake

Thanks to unique bundles put together by Riley Blake, I can now offer 1-yard cuts by collection and colorway. Click here to see them all.

20140401_riley_vintagehappyVintage Happy by Lori Holt of Bee in My Bonnet

So far, I’ve ordered all of the available Riley Blake yardage bundles and more are on their way! The bundles usually range between 6-8 yards each, from a specific collection.

20140401_riley_treasure_mapTreasure Map by Lesley Grainger

Just look all of these delectable bundles! The cool thing is that each of these collections are also available as fat quarter bundles and rolie polies.

 20140401_riley_roundupRoundup by Sandra Walker

The fat quarters and rolie polies usually include one of each piece ranging from about 18-21 in the group. The yardage bundles are divided up by colorway; so a 21 piece collection would feature three different 7-yard bundles.

20140401_riley_rocketRocket Age by October Afternoon

Now I’m hoping other fabric manufacturers will follow suit!

How to Make Quilting Your Business #8 – Designing Patterns

Welcome to my continuing series on How to Make Quilting Your Business. I’ve been designing my own quilts for nearly as long as I’ve been quilting, but only recently decided to start turning them into actual patterns for sale.

Modern XMy latest PDF pattern design – Modern X

First, I had to get over the idea that I thought it was somehow “cheating” for me to charge people money to tell them how many squares and triangles to cut out of a yard of fabric! I really enjoy figuring out the math when it comes to calculating yardage requirements, but I know not everyone feels the same way.

I recently I had a great discussion with my friend Lee Heinrich (a prolific pattern designer and recent book author) and she convinced me that it’s okay for me to share my knowledge and get paid for it. She told me that some people’s brains just don’t work that way and they are more than willing to pay for it. I finally get that now – thanks, Lee!

Vintage Quilt RevivalVintage Quilt Revival, co-authored by three talented pattern designers Katie, Lee, and Faith. See where pattern design can ultimately take you?

Today’s topic can be narrowed down to two main ideas: (1) designing the quilt (for business or even just for personal use) and (2) producing and selling the pattern.

Designing Quilt Patterns

When it comes to designing original patterns, there are a myriad of technological choices out there. It can be as basic as sketching your ideas out on graph paper, or as advanced as using specific design software.

Personally I use EQ7 for all my designs. My favorite aspect of the software is that I can import swatches of fabric from any manufacturer into the program. Although I’m by no means an expert, it’s been easy enough for me to learn the basics of what I want to do. I can even design modern “improv” blocks. 🙂 (I know – that’s kind of an oxymoron, right?)

spiraling_color_choicesI like to finalize my design digitally before I try it out in fabric. This was my working sketch that ultimately led to a darker background for Spiraling Out of Control.

Another good choice for computerized design is Adobe Illustrator. Several very talented designer friends of mine swear by this program and their work speaks for itself:

Turning Cartwheels

 Cartwheels by Lee Heinrich, designed in Adobe Illustrator

20140401_lindsey_qalLindsey’s latest pattern – designed using Adobe Illustrator

No matter which software you use (or none at all), once you have the basic “sketch” nailed down, you’ll need to do something with those designs to turn them into an actual pattern. I use simple word processing software. I copy and paste my EQ7 images into a Word document and then add text where needed. It’s very basic and gets the job done and at this point matches my skill set. 🙂

Christa Quilts Herringbone Gray Matters MoreHerringbone, designed by me in EQ7. Graphic designers from Camelot Fabrics imported my sketches and instructions into their layout software to create a professional pattern.

If you’d like a more professional look, you can import your design images into a higher-end layout and publishing software such as Adobe In-design or Microsoft Publisher. This is on my “to learn” list!

You can also opt to hire a graphic designer if you plan to produce mass quantities of a particular pattern. However, Lee’s advice is to just bite the bullet and learn the software. She states, “It will really cut into your profit margins if you have to pay a designer every time you have a new pattern that’s ready to release or you need to make changes to existing patterns.”

Modern Log Cabin Rough SketchMy current quilt on my “virtual” design wall. I’m working on the pattern for it now.

Selling Quilt Patterns

Once you’ve created your patterns, the next step is to start selling them! I asked Lee if it’s really necessary to sell printed patterns, or if PDF’s will suffice. This was her answer, “I absolutely think someone can get away with selling only PDF versions of patterns. PDFs are great because there’s practically no overhead, no page limitations, and you don’t have to rely on distributors to get them out there. But it’s important to understand that PDF patterns and paper patterns reach completely different audiences, at least for the time being.”

20121018_charmingchevronsCharming Chevrons, my first PDF Pattern design

For the beginning pattern designer, there are several options to get your patterns into the hands of your customers right away! You can sell them yourself on your own website, or from online sites such as Threadbias or Craftsy. I’ve personally chosen to start selling my patterns on Craftsy because there are no selling fees there!

20130711_concerto_pattern

Another fabulous selling model implemented by my friend Alyssa Lichner from Pile O’Fabric is her Aria Lane design company. Alyssa says, “As an independent designer sometimes you want to stop hassling with all the business details and just design! Aria Lane give designers the opportunity to publish patterns without worrying about those details. At Aria Lane we have a very specific modern aesthetic we are trying to achieve for our designs.”

If you have a design in mind that you feel would fit that aesthetic you can learn about the details of designing an Aria Lane pattern here.

20140401_aria_laneAnother fabulous Aria Lane pattern, “Hemispheres” designed by Megan Nichols

I feel like I’ve just scratched the surface of this hugely broad topic. Just remember, there are several paths to success, but the first step on that path is to start making. Don’t be afraid to dive in there and learn as you go. That’s usually my method of doing things and so far it’s served me well!

Click here for the start of this series.