Blogger’s Quilt Festival Entry – Strips of Color (Home Machine Quilted Category)

I’m doing something a little bit differently this time around and probably unheard of. Since I’ve been blogging so much about the front of my quilts and how much I adore machine quilting, I thought I would enter the back side of my Colorful Chevrons quilt into the Bloggers Quilt Festival. Crazy, huh? After all, every quilt has two sides and I really like to make my backs just as fun as the fronts!

Strips of Color

Strips of Color by Christa Watson

The “other side of the quilt” was inspired by a simple line sketch I drew on paper some months ago. I like the simplicity of the design and how it really shows off the machine quilting. I used leftover chunks of fabric from the front of the quilt, plus a rich dark navy for all of the negative space. The fabrics are Cotton Couture by Michael Miller.

Strips of Color Backing

Strips of Color Backing

I call it Strips of Color and it measures 64″ x 80″ – perfect for snuggling! I quilted it myself on my Bernina 710 and loved every last stitch! Machine quilting is very meditative for me. I can put on an audio book and quilt for hours. 🙂

Bernina

Quilting on My Bernina

I straight-line quilted tons of zig zag lines with a walking foot following the pattern on the font of the quilt. I free-motion quilted pebbles in between for added texture. For those of you new to my blog, here’s a detailed shot of “Colorful Chevrons”, just so you can see the complete picture!

Quilting

Detailed Quilting on the Front

You can vote for this quilt as your favorite in the Home Machine Quilted category here. Voting is open November 1-7, 2013.

Quilt Market

Colorful Chevrons at Quilt Market, Fall 2013

More Modern Trees Inspiration

While we are in between tutorials for my Modern Trees Quilt Along, I thought I would share some more fabulous WIP’s from Flickr. I’m very pleased to see how everyone’s really taking my pattern and making it their own. That makes me happy. 🙂

Mara C. (aka Simon Says Sew on flikr) is working on several versions including the two below. I love how she added a cute tree fabric for borders and made a table runner with some leftover blocks from another version.

Mara's Modern Trees

Mara’s Modern Trees

Mara's Table Runner

Mara’s Table Runner

I love how desertskyquilts used a green background for her trees rather than cream. You can personalize this design however you like!

Green Background

Use any background color you like! From desertskyquilts on flickr.

Carolyn (aka sweetboaterchick) chose a completely different layout, offsetting her rows of trees. Isn’t it fantastic?

Carolyn's Sweet Trees

Carolyn’s Sweet Trees

And who says they all have to line up? Make a forest of trees if you like, just like A. G. Lindsay did. (I was hoping someone would choose this layout!)

A.G. Lindays' Layout

A.G. Lindays’ Layout

Want to make it bigger than my sample? Just add more rows and borders like Jody K. from New Jersey did.

Extra Rows

Make it bigger with more rows and borders. Made by Jody K.

Or add a touch of whimsy with fun pieced borders, like Lindsey from Inspiring Creations.

Pieced borders by Lindsey.

Pieced borders by Lindsey.

I’m telling you, this is just a drop in the bucket of all the awesomeness that is being shared in my quilt along flickr group. Join the fun by posting your QAL WIP’s (say what?) or browse everyone else’s for some virtual inspiration. It’s never to late to start this project on your own schedule, sewing at your own pace.

I’ve started quilting my trees and can’t wait to share the machine quilting process with you next week! Yes, you really can quilt your own quilts. 🙂

Click here for the complete quilt along schedule for Modern Trees.

Christa Quilts Clearance (and a little bit of store history soap-boxing…)

I’ve been spending the last few weeks organizing and minimalizing, both my sewing space and my online store. I’ve had a blast selling fabrics online for the last 10 years. (Where has the time gone?) But as I’ve been hinting over the last few months, it’s time to change directions.

FMQ

Teaching FMQ techniques – gotta love it!

I’m not necessarily having an all-out going-out-of-business sale because I am most certainly not going out of business. I’m just shifting my focus, and modern quilting is to blame, but in a good way.:-)

So here’s the thing: I thought I would be content to run my little online shop forever, selling all styles of quilting cottons to whomever would buy. I stocked calicoes and batiks, fun novelty prints, some solids and big name designers, plus a few modern lines.

However, it was a joke around here that “Christa Doesn’t Quilt” because all I did for several years was cut fabric and package orders. Mind you, I was very content doing this. It was a small scale thing and something I could handle in my spare time. But I wasn’t quilting (after taking up the hobby nearly 20 years ago).

Workspace

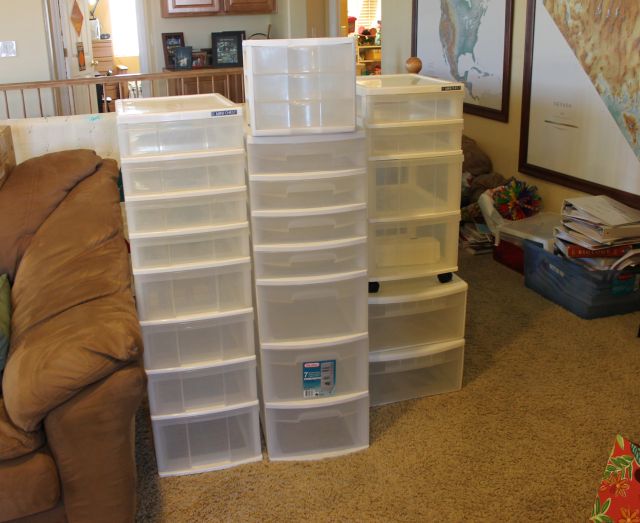
Jason helping to set up my new workspace so I can sew to my heart’s content!

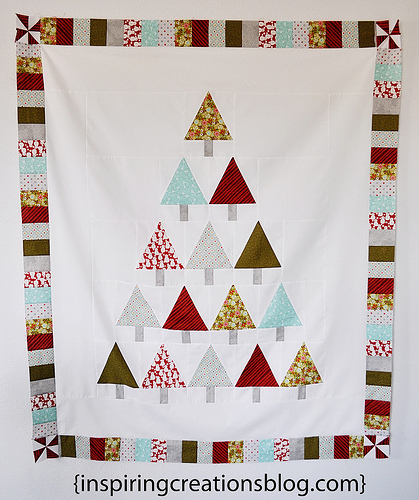
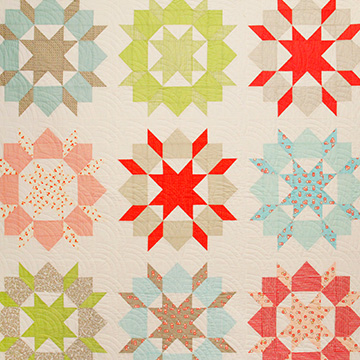
Enter the modern movement, which has totally rocked my world! All of a sudden I was pumped up about quilting again and I wasn’t the youngest one in the (quilting) room anymore. All these fresh sewers were making these amazingly bold and simple quilts that I wanted – no, needed – to make!

They were using solids that showed off their beautiful quilting and they were coming up with original designs that appealed to me big time. Not only that, but they were blogging, setting up modern groups left and right, sharing their work, and getting published. I simply had to be a part of it!

MQX email

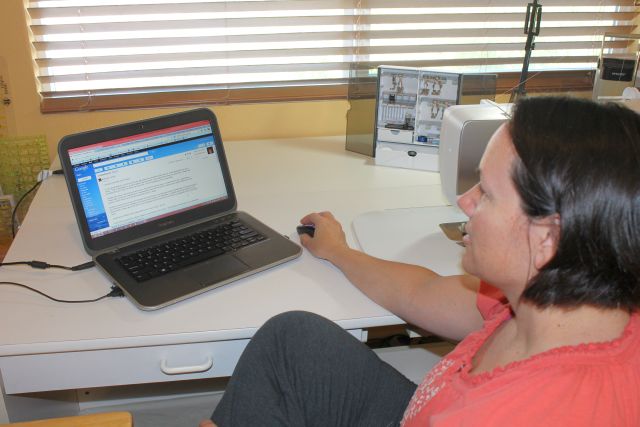
Reading the email notifying me of my MQX honorable mention for String of Pearls. What a happy day that was!

So, I quickly and somewhat painfully sat down with Jason and we had a big chat about my “quilting future”. I finally came to the conclusion that what I really wanted to do was design and make quilts! Using our accounting backgrounds, we crunched some numbers and decided we could go one of two ways.

(1) We could either find warehouse space and get really big and not work from home anymore and hire managers and become a huge online store. (2) Or, we could clear out all of our store yardage (which is labor intensive to cut, package and ship) and find other ways to supplement our income.

Fabric Reps

Meeting with fabric sales reps at home. Yes, I love orange shirts!

We I chose the latter. I started designing, teaching, and showing my quilts again, and I’ve never been happier. In addition, I took the bold and scary move to start submitting my work for publication. And it’s started working.

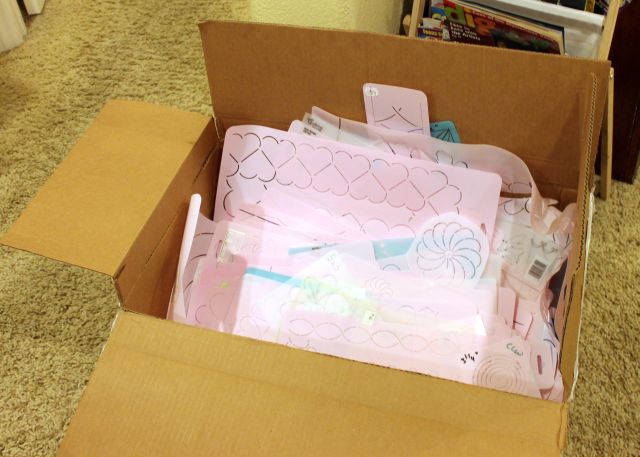
All of this backstory is basically to tell you I’m having a huge clearance sale so I can clear out my entire inventory of yardage and fat quarters (plus all patterns, gifts and notions). I’m sure it will take several months to sell out and that’s fine. We aren’t going anywhere, so it’s not like it all needs to be gone this weekend (though that would be nice).

Love to sew!

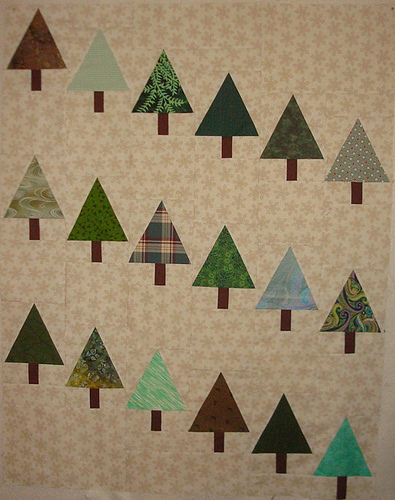
I love to sew – don’t you?

I thank you in advance for your support, and I really appreciate that I can blog on a more personal level than what I can express in my weekly store email. Blogging for me has been very therapeutic and has enabled me to articulate my quilting vision and share it with others. 🙂

Click here to view my entire clearance section – about 600+ items are on sale (over half the store), anywhere from 20% – 50% off the original prices. It includes FREE US shipping, too!

Thanks for reading and happy shopping!

I’m not at Quilt Market but my Chevron Quilt Is

I didn’t get a chance to attend Fall Quilt Market in Houston this weekend because I’m home judiciously revamping my sewing room. However, I just found out a little piece of me is there. 🙂

Thanks so much to my BQF (best quilting friend) Stacy who snapped this picture of my Chevron Quilt while she was there and emailed it to me. (Can we say jealous?) I had no idea it would be on display so this is a pleasant surprise! I was kind of wondering when they’d mail it back to me after the issue was published, but now I’m completely happy to wait a few more days, knowing it’s getting a little more exposure.

Quilty Chevrons

Quilty Chevrons at Market

Seeing it paired up next to the blown up cover shot gives me a thought – is it ok to change the name of one’s quilt after it’s been “christened”? I originally named it Colorful Chevrons, but lately I’ve been referring to it as Quilty Chevrons in honor of the magazine, and to help me keep track of which chevron design I’m referring to.

I plan on entering this quilt into shows in the future and using it as teaching sample, so the name Quilty Chevrons is kind of growing on me. What do you think?

By the way, for those of you who are new to my blog, you can read more about the quilting of this quilt here, and enter my giveaway to win a free copy of the magazine here.

You can be sure I’m not missing market next time around, and you can quote me on that!

Quilt MarketUpdated – I have to give a big shout out to another of my BQF’s Denise, who talked the gals from the booth into sending me the poster sized cover shot. Won’t that look great in my new sewing room?!

Free Craftsy Classes!

From time to time I like to blog about what’s going on with Craftsy and which classes I’m taking. In fact, I recently wrote up an article about online learning and got to interview a few Craftsy “sewlebrities” in the process. (By the way, this article will appear in a future issue of one of my favorite magazines, and I’ll share some more “behind the scenes” once it’s published).

Craftsy Classes

Quilt by Camille Roskelley

I recently asked Craftsy to create a link to all of their free classes so I could find them more quickly. I was very pleased that they replied to my request and created one. Just click here to check out their free content!

My favorite? Hands down, the QuiltCon lecture series. Even though I attended in person, there were a bunch of things I missed, especially Mary Fons’ rockin’ speech! So it was great to go back and watch these videos. Sigh, it’s almost like being there again. :- )

QuiltConMy other top pick for free classes is Elizabeth Hartman’s Creative Quilt Backs class. Several months ago I was thinking someone needed to write a book or something about piecing fun quilt backings and I found her class. I just love serendipity like that, don’t you?

Creative Quilt BacksSo anyway, enjoy a bunch of free classes. The way I look at it is that it helps spread out the cost of any of the paid classes I sign up for. Which by the way, once my sewing room is all cleaned up I can get caught up on watching and reviewing the classes I’ve signed up for.

What’s next on my list? Camille Roskelley’s Precut Piecing Made Simple. I told myself I need to watch this one before I sign up for her new class that she just released, called Playful Piecing Techniques.

Camille Roskelley Craftsy ClassFor those of you who haven’t hopped on the Craftsy bandwagon yet, here’s a little promo info that explains a little bit more of what it’s all about:

What is Craftsy?
Craftsy is a worldwide craft community offering online classes. It also has a patterns marketplace where independent designers can sell their patterns; a supplies shop with great deals on yarn, fabric, and class kits; and a projects section where members share pictures of their latest craft successes. With over two million members and counting, Craftsy has something for just about everyone, in categories ranging from quilting, sewing, knitting, painting, photography, cooking, and more.

Why should I take a class online?
Online education isn’t just for schools and universities anymore. Craftsy courses provide you the convenience of a world-class instructor in your home, whenever you want to learn. Online education, no matter what subject, is a great alternative to in-person classes for a number of reasons.

Crafsty ClassesWith many online learning opportunities being on-demand, you are able to learn at your own pace, anytime. Online learning is a fantastic alternative to in-store craft classes for people with busy schedules or who have difficulty leaving the house. It also allows you to watch a troubling section over-and-over again, so you can see exactly how a technique is carried out, or refer back to your class for relevant concepts before beginning any new projects.

Sew and Tell WIP – Sewing Room Redo

While I’m not quite ready for the complete reveal, I have been hard at work this week improving my sewing space. After reducing my fabric stash by about half, I spent the early part of this week combing though my entire collection of notions and supplies and getting rid of as much as possible. That sure felt good. 🙂

Messy Room

What a mess! Going, going… gone!

For example, I kept hanging onto a huge supply of stencils for years, hoping that one day, I’d use them on the perfect quilt. Then I quickly realized that I actually prefer to quilt more organic shapes on my quilts that don’t need stencils and usually require little to no marking. So they are on their way to finding a better home…

Stencils

Stencil Stash – I may keep just 1 or 2…

As I’ve been dejunking and reorganizing, it’s helped me realize just who I am and how I like to work. I previously opined about being a minimalist. The more I reduce the clutter, the better I feel.

After rearranging furniture and getting rid of ugly plastic bins like these, I realized I enjoy negative space not just in quilting, but in decorating, too.

Plastic Bins

Lots of junky bins and stacks of clutter to get rid of!

I was able to completely empty them out and organize them into prettier containers – baskets, bins, and on shelves behind closed doors. It’s amazing how much you can clean up the place when you stash it away where no one can see it!

Decorative Baskets

Use pretty buckets to hide things away!

Instead of cramming shelving and bins all together haphazardly, the closed shelving units look much better by themselves with a little empty space around them.

Storage UnitSee all that blank space on the right side wall? That will soon be my huge design wall area. I used to have both white storage units there and it really took up too much visual space. By getting rid of excess junk and furniture, I was able to separate the storage units, tuck them into corners, and free up some wall space so that I have more room to design!

Getting there - but I still need to replace those clunky tables!

Getting there – but I still need to replace those clunky tables!

Now all I have left to do is create the design wall, hang my rulers on the sides of my storage units, replace the junky basting tables, and maybe throw up a couple of valances for a touch of color. I plan on being a busy bee over the next few days until it’s done. Then I can quilt again. 🙂

Updated – Ok, I’ll give you guys my stencils!

After I posted this I was inundated with requests on where they will go. So I will give them to you guys. I’ll make them my giveaway for next week – so stay tuned. :-)

Favorite Tools – Kwik Klip for Basting

Since it’s almost time for my basting tutorial as part of my Modern Trees Quilt Along, I thought I would share one of my favorite tools that makes the job easier – a Kwik Klip.

These puppies have been around for awhile but I finally started using one after tearing up my fingers from previous basting attempts.

Pinning and Clipping

Pinning and Clipping

A Kwik Klip is a simple wooden rod with a metal end with grooves in it. One of the grooves holds the end of the pin in place, so you can bring the head of the pin down to fasten it.

When I first tried it out, I did it wrong. I kept trying to use the tool to push up the pin to meet the head. But that is wrong – don’t do that! Instead, hold the Kwik Klip in one hand and push the pin down to close with the other hand. I’m right handed so I held the Kwik Klip in my left hand and pushed the safety pin with my right hand. Do what feels most comfortable.

Closing the Pin

Closing the Pin

Once I got the hang of it, basting went pretty quick. I put in a bunch of pins first and then closed them all at the end.

Just so you know, I used to use Pinmoors for basting with straight pins. Those are small silicon caps that go on the end of straight pins. They are nice because you can remove them quickly while sewing. However, I timed myself and realized it takes longer to put the pins in and add the caps than it does to push in a bunch of safety pins and close them.

Kwik KlipAfter basting several quilts, I prefer regular safety pins with a Kwik Klip.

And honestly, while quilting, it’s not a big deal to take a second or two to remove a pin. I’d rather save time on the basting end of it rather than during the pin removal process.

Blogger’s Quilt Festival (Fall 2013) Begins This Week!

The online Blogger’s Quilt Festival kicks off this week, on Friday, October 25th to be precise. Hosted by Amy Ellis, it’s an online quilt show open to anyone who loves to quilt and enjoys blogging about their creations.

Blogger's Quilt Festival

Rather than stressing about making perfect quilts, it’s a chance to share and connect with others who share the same passion. There were over 600 entries in last spring’s show and it was like inspiration overload! My two entries from last spring’s festival are shown below:

Charming Chevrons, one of my early quilt along tutorials:

Viewer's Choice

Charming Chevrons, awarded Viewer’s Choice Spring 2013

Roses for Katelyn, made for my sweet sister’s baby girl:

Roses for Katelyn

French Rose Buds Pattern, Blogger’s Quilt Festival Spring 2013


If you have a recent finish, I encourage you to enter. It’s a great way to find new blog followers and fantastic blogs to follow! Plus it’s pretty fun to get positive feedback on your quilts. And you might even win a prize, either for entering your own quilt, or nominating your favorites. You just can’t go wrong by participating in this fun event.

Here’s an idea – show off one of your quilt along quilts, or finish up a current WIP!

For complete details including the festival schedule and rules, be sure to visit the Blogger’s Quilt Festival Main Page.

Be sure to check out last spring’s winners. You may even recognize some of the quilts from people you know (wink, wink)!

Christa’s Soap Box – I am a minimalist. And organizing is good.

I didn’t realize how much of a minimalist I have become until I started dejunking and reorganizing my sewing room big time! Remember this picture?

StashThis was about half of my stash that I got rid of simply because I can’t stand excess. (Sorry they are gone now but I’m sure in a few months I will need to dejunk again!)

So I started thinking about events in my life in which I get overwhelmed by choices and clutter. For example, back in the day when you would go to the video store (instead of watching videos on demand or by mail) I would never pick out movies. Instead I always left it up to my husband – there were simply too many choices! (Thank goodness he likes a good comedy and will watch a decent chick flick with me.)

Cut Squares

Stack of Yummy Solids

I’ve started comparing my lifestyle to my fabric and quilting choices and maybe the reason I love solids so much is because they are so simple. They are just pure color without any busy-ness.

Early on in our marriage we had some tight living arrangements. Before we had kids, Jason and I lived for a time in a small trailer on his parents’ property and then for several months in a motorhome. We really figured out then what we could do without!

Stash

A smaller, tidy stash.

So I’m always dejunking and getting rid of things. I figure if I accidentally throw something out, I can just buy it again. But to store too many things in the hope of one day using them – no thanks!

I think one of the reason negative spaces in quilts appeal to me is because it’s calming and gives your eyes a place to rest without the clutter. Sure I will fill up all that space with quilting, but that’s just an extra layer of subtle texture which gives life to the quilt.

Negative Space

Look at all that white space!

One of the best pieces of advice I ever heard about controlling clutter was from a home-making class at church. (I get more then just spiritual fulfillment there – bonus!)

The speaker said to take all of your personal mementos you want to keep and store them in one box only. If you are hanging onto items for family members, kindly give them back as soon as you can. And finally, put everything you don’t use/want in a box. If you haven’t touched it in a year, you can live without it. Words to live by!

Lots of organizing going on around here!

Lots of organizing going on around here!

Recently, we’ve been having the kids dejunk their rooms and started installing shelving and organizing closets. It’s sort of in my best interest as I have been slowing moving all of their creative supplies out of my sewing space and into their own bedroom corners. 🙂

Shelves

Gotta Love Shelves!

Does anyone else run into the problem of starting one project only for it to quickly overwhelm the entire house? I do, but I’m working through it one room at a time. Hopefully in a few weeks I’ll be able to have a “sewing room reveal” which will leave me more organized, efficient and ready to work!

Craftsy Blogger Awards Finalist for Best Quilting Tutorials

Craftsy AwardsThis week just keeps getting better. I got an email yesterday stating that I had been selected as one of four finalist in the Craftsy Blogger Awards for best Quilting Tutorials.

Thanks you guys – I wish I could hug you all.

The competition is pretty amazing – the other finalists are Melissa Corry from Happy Quilting, Rita Hodge from Red Pepper Quilts, and Vanessa Wilson from The Crafty Gemini.

For those of you new to my blog, you can check out all of my free quilt along tutorials here. Hopefully you will find one you like and can get started on a new project right away!

Christa's Quilt Along


Updated With the Winner!

Congratulations to Vanessa from The Crafty Gemini who was chosen as the winner!! What a great competition – it will be fun to see who’s nominated next time! 🙂