Craftsy Class Review – Design It, Quilt It by Cindy Needham

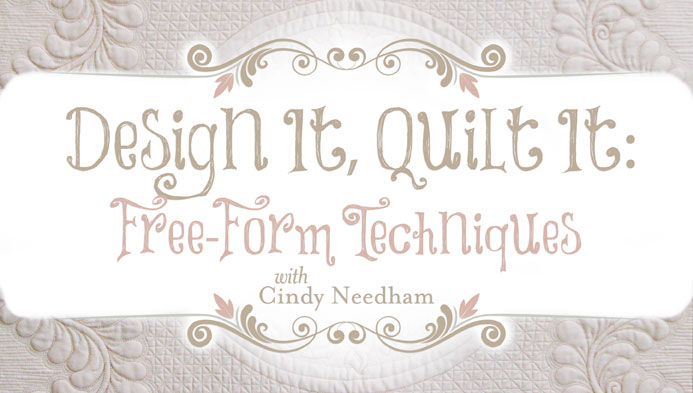
I just love taking as many quilting classes as I can. And when I can watch them over and over again, that’s like icing on the cake! I just finished watching Cindy Needham’s Design It, Quilt It: Free-Form Techniques on Craftsy and let me tell you, it was time well spent!

Design It Quilt ItThe entire class is composed of 11 lessons about 1/2 hour in length (give or take a few minutes). I like this format because I can watch one section at a time here and there when I have a few spare moments.

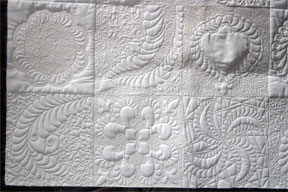
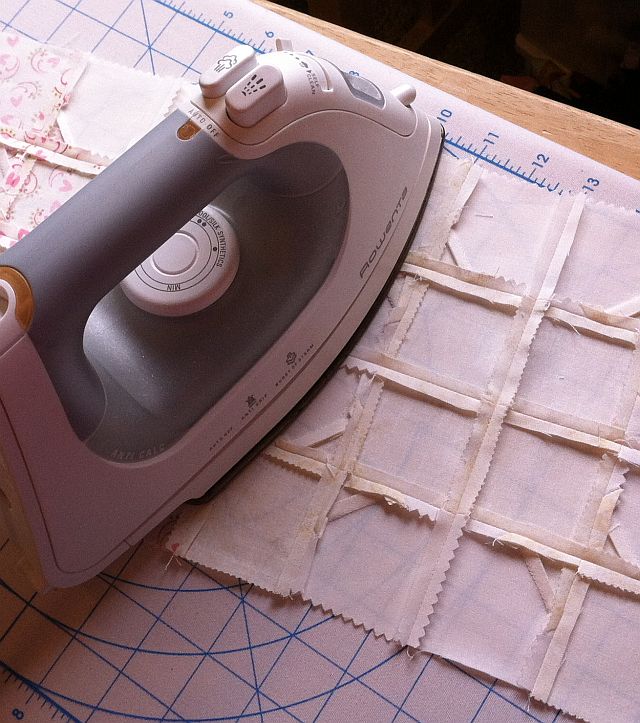
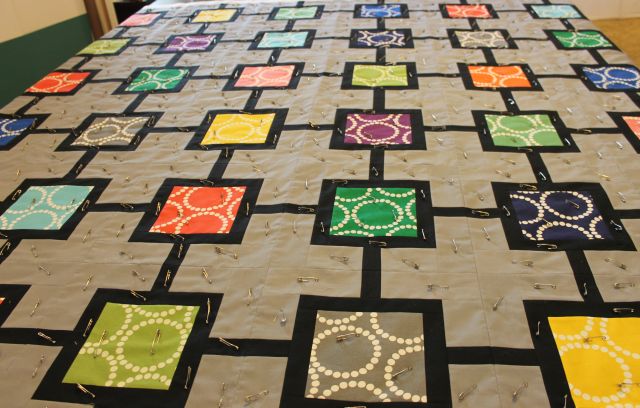
In addition to giving tons of machine quilting tips and explaining many tools of the trade, Cindy’s class includes an excellent basting tutorial, too. Here’s one of my recent quilts that I basted, after watching this segment of her class:

Safety Pin Bating

In Design It, Quilt It, Cindy covers such basics as threads and tension, plus many excellent techniques and tools. She’s really good at trouble-shooting so you can get the most out of your sewing machine.

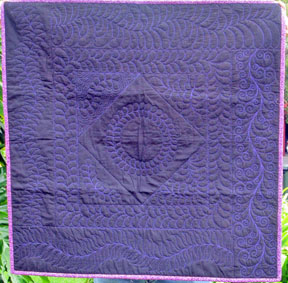
Cindy focuses a lot on designing your own quilting motifs by combining stencils and other ideas. She distils her designs down to three basic shapes which are repetitive lines, circles and S curves. Plus she has an entire section of the class devoted to feathers and another covering backgrounds or “filler” quilting.

She also includes some wonderful instruction on making borders fit. Cindy does a great job of covering all the basics, and I walked away really feeling like I had the keys to machine quilting success.

Cindy NeedhamCindy also does an excellent job of answering my questions whenever I have them. Each Craftsy class has a forum where you can post questions and read questions and answers posted by other students, too. Plus, you can strut your stuff and upload pictures of your work for others too see and comment on.

I just found out Cindy will be coming to my local quilting guild to teach a series of classes later this year and I can’t wait! She’s one of my machine quilting heroes because she encourages others to try it and quilt it themselves. I agree with her – it’s not that hard once you try. 🙂

Craftsy Class Review – Machine Quilting Negative Space by Angela Walters

While I have a little down time on vacation, I thought it would be fun to review a few of the Craftsy Quilting Classes I’ve signed up for.

Quilting Negative SpaceToday I will begin with Angela Walters’ Quilting Negative Space class.

I first heard about this class months ago when it came out. I didn’t sign up for it right away because I knew I would be taking a class from her live in person earlier this year at QuiltCon. Her live class was so fantastic, that when I returned I immediately signed up for both of her Craftsy classes.

Angela Walters

Christa and Angela at QuiltCon

Since I couldn’t possibly remember everything from Angela’s live class, the online Craftsy classes are such a great resource.

I can go back to them again and again, post questions in class and rewind and rewatch any segment of the class.

Angela’s online class is different enough from her live class that I didn’t feel like I was wasting my money by taking both.

Plus her approachable manner and in-depth explanations were easy to follow.

The class is broken up into 10 segments or lessons, focusing on things such as combining designs, and changing scales.

Throughout the class, Angela demonstrates how to achieve beautiful quilting with little or no marking, which I really like.

One of the often overlooked elements of quilt design is sketching out your ideas first. Angela covers this in great detail and she includes tips on how to apply your sketched designs to the actual quilt. She covers a little about thread selection, too.

Extra QuiltingMy favorite tip of hers is to use a blending thread, whenever possible. You want the quilting texture to show, not the thread! One of my favorite designs she teaches is how to quilt flowers which I used in my Hugs ‘n Kisses quilt, above.  They are a lot easier than you might think!

Below is another of the machine quilting samples I was able to stitch after watching Quilting Negative Space. It was fun to combine the pebbles and swirls together into one motif. Angela also covers woodgrain, tiles, leaves, wavy lines, plume feathers and more.

Swirls and Pebbles

I just checked the stats on Craftsy and over 5000 people have signed up for this class so far! I enjoyed Machine Quilting Negative Space so much that I’ve already signed up for her next Craftsy class, Free Motion Quilting with Feathers (watch for my review on that one soon – it’s on sale, too!)

Angela Walters FeathersAnd oh yeah – even though Angela quilts on a long arm and I quilt on my Bernina, the design principles she teaches are easily applicable to both. If you can only afford to take one Craftsy Quilting class – this is the one to choose!

We are Here, We are Here, We are Here! (Family Beach Trip 2013)

We’ve been at the beach this week having some much needed family down time!

I’ve done a little of this…

Reading at the Beach(reading Sunday Morning Quilts and a whole stack of quilting books and magazines)

while the kids have done this….

Beach Wavesand this…..

Boogie Boardingand yes, a lot of this….

Playing at the Beach HouseI spent several pleasurable hours yesterday binding on the boardwalk with the sun at my back and the sound of gentle waves rolling in the background. It just can’t get any better than this!

Binding at the BeachEach year we escape for a week to Hermosa Beach, California with my husband’s parents and siblings. We stay in this adorable beach house owned by friends of the family. (The little green one surrounded by all the taller condos!)

Beach HouseThis house has been in the owners’ family since 1915 and they only rent it out to reliable friends. I am glad Jason’s parents are such friends!

The beach itself is very wide and long, with volleyball tournaments taking place all up and down the beach.

Barefoot Beach RunningJason and I love to run barefoot on the beach next to the water where the sand is more firmly packed. It’s just lovely when the water laps around our ankles while we run!

Next week we will get back to our regular hectic lives, but for now, we’ll enjoy a few more days of paradise while we can…

Relaxing by the Beach

Shades of Grey – Pieced Backing Tutorial

I love to make pieced backings and by popular request I’m sharing with you a tutorial on how to put one together. This goes with my String of Pearls Quilt Along.

Shades of Grey Backing

Shades of Grey Pieced Quilt Back, 72″ x 72″

Before we start, there are a few things to consider. First of all, how big is your quilt top? You want to sketch out a backing design that leaves plenty of wiggle room around the sides. A good rule of thumb is to make your backing at least 6 inches larger than your quilt top.

String of Pearls

String of Pearls Quilt Top 66″ x 66″

For example, my String of Pearls quilt finishes approximately 66″ x 66″. Therefore, I need to have a backing that measures about 72″ x 72″. That’s a nice measurement because 72 inches is the same as 2 yards, so you can visualize a backing roughly 2 yards wide by 2 yards long.

One Fabric Backing

Backing, One Fabric, 72″ x 72″

The second thing to consider is, do you want to make your backing from all one fabric (most efficient), or would you like to make it a little more artistic (my favorite)?

The solid backing above requires 4 yards of fabric (two – 2 yard lengths). Join them with a seam down the middle making a rectangle of approximately 72″ x 80″. Trim off about 8″, making a 72 inch square and throw the excess into your scrap bucket.

Finally, you need to decide ahead of time if you will be quilting the quilt yourself, or hiring a longarmer to do it for you. When quilting yourself, you can get away with less extra around the sides.

When sending a quilt out for professional quilting, however, you may need more fabric around the edges for the longarmer to work with. She also may request that your seams need to run either horizontal or vertical depending on how she loads the quilt on the machine. Be sure to check ahead of time (or just quilt it yourself like I love to do!)

One Fabric Backing

Leftover Pearls

When deciding on a pieced back, I like to incorporate leftover fabrics or blocks from the top to give it a little interest.

Pieced BackingFirst, I lay the quilt top on the floor or a large table, then start randomly placing leftover pieces of fabric on top until it’s covered. I rearrange all my pieces as needed until I’m happy with the layout.

Pieced BackingNext, I will trim up my pieces and start joining them together in sections until my backing is big enough to overlap the top on all sides by at least 3 inches. Remember, it will shrink up some with seam allowances, so be sure to add more if needed.

Pieced Backing Diagram

Pieced Backing Diagram

For your convenience, I have included cutting diagrams for my pieced back. The measurements include seam allowances. Note, the pieced Pearl Bracelets section is made from 12 (3.5″ x 4.5″) rectangles to create a 3.5″ x 36.5″ unit.

Voila! Time for basting!

For more inspiration on making a pieced backing, check out Elizabeth Hartman’s FREE online Craftsy class, “Creative Quilt Backs.”

You can also see how I made these pieced backs by clicking the links below the pictures:

Hugs N Kisses BackSea of Squares Pieced Back

Charming Chevrons Pieced Back


Hugs ‘N Kisses Pieced Backing Tutorial
Sea of Squares Pieced Backing Tutorial
Charming Chevrons Pieced Backing Tutorial

Star Surround Quilt Along from Happy Quilting Melissa

Ready for another fun quilt along? My friend Melissa Corry from Happy Quilting Melissa is hosting a quilt along featuring her original Star Surround Block. She has kindly asked me to provide some kits for it featuring my favorite Kona Solids.

The first color scheme I chose to call “Modern Patriotic.” It’s so fresh and clean!

Modern Patriotic Konas

Modern Patriotic Star Surround

Here’s another version which I named “Dandelion Grey”. These were fun to color!

Dandelion Grey

Dandelion Grey Star Surround

I also put together a “Classic Tuxedo” version for fans of black, white, red and grey.

Classic Tuxedo

Classic Tuxedo Star Surround

All 3 versions are available in 3 different kit sizes: baby, throw, or queen. I love Melissa’s design because it’s only 9 blocks, no matter which size you pick. Rather than making more blocks, you just make them in bigger sizes. So clever!!

Star Surround Quilt AlongMelissa has already calculated all the fabric requirements and she’s a pro at figuring out the math. All you have to do is pick your favorite fabric or kit and quilt along. 🙂

Click here for Melissa’s complete quilt along schedule.
Cutting begins next week!

Road to California 2014 Registration Opens Today!

I love attending Road to California, the quilters showcase and conference. I went in 2011 and again in 2012 and this is the show that has really inspired me to take my quilting to the next level. Registration opens today for the 2014 show and I’ve just signed up for these classes:

Stich N Flip

Jacquie Gering Stitch and Flip Improv

Victorian Feathers

Karen McTavish Victorian Feathers

Feathers and Fills

Gina Perkes Fantabulous Feathers and Fills

Feather Phobics

Debby Brown Feather Phobics Only

I’m taking classes from “big name” quilters I admire so I can learn their techniques and apply them to my own quilts. This will be a long weekend of intense quilting education for me and I can’t wait!

A Little Light Summer Reading….

My prize for being a Blogger’s Quilt Festival viewer’s choice winner was $100 worth of quilting books from Martingale/That Patchwork Place. Whoo hoo! I had fun picking out these four books below:

Modern NeutralsModern Neutrals: A Fresh Look at Neutral Quilt Patterns by Amy Ellis.

She’s the host of the semi-annual blogger’s quilt fest and a fantastic quilt designer, too!


Modern BabyModern Baby: Easy, Fresh, and Fun Quilt Designs, a compilation book featuring 14 projects including one from fellow blogging buddy Melissa Corry of Happy Quilting.

Other contributing designers whose names I recognize are Amy Smart, Carolyn Friedlander, and Victoria Findlay Wolfe.


Skip the BordersSkip the Borders: Easy Patterns for Modern Quilts by Julie Herman.

Perhaps my favorite design aspect of modern quilting is borderless quilts!

It includes 15 stunning quilts pieced by Julie, 14 of which are machine quilted by Angela Walters. This is eye candy indeed!


Modern Quilts from the Blogging UniverseModern Quilts from the Blogging Universe, a compilation of 19 beautiful unique quilts with a modern aesthetic.

Some bloggers from the book I follow are Amy Ellis, Natalia Bonner, Jeni Baker, Heather Jones, Megan Jimenez, Kati Spencer, Jennifer Mathis, and Lee Heinrich.

Now I’m sort hoping they’ll come out with a sequel. 🙂


It was barely a year ago that I first discovered modern quilting and brought along the first modern book I ever purchased to read while relaxing at the beach.

Beach Book

Modern Books at the Beach 2012

I plan on diving into my new stash of books during this summer’s trip. Plus I want to catch up on all of the Craftsy Classes I’ve signed up for! So stay tuned for updates. 🙂

Christa’s Soapbox – Why I Press My Seams Open

For those that have followed my last few quilt alongs, you will notice that I am a big advocate of pressing my seams open. So I thought I would let you know why.

Pressing OpenFor starters, it makes my blocks lie really, really flat. I used to rush though the quiltmaking process, ending up with less than ideal workmanship. Over the last couple of years, I’ve started slowing things down and have noticed how utilizing good techniques really improves the quality of my work.

Additionally, since I’m writing more pattern instructions and tutorials, I need to be able to take clear pictures with easy to follow diagrams. Quite honestly, it’s such a pain figuring out which way to press the seams ahead of time so they can abutt correctly. Pressing seams flat solves that problem, too!

Press Seams OpenI think it is an old wives’ tale (or perhaps old quilter’s tale?) that seams always need to be pressed to the light side of the fabric. Yes, the conventional wisdom is that it makes for easier hand quilting, if all you are doing is quilting 1/4″ away from the ditch. But since I machine quilt the heck out of everything, this is no longer a concern. Moreover, it’s pretty darn bulky to quilt through extra layers of fabric where the overlapping seams intersect.

Press Seams OpenTrust me, I’ve broken quite a few needles when trying to free motion quilt through an area where bulky seams were pressed to the side. Fortunately, when quilting the lines in my quilt above, I had pressed every stinking seam open so quilting was a breeze and the seam lines blended together.

Wooden Seam RollerYes, it is time consuming to press all of the seams open, but the results are well worth the effort. I love to listen to audio books while I press and the time literally seems to fly by. 🙂

Also, I’ve gotten into the habit of opening the seams first with a wooden seam roller, then going back over them with a hot dry iron. It  works for me!

Angela Walters Textures Fabric and a Winning Quilt

One of my quilting heroes, Angela Walters, recently launched her own line of fabulous fabrics modern fabrics. When I met her at QuiltCon I told her that I planned to carry them in my store.

Angela WaltersNow that plan has become a reality. I just received the wonderful 10 piece collection of Textures, her debut line from Art Gallery Fabrics.Angela Walters Textures


The modern textural look of these prints really appeals to me. I especially love the panel print which was recently featured in a contest sponsored by Art Gallery fabrics.

Textures PanelIn fact, my friend Kelli from Seriously I Think it Needs Stitches won the contest with her fabulous Mod Geocruiser Quilt. Isn’t it great? You can read about her inspiration here.

Mod Geocruiser

Mod Geocruiser by Kelli Fannin
Make it Right Winner

I think Kelli did such a fabulous job with the textural quilting, too. 🙂 You can find more inspiration here to see how others creatively used the Right Angles Panel.

I’m way excited because I also preordered Angela Walters’ next collection, Legacy, due out later this fall. Here’s Angela’s Legacy Quilt, shown at market this past spring. Fabulous!

Legacy Quilt

Angela Walters’ Legacy Quilt

Let’s Get Aquainted Blog Hop Hosted by Plum and June

Hi all! Welcome to my stop on the blog hop tour hosted by Beth of Plum and June. I’m Christa and I have to say I’m committing modern quilt blasphemy by stating that I don’t like making hexagon quilts!

Christa QuiltsOh, no! Why not, you say?? Well I have a good reason. Nearly 17 years ago when I was pregnant with my first child and experiencing horrible morning sickness, I tried to take my mind off things by cutting out hundreds of hexagons for a hand pieced grandmother’s flower garden quilt.

I ended up getting an aversion to hexagons and even had to throw away all the fabric I had used to cut them out or it would make me sick just looking at it. Now, whenever I even think about touching this shape, it reminds me of morning sickness. How unfair is that??Baby Bears QuiltI was able to make my son’s baby quilt shown above once I felt better. (He’s now 16 and just got his driver’s license – boy how time flies!)

This was one of my very early quilts and I learned a lot from it. I learned that I love applique – but not by hand! I also learned that I love tons of quilting on a quilt, though this one was all straight line quilted because that’s all I knew how to do at the time.

I’ve come a long way since then! I’ve recently celebrated a finish, only the back of which I can share now. For the full reveal, be sure to subscribe to Quilty magazine in time to receive the November/December issue. 🙂Quilt Back

I love tons of quilting on a quilt and this one took a whopping 38 hours just for the quilting. But machine quilting this baby was pure zen for me, every moment of it!

I really like the negative space on the back and may play around with this design a bit more for a future quilt… Sometimes the backs of my quilts are more interesting than the fronts, LOL!

I do all my own quilting and my machine of choice is a Bernina which I blogged about recently. My mom calls my new machine the “Klingon Battle Cruiser.” 🙂

Quilty QuiltThis was about 5 hours into quilting and I knew I had bought the right machine for the job. I love all the extra throat space!

My current project is my String of Pearls Quilt. This just may be my favorite modern quilt. I love the strong bold colors and graphic design of modern quilting. I realized I’m not into embellishing or working with lots of tiny fussy pieces so modern quilting suits me to a “T”!

String of Pearls Quilt Top

I usually try to host a quilt along when I want to make a new quilt because it forces me to plan ahead and keeps me on schedule. Plus it’s fun to see how everyone else interprets my design.

Coming up later this fall I plan on attending Sewing Summit so I look forward to getting to know more bloggers and making new friends. 🙂

Here are this week’s blog hop stops:

ChristaQuiltsBlog.comYou are here!

wonderlandbyalyce.blogspot.com

the-crooked-banana.blogspot.com

www.rachelboothhappilyeverafter.blogspot.com

quarterincher.blogspot.com

www.sassafras-lane.com

www.carolinescraftiness.blogspot.com

http://hilltophousecreativeworks.blogspot.com/

Happy hopping!

Click here for the complete blog hop schedule.