This week I head off to Kansas City, Missouri for Spring 2019 international quilt market – the quilting industry trade show. I’ll have new fabric, quilts and patterns to share plus loads of inspiration! Catch live daily updates from me on instagram @christaquilts – and if you’ll be at the show, please be sure to come say hi during my in-person events below:
Saturday 11 AM Designer Showcase Booth 211 – free goody bags for attendees
Join me and the other Benatex designers shown above to learn more about our new collections, grab a goody bag and take pics of our booths – it will be super fun!!
Quilt Market Newsletter Feature
Speaking of quilt market, I was pleased to be featured in the April Edition of eInsider – News and Trends from Quilt Market. Click here to read my interview.
Today I’m excited to share a quick sneak peek of my newest fabric line, Geo Pop from Benartex/Contempo Studio. It will debut at quilt market next week and I can’t wait!
Geo Pop is my fourth fabric line and I was super stoked to add black, white and gray to the mix of fun, bright geometrics. It mixes well with my previous collections: Modern Marks, Fandangle, and Abstract Garden. More info and patterns to come, so stay tuned – I’d better go pack!!
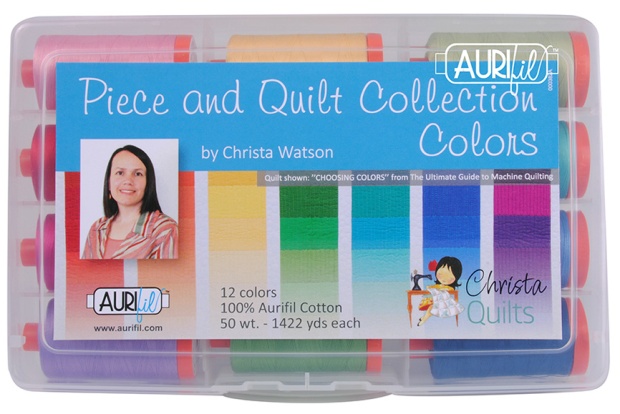
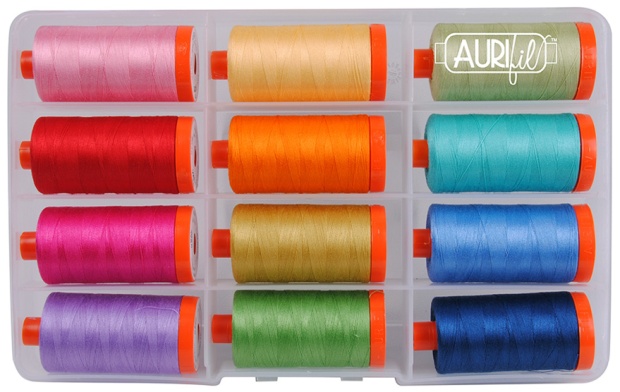
Good news for those wanting to purchase my Aurifil Thread collections: I have them in stock at shop.ChristaQuilts.com for just $99 plus shipping. This includes my new Variegated Collection as well as my Piece and Quilt Collections in Colors and Neutrals. Here’s what’s included in each:
2425 Bright Pink
2250 Red
4020 Fuchsia
2520 Violet
2130 Medium Butter
1133 Bright Orange
2920 Light Brass
2884 Green Yellow
2886 Light Avocado
1148 Light Jade
2725 Light Wedgewood
2783 Medium Delft Blue
Piece and Quilt Collection Neutrals
PIECE AND QUILT NEUTRALS INCLUDE:
2311 Muslin
5021 Bamboo
1246 Dark Grey
5007 Light Grey Blue
2326 Sand
2372 Dark Antique Gold (Brown)
2315 Pale Flesh
2405 Oyster
2024 White
2615 Aluminium
2605 Grey
4241 Very Dark Grey
Each collection includes 12 spools of 100% cotton, 50 weight, 2 ply threads with 1422 yards each They work perfectly for everything I do: piecing, quilting, machine, applique and binding.
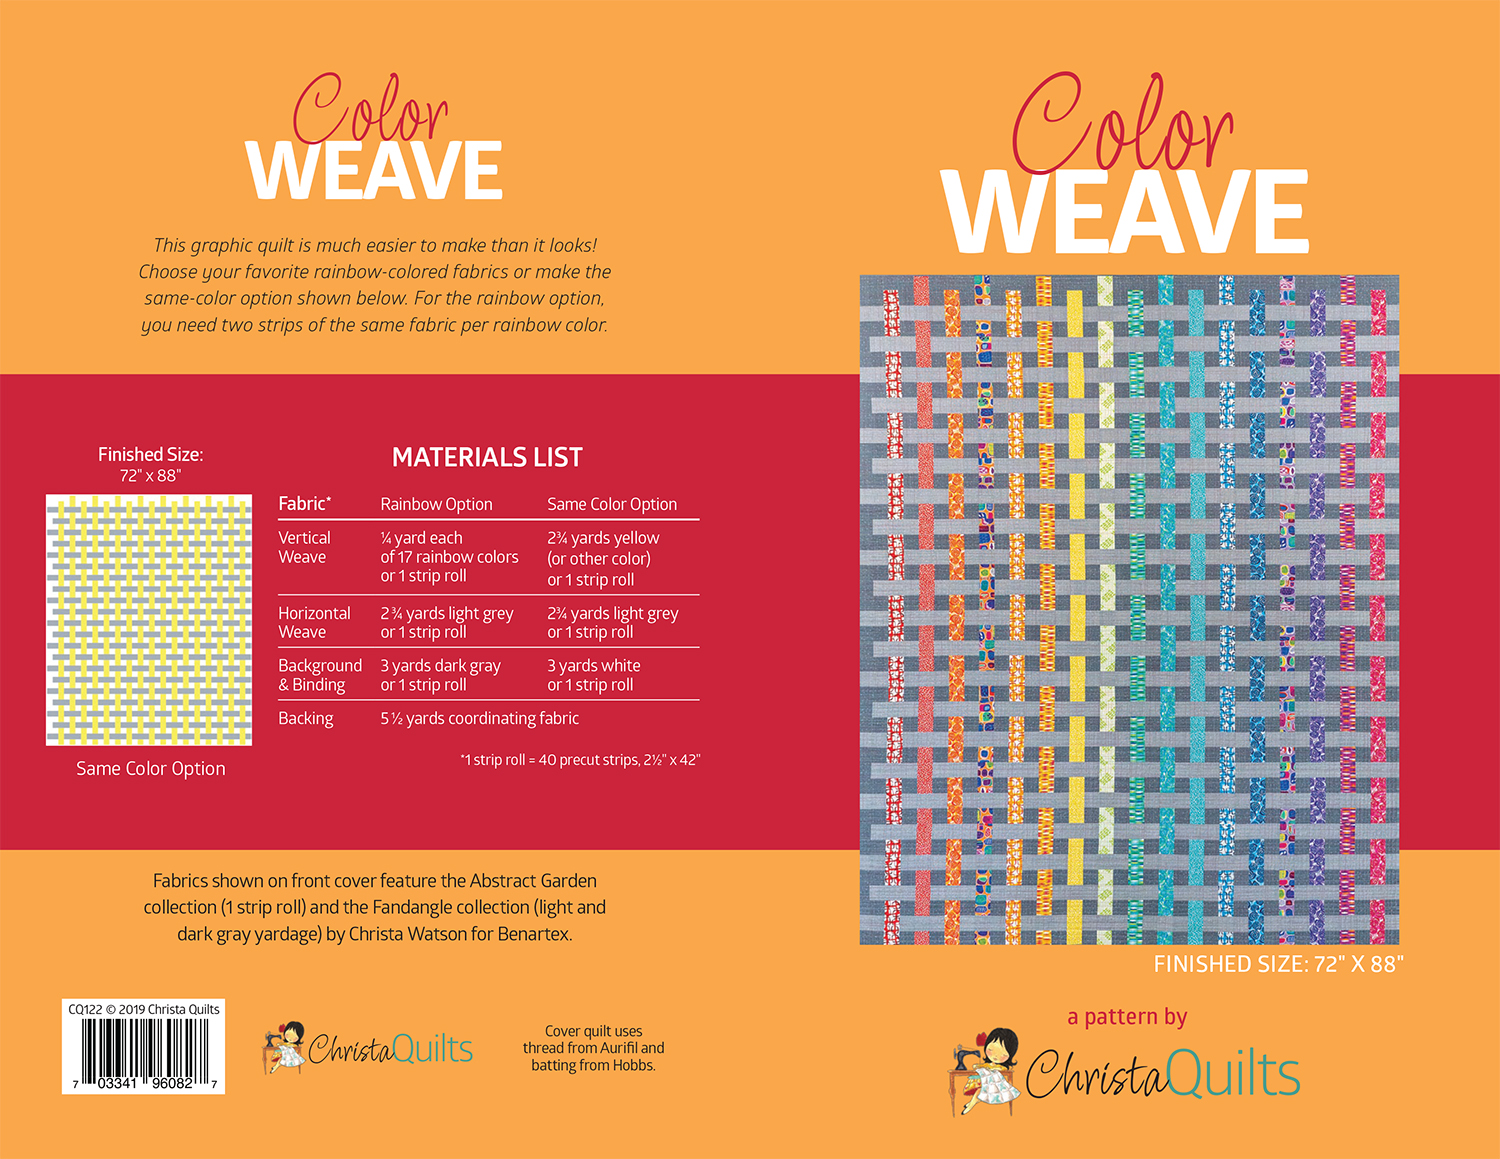
I’ve had something under wraps that I’m finally excited to share! My latest quit pattern – Color Weave is now available as a PDF download from my Etsy shop.
I enhanced the original pattern and also included an option to make it from a single color instead. But of course it would look fabulous in any fabric combo! You just need two strips of the same fabric when working with precuts. That’s why I designed my Abstract Garden precuts with 2 of each!
Click the image below to enlarge so you can see the materials requirements.
I had an amazing time making this quilt! The instructions are easy to follow and I’ve included step-by-step full color diagrams for both versions shown above. I’ve also included a quilting plan to quilt one of my favorite walking foot designs – random crosshatch.
I’m here to cheer you on every step of the way when you purchase any of my patterns. I want you to have just as much fun making this quilt as I did!
Sharing is caring! While you are making your version, be sure to share your progress in my ChristaQuilts Facebook group or use the hashtag #colorweavequilt on instagram. I’m happy to guide you every step of the way!
Most people think that stitch in the ditch is the easiest thing you can do with your walking foot, but wavy lines “near” the ditch are much easier to accomplish. Then, when you are ready to tackle straight line quilting, embrace unmarked, uneven line spacing for a quicker finish!
Irregular Parallel Lines on Geese in the Garden – Cool
Make a Quilting Plan
I originally developed the idea to make a quilting plan in my books, then refined my technique so that I could clearly teach it to others in my online video class – The Quilter’s Path. In a nutshell, I like to draw my designs out on an image of the finished quilt top to see how it will look before I quilt the quilt. Below is the quilting plan for both quilts, which is included in my Geese in the Garden quilt pattern.
The reason I like to quilt irregularly spaced, imperfect lines is because I know I’m going to “mess up” anyway, so why not build it into the design? After all – you know what they say: do something once and it could be a “mistake.” But do it two or more times and it’s a design element! Plus, it’s a lot faster to quilt imperfect lines than perfect ones!
Because the prints are so colorful and busy, a variegated thread looks great and helps blend everything together. I chose Stone Washed Denim #3770 for the cool version. Even though it looks like a solid colored thread, it has subtle color changes that will look great on this quilt. Because it’s more on the pastel side, it also blends in with the rest of the prints.
For the warm version, I selected #3840 French Lilac. The purply-pinks blend beautifully and add wonderful texture. When choosing colors, I lay the spool across the quilt and see which color disappears into the quilt the most. If I’m not using and exact matching thread, I’ll usually go a shade lighter rather than darker, as that seems to blend in the best.
To do the actual quilting, first I quilt a series of “anchor” lines to secure the quilt. These can be lines in, or near, the ditch, randomly spaced across the quilt to prevent it from shifting. Then I fill in with additional lines as desired.
Check out this video of me quilting the warm version with a simple wavy line design, following the pieced design of the quilt. I’m using my BERNINA dual feed, which acts just like a walking foot, but allows me to use different feet on my machine.
For the cool version, I used painter’s tape in some of the areas to divid up the space and give me nice, crips lines. When stitching right next to the tape, I have to be careful not to stitch it to the quilt!
Once I’ve established a few anchor lines, I’ll fill in between the lines at random intervals, using the edge of my foot as a guideline for spacing. Here’s another short video of my quilting the cool version, adding more lines in between previously spaced lines:
Finally, I prefer to bind my quilts by hand because I love the clean look it gives to them. Here’s a final video showing how I make each stitch by hand, once it’s been sewn onto the quilt by machine. (See links at the end for my full binding tutorial.)
Here’s a short video showing how I stitch the binding by hand to finish:
I really enjoyed sharing more behind the scenes of making this quilt. To help support the time it takes to create these posts, please use the links below to purchase the pattern, or find my entire pattern and fabric line at shop.ChristaQuilts.com. Many thanks!!
I’ve finally jumped on the Etsy bandwagon!! I set up an account many years ago before we had The Precut Store but didn’t do much with it. I’ve also purchased a few items here and there. But I finally made the push to get my quilt patterns (PDF versions) on the site so you could access them quickly and easily!
Although I still have my print patterns available for sale at shop.ChristaQuilts.com, AND the PDF versions are still available to purchase through Craftsy (Bluprint), with the recent changes they’ve made, I can’t add any new ones. (Instructors were supposed to be able to continue adding new patterns but I haven’t figured out how to do that…) Since I have a bunch of new patterns coming out this spring, I wanted to make sure I didn’t miss out on getting my patterns in the hands of those who needed them.
So will you do me a favor? If you’ve had your eye on a pattern or two of mine, will you go ahead and place your order and leave some feedback? That will allow me to make sure everything is running smoothly and that I can grow my presence on the site.
Just a reminder – to access your PDF pattern once you’ve purchased it, be sure to save it to your computer and then open it up with your favorite PDF reader. Then be sure and keep me posted during your progress. My favorite thing is to see what you make and the fun fabrics you choose!
Welcome to my new series where I explain a little more in depth about how I made a recent quilt and share tips to make your sewing and quilting faster and more fun! Today we’ll focus on my Geese in the Garden Quilts made from my Abstract Garden line with Benartex/Contempo.
When I designed Geese in the Garden with it’s radiating diamond-like shapes, my first instinct was to write the pattern by making all of the blocks from Half Square Triangles. However, that would have left a seam in the middle of each block which would have disrupted the fabric print.
I knew I could eliminate some of the seams using the “flip and sew” method but there would still be some seams I didn’t like, and it would have created a lot of waste. Here’s an early sketch of it in Electric Quilt with those unsightly seams (in the yellow seeds fabric and the pink roses fabric).
So then I researched how to sew diamond shapes and discovered that these shapes are NOT true diamonds, but are rather “squished” or “elongated” diamonds. However, the traditional technique to make the diamonds would still work, but I’d have to recalculate the math.
Diamond cutting in process.
After a bit of testing I figured out an easy way to cut these elongated diamonds with a simple acrylic ruler that has a 45 degree line – no specialty ruler required! It’s all about the width that you cut them, and that information is included in detail in the pattern.
You’ll get a chance to use the 45 degree line on your ruler when cutting these diamonds.
Because these are not true diamonds, they have a definite left and right side. You can create some really cool designs with “mirror image” units. Here’s a tip to cut them correctly: Cut at least 2 stacked strips at a time. Make sure one strip is right side up, while the other is wrong side up. Or fold the strip in half and you’ll automatically get mirror image pairs.
Mirror image units – and no pesky seams in the middle of the fabric!
Abstract Garden Fabric Choices
My Abstract Garden collection includes a total of 20 fabrics arranged into warm and cool colorways. However, I wanted fabric selection to be easy for this quilt pattern, so that you could use any fabrics you like. So it only takes a total of 5 prints to create the design.
Since I was making two quilts (warm and cool), I decided to cut and piece them both at the same time. I starched the fabrics ahead of time before I cut, to help control the diagonal bias edges.
The fun part about choosing fabrics is creating a radiating, glowing look with your color choices. Because the center diamonds of the design are interchangeable, I played around with them to make sure I was happy with the color arrangement.
I love pretty stacks of cut units – don’t you?
Sewing the Geese Rows
Technically, this is a “row” quilt, meaning it’s sewn together into rows, rather than blocks. The super easy thing about this pattern is that each row is exactly the same! To make sewing go even easier, I recommend laying out all of the units, and sewing them into pairs on either side of the center triangle.
Although these are for 2 separate quilts, how fun would it be to alternate the rows?
My tip for sewing units with a 45 degree angle is that you need to offset the triangle tips by the same amount on both sides as you sew. The triangle tip will stick out about 1/4″ inch on either side. Notice the tips sticking out in the image below when the fabrics are matched up, right sides together:
Sew an accurate 1/4″ seam, using the point where the two fabrics intersect in the corner. This detail image below shows the sewn seam (stitched with my favorite 50 weight Aurifil thread). Notice it’s been rotated to show the angle at which I sew each unit under the machine. (Make sure to chain piece all the units at once for speed and efficiency.)
You’ll know you’ve sewn them correctly when you’ve created a nice smooth edge along both pieces. Don’t forget to trim the triangle tips! I also press all of my seams open so that my blocks will lie nice and flat.
Remember, this technique works for ANY units with a 45 degree angle. Below is what the center triangle looks like when I lined it up with the rest of the sewn pairs. It looks a little awkward, but notice how both tips are sticking out about 1/4″. Once the pieces are flipped over right sides together and sewn, everything will come out even, just like the diamond pairs.
I often get asked how I press seams open without burning my fingers. The answer is that I open them up with my fingers ahead of the iron, and I never use steam. Here’s a 20 second video clip showing how I press my seam open, once I’ve sewn my rows:
Here’s the backside of the cool version with all of the rows sewn and those nice, flat, pressed open seams. Doesn’t it look just as pretty as the front??
Although the pattern comes in 3 sizes, I chose to make the smallest size. But the best thing about this pattern is that it’s the same number of pieces to cut and sew, no matter which size you make. They just get larger as the quilt gets bigger. It only took me a few hours to piece each quit top, so it’s a great design to make when you are in a hurry, and it’s fun to show off your favorite fabrics in the diamonds.
One final tip to share today: don’t stress too much about perfection. Do your best to line up the seams as you sew the quilt, but notice the lower left corner of the image below. The turquoise and blue corners don’t match up perfectly in all the rows, but that’s ok. Once the quilt is quilted – you won’t even notice it!!
Very few of my points line up perfectly – but it still looks great!!
If you found this post helpful, you can help support my blogging efforts by purchasing my Geese in the Garden pattern or any of my other quilt patterns or fabrics at shop.ChristaQuilts.com. They’ll come infused with a little “Christa Quilts” magic, ensuring your success while I cheer you on!
In the next post, I’ll share tips on how I quilted each quilt with two quick and easy walking foot designs, so stay tuned!
In between moving, hosting the Blooming Wallflowers quilt along, and planning out my next round of designs, I haven’t had a chance to tell you much about some of my latest finishes. So I thought I’d take some time over the next several weeks to share more in-depth about my process of making quilts from my latest fabric line, Abstract Garden.
Think of the next several weeks as Do It Yourself quilt alongs. They won’t be as in-depth as my regular quilt alongs, but they’ll provide a little more insight into my quilt-making process and will help you have a smooth experience making your own version. I enjoy blogging about the process so that I can include some in-process photos, in addition to the full color diagrams and quilting plans I include in my patterns for sale.


 Join me and the other Benatex designers shown above to learn more about our new collections, grab a goody bag and take pics of our booths – it will be super fun!!