As I prepare for International Quilt Market, which is an industry trade show held this spring in Portland, Oregon (May 18-20), I’m sewing like a madwoman, finishing up samples to promote my new quilt patterns and Fandangle fabric line. I’m currently working on two versions of my Surplus Strips Quilt Pattern – in warm and cool colors. Click here to read my previous post about making the blocks.
Color Arrangement

Arranging tiny blocks was much faster than using my design wall!
Although I designed both colorways in EQ8, I didn’t finalize the exact color placement for each block. Instead, I did something very low tech. I printed out a version of the quilt with the same number of blocks that I made and then cut out all of the tiny paper blocks to arrange on my work table. It actually went a lot faster than putting up the blocks on my design wall and arranging them there.

I like being able to rearrange the blocks until I’m happy with their color placement.
These paper blocks are only about 1″ wide!
Once I was happy with the color arrangement, I printed out the final layout in color, and organized the blocks on my work table by color. In other words, the printed out layout served as a “virtual” design wall that takes up a lot less space!

I printed out the layout in EQ8 which serves as my “virtual” design wall.
It was super fast to sew the blocks into rows using my printed out layout as a guideline. This quilt goes together in vertical columns, rather than horizontal rows, so I just had to make sure I kept everything in the correct orientation as I sewed.

I sewed the blocks and sashing in order according to my printed out layout.
Pressing Seams Open
I used this process for both the warm and cool colorway, and it went super fast! Pressing all of my seams open really helped the quilt top lie flat when I gave it a final press. It also made it soooo much easier to line up the seams accurately! Because there’s no nesting, it’s important to pin generously while joining the blocks and rows. But I actually get better results and perfect seam joins when I press seams open & use pins, so it’s worth it to take the extra time.

Seams pressed open ensures a nice flat top, with no lumps and bumps!
When pressing seams open, be sure to use a shorter stitch length (like 2 instead of 2.5) to secure the seams. A shorter stitch also makes it less likely that you’ll see thread poking through the seams, too!
Bonus Measuring Tip

Use a ruler to extend the cutting length on your mat for long borders: place the folded end on the ruler, and cut on the mat. If I needed more length, I’d rotate the ruler longways.
Here’s a bonus tip when working with borders that are longer than your mat. When cutting, I fold the border fabric in half and use an “extend a ruler” – my phrase for extending the cutting length by using a ruler, lined up at the edge of the mat. I’ll use as many extra inches as needed to get a nice precise measurement when cutting. Just divide the needed length in half and count over that many inches on the extension ruler and mat.
More Pressing

Speaking of pressing, once the quilt top is finished, I give it a final press on the front, too. It seems to make the quilt nice, flat and crisp, so it’s ready to baste! Whenever I press anything on my quilt, I always use a dry iron. I don’t like steam because it can burn your fingers and distort the fabric. Also, if the iron leaks or spits, you can get a nasty mess! If I need a bit of water for an unruly seam, I’ll just use a spray bottle filled with water instead.
Virtual Home and Studio Tour

Look closely and you can see 2 quilt tops waiting underneath the warm colorway. Plus there’s some yardage of Fandangle peeking out underneath the cool colorway.
When my quilt top(s) are finished and pressed, I hang them over the stair railing on the upper floor of my home so they don’t get wrinkled. Upstairs is my husband’s office, my daughter’s room, our bedroom and my sewing loft. Downstairs is my son’s room, work area for The Precut Store, living room, dining area, and kitchen. It’s a comfy home and we use every square foot!!
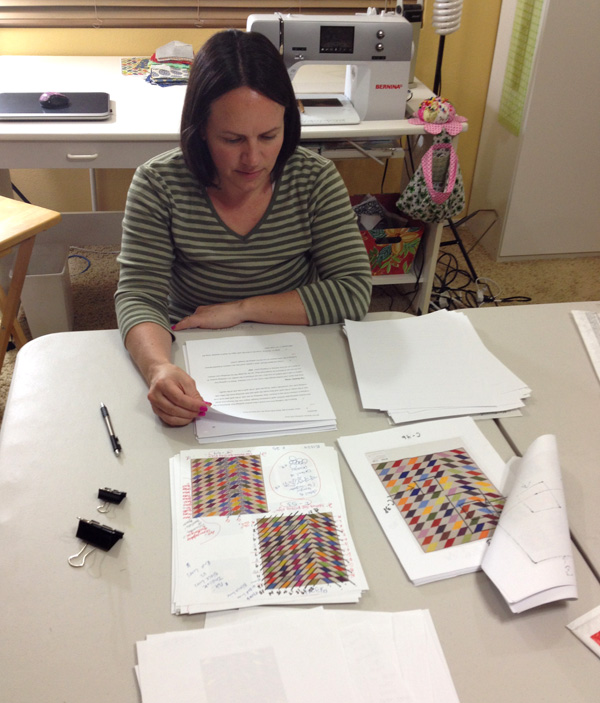
Here’s an image of my studio space, across from the stair railing where I hang my quilts in progress. This picture was taken back in 2014 for a magazine profile. It’s pretty much still the same!

Image of my sewing studio 2014 – with 3 quilt tops that are still unfinished LOL!!
Our backyard is just off the kitchen downstairs, and is where I keep a plastic table set up on the patio for spray basting. I don’t spend nearly enough time in my yard as I do my sewing room, so it needs a little work, LOL!!
Spray Basting

Click here for my spray basting tutorial using a design wall.
Click here for my spray basting tutorial using a table.
Once the backing and top are sprayed outside, I then bring them inside and assemble them on my design wall indoors.

Take a picture of the batting with the quilt, and take note of what you like/don’t like.
I’m using Hobbs cotton batting for the cool colorway.
To keep track of which batting I use, I take a picture of the batting with the quilt top so I can remember. For these quilts, I used Hobbs cotton for the cool colorway and Hobbs silk for the warm. I used those particular battings because they are what I had on hand and didn’t have time to order anything else, LOL!!
But I love using natural fiber battings like cotton, wool, or silk because they cling to the quilt, provide good stitch definition, and allow the quilt to breathe and hang well.

I’m using Hobbs Silk batting for the warm colorway.
Although the quilt pattern calls for all of one fabric for the backing, I had fun and made some bonus blocks with some of the leftover strips. Because I only have a limited amount of Fandangle yardage right now, I got creative with my piecing and used three different warm prints instead.

Click here for a tutorial on how I made my design wall – back in 2013.
I like to make sure I have several inches of extra batting and backing beyond the quilt top. That way I don’t have to line things up perfectly, and the extra will get cut off when it’s time to bind.
Once it’s basted, I’ll trim down the backing and batting so that there’s only 1-2 inches sticking out. This prevents them from flipping backwards under the quilt, causing you to accidentally stitch through them while quilting. Please tell me I’m not the only one who’s done that!!

Notice how closely I trimmed the layers, with only about an inch or two of batting/backing sticking out beyond the quilt top. This prevents quilting the quilt to itself!
The final step is to press the quilt – yet again!! After it’s basted, I’ll press the quilt, first on the back, and then again on the front. This helps set the glue so the layers don’t shift. But more importantly, it allows me to work out any creases or bubbles on either side of the quilt. One the quilt is nice and flat, it’s sooo much easier to machine quilt!
 Click here to preorder the Surplus Strips quilt pattern – print version.
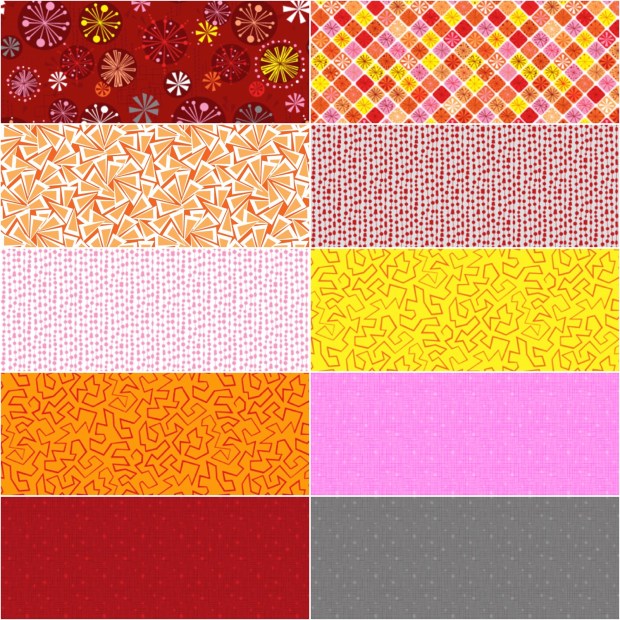
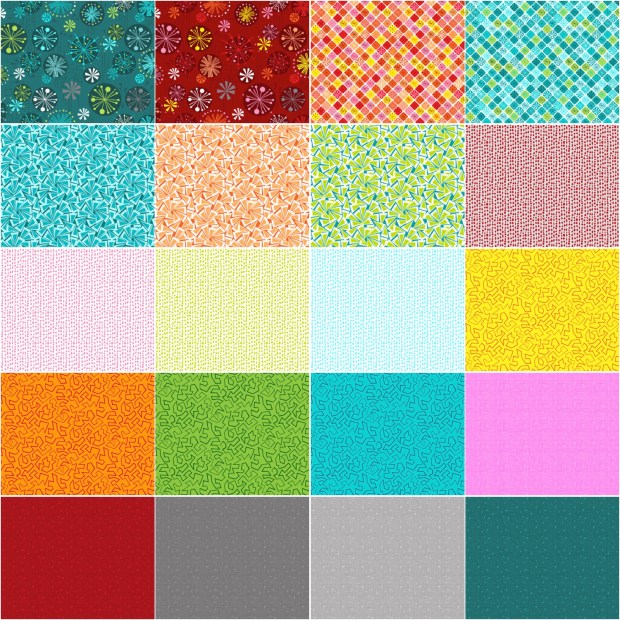
Click here to preorder Fandangle fabric bundles + background.
I hope you are enjoying seeing my progress as I make these quilts. Once they’re finished and photographed, I’ll release the patterns in both PDF and print. For now, you can pre-order the print version over at Shop.ChristaQuilts.com along with fabric to make them. (FYI the Fandangle 1/2 yard bundle + 5 yards of gray will be enough to make either quilt top.)
Now it’s time to quilt them – so stay tuned for part 3!!