The Making of Surplus Strips Part 2 – The Quilt Top and Basting

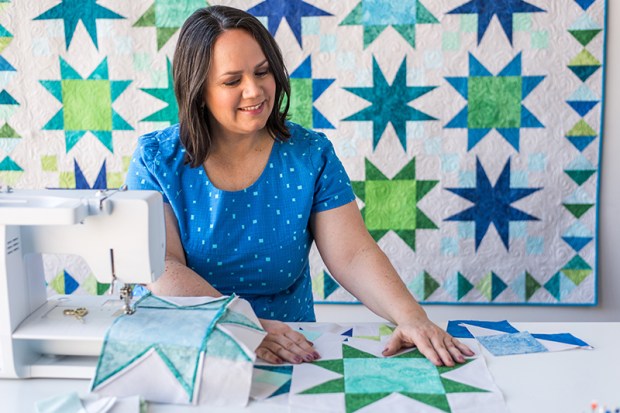
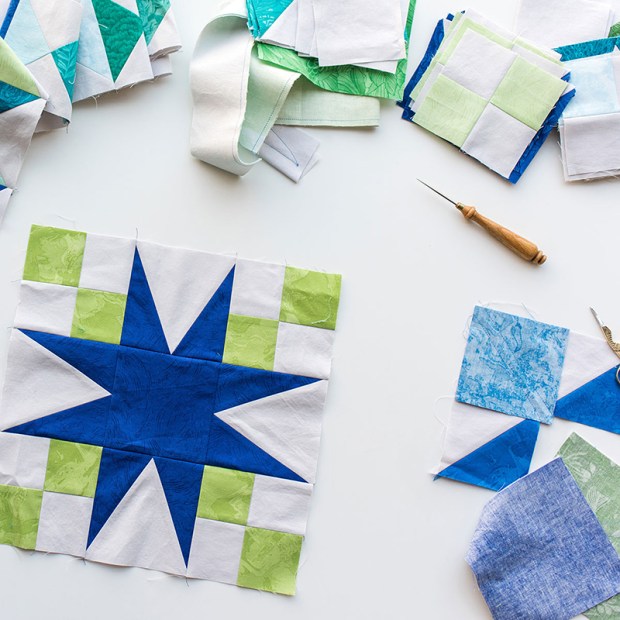
As I prepare for International Quilt Market, which is an industry trade show held this spring in Portland, Oregon (May 18-20), I’m sewing like a madwoman, finishing up samples to promote my new quilt patterns and Fandangle fabric line. I’m currently working on two versions of my Surplus Strips Quilt Pattern – in warm and cool colors. Click here to read my previous post about making the blocks.

Color Arrangement

Surplus Strips Blocks in Cool Fandangle

Arranging tiny blocks was much faster than using my design wall!

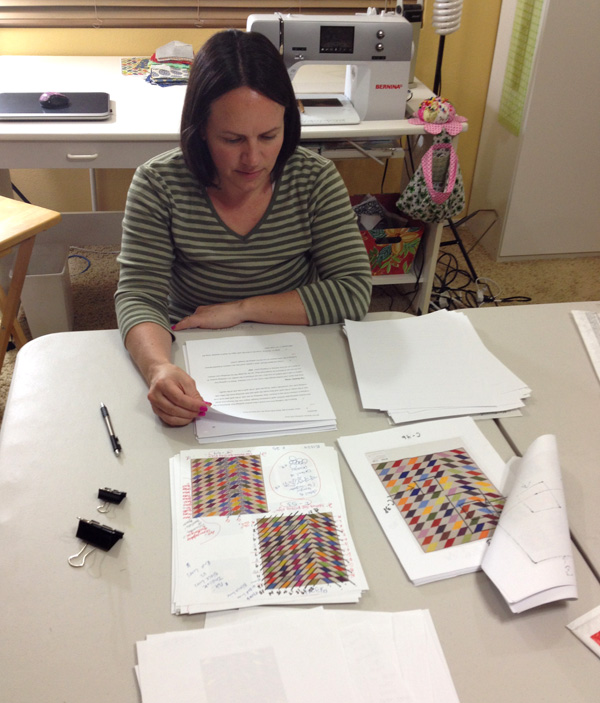
Although I designed both colorways in EQ8, I didn’t finalize the exact color placement for each block. Instead, I did something very low tech. I printed out a version of the quilt with the same number of blocks that I made and then cut out all of the tiny paper blocks to arrange on my work table. It actually went a lot faster than putting up the blocks on my design wall and arranging them there.
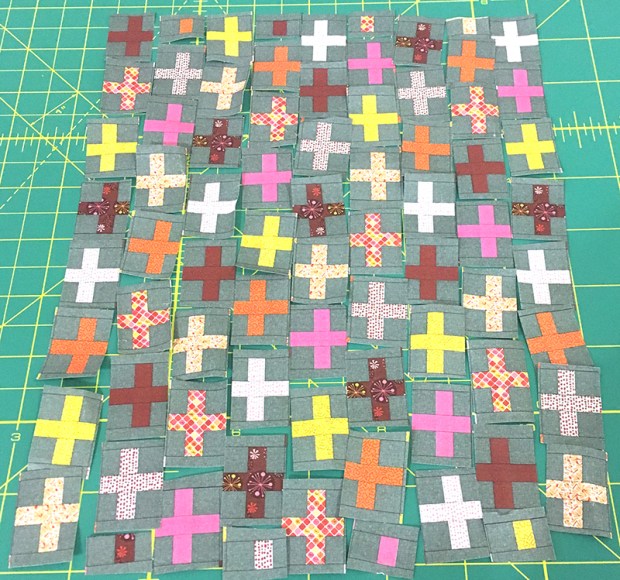
Surplus Strips Paper Blocks - Warm Fandangle

I like being able to rearrange the blocks until I’m happy with their color placement.
These paper blocks are only about 1″ wide!

Once I was happy with the color arrangement, I printed out the final layout in color, and organized the blocks on my work table by color. In other words, the printed out layout served as a “virtual” design wall that takes up a lot less space!

Surplus Strips Blocks Fandangle Warm Colorway

I printed out the layout in EQ8 which serves as my “virtual” design wall.

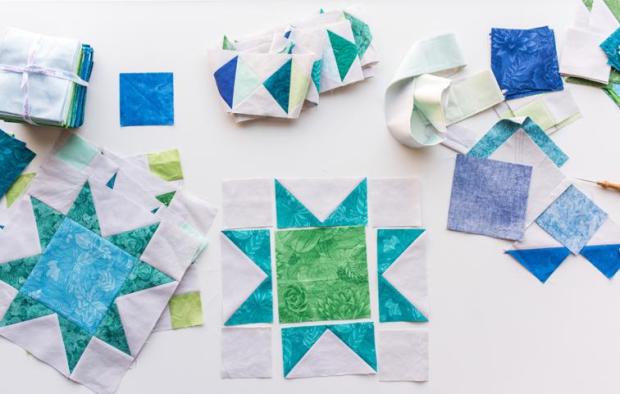
It was super fast to sew the blocks into rows using my printed out layout as a guideline. This quilt goes together in vertical columns, rather than horizontal rows, so I just had to make sure I kept everything in the correct orientation as I sewed.
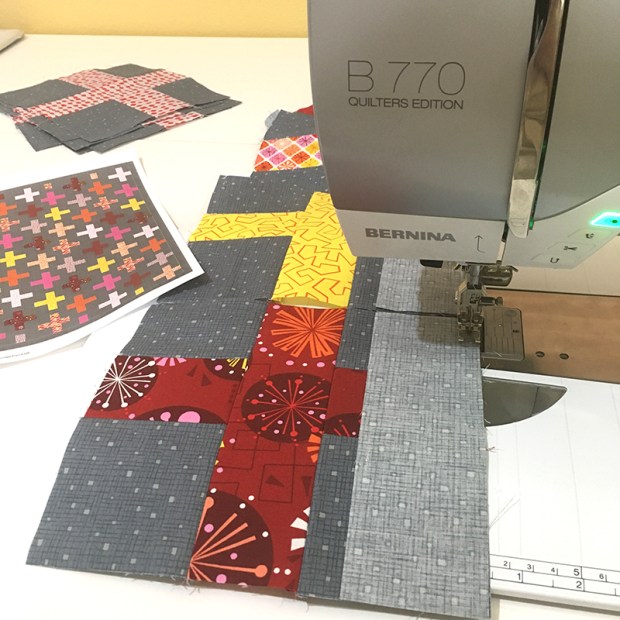
Surplus Strips blocks Fandangle Fabric warm colorway

I sewed the blocks and sashing in order according to my printed out layout.

Pressing Seams Open

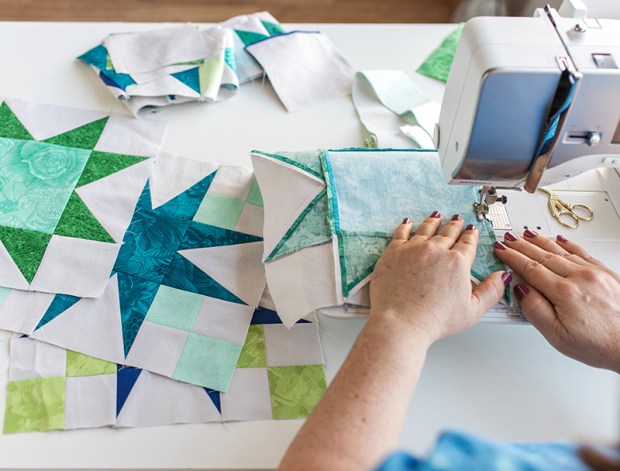
I used this process for both the warm and cool colorway, and it went super fast! Pressing all of my seams open really helped the quilt top lie flat when I gave it a final press. It also made it soooo much easier to line up the seams accurately! Because there’s no nesting, it’s important to pin generously while joining the blocks and rows. But I actually get better results and perfect seam joins when I press seams open & use pins, so it’s worth it to take the extra time.
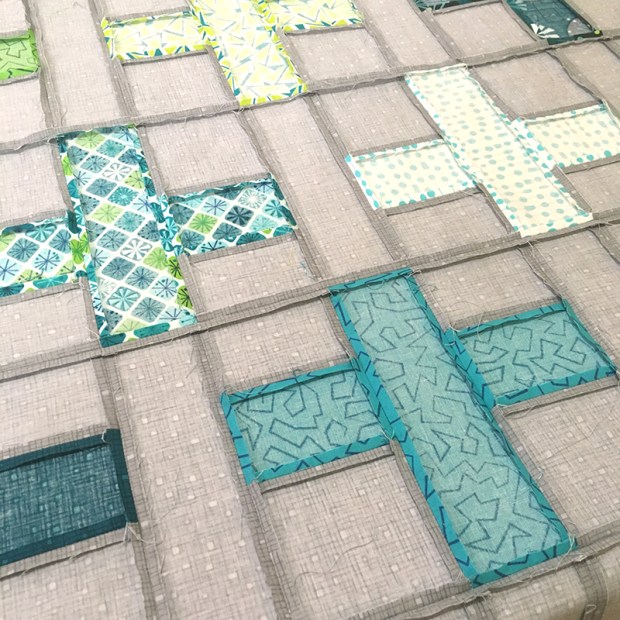
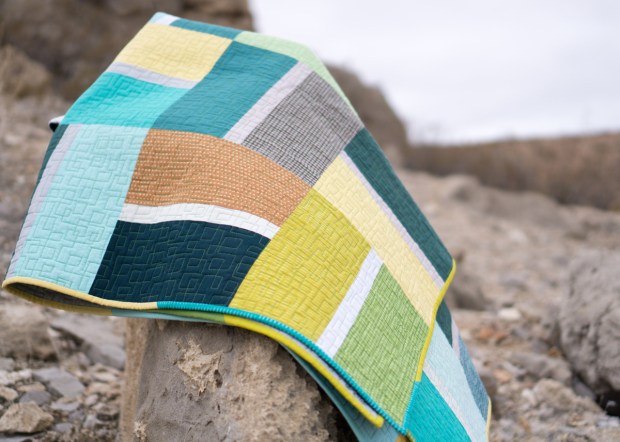
Seams Pressed Open - Cool Colorway, Fandangle Fabric, Surplus Strips Quilt

Seams pressed open ensures a nice flat top, with no lumps and bumps!

When pressing seams open, be sure to use a shorter stitch length (like 2 instead of 2.5) to secure the seams. A shorter stitch also makes it less likely that you’ll see thread poking through the seams, too!

Bonus Measuring Tip
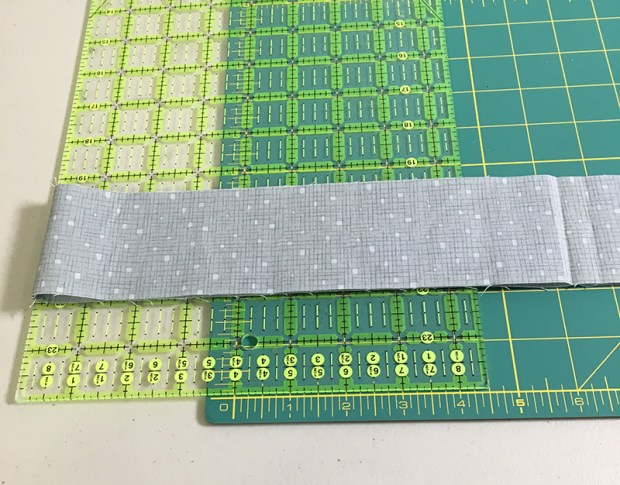
Measuring long borders

Use a ruler to extend the cutting length on your mat for long borders: place the folded end on the ruler, and cut on the mat. If I needed more length, I’d rotate the ruler longways.

Here’s a bonus tip when working with borders that are longer than your mat. When cutting, I fold the border fabric in half and use an “extend a ruler” – my phrase for extending the cutting length by using a ruler, lined up at the edge of the mat. I’ll use as many extra inches as needed to get a nice precise measurement when cutting. Just divide the needed length in half and count over that many inches on the extension ruler and mat.

More Pressing
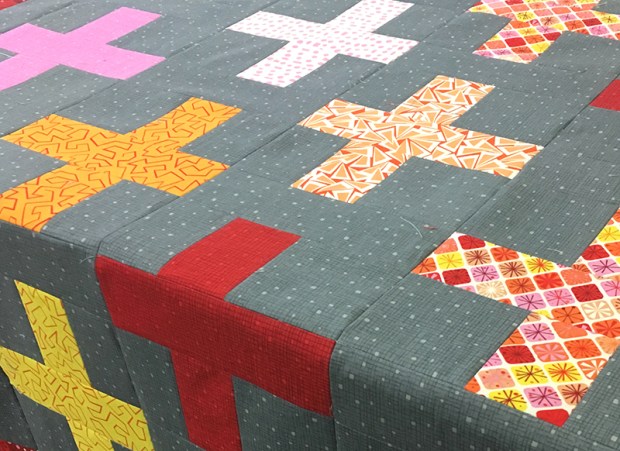
Press the quilt on both sides

Speaking of pressing, once the quilt top is finished, I give it a final press on the front, too. It seems to make the quilt nice, flat and crisp, so it’s ready to baste! Whenever I press anything on my quilt, I always use a dry iron. I don’t like steam because it can burn your fingers and distort the fabric. Also, if the iron leaks or spits, you can get a nasty mess! If I need a bit of water for an unruly seam, I’ll just use a spray bottle filled with water instead.

Virtual Home and Studio Tour
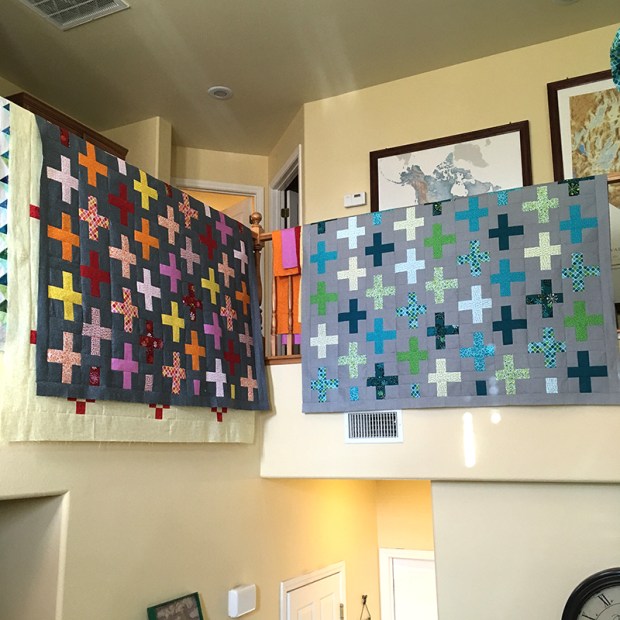
Surplus Strips Quilt Tops Warm and Cool

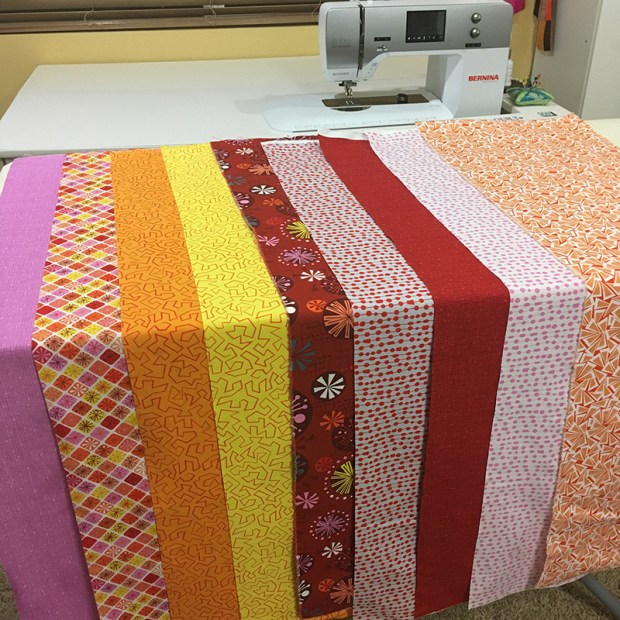
Look closely and you can see 2 quilt tops waiting underneath the warm colorway. Plus there’s some yardage of Fandangle peeking out underneath the cool colorway.

When my quilt top(s) are finished and pressed, I hang them over the stair railing on the upper floor of my home so they don’t get wrinkled. Upstairs is my husband’s office, my daughter’s room, our bedroom and my sewing loft. Downstairs is my son’s room, work area for The Precut Store, living room, dining area, and kitchen. It’s a comfy home and we use every square foot!!

Here’s an image of my studio space, across from the stair railing where I hang my quilts in progress. This picture was taken back in 2014 for a magazine profile. It’s pretty much still the same!
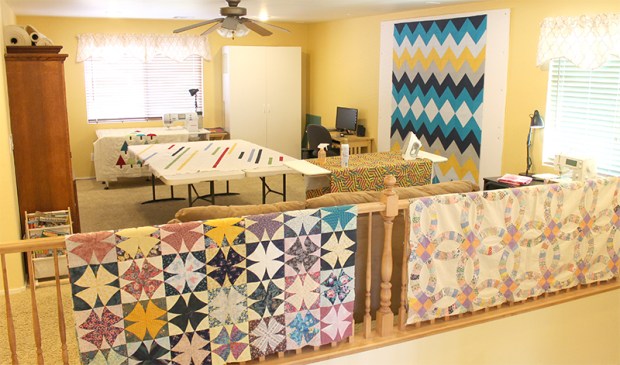
Christa's Sewing Room

Image of my sewing studio 2014 – with 3 quilt tops that are still unfinished LOL!!

Our backyard is just off the kitchen downstairs, and is where I keep a plastic table set up on the patio for spray basting. I don’t spend nearly enough time in my yard as I do my sewing room, so it needs a little work, LOL!!

Spray Basting

Basting Outside

Click here for my spray basting tutorial using a design wall.
Click here for my spray basting tutorial using a table.

Once the backing and top are sprayed outside, I then bring them inside and assemble them on my design wall indoors.

Surplus Strips Batting

Take a picture of the batting with the quilt, and take note of what you like/don’t like.
I’m using Hobbs cotton batting for the cool colorway.

To keep track of which batting I use, I take a picture of the batting with the quilt top so I can remember. For these quilts, I used Hobbs cotton for the cool colorway and Hobbs silk for the warm. I used those particular battings because they are what I had on hand and didn’t have time to order anything else, LOL!!

But I love using natural fiber battings like cotton, wool, or silk because they cling to the quilt, provide good stitch definition, and allow the quilt to breathe and hang well.
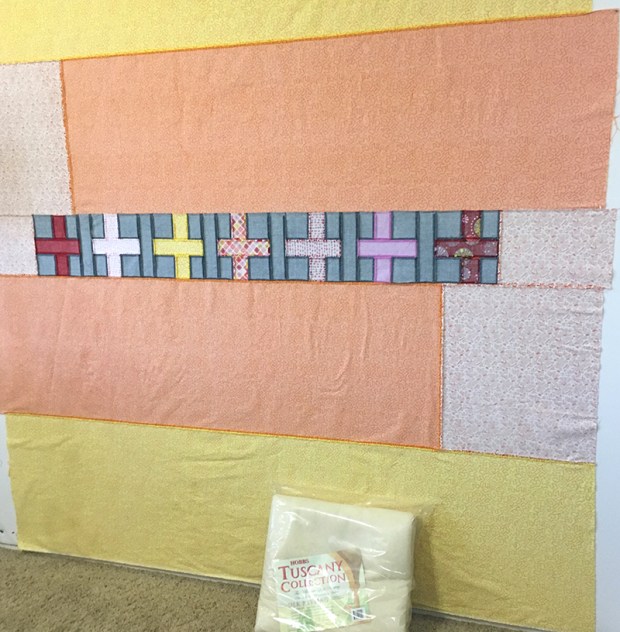
Surplus Strips Warm Colorway backing

I’m using Hobbs Silk batting for the warm colorway.

Although the quilt pattern calls for all of one fabric for the backing, I had fun and made some bonus blocks with some of the leftover strips. Because I only have a limited amount of Fandangle yardage right now, I got creative with my piecing and used three different warm prints instead.
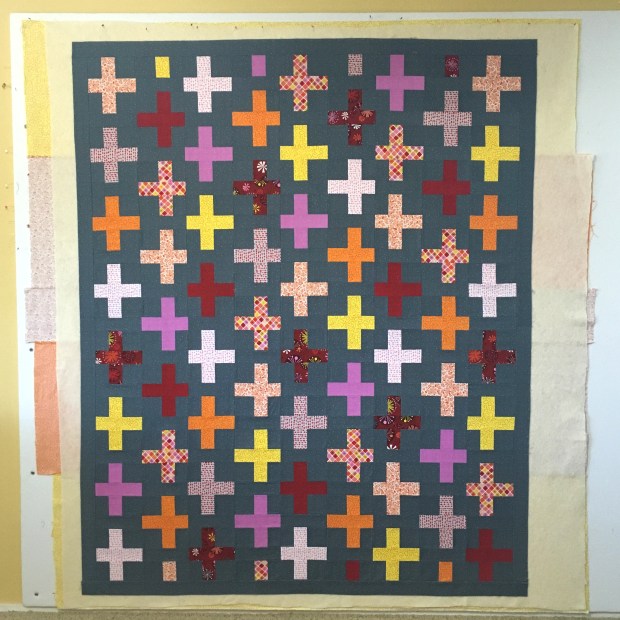
Surplus Strips Warm basting

Click here for a tutorial on how I made my design wall – back in 2013.

I like to make sure I have several inches of extra batting and backing beyond the quilt top. That way I don’t have to line things up perfectly, and the extra will get cut off when it’s time to bind.

Once it’s basted, I’ll trim down the backing and batting so that there’s only 1-2 inches sticking out. This prevents them from flipping backwards under the quilt, causing you to accidentally stitch through them while quilting. Please tell me I’m not the only one who’s done that!!
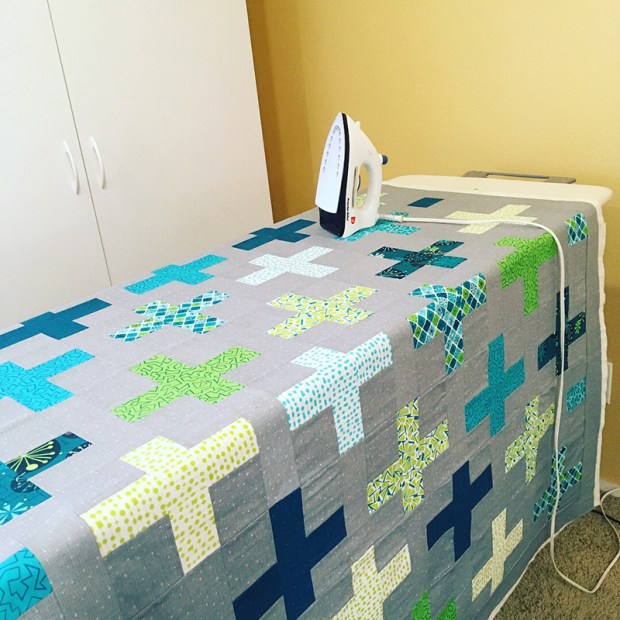
Pressing the Quilt After Basting

Notice how closely I trimmed the layers, with only about an inch or two of batting/backing sticking out beyond the quilt top. This prevents quilting the quilt to itself!

The final step is to press the quilt – yet again!! After it’s basted, I’ll press the quilt, first on the back, and then again on the front. This helps set the glue so the layers don’t shift. But more importantly, it allows me to work out any creases or bubbles on either side of the quilt. One the quilt is nice and flat, it’s sooo much easier to machine quilt!

Surplus Strips Quilt Pattern by Christa WatsonClick here to preorder the Surplus Strips quilt pattern – print version.
Click here to preorder Fandangle fabric bundles + background.

I hope you are enjoying seeing my progress as I make these quilts. Once they’re finished and photographed, I’ll release the patterns in both PDF and print. For now, you can pre-order the print version over at Shop.ChristaQuilts.com along with fabric to make them. (FYI the Fandangle 1/2 yard bundle + 5 yards of gray will be enough to make either quilt top.)

Now it’s time to quilt them – so stay tuned for part 3!!
Writing Book 4 – Part 1: The Book Proposal

Guess what? I’ll soon be writing another machine quilting book! I thought it would be fun to take you behind the scenes of book creation from start to finish because I get a lot of questions about what it takes to write one. I figured the best way to answer that was to document my process in real time as it happens. My only caveat is you’ll have to be patient as I blog about my journey because it can take a long time from concept to publish date. But sharing this journey with you in real time will definitely make the months (and years) pass more quickly.
Books by Christa Watson

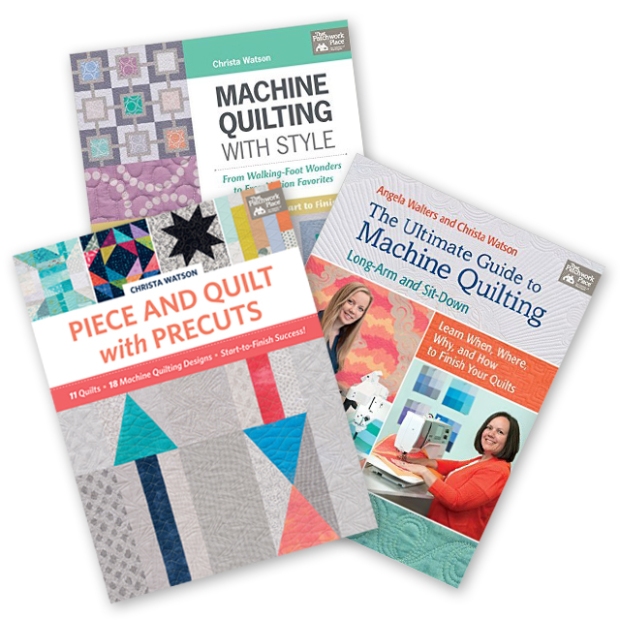
The 3 books I’ve written will be joined by a 4th (but not till 2020)!!
The first step is to submit a very thorough book proposal. Book publishers have their proposal submission forms on their website and most are very similar: they want to know the gist of the book, what makes it special or different, why it will sell (and how you plan to market it) along with what you envision the book to look like.

If it’s a project based book, they’ll want to see sketches of all the proposed projects including the fabrics you plan to use. They may request to see one or more finished quilts and a sample chapter from the book so they know that you can write and express yourself clearly.

They’ll also want a timeline of how long it will take you to complete the manuscript and make all the projects so they can assign it a production team and release date. FYI, most books take about 1 1/2 to 2 years to produce from the initial spark of an idea to publication.

Before a publisher is ready to give the thumbs up, they’ll do a thorough review, usually with an acquisitions committee. They’ll conduct a cost projection & market analysis to make sure that producing the book will be profitable. A publisher spends a lot of time and resources on any one book including a whole team of people to copy edit, tech edit, photograph, lay out, illustrate, and of course market it. To get an idea, open up any book you have from a major publisher and count the list of names that were involved in producing it.

Editing Machine Quilting with Style

Editing my first book, Machine Quilting with Style, back in 2015

The proposal for my first book, Machine Quilting with Style, took about 5 months to solidify my idea and then another 4 months to actually write the proposal which was over 40 pages in length. I first thought about the idea in February of 2013 after returning home from QuiltCon but didn’t submit the proposal until November of 2013. I completed the quilts and manuscript in August of 2014, and it was published in September of 2015, nearly 2 years later after I proposed it.

My current proposal was about 30 pages and took me 3 months to thoroughly think through my ideas – then another month to design the content and create the structure, outline and table of contents. Even after writing multiple books, getting the green light for the next one is never a guarantee and I had to complete a thorough submission each time.

Angela Walters and Christa Watson at Quilt Market

Promoting my 2nd book The Ultimate Guide to Machine Quilting with Angela Walters at Quilt Market in 2016. (Check out long my hair grew out in a year from writing to publication!)

I submitted the proposal for my 4th book to Martingale/That Patchwork Place in early April of this year, and just received the unofficial word that they want to go forward with my idea, after a bit of tweaking. (I waited to start writing this series in the off chance that they weren’t interested because then there’d be nothing to document, LOL!!)

Once my publisher received my submission, they discussed it at their monthly submission meeting, and came back with a “yes we want to publish it, but let’s tweak it a bit more before we give the official approval.” I’m always open to suggestions, and one of the keys to getting your book successfully published is flexibility.

I originally had two ideas for book #4 and pre-pitched them on both before I submitted the complete proposal, to make sure they were interested in seeing them. Although I incorporated both ideas into the current proposal, I emphasized that I wanted to go in one direction with it more than the other. However, my publisher felt that the second direction I had offered had a better chance of being successful, so I’m heeding their advice. After all, they know the market and their customers better than I do!

Box of Books - Piece and Quilt with Precuts by Christa Watson

It was such an exciting day when copies of my 3rd book, Piece and Quilt with Precuts arrived!

So the next step is to edit the proposal by emphasizing idea 2 over idea 1 and present the changes to them in person when we meet up at Spring Quilt Market. Because we are working as a team here, they’ll help me craft it in such a way that it will get the official approval when the committee meets again next month. We just need to get the final concept that we both agreed on written down into words and graphics that will illustrate exactly what the book will be about.

We also discussed timing. At first I thought I wanted it to come out in fall of 2019 but in order to do that, everything would have to be in turned in this August (of 2018) and with my current travel schedule, there’s no way I could manage that. So we are tentatively looking at Spring of 2020 which will give me the time I need to actually get everything done. Although that seems like a long way off from now, it will be here before we know it!!

Although I won’t really be able to discuss the specific content of the book, I’ll gladly take you along my journey as I write the manuscript and create the content. I’ll write another update once I get the official word, so stay tuned!

The Making of Surplus Strips Part 1 – the Blocks

I sure have enjoyed documenting more of my real-time progress as I create quilts to help promote my patterns, books and fabric. It’s so much more enjoyable to write about my process as I go, rather than trying to recapture the excitement months later!

Surplus Strips Quilt Pattern by Christa Watson

Click here to pre-order my Surplus Strips Quilt Pattern.

I’m currently making two versions of Surplus Strips – both in warm and cool colorways of my newest fabric line, Fandangle, which will be shown at Spring Quilt Market in Portland, Oregon, May 18-20. The pattern cover art above is shown using my digitally created images from EQ8 as a placeholder until the quilts are finished and photographed.

Once that’s done, I’ll send it off to the printer and release a PDF pattern, too. For now, you are welcome to preorder the print version which will ship on or before June 1, 2018.

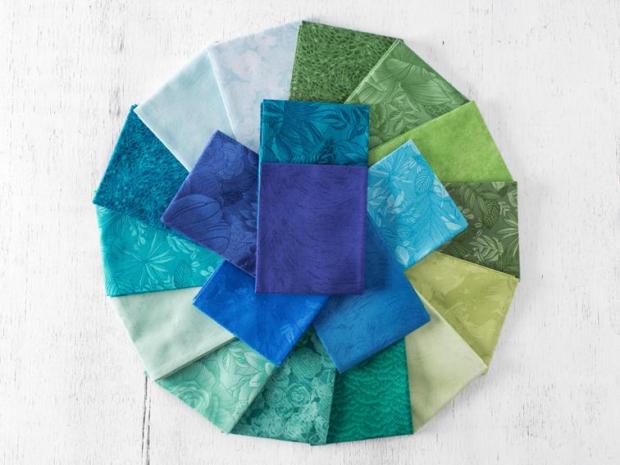
Fandangle Fabrics Cool Colorway

Fandangle Fabric in the Cool Colorway

Although my timeline is tight, I’m still going through the regular process I use to create a well-made quilt. I like to prewash and starch all of my fabrics for two reasons: (1) it gets rid of the excess dye so there’s no chance of bleeding or ruining the quilt and (2) the starch makes the fabric stiffer so there’s less stretch while piecing.

My number 1 starching tip is to spray starch on one side of the fabric, then flip it over and iron the other side. Then repeat – starch the side you just ironed, flip it over again and press from the other side. The prevents the iron from burning the starch so you don’t get flakes! Starching and pressing both sides makes the fabric more crisp so it’s easier to work with. Also – I just use cheap starch from the grocery store and I’ve never had a problem with it.

Fandangle Fabrics Warm Colorway

Fandangle Fabric in the Warm Colorway

My Surplus Strips pattern is written for either precut 2 1/2″ strips or yardage. You can go super scrappy with a single jellyroll + background, or do a color blocked quilt like I’m doing. For yardage, It takes about 1/3 yard of 9 different fabrics plus 4 3/4 yards background + binding.

Surplus Strips Quilt Warm Colorway of Fandangle

I like stacking my pieces so they look pretty!

I paired up the darker gray confetti crosshatch print with the warm colorway of Fandangle, and the lighter gray with the cool colorway. If you are interested in using the same fabrics as me, you can preorder 1/2 yard bundles of Fandangle + 5 yards of either gray and you’ll be set, with a little leftover fabric.

Seams Pressed Open

Pressing seams open ensures flat blocks, and a flat quilt top.

I started cutting out the fabrics for both quilts while I was away on my last teaching trip. When I returned home, I finished cutting all of the pieces for the warm colorway and made all of the blocks in about two days. I used a shorter stitch length for piecing (1.8 instead of the default 2.0) and pressed all of my seams open (with a dry iron, no steam). This will allow the blocks to lie flat for domestic machine quilting.

Surplus Strips Quilt Block Warm Colorway of Fandangle

Surplus Strips Blocks in the Warm Colorway of Fandangle

After piecing the blocks in the warm colorway, I jumped into making the blocks in the cool colorway. I like making two quilts at a time, so I can assembly line the process as much as possible.

Surplus Strips Fandangle Fabric Cool

Units are cut and stacked and ready to sew!

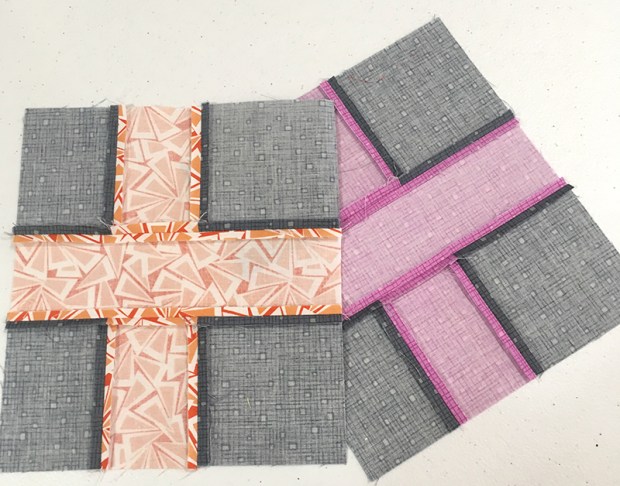
Here are a couple more piecing tips that make the blocks go together smoothly and stay square: when sewing, I pieced with the gray units on top to ensure that I switched sewing directions each time I joined the units. When you join two seams in opposite directions, it helps prevent block distortion. It’s not a huge deal on smaller units, but if you are sewing long strips together, it can be more noticeable.

Lining up block seams

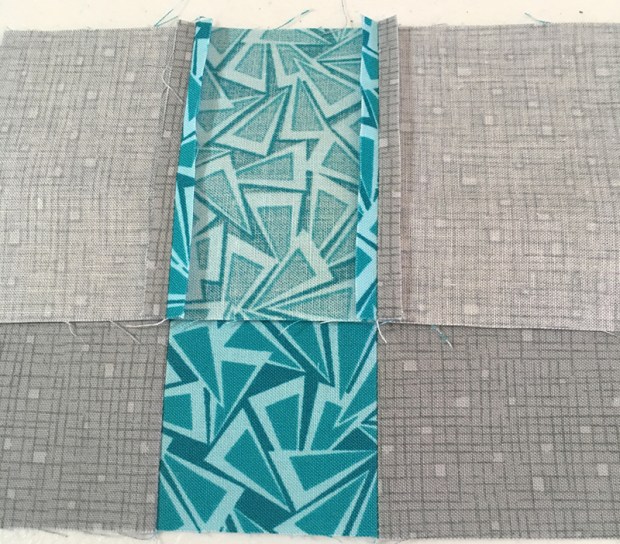
Step 1 for proper alignment – match up the fabric seams.

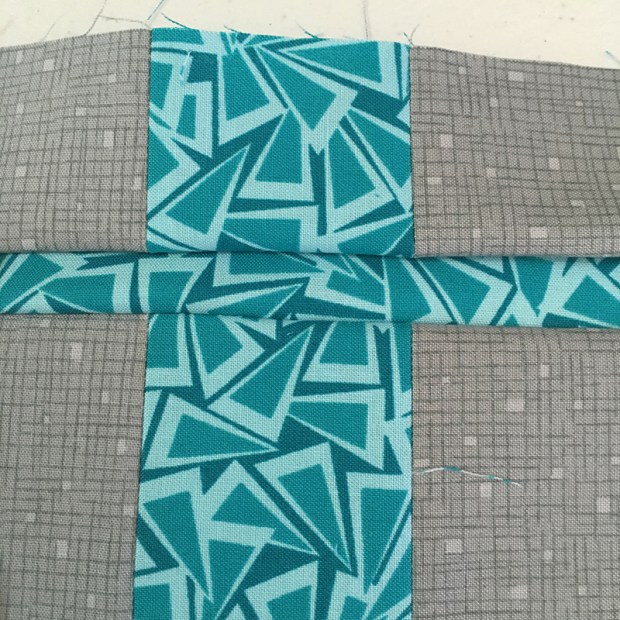
Also, in order to get the top and bottom of each plus block to line up correctly, I placed the top unit right sides together on top of the partially sewn block to see exactly where things needed to line up to keep the seams in alignment. The pressed open seams really help me see this part.

Aligning units for quilt blocks

Step 2 for proper alignment – fold back to make sure lines are straight.

Then, I folded it back up partially to make sure it’s in the proper position before sewing. I didn’t actually need to use any pins because the blocks were small enough and I used my fingers to keep the edges lined up at all times.

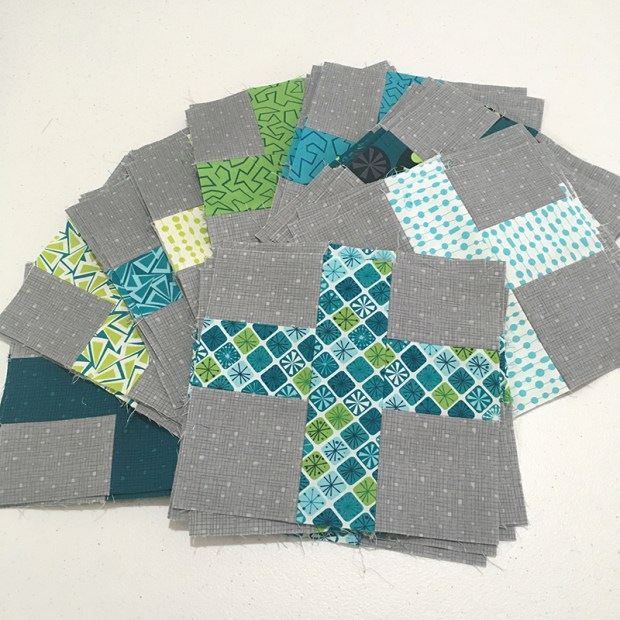
Surplus Strips Blocks Fandangle Fabric cool colorway

Click here to preorder bundles of Fandangle fabric by colorway + background fabric.
Click here to preorder the Surplus Strips quilt Pattern.

The blocks went together even faster this time around and I love the color distribution! Now it’s time to sew the blocks together and finish up the quilt top. I’ll make both tops and then have a little basting party to make that chore a little less painful, lol!! I’ll be using my spray basting method that you can read about here (wall basting) or here (table basting).

Stay tuned for the next update!

Quilt Las Vegas 2018 and Lots of Gorgeous Modern Quilts

My local quilt guild, Desert Quilters of Nevada. recently held their 28th annual show of Quilt Las Vegas. I’ve been entering off and on over the years since the early 2000’s and it’s still exciting to participate after all these years.

DQN Quilted banner by Karen Garth

Desert Quilters of Nevada quilted banner made by past president Karen Garth

The competition is always fierce, and the judging is always performed by a certified judge. Even after all these years of entering this show, it’s still thrilling whenever one of my quilts wins a ribbon and I love the feedback provided by the judge.

Below are my entries from the show along with the judge’s comments, plus several more that caught my eye. I’m so happy to see that more and more members are making modern quilts, and especially that more are being accepted into non-modern categories. Enjoy the virtual show!

Diamond in the Rough by Christa Watson

Diamond in the Rough, made in 2016. 2nd place, Modern category.
Originally patterned in QuiltCon magazine 2017, it hung in QuiltCon last year and also received an honorable mention in the modern category at UQSM quilt show in 2017.

Judge’s comments for Diamond in the Rough

  • Repetition of shape unifies design while variations provide interest.
  • Very graphic presentation.
  • Very good piecing.
  • Quilting designs are well-chosen for their areas.
  • Good machine quilting technique.
  • Slight imbalance in tension noted with red thread. Continue to strive for accurate retracing.
  • Bit of red in binding was a good choice.
  • Binding is good.

Positive Direction Quilt by Christa Watson

Positive Direction, made in 2016. 2nd place, Holiday category.
Originally patterned in one size in Modern Quilts Unlimited magazine.
Updated pattern now includes 4 sizes, available as print pattern or PDF download.

Judge’s comments for Positive Direction

  • Good interplay between quilt top design and quilting design.
  • Very good accuracy in piecing.
  • Good machine quilting technique.
  • Strive for more accuracy in retracing bubbles.
  • Binding is well done.

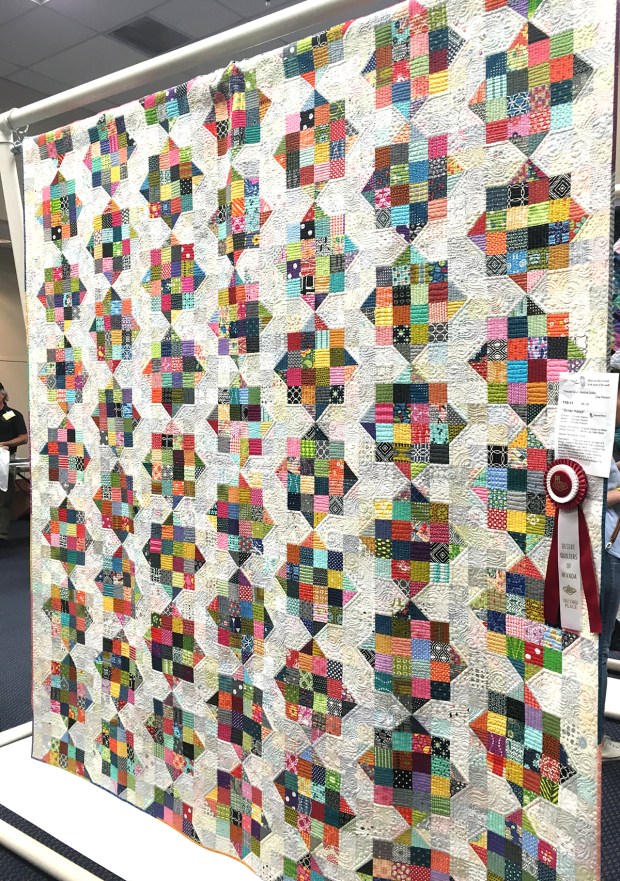
Scrap Happy by Christa Watson

Scrap Happy, made in 2017. 2nd place, Pieced – One Person category
Cover quilt + patterned in American Patchwork and Quilting magazine, October 2017.
I recently gifted this quilt to my son to take with him to college.

Scrap Happy Machine Quilting Detail

Machine Quilting Detail on Scrap Happy

Judge’s comments for Scrap Happy

  • Good definition between figure and ground.
  • Good machine piecing.
  • Colors are well balanced across quilt top.
  • Quilting designs further enhance definition between figure and ground.
  • Continue to strive for consistent stitch length in machine quilting.
  • Pieced binding enhances scrappy feel. Corners should be square.

I always mention to my students when teaching machine quilting not to stress too much about consistent stitch length when making their quilts. Yes, judges notice my “imperfections” in my quilts, but they still like them enough to award them ribbons, and I love making them without stressing about creating perfect stitches!

Other Gorgeous Quilts

Autumn Path quilt by Vicki Ruebel

Autumn Leaf by Vicki Ruebel of Orchid Owl Quilts
1st Place Pieced – One Person category and best machine quilting.

Vicki is a great friend and amazing quilter. We encourage each to other enter lots of quilt shows and I don’t even mind that she usually beats me every time, LOL!!

I love our friendly competition because it always pushes me to be a better quilter. Incidentally, her quilt was also patterned in the same issue of American Patchwork and quilting that has Scrap Happy on the cover. There’s even a bonus article on how she quilted it!

The Big Pickle by Vicki Ruebel

The Big Pickle, also by Vicki Ruebel. 1st Place, Modern

Yep, this one beat mine in the modern category, but isn’t it fabulous? This quilt nabs an award at each show it is entered, and deservedly so!

Corn Flowers by Cory Allender

Corn Flowers by Cory Allender and her Instagram quilting bee.
2nd place, collaboration/group quilt.
Design source: Blossom Heart Quilts Beehive

I love the quilting on this quilt. Cory is an amazing award winning longarm quilter and she’s nailed both the modern and traditional aesthetic.

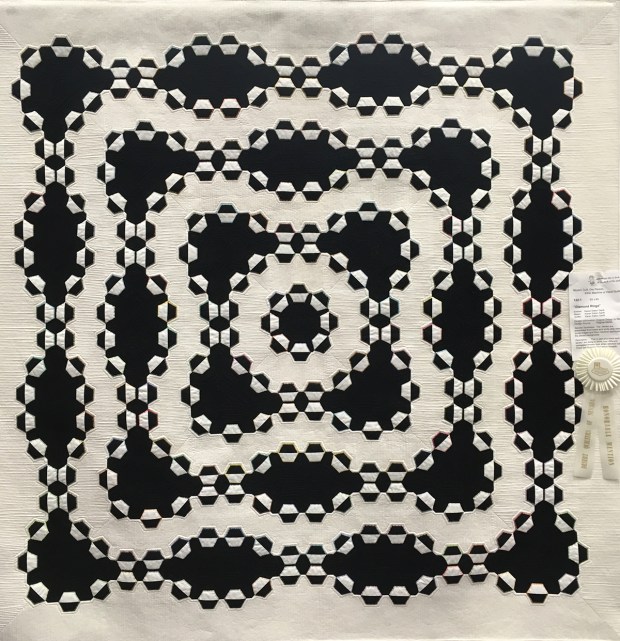
Diamond Rings by Karen Garth

Diamond Rings by Karen Garth, Honorable Mention Modern Category
Original design and made by Karen

Karen, the past president who made the DQN banner at the top of this post always creates such stunning, dynamic work. I have a thing for black and white and this design really makes my heart sing!

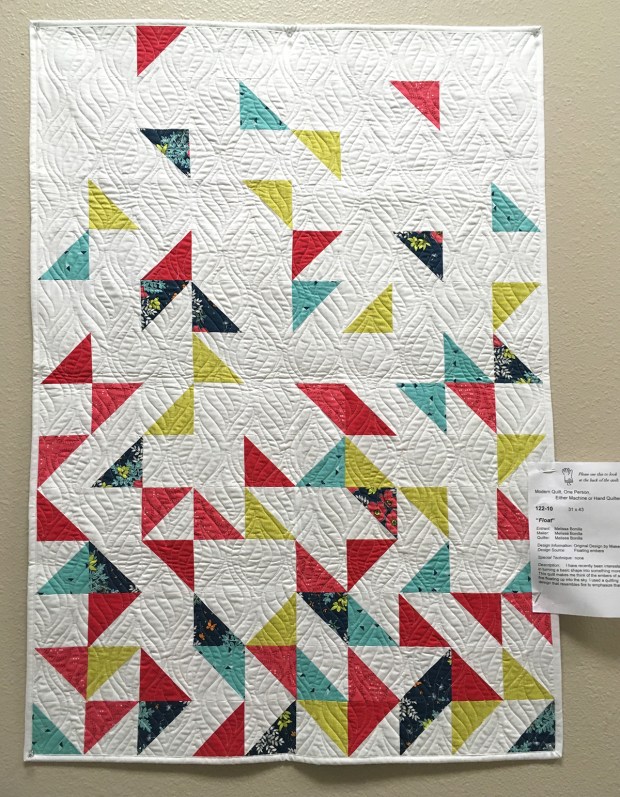
Float by Melissa Bonilla

Float by Melissa Bonilla – Modern Category
inspired by Floating Embers

Every time I attend quilt shows, I wish I could bring my own ribbons! If so, I would have put one on Melissa’s quilt above. I may actually have to do that at a show someday. Hmmm, maybe I can create my own “Christa’s Choice” ribbon!!!

Modern Logs Quilt

Super Star Bingo by Lynda Blair – quilted by Cory Allender – Modern

I walked by this quilt and was stunned by the gorgeous colors and fabric placement. I was thinking “why do I love this quilt?” and on closer inspection realized the maker had used my Modern Logs quilt pattern to make it, LOL!! She even gave me credit in her artist’s statement as the design source.

Super Star Bingo Text

I’m totally happy when people make quilts from my patterns and enter them into shows, and I especially love it when they give credit to the designer. 🙂

Quilt Show Quilts

Bertha (left) by Melissa Curley – Third Place Modern
Theresa’s Crayon Box (right) by Theresa C – Third place, small pieced

I took this picture from the show which illustrates what I love about quilting and the quilting community. From minimalist modern designs to blinged and bedazzled art pieces – there’s truly something for everyone when it comes to quilting!

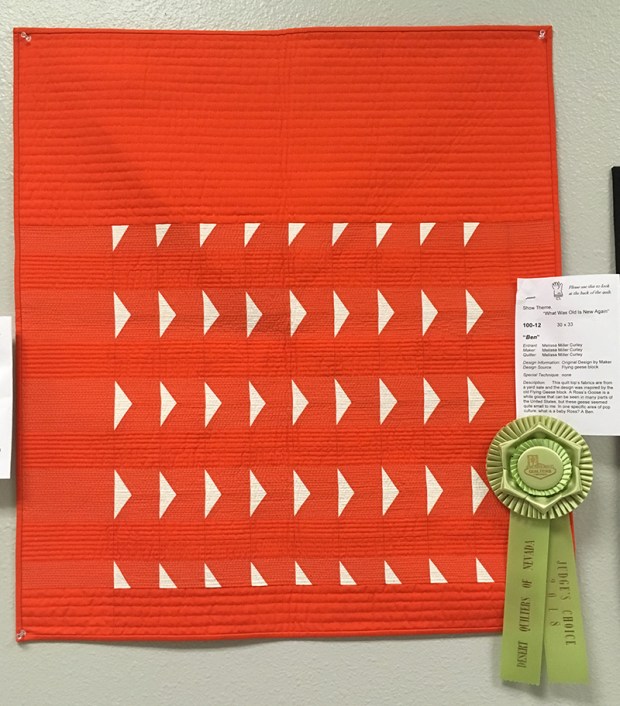
Ben Modern Quilt by Melissa Curley

Ben by Melissa Curley –  Judge’s Choice – Show Theme Category

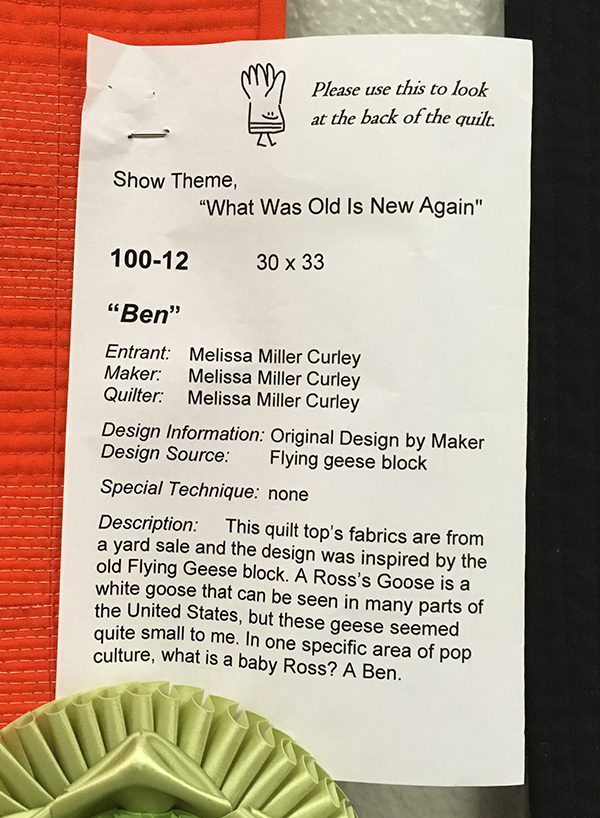
Here’s another fabulous piece by Melissa Curley. I’m a fan of everything she makes and her sense of design and color are spot on! I think it’s kinda cool that she gives all of her quilts first names. Read her artist statement below, explaining the fun pop culture reference.

Artists Statement at Quilt Show

I hope you’ve enjoyed the virtual show and remember – entering quilts into shows isn’t really about the competition. It’s about sharing your work with a larger audience and inspiring others to make quilts they’d only dream about!!

Make a Quilt from Start to Finish: Register for my Week-long Workshop this June!

This June 3-8 I have the great pleasure of returning to John. C. Campbell Folkschool in Brasstown, NC to teach my popular start-to-finish quilting class: Modern Quilting 101. This is the only in-person class I teach that guides you through every step of the quilt making process from cutting to binding.

John Campbell Folk School

Registration Open Now

Click here to register for my class : Modern Quilting 101 – Stepping Stones.
Class dates are June 3-8, 2018

Class sizes are extremely limited. With only 12 students per instructor, you get plenty of hands on help and special attention from me. Whether this is your first quilt, or your 40th, you’ll have a fantastic time and will finish a complete quilt by the end of the week!

Stepping Stones quilt pattern by Christa Watson of Christa Quilts

Click here to purchase a print copy of Stepping Stones quilt pattern.
Click here to purchase a downloadable PDF copy of Stepping Stones quilt pattern.

Each year at the Folkschool, I’ve focused on a different pattern. This summer’s group will be making my Stepping Stones quilt pattern seen here. The best part about being the teacher is getting to see the beautiful quilts my students make. Although they are all working through the same pattern, they turn out so unique, based on the fabrics and quilting each person chooses.

Stepping Stones Quilt Pattern by Christa Watson of Christa Quilts

I quilted a simple geometric free-motion design for my quilt. I’ll teach several options in class!

This is the most intense but satisfying class I teach. Think of it as an intimate week-long retreat with me where I’ll share all of my secrets and guide you every step of the way! Students have several housing options and I have to say, the food they serve is the best southern cooking I’ve had. Seriously, you could come JUST for the food!!

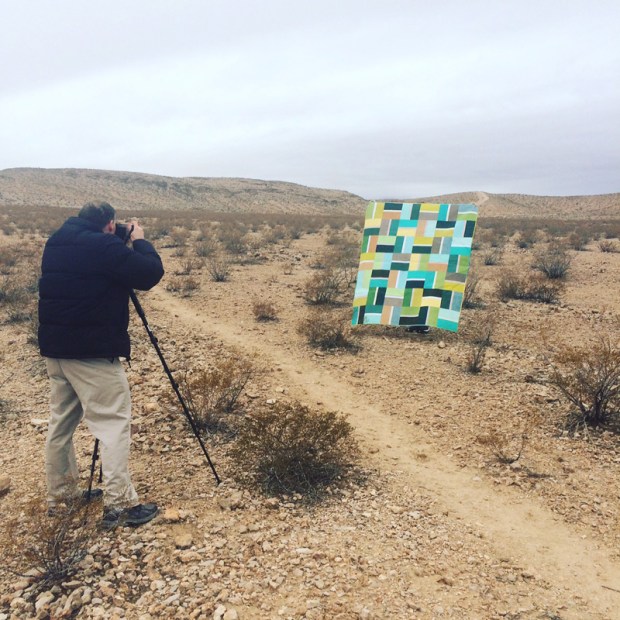
Quilt Photography

Jason putting his photography skills to use on a photo shoot in the desert near our home.

Jason came with me last year and took a photography class while I taught quilting. He now does all of the photography for my quilt patterns and he learned so many valuable skills while he was there. He’s excited to return for another photography class while I teach again this summer.

The kids are flying back east with us, too and they’ll get to visit with nearby family, while we’re there so it will be a fun trip for all of us!

Folkschool Fiber Studio

This is the fiber studio where our classes take place. There’s tons of room for everyone!

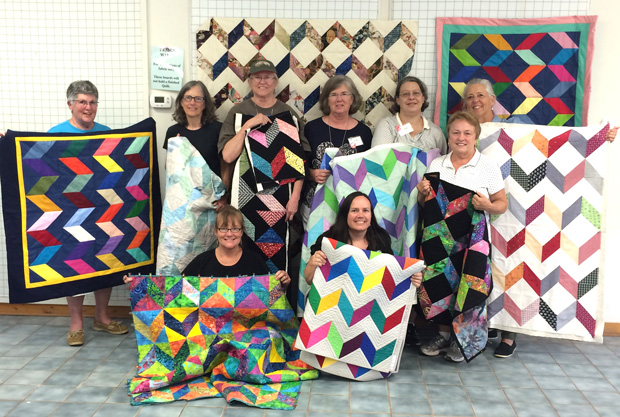
The previous time I taught (in 2016), students made my Charming Chevrons quilt pattern. They were able to make the quilt in different sizes, according to their needs, and they all turned out beautifully! By the end of the week, we were all BQF’s (best quilting friends) and it’s been so great seeing their continued quilting success!

Charming Chevrons class

Click here to read more about the previous group’s  class!

Click here to purchase Charming Chevrons Quilt Pattern.

In 2015, Students made quilts using my Modern Logs Quilt Pattern. This was my first time teaching at the Folkschool, and it’s such a magical experience that it was easy to say yes when they asked me to return.

Modern Logs class at John C. Campbell Folkschool

Click here to read more about the class of 2015.

Click here to purchase Modern Logs Quilt Pattern.

I can’t wait to return this summer and I hope you’ll join me. At last check, there were a few spaces left, but I’m sure they will go fast. So don’t delay, register soon so you can get your travel plans in place.

Students arrive on Sunday and class instruction runs Monday-through Friday with an end of the week show and share by all students Friday afternoon. Compared to other similar events, the prices they charge at the Folkschool for this week-long experience are quite a bargain because it’s a not-for profit institution interested in preserving the folk-art tradtion and educating others in a non-competitive environment.

Machine Quilting Boxes on Stepping Stones

I hope to see you in my workshop this summer!

Important Folk School Links:

Save

Save

Save

Save

Save

Save

Save

Introducing my second fabric line – Fandangle – from Benartex/Contempo

Fandangle is a silly but real word that means “excess ornamentation or embellishment.”
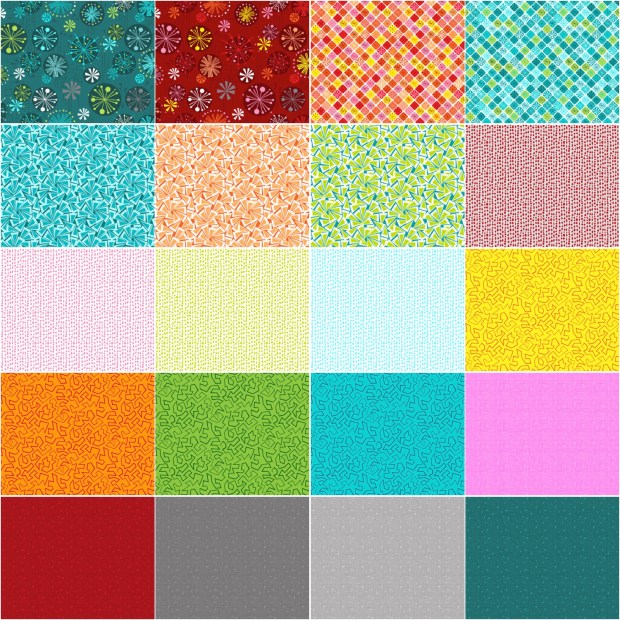
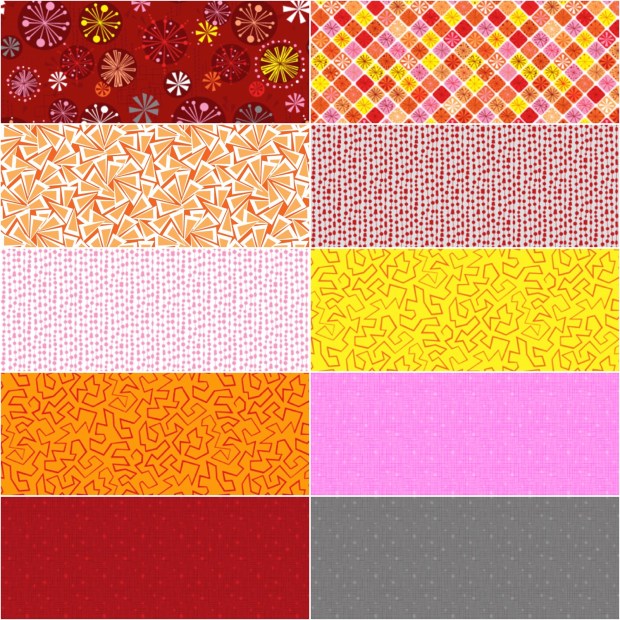
It includes a total of 20 fresh, geometric prints in two colorways – cool and warm.

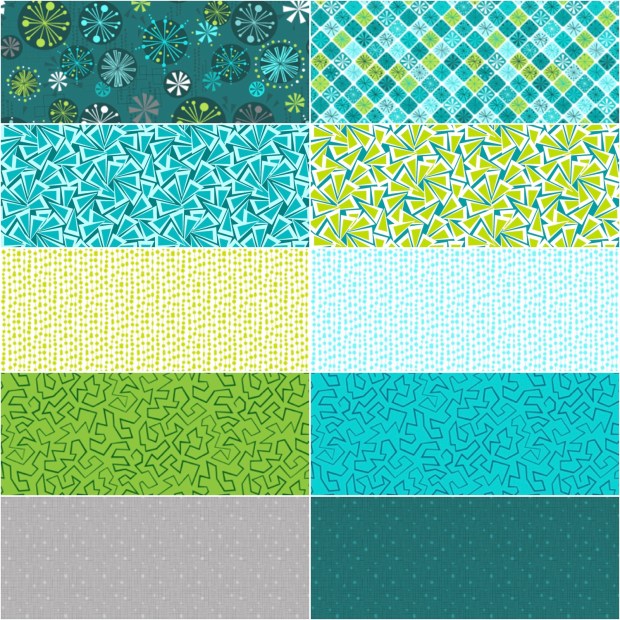
Fandangle Fabric by Christa Watson Cool Colorway

These 10 prints are from the cool colorway of Fandangle

I named this collection Fandangle as sort of an inside joke to myself. It’s  tongue-in-cheek nod to the fact that I don’t actually embellish or be-dazzle my quilts with any type of bling. Not that there’s anything wrong with that of course, but it’s just not my style.

Fandangle Fabric by Christa Watson in the Warm Colorway

These 10 prints are from the cool colorway of Fandangle.

Fandangle Fabric Designs

The names are super fun and playful, too! Here’s a little bit more about each design:

“Baubles and Bits” is a medium to large scale print with fun flourishes. If you look closely, you can see a nod to my previous collection with the inclusion of some subtle boxes – one of the prints from Modern Marks. To give the print more depth, I also added some scattered triangles, and just the tiniest hint of beads, which show up more prominently in its own print.

Fandangle Fabric, Baubles and Bits print

Baubles and Bits comes in two colors: teal and red.

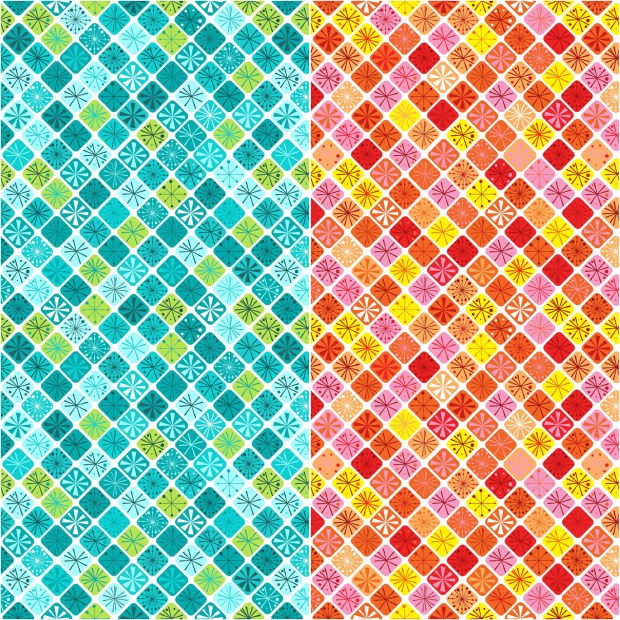
“Sparkling Squares” features retro star bursts and fun flourishes This is a companion print to Baubles and Bits but on a much smaller scale. I love being able to take a design element and try it out in different configurations – just like creating a quilt layout, right??

Fandangle fabric - Sparkling Squares

Sparkling Squares comes in two colors: teal/multi and orange/multi.

“Triangle Trinkets” is based on one of my modern machine quilting designs. But I didn’t want this print to read as a simple line drawing (I saved that idea for Paper Cuts, below.) This would make a fabulous backing print: you could quilt your quilt from upside down, following the outline of each triangle to add depth and dimension to your quilt!

Fandangle fabric -Triangle Trinkets

Triangle Trinkets comes in three colors: peach, lime and teal.

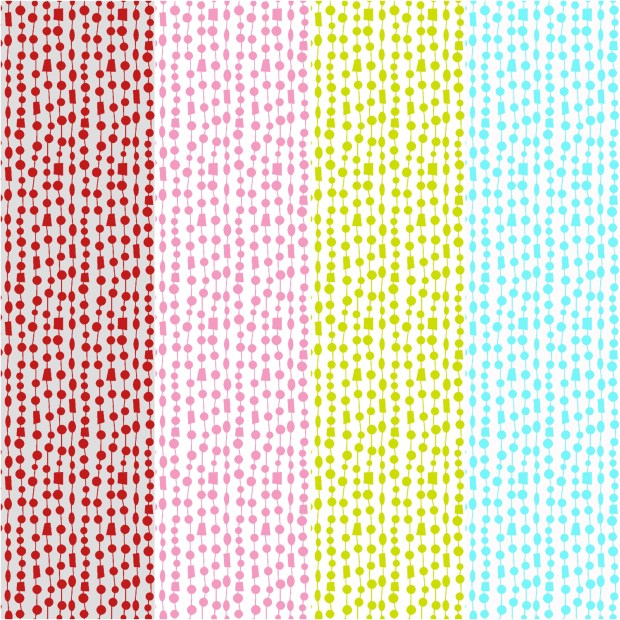
“Beaded Curtain” was inspired by another one of my machine quilting designs, “string of pearls.” But if you look closely, you’ll see all sorts of fun shapes – ovals, rectangles, squares, and there’s even some quirky triangles in there (another shape from Modern Marks).

Fandangle fabric - Beaded Curtain

Beaded Curtain comes in four colors: red, pink, lime and turquoise.

“Paper Cuts” looks most like one of my free-motion line drawings. I based it off of my “jagged stipple” motif, which many of my students tell me what their regular stipple looks like anyway. So they can rest assured that it’s a bona-fide modern design, NOT just a “creative” mistake, LOL!! I thought Paper Cuts was a more descriptive name that fits in with the artsy theme.

Fandangle Fabric Paper Cuts

Paper Cuts comes in four colors: yellow, orange, green and turquoise.

“Confetti Crosshatch” is the most versatile of the group. This is a remix of “Crosshatch” from Modern Marks, but on a smaller scale. It’s a prefect blender print and works fabulous as a background or binding. I was thrilled to include two shades of gray!

Fandangle fabric - Confetti Crosshatch

Confetti Crosshatch comes in five colors: light gray, red, lilac, teal and dark gray.

Feel free to pin and share any of these images to spread a little Fandangle fun with your friends. Then ask your favorite quilt shop to order Fandangle next time they meet with their Benartex/Contempo sales rep.

Fandangle Fabric Line by Christa Watson

Fandangle fabric by Christa Watson for Benartex released Summer 2018.

For Consumers:

Click here to purchage Fandangle yardage and bundles
Click here to purchase quilt patterns featuring Fandangle.

For Retailers:

Contact Benartex, Brewer, or Checker, or EE Schenck to purchase Fandangle fabric wholesale.
Contact me: christa@christaquilts.com for wholesale pattern orders.

My Newest Craftsy Class – Startup Project: Starry Path Quilt

It’s here – it’s here! The launch of my third Craftsy class – whoo whoo! Just after I made the sneak peak announcement earlier this week, the class went live! So today I’d like to introduce you to Startup Project: Starry Path Quilt.

craftsy Class Starry Path Quilt

Click here to preview my class Startup Project: Starry Path Quilt

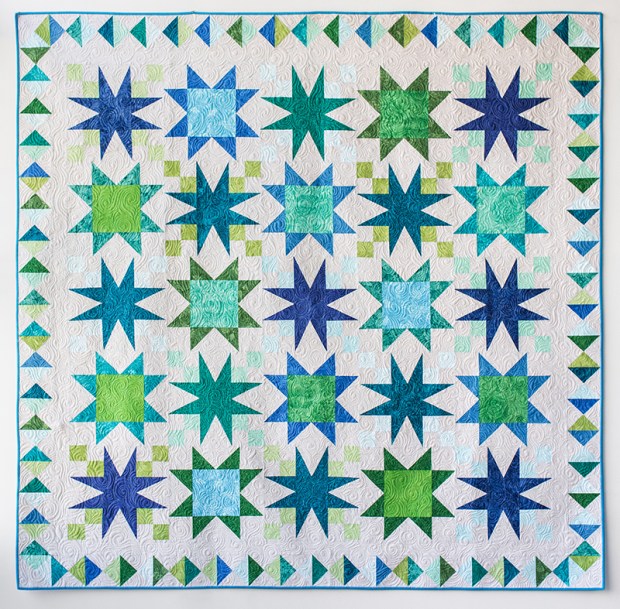
In this nearly 3 hour long class, I teach how to make this stunning quilt I designed featuring two different types of star blocks and three different types of triangles.

It was created as a followup class to my comprehensive start-to-finish class, Startup Library: Quilting. But of course, anyone can enroll and make this stunning quilt:

Starry Path Quilt by Christa Watson

Click here to get the Starry Path Quilt Kit, while supplies last

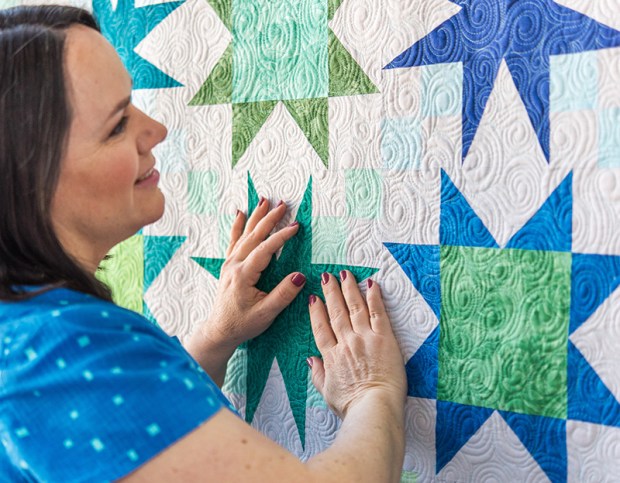
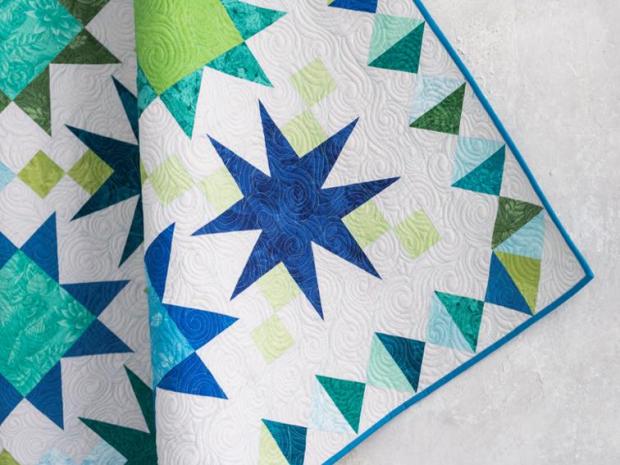
The class comes with the complete pattern to make the Starry Path Quilt above, and there’s even an optional kit. I chose to make it from basic blenders in a cool color scheme of lime, green aqua, blue and turquoise. I paired it up with a solid gray background for maximum impact. I’m really pleased with how well the design turned out and I loved taking my time to be as accurate as possible.

And, because you all know I loooove machine quilting, I threw in a bonus lesson on how to quilt elongated swirls. Isn’t it just fully of yummy texture??

Swirls quilting on Starry Path Quilt by Christa Watson

The class materials include step-by-step drawing lessons showing how to form the basic swirl design, plus a page for you to print off and practice drawing your own quilting plan. (It’s a nod to the technique I first introduced in my machine quilting class, The Quilter’s Path.)

The exclusive Starry Path pattern is easy to follow along as you watch the class, and I’ve sprinkled in as many helpful hints as I can to ensure your success with this quilt!

Starry Path Quilt with Christa Watson on Craftsy

I can’t help fondling my quilts, LOL!!

In Startup Project: Starry Path Quilt, I share my best tips and tricks for accurate cutting and piecing so that you can get stunning results, every time. My top tips for piecing any quilt?? Slow down when you are sewing, maintain an accurate 1/4″ seam and use lots of pins to get those intersections to line up precisely.

Starry Path Quilt in Progress

The best thing about my Craftsy classes is that unlike my live classes, you actually get to watch me sew and quilt. That way you can and see where I place my hands, and how I manipulate the fabric. With the magic of filming to speed things up, it’s actually fun to watch!

Starry Path Class Overview

Here’s a breakdown of what’s covered in each section and length of each lesson. The total class runs for just under 3 hours, and if you’ve ever heard me speak, you know that I can cover a lot of info in a short amount of time. So you really get more “bang” for your buck with my classes!!

Boundless Fabric from Craftsy
1. Getting Started (32 min)
Meet Christa and go over everything you’ll need for your project, the Starry Path quilt. Then she shares tips for cutting both yardage and fat quarters. Plus, see how to check and correct your seam allowance early on. This way, your blocks will be the correct size.
Sawtooth Star Block Piecing
2. Sawtooth Star Block (39 min)
Piece the classic flying geese unit four at a time! Christa shows you how to mark, sew, press and cut, and add simple squares to create the Sawtooth Star block. She helps you chain piece a few blocks at a time to speed up your stitching, and shows you how to use webbing to keep your blocks together as you go.

Christa Starry Path Quilt

3. Garden Path Block (30 min)
Learn how to cut and sew with the popular Tri-Recs specialty ruler that you can use in many other quilts. Find out how to properly cut and line up the pieces, add simple four-patches and solid units for a beautiful block, and save time by chain-piecing it.
Garden Path Block
4. Pieced Border (30 Min)
Follow along as Christa guides you to create the colorful pieced border that surrounds the Starry Path Quilt. See how to pair half-square triangles to form this hourglass unit, also known as the quarter-square triangle. Then batch-assemble the border strips.

Christa Sewing

5. Quilt Top Assembly (23 Min)
Now you’re ready to put your quilt blocks together! Here, discover a technique called webbing that will keep your blocks in order as you assemble the inner quilt top into rows. From there, sew the rows together, then add the solid and pieced borders.
Machine Quilting Swirls with Christa Watson
6. Machine Quilting Swirls (20 Min)
Wrap up class by finishing your basted Starry Path quilt with an all-over free-motion design. Christa discusses thread choices, then shares the benefits of making small samples to practice your designs. Afterwards, get her tips on maneuvering this quilt on your home machine as you add the final touches.

Starry Path Quilt by Christa Watson

I had so much fun making this quilt and I’m sure you will too! The best part about enrolling in my class is that you have my help and support 24/7. Got a question about the class or want to share your progress? Use the interactive class platform to share with me and fellow students. It’s like a virtual classroom with me at your side!!

Click here to enroll in Startup Project: Starry Path Quilt

Click here to get the Starry Path Quilt Kit

Elongated Swirls quilting by Christa Watson

I can’t wait to “see” you in class!

Join Craftsy Unlimited for All You Can Watch Classes (Including Mine!)

You guys – I’m so excited! It’s almost time for the launch of my brand new Craftsy class!! But before it goes “live” I invite you to join Craftsy’s new subscription service “Craftsy Unlimited.”

craftsy unlimited

Click here to start a free trial of Craftsy Unlimited and watch all my classes for free!!

How is this different from regular Craftsy – you say?? Rather than paying a one time fee to own the class, Craftsy Unlimited is a monthly streaming service, similar to Netflix, Hulu, etc. but on your computer. With Craftsy Unlimited, you don’t own the class, but you have access to the entire library and class materials of thousands of classes 24/7 as long as you are a member.

The coolest thing is that you can actually combine both services if you want to – join Craftsy Unlimited to check out classes you may be interested in, but aren’t quite ready to commit to a purchase. Later, you can permanently purchase any classes you know you’ll want to keep forever.

Starry Path Quilt Blocks

Sneak peek of my brand new class, coming really soon!!

For instructors, we get compensated slightly differently for either model, but Craftsy Unlimited is a great way to support your favorite teachers. The more you watch our classes on Craftsy Unlimited, the more we get paid!! So even if you own my other classes already, you can view them in Craftsy Unlimited and it’s sort of like giving me a little bonus each time you watch. 🙂

Speaking of which, if you decide to join Craftsy Unlimited, be sure to check out my current classes:

The Quilter's Path by Christa Watson

The Quilter’s Path is like taking one of my in-person workshops. I teach you how to make a quilting plan and give you tons of ideas for both walking foot quilting and free-motion designs. Plus, you get to see how I actually “scrunch and smoosh” a real quilt under the machine. But the best part is you can pause, rewind, and watch your favorite parts over and over again!

Startup Library Craftsy Class by Christa Watson

Startup Library Quilting is great for beginners who want to learn to make a quilt from start to finish. I cover all the basics – choosing fabrics, reading a quilt pattern, rotary cutting, piecing, basting, machine quilting – walking foot & free-motion –  AND binding! It’s the whole shebang right from the comfort of your home!!

Craftsy Quilting Class taught by Christa Watson

Screen shot from my newest class, coming soon!!

Click here to start a free trial of Craftsy Unlimited and watch all my classes for free!!

In the new class, I focus a lot on accurate cutting and piecing, plus there’s a bit of machine quilting at the end. So watch for the new reveal soon!

Improv Squares Finish with Machine Quilting Details

Now that I’ve been blogging again on a regular basis, I’ve realized I haven’t shared about some quilts I made from Modern Marks. And since I’ll soon be starting on quilts from my next line of fabric, I want to make sure I’ve documented my recent finishes!

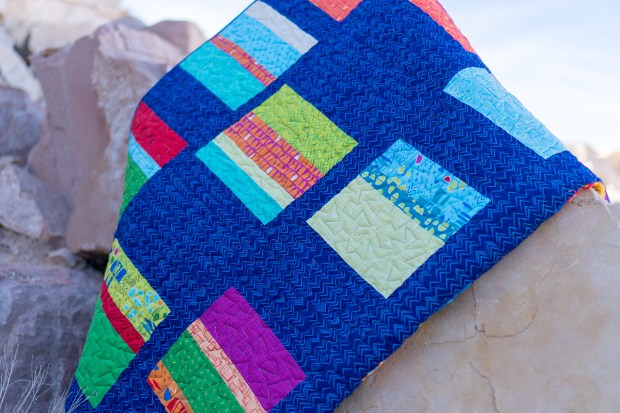
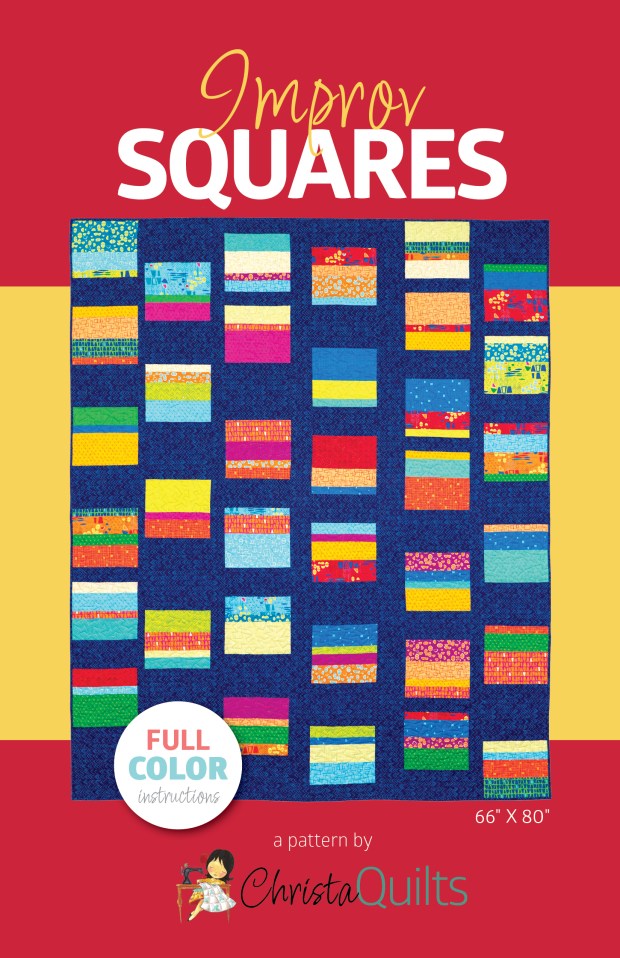
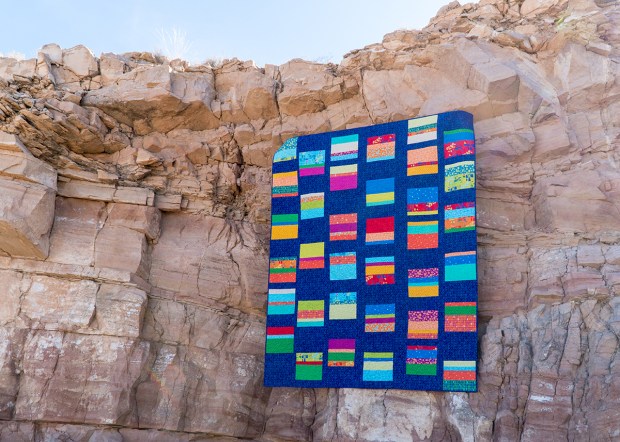
Improv Squares by Christa Watson, made from Modern Marks

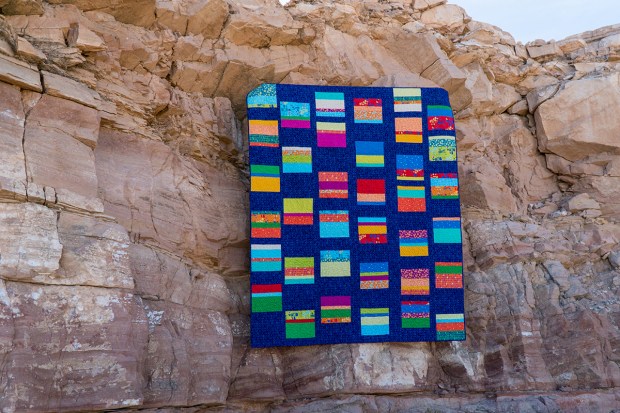
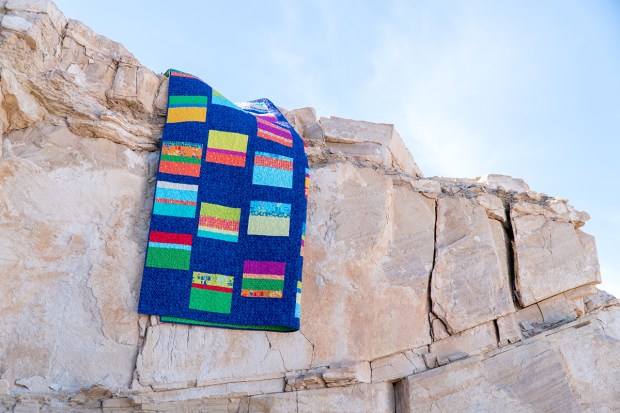
I recently shared a spray basting tutorial for Improv Squares, but here are some beauty shots of the finished quilt, taken in the desert behind our home in Las Vegas.

The inspiration for Improv Squares was a broken wooden fence that I drove by several years ago. I snapped a picture of the fence and kept it in my phone for a long time, until I was ready to do something with it.

Improv Squares Inspiration

The holes in the fence made an interesting pattern that I though would be fun to do something with. I also wanted to further explore the concept of “Structured Improv” – a technique I’ve been playing around with for several years now.

Improv Squares by Christa Watson

The improv part is that you sew a bunch of fabric together randomly. The structured part is that all of the block units are a similar shape  – rectangles. All of the blocks finish the same size so they can be placed randomly in the design, yet no two are the same.

Machine Quilting Tips

Aurifil Vareigated thread

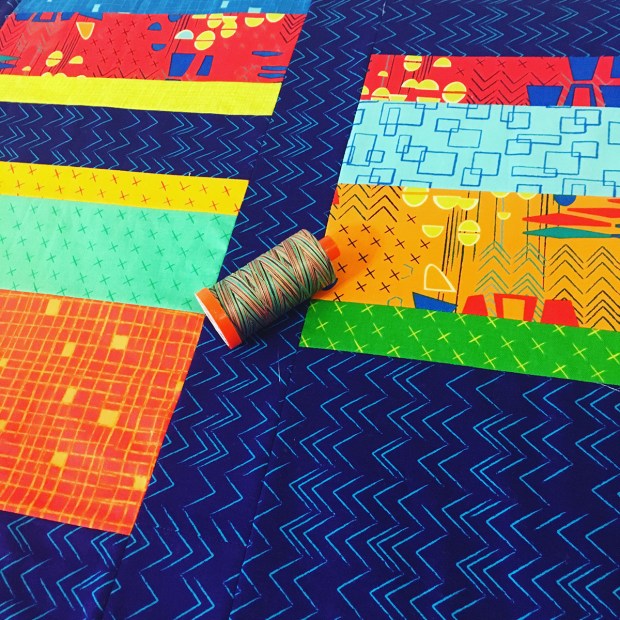
When I’m working with busy prints and I want the fabric to be the star of the show, I’ll try to choose a thread that blends in. Because Modern Marks is so colorful and I wanted to use all of the prints in this quilt, I chose a variegated thread that would add fun layer of texture to the busy prints

My favorite variegated thread is 50 weight Aurifil #3817 Marrakech. It’s fun to see the color changes while I’m quilting, and I love quirkiness that it gives the quilt! It also seems to match any rainbow-colored quilt I make!

Machine Quilting Jagged Stipple

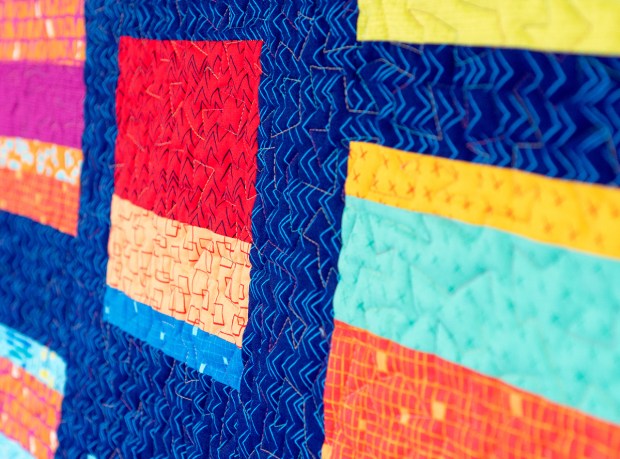
Because I was in a hurry to get this quilt finished, I quilted an allover/edge to edge design on a rather large scale. The quilting is still very dense, but by quilting larger shapes, I was able to cover more area very quickly.

I used one of my favorite designs – a  geometric, jagged stipple rather than a smooth curvy stipple. I was able to complete the quilting on this throw size quilt in an afternoon, rather than several days whenever I do more intricate custom quilting.

Jagged stipple quilting

I love this texture so much, it inspired one of the fabric prints in my second fabric line!
More about that later…….stay tuned!!

Incidentally, whenever I teach machine quilting, I always have the students practice quilting both angular shapes, and curved designs. Some people find it easier to quilt one vesus another, so it’s a good exercise to try and see which type of design you prefer!

As you can see in the detail picture below, the jagged motif gives some interesting texture to the quilt, without overpowering the overall design.

Allover jagged stipple

Improv squares is now available as a pattern, either as a printed version, or a PDF download.
If you make one, I’d love to see it! After all, the fun of designing quilts for others to make is seeing the variety!

Improv Squares quilt

Share your progress wtih me on social media with the hashtage #improvsquaresquilt. You can also share images of any projects you make from my books, patterns or fabric in my ChristaQuilts Facebook group.

Click here to get the Imrpov Squares Quilt Pattern – printed version shipped to you.

Click here to get  the Improv Squares Quilt Pattern – instant PDF download.

Improv Squares Quilt Pattern using Modern Marks Fabric

Improv Squares STATS:

  • Finished Size: 66″ x 80″
  • Fabric: Modern Marks by Christa Watson for Benartex
  • Batting: Hobbs 100% Cotton
  • Thread: Aurifil 50 weight cotton #3817 Marrakech
  • Machine Quilting Design: Jagged Stipple
  • Completed: October, 2017

Improv Squares quilt

My Pattern Writing Process and Sneak Peeks of Upcoming Quilt Patterns

In an effort to share more of what I’m working on in real time – and to answer to the question – how do I get it all done?? – I’m excited to let you know what I’ve been working on the last few weeks. I’m currently writing and editing the next round of quilt patterns that will be released along with my next fabric line, and I couldn’t be more excited!!

Pattern Writing in Process

I’ve been posing the question to my friends and social media followers, asking if they’d like me to share real time updates, or wait until everything is polished and ready for purchase. I got a resounding “share now!” as the answer which made me sooo happy! I have a hard time suppressing my excitement for what I’m currently working on and I feel like I can be more genuine when I’m sharing in real time.

I also just got word that my fabric samples should arrive some time in the next week or two so I can actually start sewing the designs you see above. I’m also excited to collaborate with my friend Heather Black on one of them because she has the most amazing design sense!!

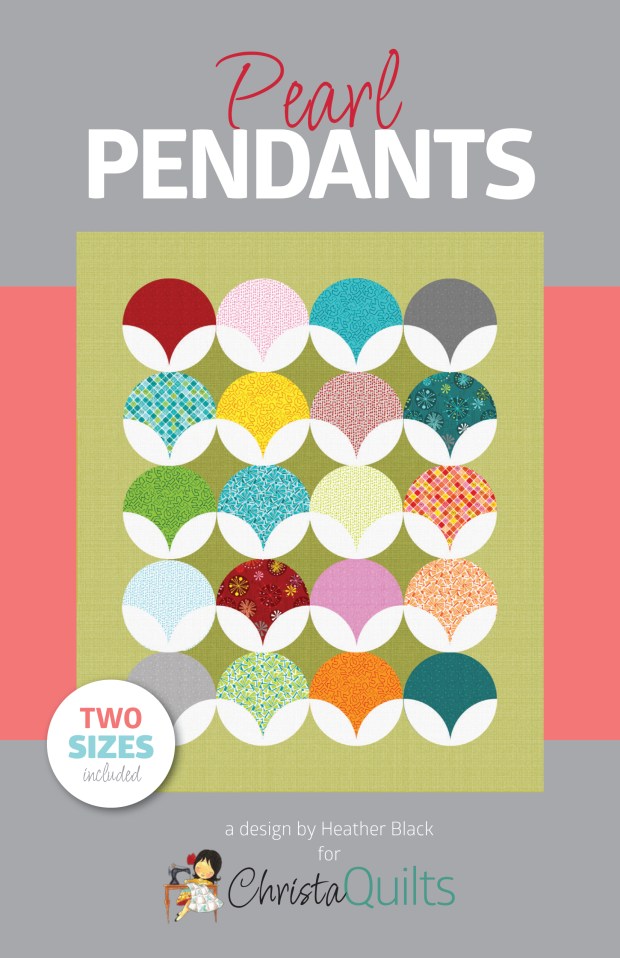
Pearl Pendants by Heather Black and Christa Watson

Pearl Pendants pattern coming soon – click here to preorder.

So here’s a bit of my pattern writing process for those that are curious. First, I design the patterns in EQ8, using digital swatches of the fabrics I plan to use. Next, I write the instructions while I’m waiting for the fabrics to arrive.

While editing the patterns, I use digital images as placeholders for the pattern covers until the quilts are made and can be photographed. Then it’s very easy to swap out the digital images with the photography, without altering the pattern layout. I send the rough draft of the pattern to my graphic designer to lay out and make everything look pretty, and then a technical editor checks all the math to make sure I haven’t missed anything.

Sparkling Stars front Cover

Sparkling Stars pattern coming soon – click here to preorder.

Once the fabric arrives, I make the quilts following my own instructions so that I can pattern test and see if there are any steps I missed. While I’m making the quilts, digital images of the covers are sent off to the distributors (companies who sell patterns on a mass-scale to quilt shops) so they can get them in their system in time for shops to pre-order.

Once the quilts are finished, they are photographed and cover images swapped out with the real ones, and I do once last round of editing to make sure everything looks right. Then patterns are sent off to the printer for physical copies, and PDF downloads are uploaded to my Craftsy shop for sale.

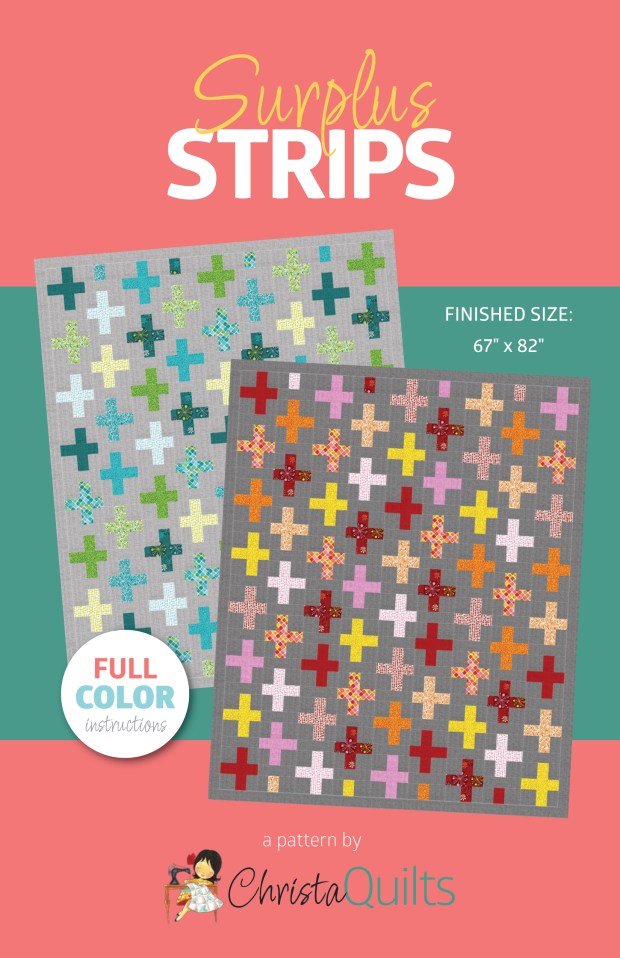
Surplus Strips Quilt Pattern by Christa Watson

Surplus Strips pattern coming soon – click here to preorder.

As you can imagine, the timing is critical to make sure everything happens in the right order. My process is probably a bit different than pattern designers who aren’t working with a specific fabric line. But I like the challenge of making all the parts fit together.

You can see sneak peeks of the fabric line in the quilt pattern covers above, but I’ll be happy to tell you more about the fabric when my samples arrive in the next few weeks. Quilt shops will be able to order it later this spring, usually around quilt market in May – and I’ll be there in person showing off these quilts and more “in the cloth.” Then the fabric will arrive in shops around mid summer – sometime in June or July. I can’t wait!!