Christa’s Sew and Tell – A Few Quilt Along Finishes

Here are a couple of great finishes from followers of my previous quilt-alongs:

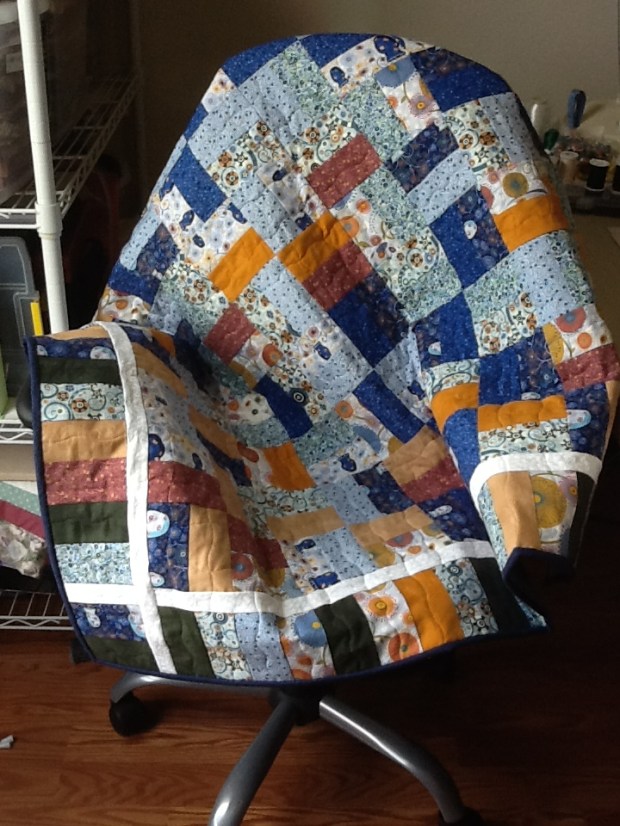
Joanne P. finished her version of Baby Bricks featuring some fantastic geometric prints. It looks very modern and makes me want to make another one to try out more fabrics! (I’m still in the the process of adding more quilting to my two baby bricks quilts).

Joanne's Baby Bricks

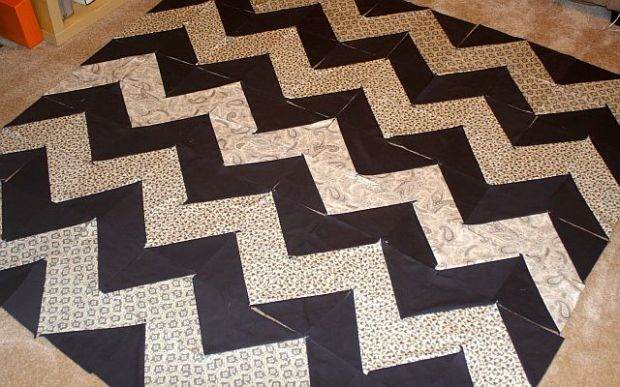
Kathleen W. sent me a picture of her lovely Charming Chevrons finish. Doesn’t it look fantastic in shades of black, white and gray? She did a wonderful job with the quilting, too.

Kathleen's Chevrons

Both of these quilts are posted on my flickr group. I want to see your quilt-along pics, too!

No matter what tutorial step you are on, or which quilt pattern you are making. I hope you’ll join so we can all share in the fun and get inspired!

The link is: http://www.flickr.com/groups/christasquiltalong/

Sew and Tell and Giveaway Winners!

I quilted all weekend on my Charming Chevrons quilt and am really pleased with the progress so far. It was pure bliss to sew for hours on end while my hubby entertained the kiddos with movies and games. But more about that later. Here’s a sneak peek, and I’ll post more pictures on this week’s Do-It-Yourself Quilt Along.

Christa's Charming Chevrons

Diana, AKA Quilting Grandma sent me a picture of her version of Charming Chevrons, made from Berenstain Bears Charm Packs. Aren’t the colors just wonderful?? I love how she added the extra borders, and her choice of solid green for the background is just awesome!

Diana's Chevrons

And I couldn’t resist sharing this picture of Martha from Illinois, modeling her Machingers Quilting Gloves on her new Tiara machine. I have to say I’m a little bit jealous of all that quilting space under the machine!

Quilting with Machingers

That got me to thinking, wouldn’t it be fun to win some of my favorite gadgets and quilting tools I talk about? Since I just reviewed Machingers Gloves last week, I’m going to give two lucky readers each a pair of gloves to try out.

It’s easy to enter, simply post a comment (any comment) and you’ll be entered to win. I’ll randomly select 2 winners and post their names here on the blog. I’ll also notify them via email. Contest ends this Friday, November 30th at 9PM Pacific Time (Midnight Eastern).

Good luck!


Updated November 30th, 9:30 PM

Thank you all for participating. This was a fun contest to run and all of the comments were much appreciated! We now have our winners!

The first winner, drawn at random is:

Judith:

Right now, I’m using a pair of slightly textured gardening gloves. The disadvantage is that they’re fairly bulky and not particularly grippy. The advantage is that I can blame any quilting gaffes on the gloves ;-) Thanks for the great giveaway opportunity.


The second winner, also drawn at random is

Evelyn H:

I haven’t done your Chevron quilt, but I made the Jolly Jelly Roll. I love that pattern. I would love a pair of the quilting gloves, which are on my Christmas wish list! Thanks for doing this and for your fun tutorials.

Congratulations, ladies! I will be emailing you shortly with your winning prize!

Charming Chevrons Followup #3

It’s so fun to see how everyone’s Charming Chevrons quilts are turning out. Keep emailing me your photos and I’ll be glad to share them here on my blog.

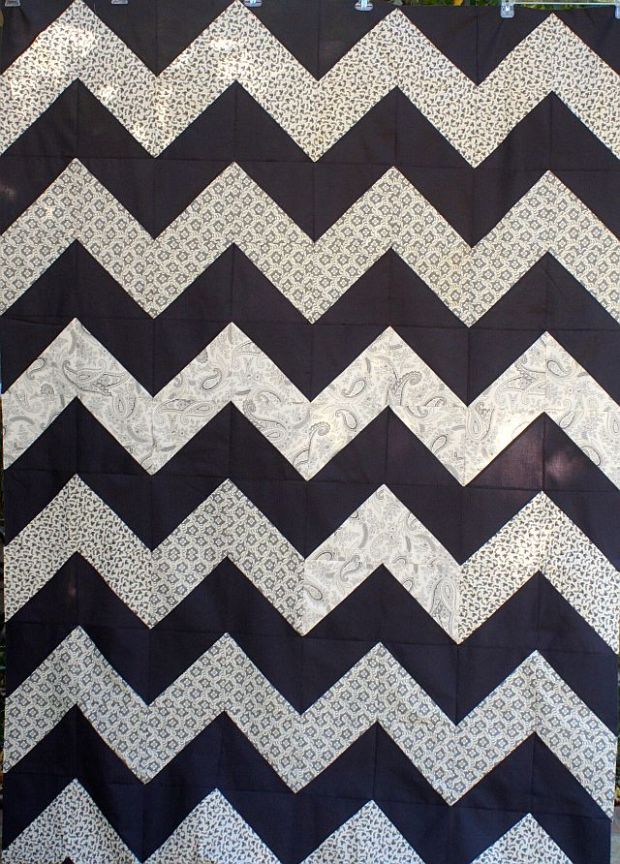
Kathie from California has worked ahead and has completed her lovely chevron quilt top in shades of black, white, and grey. She changed her quilt top up a little by sewing larger blocks and making her top narrower but longer.

She asked about border ideas. I think she could add a thin strip of black and then use her leftovers to make a scrappy pieced border like piano keys or flying geese. Any other ideas??
Kathie's Chevrons

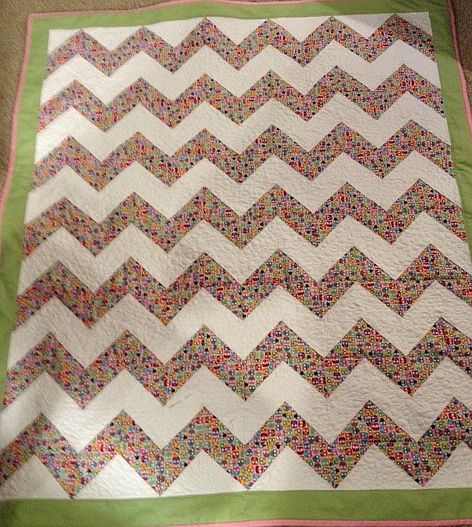
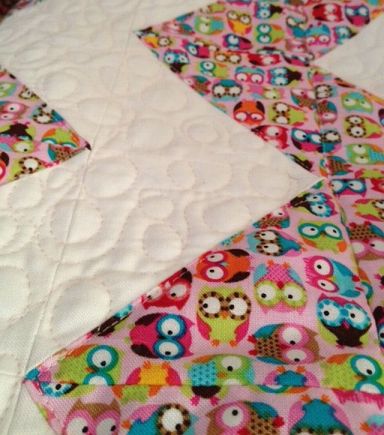
Ellen from Oklahoma was so excited about this project that she’s already completed her first baby chevrons quilt and is now making another. She made her first quilt using one novelty focus fabric featuring owls for the zig zags with a cream background.
Ellen's Chevrons

Owls CloseupI love how she chose the green solid border and the pink binding fabric to pull it all together.

She paper pieced the 3 1/2″ blocks using triangles on a roll.

At left is a closeup of her gorgeous background quilting.

She stitched circles and loops with pink thread in the background and outlined the chevron blocks.

I’m going to do some similar pebble quilting with straight lines for my version in 2 weeks.

Finally, here’s the next chevron quilt Ellen is working on using a pink cupcake novelty fabric and solid white background. This time she cut her triangles from 6 inch squares to start with.
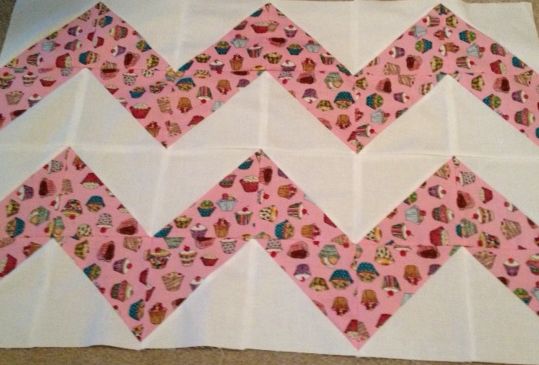
Cupcake ChevronsIf you want to make a similar chevron quilt using just one fabric for the stripes and one fabric for the background you would need about 2 yards of each. Here’s a link to my original Charming Chevrons supply list and sewing schedule.

For those of you wondering why I don’t just have a link up party, or use Flikr, that’s because eventually, I’ll be hosting the blog myself on its own domain which means I’ll have a lot more flexibility and control over the blog and what bells and whistles we can offer. Jason’s working on that right now but we are still a few weeks away from the big rollout. So more on that later…

Charming Chevrons Followup #3

I’m getting a great response from my Charming Chevrons quilt tutorial. With the easy to piece blocks they are going together very quickly.  Several blog readers are making it in alternate sizes, too.

Chevron Blocks

I was very happy to find a larger seam roller to use in pressing my blocks. I started off using a narrow roller. But when I took Deb Karasik’s workshop she recommended using one with a wider roll, sort of like a wallpaper roller.

Narrow Seam Roller

Wide Seam RollerYou can order one directly from Deb’s store.

I hope to carry them too!

By the way, here’s a picture of Kathie’s quilt in progress using coordinated fabrics and larger blocks cut 8.5 inches instead of 5 inches. The graphic colorscheme is rockin’!!

Kathie's ChevronsKathie is thinking of using Minkee on the back. I think that would be fabulous and she could even skip the batting if she wants!

You’ll notice that Kathie folded and pressed her blocks to get the diagonal registration lines rather than marking them with a pen. This works, too!

Fold and Press HSTThe beauty of this pattern is that it will work in ANY size because the blocks are all the same size. You can also use fewer blocks or make your quilt larger by adding borders. Remember, this is YOUR quilt so I give you blanket permission to change it any way YOU want! Now, wasn’t that fun??

Sew and Tell – Holiday Projects

Are you looking for a couple of quick and easy ideas for the holidays? Well thanks to a couple of my blog readers I have just thing to inspire you!

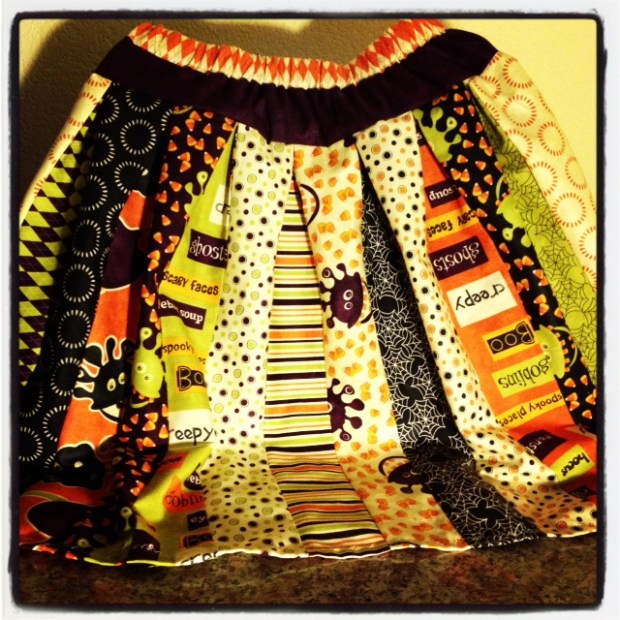
I know that Halloween is just a few days away, but my friend Stacy whipped up a couple of “Spooktacular” strippy skirts for her girls using just one Monster Bash Jelly Roll. She got them done in record time, too!

Jelly Roll Skirts

Aren’t they just adorable? (And the girls are cute, too!!) Stacy found a pattern for her skirts over at the Moda Bakeshop. She’s planning on making a Christmas version next. I think she should also make one for herself and they should all go caroling together this winter!!

Monster Bash Halloween Skirt

Moving onto Christmas projects, Wendy S. took my Baby Bricks quilt and scaled down the design so it was suitable for a set of holiday placemats.

She cut her bricks into 4 1/4″  x 2 1/4″ rectangles and used a thin 1 1/2″ strip of black. I think this makes the sparkling Christmas prints really pop!

Christmas Bricks

Thanks for sharing, gals. These ideas would make super fun holiday gifts and are much quicker to sew than making a quilt!

Sew and Tell Friday – Holiday Jelly Roll Quilts

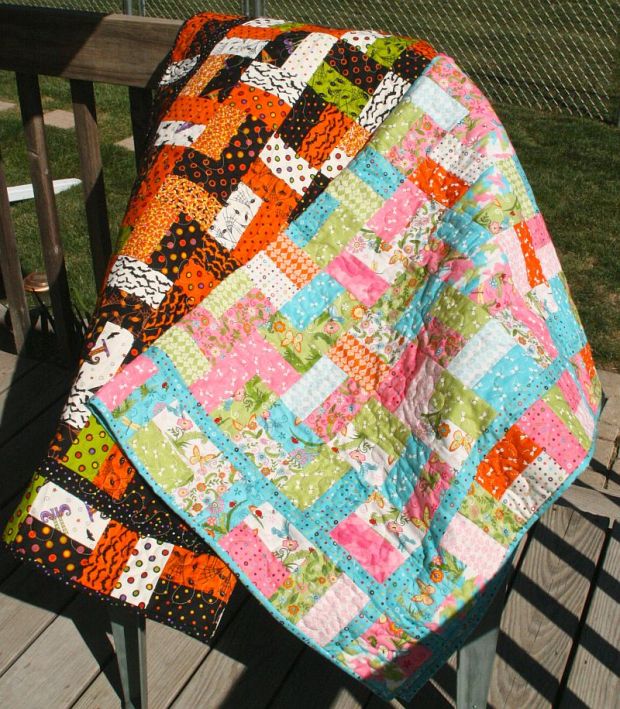
Linda M. and Martha A. both participated in my first ever quilt-along tutorial and have finished two jelly roll quilts just in time for the holidays! Don’t they look great? I love the stippling they added – it gives the quilts lots of texture.

Jolly Jelly Roll QuiltsLinda completed her Meadow Friends quilt and Martha finished her Trick or Treat quilt just in time for Halloween. (Martha has one more quilt to finish, in time for Christmas.)

All three of their quilt tops are shown below.

Holiday Jelly Roll Quilts

These two quilting friends love to participate in “strip clubs” and enjoy working with jelly rolls. Nice job ladies!

As my way of saying thanks for sharing a completed project using fabric purchased from me, each of them will receive a $5 gift certificate to my store. They can put that toward their next jelly roll purchase or anything else that suits their fancy!

Sew and Tell Friday – Finished Jelly Roll Quilts

I am so excited to see that people are finishing their Jolly Jelly Roll quilts. This was my first ever quilting tutorial and it gives me great satisfaction to see that it was a success! You can click here to see all the tutorials. (I still have a few Jolly Jelly Roll kits available, too!)

First, we have Joanne P. who made her quilt from fabric she got from me plus scraps from her stash. She picked a bright white inner border for a little “pop” and then bound it in blue.

Joanne's Jelly Roll Quilt

Joanne quilted a wavy grid effect by starting the quilting in her piano keys borders and continuing across the surface of the quilt  from top to bottom and side to side. You can see the neat effect it gave on the back of the quilt. I am so glad she “did-it herself!”

Quilting CloseupQuilted Grid

Kathleen W. was also very productive and finished her quilt, too. I just love the aboriginal prints, don’t you?

Kathleen's Jelly Roll QuiltKathleen’s favorite part of the quilt is her pieced backing. I concur! She did a nice job on the serpentine stitching,  and she even added a label, too. Way to go, Kathleen!

Kathleen's Quilt Back

Sew and Tell Friday – Strips and Bricks

It’s so fun to see how everyone’s Jolly Jelly Roll quilts have turned out.  Even though I finished up this tutorial, I will be happy to share pictures of those that have followed along, whether they are finished or not (though I can’t wait to see the quilting on them)!

Also, I put together a Jolly Jelly Roll quilt kit if you’d like to make another one.

This is Laura F.’s top that she made from her stash. She chose to make her quilt as I had shown in the original pattern drawing, with piano keys borders. She’s toying around with the idea of using oilcloth for the backing as a picnic blanket. I think that would be fantastic!

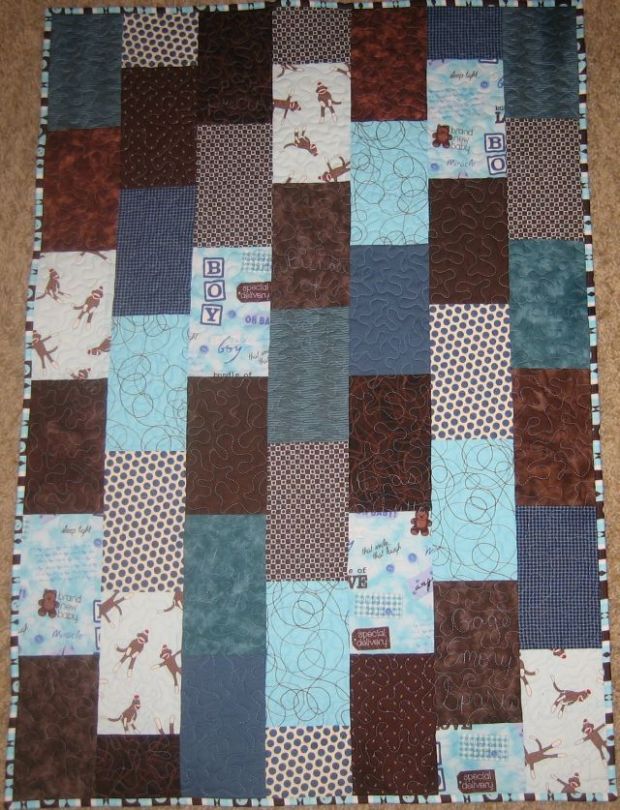
Laural's Jolly Jelly Roll QuiltI’ve just begun the next quilting tutorial series, called quilt Baby Bricks. I tweaked a design I had done previously, based on a couple of fun quilts I designed and made last year.

Blue BricksMy tutorial will be very similar to the blue quilt, with the addition of neutral solid strips in between the rows. That will give it a modern touch while providing some negative space.

Kits are available for that one, too.

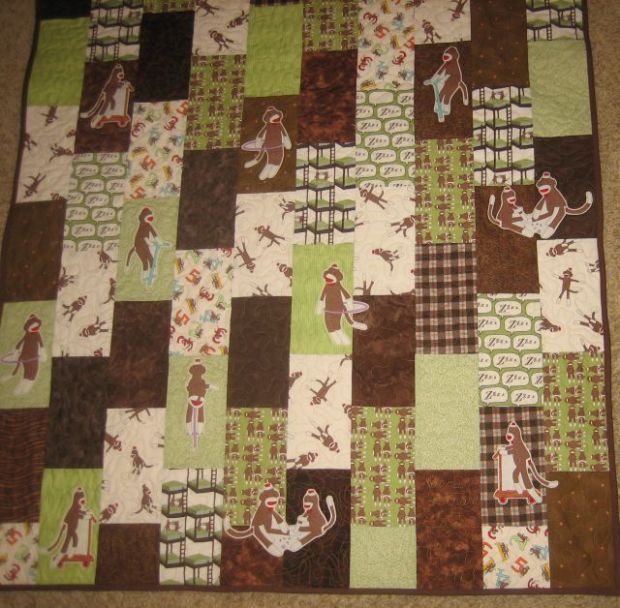
Green BricksJust for fun, I made a similar quilt in brown and green and added a few monkey appliques.

To do this, I simply ironed some wonder under to the back side of my Funky Monkeys fabric and cut around the shapes. I ironed them to the quilt top and then stitched around them with a straight stitch once the quilt was basted, an appli-quilt technique!

This is the first time I’ve sort of worked in a series. I like the look of the bricks and it was fun to explore a few different possibilities with the design.

Sew and Tell Friday – Zazzle, Turning Twenty Diamonds

I am excited to share some more Sew and Tell with you today.

Joanne P. is following along with my Do-it-Yourself-Quilt tutorial. But, instead of using a jelly roll, Joanne cut up her strips from Mark Lipinski’s Zazzle line in blue. She mixed in some brown and gold Moda scraps from her stash to add a little sparkle. How beautiful! I love how the white inner border provides a contrasting frame to the quilt. Notice how she used a piano keys border variation. Love it! Now I can’t wait to see it quilted!

Jolly Jelly Roll Zazzle

Anne Y. recently finished a Turning Twenty into Diamonds quilt using Arnold’s Attic from Moda. (How did I miss that quilt pattern? I better put it on my list to add!) I love all of the texture that her quilting gives to the piece. She quilted straight lines in a diagonal setting. Don’t you think the quilting makes the quilt?

Turning Twenty Into Diamonds

In the next couple of weeks I will be improving my blog so that we can have more sew and tell fun. Instead of waiting for everyone to send me their show and tell pics, we’ll have some link-up parties where you can post your own quilt-along pics, finished quilts, and wip’s (works-in progress). So stay tuned for that.

In the meantime, you can still email me pictures of your finished projects, using one or more fabrics that you got from me. Plus, I can’t wait to see more finished quilts from all of you who are finishing up your own Jolly Jelly Roll quilts. Happy Quilting!

Sew and Tell – Dragonfly Batik Art Quilt

I am so excited to share with you Diane’s beautiful art quilt below. She used green batik fat quarters that she got from me, and quilted with metallic thread to add the textured water and pond ripples to her piece. The dragonfly was begun in a Susan Brubaker Knapp thread sketching class and finished at home. (Some people actually finish their class projects!!) She added glittery glue to give the dragonfly some sparkle and make its wings look iridescent.

Dragonfly QuiltDiane has also been following along making her version of the Jolly Jelly Roll quilt. She finished up her homework for the week and shares her lovely jewel-toned top with us:

Jeweled Jelly Roll QuiltNice job, Diane! For those of you quilting along with my tutorial, be sure to email me pictures of your in-progress diy quilts, too. It’s such fun to see the variety.

And for those of you that want to share your work using fabrics purchased from me, I’ll send you a little thank you if I feature your finished project on my blog. You can email pictures to christa@christaquilts.com. Happy quilting!