Paper Pieced Quilt Along #12 Machine Quilting Linear Echoes

New to my site? Be sure to sign up for my email newsletter and get a free PDF pattern!

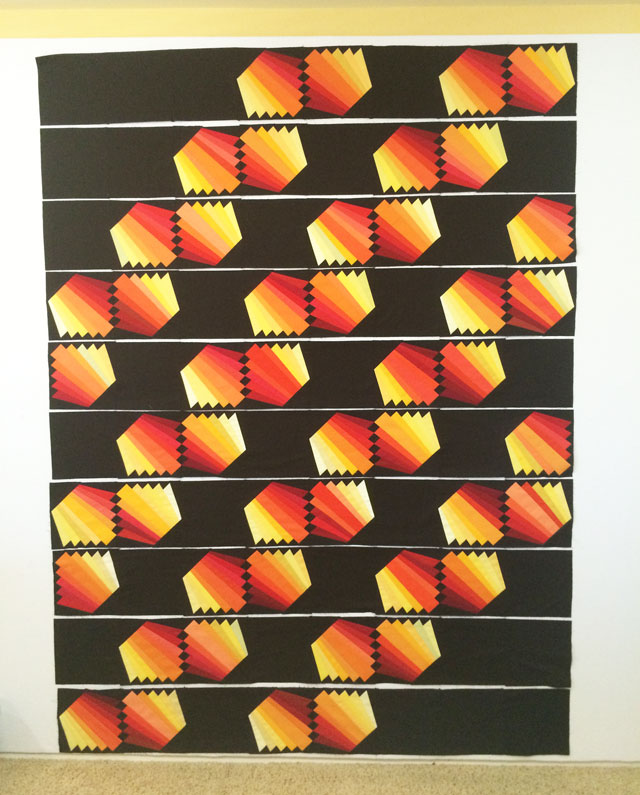
Today we are back to using the walking foot or integrated dual feed (IDF)  to quilt straight lines of texture around the blocks. In my book Machine Quilting With Style, I call this quilting technique “Linear Echoes” because you are basically stitching echoing lines around the patchwork to help outline the piecing design and make it pop.

linear_echoes_1
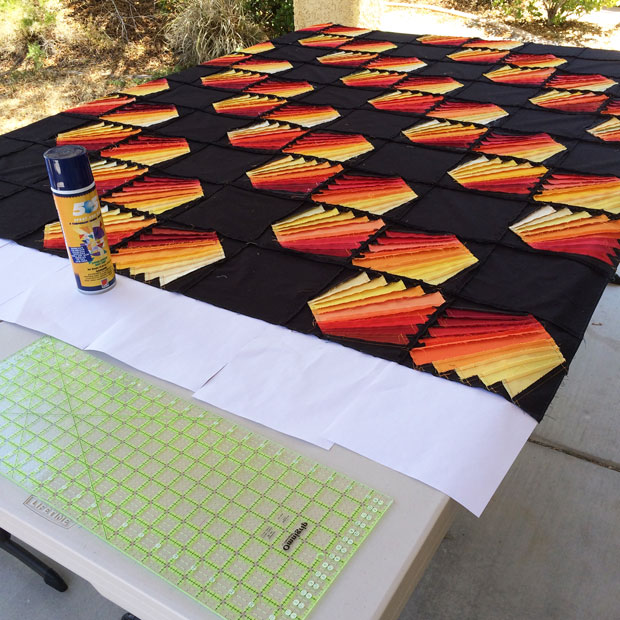
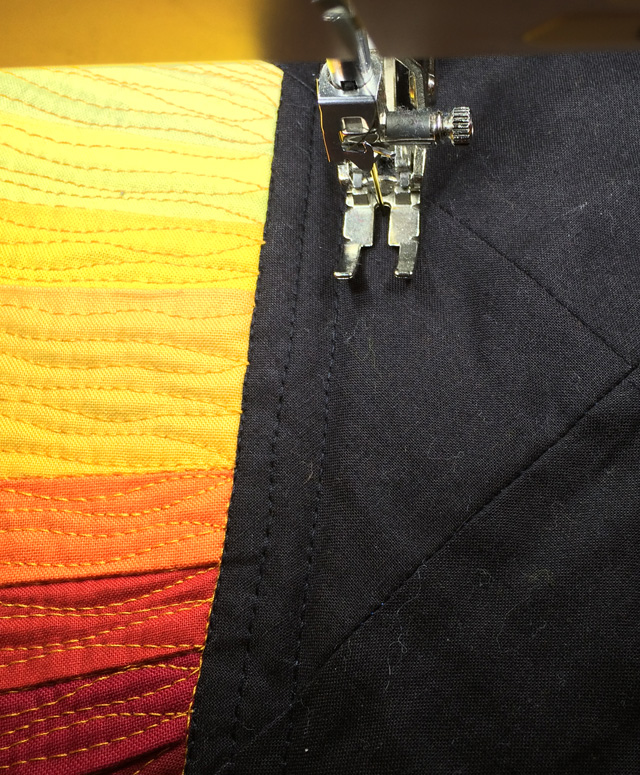
Start the first linear echo with the foot right next to the seam line. Vary the spacing if desired.

I did not mark the lines, but instead used the edge of my foot as a guideline when quilting each line. I was able to start and end each line of quilting off the edges of the quilt, in the batting, so I didn’t have to worry about burying my threads at either end.

linear_echoes_2Use the width of your foot as a guideline for spacing. Wider spacing means fewer lines to quilt.

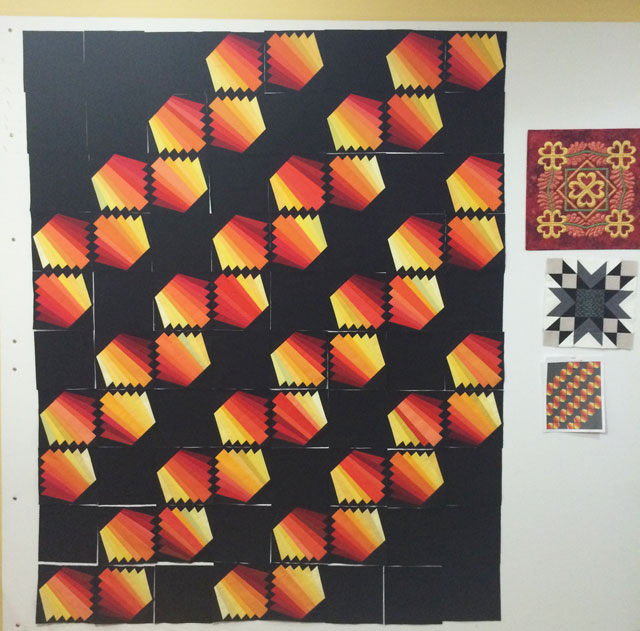
You can quilt one or more lines around the blocks, depending on the type of look you want to achieve. So far I have quilted three lines around each row of blocks, each approximately 1/4″ apart. Rather than using a walking foot, I used my quarter inch foot for spacing, combined with the integrated dual feed on my BERNINA.

linear_echoes_3I’ll fill in the rest of the negative space with more lines, or a different FMQ design.

Here’s a tip – quilt a couple of stitches on a practice sandwich and measure them so you know how many stitches you are doing per inch. I only need to quilt about 2-3 stitches per quarter inch. That comes in handy when you need to echo quilt beyond the first line.

linear_echoes_backing
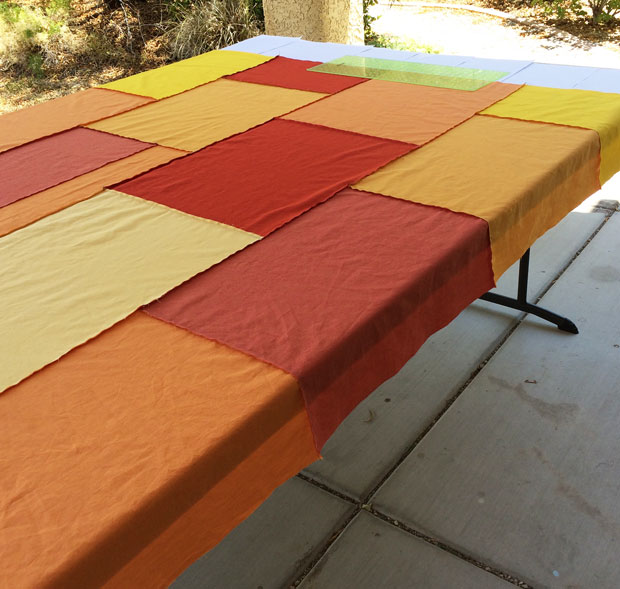
This is what the backing looks like so far. I love all that texture!!

So far I’m quilting my lines in black thread to match the background fabric on the top. I only want to see a little bit of the texture rather than the stitches so I’m ok if my quilting blends in at this point. I used an invisible thread from Aurifil for the bobbin so that the black thread wouldn’t be so stark on the lighter backing fabric.

For the next tutorial, I plan to add in a little more decorative free-motion quilting, probably with a contrasting thread. I’ll start on that now so I’m ready for the next QAL post!

Share your progress

Be sure to share your version in my Facebook group: Quilt With Christa.

Click here for all of the Paper Pieced Quilt Along Tutorials.

Paper Pieced Quilt Along #8 – Spray Basting Tutorial

I have been a quilter for over 20 years, but I’ve only been using basting spray on my quilts for about the last 2 years and it’s now my favorite go-to method. Although there are a few drawbacks: it’s more expensive, you need to do it outside or in a well-ventilated area, the convenience of not having to remove pins while machine quilting more than makes up for it!

Be sure to share your progress in my facebook group: Quilt With Christa!

qal_basting_spray

I can usually baste about 2-3 throw sized quilts from one can of basting spray.

Tips before starting

  • My spray basting method works best for quilt batting that is mostly or all cotton.
  • I use 2 large plastic tables that fold up and out of the way for storage. You can also use just one table for this method.
  • Make sure your batting is at least 2″ all around all four sides of the top (4″ larger than the finished measurement).
  • Make sure your backing is at least 3″ bigger all around (6″ larger than the finished quilt top).
  • If using a lot of black like I did, consider using a black batting (I used an 80/20 blend).
  • Grab a helper and a long acrylic ruler to help smooth things out.
  • If the quilt top or backing sticks to itself, you can easily pull it apart to reposition as needed.

Step 1

Press all 3 layers – quilt top, quilt backing and batting with a dry iron. This works best for 100% cotton or a cotton blend, but yes, you can iron your quilt batting. If you are worried about the batting sticking to your iron, put a piece of clean fabric on top of the batting and iron on top of that. If you have stubborn wrinkles, lightly spray the batting with water before pressing.

Step 2

Cover your table or work surface with a clean bed sheet or cardboard to protect the table from overspray. If it’s not windy outside, you can place pieces of white paper around the edges of the fabric and then remove them easily once the top and backing have been sprayed.

qal_basting_top

Spray outside to let the fumes dissipate. I used sheets of paper to catch the overspray.

Lay out the quilt top, wrong side up on a large table outside. Gently and evenly spray the entire top with 505 basting spray. (This is the brand I recommend.) I will usually spray in sections, following the pieced design of the quilt. Set aside the quilt top.

qal_basting_top_detailYou want the adhesive to completely cover the back side of the quilt top – just don’t overdo it.

Step 3

Lay out the quilt backing wrong side up and repeat the process to spray the entire backing. If the backing hangs over the edges, spray the center first and then the sides. Remove the bed sheet or papers and leave the backing on the table.

quilt backingBy using paper to catch the overspray, it’s easy to remove and leave the backing in place.
Dead summer grass and dirty concrete patio optional!! 🙂

Step 4

With a helper, lay the batting on top of the quilt backing. It may help to fold the backing in half and then in quarters first. Lay it on the corner of the backing and then unfold it and smooth it out as you go.

With a long acrylic ruler, smooth the batting across the backing, working out any lumps and bumps.

Step 5

With a helper, lay the sticky top right side up on top of the batting and backing piece. Again, smooth it out with a long ruler if needed. Flip the quilt sandwich over to ensure there are no wrinkles on the back and that the entire top has batting and backing underneath. Trim the excess batting and backing with batting shears leaving only an inch or two all around.

basting a quiltSmooth the layers out the best you can with your hands and a ruler.

Step 6

Bring all 3 layers inside and iron it from the back of your quilt to set the glue. If you have an oversized board that fits on top of your regular ironing board, this comes in really handy! Once the backing is smooth, flip the quilt over and iron it again from the front side.

If spray basting isn’t your thing, here’s a link another quilt along with my pin-basting tutorial. 🙂

You are now ready to quilt! Start choosing  your thread colors and meet me back here August 26th to begin the quilting. Or get a jump start on it now if you can’t wait!

Click here for all of the Paper Pieced Quilt Along Tutorials

New to my blog? Be sure to sign up for Friendly Threads – my email newsletter!

Paper Pieced Inspiration and Schedule Update

I am constantly amazed with the creativity that is being shown during my paper pieced quilt along. I knew this design had potential, but it’s quite inspiring to see all the different variations that are being shared in my facebook group! For those who aren’t on facebook, here’s a small sample of the fabulous blocks, color combinations, and layouts that are being shared:

layoutsFrom left to right: Michele H., Chelsea M,. Julie G., and Lorraine A.

Many of you are worried that you won’t be able to keep up or catch up during this quilt along, and several of you have mentioned that you haven’t even started. Do not fret – this quilt along is free, the tutorials will stay up indefinitely, and you can work at your own pace!

In fact, I’m even including a longer delay myself than I had originally planned. I got an exciting opportunity to work on a big project right before the quilt along launched. At the time I thought I would be able work on both at the same time, but it turns out that was a little ambitious. Although my top is done, the quilting will need to wait until August for me to finish it.

I’ll throw in an extra tutorial for piecing the backing in July, and will include one for basting the following week. Then we’ll have a nice little summer break and I will begin the machine quilting at the end of August.

How does that sound?

Paper Pieced Quilt Along #6 – Sewing the Top

I have a simple method I employ when sewing nearly all of my quilt tops. I lay out my blocks on a design wall, join them into rows, and sew the rows together to complete the top. For this lesson, I’ll share a few tips on how I make that go more smoothly. (Visit my Paper Pieced QAL page for links to all previous tutorials.)

finished_blocks I chose to leave this picture uncropped so that you can see I usually have several things happening on my design wall at the same time.

Step 1

First I throw up the blocks on my design wall. Although I will place the blocks into position, I don’t care too much about the color balance yet. I constantly refer to a picture or printout of my design so I can lay the blocks out in the correct position.

Step 2 (not shown)

After I have laid out all the blocks and background squares, I will play around with the arrangement until it feels right. For this quilt, I had just a few pops of light green and a couple of darker colors purposely out of order to give a little interest. I made sure to balance those out a little when I chose my final layout.

Step 3

sewthexHere’s another thrifty hint: I tend to use up leftover colored cotton bobbins in my piecing.

I take a picture with my camera phone and then begin sewing individual rows, two blocks at a time. As I joined the blocks, I pressed all of the joining seams open. I also pressed each row of blocks open to reduce the bulk.

Tip: use the seam line intersections as a guideline when matching points. For the sides of the block, I sewed just a few thread widths narrow of the intersection between the two seams shown above. When matching up blocks point to point, I pinned generously and sewed through the “x’s” that were formed by intersecting seams.

Step 4

I sewed all of the block rows individually, pressed each open, and put it back into position on the design wall. Then I sewed together two rows, pressed them and put them back on the wall.

block_rowsI made 5 sets of 2 row pairs, then joined those into 2 sections of 4 rows and 6 rows. Finally I joined the rows together to complete the quilt top.

Step 5 – The “Victory Lap”

Once the top is complete, I will secure the perimeter edges by sewing 1/8″ in from the edge of the quilt top, around all 4 sides. Someone jokingly referred to this as the “victory lap” on instagram and I got a kick out of that!

edge_stitchingStay-stitch around the perimeter to secure the edges for basting and quilting.

Now, we are ready to baste! Remember to share your work-in-progress on my Facebook group: Quilt With Christa, or on Instagram #paperpiecedqal.

Copyright and Permission Granted

I am very happy to share my knowledge with you free of charge during this quilt along. However, this information is for your personal use as a loyal reader of my blog. Please do not make copies of any part of this quilt along to distribute it to your friends. If you’d like to tell them about it, simply share my QAL site link with them and encourage them to come on over and join us: ChristasQuiltAlong.com

If you’d like to share links to my site on Facebook or on your own blog, that is great, too!

At the conclusion of the quilt along, I will be happy to edit down all of the content and turn it into a pattern for sale, so that others can use my pattern as a teaching aid in the future. 🙂