Free Quilt Pattern
New to my blog? Be sure to sign up for my email newsletter to get a free pattern!
Time for another fun quilt-along! My Hugs ‘n Kisses design is based on a quilt I made several years ago. If you look closely, it’s similar to the quilt shown on my blog’s header. Over the years I’ve had several requests for this quilt pattern, so I finally decided to make one!

Hugs ‘n Kisses
About This Quilt – Finished Size 48″ x 64″
I designed this quilt using EQ7 so that it will work with Jelly Rolls or precut strips. Although I am making this quilt in the size stated above, you can easily double the yardage requirements, purchase additional kits, or add borders to make it bigger.
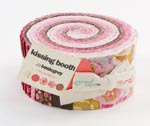
Kissing Booth Jelly Roll
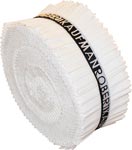
Kona Snow Roll Up

Kona Solids Brick
Fabric Requirements (Hugs and Kisses Quilt Kits are available for a limited time.)
- 1 Jelly Roll of print fabric. You may use any jelly roll or set of precut strips you like as long as you have at least 38 – 2.5″ strips.
- 2/3 Jelly Roll of solid or background fabric, or 24 – 2.5″ strips. If you prefer to purchase yardage and cut the strips yourself, you will need 1.75 yards.
- 1/2 yard fabric for the binding in a coordinating color – I prefer to use solid 2.25″ strips. Purchase a little more if you like wider strips.
- At least 52″ x 68″ piece of batting; my favorites are high quality cotton or wool.
- 3 yards of non-directional fabric the backing, or scraps and fat quarters to total about 3.5 yards if you prefer to make it scrappy like I do.

Machingers Gloves

Supreme Slider

Superior Needles
Supplies Needed
- Sewing machine with walking foot (darning foot for optional free-motion quilting)
- Brand new sewing machine needles
- Rotary cutting equipment (rotary cutter, cutting mat, acrylic rulers)
- Basic sewing supplies (pins, scissors, seam ripper, etc.)
- Machingers quilting gloves
- Basting pins
- Thread to match your fabrics
- Optional – bobbin washers for smoother thread delivery
- Optional – Supreme Slider for FMQ
If you have any questions please be sure to join my flickr discussion or email me directly at christa@christaquilts.com.
Quilt Along Schedule – Links will go to each active post when published.
- 5.1 – 2/27/13 Supply List
- 5.2 – 3/6/13 Choosing Fabrics and Alternate Layouts
- 5.3 – 3/13/13 Cutting and Sewing the Bow Tie Blocks
- 5.4 – 3/20/13 Sewing the X and O Blocks (or alternates)
- 5.5 – 3/27/13 Finishing the Quilt Top and Pieced Borders
- 5.6 – 4/3/13 Piecing the Backing
- 5.7 – 4/10/13 Pin Basting
- 5.8 – 4/17/13 Stitching in the Ditch
- 5.9 – 4/24/13 Decorative FMQ
- 5.10 – 5/1/13 Additional Quilting
- 5.11 – 5/8/13 Binding – It’s Finished!
Sharing is Caring
Please share your work in progress in my facebook group: Quilt With Christa . 🙂


