My Craftsy Class is Now Live – Save 50% on The Quilter’s Path: Plan It, Stitch It, Quilt It

My class, The Quilter’s Path: Plan It, Stitch It, Quilt It is now available online. I’m so excited for you to join my classroom where you’ll have direct access to me – 24/7!! And the best part is, for a limited time, you can save 50% using my exclusive instructor discount! But here’s the catch: it’s available only from me using this link and you won’t see the discount until you actually put the class in your cart. So be sure it shows up before you check out. πŸ™‚

the-quilters-pathClick here to add The Quilter’s Path to your cart and save 50% off the regular price!

As you view the videos, you can take notes, ask questions, and upload images of what you are working on. It’s a great place to get quilting advice from me, or to trouble shoot any issues you are having. My Craftsy class is a dedicated space where I can help you one on one, and I’m really looking forward to it! I like to think of it as 2+ hours of engaging video, along with unlimited coaching. πŸ™‚

navy-pinwheels

Learn how to quilt an easy but effective wavy grid using your walking foot! This is just one of the many quilting motifs I’ll show you how to do with your walking foot, free motion, or both!

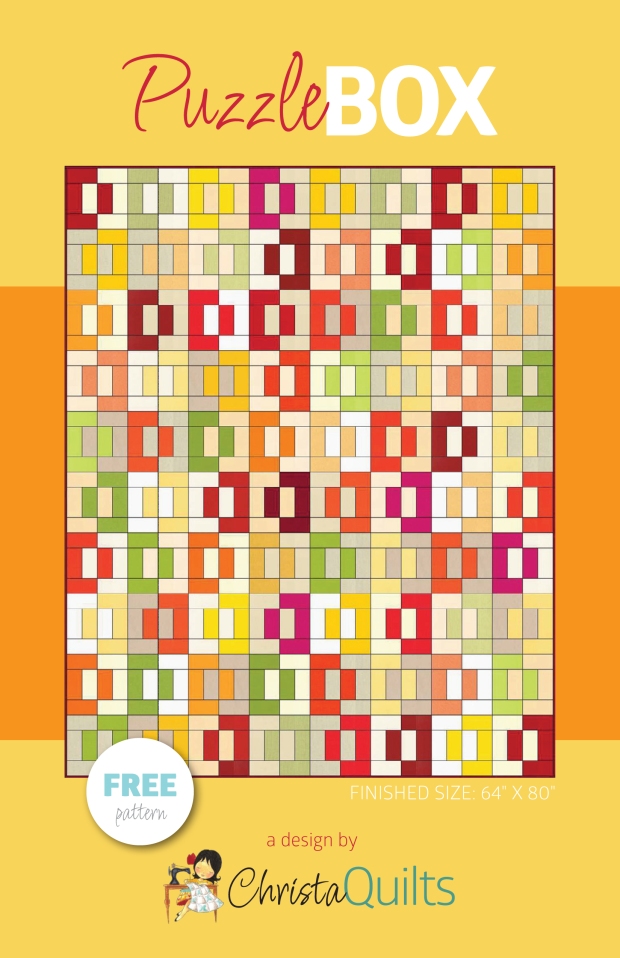
In The Quilter’s Path, it was very important for me to show you how to quilt on real quilts and blocks during class, so the class materials include a free pattern for the Pinwheels quilt. I’ve made it in three different colorways (navy, pink and teal) so that you can see how changing the fabrics and the quilting can totally change the look of the quilt!

pink-pinwheels-quilting

You can easily quilt your own quilts when you find your quilting path!

Here’s an actual screenshot from class so that you can see what the platform looks like. There’s a detailed menu bar where you can find the lessons and class materials, as well as take notes and post projects. On the right hand side of your screen, you can ask questions and read the Q&A of other class members. You can also hide this part of the screen if you don’t want to view it.

video-screenshot

The best thing about asking a question and interacting on the platform is that all of the other students can see your projects and discussions, too. I honestly think you learn as much from the Q&A as you do in the class itself! And remember, my philosophy is that the only dumb question is the one that is never asked!

During class,Β  I show how to quilt effective designs using a walking foot (or dual feed), free-motion techniques, and combined designs to create a truly custom look.

Click here to enroll in The Quilter’s Path and let me help you become a better quilter!
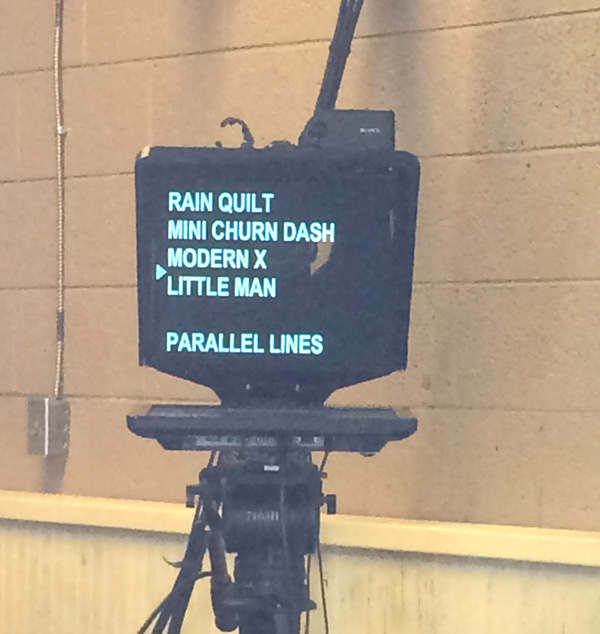
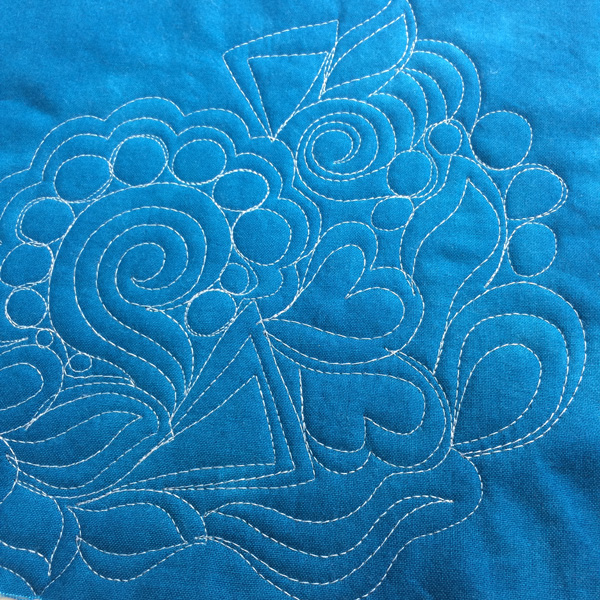
the-quilters-path

Christa’s Soap Box – Why I Make My Own Quilts

Recently, as I’ve been working long hours in my business, I’ve been thinking more and more about WHY I like to make my own quilts and do all my own “stunt sewing.” What I mean by that is that I enjoy every part of the quilt making process. From designing the pattern, to finishing the final binding stitches by hand, I really do enjoy taking ownership of the entire process. What you may or may not know is that many designers enlist the help of others to complete their projects, and this is TOTALLY OK!!

FMQ

In addition to teaching how to quilt, I love talking about the business of quilting, too!

Some enjoy designing, some enjoy piecing, some enjoy quilting or finishing, and some like to do it all. For a prolific designer that has weekly or monthly deadlines, many times there’s simply not enough time to do all of the work themselves, so they enlist the help of “sewing fairies” (sometimes paid, sometimes not, depending on the arrangement). This can be mutually beneficial to both parties, each getting to do what they love best. After all, the worst thing a sewing professional can do is miss his or her deadlines, if they want to stay in business and build relationships with other industry companies.

Binding by Hand

I’m one of those weirdos that actually loves to hand bind. I love the slow-pace stitching!

I’ve had many offers both to help with my sewing, or to be a stunt sewer or quilter for others. And every time I’ve politely declined. I’ve been pondering why that is. The best I can come up with (other than my type A control freak personality that I try to keep under wraps) is that I’m afraid it would feel more like “work” and less like “fun” if I only did one thing over and over and over.

While machine quilting is certainly my favorite part of the quilt-making process, it’s not the only thing I want to do. I actually tried machine quilting for hire many years ago and it was not the right fit. Quilting for me is very meditative, and each part of the process engages a different area of my brain. I actually get bored if I only do one thing over and over, so by constantly switching back and forth between designing, piecing, quilting, and hand-sewing it allows me to fully enjoy each part of the process. I’ve even come to enjoy basting, once I figured out an efficient method!

Busy Hands Quilt

Machine quilting is my favorite technique – but I enjoy the entire process.

I realize that in the end, doing all of my own work will mean that I make less quilts. But I’m totally okay with that. I also prefer to make one quilt at a time from start to finish, rather than having a whole bunch of WIP’s (works in progress) going on at the same time. That’s just too much mental chaos for me, LOL!! I enjoy the process of making, but I also love the thrill of getting to the finish and checking it off my list!

Because teaching machine quilting is a big part of my focus right now, I think it helps me relate to my students by piecing my own quilts. Quilting a real quilt is a LOT different than demonstrating a free-motion design on piece of plain fabric. So, by quilting a quilt top I’ve pieced myself, I’ve gained experience on how best to prepare a quilt top FOR machine quilting. I also have lots of time to think about what machine quilting designs will look best on the quilt I’m currently making, while I’m piecing it. I’m of the opinion that “you can’t rush art” so by having this extra thinking time, I’m usually ready to go once it’s time to quilt.

2015quiltstack

I love a yummy stack of finished quilts!

I hope this helps you understand a little bit more about my process, and why I do things the way I do them. Again, remember, this is is NOT a one size fits all strategy.Β  It’s just what works for me. My biggest goal with quilting is to help encourage you to do what works for best for YOU.Β  πŸ™‚

So what are your thoughts? Do you prefer one part of the process over any other? There are no wrong answers here, I’m just curious. πŸ™‚

Quilts from my Craftsy Class, and Your Chance to Win it Before You Can Buy it!

My Craftsy class, The Quilter’s Path: Plan It, Stitch It, Quilt It is scheduled to launch next week!! Whoo hoo!! It’s all about showing you how to quilt some of my favorite motifs using your walking foot, free motion, or both. To celebrate, one of you lucky readers will get a chance to win it before you can buy it. πŸ™‚

Update: Congrats to winner Linda B! The class is now live and available for purchase!

Click here to save 50% off The Quilter’s Path through April 4, 2017

11276_thequilterspath_christawatson

Win My Class!

To enter, first click here to sign in or register for a free Craftsy account (if you don’t have one yet). Then leave me a comment letting me know if you’ve ever taken a Craftsy class before.

If you are a regular Craftsy user, I’d also love to know what you love best about the class platform. As for me, I love being able to interact 24/7 via the Q&A sidebar in each class. πŸ™‚

The giveaway will be open to all and will run through the end of the week. I’ll draw a random winner on Saturday and will contact them via email.

Pinwheel Quilts from Class

I used Craftsy’s Boundless precut strips in three different color schemes to make the 3 full-sized pinwheel quilts shown in class. With careful cutting you can actually make 2 quilts from each set, or make one larger version. The free pattern will be included exclusively as part of the class.

Here’s closeup shots of each of the pinwheel quilts I share in class:

pinwheels-navy

The Navy/30’s Pinwheels (with walking foot quilting) was made from 30’s prints and navy solids. I actually show two versions of this quilt in class, the finished red/white/blue version shown above, plus the pastel version shown below. I separated the precut 2 1/2″ strips into two color schemes to make both quilts. I used a contrasting thread on the pastel version that I actually quilt on during class, so you can see what I’m doing.

pastel_quilting

Click here to purchase Boundless 1930’s Delights 2 1/2″ precut strips.
Click here to purchase Boundless Solids Navy 2 1/2″ precut strips.

For the Pink/White pinwheels, I free-motion quilted a fun and easy edge to edge design that gives the quilt lots of texture. This is a fast way to finish that looks amazing on your quilt!
pinwheels-pink

During class, I teach many more quilting motifs than shown in these three samples, but I still quilt them on real blocks so you can see how the designs will look before you commit to a full quilt. For the pink/white version I used some of the leftover solid pink strips to make a scrappy binding. I think it adds such a fun look to a quilt!

scrappy_binding

Click here to purchase Boundless Solids Tickled Pink 2 1/2″ precut strips.
Click here to purchase Boundless Solids Bright White 2 1/2″ precut strips.

For the grand finale, I show how to combine both walking foot and free-motion techniques to create a truly custom look with your quilt, as shown in the Teal/Gray Pinwheels quilt.

pinwheels-teal

There’s plenty of leftover pieces in each bundle that you can use to whip up sample blocks to practice on like I did. It always amazes me how different a quilt can look, once it’s quilted!

pinwheel_block

Click here to purchase Boundless Blenders Aura Coastal Escape 2 1/2″ precut strips.
Click here to purchase Boundless Solids Nickel 2 1/2″ precut strips.

In class, I also share several of my other finished quilts for inspiration, explaining how I apply the quilting to each of these quilts. My goal is for you to not only learn the designs, but feel comfortable quilting them on any quilt. Once the class launches, I’ll be back with a detailed class summary, along with an exclusive discount available only from me. I can’t wait!!

titlecard_4x3

Craftsy Holiday Sale and a Sneak Peek of my Upcoming Class

While I excitedly await the release of my Craftsy class in January, I’m paying much more attention to all of the great deals the company is offering. For example, I just saw that ALL classes are on sale for under $20, now through the day after Christmas (12/26 at 11:59 PM MT).

holiday-sale

So now that you are done with your gift shopping, why not reward yourself with a gift of learning? Click here to view all quilting classes on sale.

Speaking of learning, here’s a behind-the-scenes shot of me quilting for my upcoming Craftsy class, The Quilter’s Path: Plan It, Stitch It, Quilt It.

pinwheel_quilts

The best part of filming was getting to quilt on a BERNINA. I felt right at home!

See those pinwheel quilts? The main focus of the class is showing how to quilt the same quilt in different ways depending on the look you are going for and what your skill level is. My students have been asking me to show them how I physically move an actual quilt under the machine; so most of the class is spent quilting real blocks and real quilts, using both walking foot and free-motion techniques. I also wanted to give as much value as I could, so the Pinwheels design is included as a free pattern in the class. πŸ™‚

bernina_dualfeed

Tip from class: If your machine has built in dual feed – you DON’T need a walking foot!

I’ll be telling you much more about my class as it gets closer to launch day in early January. In the meantime, be sure and grab the other quilting classes you’ve had your eye on, now while they are on sale. I highly recommend taking as many different classes as you can, from as many different instructors as you can. We each put our own spin on the material, and you never know when one of us will say something in a way you’ve never heard before. I sure love teaching, but I’m still always learning, too!

Click here to view all Quilting Classes on sale. And remember, every class site-wide is on sale, too! (Note: this post contains affiliate links, so thanks for your support!!)

My Week at Craftsy – The Big Announcement

craftsy-door

Opening the door to the Craftsy studio kind of reminded me of Charlie Bucket getting to peak inside Willy Wonka’s factory for the first time. And yes – there was chocolate!!!

Last week I filmed a Craftsy class! It’s been on my bucket list for awhile, and many of you wonderful readers have been asking me to do one now for over 2 years. The stars finally aligned this year for it to happen. Craftsy first approached me at Spring Quilt Market but I was right in the middle of some crazy deadlines, so I told them I wouldn’t be available until the fall. (Can you just imagine how scary that is when someone asks you to do something big and you have to say “I’d love to – but not right now!!”) My class will launch in early January, and I’ll tell you all about it then. But for now, here’s a little recap of how last week went:

denver

I have a thing for old red-brick buildings!!! This is a view of downtown Denver, (not Craftsy HQ!)

I arrived to Craftsy Headquarters in Denver, Colorado last week and couldn’t help but admire the architecture of this amazing city. When you live in a city known for imploding buildings when they get too old, seeing old brick buildings and interesting architecture is such a treat!

The day after my arrival, it was time to head straight to Craftsy studios which is housed in a one-story industrial complex that used to be a bustling taxi depot back in the day. Very cool. Day 1 consisted of meeting the crew, getting some publicity photos taken, and going over the lessons and agenda so we could begin filming the next day. As an added bonus, I got to participate in a couple of promo videos for the new year. Craftsy has some creative marketing on tap for next year, and it was fun to be a part of that!

makeup

Getting made-up by Danica. What a great way to start each day!

On Day 2, we began filming. I felt quite pampered getting my makeup done and my hair professionally styled each day. That’s something I could definitely get used to! The production crew at Craftsy are super smart – for first time instructors they film some of the lessons out of order so that we can get used to the whole process and not look nervous at the beginning of the video! I loved that I was able to use a teleprompter to help me stay on track whenever I needed it.Β  By the afternoon, I felt like I had hit my stride. πŸ™‚

teleprompter

Using a teleprompter was such a luxury. But I tried not to rely on it too much!

On Day 3 we wrapped up the series of lessons. As we shot each scene, the producer would make notes and confer with the technical director so that they would know where to splice and dice any scenes that needed post production editing. The camera guy was pretty amazing, too. He knew what shots to get and used a series of 3 cameras so that we could get some really great closeups of my quilting.

on-set

The set was very comfortable even with cameras and lights everywhere.
I even got to quilt on a BERNINA – score!!

The whole process from start to finish was completed over a series of about 3 months from concept planning to the actual filming date. I worked with a content editor to flush out the idea, and the producer was able to help me plan how each concept I teach would show up best on camera. I have to say one thing for sure – it’s a whole lot faster and easier than writing a book, LOL!!

quilted-sample

Sneak peek of one of the smaller samples I quilted live on camera.

Overall, it was a fabulous experience, and if the class does well, I’ll be invited back to film more of them in the future. My class is called The Quilter’s Path: Plan It, Stitch It,Quilt It! It basically explores the steps I take to machine quilt a “real” quilt on a home sewing machine while sharing some of my favorite quilting designs using both the walking foot and free motion techniques.

production-crew

My fabulous production crew – they made me feel right at home!

So barring anything out of the ordinary happening between now and release day, it’s scheduled to launch in early January. I’ll keep you posted it gets closer. πŸ™‚

For now, be sure to create a Craftsy account if you haven’t already so you’ll be ready to order once the class becomes available. I can’t wait to share it with you! And click here to check out their current holiday promotion using my affiliate link. They have some super deals happening now through Dec. 12th!

Pat Sloan Book Tour – Teach Me to Machine Quilt

First of all, I have a question for you – how does one write 33 books and still stay sane? The answer of course, is if you are the amazing Pat Sloan – the Wonder Woman of the quilting world! I’ve been a big fan of Pat’s ever since I discovered her weekly quilting podcast with American Patchwork and Quilting. (I’ve been a guest a couple of times and it’s really top notch!)

pat_christa_market

Pat and me at Fall 2016 International Quilt Market

Pat does it all: she’s a pattern designer, book author, fabric designer, thread curator, fearless facebook leader, community quilting organizer, and more! Plus she’s knows anything and everything when it comes to quilting. And I literally think she knows the entire quilting community by name!!

So without further ado, let’s take a look at her latest book, Teach Me to Machine Quilt, published by (my favorite publisher) Martingale/That Patchwork Place. Photography courtesy of Brent Kane.

teach-me-to-machine-quilt

Whenever I teach machine quilting, I always recommend that students learn from as many different instructors as possible. We all have our own ways of teaching similar material, and sometimes it takes hearing the same thing presented in different ways before it really sinks in.

That’s why I highly recommend Pat Sloan’s Teach Me to Machine Quilt. Not only does she cover both walking-foot quilting and free-motion quilting, but she shows them on real quilts so you can actually get a better feel for the process. Here are just a couple of my favorites from the book:

2-mini-charm-star-quilt

Mini Charm Star Quilt

3-checkerboard-hearts-quilt

Checkerboard Hearts Quilt

8-dresden-candy-dish-quilt

Dresden Candy Dish Mini

Aren’t those just fun?? I would say that my favorite part of the whole book is on page 7 where Pat says, “Yes, You Can Machine Quilt!” With her helpful advice, detailed stepouts and gorgeous photography, owning this book will really improve your machine quilting techniques.

Time for a giveaway!

And now, for the best news of all, Pat’s giving away 5 copies of her book over on HER blog.
Here’s the direct link to enter the giveaway:Β  blog.patsloan.com/pats-mega-fun-book-tour/

I’m one of the last stops on the tour that runs through Nov 30, so be sure to visit these other sites today:

Click here to see the entire blog hop schedule. Good luck and happy hopping!

Quilt As Desired Article 5: Quilting Negative Space

The following article was originally written as part of my Quilt As Desired column for the National Quilting Association’s Quilting Quarterly magazine. The association was disbanded after nearly 46 years, so this article was never published. Scroll to the end for links to all of my previously written articles.

Quilting Negative Space by Christa Watson

Negative space, also known as β€œthe background” or β€œwhite space,” can include any color of fabric and is not relegated to solids only. Negative space creates contrast in your quilt, allowing the main design to shine. In many modern quilts, there can often be more negative space than design or β€œpositive space,” leading to a conundrum of how to quilt it.
Here are four suggestions on how to quilt negative space:photo1 Photo 1 – Abacus Quilt by Christa Watson

(1) Quilt an allover linear design such as the continuous wavy lines in Abacus (see photo 1). This type of quilting works well regardless of block layout. It can help emphasize the textural quality of the quilt, rather than the absence of design. Continuous wavy lines can be quilted easily with a walking foot and a straight stitch by turning the quilt from side to side, or using a decorative machine stitch. Confident free-motion quilters can comfortably quilt continuous wavy lines back and forth across the entire surface of the quilt.

photo2
Photo 2 – Me and My Shadow by Vicki Ruebel of Orchid Owl Quilts

(2) Create a secondary composition in the negative space. Vicki Ruebel quilted a near-mirror image of her whimsical bird in her award winning quilt, Me and My Shadow (see photo 2). She sketched the outline of the bird and feathers, and used the same drawing to create both the quilted and appliqued birds. She used two layers of batting to create definition, filling in the areas around both birds with free-motion swirls on her long-arm machine.

photo3
Photo 3 – Wholecloth by Ida Ewing of Ida Rather Be Quilting

(3) Divide and conquer if the negative space is too much to tackle at once. Ida Ewing created her negative space design by marking an β€œE” and echoing around the letter. She then subdivided each section of the quilt and filled it in with a different free-motion motif (see photo 3). This filler technique looks stunning on any size quilt from a small wholecloth piece to a bed-size quilt with vast amounts of negative space.

photo4

Photo 4 – Ida shows what a difference the quilting can make!

(4) Repeat elements from the block into the negative space. For Ida’s Little Guppy quilt (see photo 4), she created a diamond in a square motif with her quilting, emphasizing the square block design. The pebble quilting relates to the circles in the print, unifying the piece.
The next time you are stumped on how to quilt negative space, grab a piece of paper and a pen or pencil and just start doodling. You never know when inspiration will strike!

Further Reading

Click the links below to read all the articles I wrote for NQA:

QuiltCon 2015 (co-authored with Jacquie Gering)
Modern Machine Quilting
Embrace the Line
Filler Designs Add Texture
Handwork Makes a Comeback

Latest Finish – Nested Pinwheels Quilt and Podcast Interview

Earlier in the year, my friend Becky from Patchwork Posse invited me to design a small project exclusively for her subscription based online quilt group.

nested_pinhweels_finished_large

Nested Pinwheels 27″ x 27″ by Christa Watson

I came up with Nested Pinwheels, shown above. It’s a great design to practice one of my favorite walking foot quilting designs, the large continuous spiral. I teach how to do this design in both of my machine quilting books.

The trick is to mark the center spiral and then use your walking foot to quilt the entire thing – using the edge of the foot as your guide for consistent spacing.

photo-2

Your starting spiral doesn’t have to look perfect!

Along with this project, Becky interviewed me for about 20 minutes talking about my adventures in quilting. You all know thatΒ  machine quilting is my favorite part of making a quilt!

photo-3
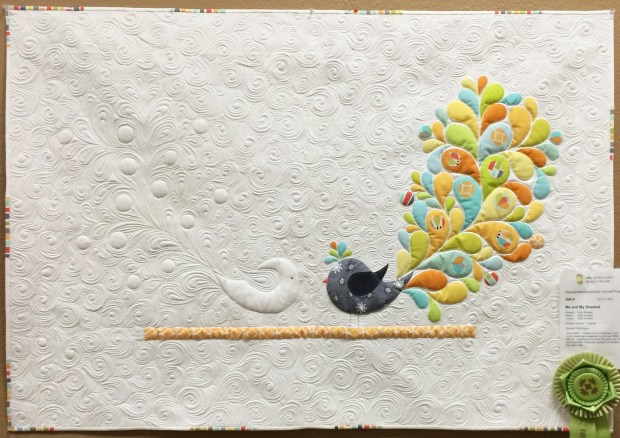
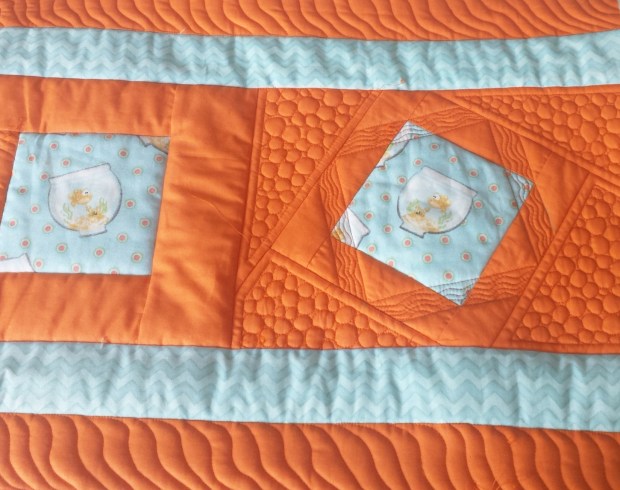
I use the integrated dual feed on my BERNINA – it does the same thing as a walking foot!

Click the link below to learn more about my Nested Pinwheel quilt, read my interview and to listen to the podcast. (You can listen to it directly from your computer, about halfway down the page.)

Click here to listen to the Patchwork Posse guest designer podcast.


Quilt As Desired Article 3: Filler Designs Add Texture

Today I’m continuing to share the series of machine quilting articles that I originally wrote for the National Quilting association as part of my Quilt as Desired column. This article first appeared in the Spring 2015 issue of the Quilting Quarterly.

Click here to read the other machine quilting articles I’ve written.

Happy reading!

qqspr15_p26

Spiral Flower Machine Quilting on Maggie’s First Dance BOM

My good friend Jacquelynne Steves has been hosting a gorgeous free Block of the Month program she started over the summer, and I finally have a free minute to tell you about it! It’s a 6-part series called Maggie’s First Dance featuring 5 adorable blocks plus border and finishing instructions.

Maggies First Dance

Click here to sign up and get all of the blocks that have been shared so far.

This month’sΒ  design is the setting block, and I thought it would be perfect to showcase one of my favorite free-motion quilting designs: spiral flowers. So I decided to make a cute mini from one of the blocks and take pictures of my process so I can walk you through how I did it. This block uses my no-mark method for free-motion quilting that I teach in both of my machine quilting books.

Aurifil Thread

Step 1 – choose your thread

Look at your beautiful finished block and think about how you want to quilt it. I always like to audition several thread choices to see which one will look the best. In this case I chose to go with a light yellow, 50 weight cotton Aurifil. White or light gray would have looked nice, too. I’m going to quilt it with one color thread only so that I can custom quilt the entire block without starting and stopping.

Quilt Design Sketch

Step 2 – Sketch Your Design

Print out a color copy of your block on paper and sketch out some design ideas. This allows you to plan out how you will move around the block quickly and efficiently before you try it on the real thing. I choseΒ  a large spiral flower in the center of the block surrounded by pebbles.Β  I’ll repeat the flower petal design in the white areas, and add some more pebbles in the corners. This will allow me to quilt the entire design in one pass, traveling (backtracking) in the seams if needed to quilt each section of the design.

I only sketched enough of the design to give me a general idea of what I was going to quilt. Of course, you can draw the design over the whole block if you prefer. Doesn’t it look like I drew right on the block? Don’t worry, it really is just a color printout of the block. πŸ™‚

Free Motion Center Spiral

Step 3 – Start the Center Spiral

Starting in the middle of the block, pull up the bobbin thread to the top and move it out of the way for now. You can go back and tie off the knot later and bury the thread within the batting. Or just start with a series of teeny-tiny stitches to lock your beginning threads in place.

Quilt a small spiral to start and then immediately turn the spiral into a series of small, irregular flower petals. It doesn’t matter which direction to stitch in, or how many petals you quilt as you spiral around. Aim for nice, smooth stitches, but they don’t have to be perfectly uniform in length.

Spiral Flower Quilting

Step 4 -Complete the Center Block

As you echo back out around the center spiral, quilt a series of petals that don’t quite touch each other. Fill in all of the space, backtracking in the seam if needed to get to any areas you missed. Again, notice that each petal is not perfect or uniform. You are aiming for texture over perfection.

Pebble Quilting

Step 5 – Fill in the Rest of the Block

I quilted the area around the flower with pebbles, a dense texture that would allow the floral quilting to really pop. Because I used the same color thread, I was able to easily switch back and forth between quilting motifs as needed. To create interest in the block, I repeated the petal shapes in the outer portion of the block, with an extra pop of pebbles in the corners.

Although I’m only showing one block as an example, you can easily apply this design to all of the setting blocks. I like dense textural motifs that lend themselves well to any size block or quilt!

Ta-Da! Enjoy Your Finish

Machine Quilted Block

If you are new to machine quilting, I recommend making one or two practice blocks like I did to get the hang of it, or to try out different quilting ideas. You can always refer to your practice blocks as a stitch journal of your progress. I turn mine into class samples, so I don’t have to pack up a suitcase full of quilts when I teach. πŸ™‚

Let’s Have a Giveaway!

To celebrate the release of Jacquelynne’s latest BOM installment, 7 other bloggers and I have teamed up to give away a fun prize pack of my PDF patterns, perfect for practicing your machine quilting skills! So that means that 8 people will win, one for each stop on the blog hop below.

Pattern Giveaway

Visit each of these blogs to increase your chances of winning. Leave a comment at each for your chance to win! The giveaway is open to everyone and runs through October 10th.

Farmhouse Quilts

My Go-Go Life

The Crafty Quilter

LilyPad Quilting

Grey Dogwood Studio

The Quilting Nook

EvaPaige Quilt Designs

Christa Quilts – You Are Here!

New Around Here? Everyone’s a Winner!

Puzzle Box Pattern

Click here to get my free Puzzle Box quilt pattern.

As an extra bonus for anyone new to my blog, be sure to check out Friendly Threads, my weekly email and get this free PDF pattern instantly. My Puzzle Box pattern uses two Jelly Rolls and goes together super quick!