For this week’s tutorial we are back in business with free-motion quilting! This design, Hourglass, is basically a geometric and modern version of an earlier design: Cursive L’s. The technique of these two designs is very similar, so if you got one down, you can easily do the other!
Dot n’ Dash Quilt – Pick Up Piece and Quilt With Precuts
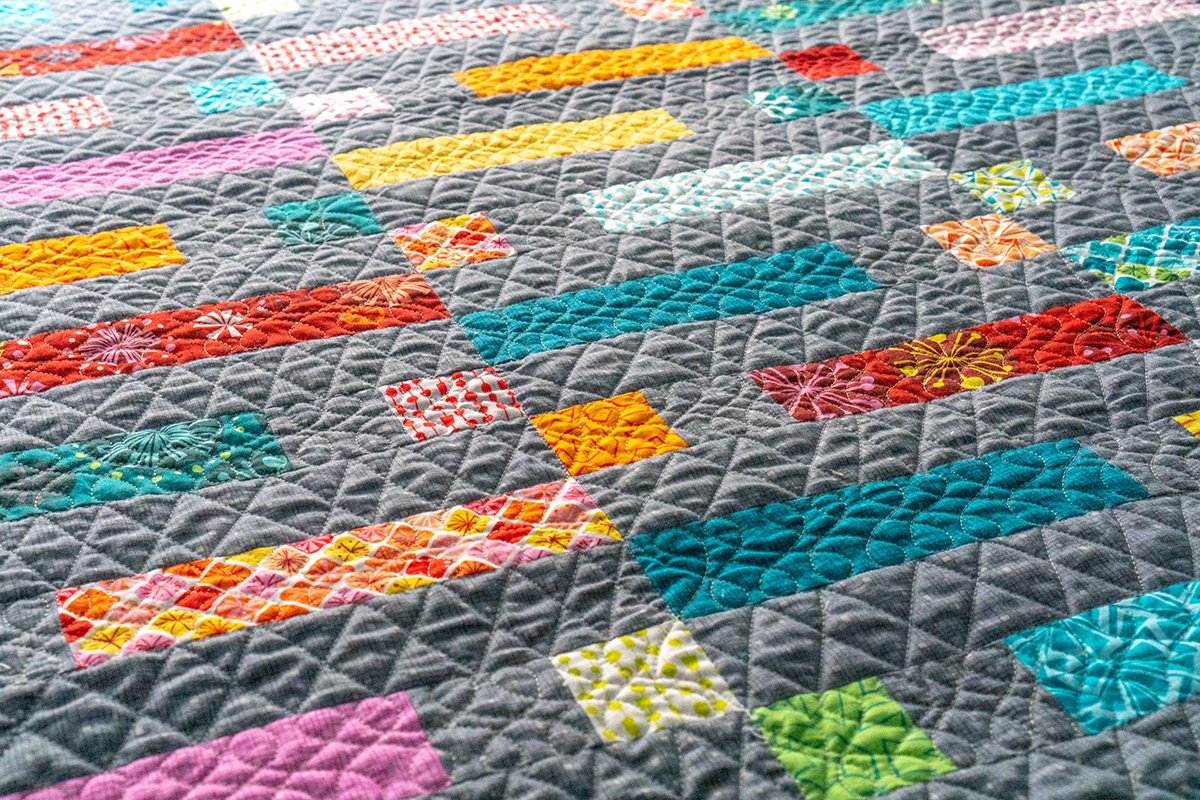
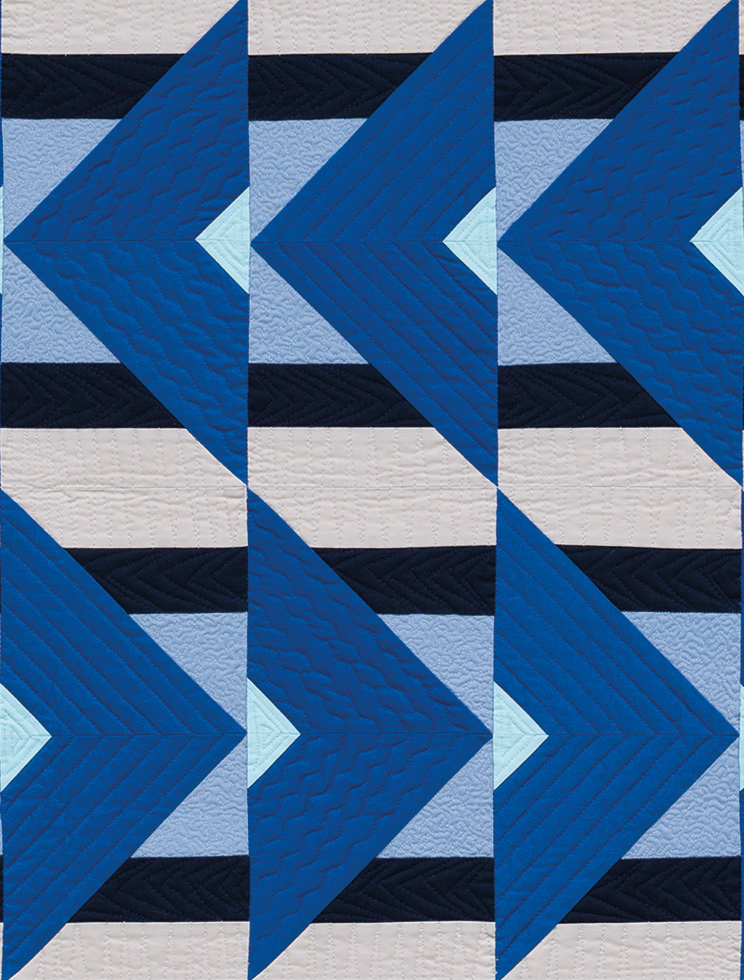
I admit I haven’t actually made a full-size quilt with Hourglass – that is on my bucket list! However, I’ve quilted a similar design on Dot n’ Dash, the featured quilt of this week. I call this a my Modern Jelly Roll Quilt since it can just be made with strips from a jelly roll! If you are interested in making this quilt for yourself, the original version of the pattern comes from my book, Piece and Quilt with Precuts.
Want to level up your walking foot quilting game? Try combining straight lines and decorative stitches to create unique motifs that are super easy to do! Click below to watch my latest video tutorial and be sure to leave a comment letting me know what you think!
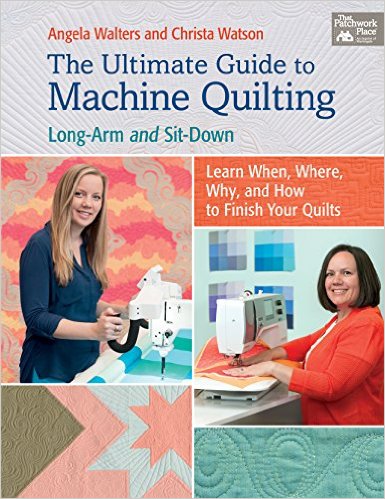
Get My Book – The Ultimate Guide to Machine Quilting
In the second book I ever wrote – The Ultimate Guide to Machine Quilting – I first explored this idea of combining straight lines and decorative stitches. The book itself includes 10 patterns and 20 quilts (each pattern is made 2 different ways). It was fun to explore lots of different domestic quilting ideas, while my co-author Angela Walters explored lots of different long arm quilting ideas.
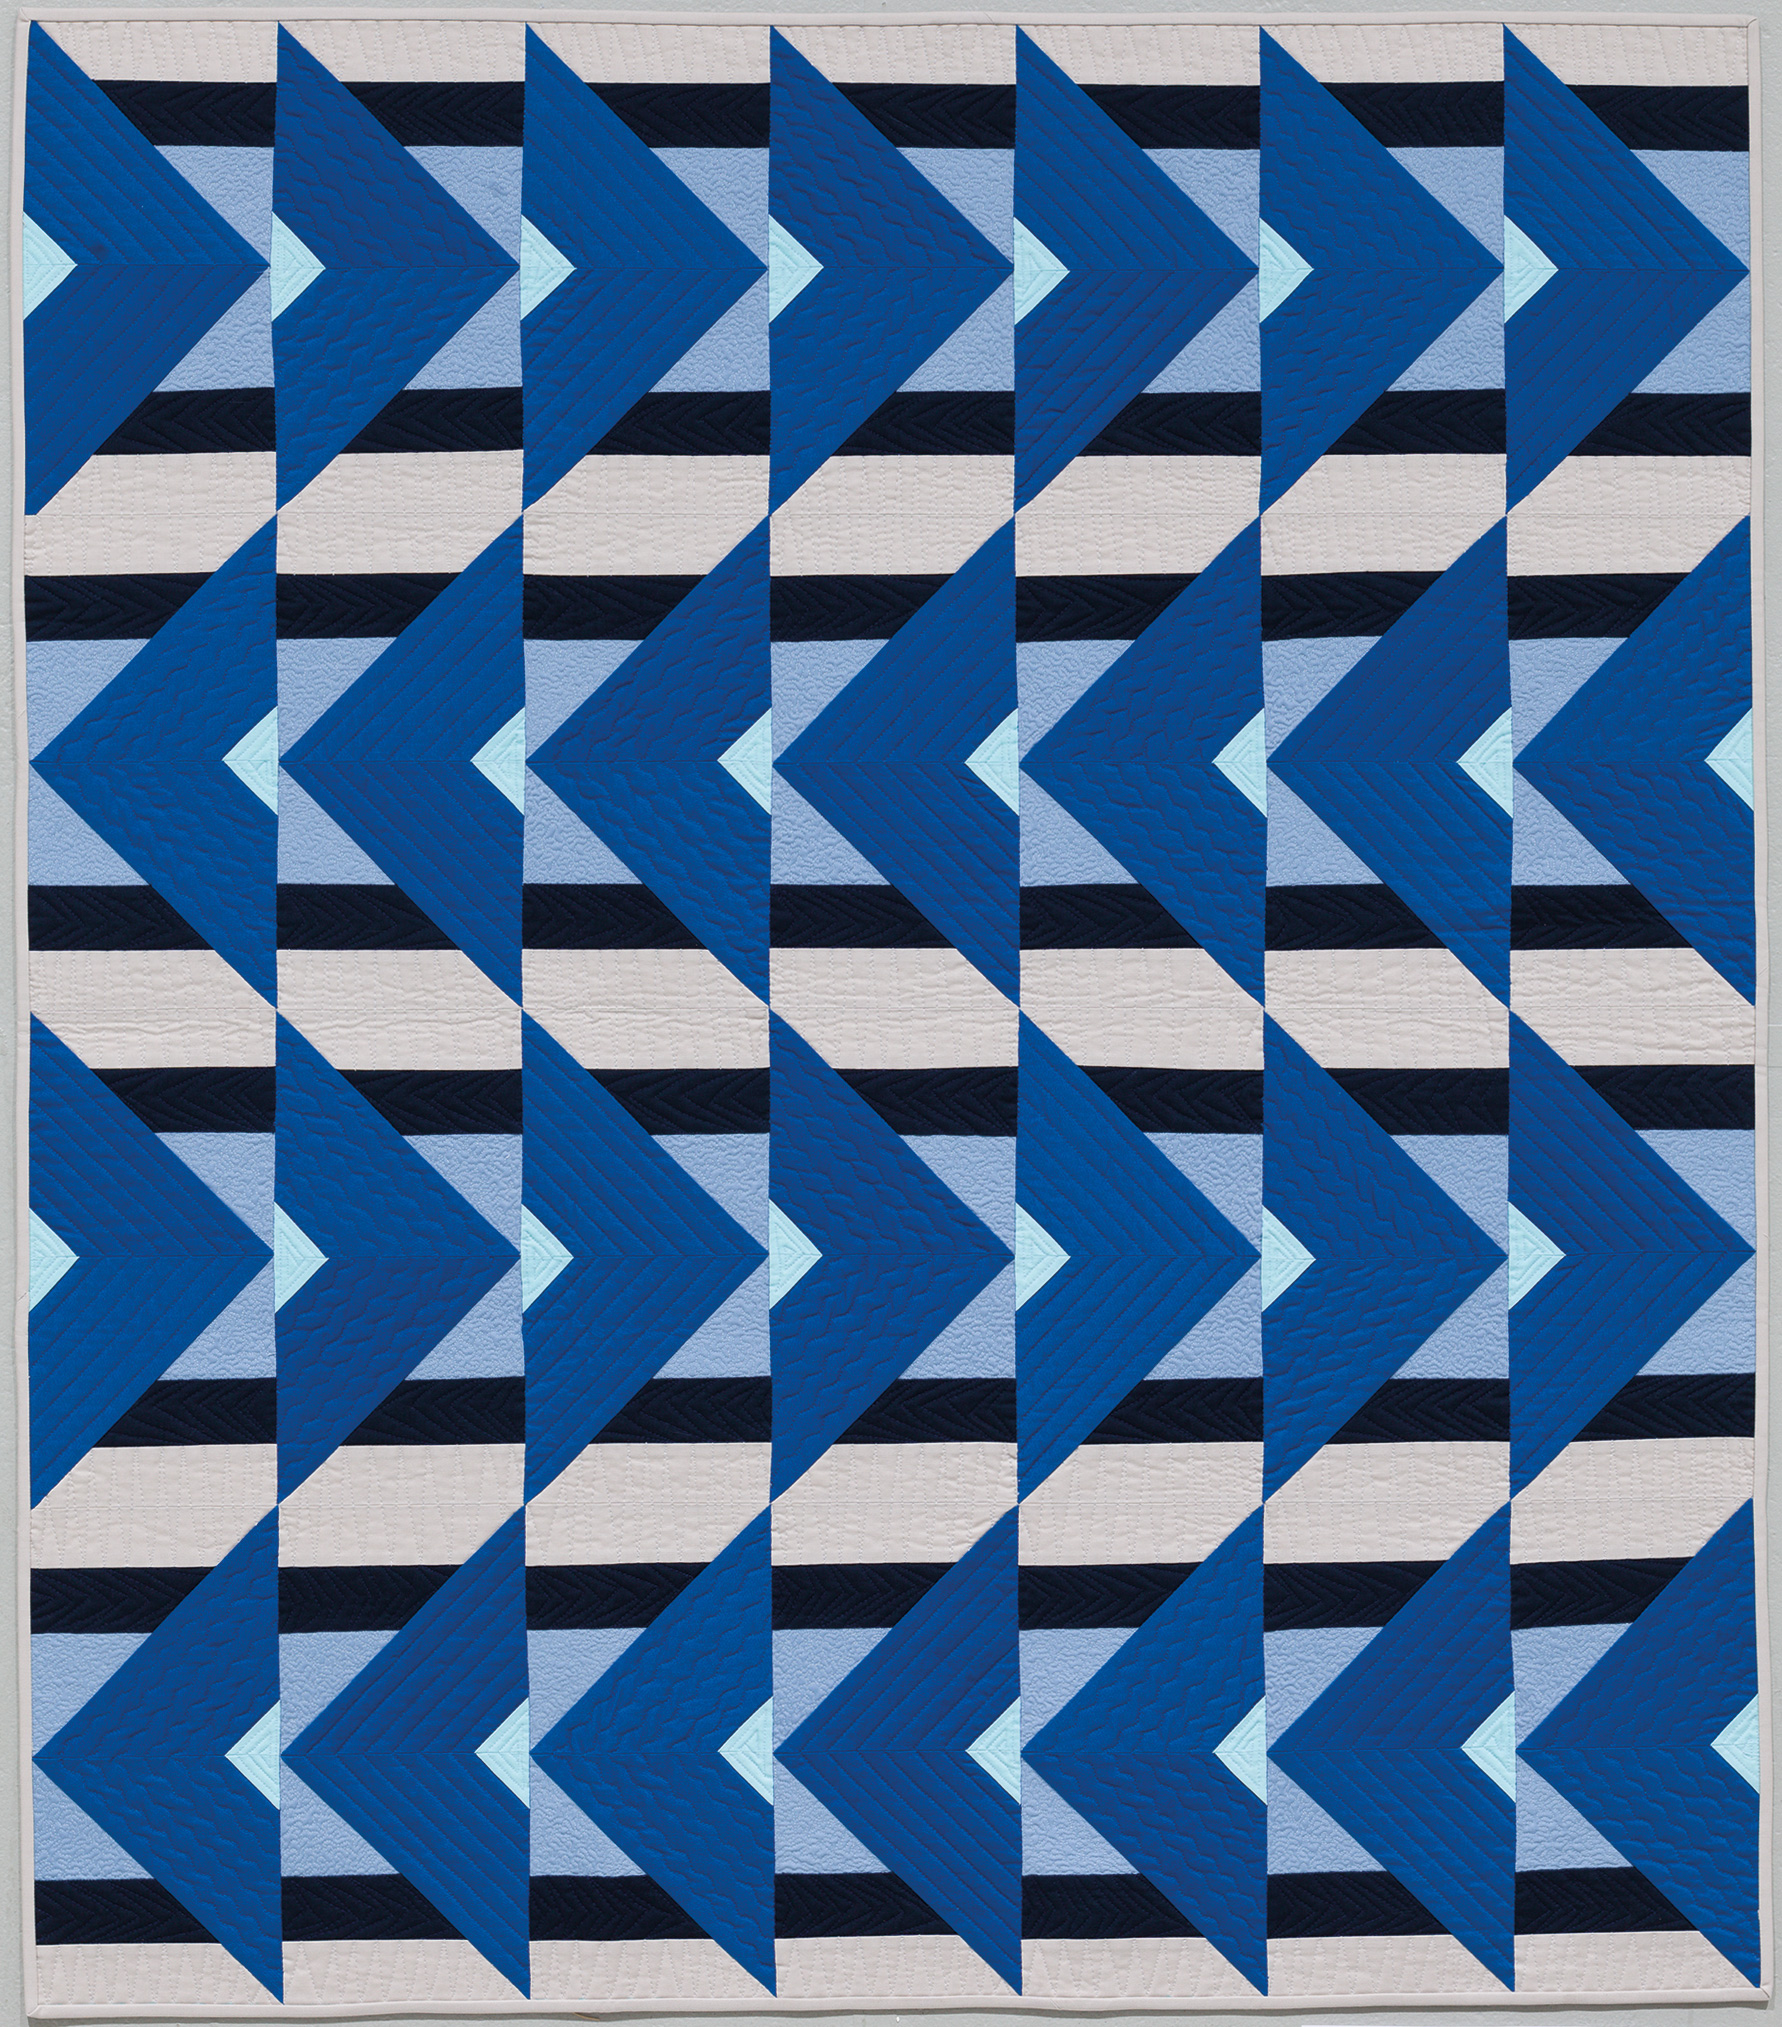
In 2 of the quilts I combined straight lines and decorative stitch ideas in 2 different ways. In the quilt called Directionally Challenged (shown below), I stitched straight lines in every other block, with decorative stitching in the alternate blocks.
Here’s a closeup image of the quilting so you can see more of the detail:
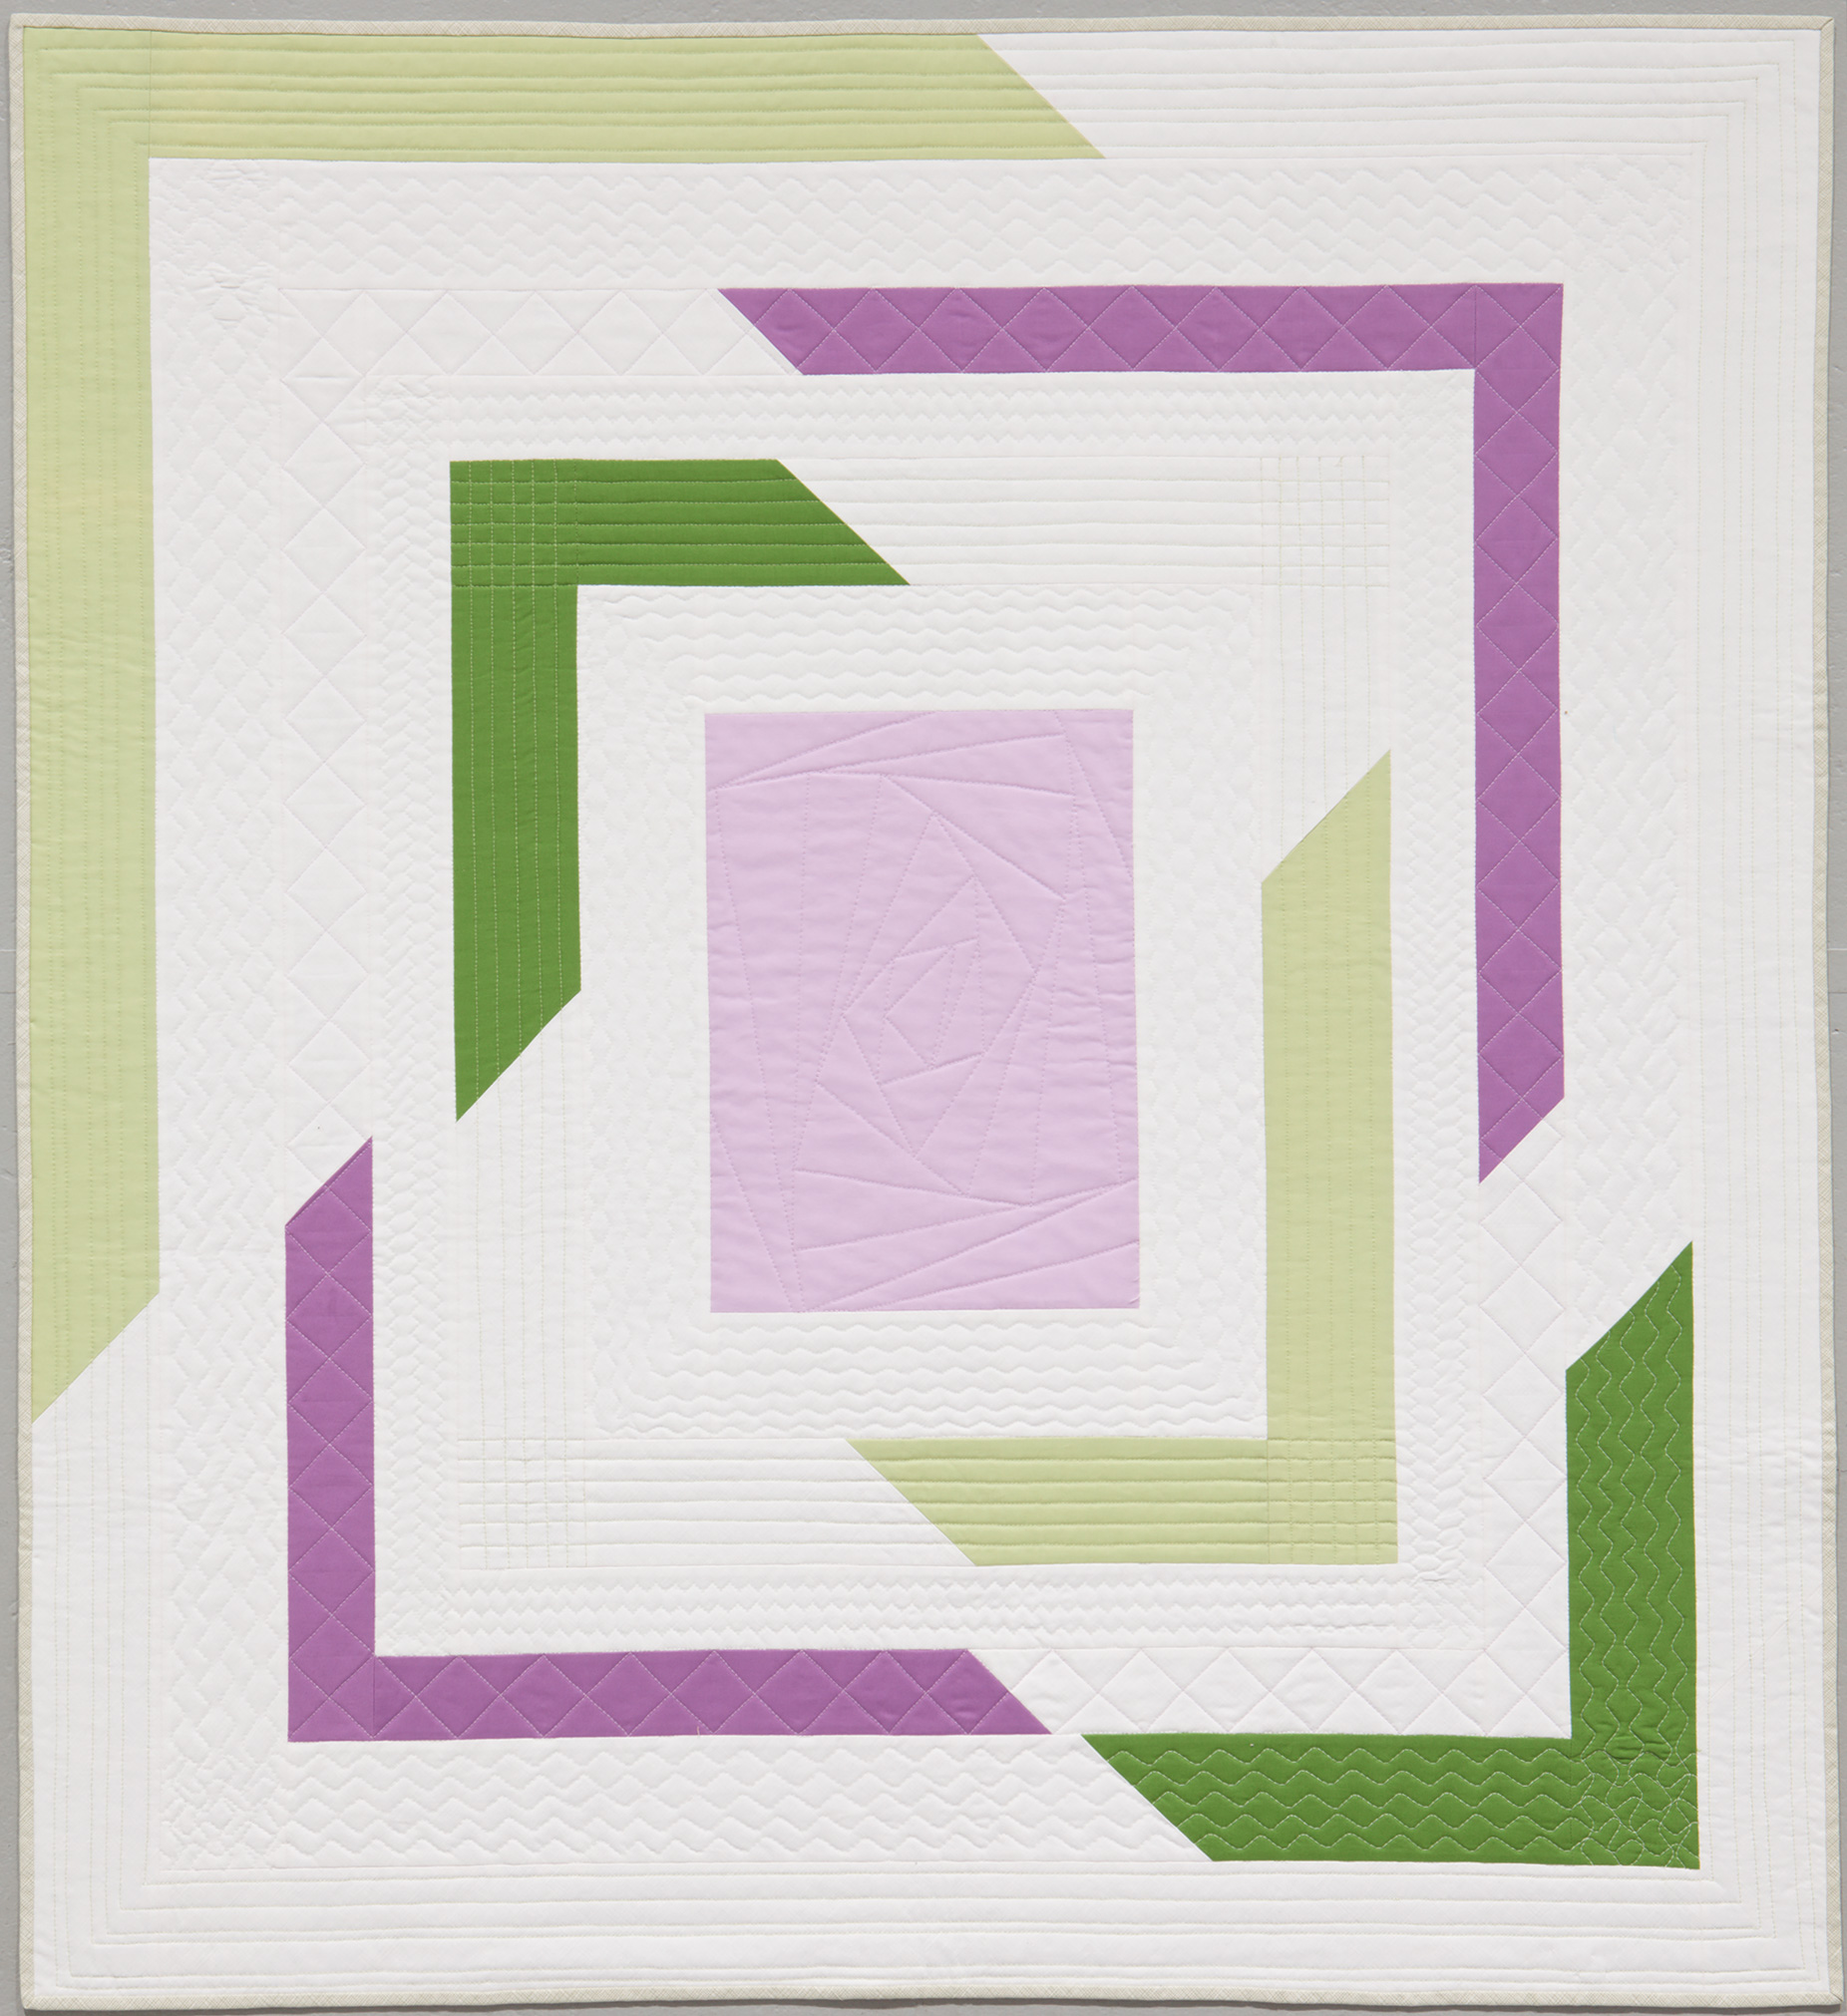
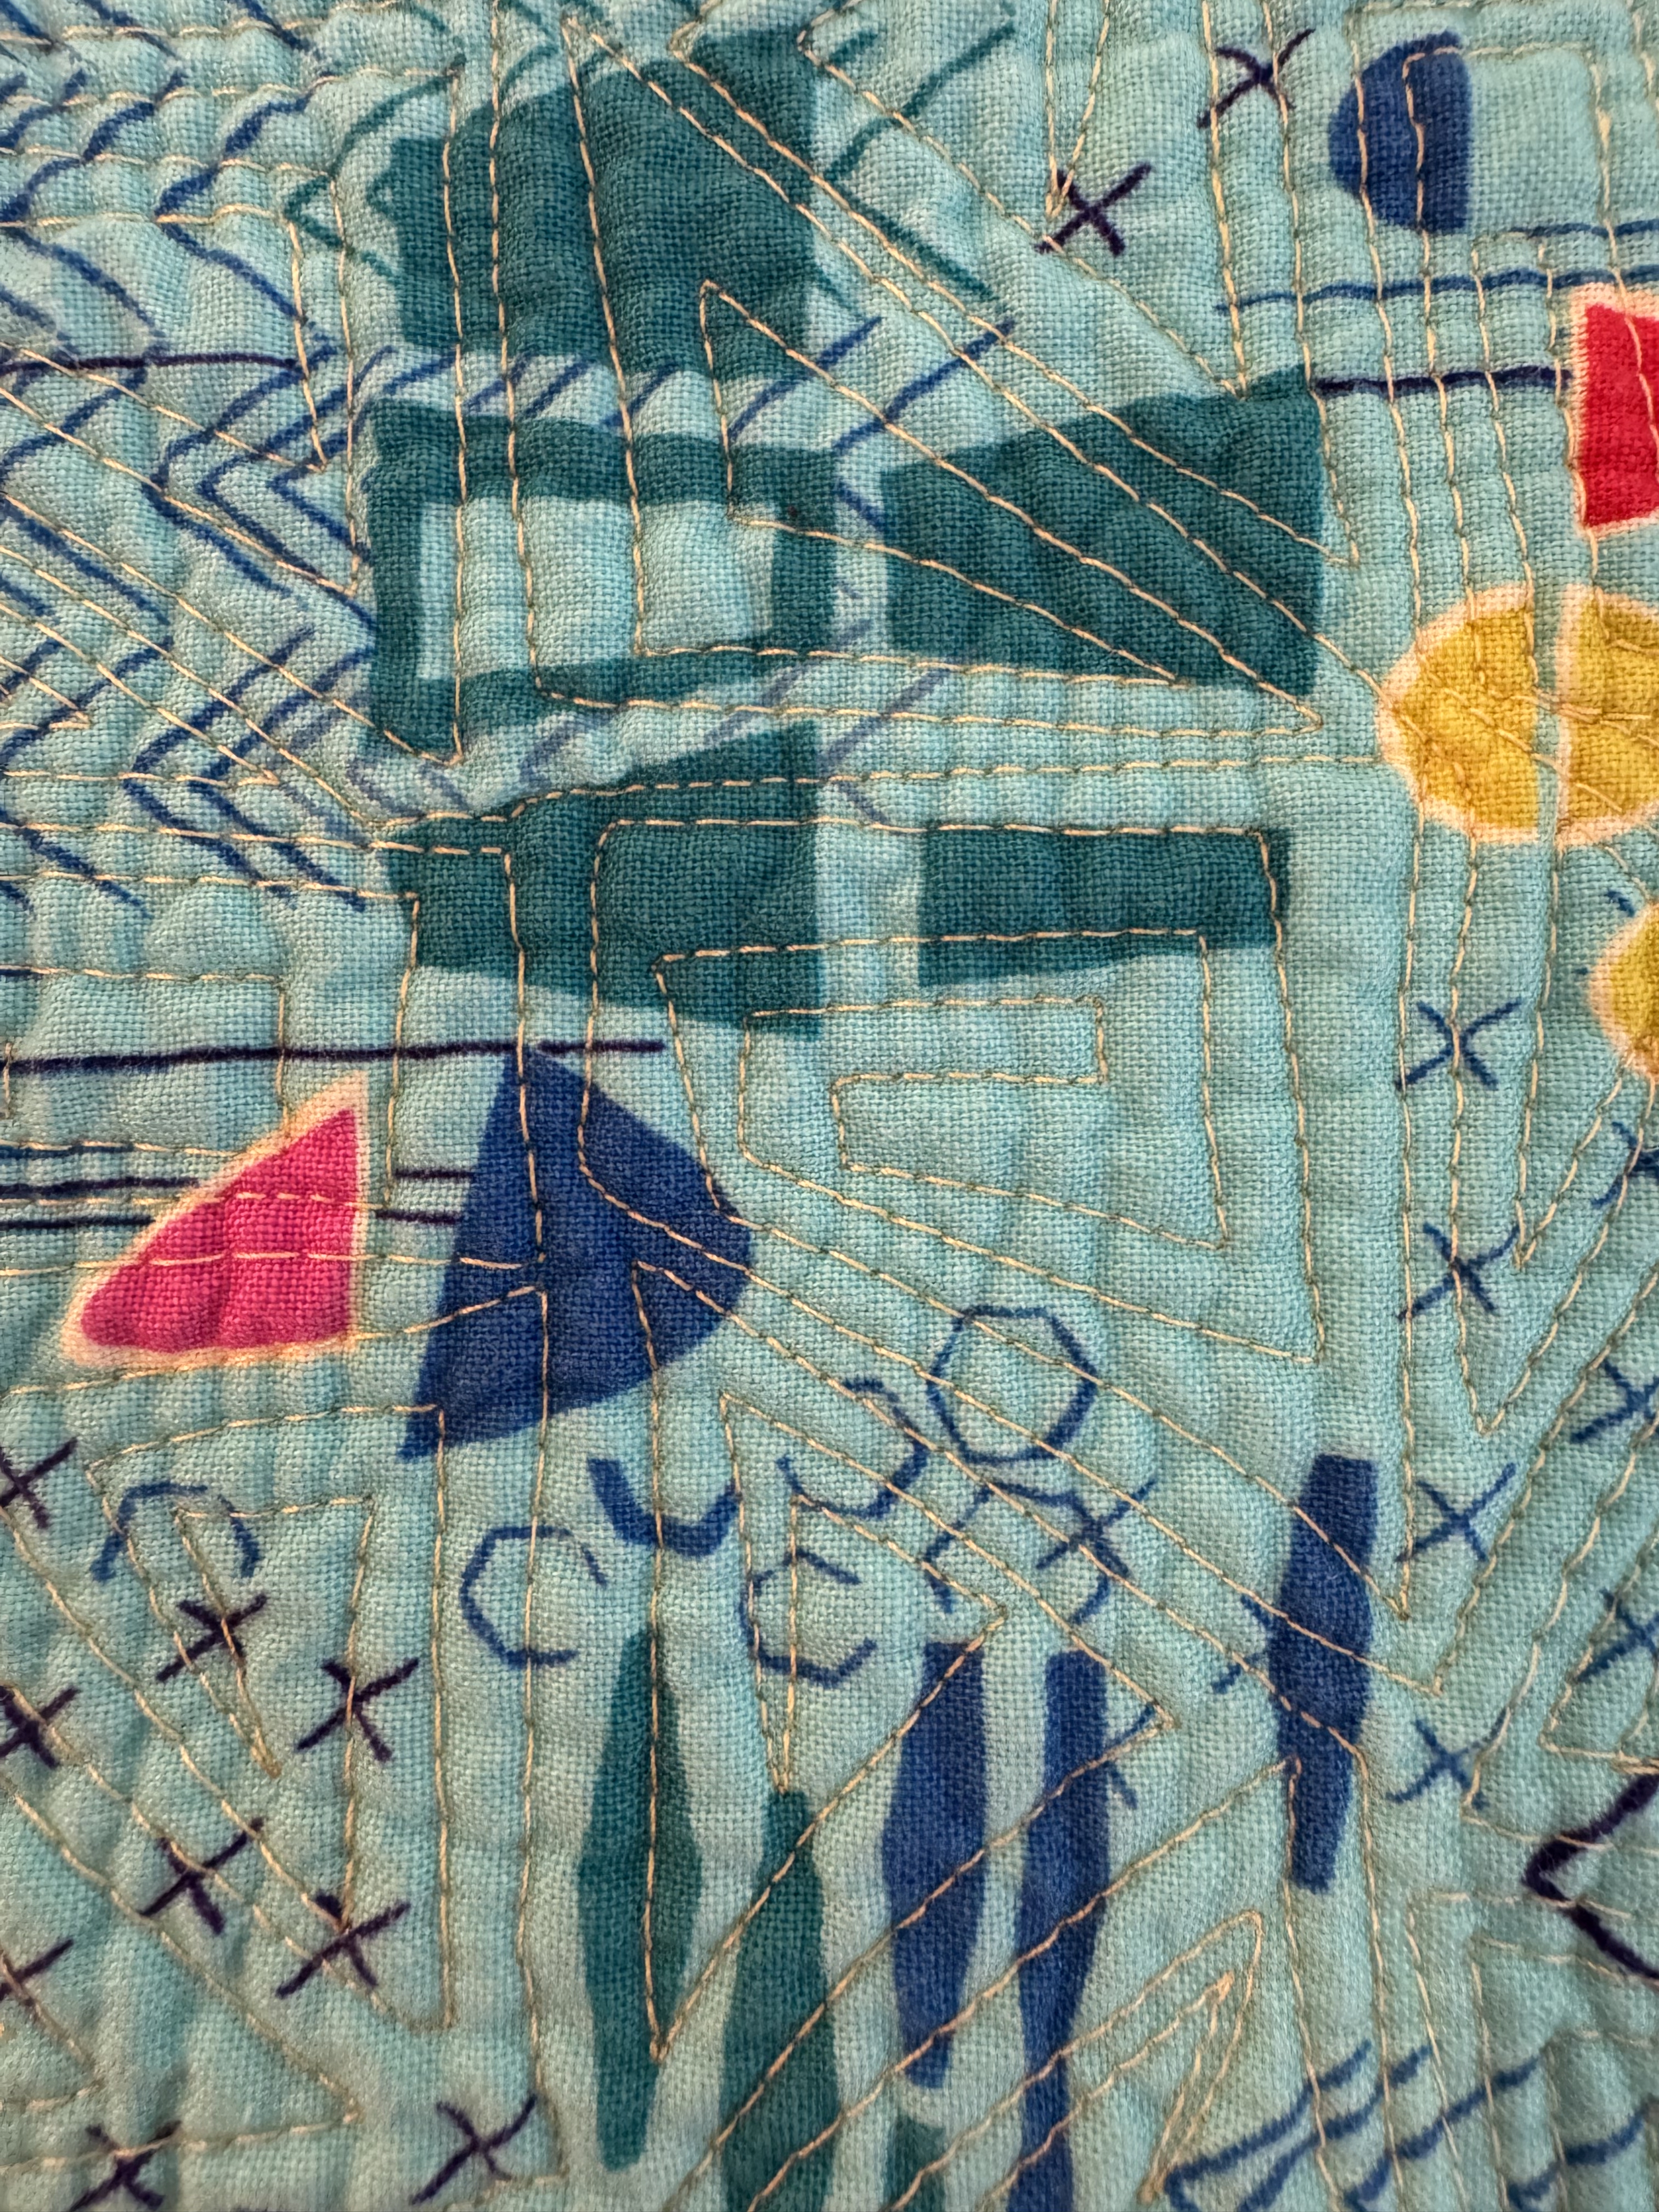
In another quilt, called Fractured Squares, I quilted it like a round robin design, with a different walking foot motif in each part of the quilt.
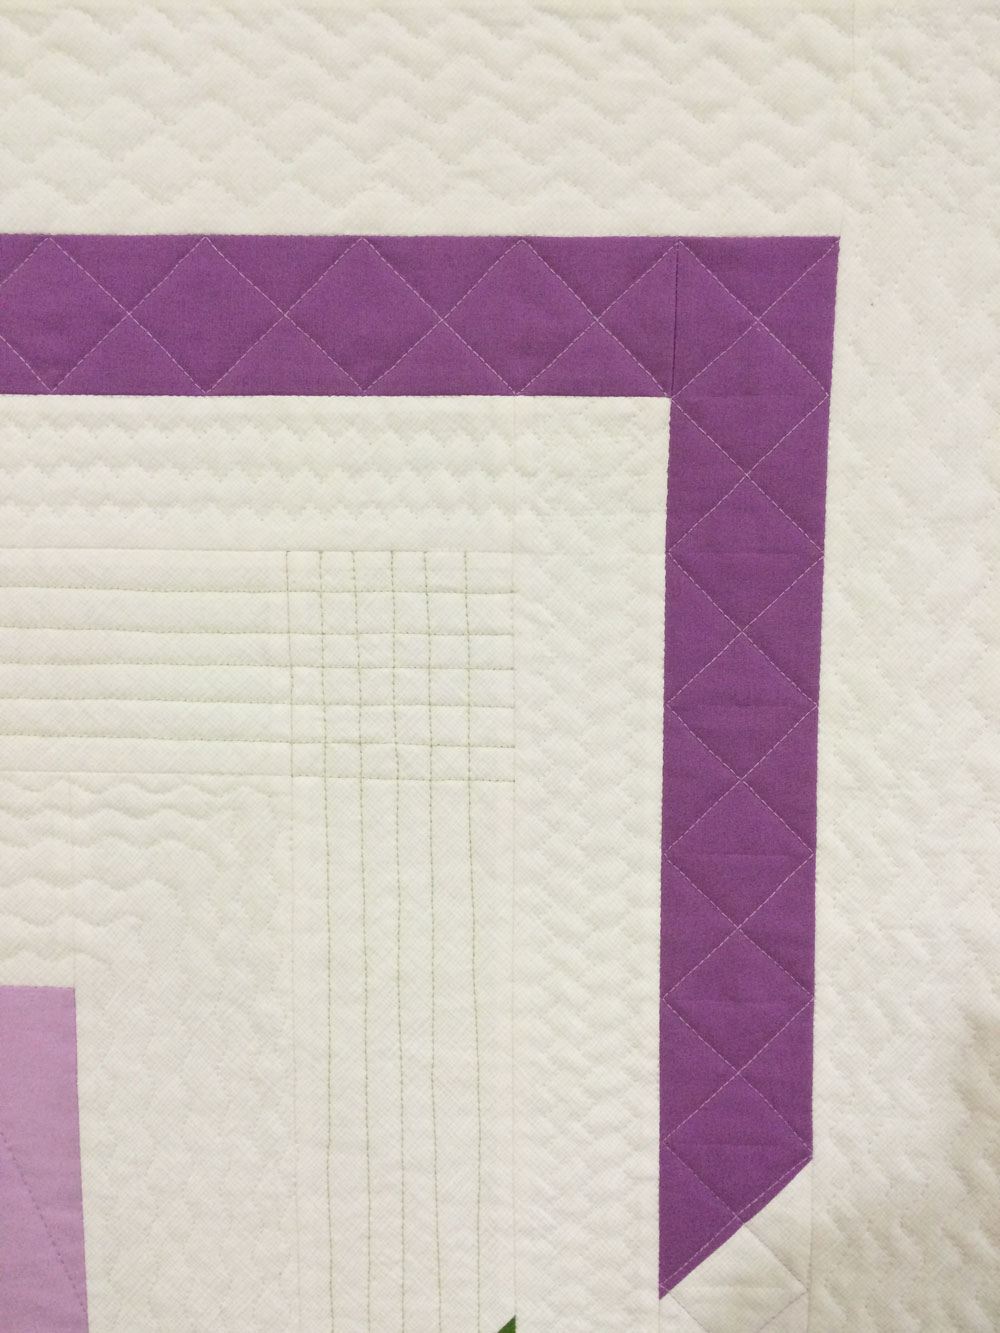
Here’s a closer shot of the quilting detail:
Let me know what you think of combining these two walking foot quilting ideas. It takes just a little bit of planning, but it’s a unique way to stitch and add lots of texture to your quilts!
For this week’s tutorial, we have two geometric spiral designs: Square and Triangle Spirals. These two free-motion designs can be used separately, or you can combine them in the same quilting plan to give lots of texture to your quilt. If you want to check out this video, click the link below:
Piece and Quilt with Precuts
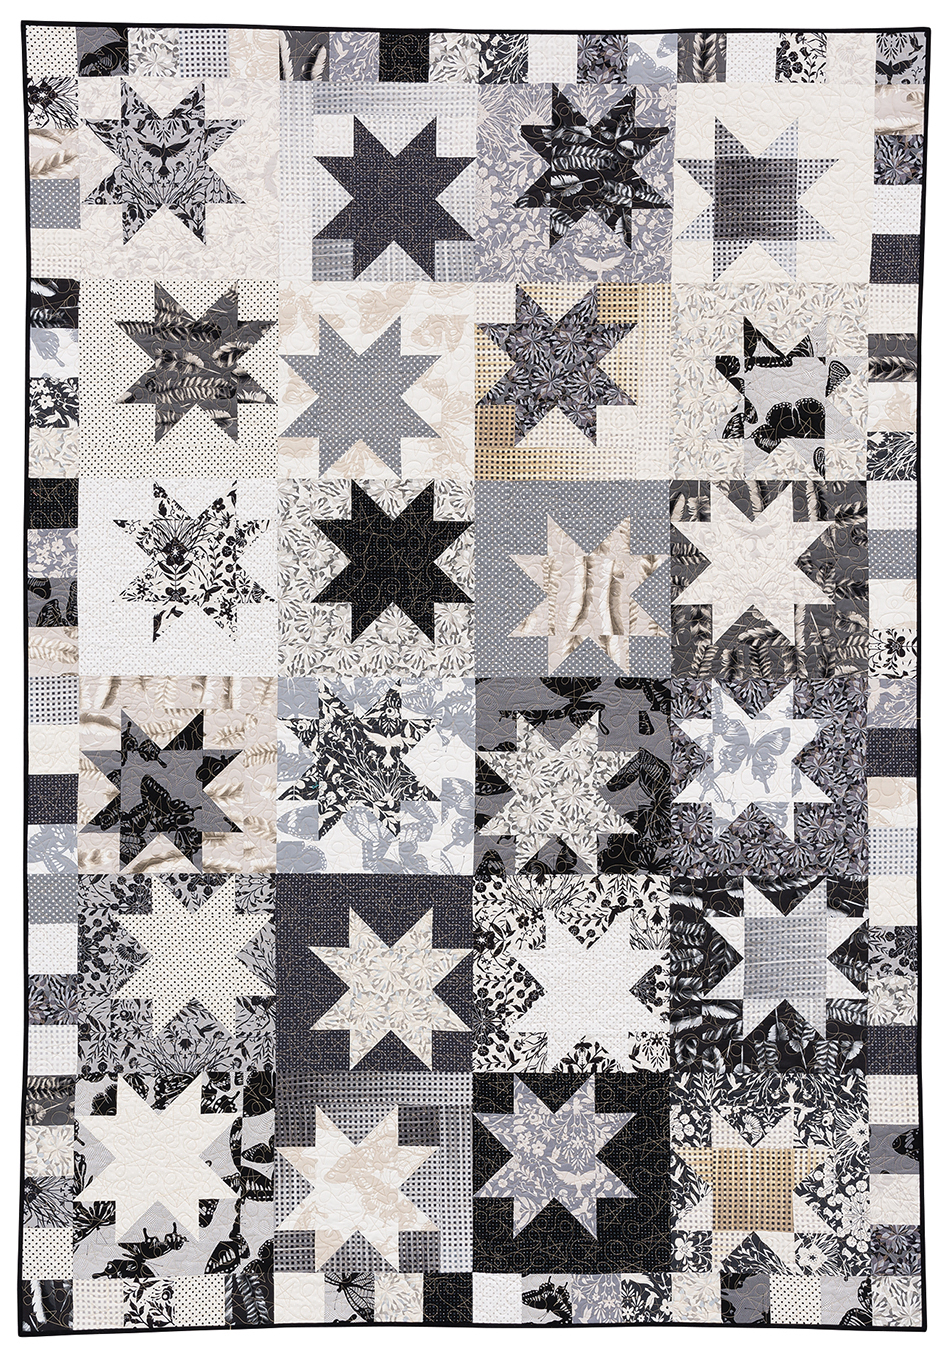
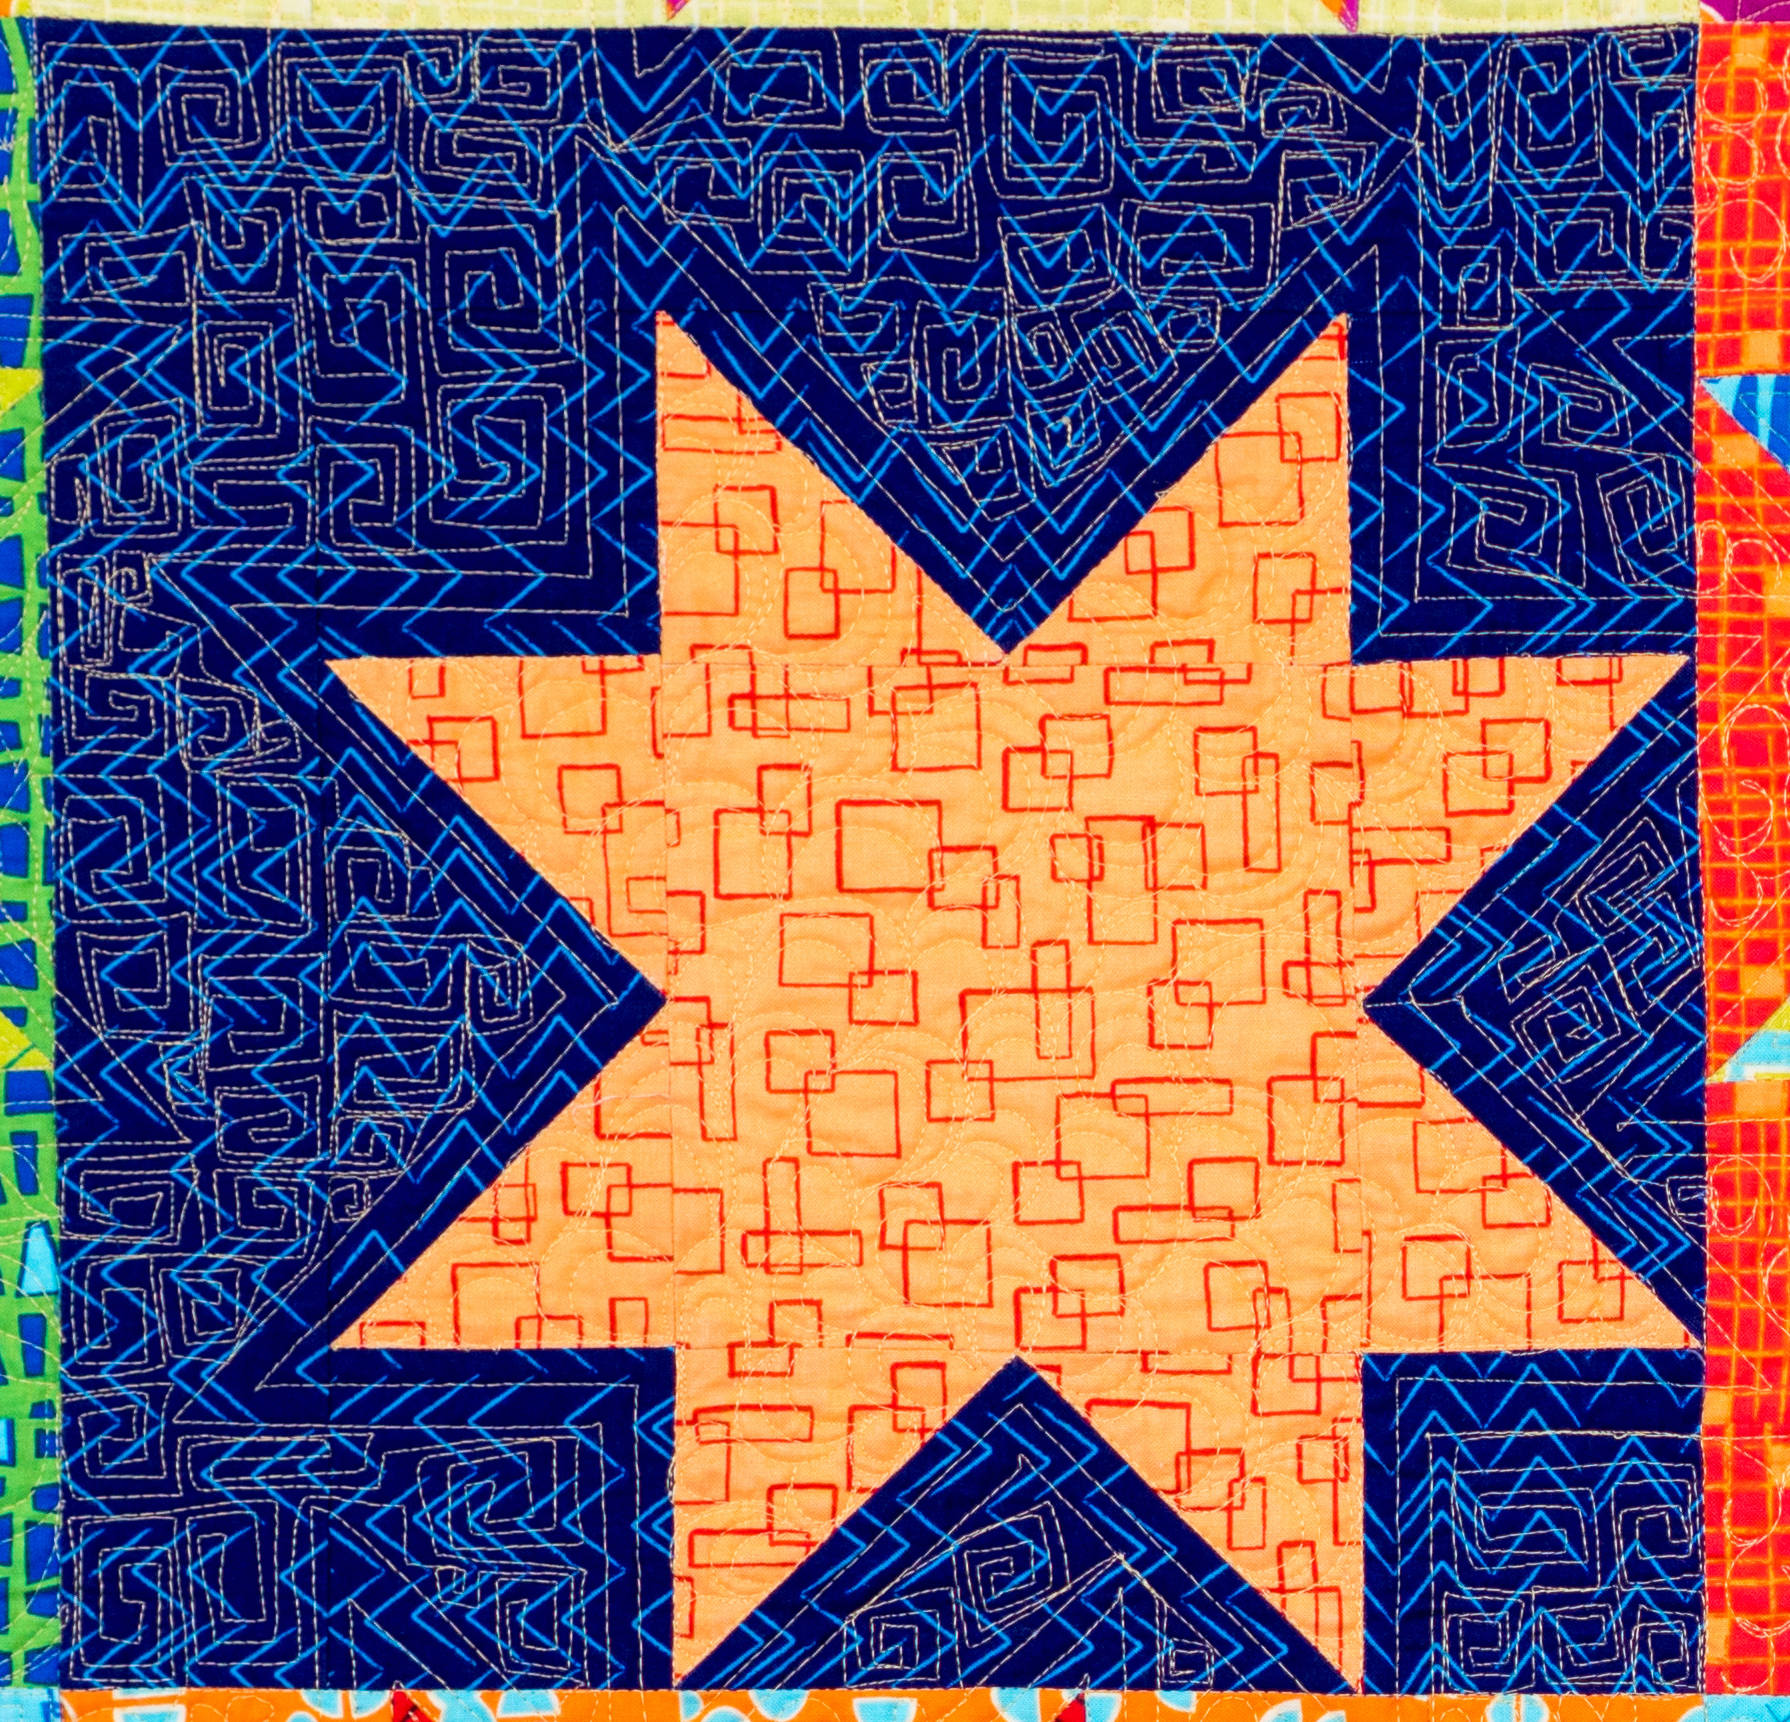
The quilt I feature in this week’s video is called Starstruck. I used both Triangle and Square spirals on this quilt, but you can choose any designs from this series, as the busy pattern for this quilt and fabric choice can help to hide inconsistencies. This quilt comes from my book, Piece and Quilt with Precuts. If you want to get this pattern, as well as 10 other quilt patterns that come with this book, check out the link below for a digital PDF download.
I made the original version of Modern Starstruck with black and white fabrics. I later remade a version with bright, colorful fabric that I designed. You can use either color scheme, or make up your own, using any color combination you want. The pattern works with any choice of fabric, so let me know what you put together!
Bonus Video – Setting Yourself Up for Machine Quilting Success
Just getting into series? I’ve made an introduction video that goes over how to set up your machine and the basics of walking foot and free motion quilting. If you want to get started, check out this video for machine quilting success!
I named this pattern “Bling” because the main part of the design is an abstract representation of a sparkly ring. Can you see it?? Last week we cut out our fabrics and this week it’s time to sew them together to make Bling blocks! I like to lay out all of my pieces stacked up in order next to my sewing machine.
I’m making the scrappy background version, so as long as there’s good contrast between my lights and darks, these are going to look great! You can also use all of one background fabric for a more consistent, cleaner look.
In the Bling quilt pattern, I give you a couple of options for arranging each Bling block. You can use all of the same fabric for each Bling like I did above. Or you can use more than one fabric for a bit of a scrappy look. It’s totally up to you!
I like to press my seams open so the blocks will lie super flat. I sew with a shorter stitch length (2.0 instead of 2.5) to add more thread to each seam for extra strength. Click the image above to watch a short video of me sewing the units together using pins to line everything up. I assembly line sew, aka “chain piecing” to make this process faster.
The pattern tells how many blocks you need to make for each size. So your homework this week is to follow the diagrams and instructions in the pattern on pages 2-3 to make your blocks. The be sure to share pics of your progress in my Christa Quilts group on Facebook!
If you are just joining us, you can grab a copy of the Bling quilt pattern and choose your own fabrics. Or you can grab one of the optional kits if you want to make one just like mine!
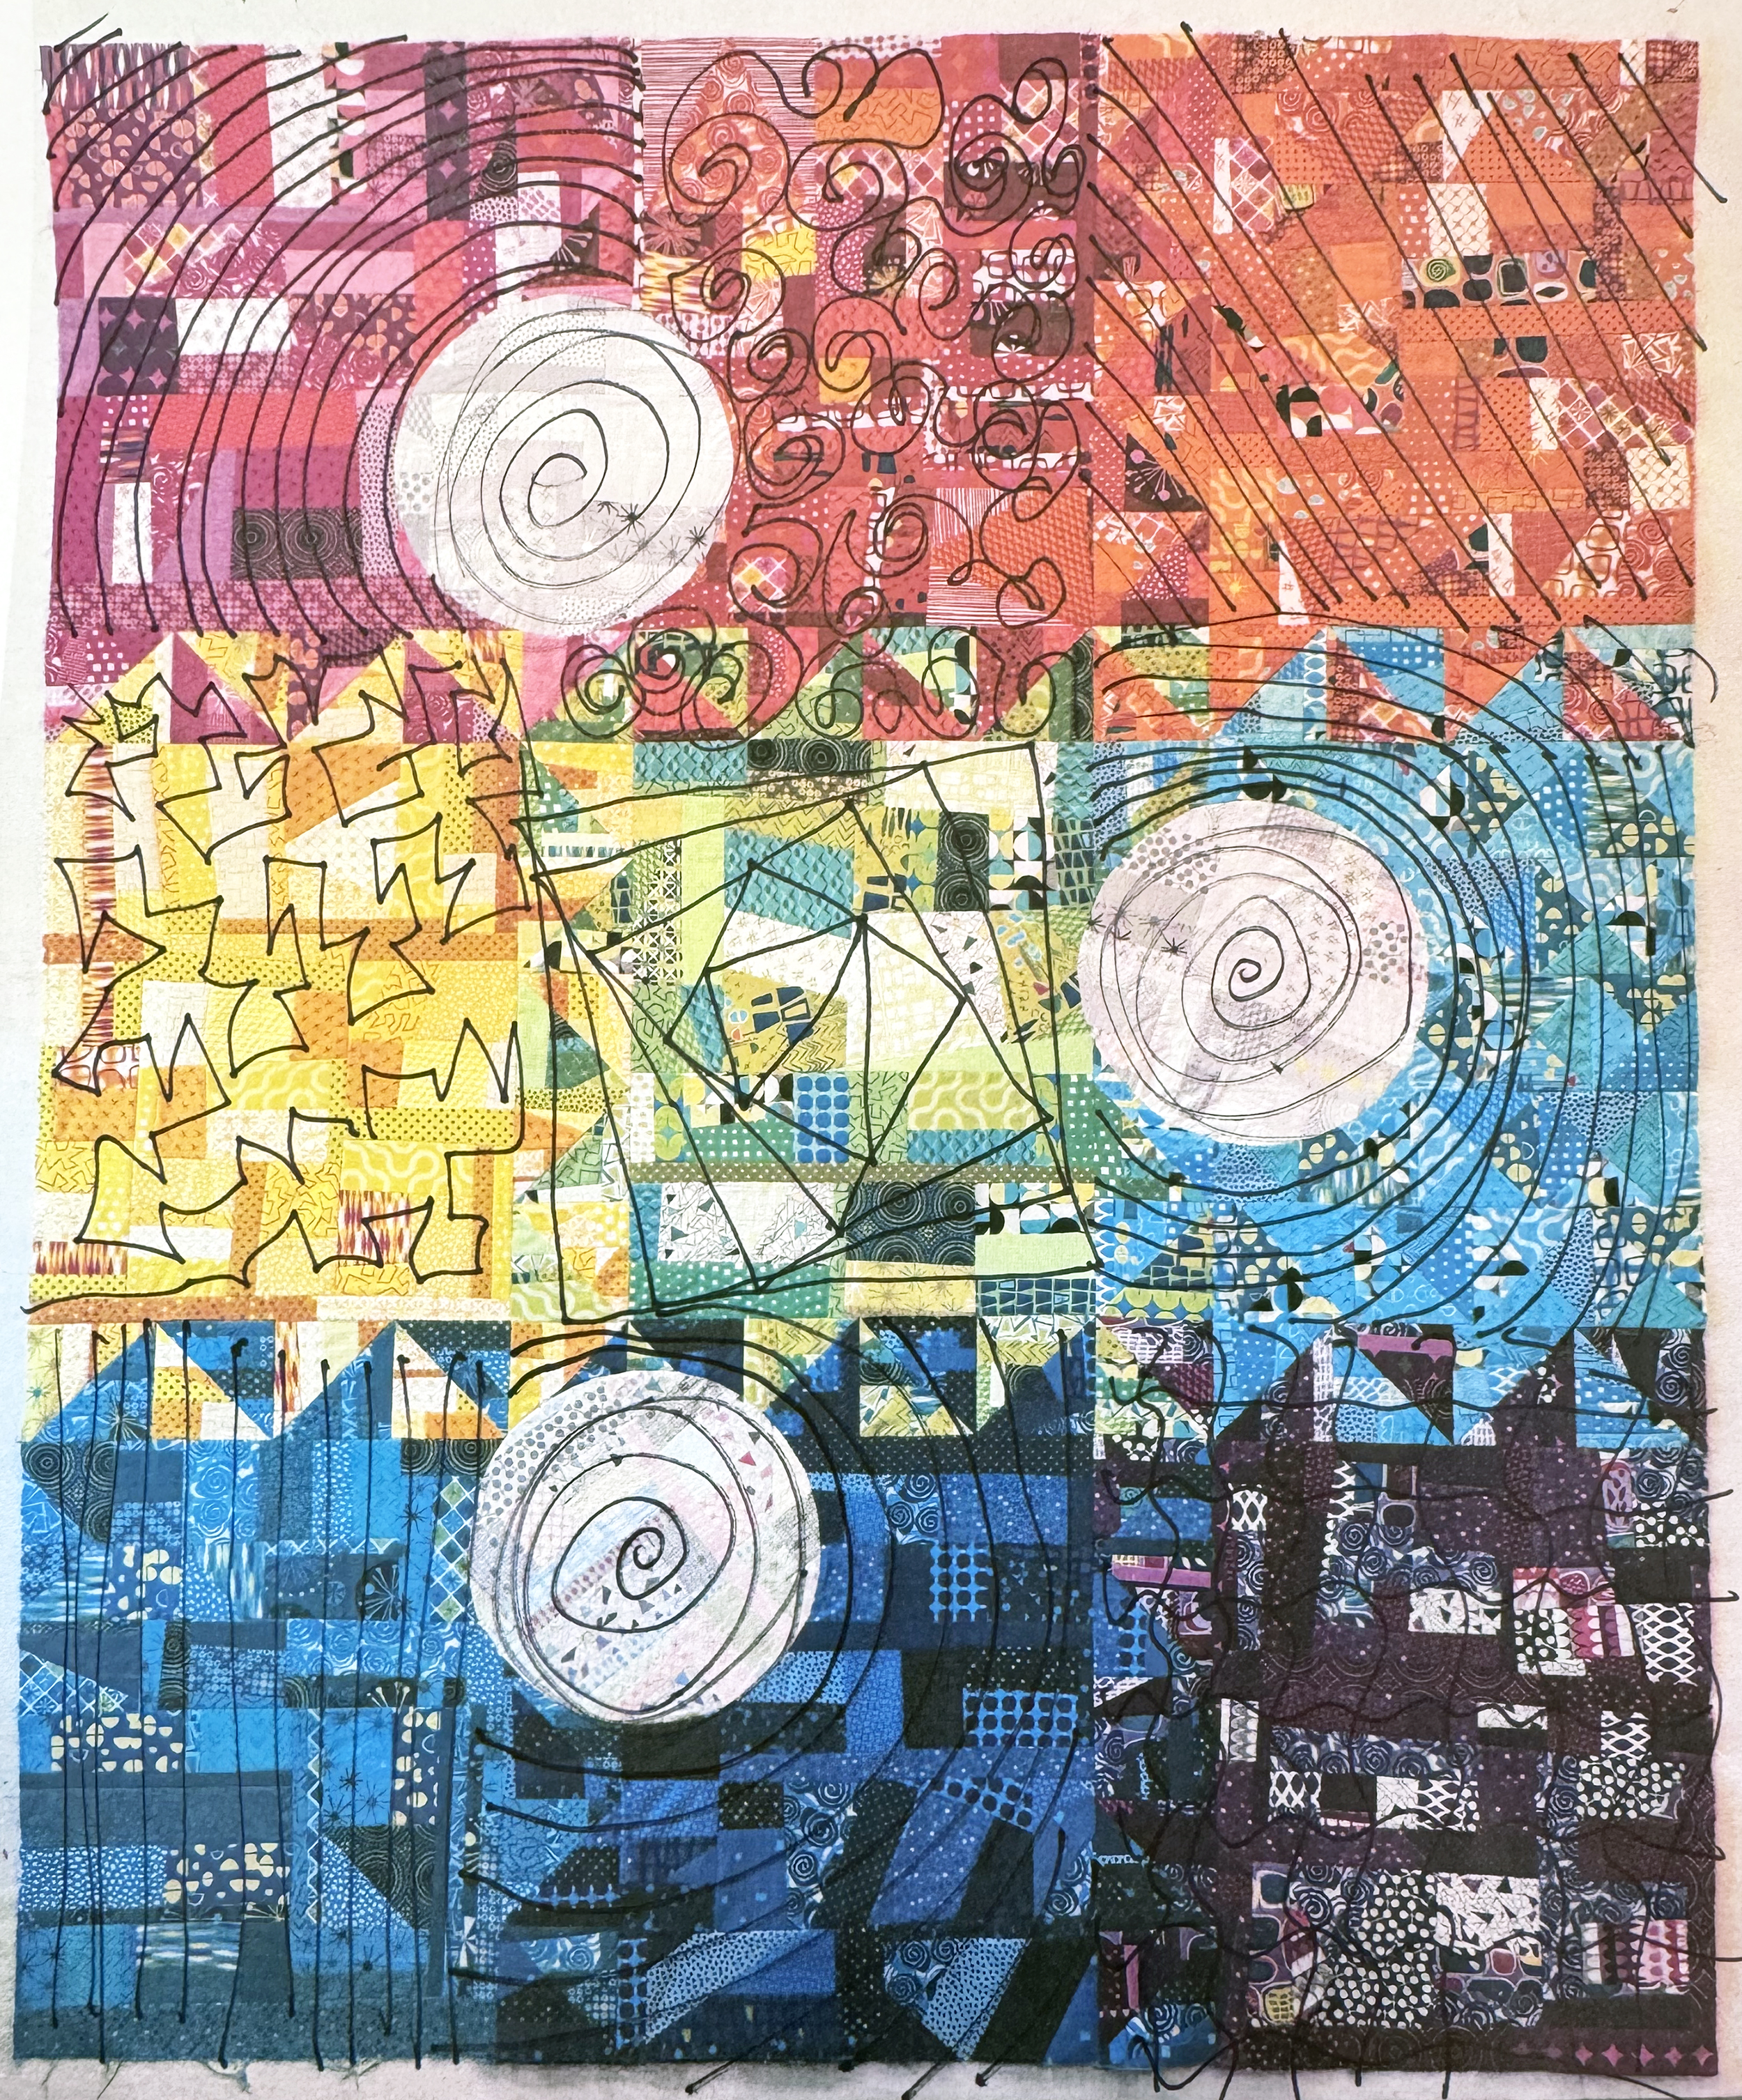
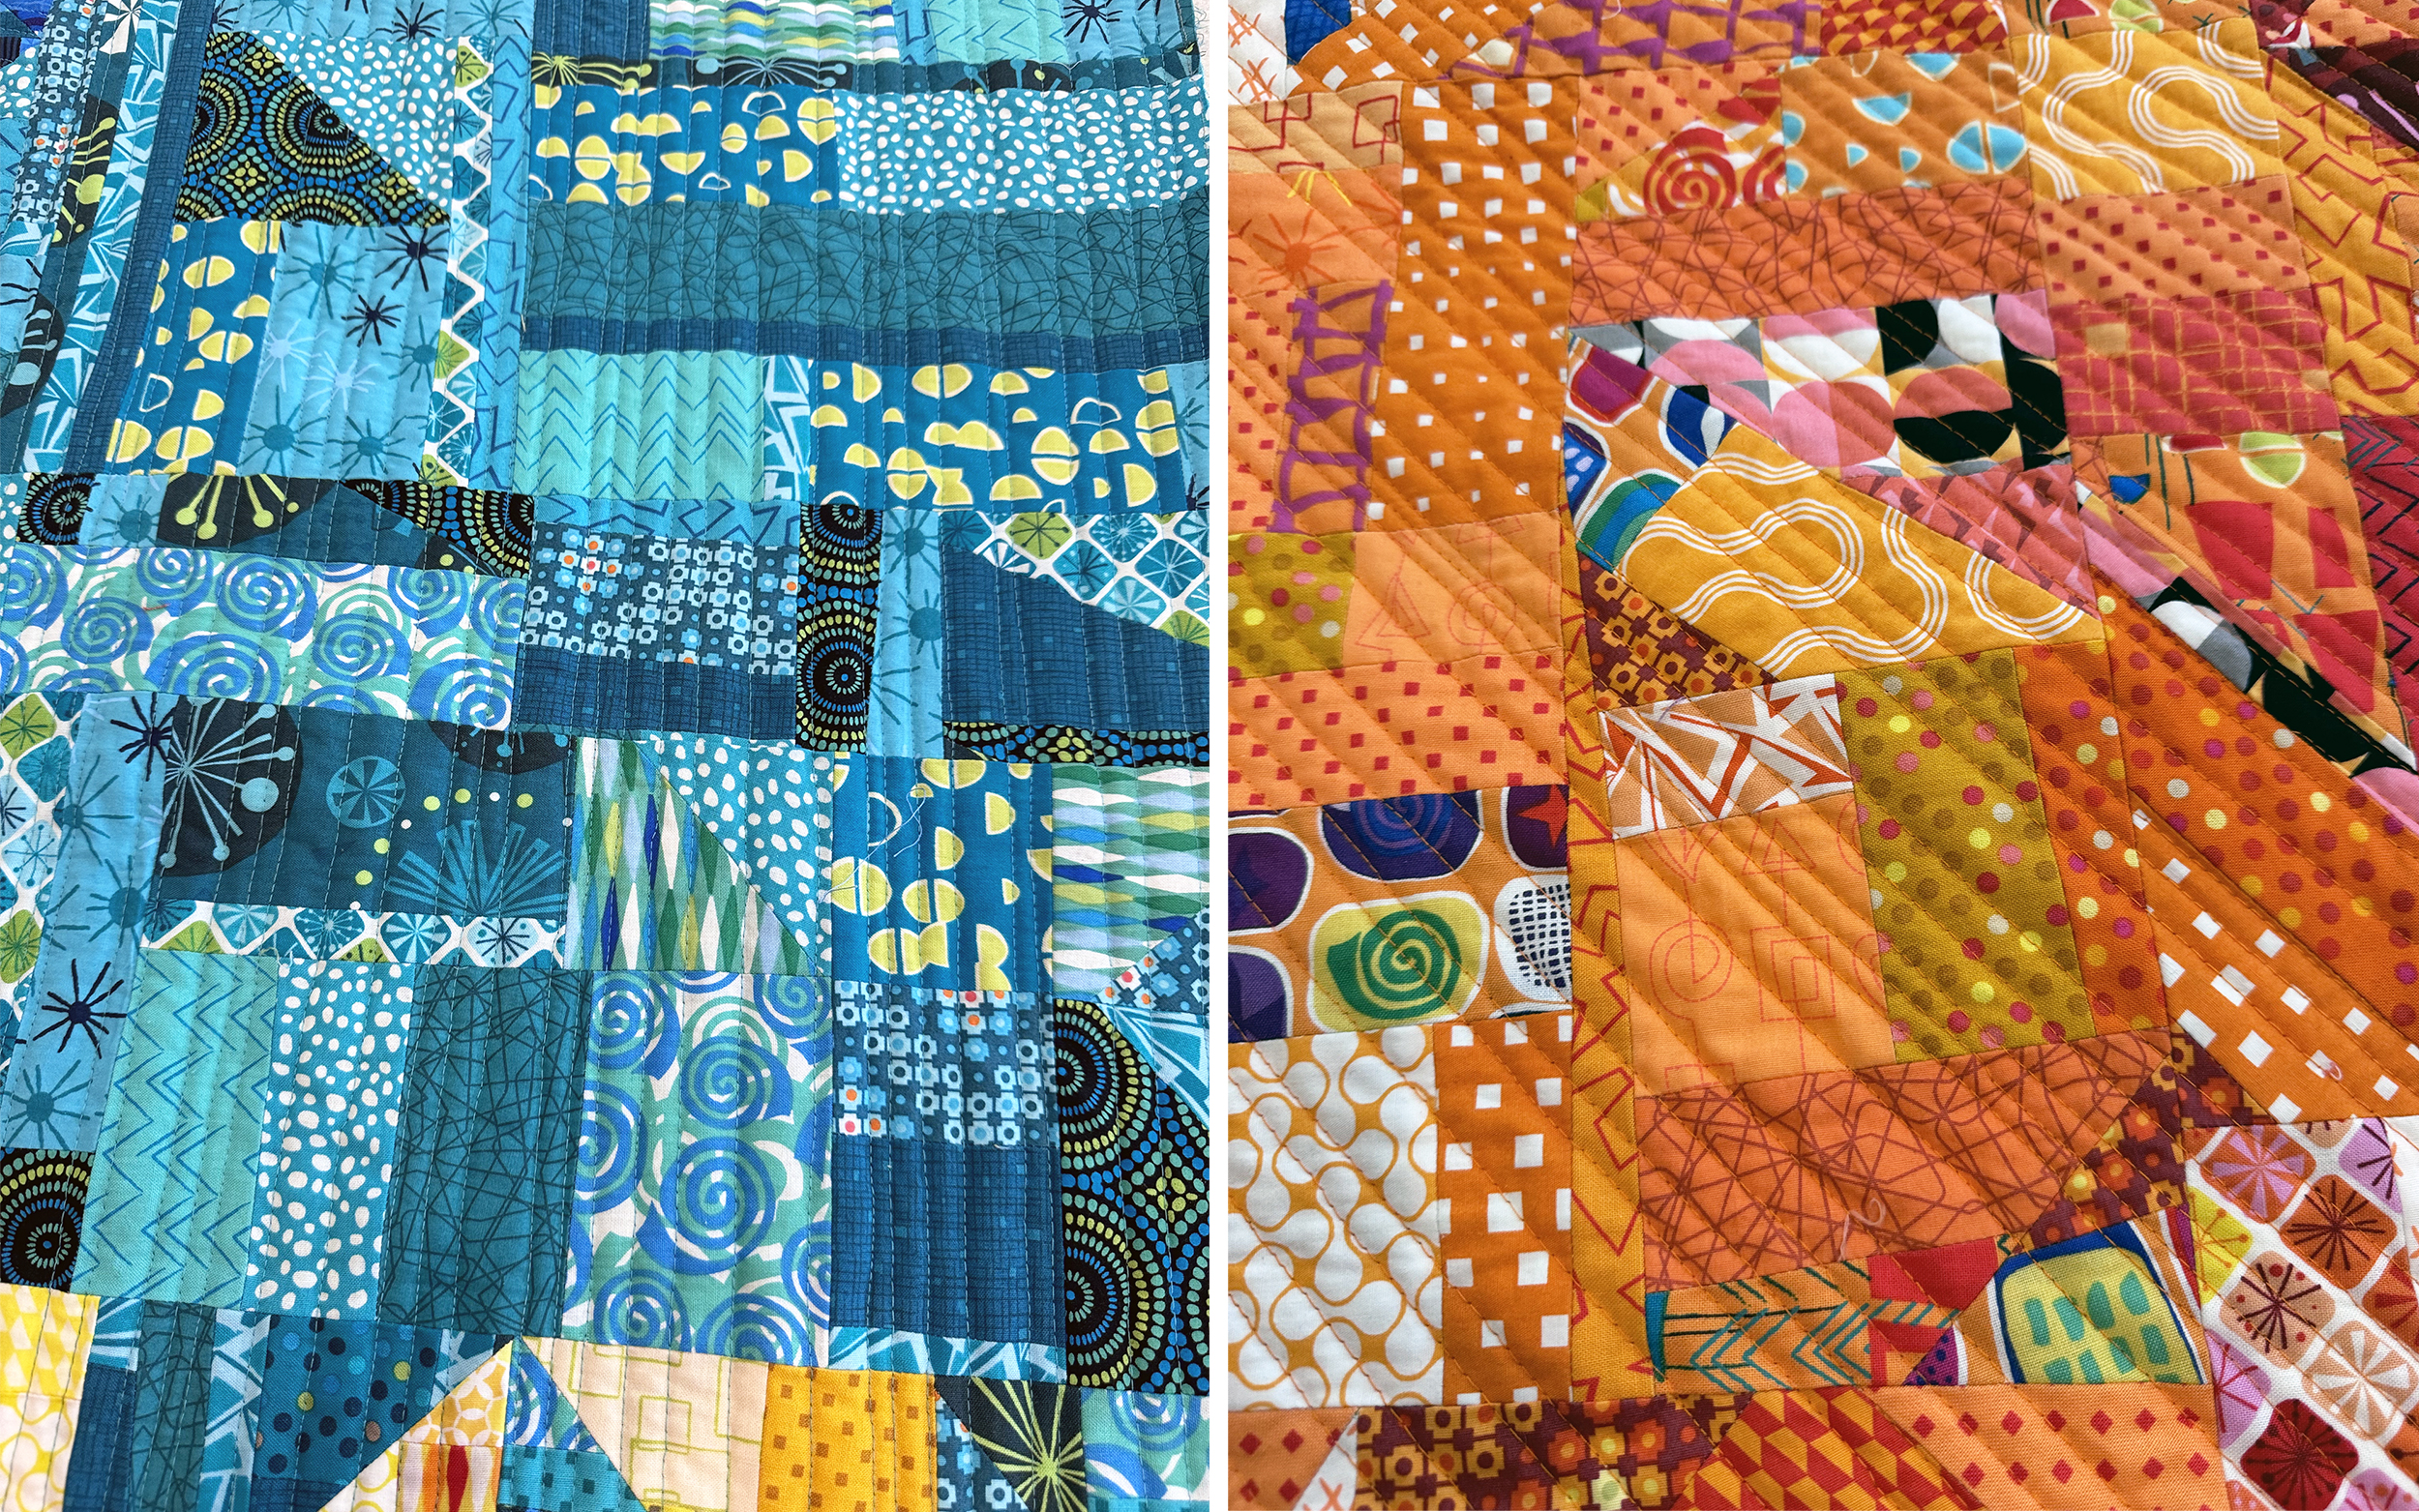
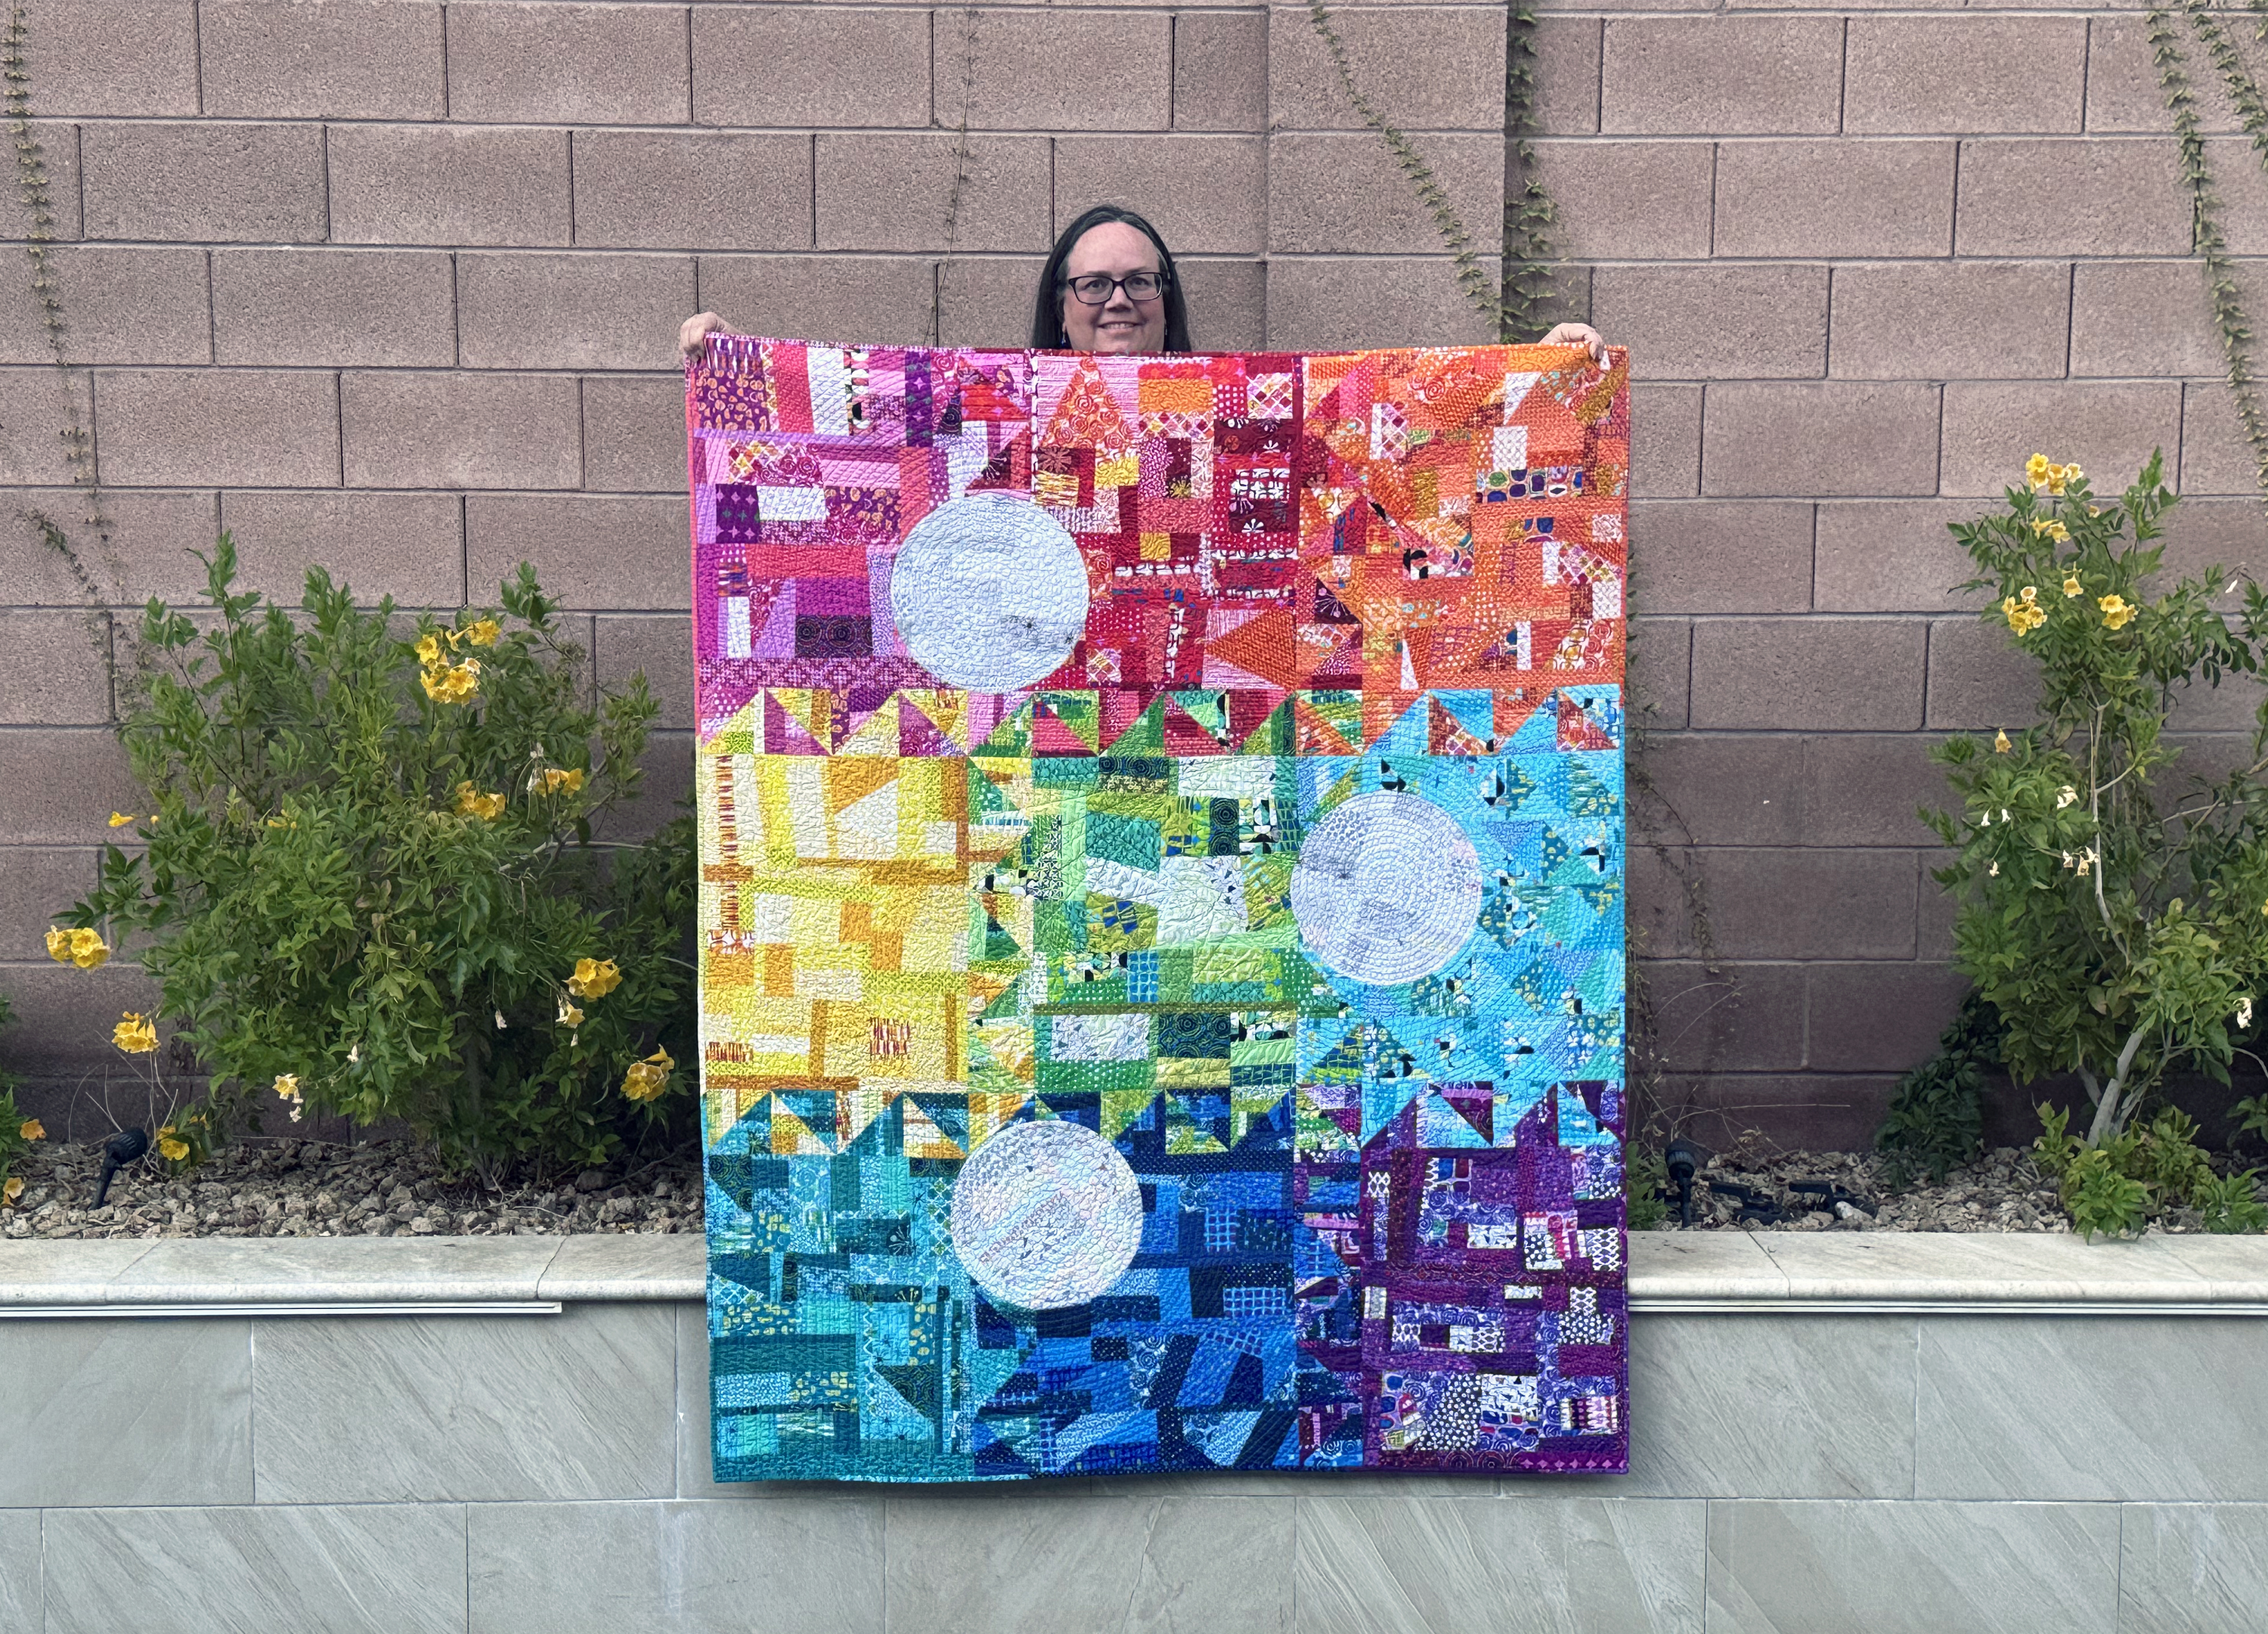
After a hiatus of entering quilt shows the last couple years, I just got the exciting news that Colorful Chaos was juried into the international quilt show in Paducah, KY!! There’s no pattern for this quilt because it’s part of my renewed push to make new and exciting experimental work that pushes me out of my comfort zone. I’m thrilled with how it turn out. Read more about it below….
In this post I thought I would share more about my machine quilting process and how I decided to quilt it. I hope you enjoy all the quilty eye candy!
Step 1 – Make a Quilting Plan
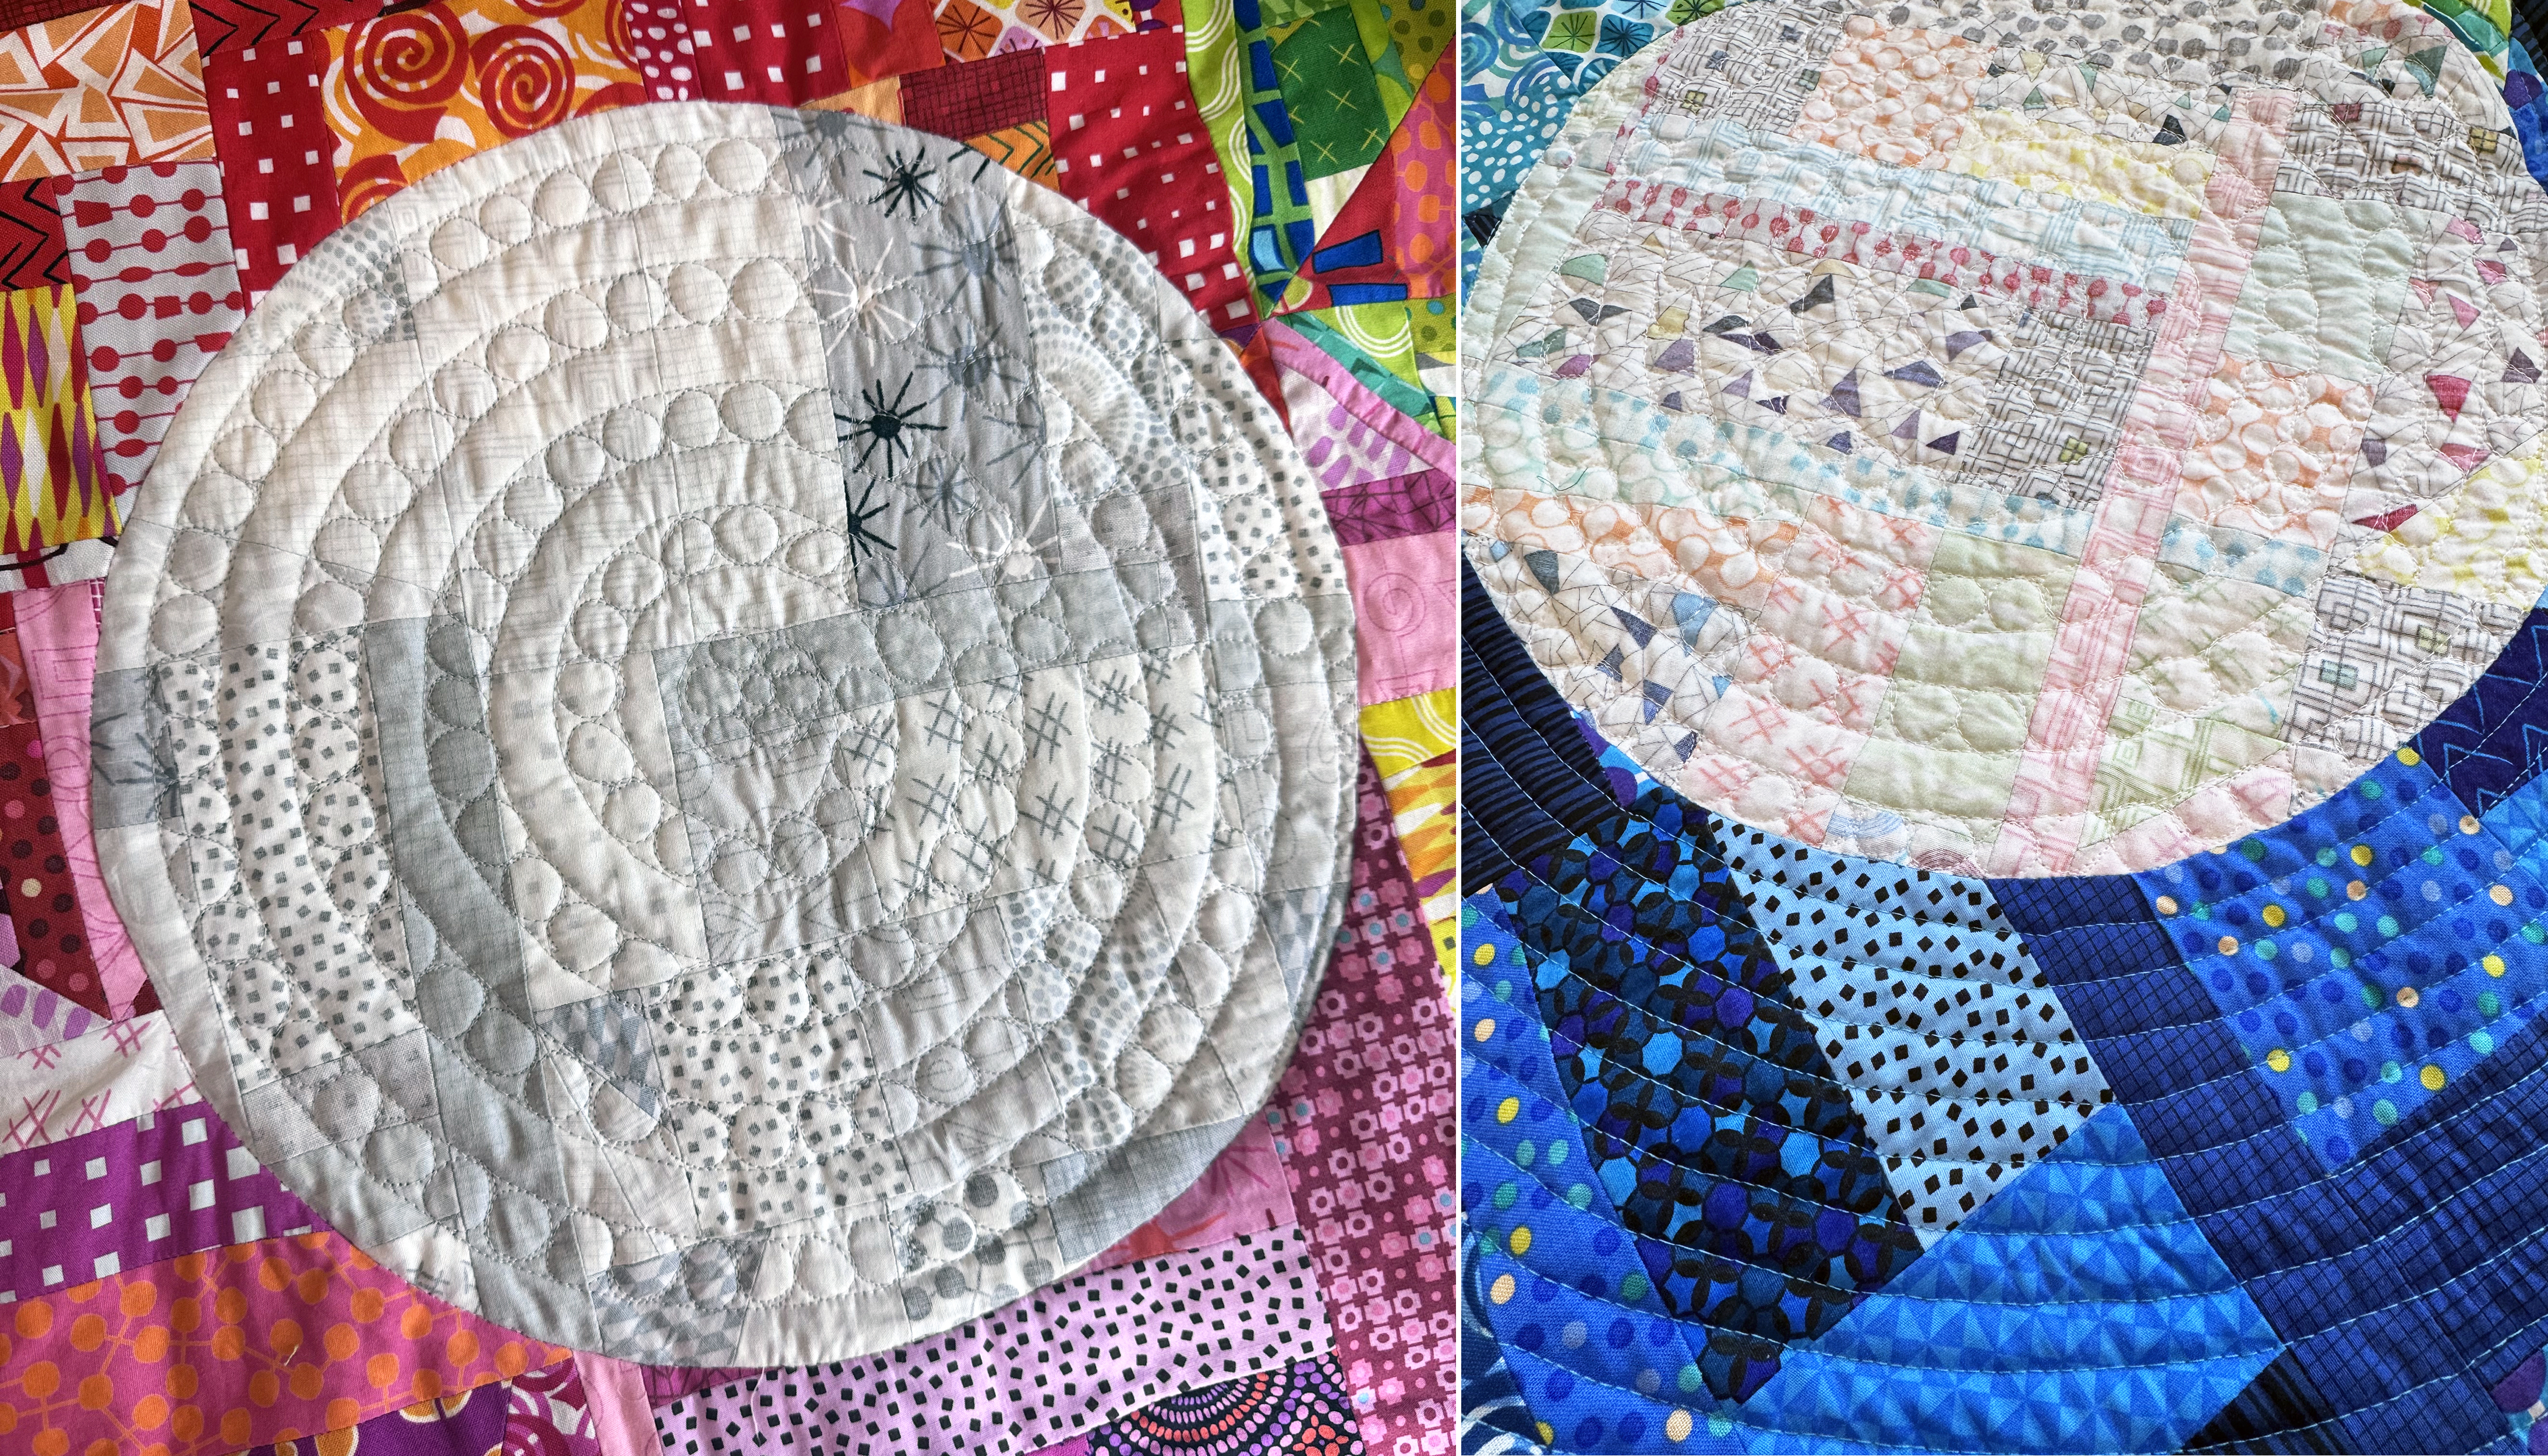
Before I begin quilting, I always start off with a quilting plan. I printed off a few color copies of my finished quilt top and then sketched out several different possibilities. These were simple pics I took from my phone and printed on a regular piece of paper. I wanted to emphasize the circles with the quilting and then fill in the other areas with some fun, geometric designs. This is just a roadmap, and I usually change it up a little when I get to the actual quilt.
I always make a quilting plan before quilting, and it’s totally ok to deviate from the plan!
Step 2 – Choose Thread Colors
For most of my quilts, I usually just choose 1 or 2 thread colors, and I always use the same thread in the bobbin. For this colorful quilt, however, I wanted to quilt each colorful section with a matching thread color.
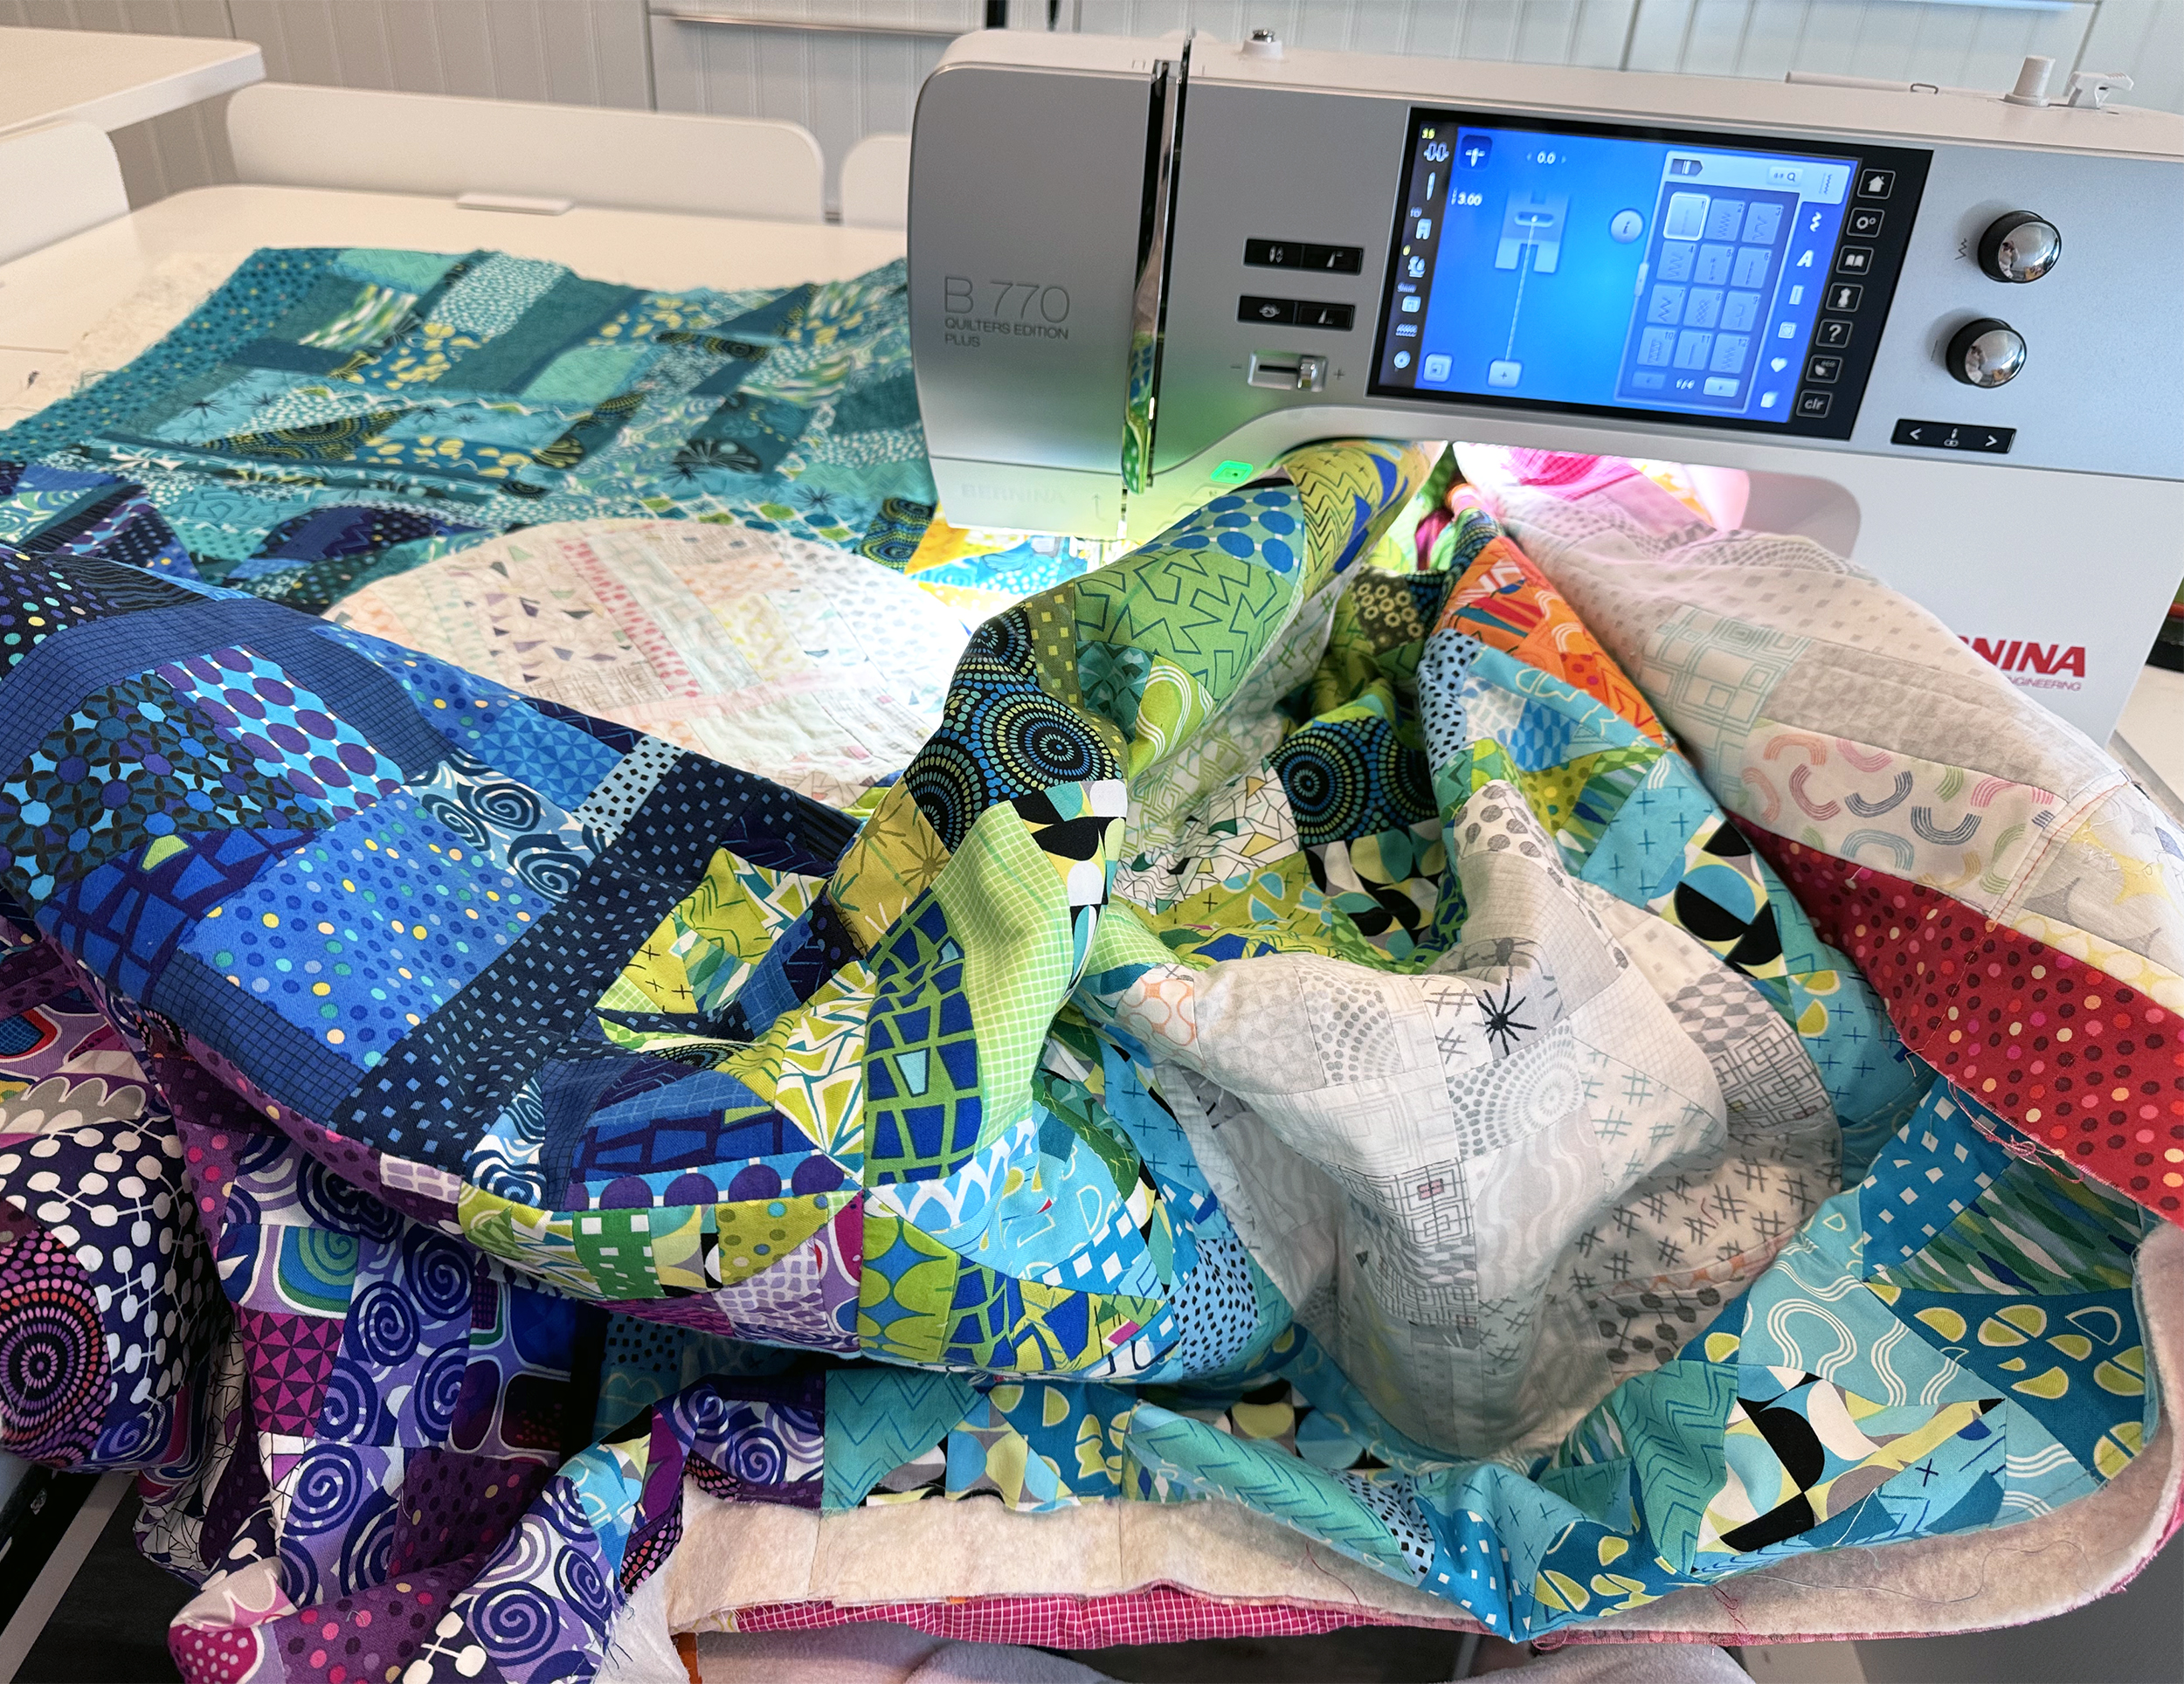
When I’m doing custom quilting, I take my time and focus on one area at a time. For this quilt I did some light stitching in the ditch between sections to anchor or secure the quilt. Then I went to town with different motifs in each colored area.
Above is what it looks like when I’m scrunching and smooshing my quilt under the machine. I’m using my Christa Cabinet to hold the weight of the quilt and it’s a game changer for domestic machine quilting!
Below I’m using pieces of painters tape to help me quilt straight lines using my dual feed system, which performs the same function as a walking foot.
Straight lines are super versatile because they can be stitched at lots of different angles, and they always look great! My secret is to quilt them in an irregular pattern rather than trying to have an even amount of spacing between the lines.
I also used walking-foot style quilting to stitch spirals inside and outside of each inset circle. To jazz them up a bit, I then went back and free motion quilting pebbles in between each of the spirals. It was a fun challenge figuring out how to make that work, but I love trying new things with every quilt I make!
This year it’s been my goal to work on what I call my “runway” quilts in between other projects. These are quilts that are a bit more edgy and push the boundaries of what I can do. There’s no pattern for them so that frees me from the need to be able to replicate everything I do.
But just like runway fashions inspire colors and style you’ll see at your local department store, my experiments will show up in bits and pieces, such as this practice sample that I’ve added to my “Spirals and Swirls” machine quilting workshop:
I continued the rainbow colors around the edges with matching binding. I pieced the binding in sections and then added one section at a time, splicing the seams together roughly were the colors overlapped.
I get to wrap up this week by telling you about the adorable and hilariously funny Samarra Khaja who recently wrote the book Sew Adorkable. I mean, the tongue-in-cheek title really says it all!
Samarra first came to my notice when she became known as “The QuiltCon Artist” – photoshopping herself into other people’s QuiltCon pictures and then posting them on Instagram, when she couldn’t attend the event herself. (Just go to instagram and search #quiltconartist to see what I mean.)
Now I normally don’t do 3-D sewing (clothes, bags, accessories, etc.) but if I did, I would for sure pick one of Samara’s projects to make. They are just so fun! Just check out some of these adorable (or adorkable) ideas (all photography courtesy of C&T). I think my favorite is the “Pencil Skirt” shown on the cover. Get it? (Get it??)
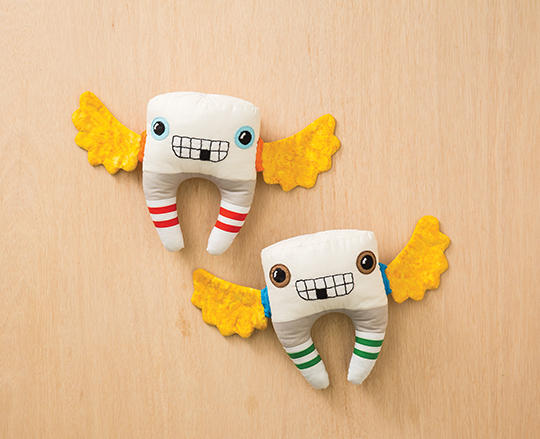
Masculine Tooth Fairy Pillows
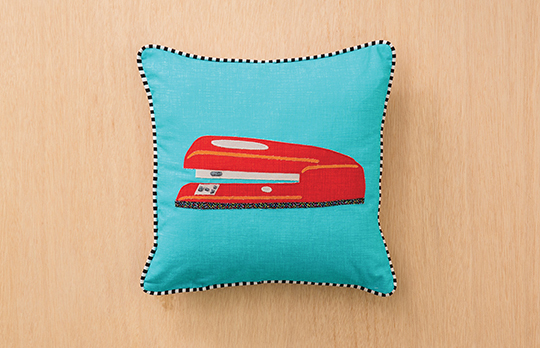
Stapler Pillow
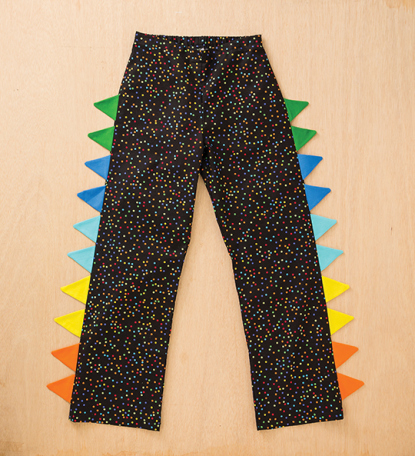
“Trawzers”
Typewriter Tissue Box – Everyone needs one of these!
Samarra also included some delightful quilt patterns in her book. Take a look at these:
Odd Socks – That’s where they went to!!
8 Bit Birds
Braille Alphabet Quilt
Candy Dots – Love those added illustrations!
One of the most delightful things about Sew Adorkable is Samarra’s illustrations which are included throughout the book, like in the photos above. Her sense of playfulness is really evident throughout the book.
So if you are looking for that unique gift this holiday season, pick up your copy of Sew Adorkable and stitch up one of 15 fun projects!
But Wait There’s More!
PS – if you like her illustration style, Samarra also has her very own coloring book! It’s called Off the Bookshelf and it just released this week!
Today’s Sew and Tell is a little different. Instead of featuring a finished project made by one of my customers, I’m excited to share with you some finished jelly roll blocks from one of my quilt- along followers. Scroll down to the end of this post if you want to join the fun!
These pictures come from Diane in Canada and she finished up this week’s homework in a jiffy! She had an older strip bundle lying around that she put to good use.
Diane’s fabric is Greenfield Hill by Denise Schmidt for Westminster. Instead of randomly sewing the strips together, she matched up the pretty jewel tones into coordinating pairs.
“Sew” far, “sew” good, Diane! I think your use of color will be striking if you sew each row in a different color, “strippy” style, or if you have the colors cascade across the quilt in an orderly fashion (like green, red, blue, black, etc.)
For those of you eager beavers out there like Diane that are ready to move on, I’ll give a sneak peek of what we’ll be working on for next week’s lesson. If you select 100 of your blocks and sew them together into 50 pairs like this you’ll be one step ahead.
Next week’s post will include complete directions on how to finish the quilt top, so make sure you grab your one yard of tone on tone or solid coordinate to go with your jelly roll. I’m going to use Ruby Red Kona Solid to go along with my Vintage Modern jelly roll shown above.
In case you are just joining us, you can click the links below to catch up and follow along with this tutorial in it’s entirety. My main reason for starting this tutorial is to teach you that yes, you can, make a complete quilt from start to finish, all by yourself!
The idea of pressing seams always to one side is pretty old school. It comes from when seams were hand pieced; the double seam pressed to one side gave strength. Also, when hand quilting, it was easier to stitch in the ditch if the bulk of the seams was out of the way.
However, with so much modern quilting going on, using lots of solids and white background space, there’s more of a need to press seams open to prevent shadowing.
Moreover, it’s much easier to machine quilt if all of the seams are pressed open.
When I first began doing free motion quilting, I took a class from a teacher that recommended planning all of your quilting ahead of time so you would know which way to press your seams. (For machine quilting stitch-in-the-ditch, it was conventional wisdom to always quilt in the low side of the ditch.) My first thought was, what a pain!
I want the freedom to be able to quilt how I want when I want without being limited by piecing decisions. I also like how much flatter the quilt lies when all of the seams are pressed open. So yes, you have my permission to press ’em open as much as you want!
By the way, the quilt seams shown in this post are from my Bungle Jungle modern quilt I’m currently working on. You can read this week’s earlier post about making this quilt here.
Before I’ve even finished my current project, the Little Rascals baby quilt, I’ve already started on my next charm pack design! I was inspired by Leah Day’s modern quilt on her free-motion quilting blog. However, I’m making mine a little more uniform and less wonky.
I started with one charm pack of Bungle Jungle – a set of 42 precut squares that measure 5 inches. That means the finished size of each square is4 1/2″. I wanted to surround the squares with lots of open space for quilting, so I grabbed 2 yards of of Kona Cotton Solids in white.
I cut fifteen 4″ wide strips of white and sub-cut them into 42 pieces that measure 4″ x 5″ for the short side of the blocks and and 42 pieces of 4″ x 8 1/2″ for the long side of the blocks.
I stacked the pieces up next to my sewing machine in order so they were all ready to sew. Some of the prints are directional, but I won’t worry about that as I sew this quilt together. That will add to the “charm!”
To help with quilting later, I pressed all of the seams open. This helps reduce bulk and prevents shadowing of the seams. I will sew a total of 42 blocks, one for every charm square.
This week I will work on arranging the blocks into a pleasing setting. I’m loving it already!
The Modern Quilt aesthetic really appeals to me with lots of negative space and clean lines. One of the hallmarks of this design style is to use lots of solid fabric and crisp, clear colors.
If you’d like to follow along, grab 1 charm pack of your choice and 2 yards of background fabric, then sew a total of 42 blocks like those shown above. (I’ve only finished 12 blocks so far.) I’ll continue to blog about this project until it’s done, including quilting and binding.