I have been dabbling with using 505 basting spray to hold the three layers of my quilt together while quilting. I’ve learned a few things along the way and would like to share them with you. Thanks to Ann Petersen for introducing me to this method of basting.
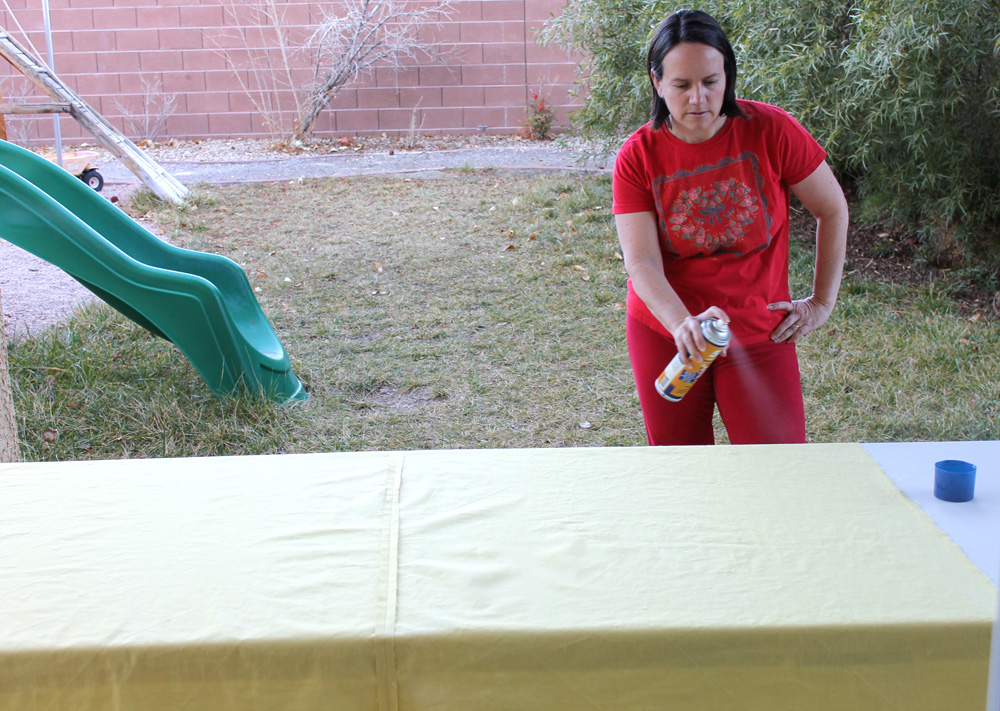
 Yes, you get to see my ugly backyard during this tutorial. Yay, you!
Tips Before You Begin
First of all, when basting a quilt with spray, it is best to use pre-washed 100% cotton fabrics. The spray make not stick as well to other fibers. Also, if you like to starch the back of your quilt to make it slicker and aid in machine quilting, wait to do this until after you have spray-basted the quilt.
For best results, choose a natural fiber batting made of cotton, silk or wool (or a blend that is mostly cotton) because the adhesive tends to stick better. Finally, be sure to use the spray adhesive outside, or in an extremely well ventilated room with the doors and windows open.
Now on to the Tutorial
Begin by setting up one or two tables on which to work. Alternatively you can place a sheet on the ground, or even drape your fabrics over a wall if needed. Lay out the backing of your quilt first, wrong side up. You will be applying the spray to the wrong side of the fabric.
 Working outside is best so that fumes can dissipate.
Not shown in the photo: place a towel or two on each end of the table under the backing to protect it from over-spray.
Shake the can well before beginning. I have only used the 505 spray, so I cannot speak to the effectiveness of the other brands. Starting on one end of the quilt, spray the adhesive smoothly back and forth across the surface of your quilt. It should be very tacky to the touch. Set the backing aside and move on to the quilt top.
 Not a very flattering picture, but I’m keeping it real!
Lay out the quilt top and use the same method to apply spray evenly over the wrong side of the top and set it aside. I sprayed the center section of the quilt top and then went back and sprayed the sides. I didn’t move the top; I just sprayed the edges while they were hanging off the table.
 Lay out your quilt top wrong side up.
I usually hang my top and backing wrong side up over a railing while waiting to assemble them. You can also fold them up and open them later as needed. The quilt pieces will be tacky but can still be opened up if the sticky ends touch each other.
 I drape my quilt tops over a railing in my sewing room.
Using a large surface (like a couple of long plastic tables pushed together), spread the backing wrong side up and tape or clamp down the edges. Next, place your layer of batting on top.
 Tape the backing down with painter’s tape, wrong side up.
It is really helpful if you can grab an assistant to help you place the batting directly on top of the backing without having to move it around too much. Grab the quilt top, again with help, and place it on top of the other two layers, right side up.
Take some time to smooth out all 3 layers until it is nice and flat. Once you have worked out any wrinkles, take the whole sandwich over to your ironing board and press it together from the back of the quilt. This will help set the adhesive and works best with natural fiber battings. If needed, press the front side as well.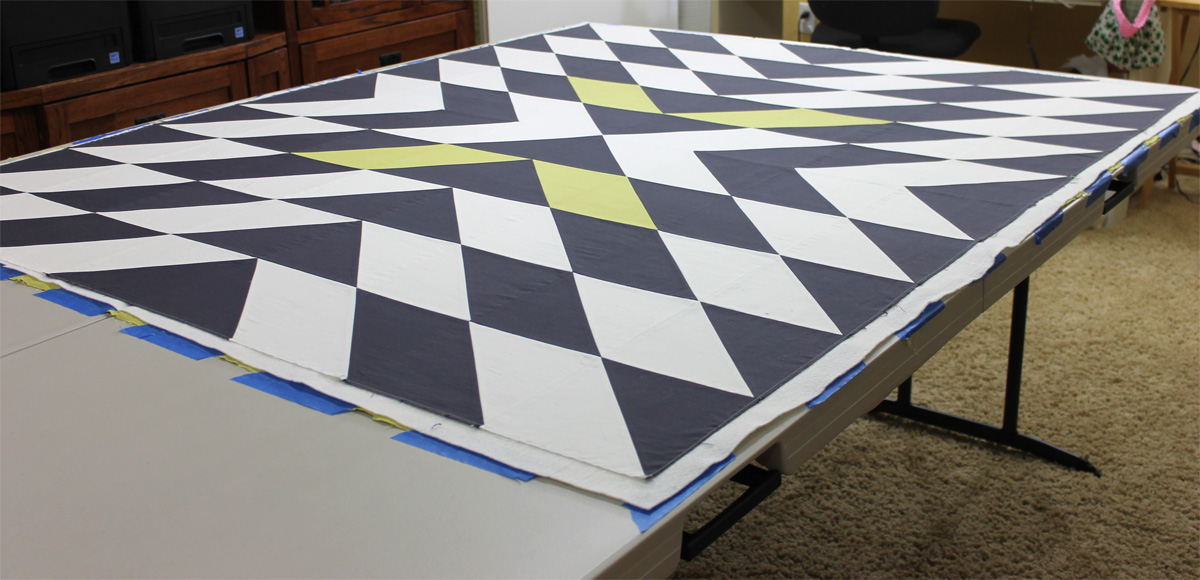 You are now ready to quilt!
The quilt shown is Modern X, featured as March’s Modern Quilt Guild Quilt of the Month. Pattern available for purchase here.

When I put my layers together, I have my bating and top folded in quarters. I have already marked centers on the backing or table, so I place the batting, and then top on the appropriate quarter and unfold. I usually don’t have help to lay them together, so this helps greatly. It also gives me the ability to smooth things out better. I have not used 505 to baste a quilt yet, but will give it a try. Also, have not pressed the layers together, so thanks for the tips.
Connit, It says on the 505 can to spray the batting. I don’t know but maybe spraying the fabric is why you had a problem? Perhaps a second wash will take care of it.
This is the BEST spray basting tutorial I’ve found….and, believe me, I’ve researched and read lots and lots of them. Thank you so much for sharing this wonderful teaching moment 🙂
I’ve just done a quilt using adhesive spray and loved the way it held the layers together. Machine quilting it was a snap. When I was finished I washed and dried the quilt but found that my quilt was left with a dimpled effect. Instructions on the can said that the adhesive washes away but it still looks like the top and backing are stuck to the batting. Ironing helped a bit but I’m wondering – should I wash it again or am I using too much spray?
I use the Elmer’s school glue technique to baste my quilts. I haven’t used a sponge roller, though. Sounds like a good idea to avoid the globs that can happen. All the glue washes out.
I am wondering if you have used the Elmer’s School Glue that washes out with water for basting ? I have heard wonderful things about it but I have only used it for basting when I was piecing a quilt. It was very easy to just dab a piece on and it stuck. Apparently after you use a foam roller to roll the glue, you iron it ASAP. It is very cheap and everything washes out easily. Of course, if you don’t want to wash the quilt, then don’t use it. I did like your tutorial and your way is basically how I do my quilt sandwich also.
Boy, your post came at a great time for me. I just got a sit down quilter and am getting ready to quilt my granddaughter’s first quilt. I was going to starch her fabric as it is somewhat flimsy. I’ve done quilts before using 505 spray, but had never starched them prior to making the sandwich. I’d hate to do anything to hurt this special quilt. Thanks so much for sharing your experience!
I spread the backing out on my back deck and tape it down. I spray with spray adhesive and place wadding on top. I roll the top from both ends onto either cardboard rolls I’ve acquired from the fabric shop (the wide backing ones are a great length). I then spray the wadding and place the centre of the backing onto the wadding. I work one half at a time unrolling the top and smoothing it down as I go. Repeat with the other half and you’re done.
Great tutorial. I, too, learned this from Ann Petersen. Living in windy Amarillo, Texas, I do this in the garage with the door up.
I use a method for spray basting I found on u tube by Patsy Thompson. She has a video showing how to spray baste by making a basting wall in your garage, basement or anyother acceptable place. My husband nixed the celing tile idea so we stapled a purchased low pile area rug (8×12) on the wall and I just angle T pins to attach and stretch my backing. I also pin an old queen sheet over the carpeting to protect it from the spray. Check out Patsy’s video, it’s a great method.
I have only used Sullivan’s Spray basting. I have learned to use it VERY sparingly. If not, I have trouble with thread braking while machine quilting.
I love this pattern but cannot find it anywhere. I just became a member Modern Quilt Guild so I could get the pattern…and it looks like an interesting site as well. Can you help me?
It’s located on the members-only forum under resources 🙂
Christa, I put my whole sandwich together first on my dining room table, smoothing it all out. It really helps if you have a helper. Next I fold back the quilt top and batting halfway, spray the backing and smooth the batting and top. Next, fold back the top and spray the batting, smooth top on. Repeat this method on the other side of the quilt. Usually I have to slide it over to get some room on the other side of the quilt. Since I discoverted spray basting, I have become a quiltmaker and not just a top maker.