I love making every part of a quilt, including the binding, so I thought I’d share with you my favorite method for binding my quilts. It’s called continuous length, double fold, straight of grain binding. That’s a mouthful, but it’s how I do all my quilts.
the quilt Shown is Modern X. Pattern available here.
Ready for picture overload? Here goes:

Note: I used Kona Solid Charcoal for my binding strips with Aurifil thread #1246.
Step 1 – Calculate and cut your binding strips
 Measure the perimeter of your quilt by adding the length and width of your quilt and multiplying that by 2. Then add an extra 10 inches to deal with seams and corners. For example, my quilt measures 56″ x 70″. Here’s how I calculate my binding:
56+56+70+70+10 = 262 inches needed
Next, take this measurement and divide it by 40 inches. This will tell you the number of strips you will need to cut, with 40″ of useable fabric. My number is 6.55 which I will round up to 7 strips of fabric.
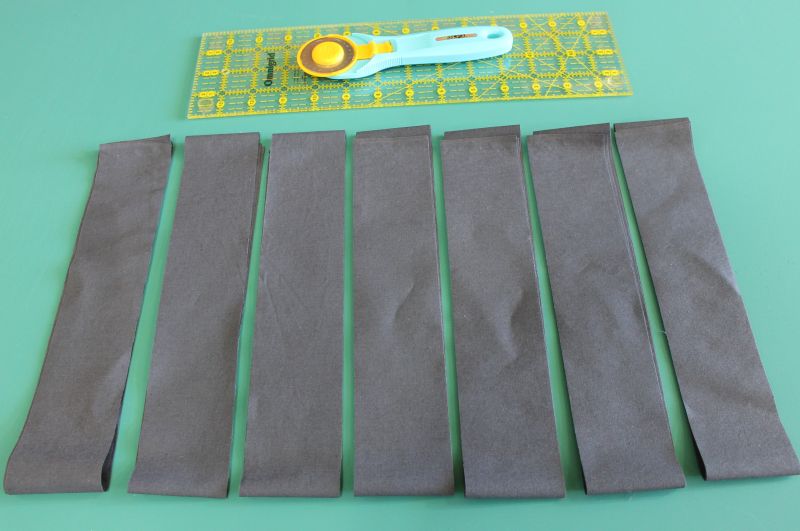 I like my binding to finish approximately 1/4″ on both front and back. Therefore I will cut my strips at 2 1/4″ wide. You can cut them wider if you prefer more of the binding to show.
I need to cut a total of (7) 2 1/4″ wide strips to bind my quilt.
Step 2 – Sew the binding into a continuous length
Place two strips right sides together at a 90 degree angle. Sew them together at a 45 degree angle across the diagonal. Sewing mitered seams like this helps distribute the bulk. If needed, you can draw a straight line across the diagonal, or press one of the ends along the diagonal to form a sewing line.
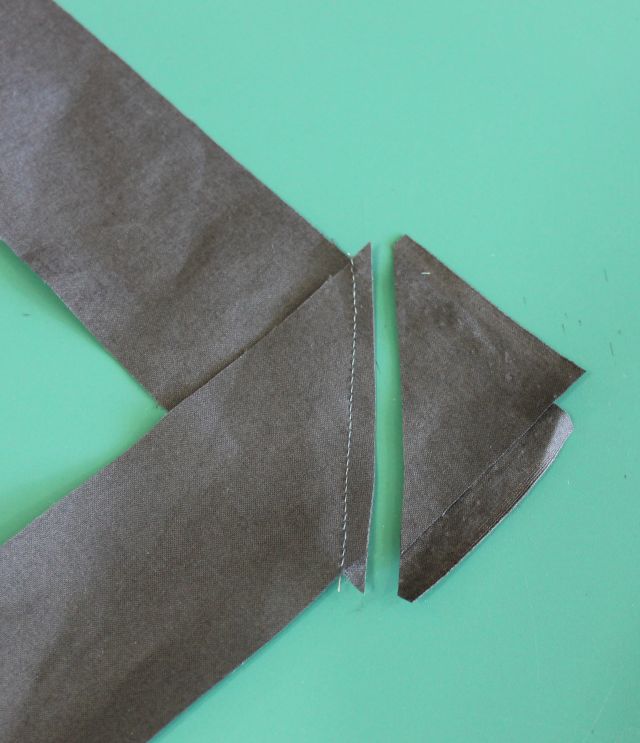 If you are using solid fabric like me, it will be a little trickier to keep track of which is the “right” side. You can use a pin or piece of tape to designate the right side if you like. Be sure to trim the starting edge of your binding at a 45 degree angle, too.

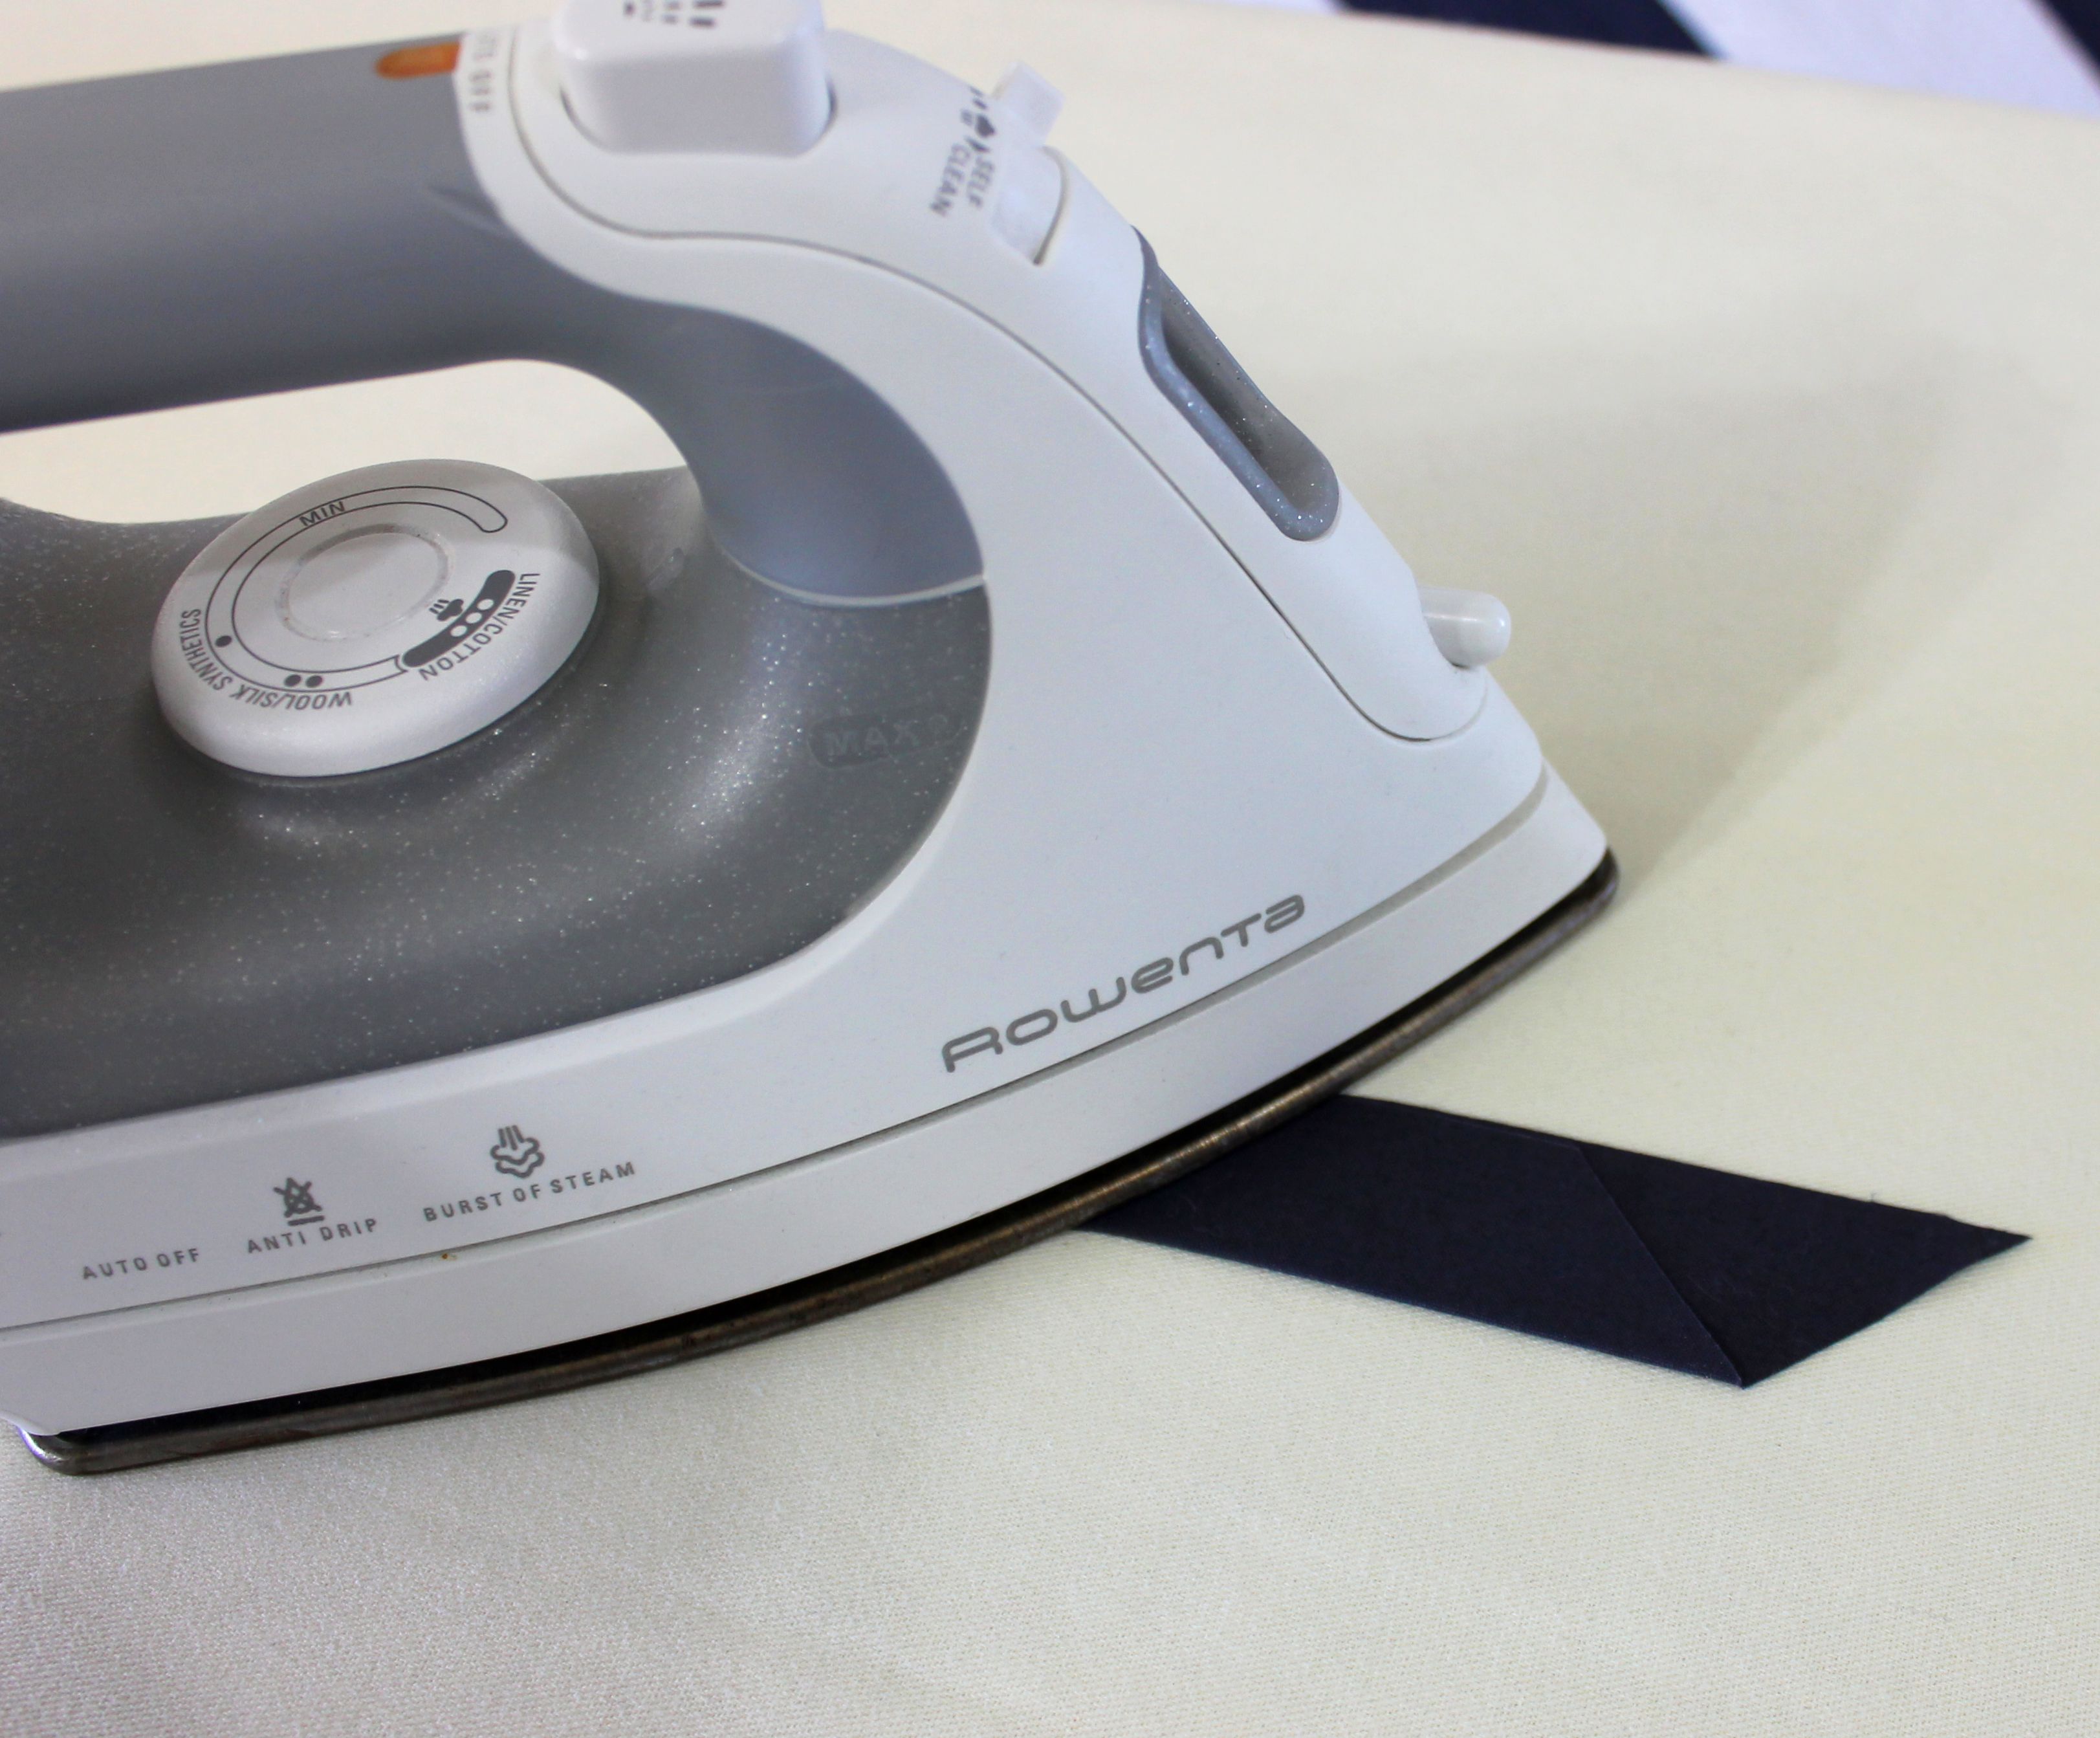
Step 3 – Press the binding
Press the binding wrong sides together along the entire length.
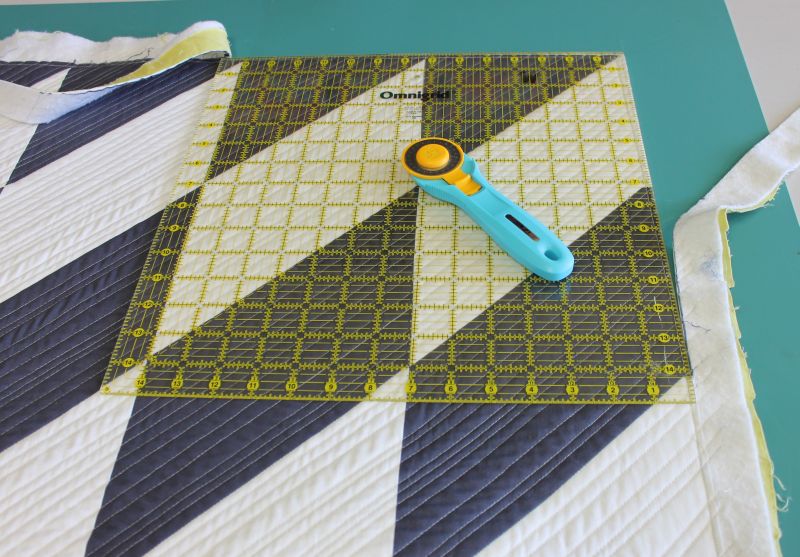
 Step 4 – Attach the binding to the quilt
Trim off the excess backing and batting before you attach your binding. I use a large square ruler for the corners, and a long straight ruler for the sides.
 Quickly run your binding along the perimeter of your quilt to ensure you won’t have any seams falling in the corners. If you do – move the binding up or down a few inches to avoid seams at the corners.
 Starting at least 6″ – 8″ away from the corner, place your binding on the front side of the quilt and leave a tail of about 6″ – 8″. Line up the open binding ends with the edge of your quilt. The folded edge should be facing towards the quilt.
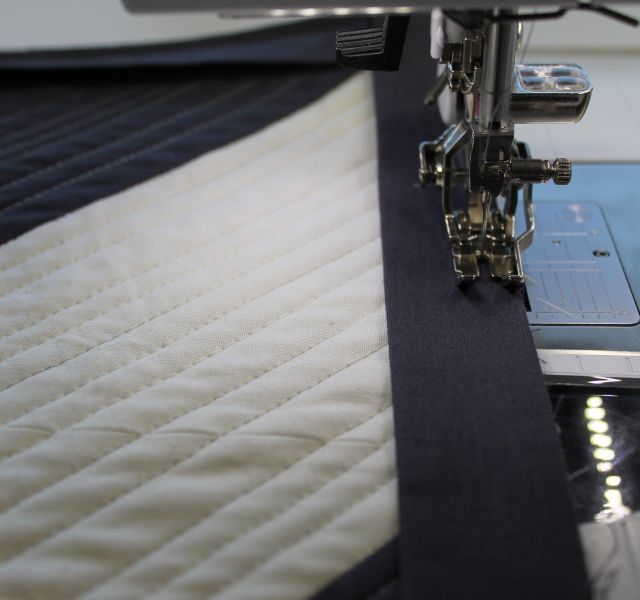 Starting at the pin shown in the previous photo above, stitch the binding onto the front of the quilt with 1/4″ seam allowance. Use a walking foot or even-feed if possible. When you get to a corner, stop stitching 1/4″ away from the corner and sew off the corner.
 At this point, your corner should look like this:
 Take the quilt off the machine and fold the binding up and away from the quilt as shown. Keep the edge of the binding in line with the edge of the quilt as shown.
 Bring the binding back down, creating a tuck of fabric underneath. This will form the miter on the front of the quilt.
 Starting from the edge of the quilt, stitch the next side of binding down until you reach the next corner and repeat this process for all four corners.
 Leave an ending tail of 6″ – 8″ of binding. Trim off the excess leaving a few inches of overlap to work with. Open up the end of binding and place the beginning tail inside it.
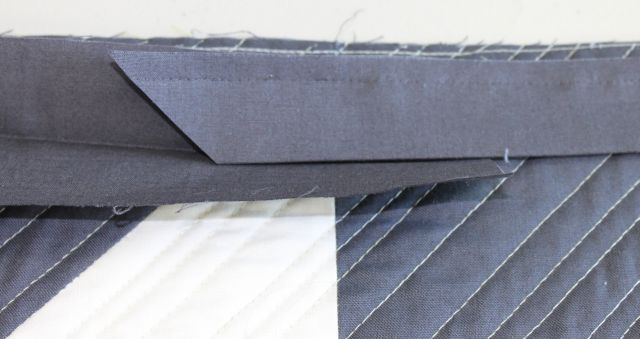
Using the cut angled end as a guide, lightly mark a line right up next to it. Then cut 1/2″ away from this measurement to account for seam allowances on both ends.
 Put the two tail ends right sides together, and sew with 1/4″ seam to complete the continuous loop of binding.
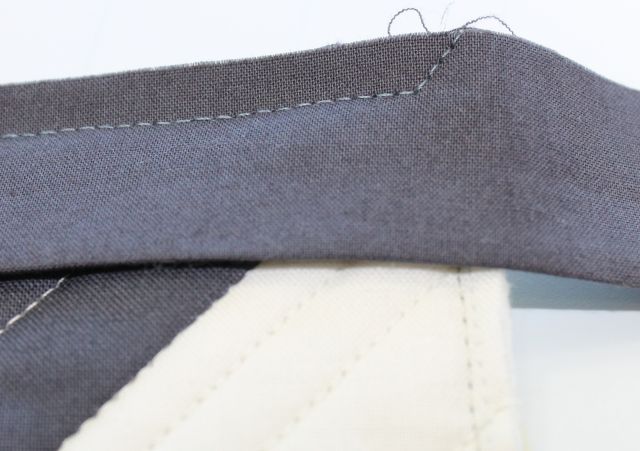
 Close up the binding and finish stitching it down on the front of the quilt. You are now ready to finish stitching the binding down on the back of the quilt.
 Step 5 – Secure with clips
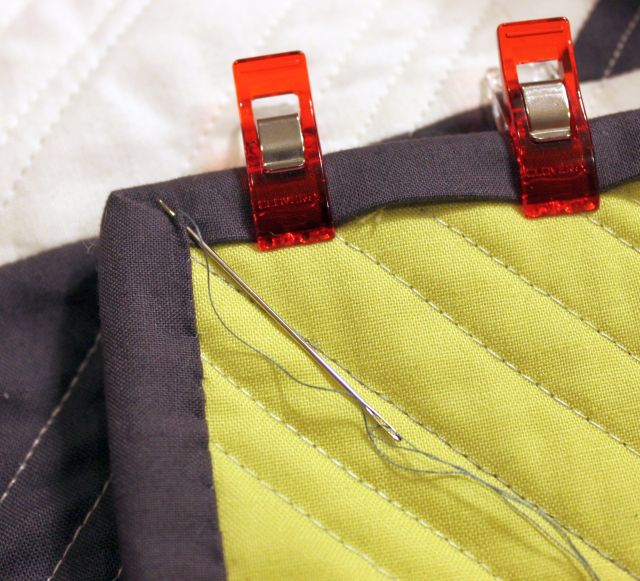
I find it easier to completely secure the binding to the back of the quilt with clips before I begin hand-stitching it down. For a throw sized quilt it takes about 100 wonder clips to go all the way around the quilt. Pins or hair clips work well, too.
 Step 6 – Hand stitch the binding on back
Put on a good movie and enjoy the relaxing process of hand work for a pretty finish.
Don’t want To Hand Stitch? machine binding tutorial Here.
Thread several needles using the same cotton thread you used to sew on the binding. Clip off about 18″ of thread to use at a time. Wrap the thread around the needle 3 times and pull it to the end of you thread to create a quilter’s knot. You can double your thread for extra strength and durability.
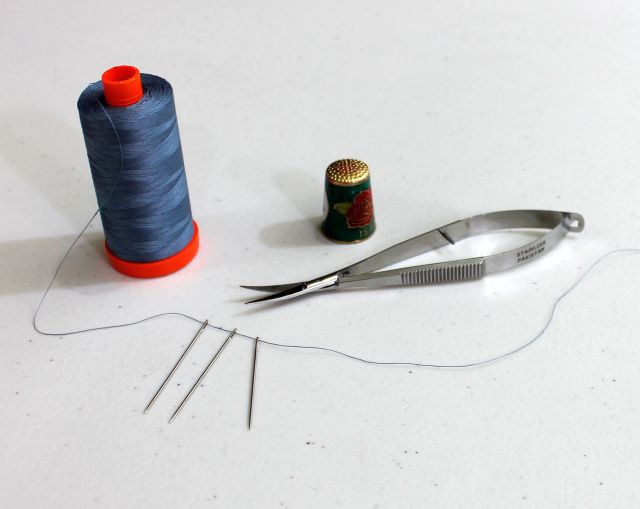 I use a thimble to help push the needle through the fabric when needed.
Tuck the knot underneath the binding, then grab a bite of the backing of the quilt and then a bite of the binding to complete each stitch.
 Continue forming each stitch by bringing the needle in behind each previous stitch and pushing it out ahead of the last stitch. Pull the thread slightly taut as you go.
 When you get to the corners, be sure to sew them closed. Take a few stitches on the back to close the miter. Push the needle through to the front, stitch the front of the miter closed, then push the needle to the back again.
 When you are near the end of a length of thread, make a knot, then take a stitch through the backing and batting only, pop it through the backing and cut off the excess. Continue in this manner until you’ve sewn down the entire quilt.
Congratulate yourself on a great finish!


Great tutorial with some great pictures. Thanks Christa!
Thanks to you, I’m going to bind my next quilt this way! Your directions are as clear and complete as directions given by Eleanor Burns and her’s are THE BEST! Way to go Christa!
Thank you for this tutorial! The corners always drive me BONKERS, so I’m definitely trying this technique on my next quilt!
Great tutorial, Christa! But it’s amazing that two quilters can sew binding to a quilt so completely differently! 🙂 I don’t do any of the things you do. Your binding looks lovely, in any case. I’m glad it works for you!
Great tutorial! I mostly make mine the same! The only difference is I use 2-1/2″, I stop at the corner and I don’t sew down the corners. I don’t like the look of sewn corners. The quilt is stricking!
I am like some of the others. I did not sew off into the corner although I saw that you had done that before. Tried it last night and it worked like a charm. So, it is not a personal preference to sew down the mitered corners, must it be done to hang a quilt for a show or to enter a quilt in a competition? Thanks for the tutorial.
I’m glad you found it helpful. Judges always recommend the corners are your binding to be sewn closed by hand whenever entering them into a quilt show so I’ve just gotten in the habit of it 🙂
But you are right – there are always our own personal preferences to consider. You are the boss of your quilt so go with what you like to do!
Awesome tutorial!! Such great pics. Thank you. I bind my quilts EXACTLY like this, except for a minor difference in the final join: I join them as you did in Step 2 (adding in the 1/2″ for seam allowances) and sew and then cut on the 45. Same difference. 🙂 I hand-sew the mitred corners on each side too as I’m hand-sewing the binding down. A friend got dinged points once when she entered a quilt into a competition for failing to do this , so I have ever since, even though I’ve only ever entered stuff one time… I’ll recommend this post to ‘all’ my readers, lol, as well as to all my quilting buddies!
This is a wonderful tutorial and will be a good reference! thank you for sharing. Beautiful quilt too!
What a well laid out tutorial with great pictures. This post will be getting a lot of hits! Thanks so much for sharing, Christa!
Great tutorial Christa!
Look at me, just reading along going…Check…Check…Check…when all of a sudden I got to your “sew off the corner” comment and I’m like….WHAT? I am so going to try this on my Pantone Challenge Quilt, it will be my next one up for binding.
I always mitered my corners; but just stopped a 1/4″ away from the edge…it never even occurred to me that I should/could sew off the corner.
Thanks for sharing!
Thanks, Christa! As a newbie quilter, I’ve never been sure where to start on binding. This tutorial has given me the info I needed to cut that binding and get going.
It looks like you’re using Kona Charcoal for the binding–if so, what color Aurifil are you using? I am trying to find a matching (or close, I’m really not that picky) thread to charcoal, and don’t have a color card yet.
Hi Christa. My fingers no longer work well for hand sewing. I have been stitching in the ditch. What else can you suggest for me to try? I do the rest of the process the same as you do.
Great question! When finishing by machine, I will use a decorative stitch and sew from the back of the quilt, right along the edge. The bobbin thread ends up showing on the front of the quilt as a decorative element. I don’t try to stitch in the ditch as I have never gotten that to work precisely.
I have a machine binding tutorial here: http://christaquiltsblog.com/2011/08/22/machine-binding-demo/
It’s an oldie but a goodie!
After you machine stitch the corner at an angle and are ready to hand stitch, do you clip the corners? Hope I worded that clearly. Thanks.
Thanks for your question! No, I haven’t found it necessary to clip any corners. They are nice and sharp by following the steps that I outline 🙂
Christa how can we go wrong with such clear instruction! Thanks for helping. US improve our skills
Thank you for this tutorial, Christa!!
Sent from Samsung tablet
Thank-you for another helpful lesson!
I almost skipped reading this blog post (so bad, I know), then decided I might learn something new… so why not take the time to read it?! I am SO glad I did! I have not found a good way of sewing the ends of the binding together until now. YES! I am SO excited to try this!! I’ve even bought the binding tool thing, tried other tips and tricks, but this one is so simple and matter-of-fact… I am definitely doing this next time!
Thanks so much, Christa!
Oh so timely! I have 3 quilts ready to bind. Was going to write it up, but you’ve already done that! I’ll just link back to your directions. Love it! Thanks.
I bind the same way but haven’t sewed off into the corner. Great tip I’m going to try it on my next quilt. Thanks