We are nearly to my favorite part of any quilt – the machine quilting! But first we need to prep our quilts by making sure the backing is big enough, and then basting. I love making pieced backs from leftovers or other coordinating fabrics because that makes the quilt twice as nice!!
Because I had too many pictures of this process to share, I thought it would be much easier to put them all together into a super short video and talk over the process. You can watch that by clicking play below:
Once the quilt is basted, you are ready to quilt. Just remember, all of these quilt along posts will stay up indefinitely so you can make your quilt any time you wish. I’m here to help you every step of the way!
Ready to practice your modern machine quilting? Try these 2 fabulous free-motion fills and see how you can tweak them to make them your own. Click the video below to watch:
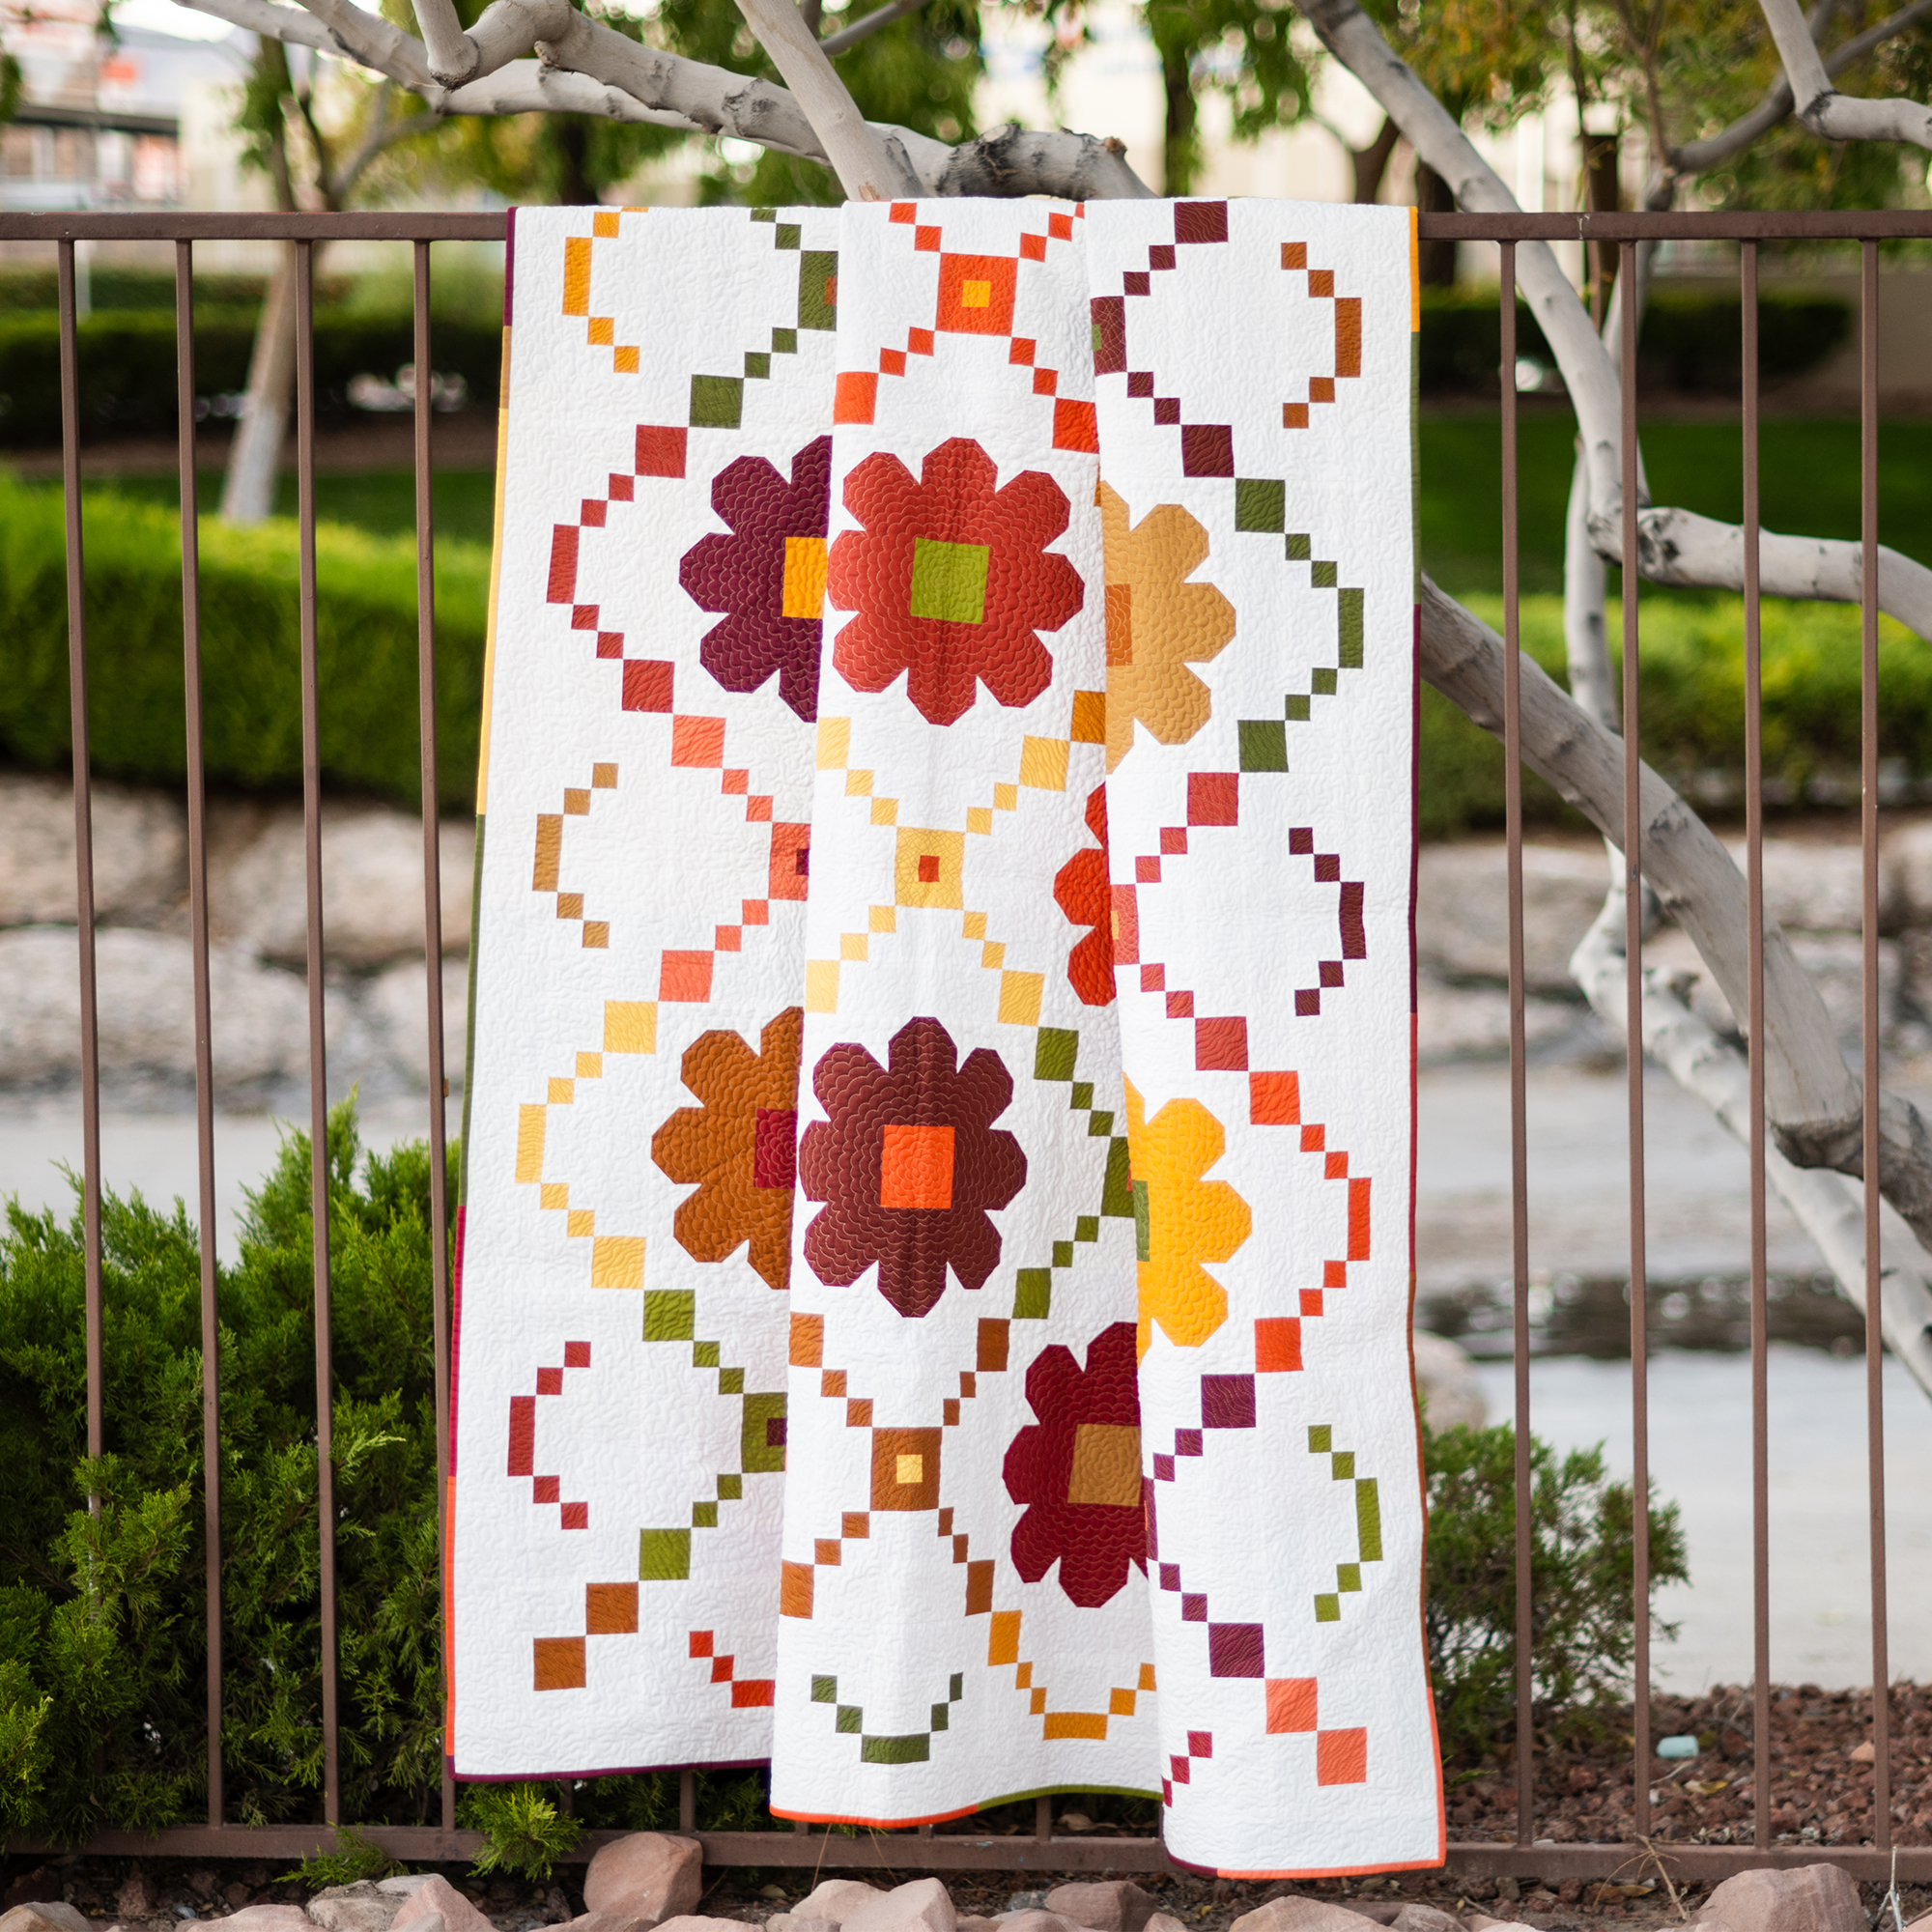
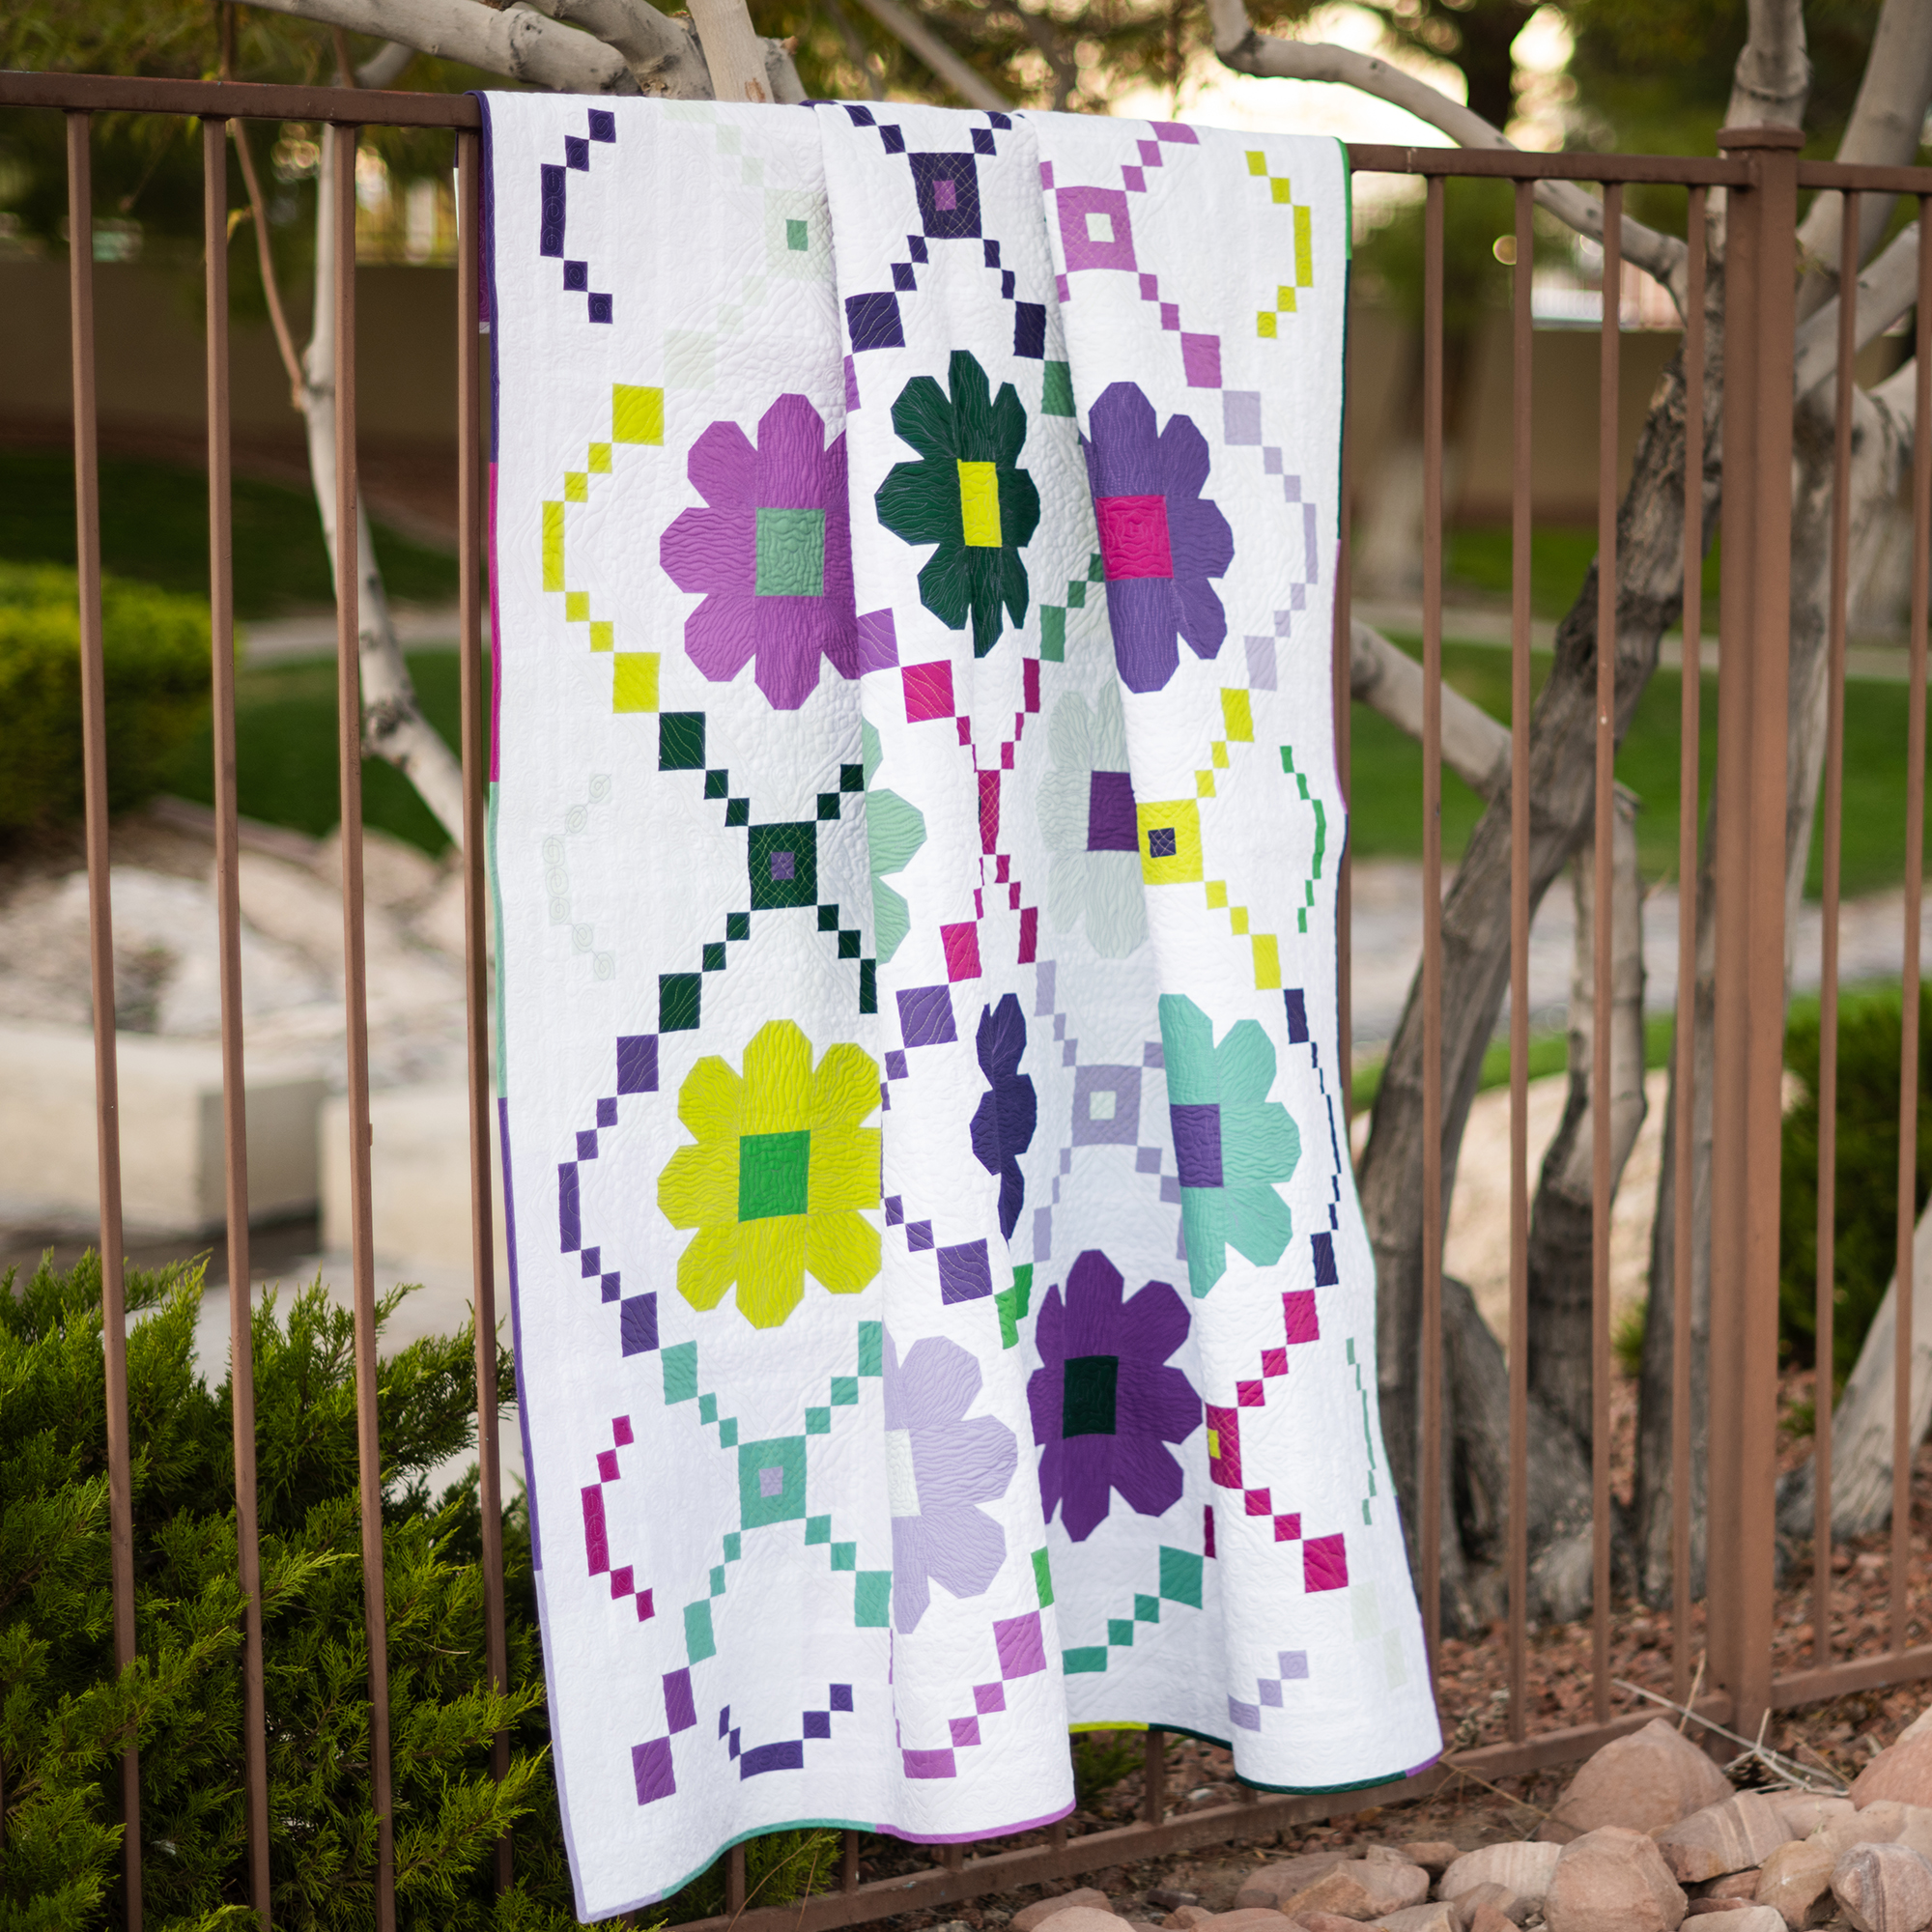
Featured Quilt – Surplus Strips
I turned the bumps from clamshells into a floral swirl design by combining them with a basic swirl technique. Then I quilted it edge to edge on the white version below Grab the Surplus Strips quilt pattern to make one for yourself!
Bonus Video – Quilting Surplus Strips 2 Ways
See how I quilted both of the quilts below using 2 different free-motion motifs. You can apply any design I’m sharing with you as an edge-to edge design on any quilt in your UFO pile!
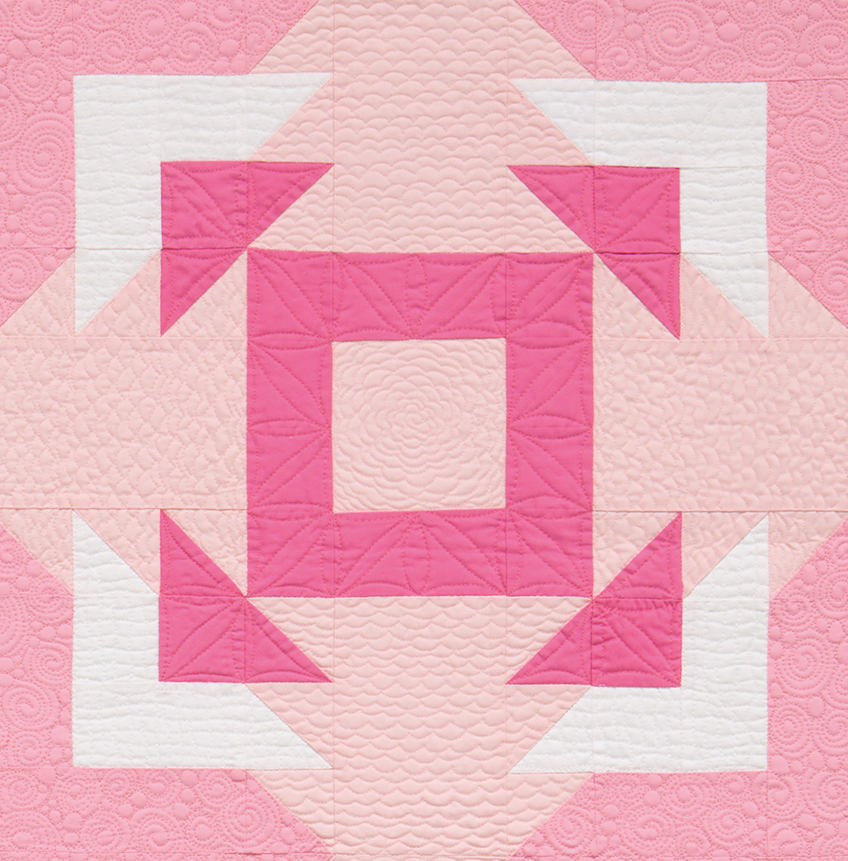
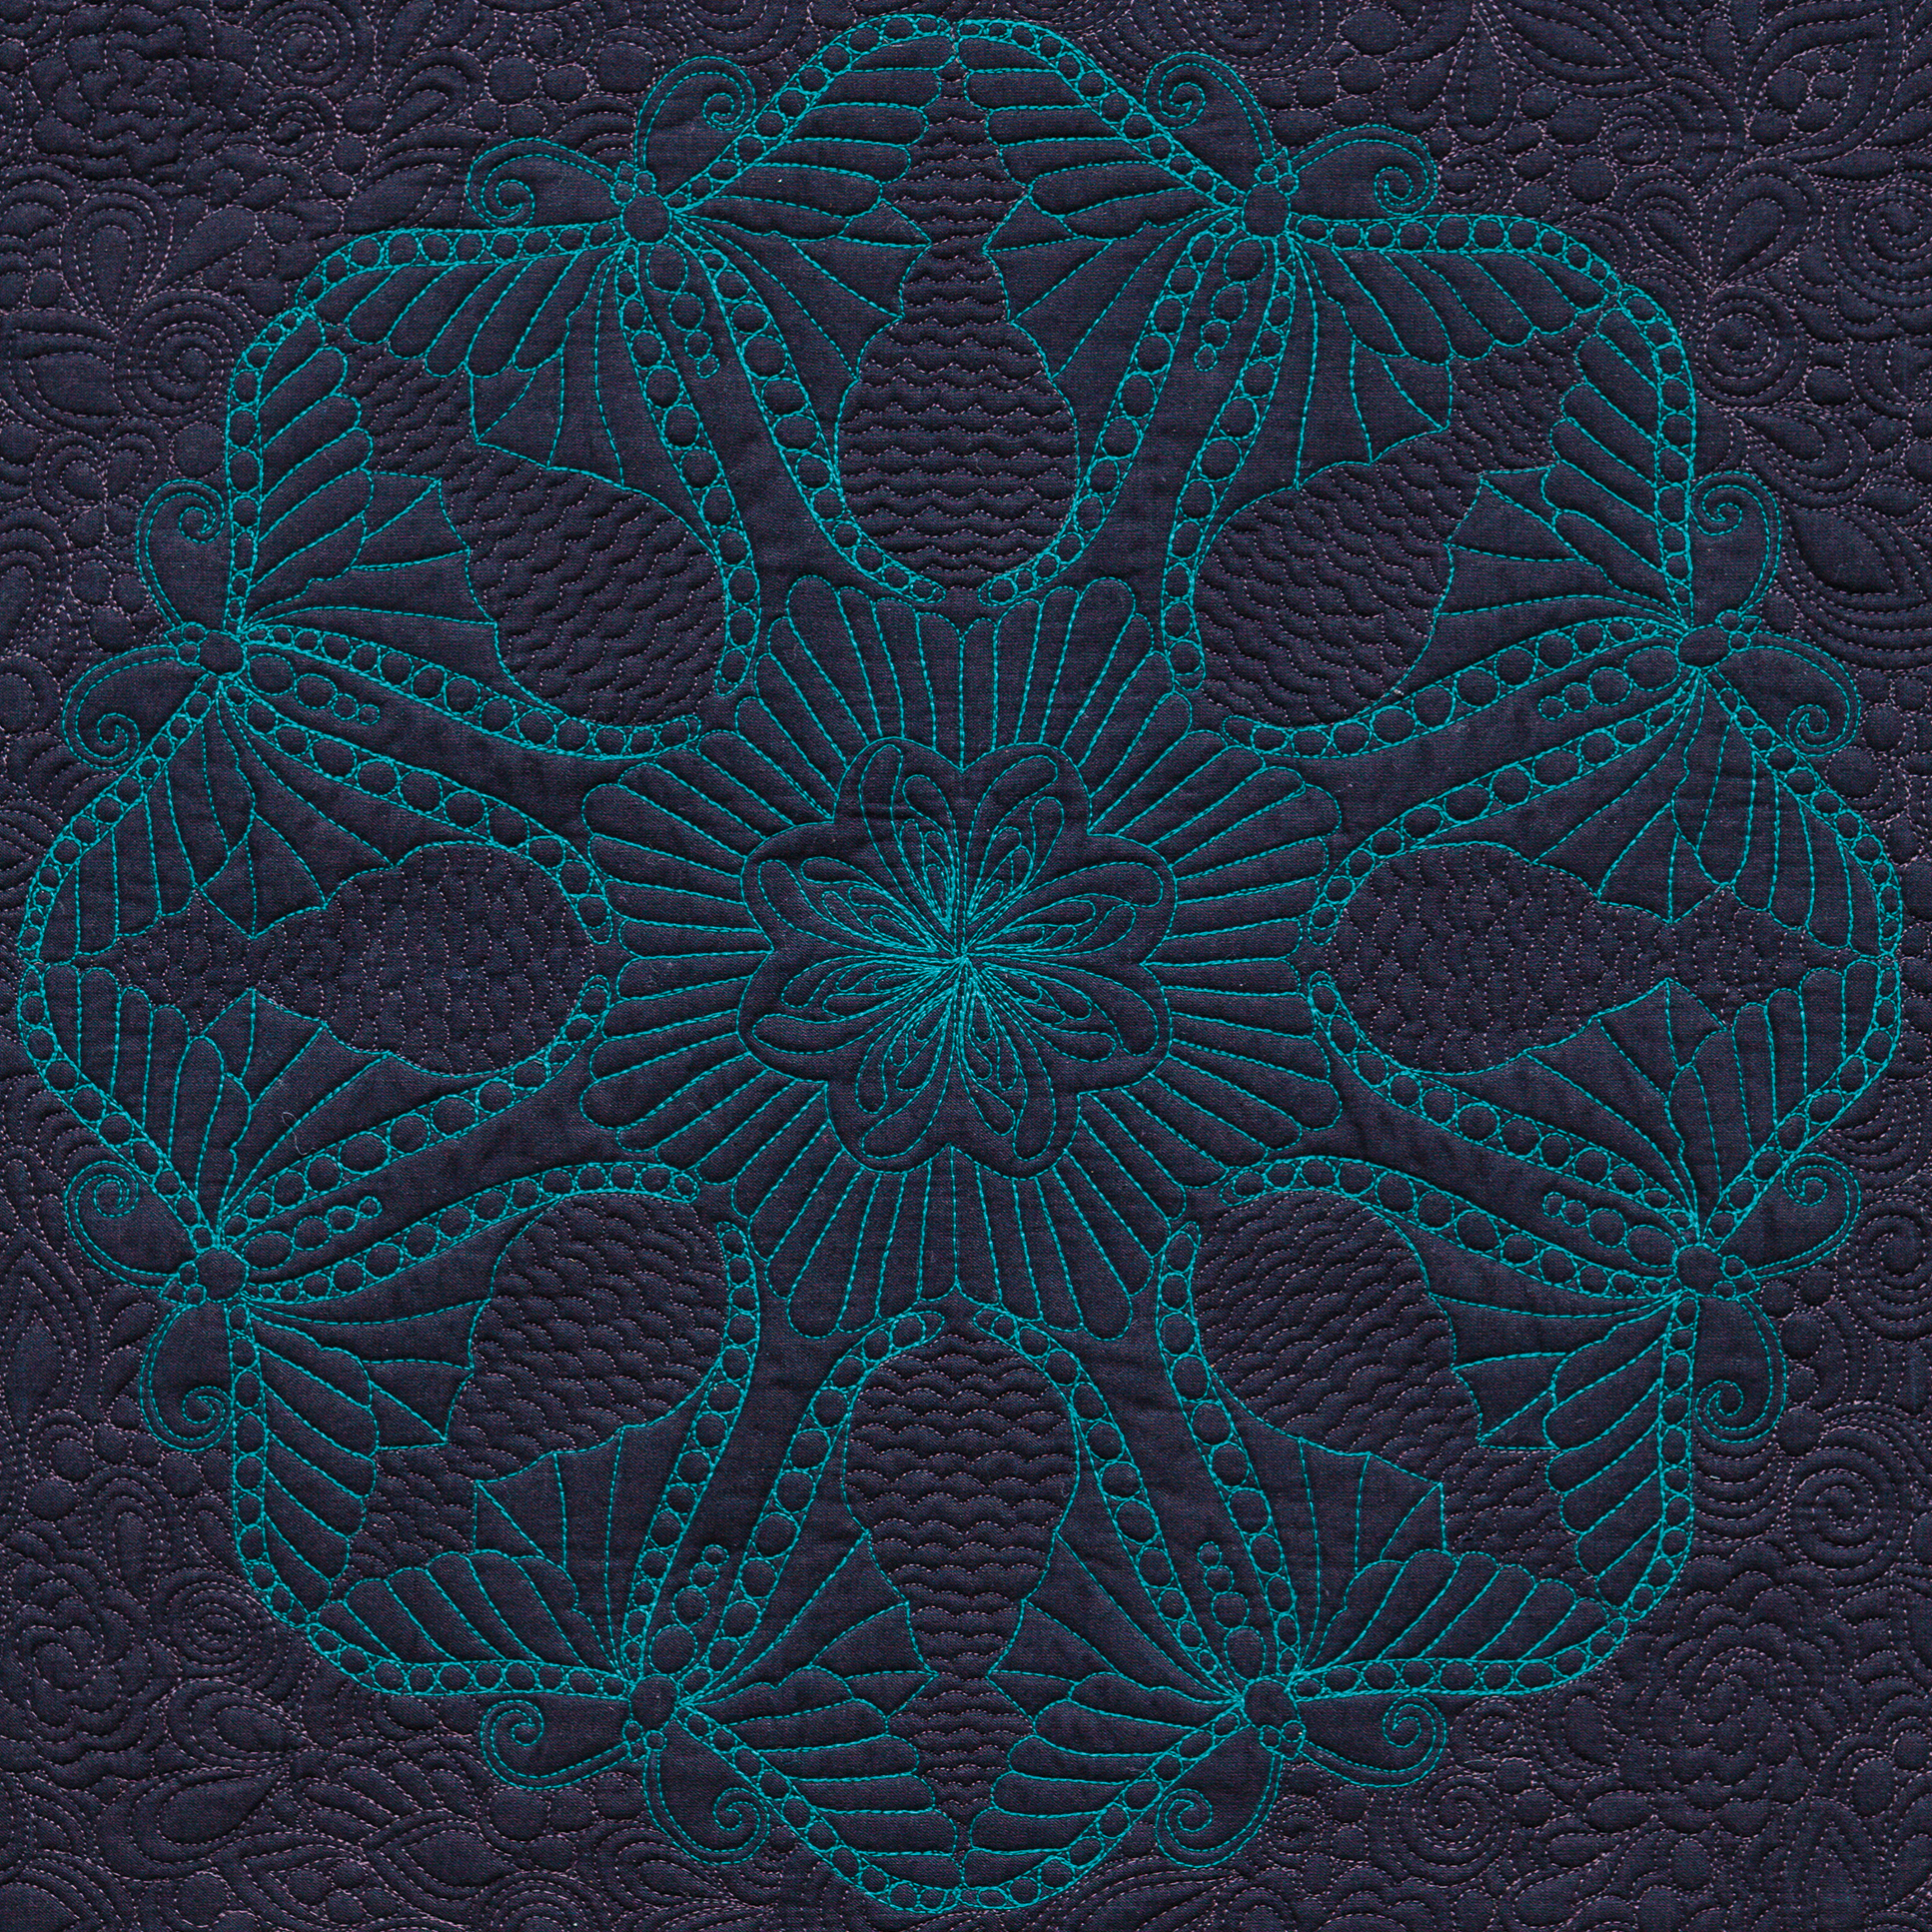
More Ideas for Quilting Clamshells
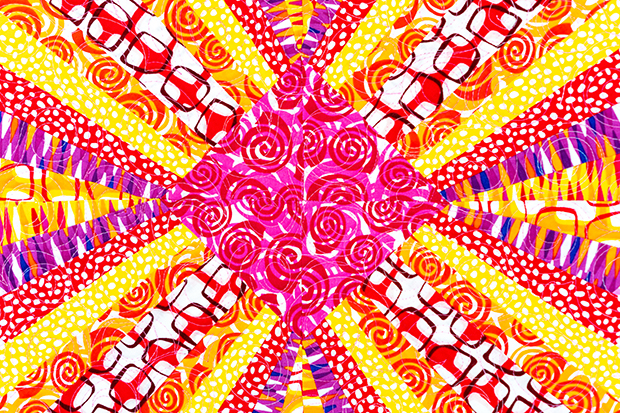
The pink quilt below shows clamshells as a background design, repeating the motif in the center. The dramatic black/teal whole cloth utilizes clamshells as a filler motif to highlight the focal point of this design.
The new year is a great time to pick up a new hobby, or develop one you’ve been working on. Well I’m excited to say that 2025 is definitely the year to improv your machine quilting skills! My Year of Free Machine Quilting Tutorials has begun, kicking off with this in-depth introductory video. Click play below to watch:
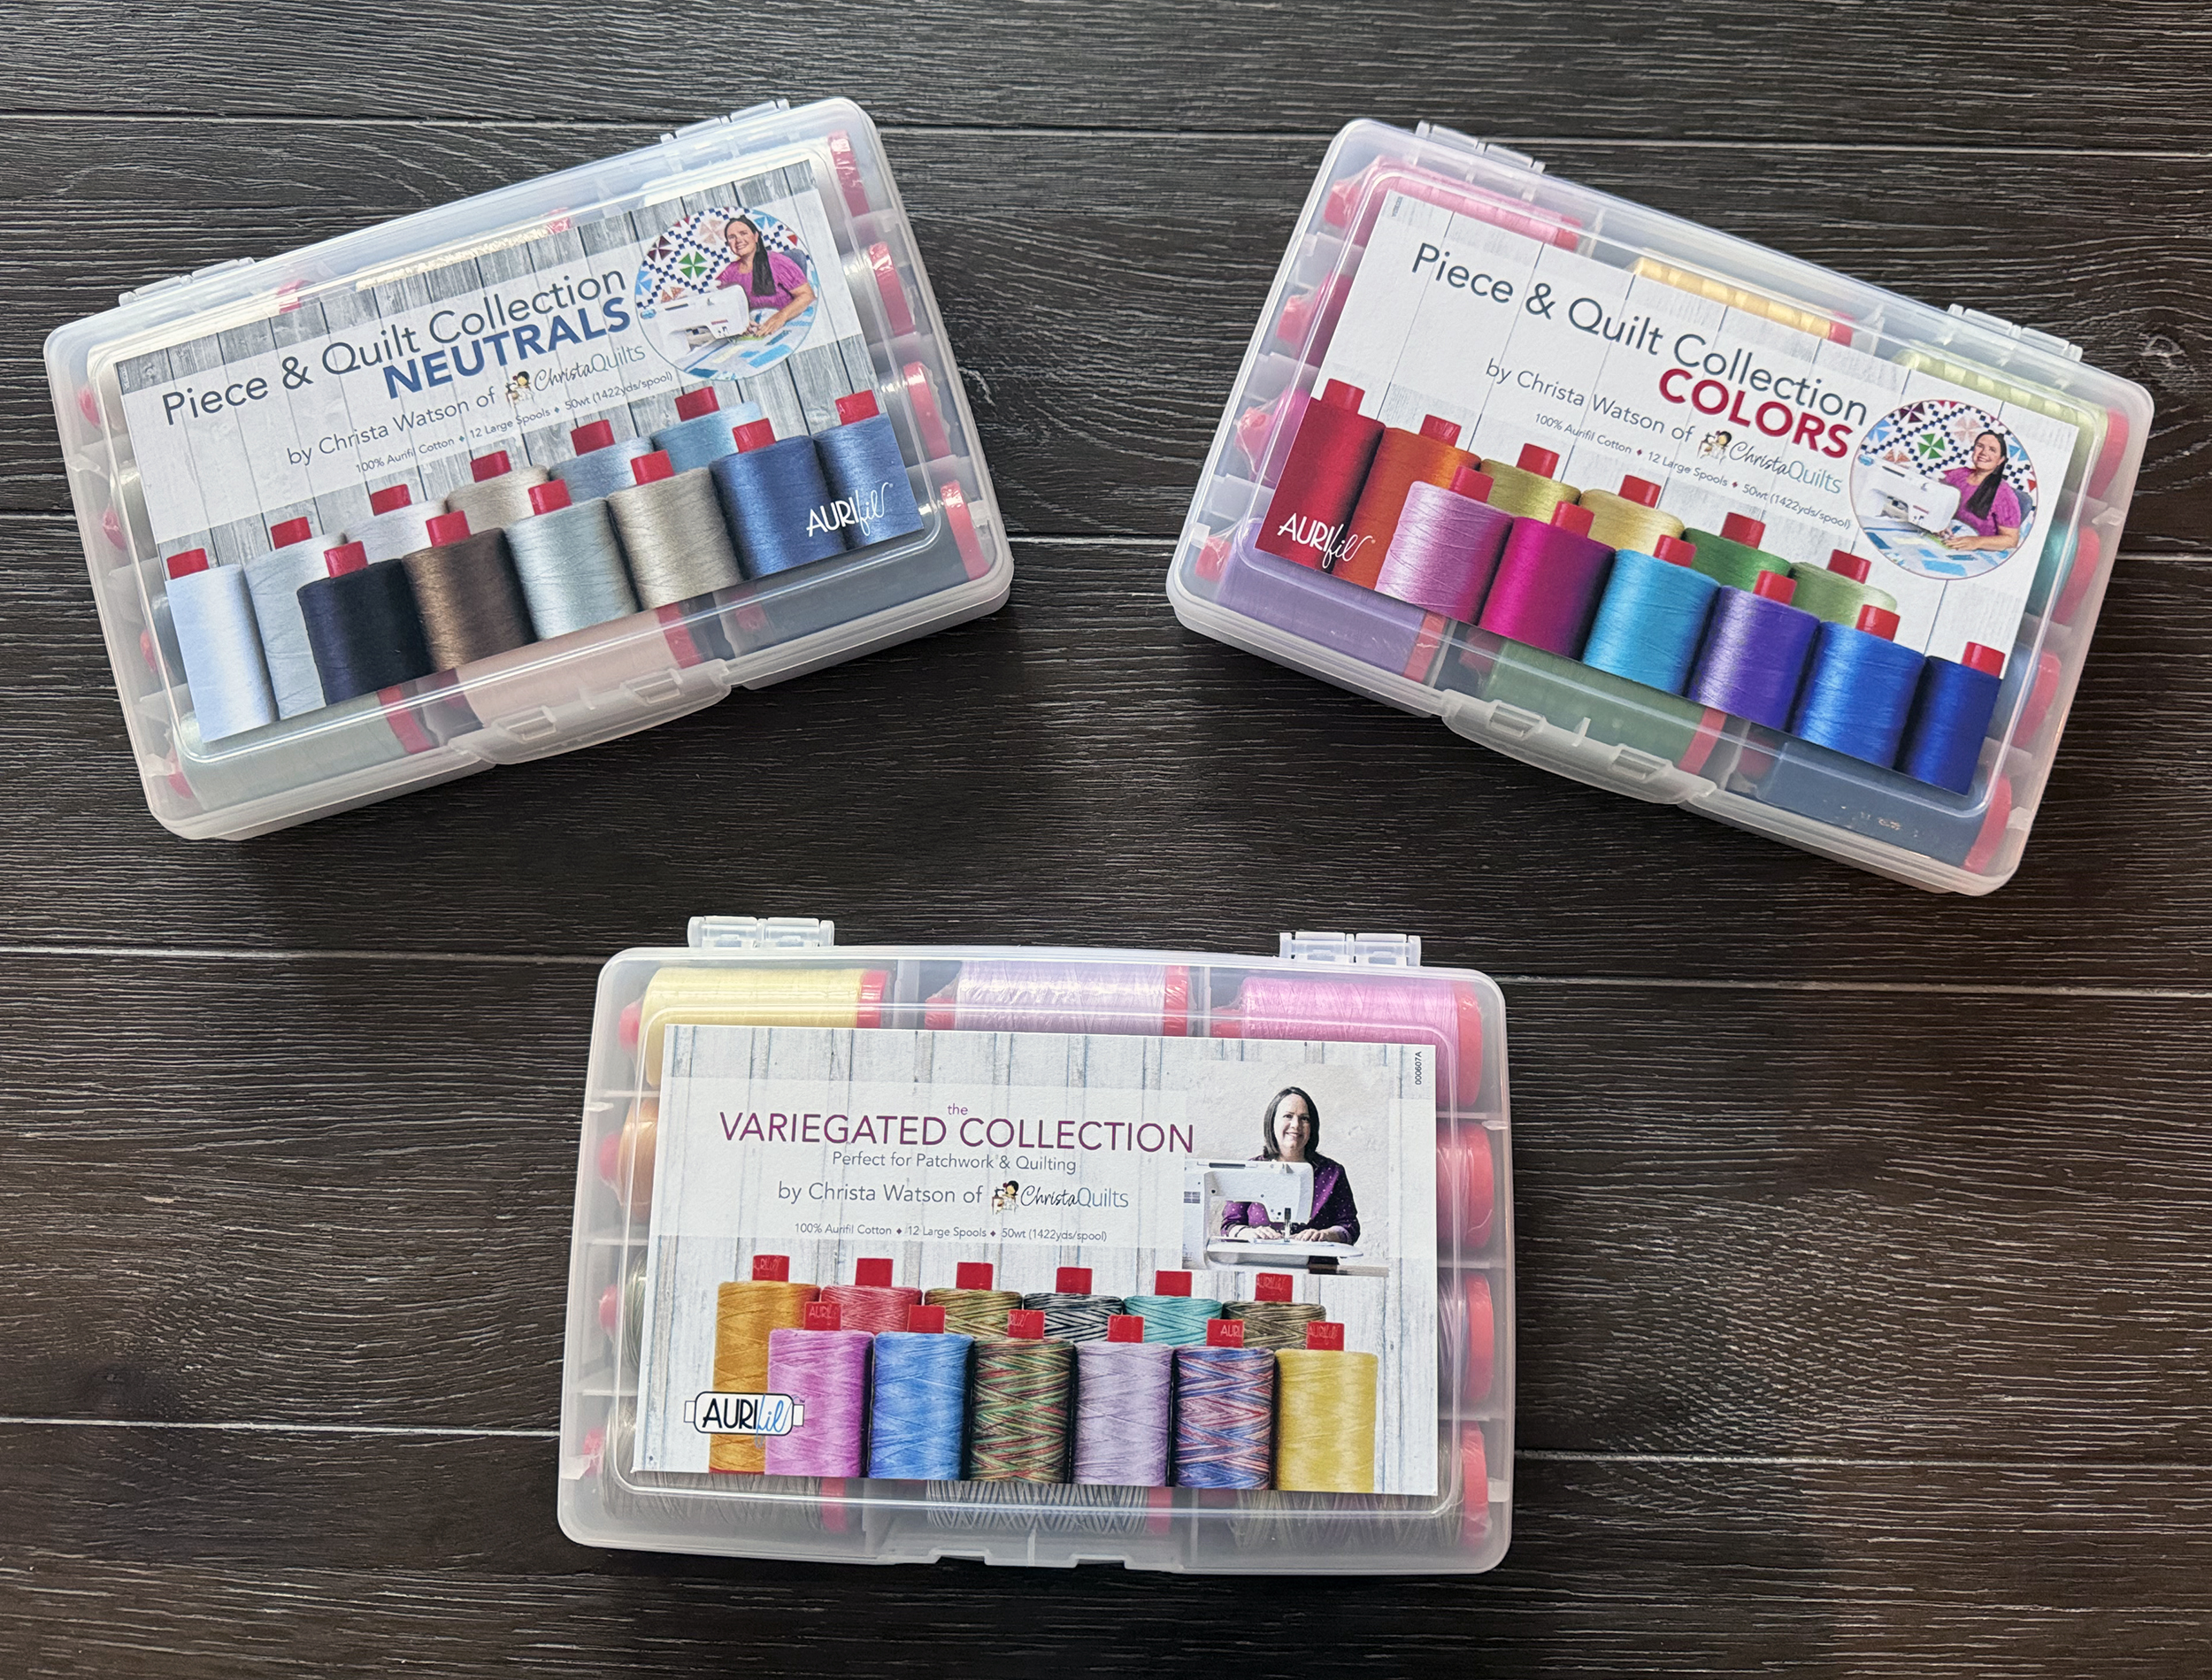
Before we get started practicing, it’s important to set up your machine and gather your supplies. To make it easy, here are a few of my recommended supplies that I mentioned in the video above.
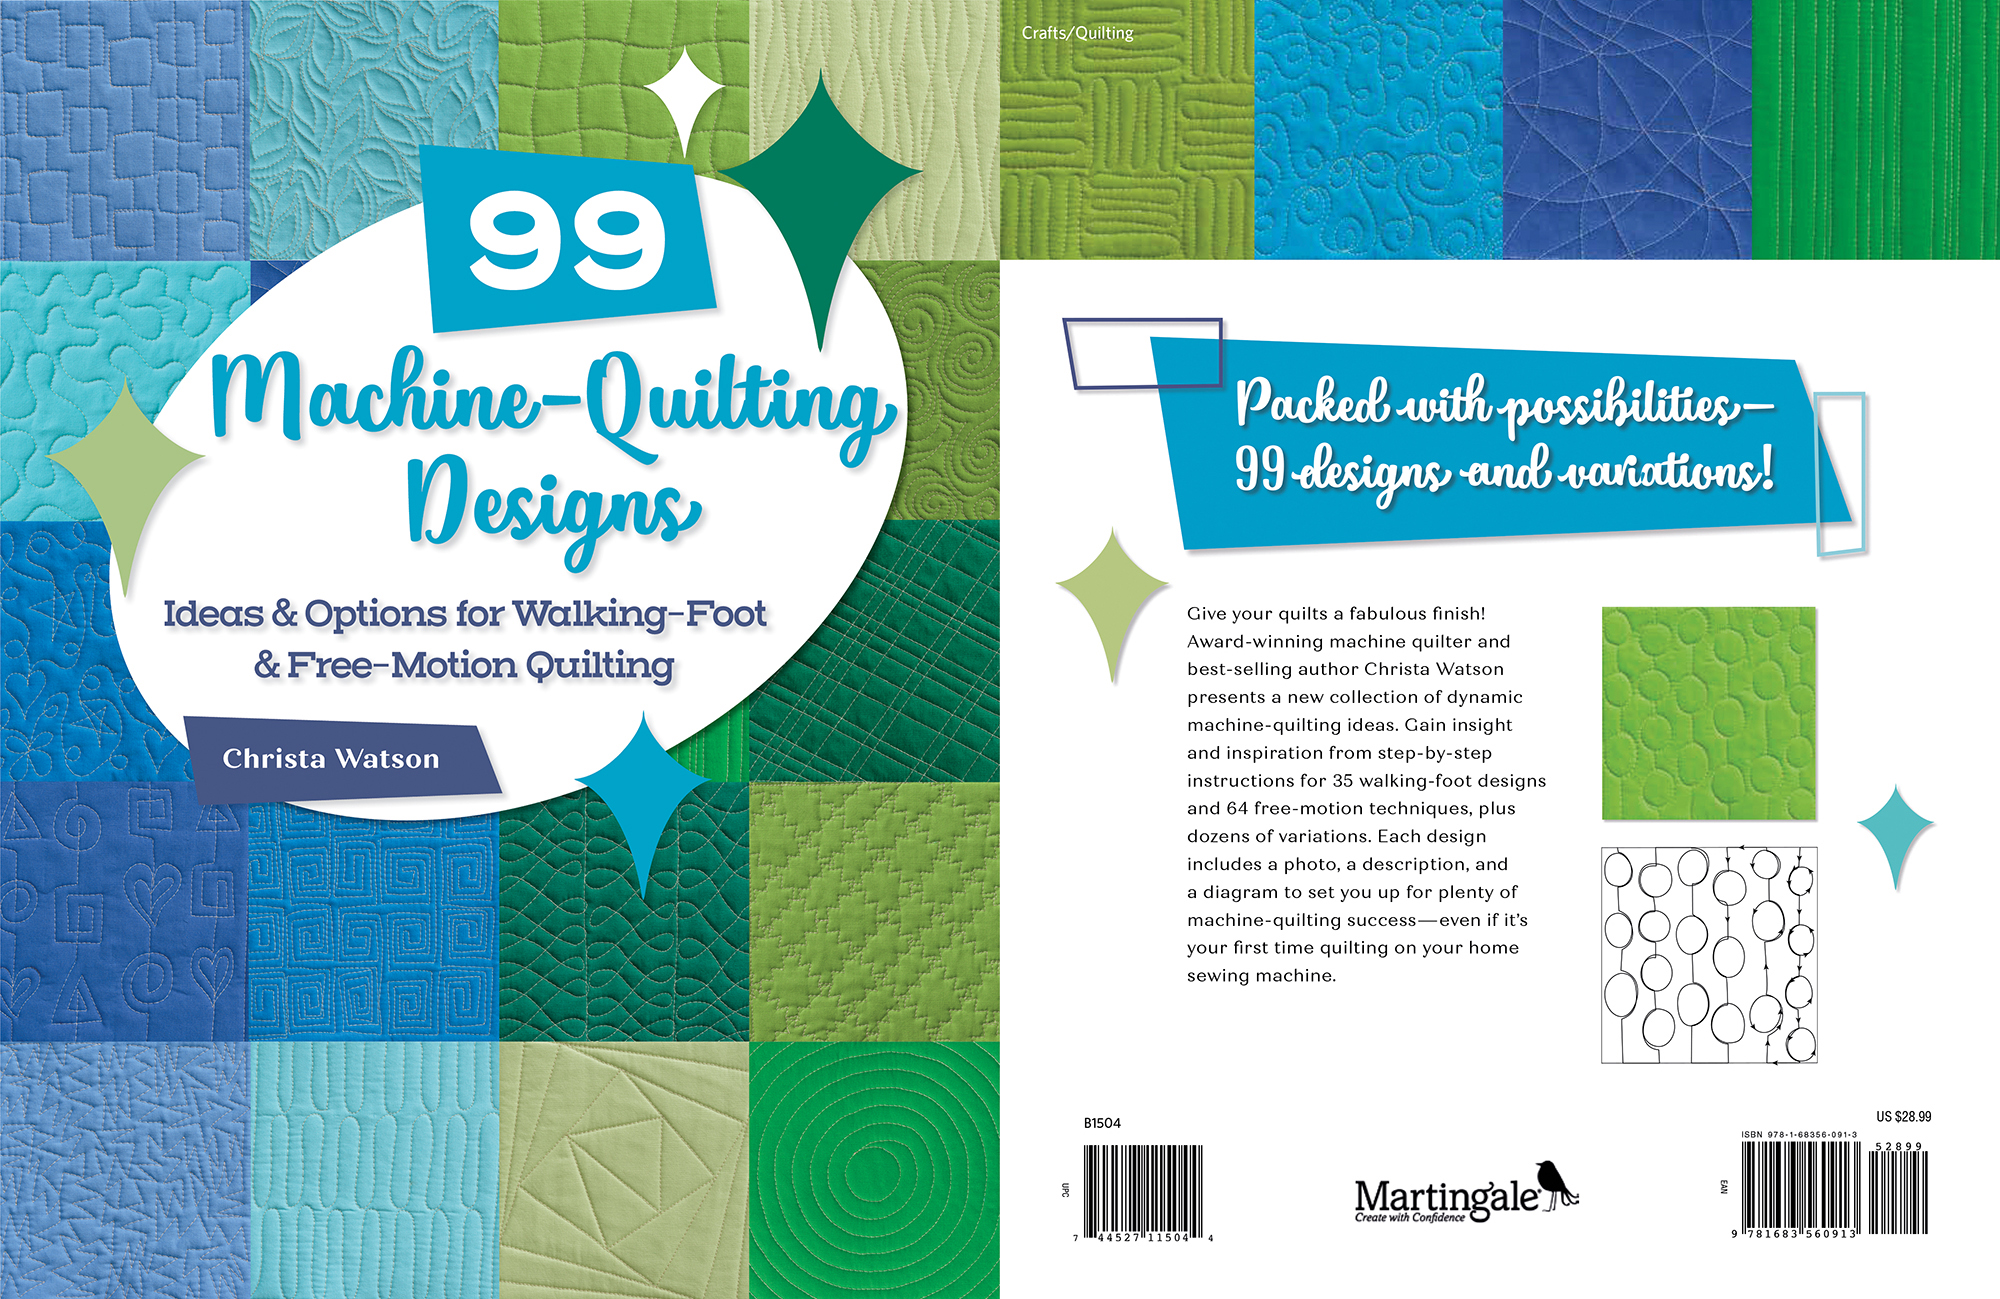
I’m so excited to demonstrate on a full quilting sample for every single design in my book, 99 Machine Quilting Designs. Although it’s not required to watch the videos, I highly recommend it as a great resource to follow along. Think of it as pre-written notes for the entire series.
Along the way I’ll share bonus tips and tricks using both walking foot and free motion motifs. My goal is that by the end of the year, you’ll see a vast improvement in your quilting skills. In fact, I’m sure you’ll start to notice smoother stitching in just a few weeks!
For example, here’s a bonus video I’m sharing along with the introductory video. It’s a longer sneak peak showing how I quilted my Daisy Chain quilt 3 different ways. This is the cover quilt from my book, How Do I Quilt It? Click play below to watch:
Each new video tutorial will post to my YouTube channel on Fridays at 8 AM Pacific Time. They are all pre-recorded and edited ahead of time, so you can watch them anytime, on *your* schedule! I’ll include a reminder blog post each Wednesday, just in case you forget. And you can subscribe at ChristaQuilts.TV so you don’t miss a thing. Watch the videos as much as you like. Pause and rewatch your favorite sections so you can work comfortably at your own pace.
In every video, I get down to the nitty gritty right away. And the comments section is lively and educational, too! I read and answer every single one. So rest assured, if you have any questions at all, I’m happy to help!
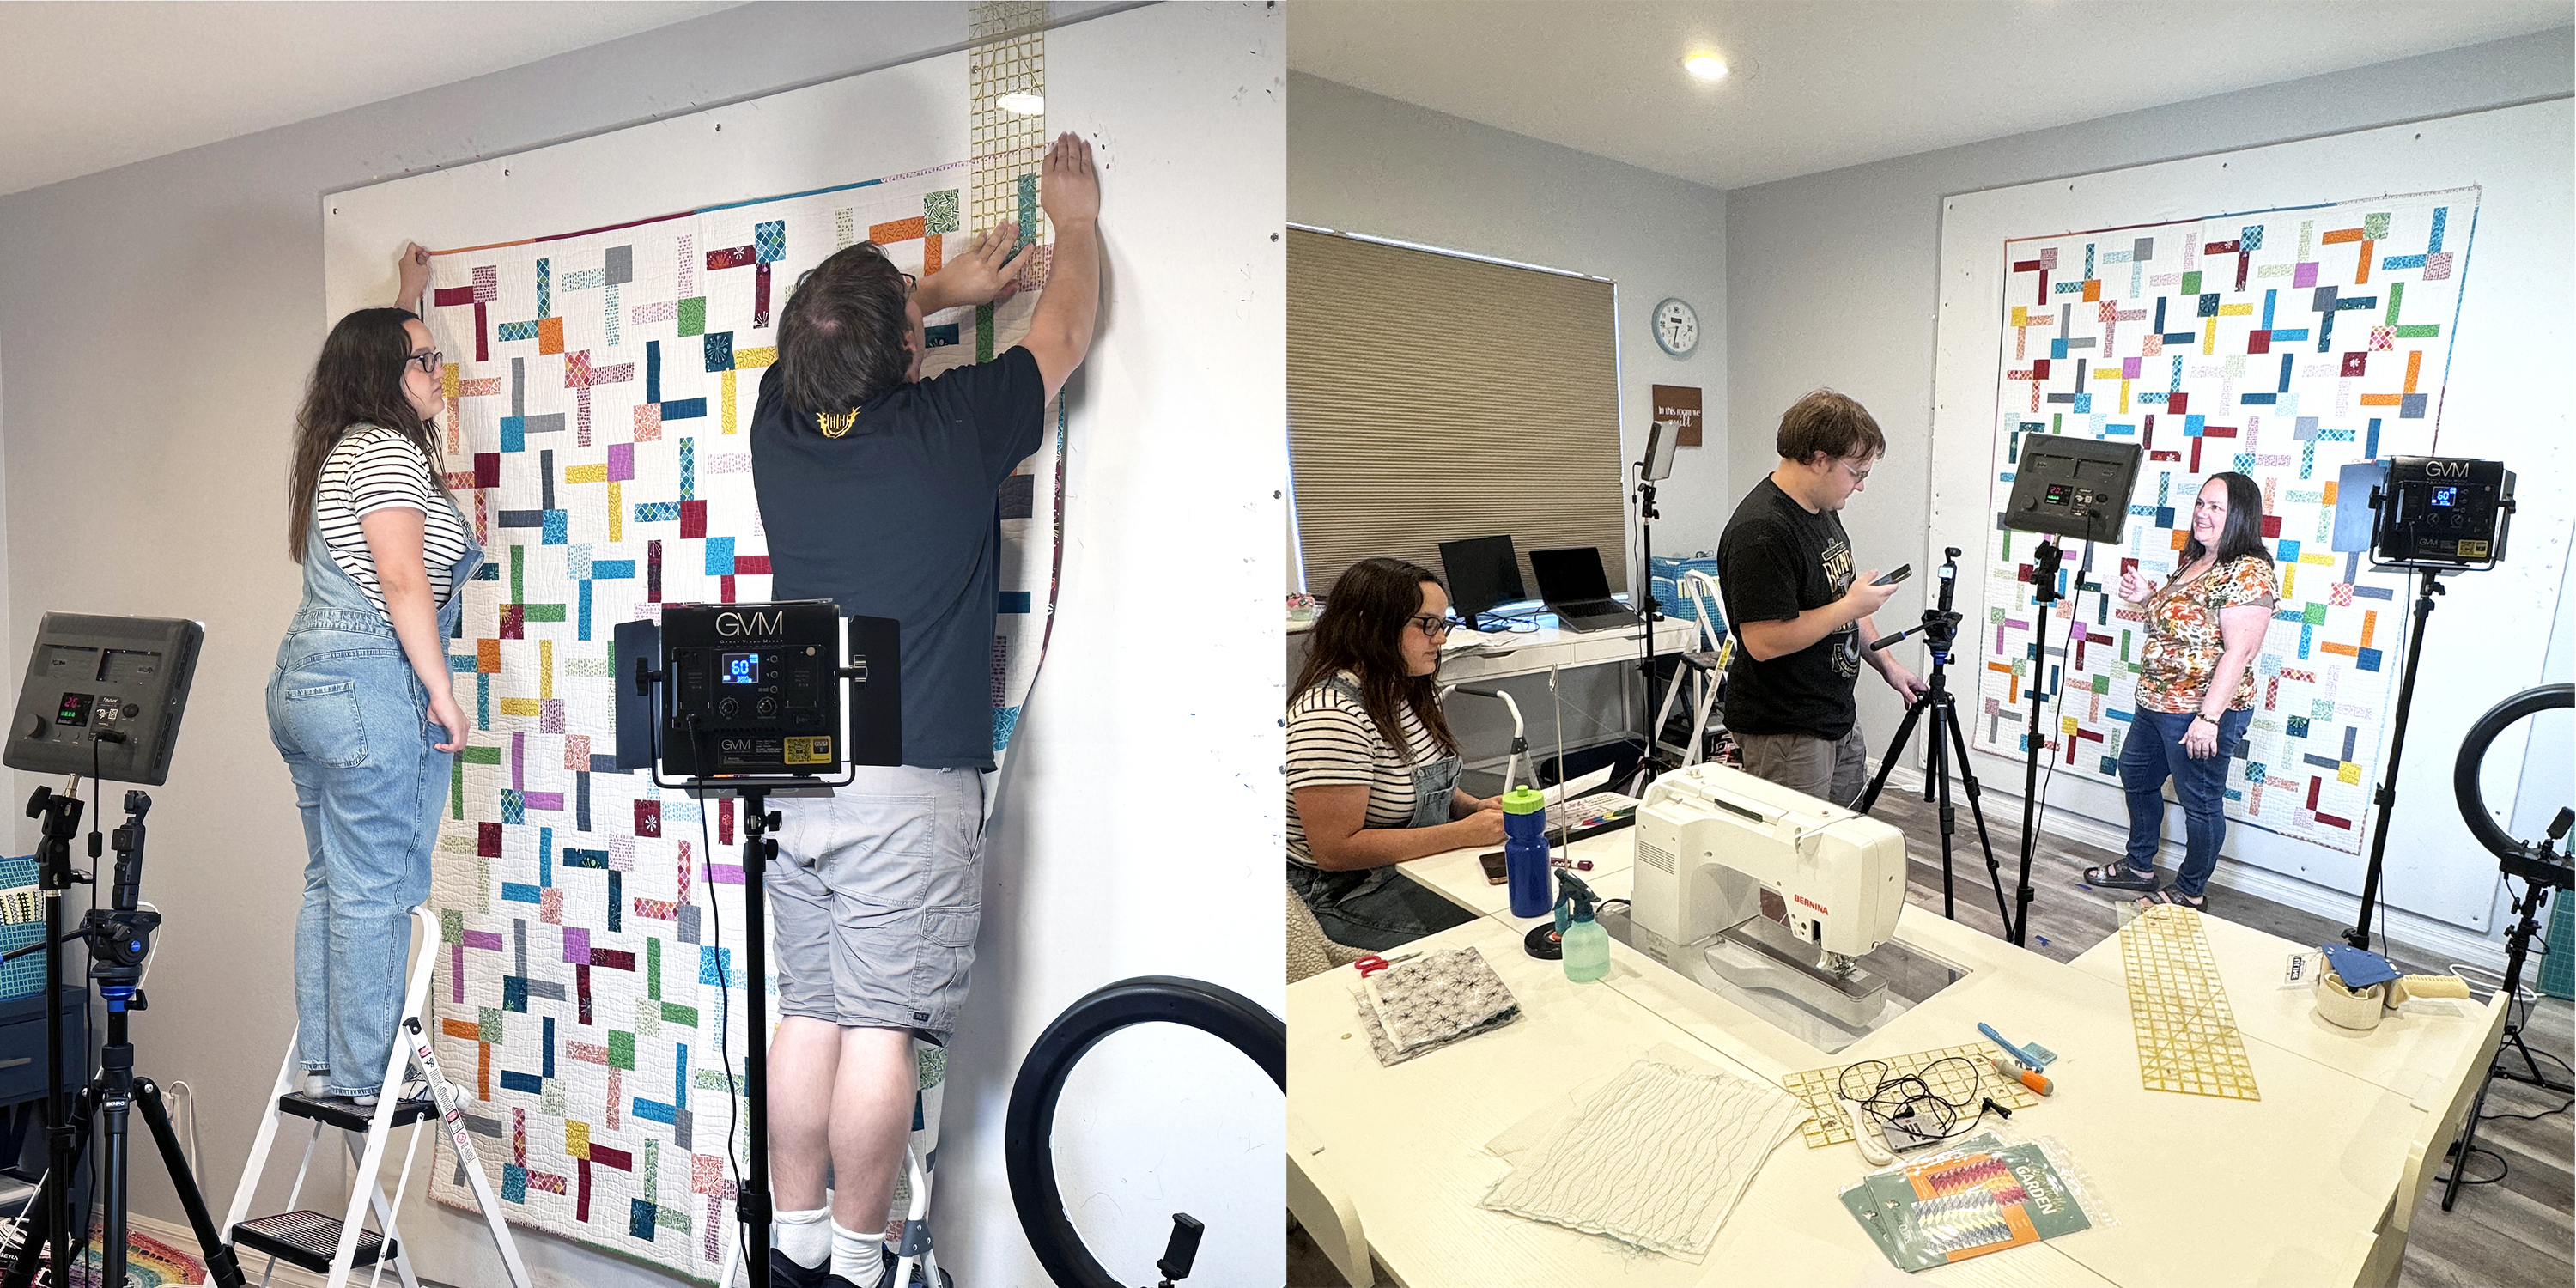
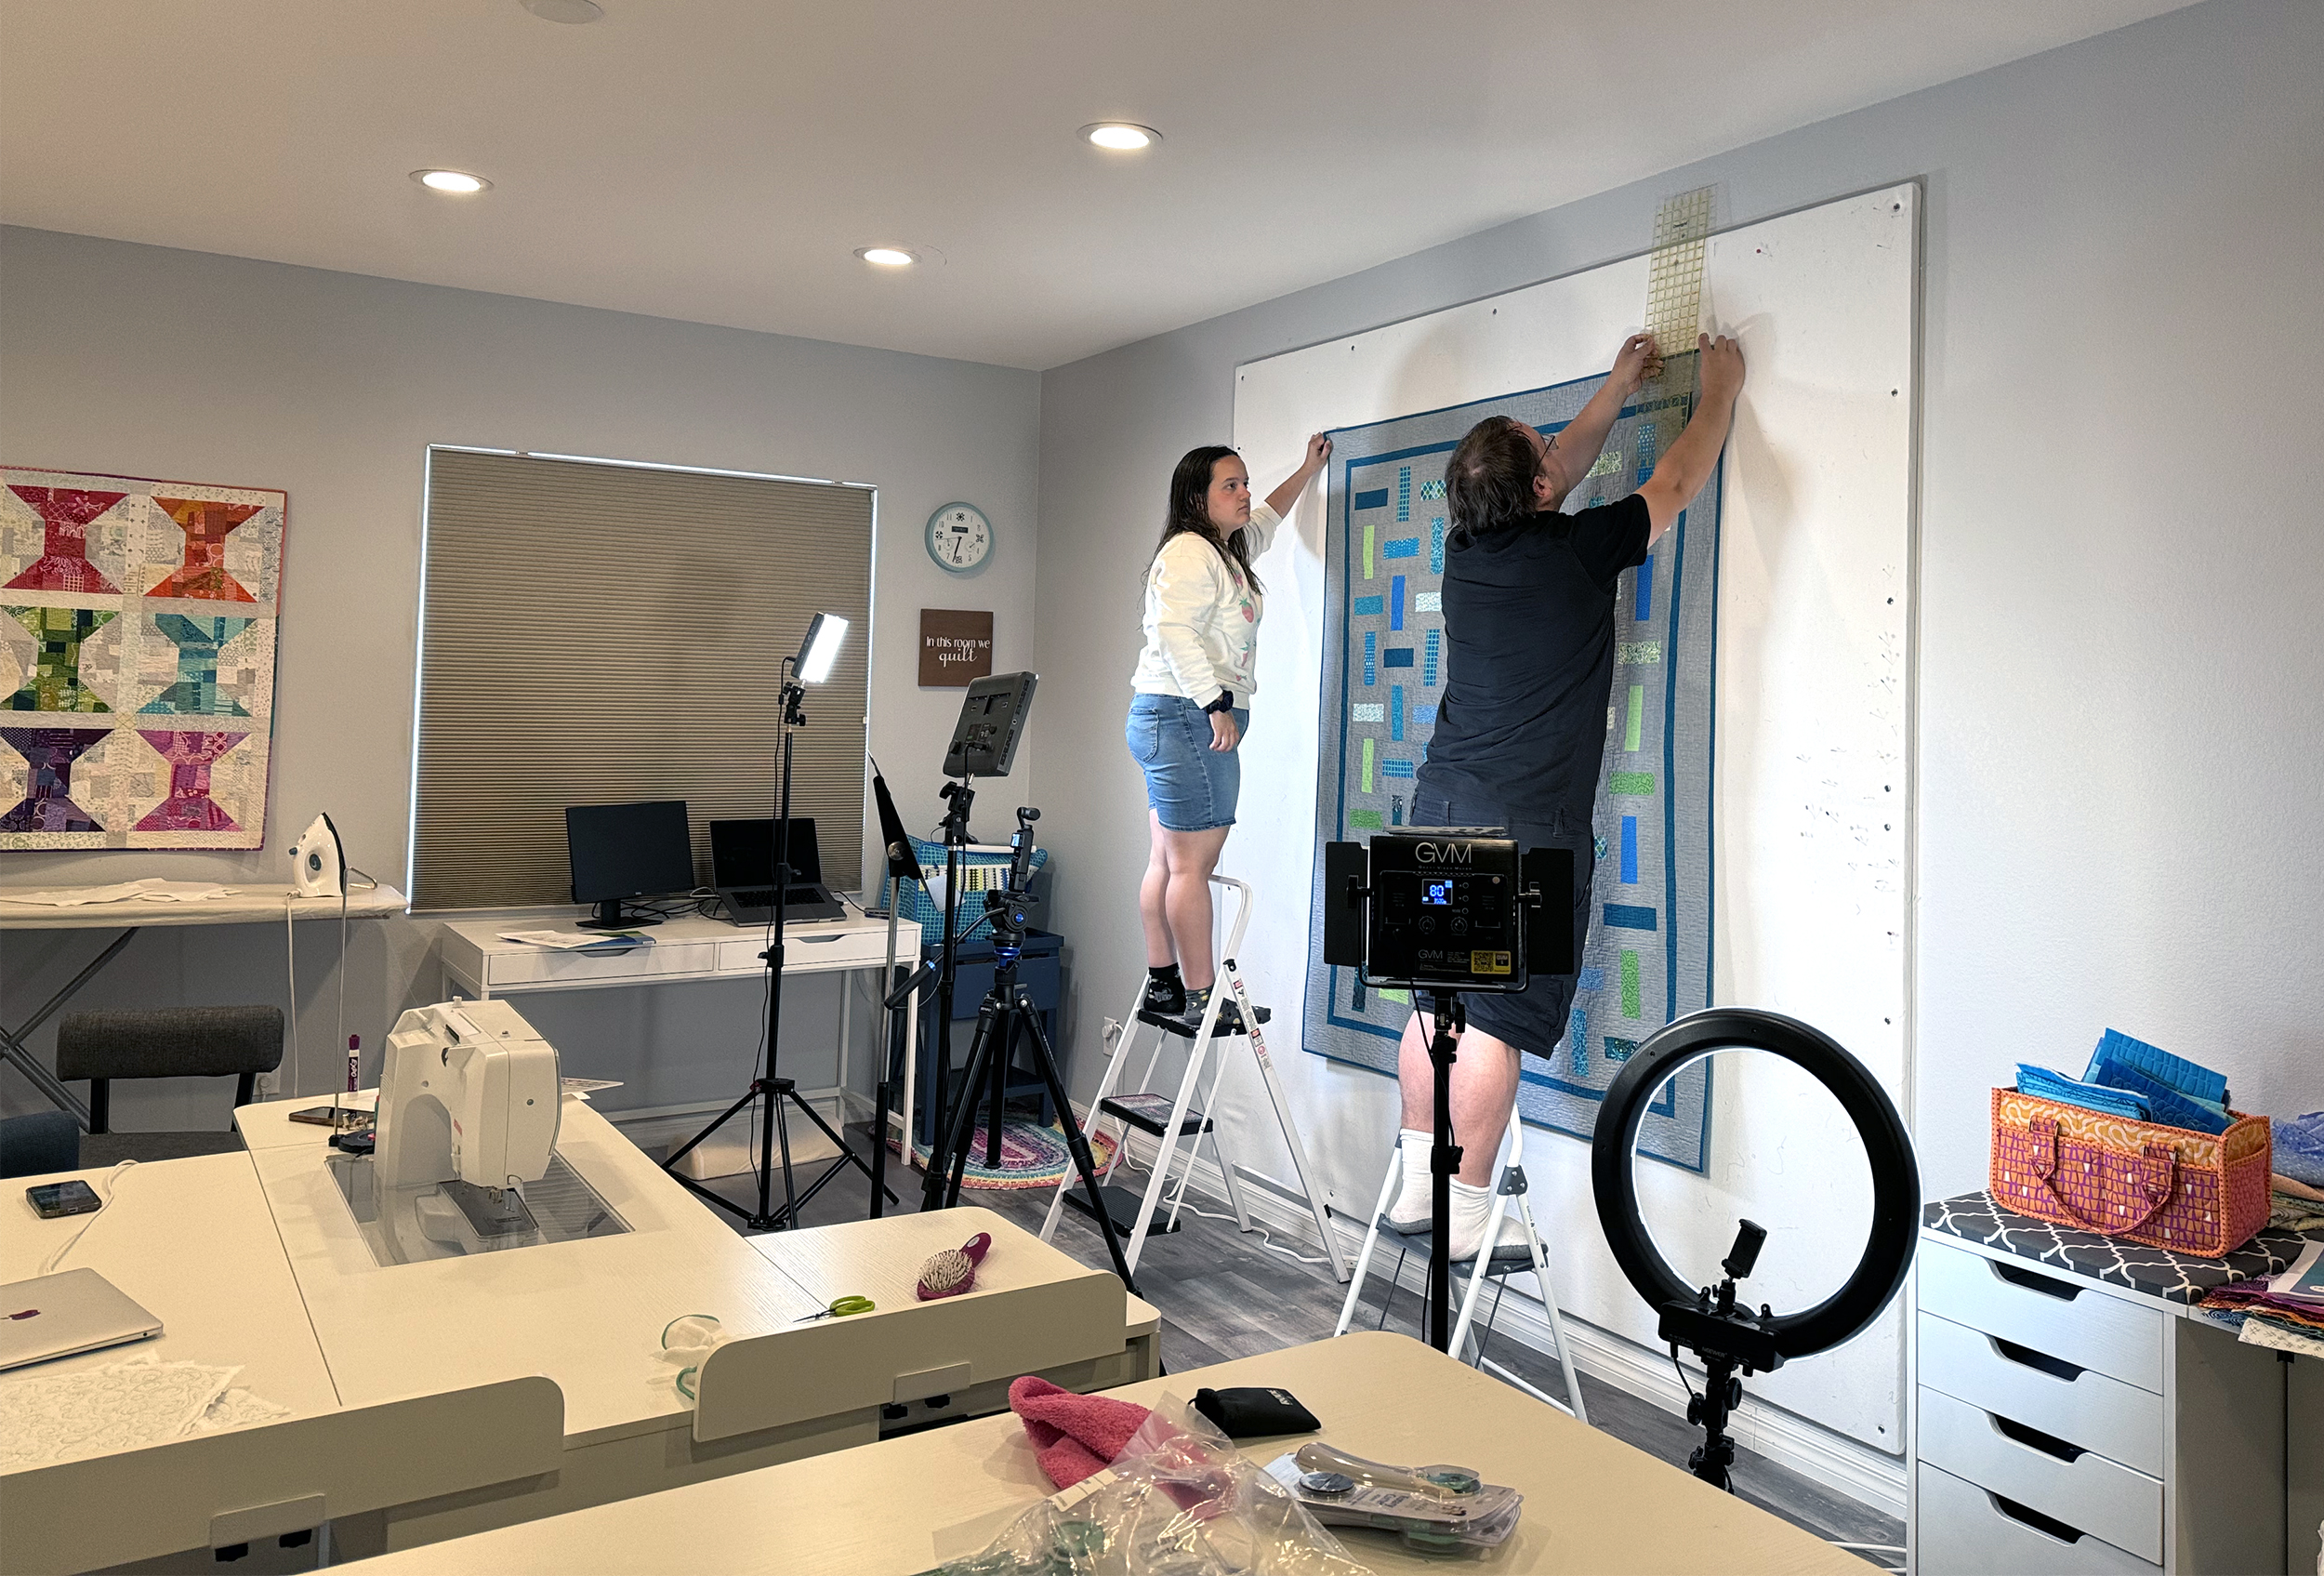
I couldn’t have pulled this off without the help of my college kids. They worked hard behind the scenes to help me hang quilts, edit all of the videos and generally keep me on track. I’m sure they enjoyed bossing their mom around to get this done, LOL!
I also have to thank *you* for supporting my little business over the years. It’s allowed me to work from home while raising the kids. I couldn’t be more proud of the education and career paths they’ve chosen, and I love that they enjoy working for me part time during their breaks.
Starting in January of 2025, I’m excited to share an entire year’s worth of machine quilting tutorials over on my Christa Quilts YouTube Channel. This is something I’ve been wanting to do ever since I wrote my book, 99 Machine Quilting Designs. With the help of my tech savvy college kids, I’m finally making this dream a reality. Click the video below for a sneak peek of what’s to come!
Grab Your Quilting Textbook to Follow Along!
Although the entire series will be free to watch, I highly recommend getting my book to follow along. It’s the perfect textbook for independent study as you practice your machine quilting skills. It’s available as an instant PDF download which you can save to your computer for quick and easy reference!
We filmed about half of the series over the summer and the kids have spent the last few months editing them together so they are ready to go starting on the first week of January. That will take us through until about the summertime. Then, over the winter we’ve been working on the other half of the series which will run through the end of 2025 and a bit into 2026. I’m very pleased with how everything is looking so far and I’m excited to share it all with you!
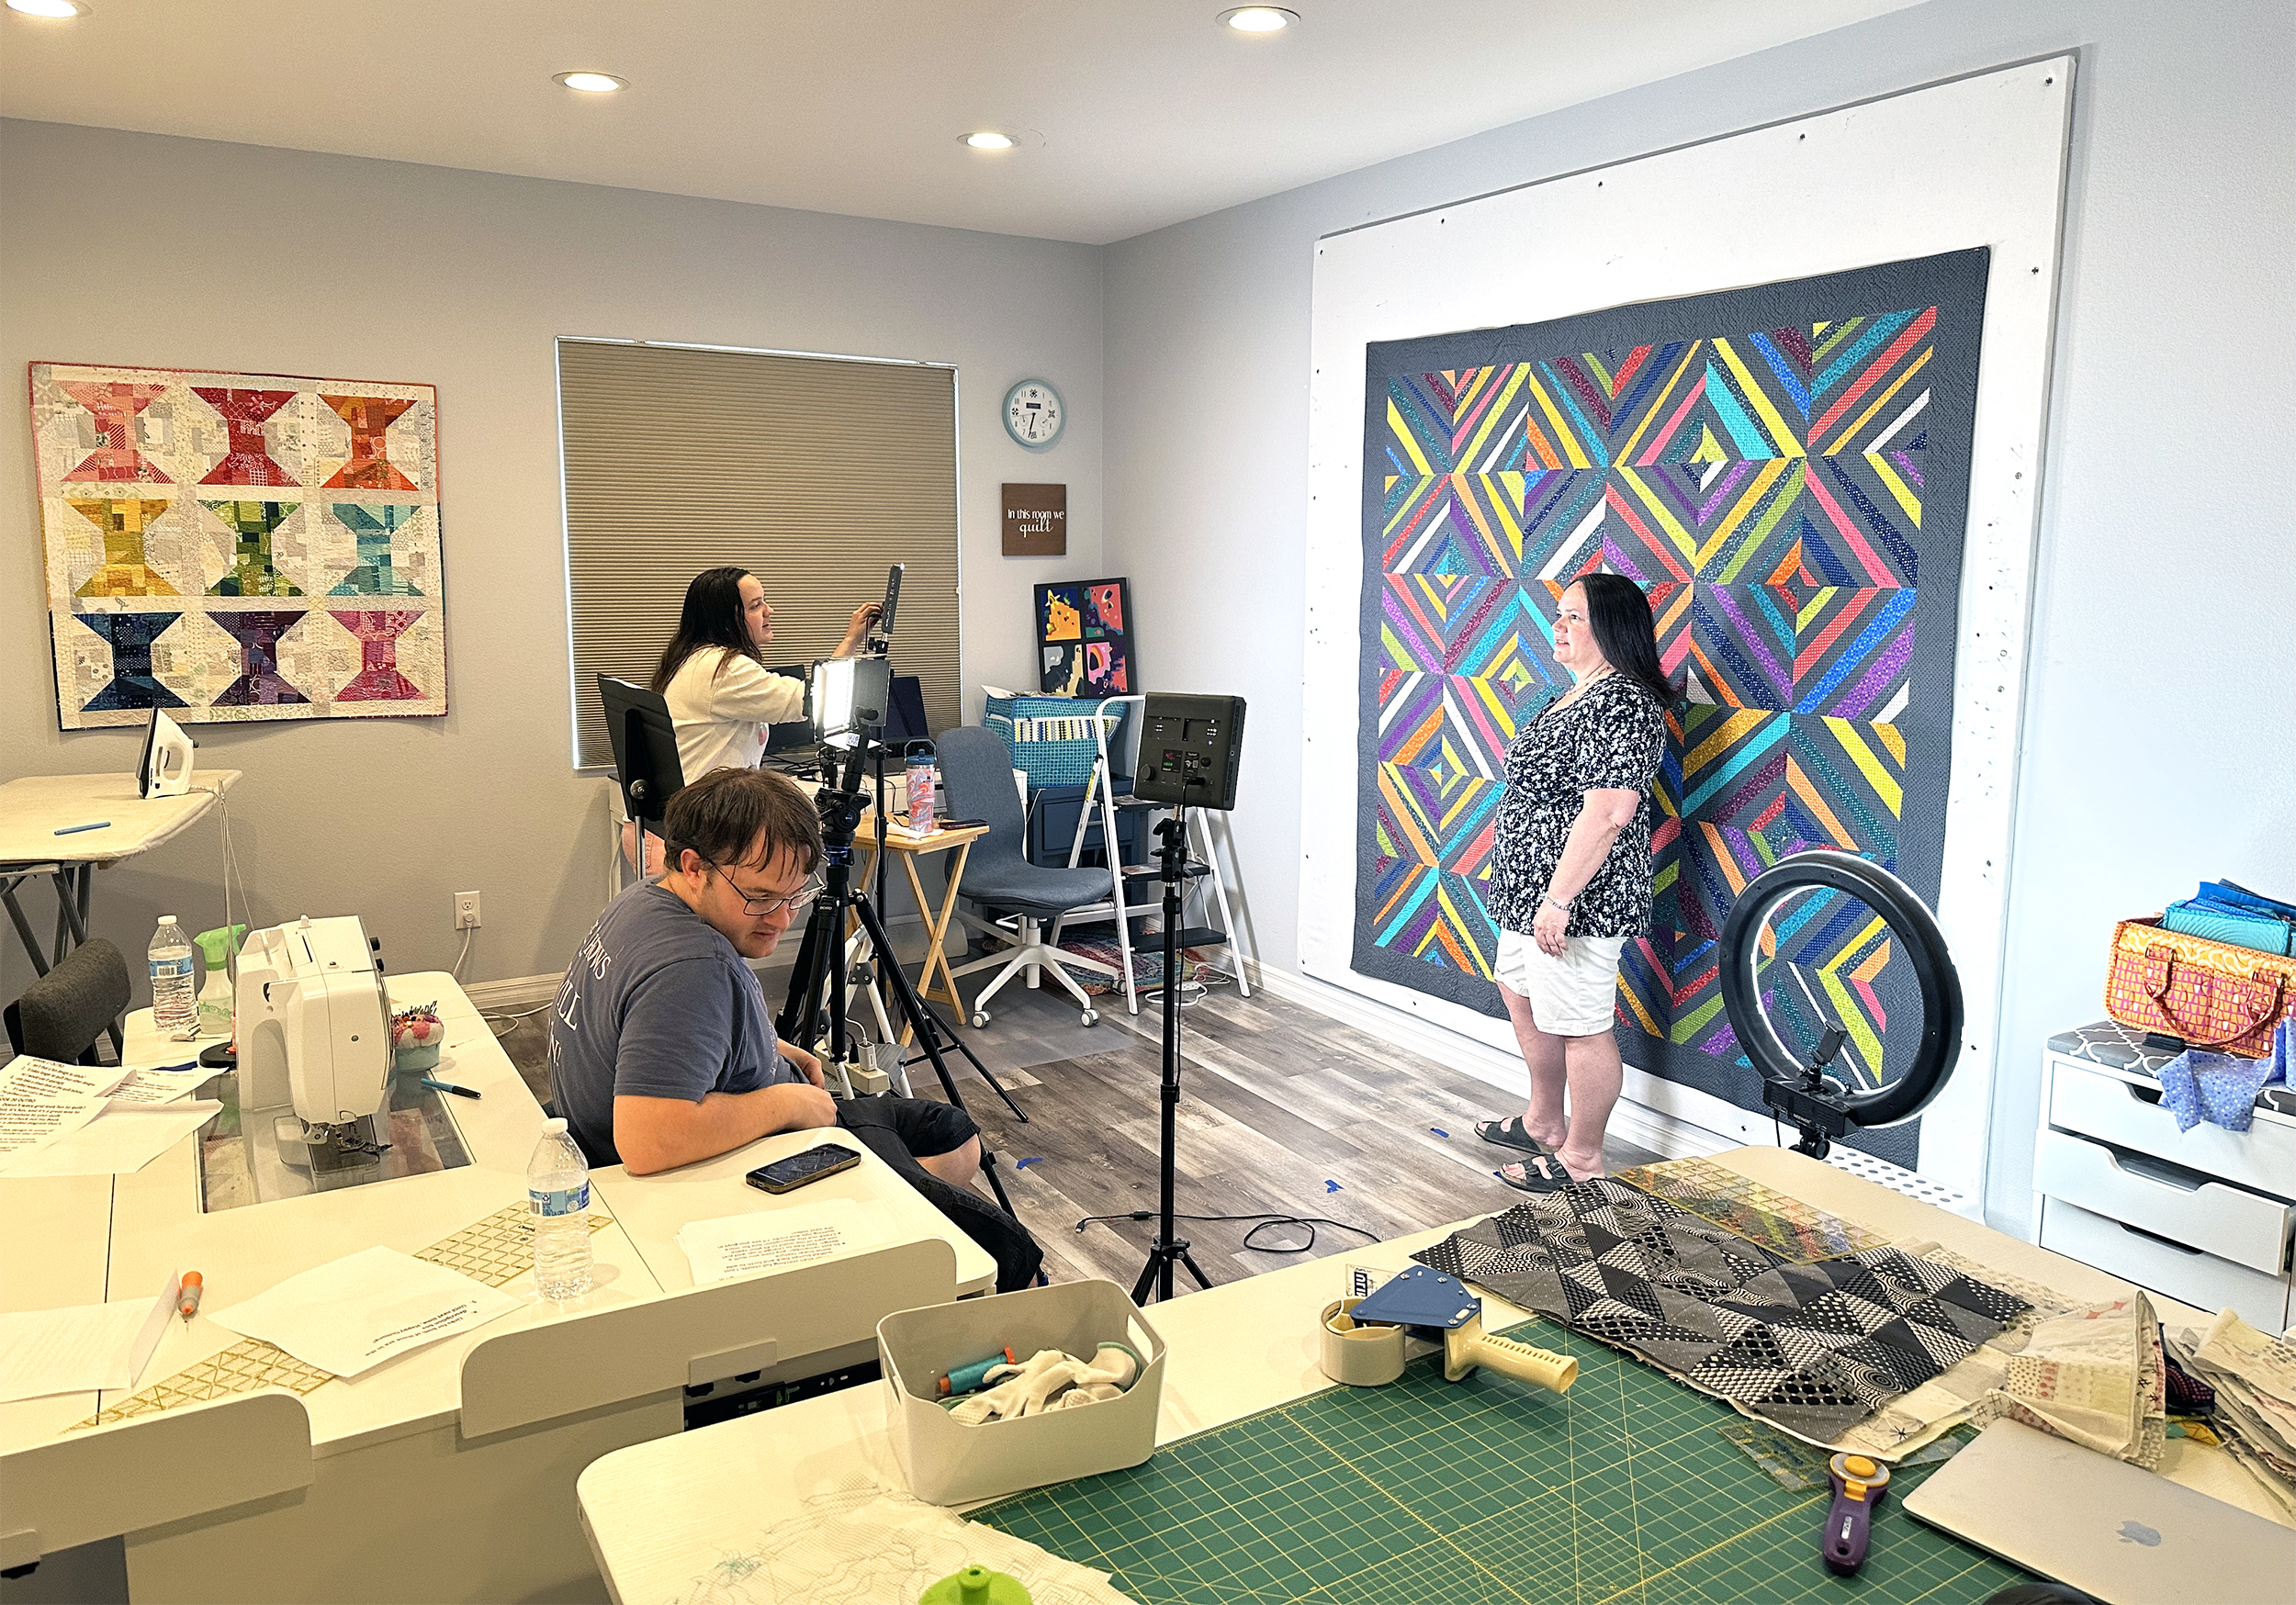
Here’s a bit of what my studio looks like when we are in the thick of it:
My kids did a great job hanging the quilts that served as my backdrop for each episode.
Making these videos has been a fun family affair. I hope you enjoy them!!
Bonus Machine Quilting Tutorials on “Real” Quilts
Throughout the year as I make more quilts, I’ll share bonus videos showing how I apply many of these motifs to an actual quilt. Here’s just one example from a previous quilt I made called Swanky Spirals. This is the quilt shown behind me in the preview video above.
Now I need your help. I’d love to know your biggest stumbling blocks when it comes to domestic machine quilting. Please leave a comment below letting me know any particular issues you have. I’ll incorporate these into the series as much as possible. Be sure to subscribe to my YouTube channel to join the fun!
I’ve been working on a remake of my popular Color Weave quilt. I realized that I don’t create a ton of new patterns each year and I really like remaking some of my classics! It’s been super fun to create it from my current fabric collection, Dazzle Dots (#9 if you are counting). Originally I made this quilt using my Abstract Garden fabric line (#3) which is shown on the pattern cover below. Don’t they look similar?
I spray baste all of my quilts, so I took the opportunity of creating a step-by-step video tutorial showing how I did this on my Color Weave quilt. Click the image below to watch:
For a limited Time, you can grab a complete Color Weave quilt kit if you’d like to make one exactly like me, using Dazzle Dots. Or you can grab the Color Weave quilt pattern and choose your own fabrics for a different look. You can make this quilt from pre-cut strips, fat quarters, or even scraps. The hard part is trying to make just one!!
I have a little secret to share. I’m currently working on a followup to my popular Dazzle Dots fabric collection. But in the meantime, while I can’t share what’s new, I can revisit some of my earlier fabric collections, just in case you missed them the first time around!
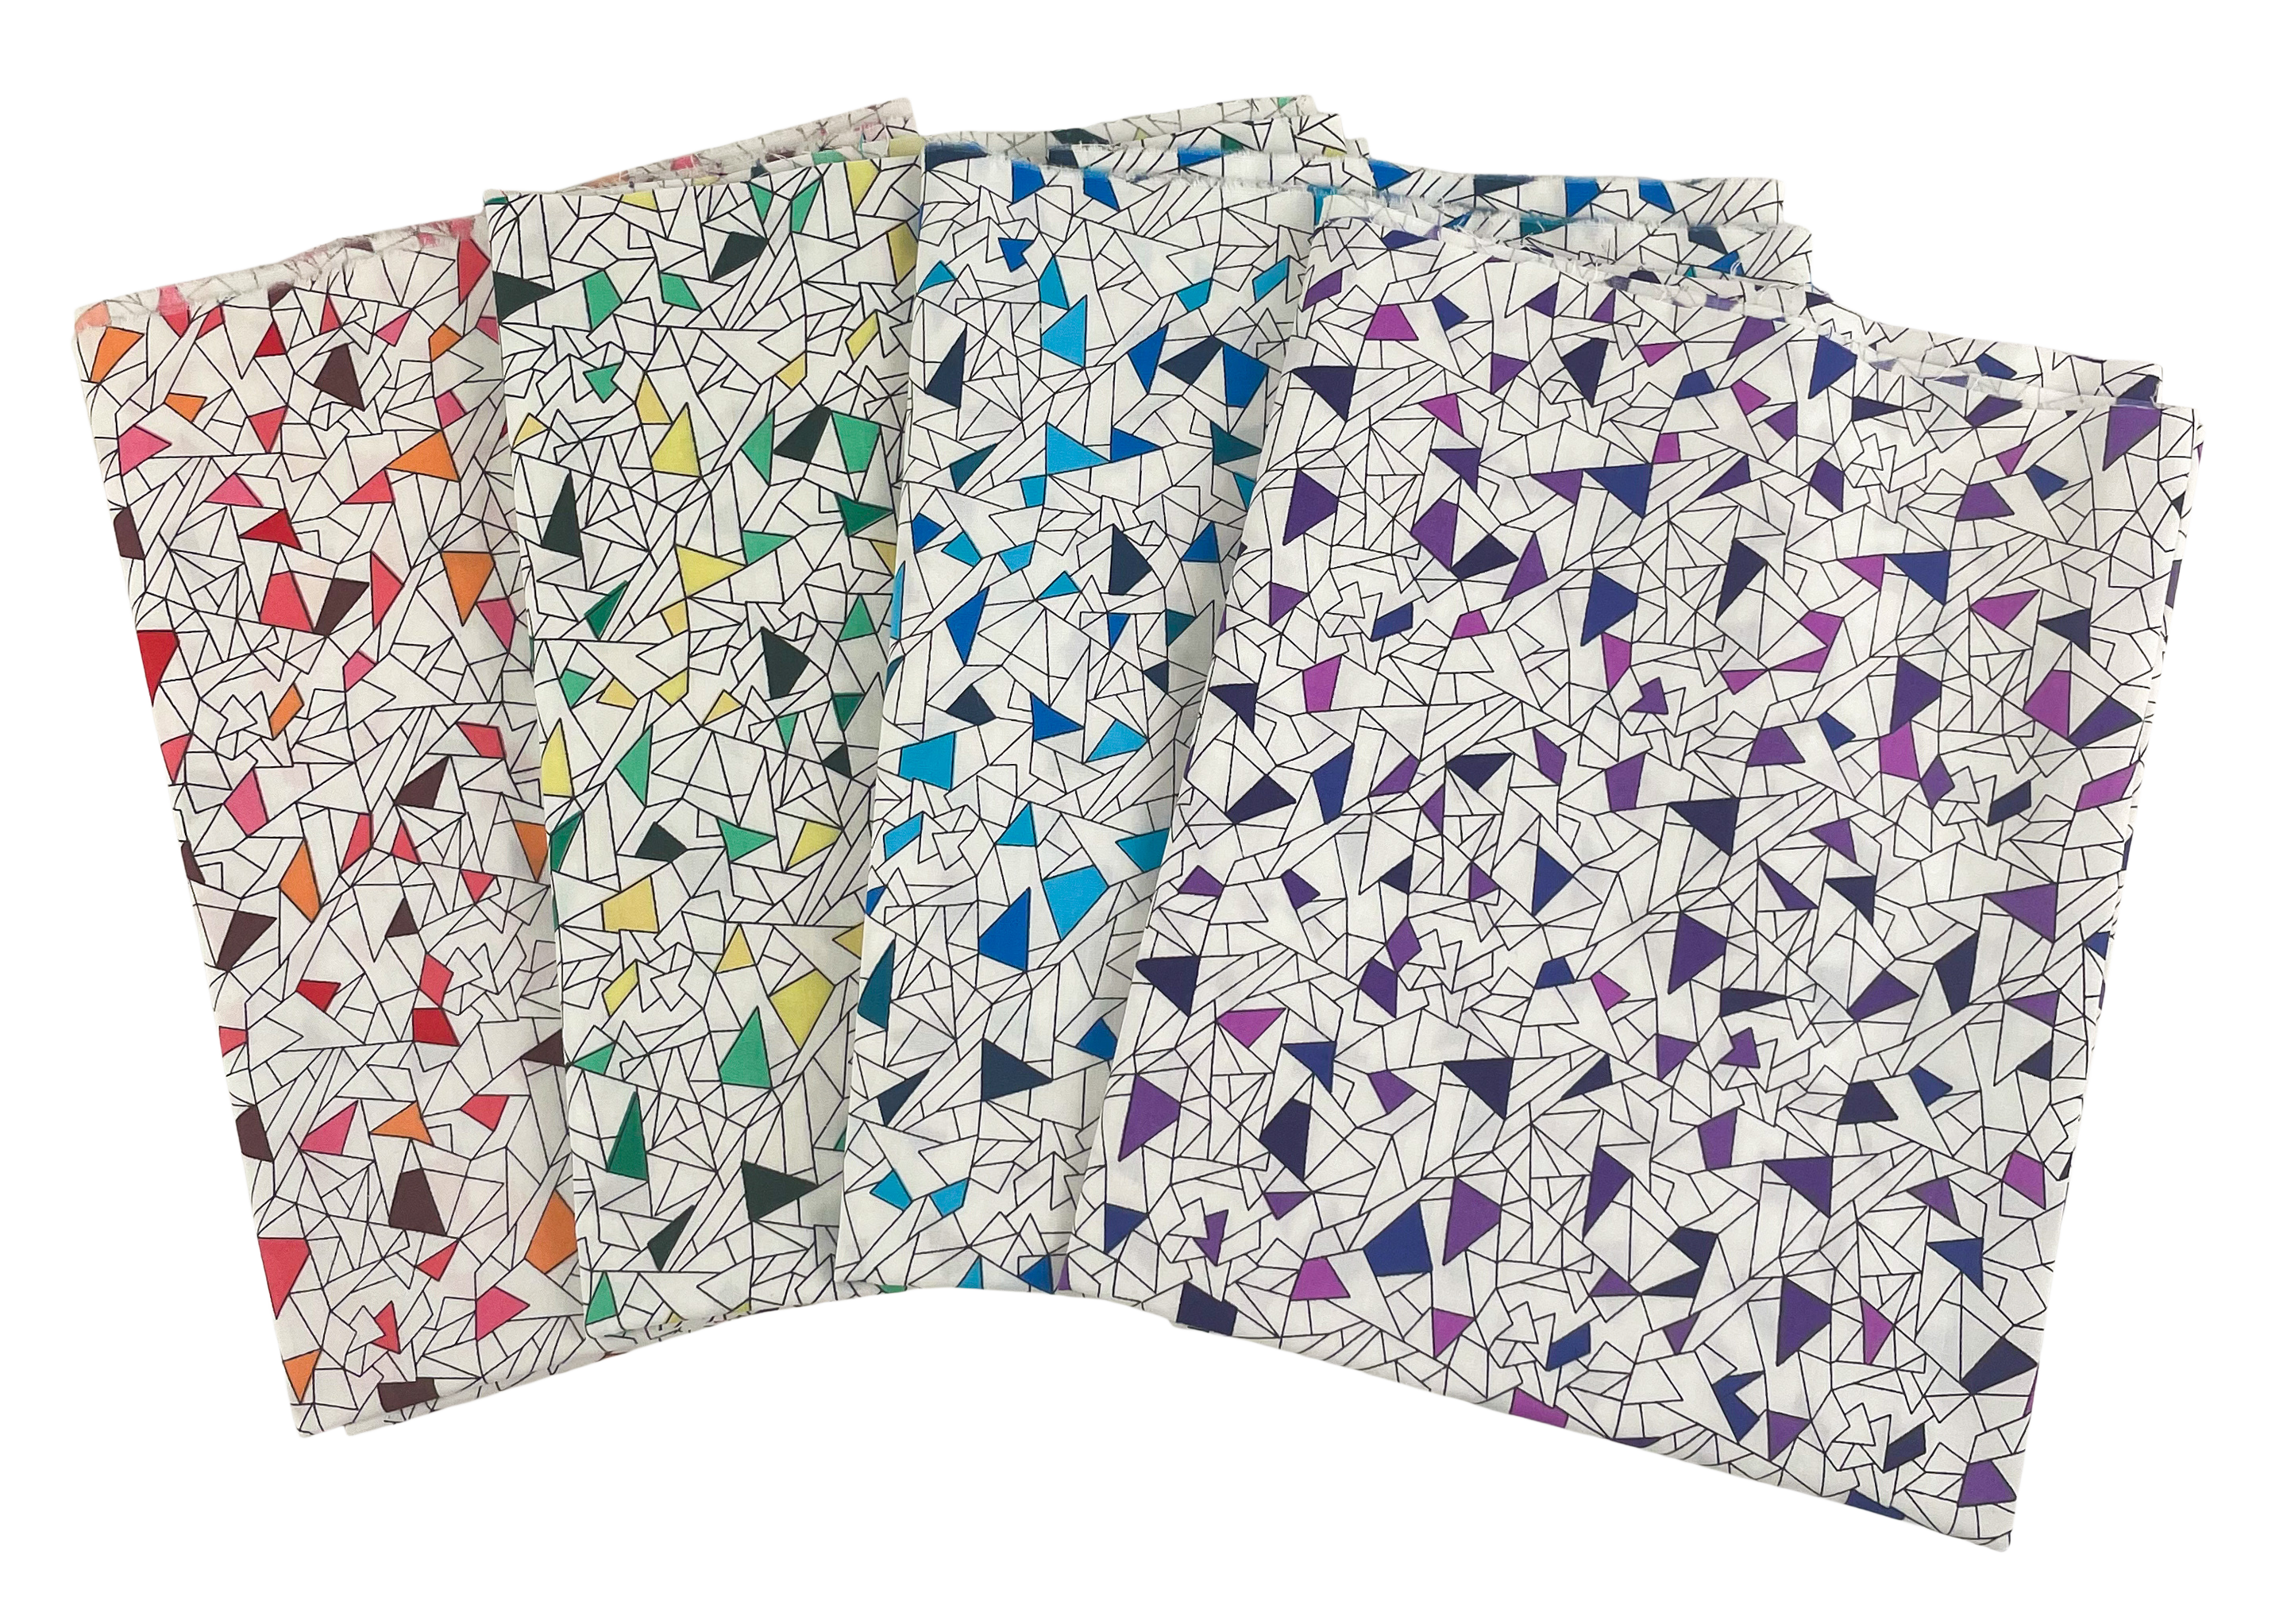
I designed this grouping to add to my stash of black & white prints, but then threw in a few bright colors and fun backgrounds. In fact, the four prints shown below – called “Crackle” are my absolute favorites from the group.
You can use the front side shown below for a “low volume” background with a pop of color. Or turn them over and use the back side of the print to tone it down a bit. These are such high quality that they look great on either side!!
The other quilt I made from this grouping is called Blooming Wallflowers, a quilt that I’ve made in several different collections. This time around I made a scrappy version and I recorded a longer video sharing cutting tips and tricks, too!
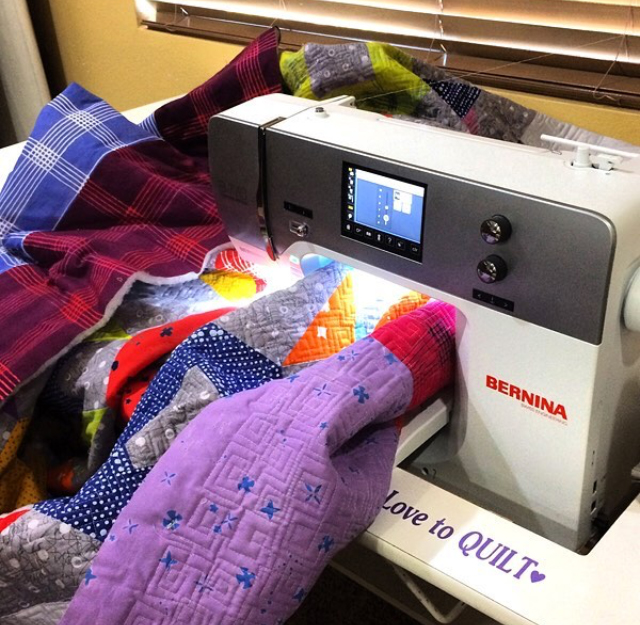
When I’m prepping a quilt for machine quilting, I do everything I can to get a nice, flat quilt sandwich. This is especially helpful when quilting on a domestic machine because of all the quilt wrestling, scrunching and smooshing that happens during the process.
“Scrunching and Smooshing” in progress!
In order to make my quilt as flat as possible, I press ALL of my seams open. I know this can be a bit controversial, but contrary to popular belief, it will NOT weaken your seams. After all, dressmakers have been pressing seams open forever, and clothing certainly gets a lot more wear and tear than a quilt.
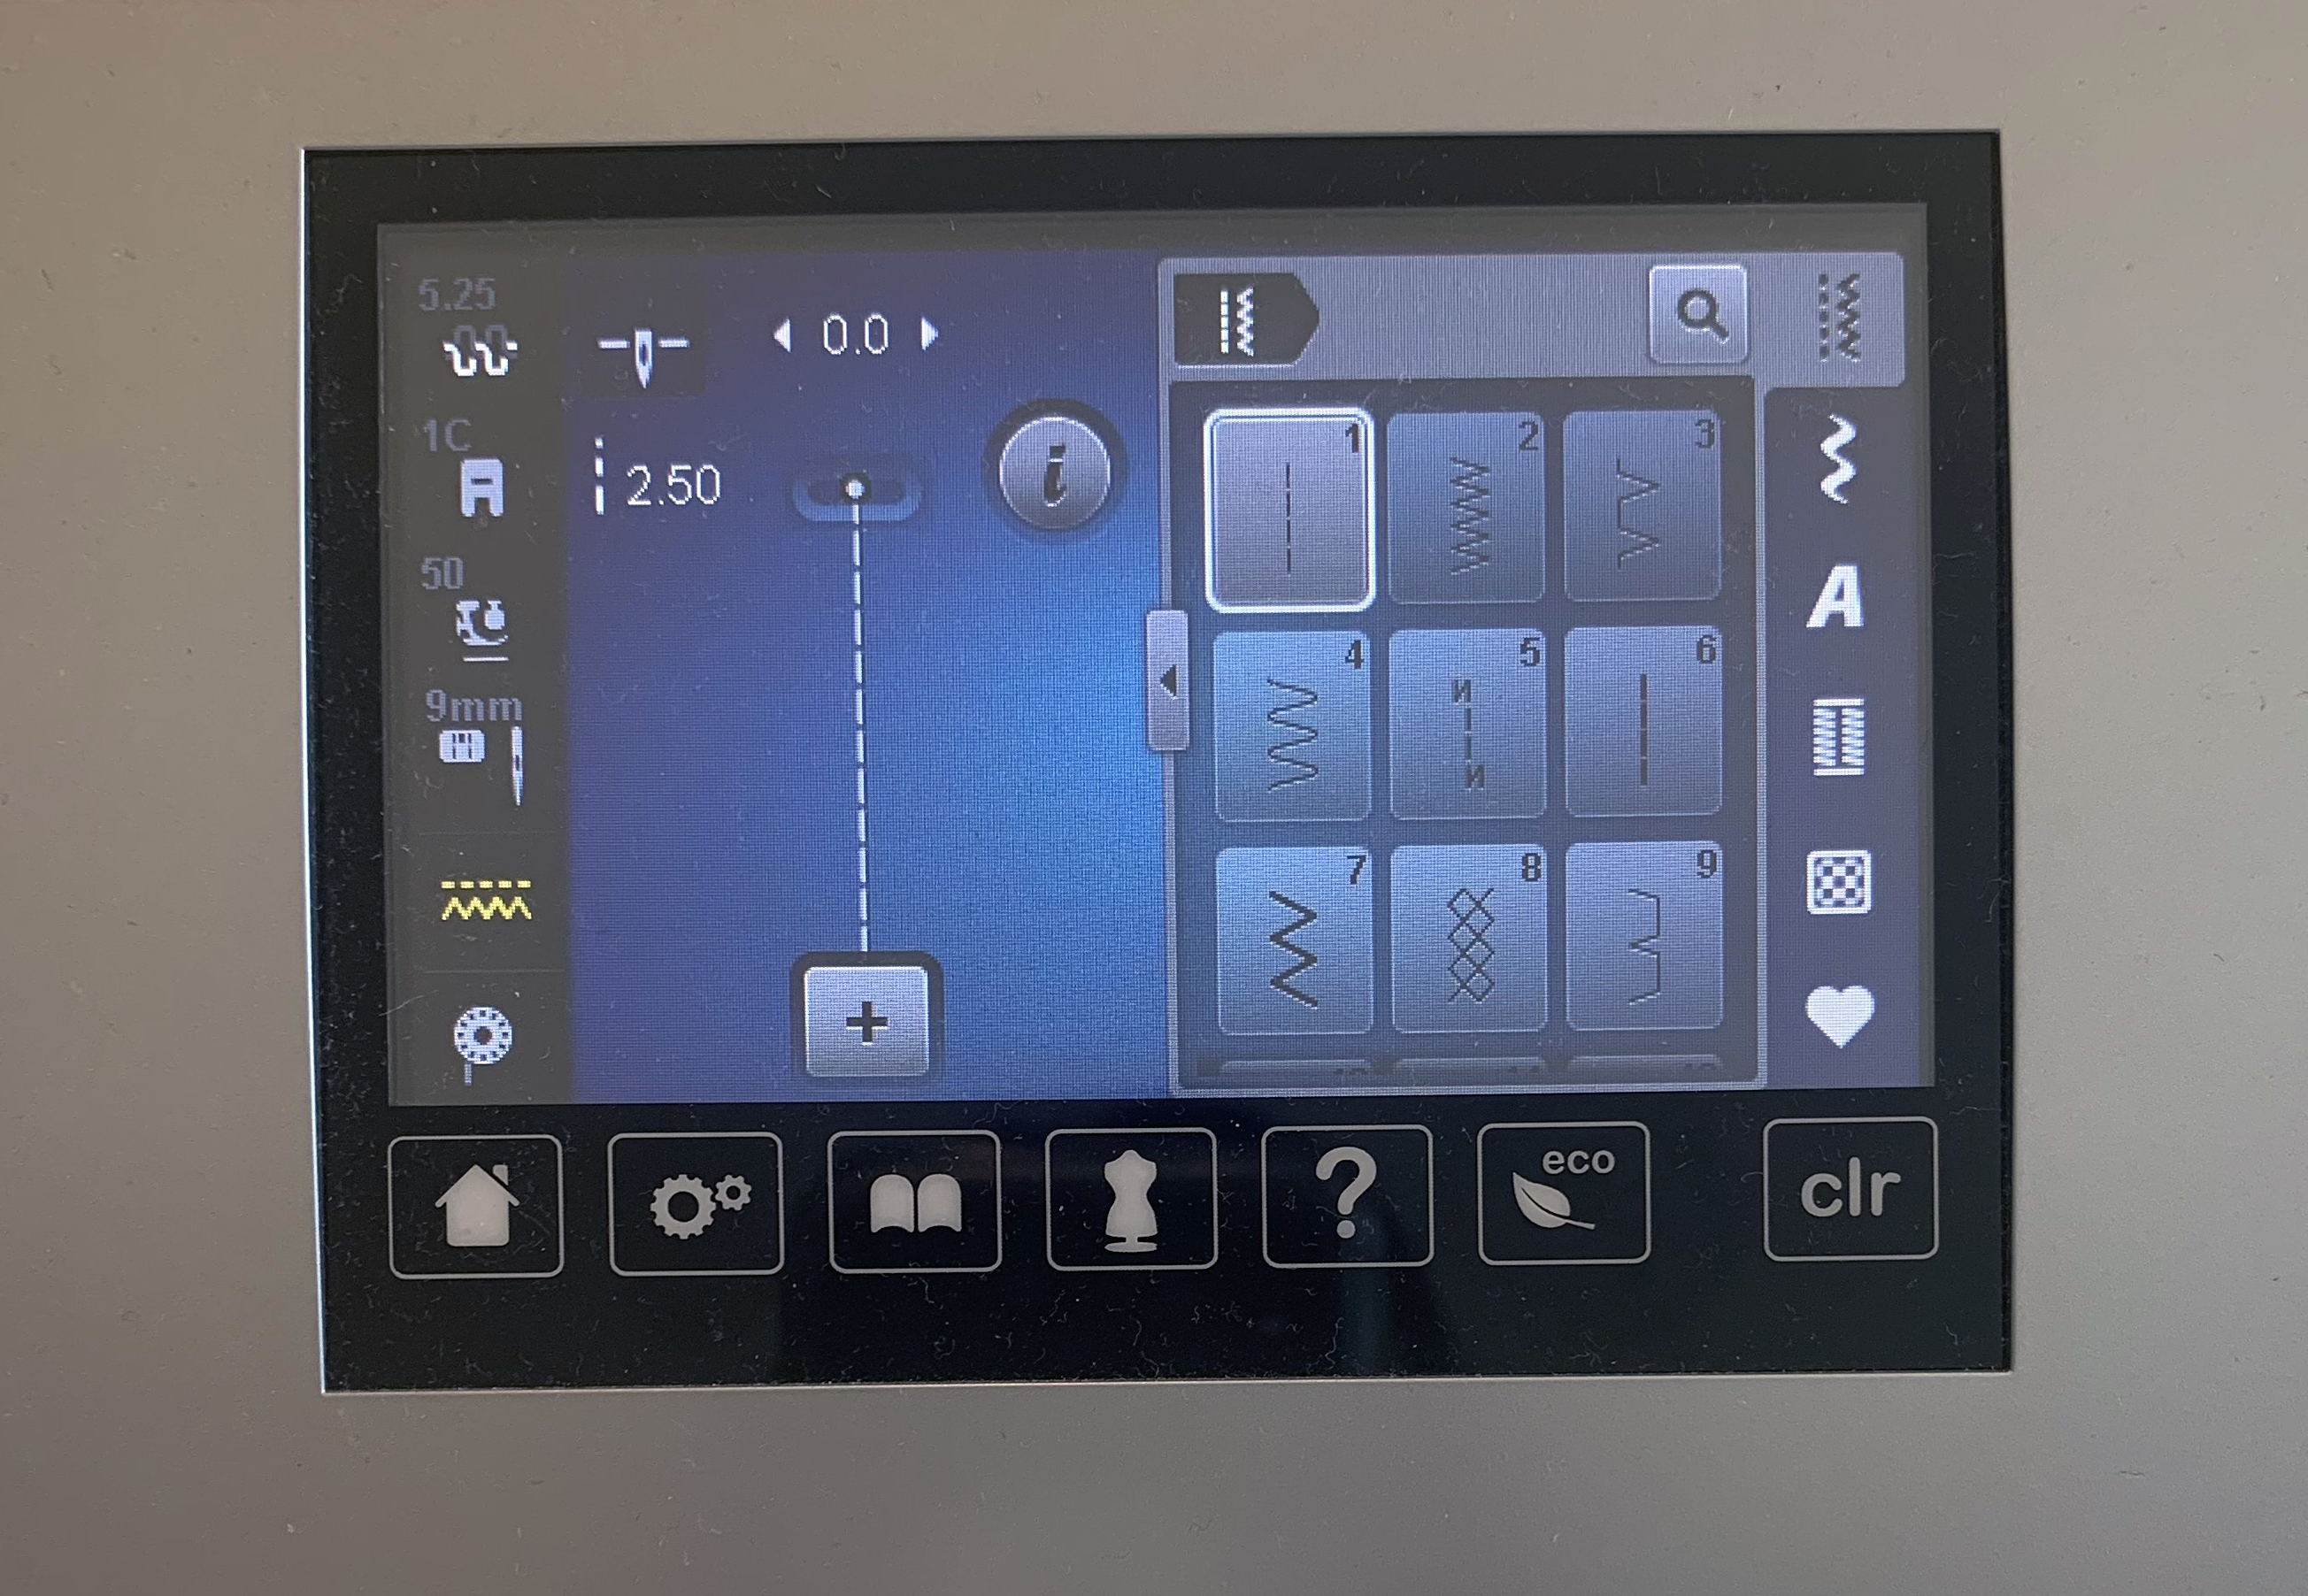
In order to ensure that the seams don’t split apart, I recommend sewing with a shorter stitch length (such as 2.0 instead of my default 2.5). This has the added benefit of hiding the piecing thread in the seam, so you don’t have to worry about perfectly matching your thread to your fabrics while piecing. Another reason I love Aurifil 50 weight cotton thread is that it really seems to sink onto the seams!
This is my default setup. I reduce the stitch length and usually lower the tension.
When it comes to preparing my fabric for quilt making, I do prewash any fabric that’s a fat quarter or larger. Sadly I’ve seen too many issues with fabric bleeding to leave it to chance. If I’m using precuts, I don’t prewash since that will shrivel them up. However, I DO wash the finished quilt with dye magnet sheets such as Color Catchers. This grabs any excess dye in the wash and makes a huge difference in protecting your quilts!
I also starch my fabric yardage after washing and before cutting into it. This makes a huge difference in how well the fabric sews together without stretching, and it’s an important step when sewing together larger lengths of fabric for a quilt backing.
Click the short video below for my starching tutorial on a small piece of fabric. This works well for larger pieces, too!
The other thing I’ll do to get my quilt layers nice and flat is to iron the quilt batting if it has any wrinkles. I prefer to use natural fiber battings (cotton, wool, or silk) rather than synthetic battings because they are more breathable AND ok to iron.
I’ll spray a bit of water on the batting, then iron it directly. If I’m worried about damaging the batting with my iron, I’ll cover it with a piece of fabric first. As with any new technique in quilting, be sure test on a smaller pice first to ensure you get the results you are looking for.
I use a “big board” that fits on top of my regular ironing board.
Once all 3 layers are nice and flat, it’s time to baste them together. I’ve written several basting tutorials over the years, but my favorite method is to use basting spray and my design wall.
Click the clip below for my most recent spray basting video tutorial.
Just for your reference, here are several links to other basting tutorials I’ve shared over the years. Feel free to pick and choose which techniques resonate with you.
To continue supporting my sewing and sharing, you can pick up any of my fun fabrics, patterns, thread and books on my website at shop.ChristaQuilts.com.
I love it when we get to the machine quilting part of a Quilt Along! I’ve just finished my fourth book on machine quilting so I feel like that is one of my specialties. I’m excited for you to try free motion stipple quilting like I did on my Modern Logs, or another quilting design of your choice.
I made a video with all my best tips and tricks for quilting Modern Logs. Just nine minutes but it’s packed full of help and guidance! Click play below to watch.
If you’ve never tried free motion quilting or a stipple (also called a meander), layer up a couple of fat quarters with batting and practice there before you start on your real quilt. You can quilt on this practice sandwich many times over, using it as a warm-up if you like.
I can’t wait to see how you decide to quilt your Modern Logs!
When the quilting is finished on your Optical Illusion quilt, or whatever quilt you happen to be making, just the final step of binding is left. I’d like to show you in words, pictures and videos how to bind a quilt. Let’s dive right in.
Finished Optical Illusion Quilt, 67″ x 88″
If you’re still working on your Optical Illusion quilt, no worries! This will be here when you’re ready for it. You can scroll to the bottom for links to all of the steps.
The first thing to decide is whether you want to make the binding from just one fabric or you want to make it scrappy.
Which way you go is just a matter of personal preference, as there is not a right or wrong decision.
Step 1 – Calculate and cut your binding strips
A well-written quilt pattern will tell you how many binding strips to cut, but it’s handy to know how to figure it yourself. To determine the length of binding you’ll need, add up the length of the four sides (known as the perimeter) and then add 10″. The extra 10″ is for the seams and gives you a little insurance.
For example, Optical Illusion finishes at 67″ x 88″. This would be the math:
67+67+88+88+10 = 320″
You’ll need 320″ of binding. We use 40″ as the standard width of useable fabric from selvage to selvage, so from each cut across the fabric, we will get 40″ of binding. So we divide 320″ by 40″ to see how many strips to cut.
320″/40″= 8 strips
Just as a side note, if you ever divide by 40 and get something like 6.49, round up to get the number of strips. If you got 6.49, you’d round up to 7 because you’d need 7 strips.
How wide should your binding strips be cut? It’s a matter of personal preference. Most of my patterns, including Optical Illusion, give 2-1/4″ as the cut width for binding strips. But over the past few years, I often cut my strips 2″ wide and sew them to the quilt with a scant 1/4″ seam allowance. If you’re a beginner, it may be a little easier to cut binding strips at 2-1/4″ wide.
Step 2 – Sew the binding into a continuous length
To join the strips with mitered seams, place two strips right sides together at a 90 degree angle. Sew them together across the diagonal as shown. Join all of the binding strips into one long piece.
Trim the seam allowances to 1/4″ and press the seams open.
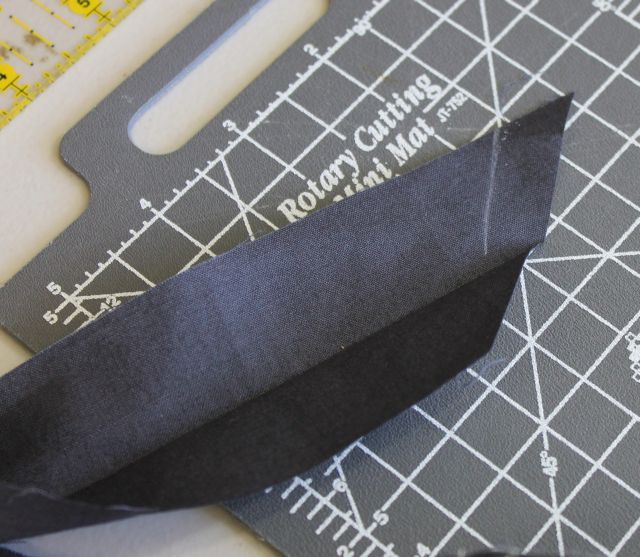
Trim one end of your binding at a 45 degree angle as shown above. This will be the starting end.
Step 3 – Press the binding
Press the binding wrong sides together along the entire length.
Step 4 – Trim the quilt and walk-around
Trim off the excess backing and batting before you attach your binding. I use a large square ruler for the corners, and a long straight ruler for the sides.
Quickly do a “walk-around” by running your binding along the perimeter of your quilt to ensure you won’t have any seams falling in the corners. If you do – move the binding up or down a few inches to avoid seams at the corners.
Step 5 – Attach the binding to the quilt
Please note: These instructions are for sewing binding to the front of the quilt and then sewing it by hand on the back to finish. If you prefer to bind completely by machine, see this video. Or:
Now back to Step 5: Attach the binding to the quilt
Starting at least 6″ – 8″ away from any corner, place your binding on the front side of the quilt and leave a tail of about 6″ – 8″. Line up the raw edges of binding with the raw edges of your quilt. The fold should be toward the quilt.
Attach a walking foot or even-feed foot or use a dual-feed setting on your machine. Starting at the pin as shown, stitch the binding onto the front of the quilt with a 1/4″ seam allowance.
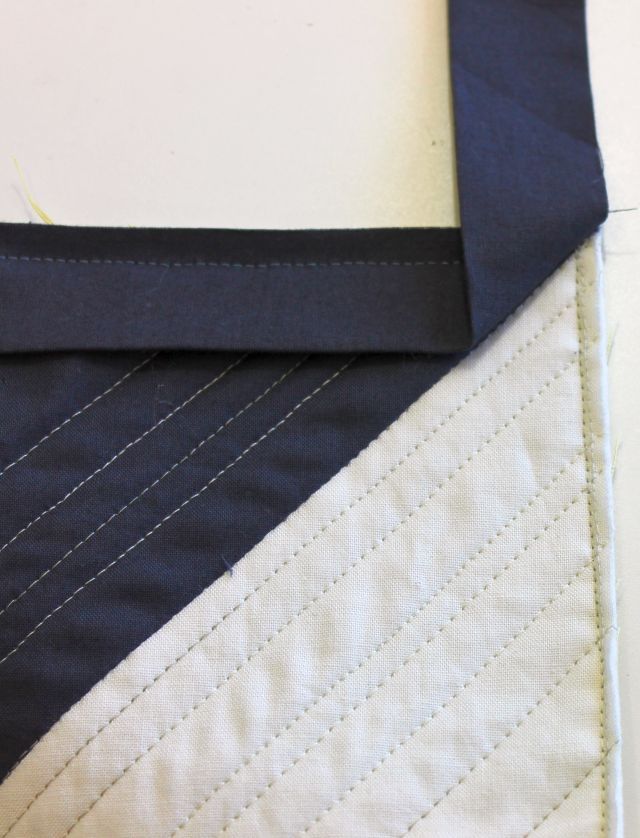
As you come to a corner, stop stitching 1/4″ before you reach the corner and sew off the corner at a 45º angle.
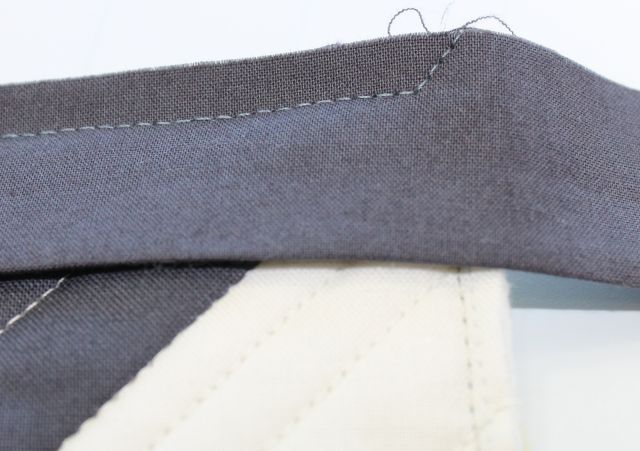
It will look like this. In order to miter the corner, fold the binding up and away from yourself. Keep the raw edges of the binding in line with the raw edges of the quilt as shown.
Next, fold the binding back down toward yourself, creating a tuck of fabric underneath.
The fold will form a little triangle that stands up off the quilt.
The fold will form a little triangle that stands up off the quilt; later it will form the miter on the quilt front. Now the quilt goes back under the machine.
Starting from the edge of the quilt, stitch the next side of binding down until you reach the next corner. Repeat this process for all four corners until you approach your starting point. STOP when you’re about 8″ away from where you began.
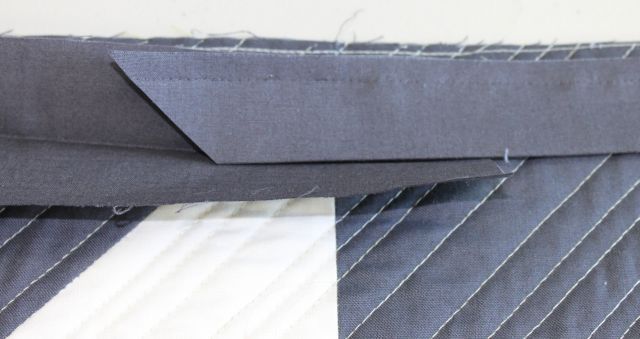
Trim off the excess, leaving a few inches of overlap to work with. Open up the end of binding and place the beginning tail inside it.
Using the cut angled end as a guide, lightly mark a line right up next to it. Then cut 1/2″ away from this measurement to account for seam allowances on both ends.
Put the two tail ends right sides together, and sew with 1/4″ seam to complete the continuous loop of binding. Finger press the seam open.
Sew that last part of the binding to the quilt. Now the binding is attached all the way around the quilt.
Step 6: Sew the binding down
The next step is to fold the binding to the back of the quilt and sew it down by hand. I love using binding clips all round the edges to hold it down. Here’s the only picture I got of my binding Optical Illusion:
And now we come to everyone’s least favorite part of making a quilt – basting!! But really, if you just set aside the time to do it’s not that bad! Here’s what both versions of Pieced Primose look like up on my design wall that also doubles as my basting area. Read on for helfpul ways to tackle this part of the quilt-making process. It’s easier than you think!
Because I wanted to include all 10 warm or cool fabrics from Abstract Garden in both colorways of Pieced Primrose, I used 9 fabrics for the blocks, and then the multicolor print “Raised Beds” for the backing and binding. The wall size kit includes the backing; for the larger size you’d need 6 yards of either color.
I’ve basted my quilts many different ways over the last few years, and I try to share as much about the process as I can. So take a look at the different tutorials below from prior quilts I’ve made. I’m sure one of them will make your quilting life easier!!
This is the first full-fledged basting tutorial I’ve created for my YouTube channel. I filmed and edited it while making my Infrastructure quilt. In reality it takes about an hour to do, but with the magic of edting, you can watch on super speed which only takes about 7 minutes. Too bad I can’t baste that quickly in real life, right??
If you don’t have a dedicated design wall, no problem! You can still do my spray basting method using a table. It’s the method I used when making my Improv Squares quilt:
Finally, here’s the way I USED to baste my quilts until about 5-6 years ago – using safety pins! It’s still a good method if basting spray isn’t your thing.
If you have another method you prefer, feel free to share you tips or links in the comments for others to see. Until next week – happy piecing and basting!!
LINKS AT A GLANCE
Click the links below for supplies needed to make this quilt: