My “other” hobby besides quilting is swimming and generally being outdoors. I love the Las Vegas heat, but I also like to stay cool, so earlier this summer we decided to get a pool in our backyard! (Click here to read part 1 if you missed it the first time around). So far we have a giant hole in the ground and it is HUGE!! So let me tell you more about that…
Excavation Begins!
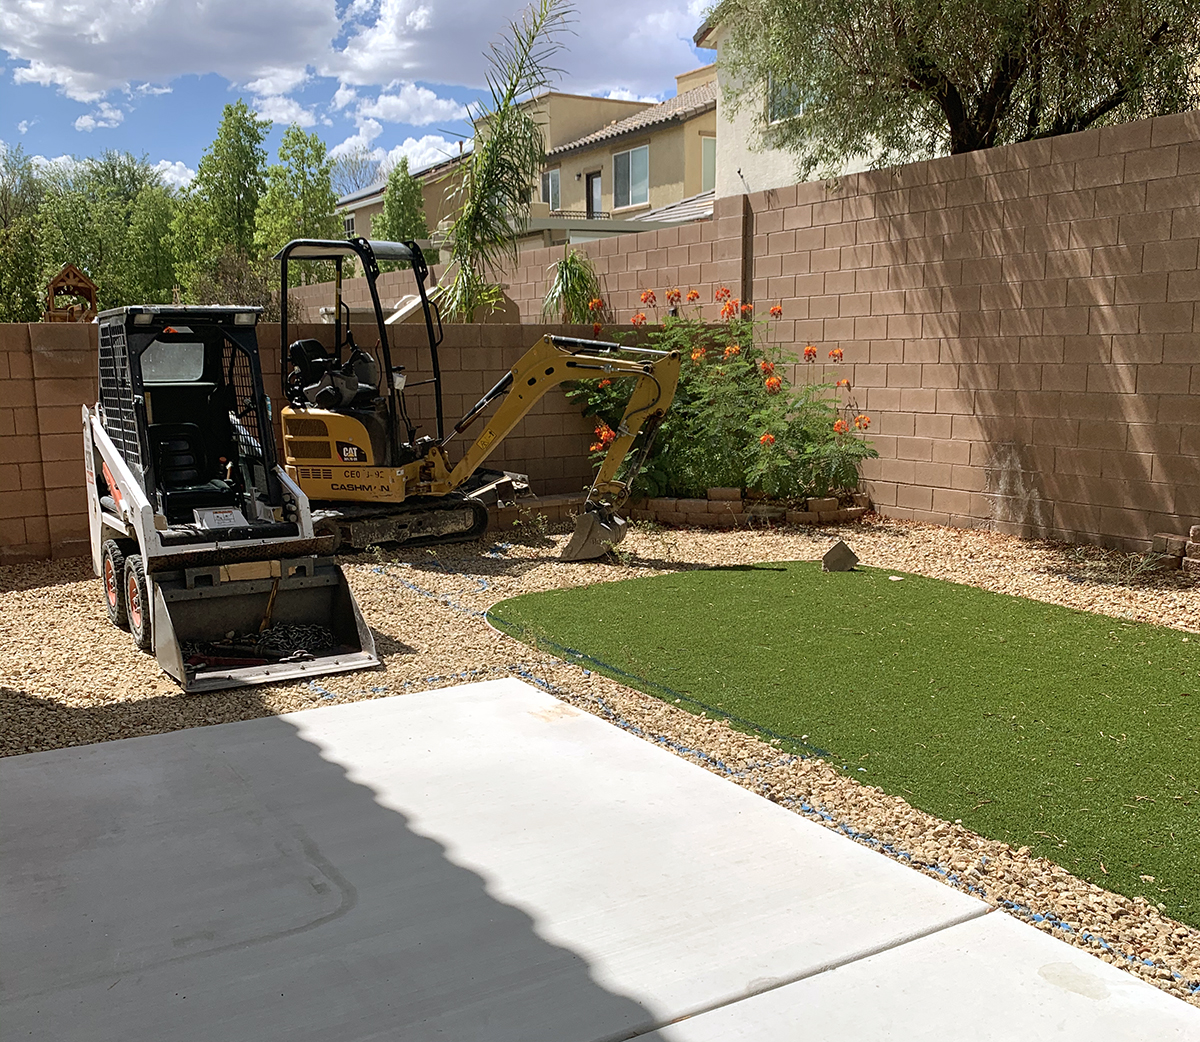
Before they were able to start digging the hole for our backyard pool, they excavators had to first remove everything that was there to begin with. In order to get those tractors into the yard from our super skinny side yard, we had to have the gas meter removed because it stuck out too far.

The gas company came out and removed the meter for us which meant no hot water for 2 weeks while the excavators dug the hole!! But we are so excited about this project that we didn’t care. We had some very accommodating neighbors and family members that let us use their shower, and we ate out a lot so we didn’t have to do any dishes.
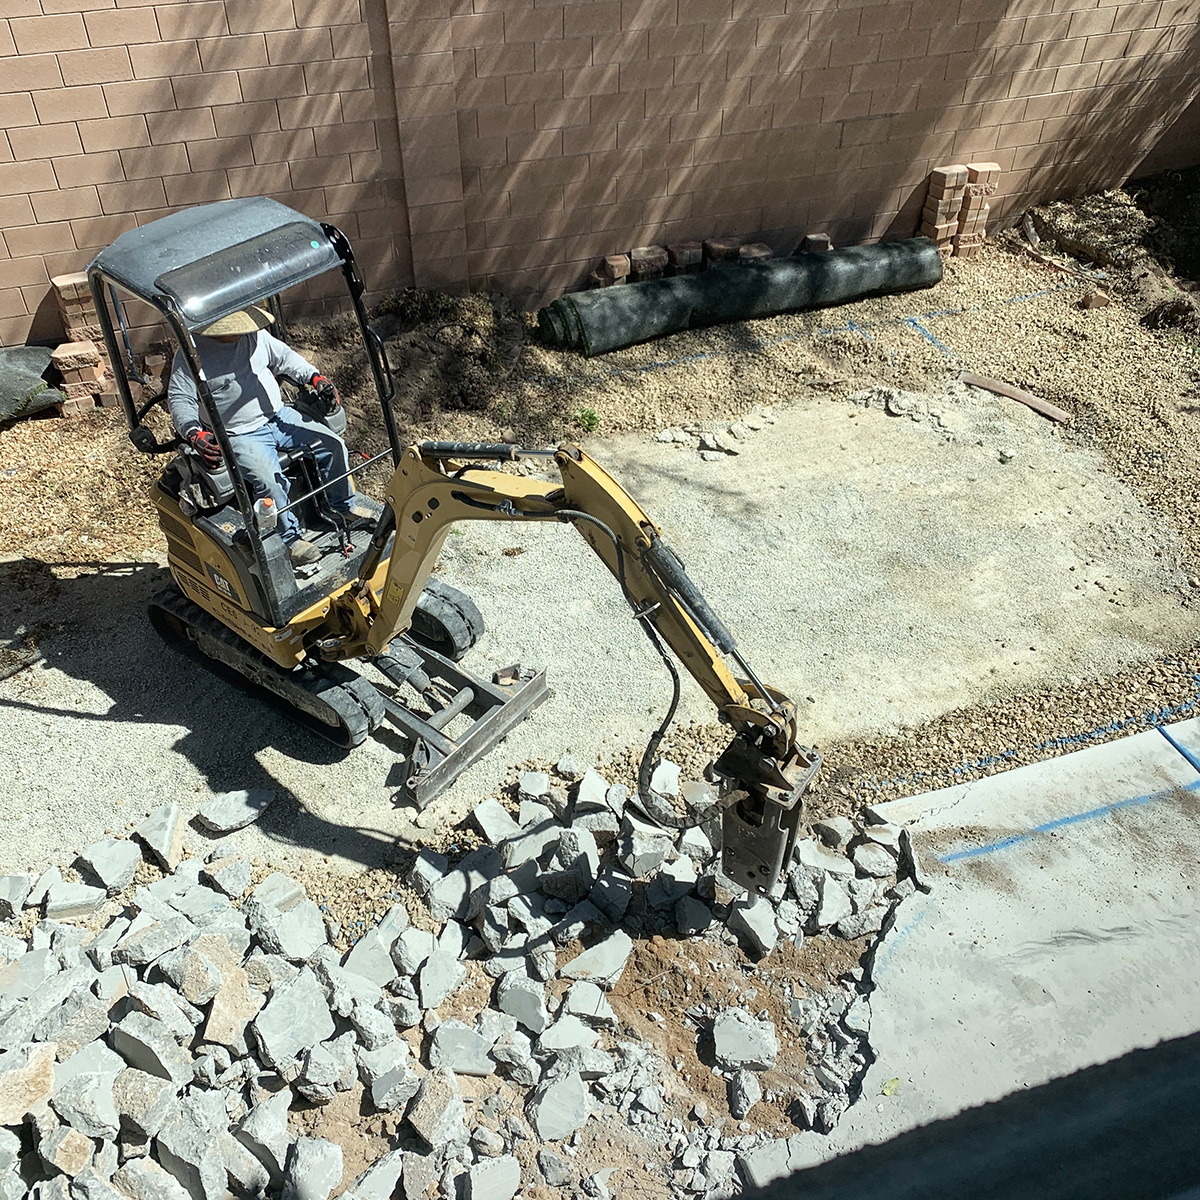
It took 3 days to completely destroy and level our backyard, including jackhammering the entire concrete patio that was there to begin with. It was fascinating to watch them work and I got a great view from my bedroom window on the second floor of our home.
Once the backyard was clear, the digging began!! It took a total of 8 days to dig a huge giant hole in the ground!! Here are some progress pics:
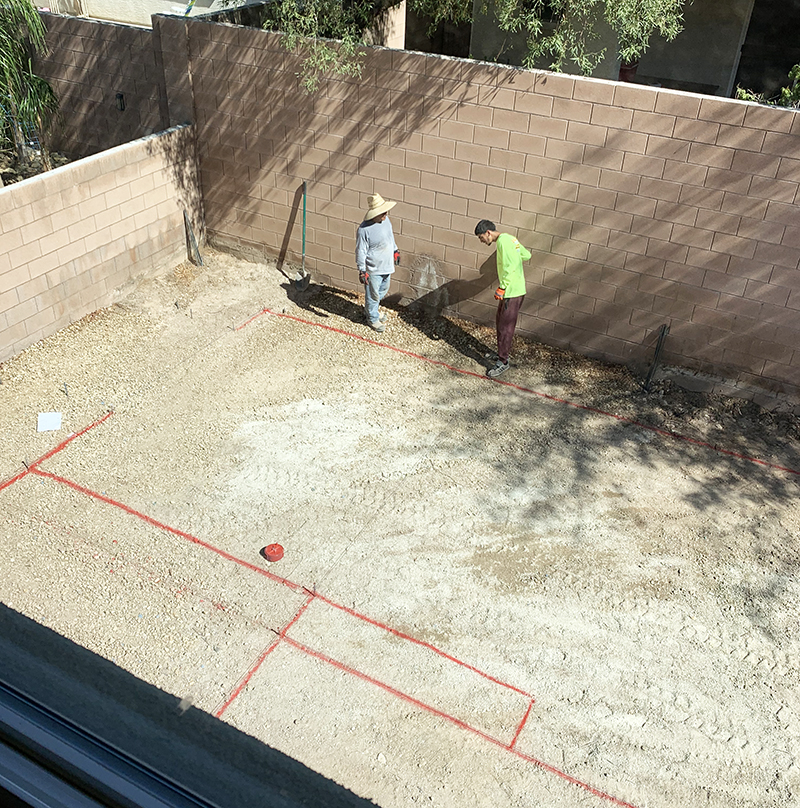
Pool Lines Drawn and Stakes placed
Digging Begins!


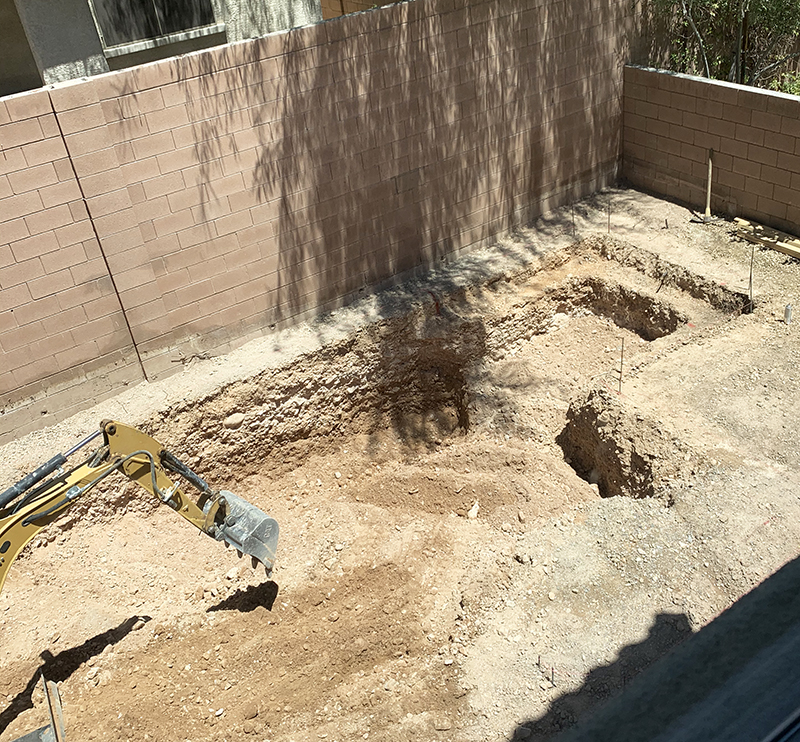
Expanding the Hole

Framing the Walls

My Daughter in the deep end (6′ Deep)

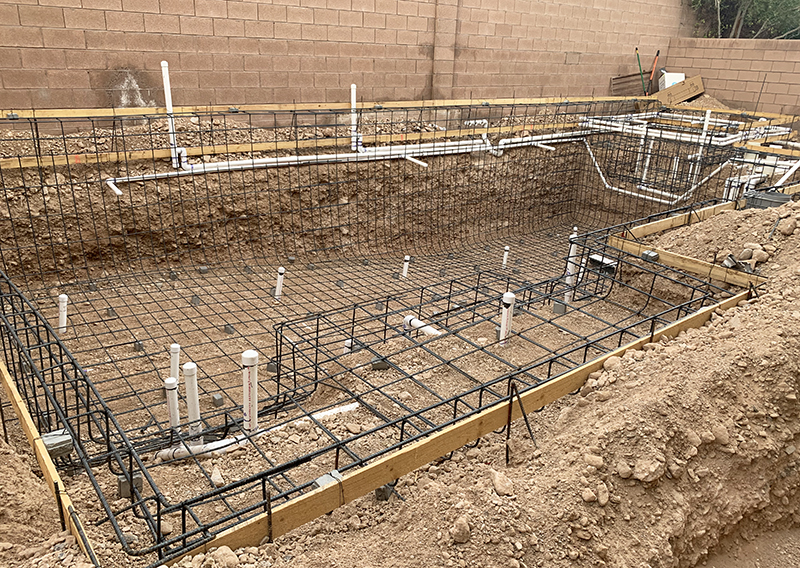
The Hole is Done!!

Plumbing and Steel Framing
While this was all going on, we got to choose our tile and flooring colors. I want a very neutral backdrop that will contrast with the pretty teal/blue water color that I want. My inspiration for for the “decking” areas surrounding the pool was a friend’s decking that she recently completed. It’s a very pretty gray/tan travertine tile and I fell in love with it as soon as I saw it:
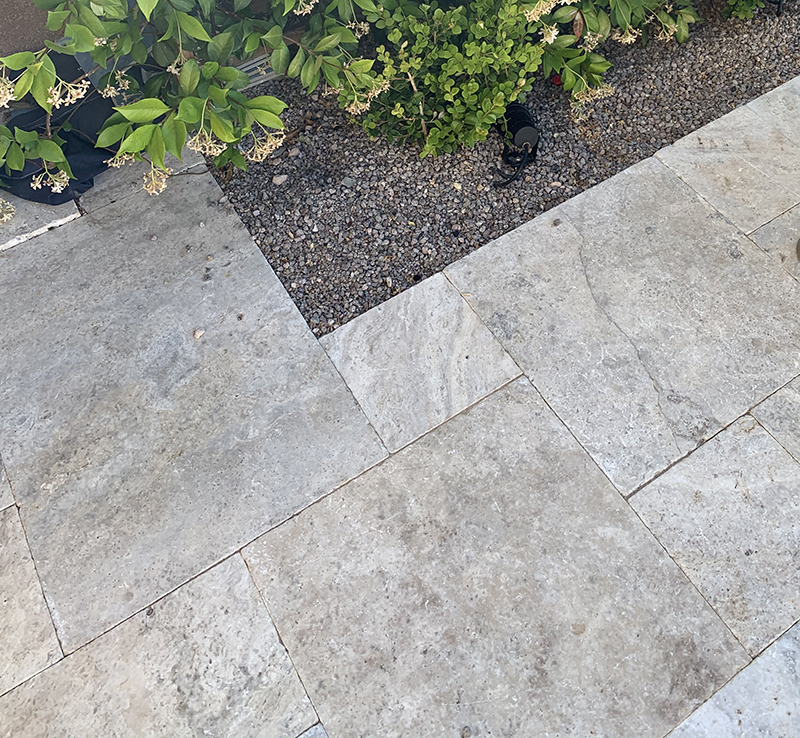
Just like choosing fabric colors, we took the samples outside to see what they’d look like in real daylight. The square below is the travertine tile that will be the outside flooring. The rectangle tiles will be along the water line and the raised wall along the back of our pool. I was deciding between the gray and the tan, and I decided to go with the tan because it seems to blend better.

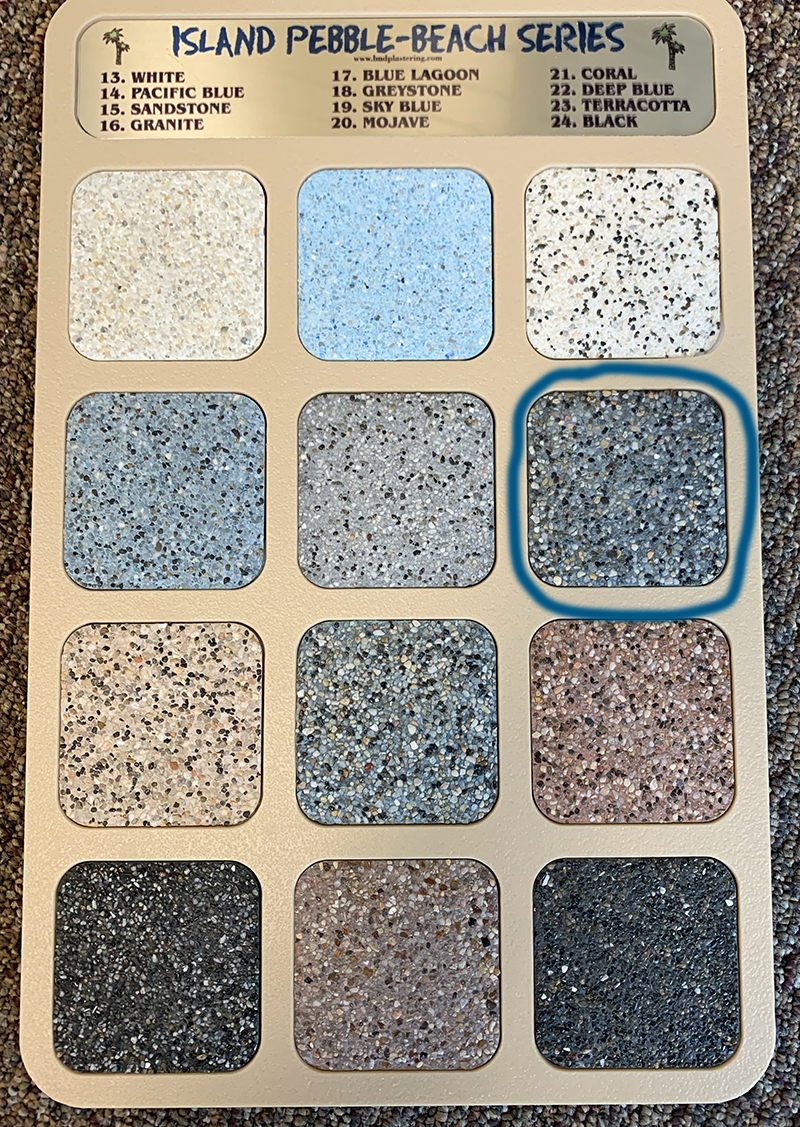
For the “plaster” which is on the sides and bottom of the pool, we chose to go with a pebbletec finish which is very durable and can give the water a lot of color. We chose the deep blue/gray color (circled below) which will produce a very pretty deep blue/teal water color. Thanks to youtube and internet research, I was able to look at a LOT of example pools with different finishes!!
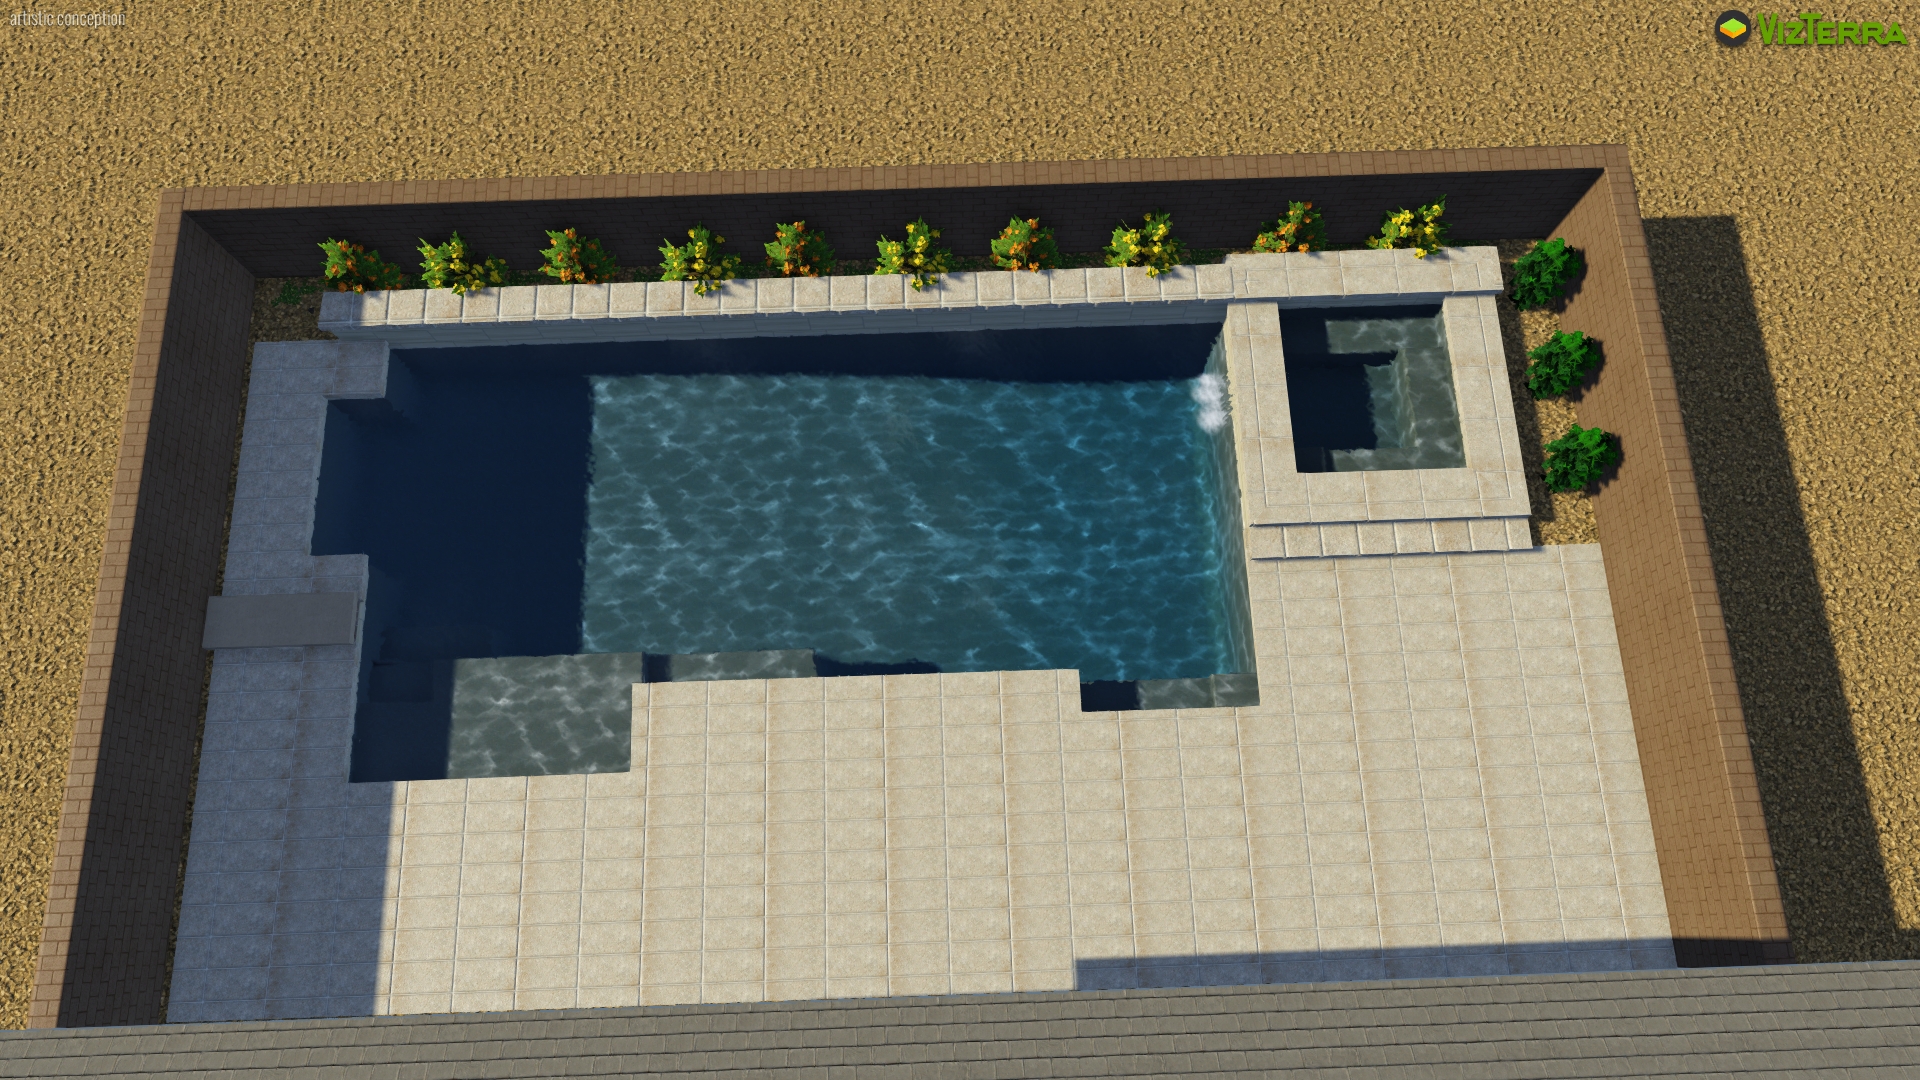
We also finalized the landscape plan which will be very simple: colorful vines and bushes along the back wall and a couple of tall bushes behind the spa. Not shown is the patio cover that will be replaced along the back of the house, giving us plenty of shade The yard will be mostly pool and decking, but it will give us plenty of room to relax and enjoy!
Now we are in a holding pattern, waiting for the rest of the equipment to arrive. Next, they will pour the concrete – called shotcrete – and then finish it all up hopefully by the end of next month. I can’t wait!!

So interesting and looks like it will be delightful!
I bet we won’t see much of you next summer. You’ll have to wok double time in the studio over the winter lol.
Congrats! It’s going to look great, and give you so many hours of enjoyment.