I’m excited to be a part of Virtual Quilt Market June 2–4, a brand new event from Quilts Inc. Traditional quilt market has been reimagined in light of current events and it’s going to be so interesting to see everyone’s creativity come shining through!
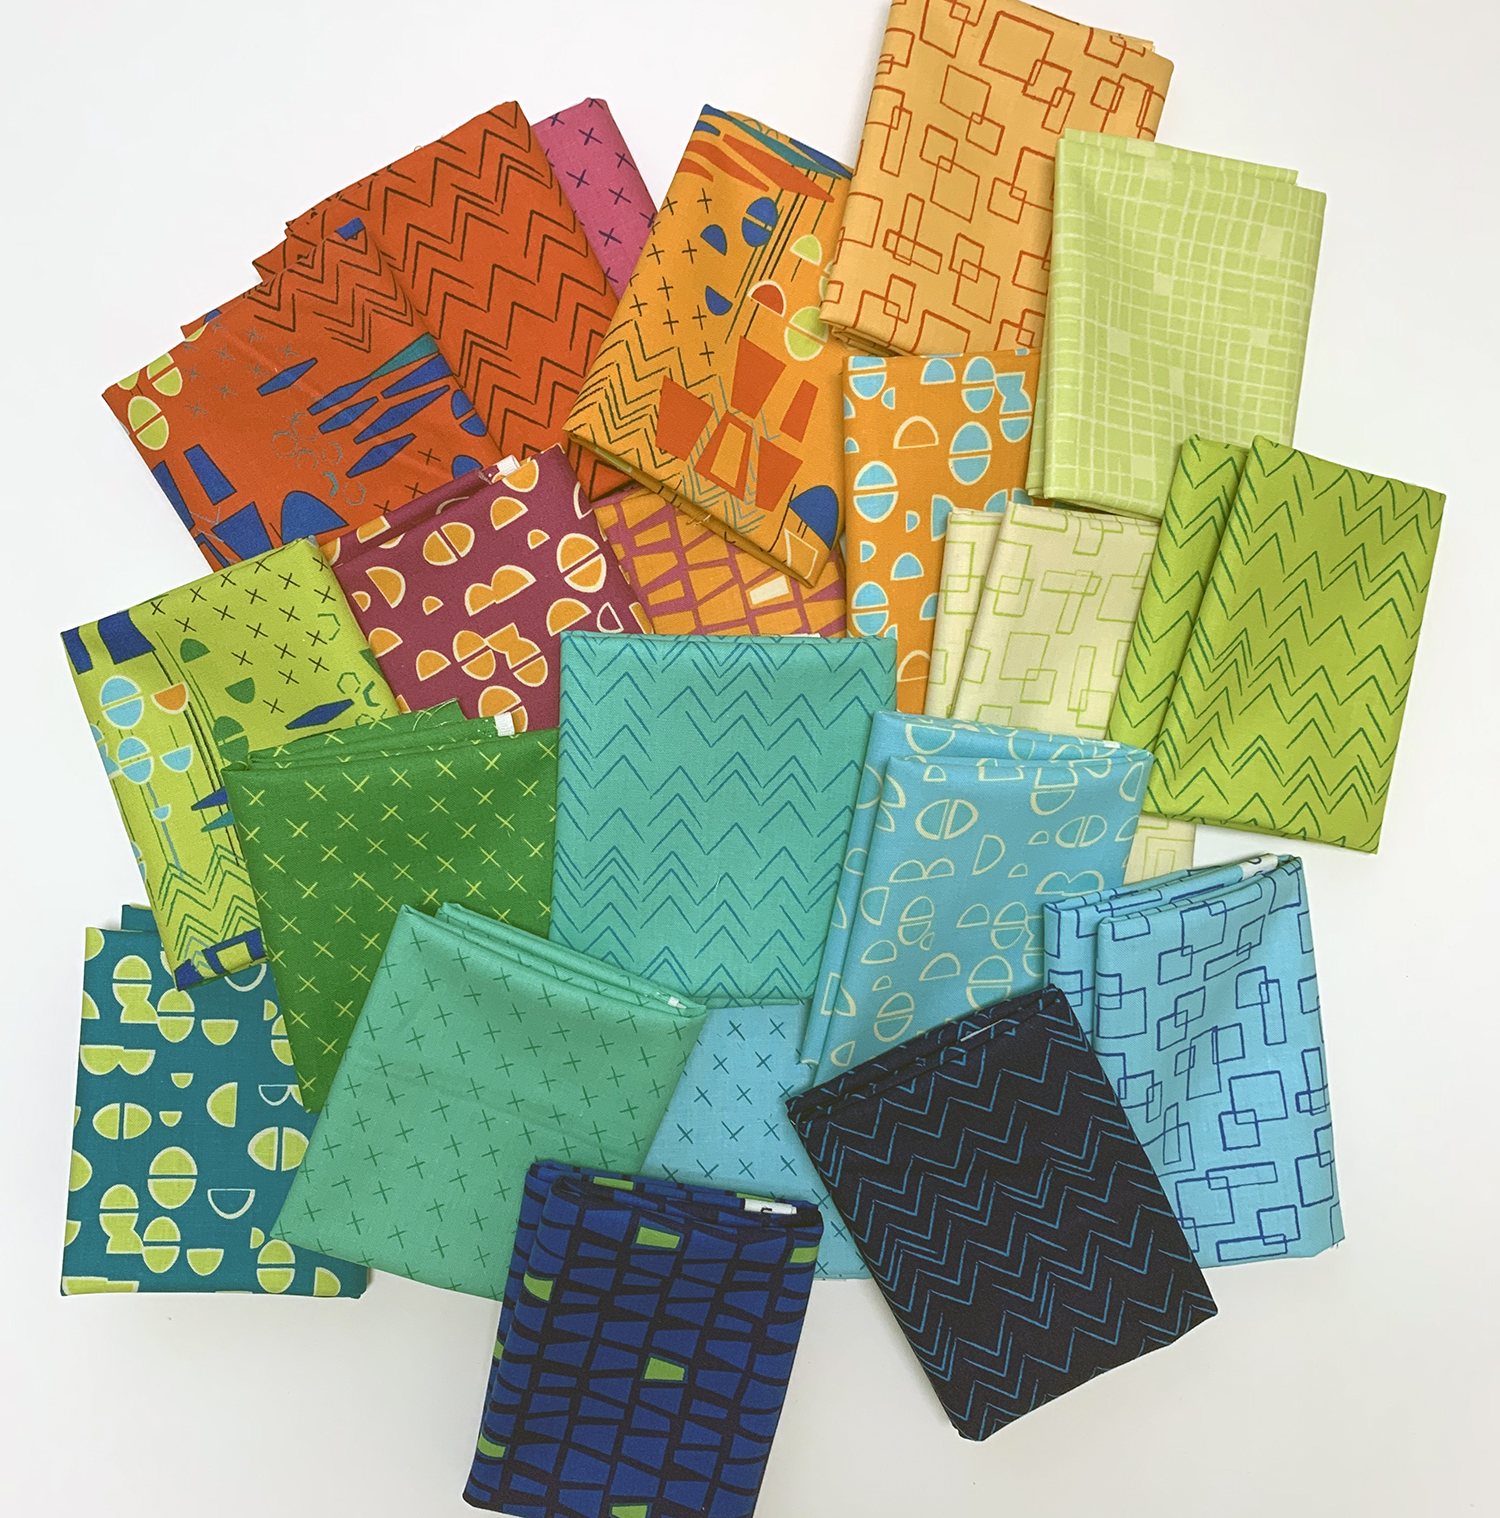
I’ll debuting my 6th fabric line for Benartex called Good Vibes which is a nod to good vibes and happy times of my childhood as a kid growing up in the 80s!
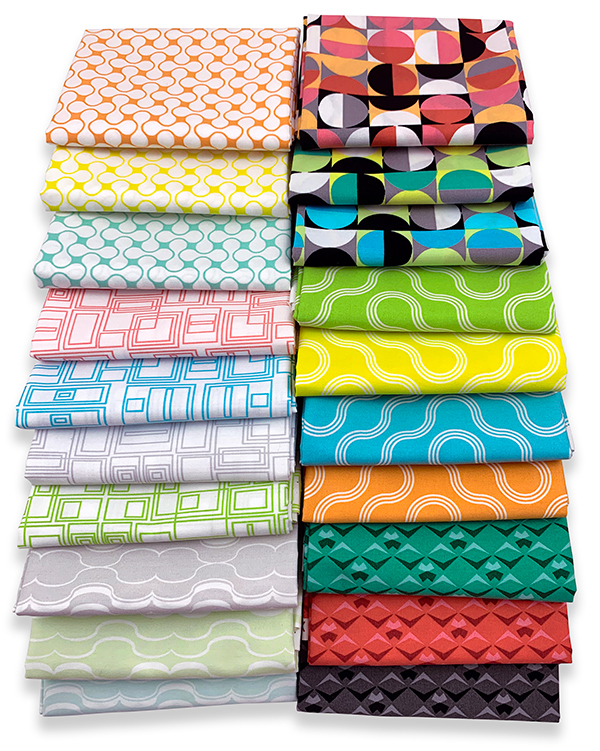
There are 10 low volume prints and 10 saturated colors, all featuring my signature, colorful geometrics. Here’s a sneak peek for now – I can’t wait to tell you more about them!
Good Vibes Saturated Prints
Here’s a short, seven-minute video I put together for Benartex to introduce the line. I’m still working on quilts and patterns, and everything will begin shipping to stores in July of 2020.
Sneak peek of Good Vibes fabrics and patterns on my YouTube channel – please subscribe!
I will be sharing more about this collection during my virtual Quilt Market Schoolhouse at 10:40 AM Central on Wednesday, June 3. This event is for registered, paid attendees. To view the Schoolhouse sessions during Virtual Quilt Market, register for General Access or All Access. Find complete details at VirtualQuiltMarket.com. There are also business webinars and of course, tons of new quilty products of all kinds.
If you can’t catch the live presentations, all registered attendees will have access to the content for one month after the event. There will be so much to see! I hope you’ll take advantage of this great chance to get the latest scoop on what’s happening in the quilting industry.
You can’t imagine how much fun it was to name the prints in Good Vibes. My memories of Gumballs, Slippin’ Slide, Bedazzled, Good Vibrations, Interconnected and Circuit Board are all immortalized in fabric. They bring a smile to my face!
Benartex has put together this handy guide for shops. Feel free to download and save the Good Vibes Lookbook and tell your favorite shop owners to contact their Benartex sales rep to order. The best part of designing any collection is seeing what others make with it – and I can’t wait!!
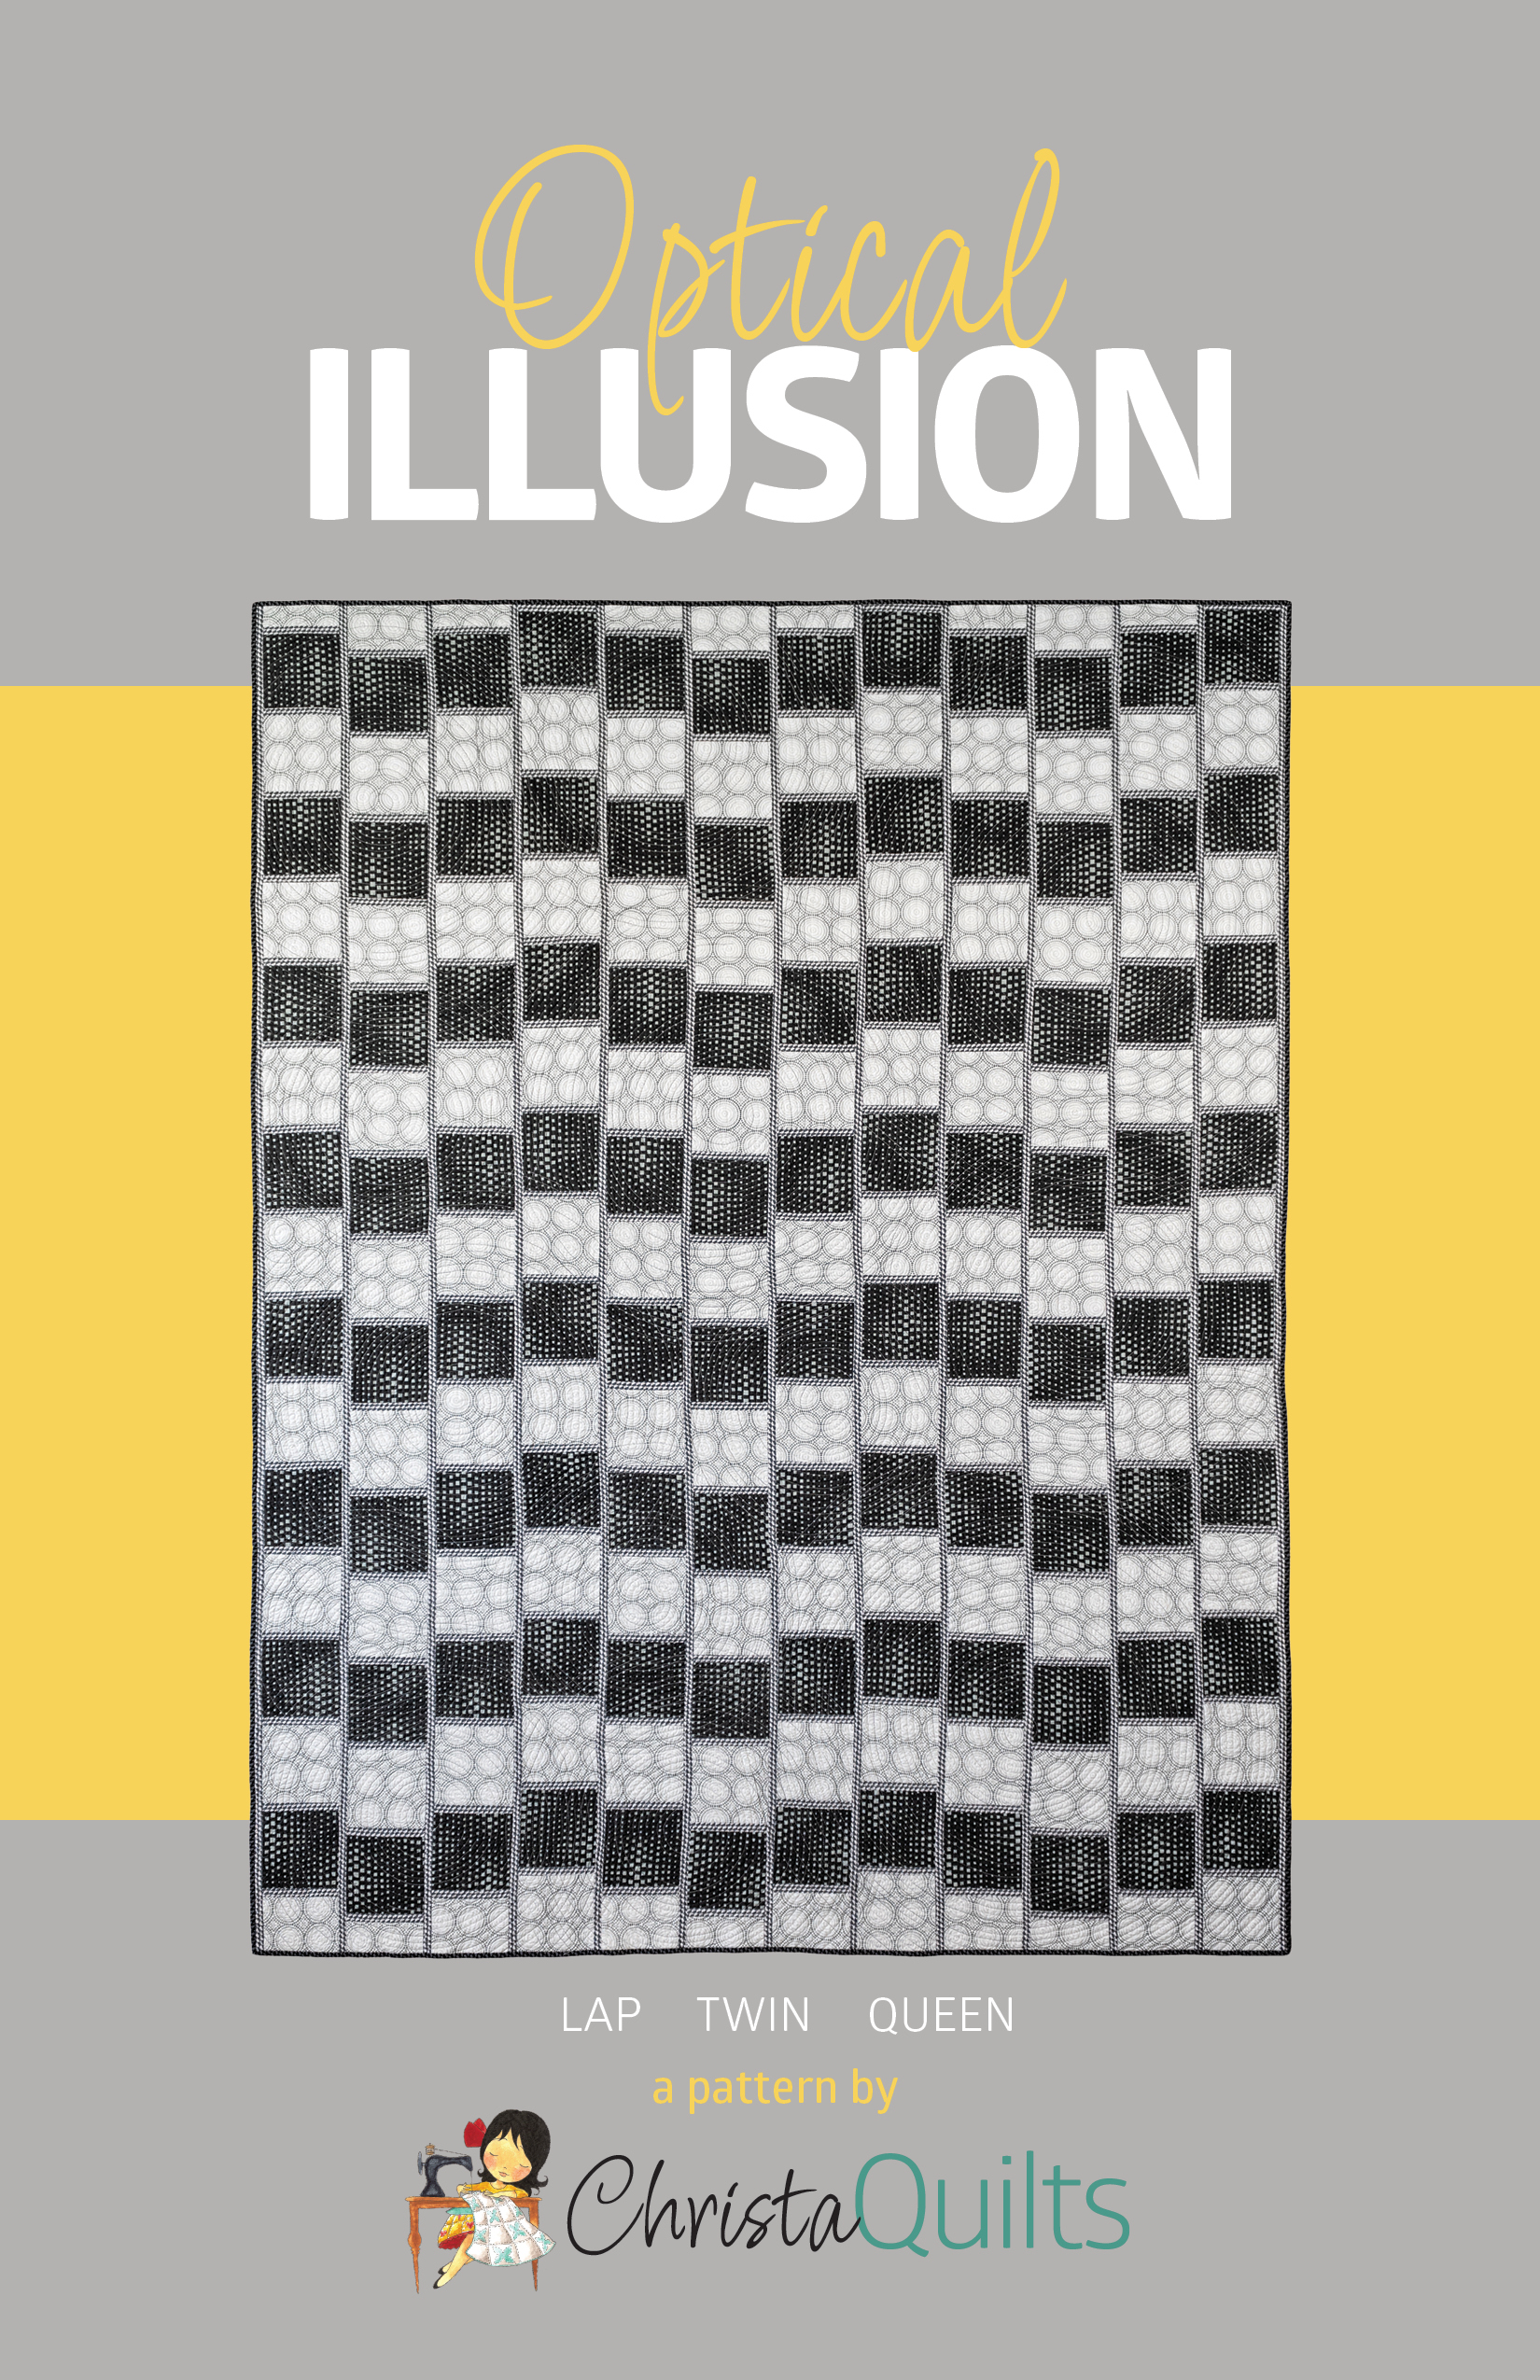
Are you ready to join me for the adventure of a lifetime? Or at least a fun sewing escapade over the next several weeks? I’m excited to guide you as we make my Optical Illusion quilt from start to finish. All you need is a copy of the Optical Illusion quilt pattern and a can-do attitude!
Optical Illusion made from Geo Pop, 67″ x 88″
Scroll this image to see the lines move!
My original version was sewn up in bold black, white and gray from my Geo Pop fabric line. I had requests to see how it would look in other colorways, so thank goodness for EQ8 software which allowed me to quickly recolor lots of fun combinations!
I made some of them into quilt kits which you can pick up if you desire, or just use them as a color guide and pick something similar from your stash.
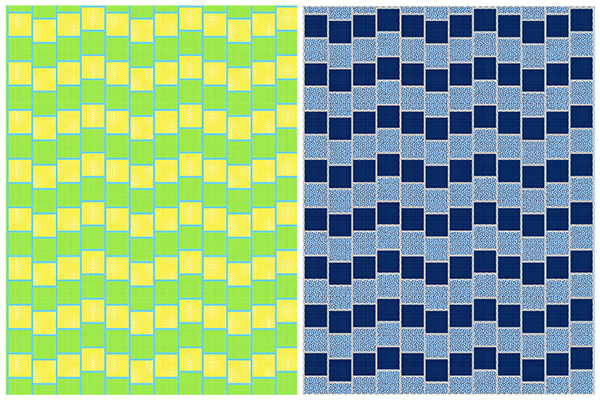
Color Play: Choose Light, Medium and Dark
The trick to making the design work is the interplay of the values. Value is just the lightness or darkness of a fabric compared to its neighbors. For this design to work you need three fabrics that read as light, medium and dark.
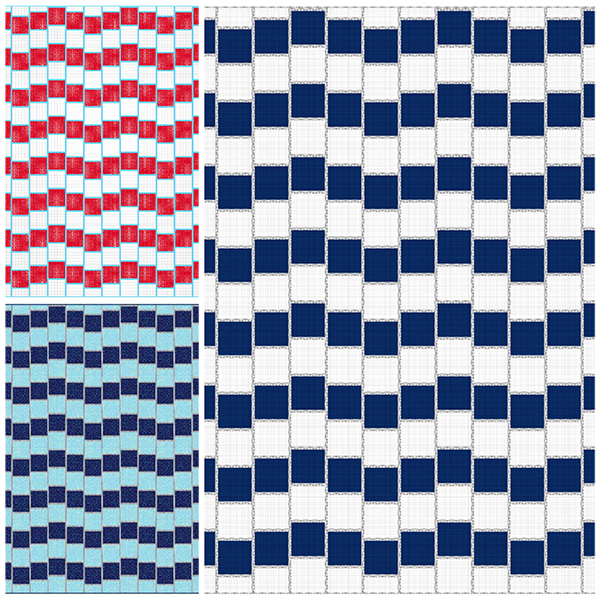
So take a look at these color combos and scroll your screen up and down to see the illusion of the lines waving back and forth. Pretty trippy right?
The illusion works because the medium fabric is ALWAYS used for the skinny strips whereas the light and dark color combos are used for the squares.
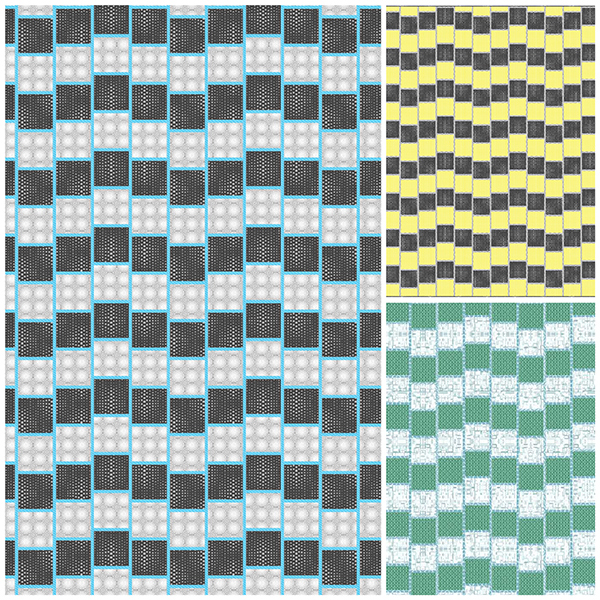
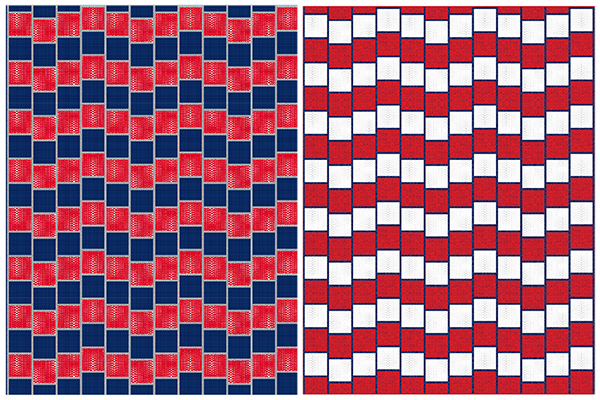
Here’s another group of colors that also showcases the illusion with some interesting color combos:
Solids, or fabrics that read as a solid look best for the bold, graphic design, but that doesn’t mean you can’t use prints. Just be sure you choose something that is mostly one color or color family per print. Here’s another color grouping that works well:
Remember, for best results, use the lightest and darkest fabrics are for the squares, with the medium for the skinny strips. To test the value of your fabrics, take a picture set on gray scale from your camera phone. Then you can easily tell which should be classifued as light, medium or dark.
That’s a dozen different combinations that WORK! (Many are available as kits for the Quilt Along.) I have no idea why our brains read it this way, but it sure is cool, don’t ya think??
Now…
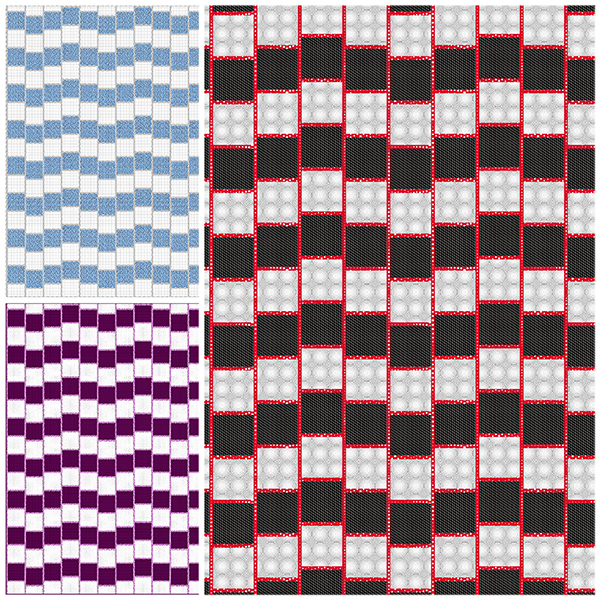
Watch what happens when the skinny strips are LIGHTER or DARKER than the two colors in the squares. It creates too much contrast and doesn’t give the illusion.
These 4 colorways above and below still make a nice looking modern quilt, so don’t despair if your color combos don’t work exactly as you thought. Part of the fun is learning new things, right??
For further discussion and some more examples, check out this video from my Facebook Live “Ask me Anything” series. Click the image below to play. It’s just under and hour and I go through color combinations as well as other quilty tips and advice asked by the audience. (I do these live sessions each wee k and have started posting them on YouTube so be sure to subscribe!)
In my examples, I’ve used mostly prints that read as one color for the best results. But don’t worry—the modern quilt design looks cool whether the illusion works or not!
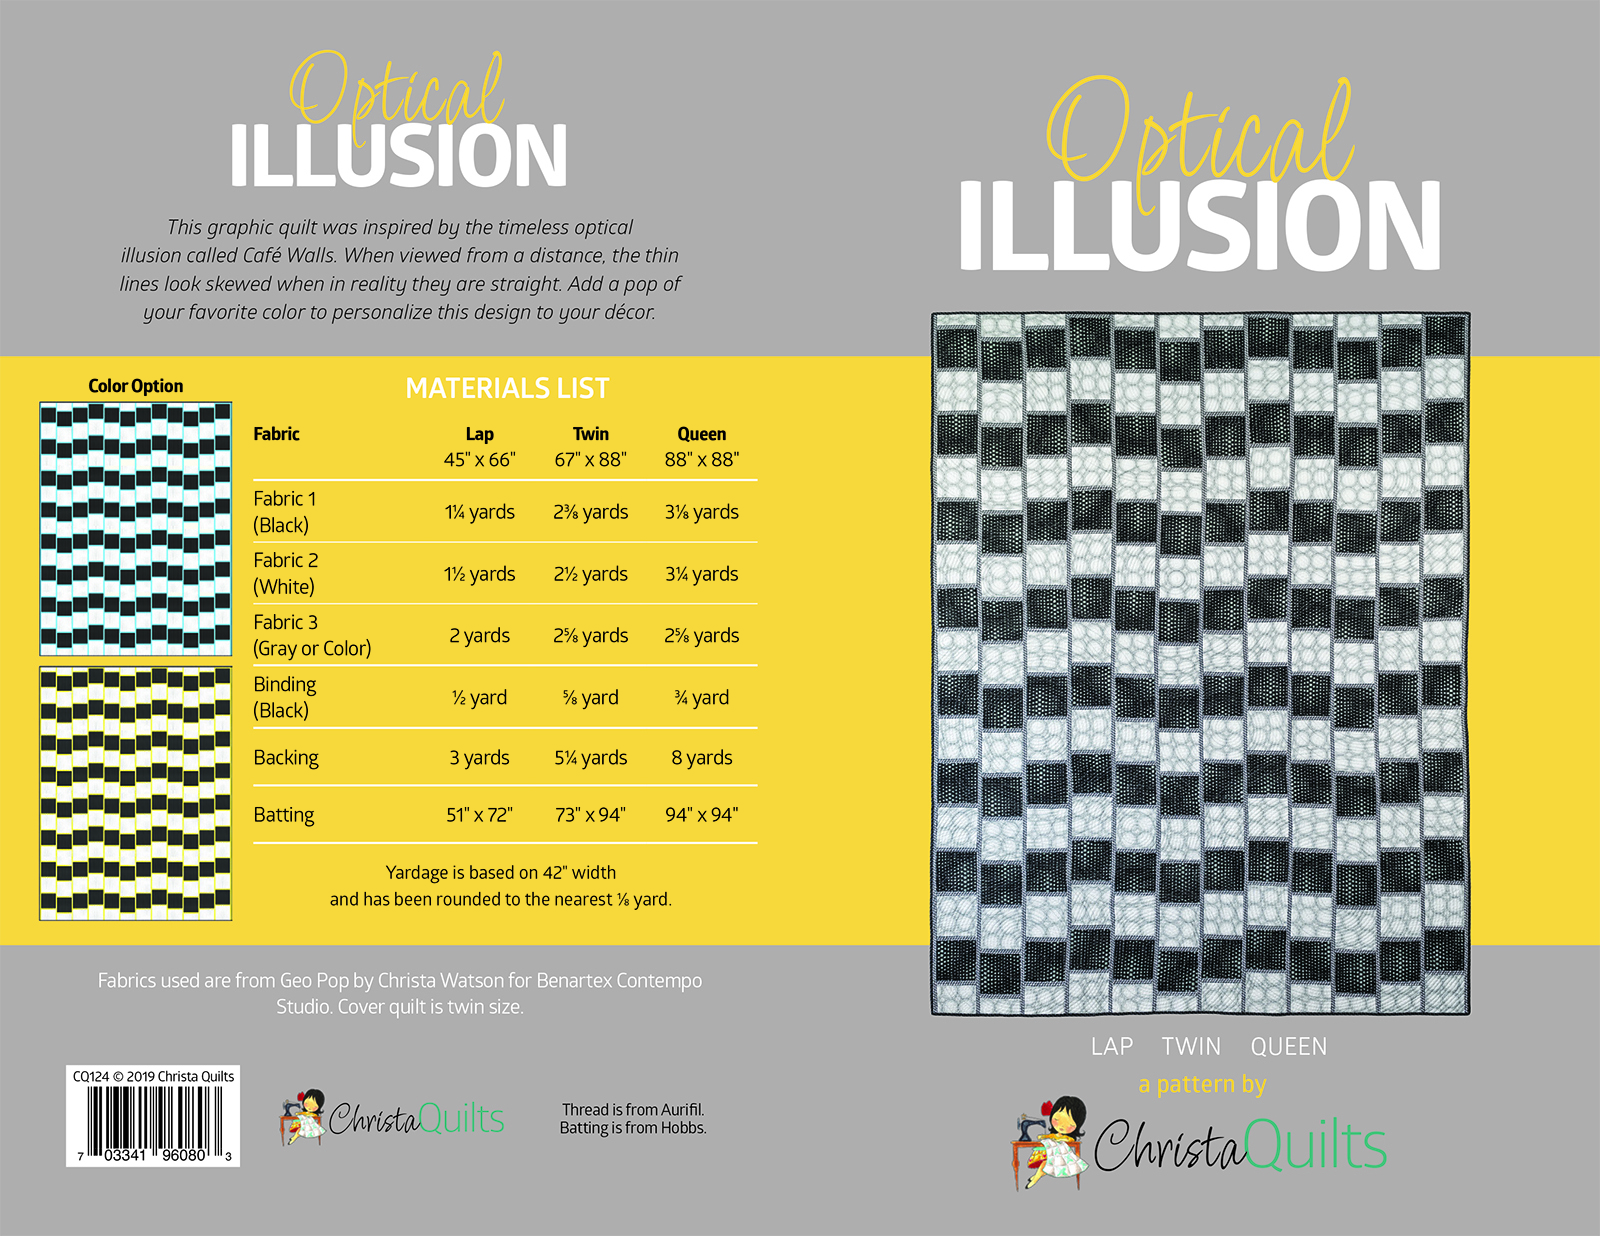
Optical Illusion Supply List
Start thinking about the colors and fabrics that you would like to use, and gather up the needed supplies. The quilt pattern comes in three sizes. Click the pattern image below to expand.
Here’s what you need for the Twin size quilt top (67″ x 88″), which is what I made:
I can’t wait to show you how to quilt the walking foot spiral design!
Quilt Along Schedule
The links below will go live as each part is posted. Bookmark this page and refer back to the schedule anytime in the future to work on this quilt at your own pace.
If you’re an Instagram junkie (like me!), please tag me at @christaquilts and use the hashtag #opticalillusionquilt so I can see what you are doing and cheer you on!
If you’d like to ask questions or need additional help, please participate in my Christa Quilts Group on Facebook. It’s a great place to encourage your fellow makers and get additional ideas for fabric choices and a quilting plan!
Sign up for Email Notifications
Be sure to enter your email address in the box on the sidebar of this blog. If you are viewing this on your phone or tablet, scroll aaaaaaaallllllllllllll the way down to the bottom of the page to find the email address box.
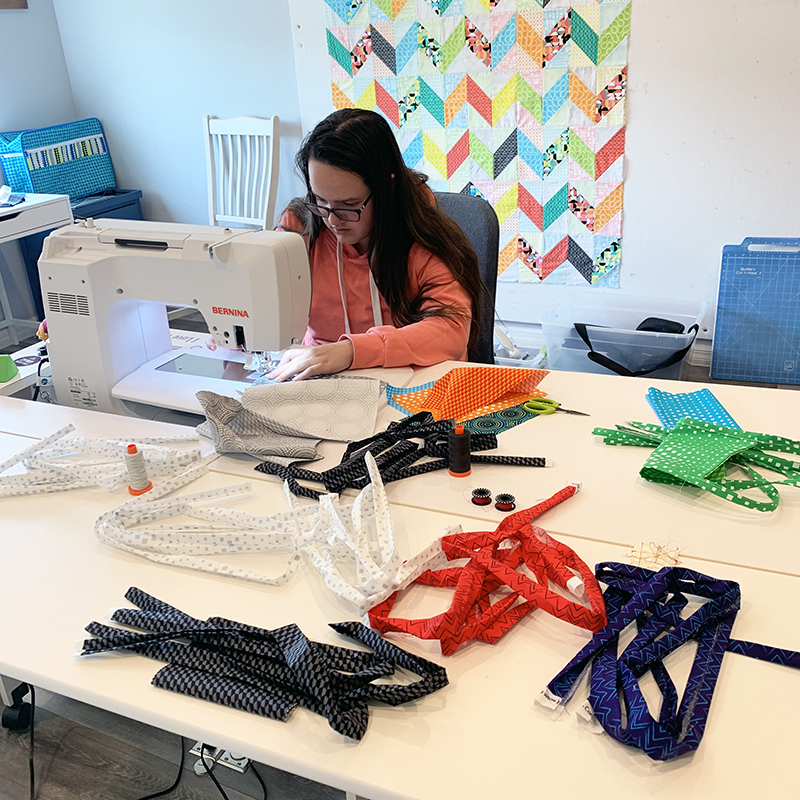
Well, I finally had some time to sit down and sew some masks with my daughter. She needed to do a community service project for her school and of course it needed to be something we could do from home.
I’ve been the only one going out lately to get groceries and mail, while the rest of the family has been at home (other than the occasional walk or jog outside). But now that things are starting to open up, I know we will all need to wear them on a regular basis, so we decided to get busy sewing!
See that little sneaky peak on my design wall? I can’t wait until July to tell you more about it!!
We used up some leftover 10″x10″ layer cake squares from my Geo Pop fabric line to make the masks, and I paired them up with some leftover binding strips and scraps. The layer cake squares worked great and were easy to cut down and make a variety of mask colors for family members to choose from.
We had a great time working on them together and feel good knowing we can literally breathe a little easier now when we go out!
I love all the colorful piles of fabric scraps!
Although my daughter is not really interested in sewing or quilting with me on a regular basis, she enjoys pursuing writing and drawing, so I had to share one of her latest creations.
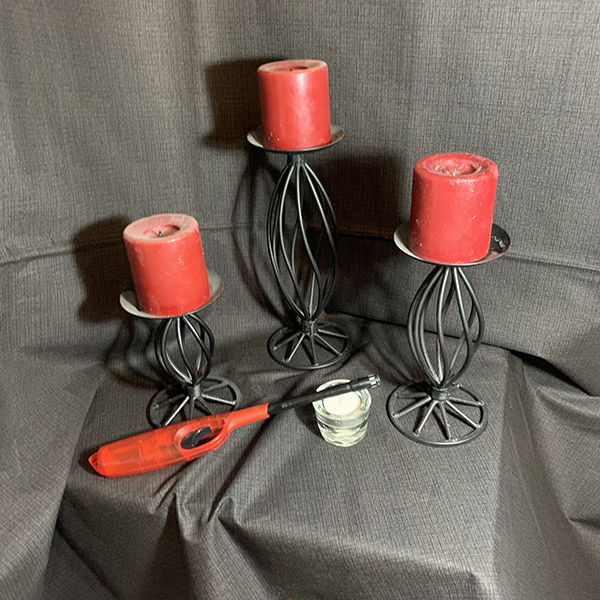
For her art class at school, she routinely creates little vignettes around our home and then draws them with various tools. Here’s her latest creation, a grouping of candles…
I tried to clean off the candles, but she wanted to leave the dust on the candles to add to the “texture” of the composition!
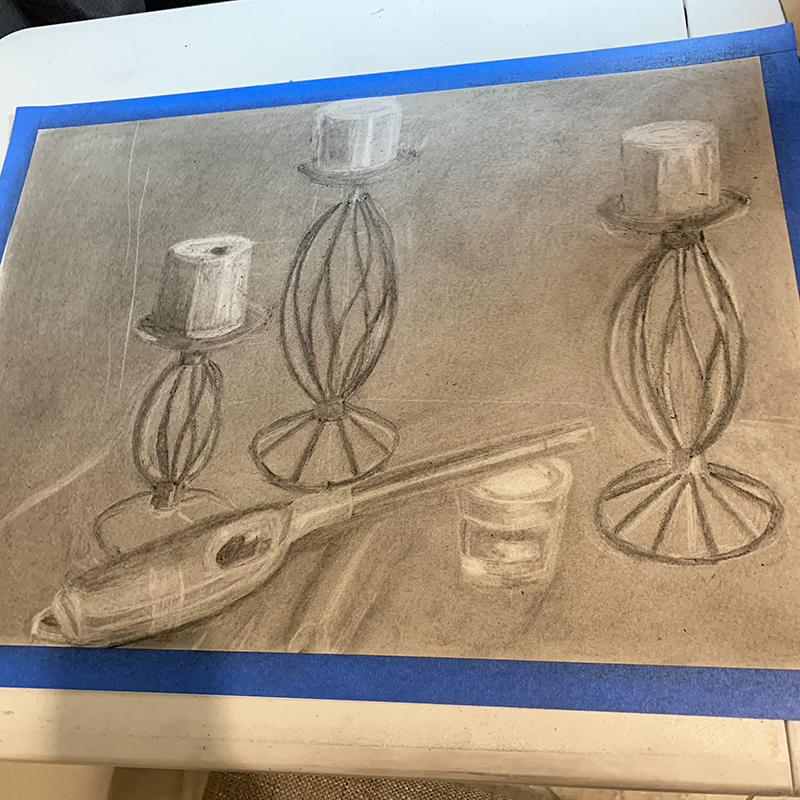
Next, here’s an in-progress pic where she’s drawn the basic design but hasn’t added the details yet. She used a combination of charcoal and some kind of resist where she erased a bunch of the charcoal get the lighter color.s. It was amazing to watch it come to life.
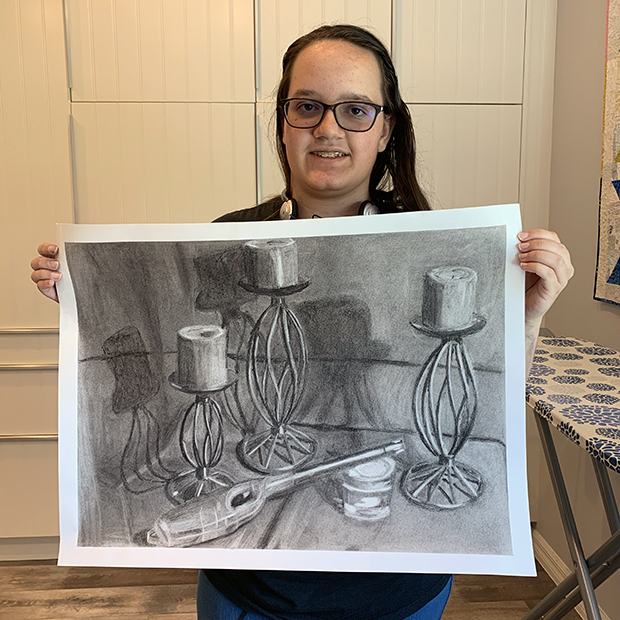
And now the final art piece: I love how she even captured the shadows below. I love watching her develop her talent and I can’t wait to frame it and hang it up!
Since I’m sharing a bit more family time in this post I also wanted to share a picture of the scenic desert near our home. It may not look like much, but I’ve taken up trail running again with my husband and daughter.
We are currently training using the couch 5k program and getting healthier in the process! That means more endurance for quilting and a great way to get outdoors and get some sunshine, too.
Happy quilting, mask-making, sewing, exercising and breathing my friends!
I’m super excited about my next quilt along which will kick off on May 19th with a complete sewing schedule and supply list. Every time I share my Optical Illusion quilt, I love how many people ask for the quilt pattern. I’ve also had numerous requests for a quilt along, so I was finally able to work it in to my schedule, yippee!
Several years ago, my family and I were out to dinner and I saw this really cool optical illusion on the back of a kid’s menu. As with most things whenever I see an interesting design, I wonder to myself, “can I make a quilt out of that??” The design was called “Cafe Walls” and here’s a public domain image of it:
Cafe Walls Optical Illusion
So I began to design in EQ8. It took awhile to get the proportions right and I decided that for an interesting quilt, I preferred the lines to run vertically rather than horizontally.
Once I was happy with my design, I made a version of it from solid fabrics, to try out the idea. It actually hung in QuiltCon back in 2015 and I had sooo many requests to turn it into a quilt pattern, but was so overwhelmed with other deadlines at the time that I had to put it on the back burner for awhile.
I did manage to get it into an issue of a magazine, that is sadly no longer in print, and then I kept putting off the editing and rewriting I needed to release on my own. Since then I’ve seen several different design variations, so it’s fun knowing I’m not the only one who thought this would make a fabulous quilt!
The original version of Optical Illusion Hung at QuiltCon in 2015
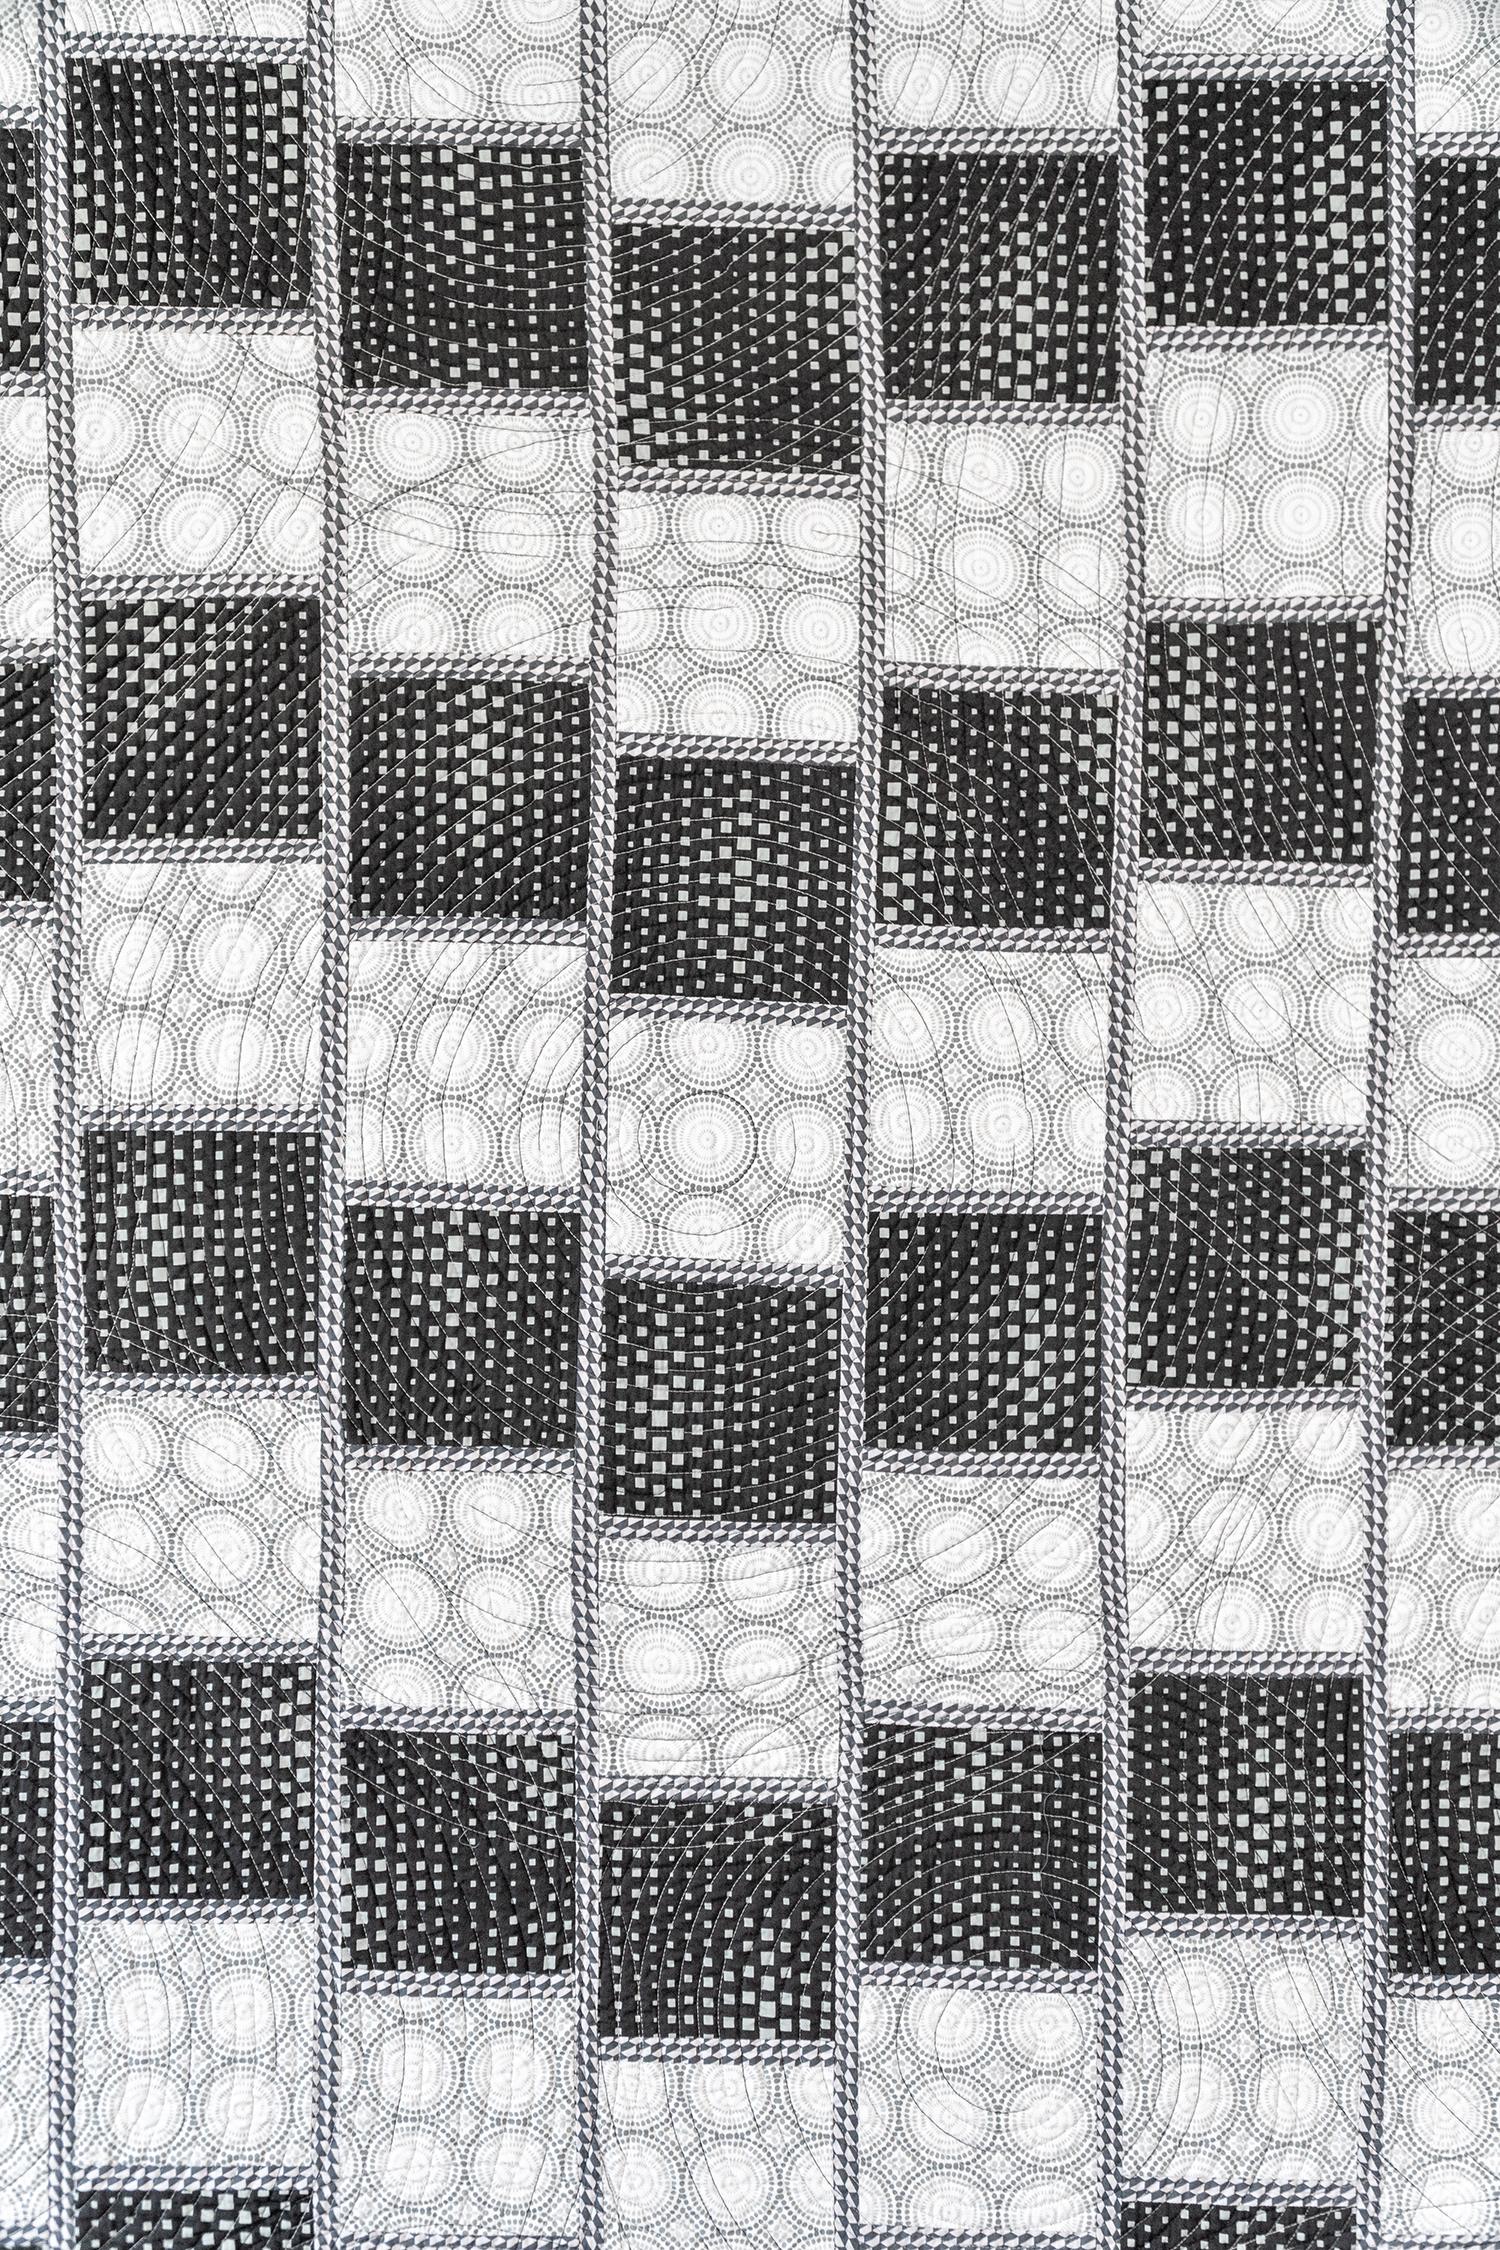
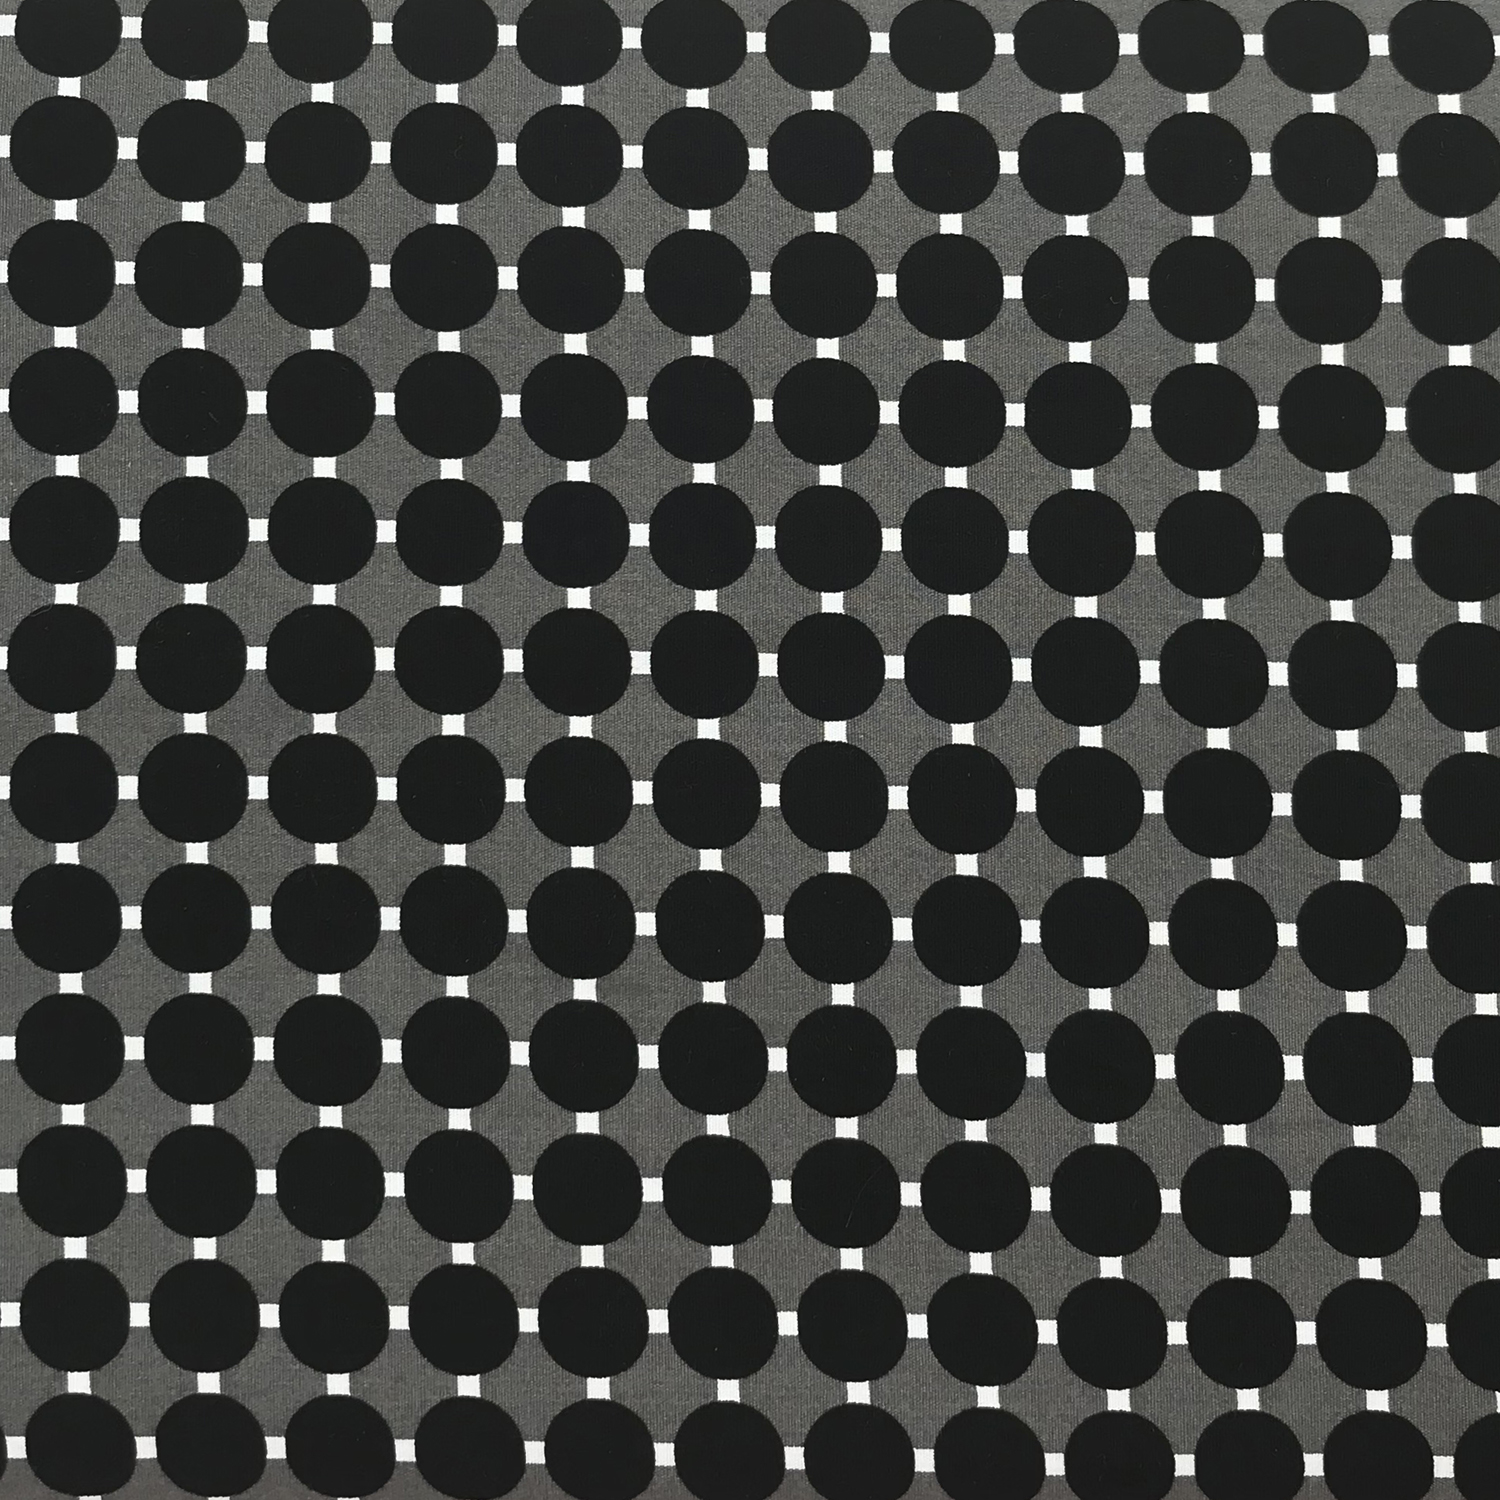
Finally, the timing was right to recreate the quilt and pattern when I released my fourth fabric line, Geo Pop for Benartex. I included a lot of black and whites in this colorful collection and knew I wanted to do something special with them!
As you can see from the detail pic below, I only needed one black fabric, one white fabric, and one gray fabric to create the design. The biggest test for me was to see if the illusion would still work using prints – and I’m thrilled that it does!!
So I really hope you’ll join me for this quilt along to make your own version. Here’s a hint as you start thinking about colors: It doesn’t have to be strictly black and white. But you need good contrast between the lightest color (white), the darkest color (black) and the medium color (gray) to make the illusion work. And the further back you stand, the more you will see the illusion.
Next week I’ll post the full supply list and quilt along schedule, and we will actually dive into making the quilt starting on Tuesday, May 26. So that gives you plenty of time to start gathering your supplies.
Get the Optical Illusion Quilt Pattern
For now, grab a copy of the quilt pattern or optional kit and be sure to sign up to get an email whenever there’s a new blog post. You can do that by entering your email address in the sidebar if you are viewing this on a computer. Or scroll AAALLLLL the way down to the bottom of this post if viewing on your phone.
If you really ant to see the illusion in this quilt, scroll up and down to see the lines wiggle!!
Next Week: Choosing Fabrics
In addition to posting the schedule next week, I”ll dive into sharing some tips and trips for successful fabric combos. The quick answer is that you want very good contrast between light, medium, and dark, with fabrics that read as one color. I’ll go in depth with this more next week with good and not so good examples of successful fabric combo’s. See ya then!
I’m thrilled to introduce a brand new quilt to you today! It’s called Interlinked and was a design I came up with a couple years ago when playing around with some modern design ideas.
Interlinked Quilt by Christa Watson, 64″ x 80″
Made from neutrals of Fandangle, Geo Pop, and Gridwork
I love making all kinds of quilts and most of my designs fall on the “Modern Traditional” side of things. But with Interlinked, I wanted to get out of my comfort zone and really embrace modern principles like “minimalism” and “negative space.”
Interlinked Beauty Shots
I’ve also been having fun taking some styled shots of my quilts. there’s something about surrounding a stark neutral quilt with some earthy color that makes it pop, don’t you think?
The most fun part about making this quilt was combining white and gray prints from several of my fabric lines. After releasing my first fabric line, Modern Marks back in 2017, I realized I needed to add more backgrounds and neutrals to work with in each of my succeeding lines. So this one includes white & gray from Fandangle, Geo Pop and my newest line, Gridwork.
When I shared sneak peeks of me making this quilt a few months ago, I immediately got requests for kits once the pattern was available. So I’m happy to announce that kits are now in stock and ready to ship over in my online store at shop.ChristaQuilts.com.
The PDF pattern can be found in my Etsy shop and it includes a couple of bonus options such as adding borders, color ideas and even a coloring page.
The quilt is actually really quick and easy to make and you can have fun with the quilting just like I did. I quilted a different geometric design in each fabric of the quilt and it was so fun putting this one together. It’s the first time I’ve made a quilt from my fabrics where I’ve used more than one collection and I really enjoyed the freedom of doing that!
Interlinked free-motion quilting detail – click image above to enlarge.
I hope you enjoyed looking at all these fun pics and I can’t wait to see your version of the quilt. When you make it, please use the hashtag #interlinkedquilt on social media so I can cheer you on!
I had so much fun making my Block Chain quilt, and I love seeing all the variations out there that others have made. I enjoyed experimenting around with the quilting on this quilt, and am excited to share this “Finish” post as a way to record all the details about this quilt!
Thanks for joining me in this journey to make the Block Chain quilt. If you are still working on your quilt, scroll down to the end for links to all of the quilt along steps.
This is the week to finish up your quilt with binding, but of course you can work at your own pace, and share your progress in my ChristaQuilts Facebook group anytime. And feel free to ask questions about this quilt. I want you to be successful from start to finish!
Quilt Binding
For my quilt, I used the Circle Grid print in black for the binding. I love the pop of interest it gives the quilt around the edges.
Here’s a roundup of quilt binding tutorials from other quilts I’ve made. I use the same process on all my quilts, whether I bind them by hand or machine. Check out these educational links below:
So the biggest casualty for me in this whole quarantine situation is getting out and chatting with fun folks like you! Don’t get me wrong, I enjoy working from home and am grateful for the flexibility that my job in the quilting community allows. However, I miss teaching quilting and I miss talking about quilting and I miss being with quilters. So I wanted to try out an experiment….
Starting on Monday, April 27th at 2 PM PST (5 PM EST) I’m going to host “Ask Me Anything” using Facebook Live in my ChristaQuilts facebook group.
It’s going to be very casual and unscripted, mostly so I don’t have to plan too much ahead of time. And I’d like to keep it at about 30 minutes so it doesn’t take up too much of your time. This will be a great chance for you to ask me ANY questions you have, quilting related or not!
I might even share some behind the scenes sneak peeks of the “secret sewing” I’m currently working on, and maybe some general thoughts about life or anything else that naturally comes up.
If it goes well – meaning people show up for some fun conversation – I’d like to make it a weekly thing. So think about what you’d like to ask me and let’s have a fun conversation. I can’t wait!
I’m sorely missing quilt market, teaching, and other live events, so hopefully this will be the next best thing. Click here to join my Facebook Group and I’ll see ya on Monday!!
This part of the quilt along is always my favorite!! I’m excited to share how I free-motion quilted my Block Chain Quilt with a fast, fun and forgiving modern design I call “Geometric Chains.”
The basic idea is to quilt an allover design, one line at a time across the entire quilt. Below is the basic motif diagram shown in the Block Chain quilt pattern.
To get a feel for how this design is stitched, draw a series of geometric lines, similar to those shown below on a blank piece of paper. Start with a straight-ish line, then sketch a series of geometric shape such as circles, triangles, squares, spirals, hearts, etc. The sky’s the limit when it comes to ideas!!
To get around each shape and make the next one, you can backtrack (stitch over a previous part of the design), or you can echo part of the design. There’s no wrong way to do it! To avoid marking, make the shapes roughly the size of a pieced block unit. Notice how the middle spiral chain above is roughly the width of the center of the block.
Once you’ve sketched out a few shapes you like, stitch them out on some practice scraps before quilting them on your actual quilt. Be sure to test out thread colors so you are happy with the results.
In the closeup image below, you can see I used a colorful thread from my Aurifil Variegated thread collection. Because the quilt has such a high contrast, I didn’t want to have to change threads as I quilted – so I made the colorful quilting a part of the final design!
When it comes to quilting the quilt, I use my “divide and conquer” method. I start on the right side of my quilt and begin stitching at the top of the quilt, in the batting sticking out around the edges. Then I quilt one “anchor” line of quilting through each block. This will hold each pieced row together so it won’t shift after basting. Then I go back and fill in all of the quilting in each row of blocks.
Click the play button below to watch a short, 2 1/2 minute video of me quilting a couple of the “chains” in this quilt. I’m only showing the closeups, but I’m just quilting one section at a time, and taking my time. I’m able to quilt an entire chain from top to bottom without having to tie off threads at either end.
Click here, or above to view my Block Chain quilting on YouTube. (Be sure to subscribe!)
The image below is a cross section details of the quilt. Notice how all that quilting adds a somewhat whimsical texture to the quilt. Click the image below to enlarge for detail.
You can definitely apply the Geometric Chains quilting motif to any quilt, and there are several ways you can change it up, too! How about using ONE geometric design across the entire quilt? Or mix up each “chain” of quilting so it looks like a geometric sampler.
Instead of quilting straight lines with each shape, try wiggly lines, or do an allover meander with the shapes instead. No matter how you quilt it, I’d love to see your variations! Be sure to share them in my ChristaQuilts Facebook group. Or tag me on instagram @christaquilts and use #blockchainquilt so I can see your progress.
Next week it’s time to bind this quilt and then it will be complete! Be sure to check out my Quilt Along landing page for past quilt alongs and new ones coming in the future!
During these crazy times, sewing is such great therapy! Nothing warms my heart like seeing so many of you sewing masks (especially from my fabrics), making beautiful quilts, and sharing and encouraging each other! I’m currently working behind the scenes on quilts made from my next fabric collection coming later this summer. (See the sneak peek below!)
My next fabric line is called Good Vibes and will be available in July 2020!
So naturally, this means it’s time to clear off some shelf space to make room for the new arrivals! I’ve just reduced the yardage price on my first fabric line, Modern Marks. It’s now only $8.95 per yard, with no coupon required!