My Quilt in American Patchwork and Quilting – Featuring Fandangle

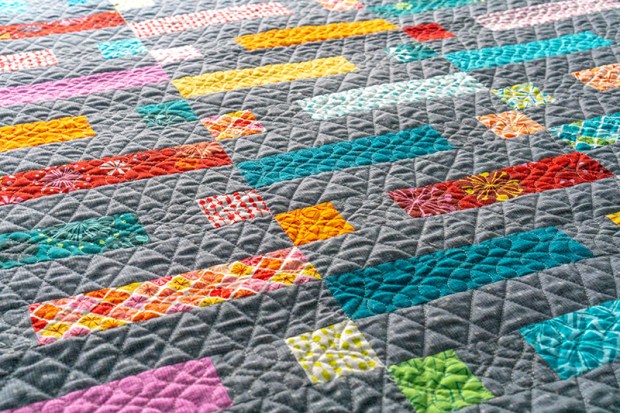
Today I’m happy to introduce you to my quilt “Out of the Box” that can be found in the December Issue of American Patchwork and Quilting. It’s made from one fat quarter bundle of Fandangle and 4 yards of white background fabric.

Out of the Box by Christa Watson

Image shared with permission from American Patchwork & Quilting® magazine.
©2018 Meredith Corporation. All rights reserved.

Look closely and you’ll see that I used leftover fabrics to make a scrappy binding. It’s one of my favorite ways to use up leftovers from a fat quarter bundle without having to purchase any more fabric.

Fandangle Fabric + Color Tip

All it takes is one 20 piece fat quarter bundle and a contrasting background to make this quilt. Here’s a tip when working with fabric bundles: pair them with a very light or very dark background, and you’ve got a winning combo, no matter which fabrics you choose!

Click here to purchase a 20 piece fat quarter bundle of Fandangle, while supplies last!

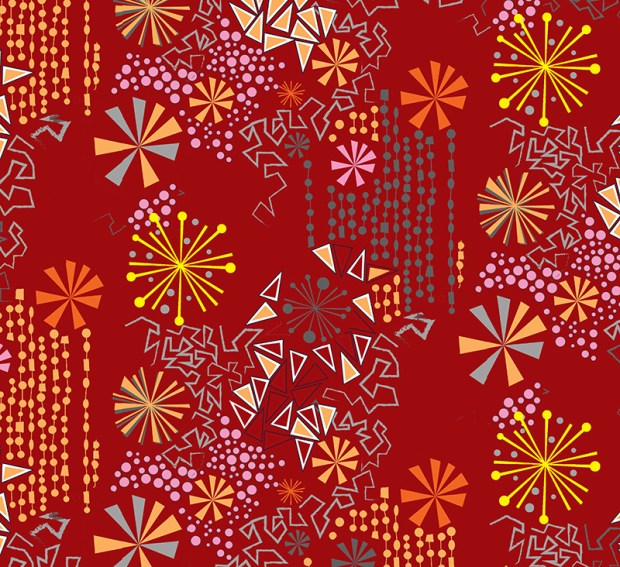
Fandangle fabrics

Fandangle is my second fabric with Benartex Contempo Studio.

Here’s what the cover of the December issue looks like which I believe goes on sale tomorrow. I’ve already received my contributor copy and am in love with several projects in the issue. This is by far one of my favorite magazines because they feature such a wide variety of techniques and styles. (And they pay designers very well for their patterns, too!)

American Patchwork and Quilting DecemberImage shared with permission from American Patchwork & Quilting® magazine.
©2018 Meredith Corporation. All rights reserved.

Quilting Plan

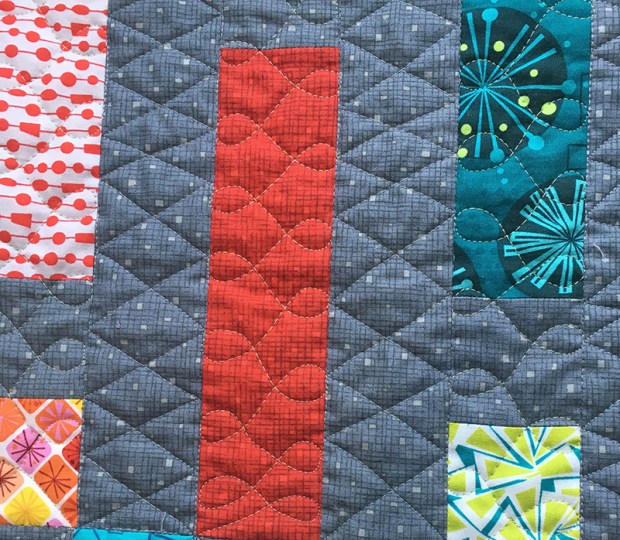
Here’s the quilting plan I created for Out of the Box, a simple wavy grid. It’s one of my go-to quilting designs that’s fast and easy to do with your walking foot or dual feed. I use the pieced seams of the quilt as a guideline for how far apart to space my lines so I can quilt the entire design without any marking!

Wavy Grid quilting plan.

I always make a quilting plan for my quilts before I quilt them.

Although the pattern includes instructions for the piecing, you can learn how to machine quilt the wavy grid motif in my Craftsy class, the Quilter’s Path, and also in my third book, Piece and Quilt with Precuts. It’s my go-to design when I’m in a hurry, and it looks great on any quilt!

machine quilting detail by christa watsonMachine quilting detail – click the image to enlarge.

Here’s another view of the quilt where you can really see the quilting. My hubby Jason has been helping me photograph quilts in order to showcase the fast, fun, and easy machine quilting designs that I love to teach! For me it’s all about texture over perfection.

machine quilting detail

Learn how to quilt this walking foot design from my book Piece and Quilt with Precuts,
and also in my Craftsy class, The Quilter’s Path.

I really enjoyed making this quilt to showcase my fabrics and the best news is, it will be on display in the American Patchwork and Quilting booth at International Quilt Market in Houston, Texas next month!

When you make this quilt, be sure and tag me @christaquilts on social media so I can see what you’re doing. You can also share pics of your progress with this quilt (and anything else you make from my books, patterns and fabric) in my ChristaQuilts group on facebook!

Out of the Box by Christa Watson for American Patchwork and Quilting using Fandangle fabricOut of the box by Christa Watson, Made from Fandangle Fabric

Quick Links to Items Mentioned Above

American Patchwork and Quilting Magazine
Fandangle Fat Quarters
Online Video Class – The Quilter’s Path
My book Piece and Quilt with Precuts

Dot ‘n’ Dash Quilt Along Week 7 – Machine Quilting Part 2: Double Zig-Zags

It’s time to embellish our quilts with some fun machine quilting this week! In my book Piece and Quilt with Precuts, I’ve shared 18 different quilting ideas that you can mix and match along with the 11 projects in the book. We are going to do a little bit of mixing and matching of motifs this week!

(By the way, If you are a little unsure of your free-motion quilting skills, be sure to check out my machine quilting class on Craftsy for my best machine quilting tips and tricks!)

Dot n Dash Quilt Along

Original Dot N Dash Quilting

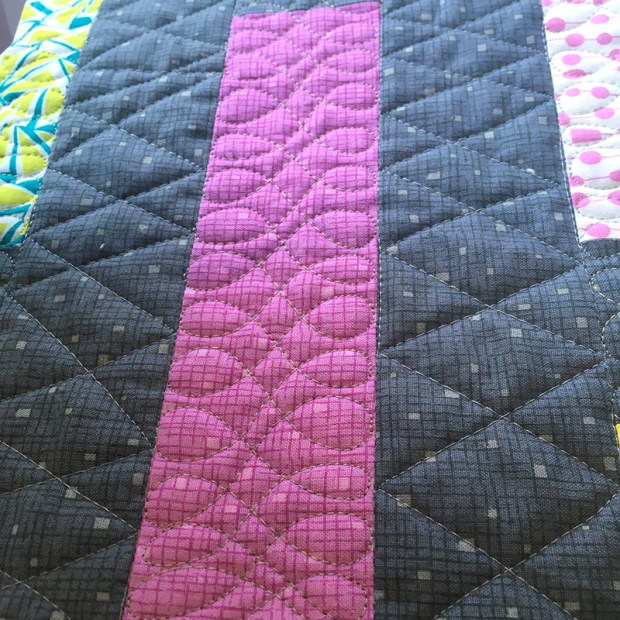
Here’s how I quilted the original Dot ‘n’ Dash quilt. I quilted “crazy 8’s” in the background areas, and wavy lines in the print strips. I followed a similar quilting plan to what we are doing today, but with different designs. If you’d like to follow this quilting plan, see pages 50-55 of the book.

Free-Motion Quilting Dot n Dash

Original quilting plan for Dot ‘n’ Dash – from the book.

For this week’s quilting “assignment,” we are going to play with one of the walking foot designs from another project in the book to  come up with a really fun variation. Take a look at the “Frequency” quilt on page 28 of Piece and Quilt with Precuts. You can create amazing texture by quilting “sort of” straight lines, zigging and zagging from side to side across each strip.

Quilting Modern Zig-Zags

Notice the random irregularities. Not only do they add interest to the quilt, they are fast and easy to do because there’s no marking involved and you don’t have to measure any spacing. This is MY kind of perfectly imperfect quilting!!

Frequency Quilting

See page 28 of Piece and Quilt with Precuts to practice this design.

quilting with your walking foot/dual feed

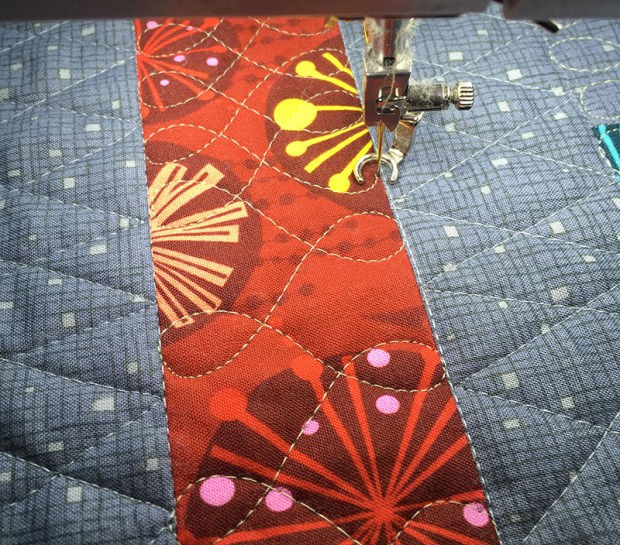
Rotate the quilt so that you are quilting each strip row from the top to bottom. Quilt a short line by eye and stop with the needle down when you get to the side of your strip. Lift the foot up and slightly rotate the quilt so that you can angle the line in the opposite direction. Keep going, quilting the irregular lines from side to side. If you have a knee-lift or hover feature on your machine, use it so that you can leave your hands on the quilt the entire time.

To prevent whiskering (wrinkles) or puckers on your quilt, quilt each row starting at the top of the quilt and working your way to the bottom each time. Just like when I stitched in the ditch last week, I’ll start on the right side of the quilt and work my way towards the center, then rotate the quilt and keep going from the center out.

Alternate Method: Free-Motion Quilting the Zig-Zags

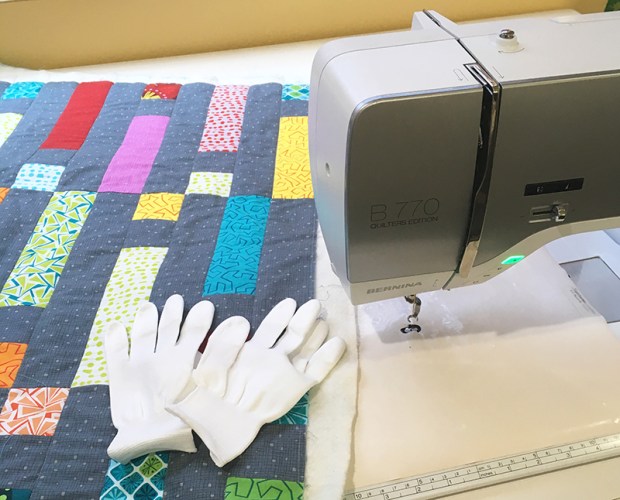
To get started free-motion quilting, I recommend using a Supreme Slider – a slick sheet that clings to the bed of your sewing machine, and a pair of Machingers gloves that will give you a better grip on your quilt. Just remember to only use the Supreme Slider while FMQ, not walking foot quilting, so that you don’t accidentally stitch through it! (Ask me how I know….)

Tools for free motion quilting: open toe foot, gloves, supreme slider

The gloves and slider will help me control the quilt with less strain on my hands.

I’ve lowered my feed dogs and I’m quilting with an open toe free motion foot so I can better see what I’m doing. Although my machine does come with a stitch regulator, I actually prefer quilting without it. I learned without a regulator so that’s the movement I’m most comfortable with.

However, if you have a stitch regularot, give it a try and see which feels more comfortable to you – with or without. Here’s another tip I picked up from my good buddy Leah Day: try quilting both with your feed dogs up and down to see which gives you a better stitch. The nice thing about using a Supreme Slider is that it covers the feed dogs, keeping them out of the way if you decide to keep them up!

Free Motion Quilting Zig-Zags

Free-motion quilting is faster, but requires more control and lots of practice.

Did you know you can free-motion quilt short straight lines without a ruler? If they are done in short bursts, you can eyeball a straight line if you look ahead and pick a point you are trying to get to.

The reason I’m quilting this design free-motion instead of with a walking foot is that it’s faster, since I don’t have to stop and turn the quilt for each zig and zag. However, it requires more muscle control, so practice both ways first on a scrap of batting and fabric and then decide which technique is easier for you to master.

Free Motion Modern Zig-Zag Design

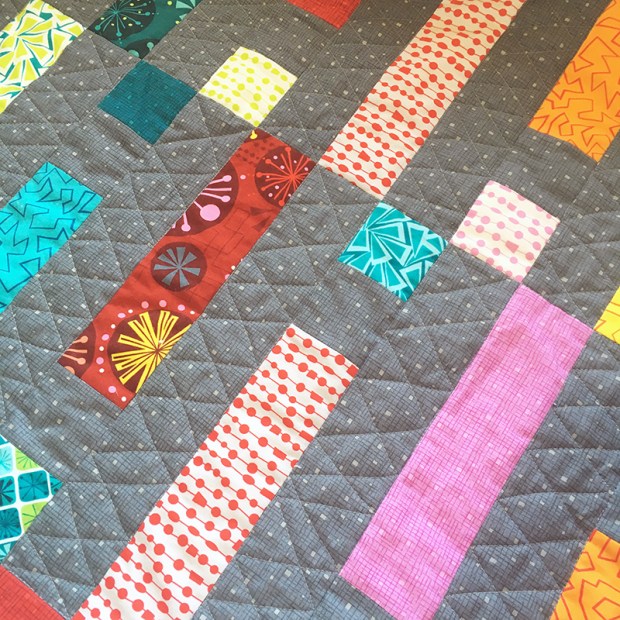
First pass across the quilt – zig-zags in all the gray areas.

Notice that I’m quilting modern, random zig-zags in the gray strips between each print strip (not including the small gray squares). To quilt one long continuous line without breaking thread, zig or zag over to the next gray section to quilt. If needed, it’s okay to backtrack (or quilt over a precious quilting line) in the seam to get to where you need to go.

After quilting one pass of zig-zags, I decided that I wanted to quilt another set of lines, intersecting what I had already done. I’m using the same method to quilt the random short lines, but crossing over each previous line as shown below:

Double Zig-Zags fmq

Notice how I’m quilting each row from the top of the quilt to the bottom.
I will rotate the quilt as needed to find a comfortable quilting position.

Machine Quilting Homework

Quilt all of the gray areas with a blending thread. I used the same Aurifil 50 weight gray that I used for stitching in the ditch last week. Quilt one pass across the quilt like the pictures I showed above. Then quilt a second pass across the quilt to give it more random texture.

We will tackle the print strips next week, using another free-motion motif from a different quilt in the book. It’s been fun to mix and match the designs to show how versatile they can be!

Free Motion Quilting Double Zig-zags

Divide and Conquer – quilt all of one design first before moving on to the next.

It’s Not to Late to Start!

Remember – you can jump in and make this quilt any time. Just grab a copy of the book and your favorite fabrics (strips, scraps, or stash).

Click here for the supply list and links to all of the previous posts.
Then share your progress on instagram #dotndashqal or in my Christa Quilts facebook group.

Free motion quilting double zig zags

I love yummy machine quilting texture!! Next week I’ll show you how to quilt the rest.

Behind the Scenes: My Design Process for Fandangle

Today I thought it would be fun to share a little bit of my fabric design process for Fandangle. The line includes 6 designs in multiple colorways so I’ll take you through the design process of 3 of them. (When my first line, Modern Marks came out, I shared a bit of my process along with some some of the rejects, and that got a lot of interest. Read about  that here.)

Fandangle Fabric

Click here to get yardage and bundles of Fandangle, while supplies last.

For Fandangle, I knew that I wanted it to coordinate with Modern Marks, but still stand on its own as a separate collection. In fact, as I was working on the line, I scattered some of the in-process paper swatches onto my Modern Marks Rainbow Taffy quilt, just to make sure they’d look good together:

Fandangle and Modern Marks

If you look closely, you’ll notice that the orange, yellow and green tone on tones are not the final versions I ended up with. Read more about those “rejects” below!

Whenever I design a line, I start with a concept and a rough color palette. When inspiration strikes, I can see what I want in my head, but the hard part is technically getting that into the computer to form a proper repeat. Fortunately, I work with a fabulous stylist and graphic designer at Benartex who can help translate my ideas into reality. I thought it would be fun to walk you through the design process of three of the prints so you can see how they evolved.

Evolution of Baubles and Bits

This print was the hardest to finalize and the one that took the most work. I knew I wanted to create a fun, funky medallion that would almost read as a floral. So we started with the basic medallion shape. You’ll notice that colors and designs change quite a bit during the process. First I finalize the shapes, and then the colors. So any in-process and designs and hues are always just placeholders.

First Try:
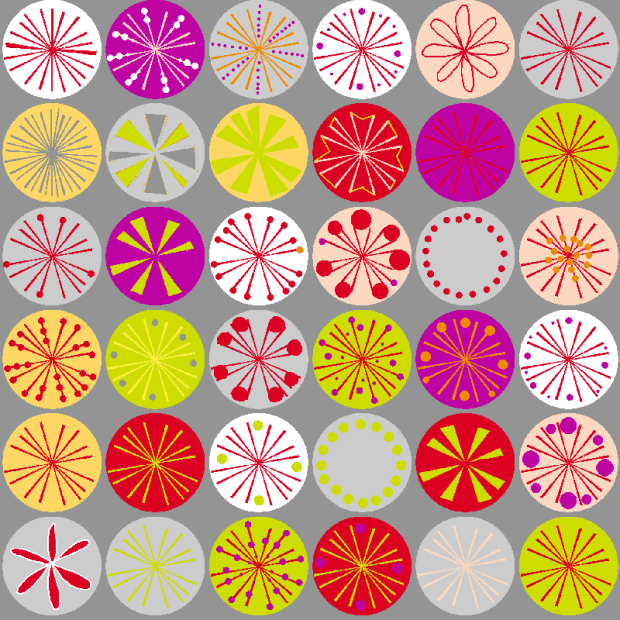
Second Try:
Baubles and Bits in Process

Third Try:

Final Design:

Baubles and Bits final design

Isn’t it fun to see how it evolves? Of course there were a lot of intermediate steps in between each image involving more sketches, lots of cutting and pasting, and the painstaking decisions to add or remove colors that didn’t work. Did you notice that I cut the purple? It just didn’t work this time around (although we were able to work in some nice pink and lilac). But don’t worry, purple will work its way into my fabrics in the future – I promise!!

Multiply these design and color changes by each print and color in the line and you can see what an involved process fabric design can be!

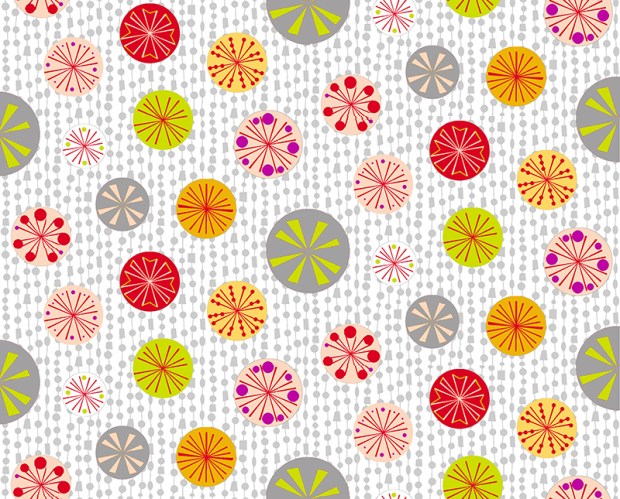
Triangle Trinkets Design Process

This print was a lot quicker to finalize. It began with a simple line-drawing sketch of my arrowheads quilting design in several different arrangements.

Original Concept:
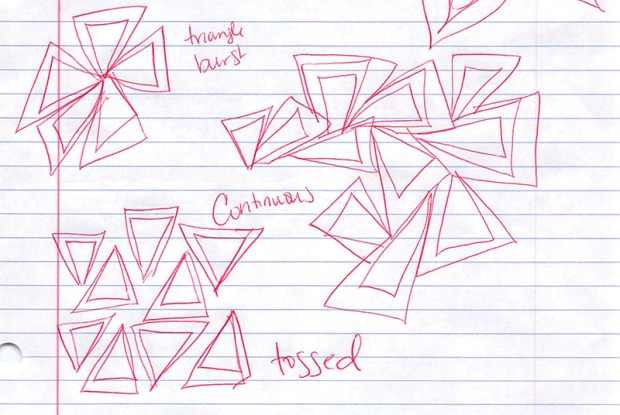
Triangles sketches

Then we put the designs into the computer and tried different color groupings and design layouts to see what worked. The teal colorway was one of my favorites, but I thought the stripe arrangement below was too directional.

Good Color, Bad Layout:

Final Design:

Once the design was finalized, we recolored them in a dozen different colors that coordinated with the rest of the prints. It was hard to narrow it down to the final three colors I included in the line, but sadly, I knew I couldn’t include them all!

Fandangle fabric -Triangle Trinkets

Paper Cuts – the Tone on Tone Blender

This print was one I felt strongly about from the beginning. I knew exactly what I wanted but it took awhile to get there. Again, I started with a simple pen and ink sketch on paper, inspired by another one of my favorite free motion designs – jagged stipple.

Design Sketch:

The design team at Benartex wasn’t so sure it would translate well as a design, so we tried a couple other things first that I ultimately rejected. First of all, we revisited the boxes print from Modern Marks with a different take on the design.

Boxes Blender:

Boxes blender

Nice, but nope, that wasn’t it. It turned out very nice but was too close in concept to the boxes design from Modern Marks.

Loops and Strings:

blender loops

We tried something that looked like loops and strings, again based on one of my free-motion quilting designs. This print would have worked well, but it wasn’t what I wanted.

Jagged Design – First Try:

Blender print

Finally, they were willing to let me try the jagged, edgy design that I really wanted with this line. The first iteration was a little too dense for my taste, so we spaced it out to give the design a little more breathing room.

Final Tone on Tone Design:

Paper Cuts design from Fandangle

It was worth all of the time and effort we put into this print! After the design and scale were finalized, the hardest part was naming it. “Jagged Stipple” didn’t really go with the other design names inspired by the idea of ornamentation and embellishment.

So I finally renamed it “Paper Cuts” because that sounded cutesy and crafty. The irregular jagged lines reminded me of small cuttings of paper. I almost named the print “scherenschnitte” which literally means “scissor cuts” but I knew people would have a hard time trying to pronounce that word it, let alone spell it, LOL!!

Fandangle Quilt Patterns
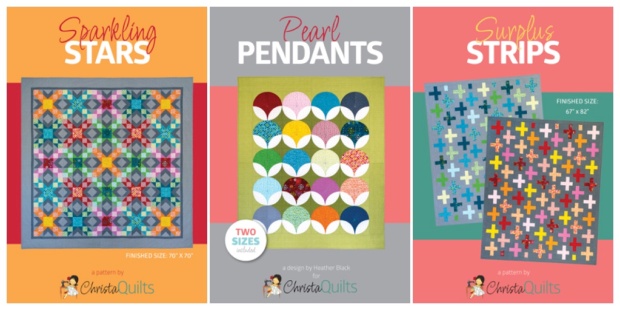
Fandangle Quilt PatternsClick here to get PDF versions of the Fandangle Quilt Patterns
Click here to get print versions of the Fandangle Quilt Patterns

Of course, once the prints were finalized as digital images, it took me nearly as long to come up with quilt patterns to showcase the fabrics effectively. Designing quilt patterns is a very similar process for me as fabric design: I start with an initial sketch, and tweak it until it feels right. All of this work was finalized before I even received fabrics to work with. It’s a long process for sure, but I enjoy every minute of it!

Fandangle Finalized

Fandangle fabric by Christa Watson for Benartex Contempo

I hope you enjoyed seeing this peek behind the curtain of how one designer’s process evolves. I know it’s different for each and every fabric designer, but so far this process has worked very well for me. I went through a similar process described above for all six prints in the line, but it was worth it to create a collection I love!

In fact, as I write this, I’m developing additional concepts, sketches, colorways, and ideas for future fabric lines. I’m starting to get the hang of how things works which each new collection I create, and it’s been such an incredible journey. As long as you all continue to love them as much as I do, I’ll have more to share in the coming months – so stay tuned!
Dot ‘n’ Dash Quilt Along Week 6 – Machine Quilting Part 1 SITD

Can you believe we are 6 weeks in to the quilt along?! The work you all are doing is fabulous and I’m excited to get to my favorite part – machine quilting!! This week we will Stitch in the Ditch (SITD) to secure the quilt for the jazzy free motion quilting we will do later. Many times, this crucial step is overlooked, and although it’s not the most exciting part of machine quilting it’s one of the most important steps for successful free-motion quilting.

Machine Quilting Detail on Dot n Dash Quilt

Machine Quilting Detail on Dot ‘n’ Dash Quilt. Stitching in the ditch allows you to break down the quilting into sections, which makes for more successful free-motion quilting later.

My Fave Machine Quilting Supplies

First of all, let me tell you about the needles I prefer to use for machine quilting. They are from Superior Threads and are called Topstitch needles. Look at the image below to see the difference between a Topstitch needle and a Universal needle. The Topstitch has a slightly sharper point which is helpful for penetrating the fabric. But the most important feature is a slightly longer eye (the hole) so that your thread won’t shred. I love these needles so much that I use them for piecing as well.

Needle Closeup

I buy the needles in the blue package as they are most economical for my projects:

Next, the thread I use for piecing AND machine quilting is 50 weight 100% cotton from Aurifil. The 50 weight is thin, yet strong so that it will blend into your quilt. I’d rather see the overall texture of the quilting rather than the individual stitches, and quilting densely helps me mask any mistakes. After all, the easiest way to hide imperfect stitches is to surround them with more imperfect stitches!

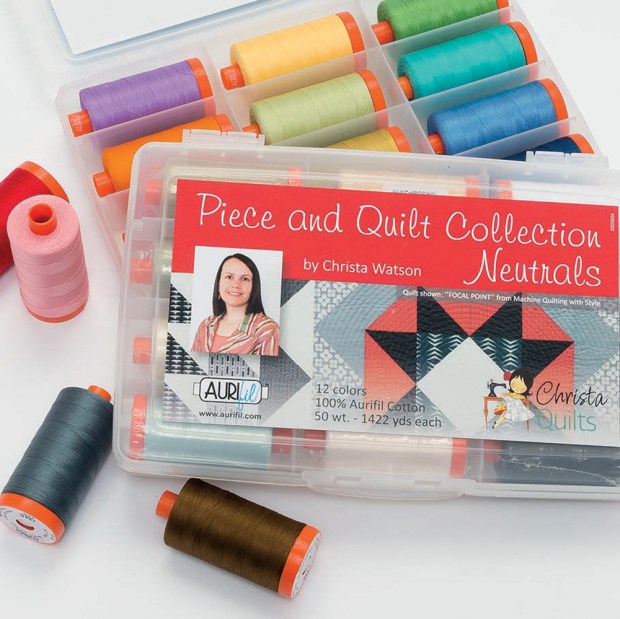
Piece and Quilt Collection Aurifil Thread by Christa Watson

For this quilt, I’m using the medium gray #2605 from my Piece and Quilt Neutrals thread collection. (My neutrals box also includes a lighter gray and a darker gray so that you’re covered, no matter which shade of gray you like!)

Stitching in the Ditch

Whenever I do any custom quilting, I will always “anchor” the quilt by stitching in the ditch first, in key areas of the quilt. For Dot ‘n’ Dash, it made sense to stitch in the ditch between each long row. I recommend using a walking foot, or a machine that has a built in dual feed system (such as the BERNINA 770 QE that I’m using).

The nice thing about pressing seams open, is that you can actually stay in the ditch, and you don’t have to worry about switching thread colors for the low vs. high side of the ditch. Contrary to popular myth, stitching in the ditch with seams pressed open will NOT weaken your seams. I’ve been doing it for years with no problem, and I find it actually strengthens my quilts and adds more stability. (Just think about it – if stitching over a previous line of stitching would cut your threads, then you’d never be able to backtrack over a seam, right??)

Stitching in the Ditch on Dot n Dash Quilt

I use the terms walking foot quilting and dual feed quilting interchangeably.
Stitch slowly , so you can stay in the ditch as much as possible

The built in dual feed turns my 1/4″ patchwork “D” foot into a walking foot, feeding the quilt through evenly with no puckers. I recommend quilting with a slightly longer stitch length (3.0 instead of 2.5) to help compensate for any drag on the quilt. I also recommending reducing your presser foot pressure when doing walking foot/dual feed quilting (but not for FMQ).

Because you are making contact with the quilt on every stitch, this puts a lot of pressure on the quilt which can lead to tucks and puckers, especially when crossing seams. By reducing the presser foot pressure, it enables you to quilt with a lighter hand (or should I say foot?) on the quilt.

Modern Marks Quilt Backing

Look how nicely the gray thread blends into the blue Modern Marks print on the back.

When stitching long straight lines across the quilt with a walking foot, I recommend stitching in one direction only, from top to bottom, rather than going back and forth. This will keep the quilt flatter, with less torque on the quilt. Many times, “whiskering” – or lots of little creases will appear if you stitch lines back and forth.

Scrunch and Smoosh the quilt under the machine

Scrunching and Smooshing in Progress

To deal with the bulk of the quilt under the machine, I scrunch and smoosh it out of the way however I can, and only focus on one area of the quilt. I start on the right side of the quilt and work my way across the quilt, stitching one line at a time.

When I get to the center of the quilt, I’ll rotate the quilt 180 degrees and keep going from the middle to the edge of the quilt. This allows you to deal with the least amount of bulk at a time, and by the time you get to center you know that the bulk will get less and less as you quilt the other side.

Stitching in the Ditch on Dot n Dash

Detail of stitching in the ditch

Once either side of the strips has been stitched in the ditch, your quilt is fully secure to add more quilting. Note that I’m only SITD along the long rows, not in between the smaller squares. That would be too much starting and stopping for my taste! And don’t worry, even if your ditching lines veer off a little bit, you won’t notice it once you add more quilting.

Quilting Homework

Finish stitching the rows in the ditch and then get ready for free-motion quilting next week! Because we are taking our time and spending 3 weeks on machine quilting, you’ll have plenty of time to ease into it.

Dot n Dash machine quilting

Next time we quilt, all we have to do is think about smaller sections, one row at a time.

You could always stop right here and call it finished, but I can’t wait to show you how to add more yummy texture next week! Be sure and share your progress and ask questions or get any trouble-shooting help over in my Christa Quilts Facebook group, or on instagram #dotndashqal.

Click here for the start of the quilt along with supply list and links to all of the QAL steps.

Beaded Lanterns Quilt Along Part 2 – Making the Blocks (on the BERNINA Blog)

Are you having fun with my quilt alongs? I know it’s kinda crazy that I’m doing two at once (Dot ‘n Dash on my blog and Beaded Lanterns over on the BERNINA blog). But seriously, if I didn’t have deadlines for my quilting, I wouldn’t get anything done, LOL!!

Fortunately – just so you know, I actually made both quilts ahead of time since I knew I would be out of the country teaching when they were scheduled to be shared. (More about my Australia trip later, so stay tuned!)

Beaded Lanterns Blocks

Click here to purchase Fandangle precuts, bundles and yardage while supplies last.

This week over on the BERNINA blog – We All Sew – I’m sharing the process of cutting the strips and making the blocks. So head on over there to check it out!

Remember – for any of my quilt alongs, I leave the posts up indefinitely so you can always come back to them later when you have time.

Dot ‘n Dash Quilt Along Week 5 – Backing and Basting

I love quilt alongs and the best part is seeing the variety you all are making! It makes my day. 🙂
This week we are getting down to the nitty gritty and getting the quilt ready for machine quilting next week. But don’t worry, if you aren’t to that point yet, that’s perfectly fine. These quilt along posts will stay up indefinitely and you can always refer back to the intro post for links to each specific QAL step.

Dot n Dash Quilt Along

Click here for the quilt along schedule and supply list.

Preparation is Key

Getting ready to machine quilt is a little like getting ready to paint a house. The actual painting isn’t hard – it’s all the prep work (ike moving furniture and taping down the windows) that takes time and gets in the way of the fun part. So take your time to prepare the quilt and baste it and don’t feel like you have to rush this part. In fact, I always set aside a separate day for backing and basting and then give myself a little reward when my least favorite part of the process is finished!

A tip on choosing batting: if you want to hide machine quilting “irregularities” and give your quilt that antique puckered look, choose a cotton batting. If you want to give your stitches more definition and a loftier look, choose wool. I usually stay away from polyester batting because it’s very slippery and usually causes me to get puckers on the back of my quilt. Cotton and wool cling to the quilt which gives you better control while quilting.


Sewing the Backing Fabric

You want to ensure that the backing fabric is at least 3-4″ bigger on all sides of the quilt top, more if you plan to long arm quilt. The easiest way to do this is to cut two large pieces of fabric and sew them together. For example, my quilt measures 60 x 72. So If I cut 4 yards into 2 two -yard pieces that will give me one big rectangle approximately 72″ x 80″ to work with once the chunks are sewn together parallel to the selvage.

Sewn Quilt Backing

I basted this quilt at a recent teaching retreat I participated in. All you need is one table for basting – work on the middle and then the sides as needed.

Spray Basting the Quilt

If you prefer to pin baste, click here for an alternate tutorial.

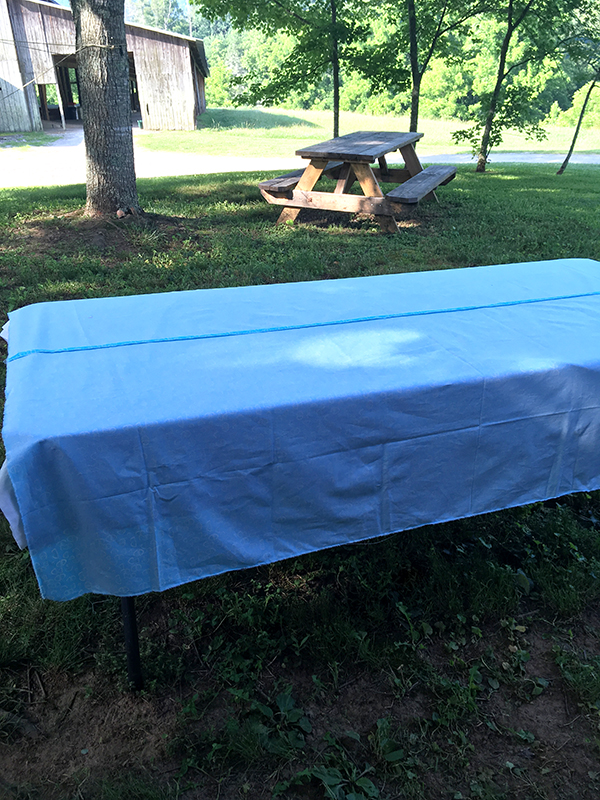
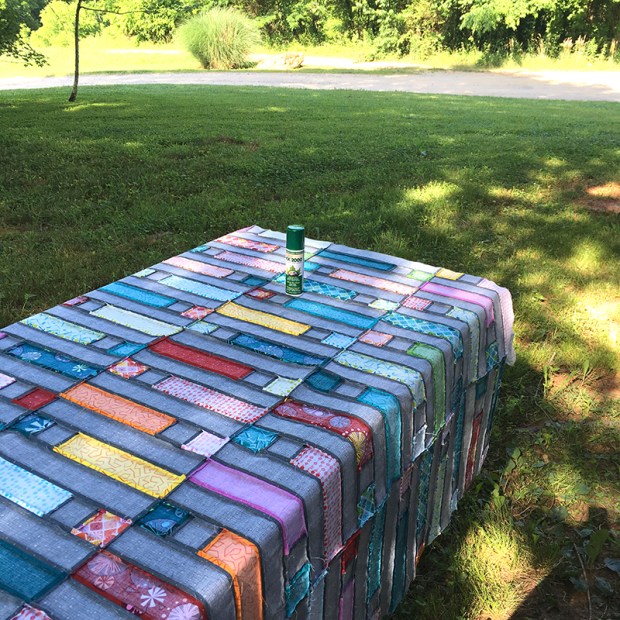
My basic method for spray basting is to spray the wrong side of the top and bottom layers of the quilt outside, then bring them inside for assembly. For a slight variation of this technique, click here for my wall basting tutorial.

My favorite basting spray is 505. Be sure to shake the can before you use it and spray a little on a scrap to make sure the nozzle isn’t clogged. If the spray doesn’t flow out evenly, some of the chemical can accumulate and leave a stain on your quilt, so always test it first.

Spray Basting the Quilt

At first I tried an off brand that a friend had but I didn’t like it because it wasn’t sticky enough. Fortunately one of the other retreaters had some 505 which they let me use for my quilt!

The basting spray does not cause any problems with machine quilting, and if you notice it starting to gum up the needle at all, just wipe it away and you’ll be all set!

Lay out all 3 layers of the quilt – backing, batting, and quilt top on a large table (or design wall). Spend time smoothing out each layer with a long acrylic ruler before adding the next layer. This can take awhile but is worth it so that the quilt is nice, flat and smooth.

Quilt Basting

Notice the leftover batting – most of it will get trimmed away after basting. I like enough extra batting and backing so that I don’t have to worry about getting my quilt top perfectly centered.

You can also use the acrylic ruler to scooch any quilt blocks back into place and straighten out any wonky seams as needed. Smooth out any bubbles as needed so that the quilt is nice and flat.

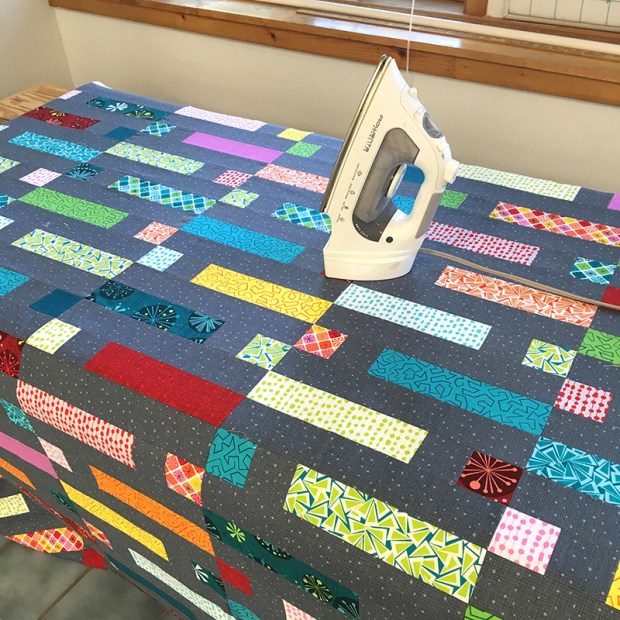
The last step is to iron the quilts on both sides – front and back. This helps set the glue and allows you to work out any wrinkles one last time before you quilt. I use a hot dry iron ,with no steam. You can iron the quilt on an ironing board, or on a table to give you more room. Because there’s batting inside, the quilt acts as it’s own pressing surface.

Iron the basted quilt to set the glue

My quilt is basted and ready to quilt!

Now it’s your turn! Get your quilt basted and we’ll start machine quilting next week. We’ll have extra time for quilting since it’s my favorite part!

Show Your Work

Don’t forget to share your progress in one of 3 ways (or all of them if you like):
(1) In my Christa Quilts Facebook group
(2) On Instagram, #dotndashqal
(3) Share a link to your blog, or leave a comment about your process on this post.

Dot n Dash Ready to quilt

Trim the batting so that there’s only 1-2 inches sticking out on all sides of the quilt. This will prevent the excess from flipping under the quilt and getting caught in the machine.

Beaded Lanterns Quilt Along Part 1: over on the BERNINA Blog

This week kicks off another fun quilt along that I created to help promote my Fandangle fabric collection. Over the next 7 week’s I’ll be sharing step by step tutorials over on BERNINA’s Blog – We All Sew. We will make my Beaded Lanterns quilt – a free pattern I designed that is precut friendly.

Beaded Lanterns Quilt

Of course, all of the patterns I design would look fabulous in any fabrics you choose, but I really love the excuse to design and make quilts with my own fabric lines.

All you need is one jelly roll or Fandangle “strip-pie” plus 4 yards of background fabric. The two grays I’ve been using from the line – Confetti Crosshatch – have been so popular that they’ve already sold out of the first printing. But fortunately Benartex reprints fabrics that sell well, so more of those will be coming in October thank goodness!

Fandangle Strippie

Click here to get the Fandangle Strip-pie while supplies last.

In the meantime, you can check out my where to buy page for a list of shops that carry Fandangle. I have a note on there indicating which shops carry the full line as well as which shops sell online so you can track it down for yourself.

Click here to visit BERNINA’s blog – We All Sew.
The Quilt Along will be shared there each Wednesday. Happy quilting!

Dot ‘n’ Dash Quilt Along Week 4 – Sewing the Quilt Top

Did you finish your quilt blocks from last week? How is it going? Be sure to share your progress over in my ChristaQuilts Facebook group and/or on instagram using the hashtag #dotndashqal.

Finished Dot n Dash Quilt Blocks

Today we will be laying out our blocks and sewing them together to make the quilt top. The most important thing to remember is that each row in the quilt goes in opposite directions, so separate your blocks into two piles, A and B.

See pages 53-54 of Piece and Quilt with Precuts for specific directions.

It’s super helpful to lay out all 30 blocks on a design wall or other larger surface area. If you have a design floor or a design bed, that will work, too! Take as much time as you need to orient your blocks in the correct position with a nice color distribution of prints.

Dot 'n Dash Quilt Along

All blocks are laid out in order on the design wall, and ready to sew.
Take a picture with your camera phone to refer to as you piece the rows.

Pinning and Pressing

The key to a really nice flat quilt top is pinning and pressing. I prefer to press all seams open for the entire quilt and sew with a shorter stitch length (2.0 instead of the default 2.5.) However, if you choose to press to the side, that’s ok, too. Just be sure to press each and every seam as you go with a hot, dry iron.

Dot n Dash piecing detail

My corners match up nicely because I pressed each seam, and pinned each intersection.

Here’s a tip for managing the bulk of the quilt top while sewing and pressing: Sew the block rows together into pairs of two. Then press each pair of rows before joining larger sections together. The quilt to will shrink up a bit once it’s all joined, but you can always add more blocks or a border to make it larger if you like.

Dot 'n Dash finished quilt top made from Fandangle Fabric

My finished quilt top – ready to baste in next week’s lesson!

Take a Victory Lap!

Whenever I’m making a quilt top with blocks that go all the way to the edge (no borders), there is a chance that the edge seams could split open. To prevent this, I take a “victory lap” around the edges – sew with a larger stitch length approximately 1/8″ in from the edge of the quilt around the entire perimeter. It feels like a great way to celebrate the finished top!

Here’s what the edge stitching looks like from another quilt I recently made:

Victory lap around the quilt to secure the edges

By sewing with a larger stitch near the edge of the quilt, the stitching line will get covered by the binding. This secures the edge seams from splitting open during all of the rough handling that will occur with basting and quilting.

Jump in any time!

If you are just joining the quilt along, remember you can work at your own pace. Please don’t ever feel like you are “behind” as that’s never the case. And if you want to work ahead, that’s great, too! I’m just glad you are following along, either on your own version of the quilt, or virtually in your head!

Dot n Dash Quilt Along

Click here for the Dot ‘n Dash Quilt Along Schedule and Supply List
Click here to purchase the Fandangle Strip-pie or other precuts.
Click here to purchase a signed copy of Piece and Quilt with Precuts.

EQ Design Contest Winners

I have to tell you how blown away I was with all of the entries into the Fandangle EQ design contest last month. EQ limited it to one entry per person which was probably a good thing, or we never would have been able to make a decision, LOL! EQ picked their favorite, I picked my favorite, and together we picked a joint favorite. So without further ado, congratulations to the winners below:

Overall Winner – Betsy’s Pinball

Betsy EQ8 entry for Fandangle

This quilt really spoke to me with it’s asymmetrical modern style. It’s really eye catching and I love how she took a traditional block – the Drunkard’s Path and created such a unique, fresh design!

MY Honorable Mention: Mel Beach Slice & Insert

EQ8 Design by Mel Beach

Mel’s design absolutely blew me away! I love how she incorporated some of the design motifs from the fabric into her unique and original quilt design. Check out the blog post she wrote about her process and several other design ideas. Each improv-looking blocks is actually an abstract pieced “F” (for Fandangle). How cool is that??

EQ Honorable Mention: Janet Barker Cut the Deck

Janet Barker EQ8 design with Fandangle

Here’s what Janet had to say about her fabulous entry: “My Cut the Deck quilt design uses a range of dark and light fabrics in the same color family. The teals with lime green accents fit the bill perfectly. The quilt uses easy strip piecing with sub-cuts to make up the blocks.”

Other Favorites

I have to give a shout out to a couple of other designs that really made my heart sing. Don’t get me wrong, I absolutely loved ALL of the entries and it was so so hard to choose! We have some amazing talent out there in the quilting world and I was impressed by all of the original designs. I hope that several of the entrants decide to turn their designs into quilt patterns because they are all so good!

Willow Olson – Oh My Stars

Willow Olson EQ8 fandangle Design


Diane – Lisbonesque-like

Diane EQ 8 Fandangle Design


Pat A – Untitled

Pat A EQ 8 Design


Terri Nice – All that Glitters

Terri Nice EQ8 design


Darlene Cunningham – All The Ins & Outs

Darlene Cunningham EQ 8 Fandangle Entry

See The Rest of the Amazing Entries!

There were a total of 96 entries and they were all so fabulous! The ones I just showcased above are just a drop in the bucket of all the incredible designs that were shared.Do you know how hard it was for us to choose the winners?? The rest of them are still up on the EQ site so you can enjoy an amazing virtual trunk show. Be sure to read the comments for more about each entry.

Click here to see all of the remaining entries and grab a couple of fun freebie from me – a PDF pattern download & the EQ file to make a simple jelly roll quilt from Fandangle (or any other fabrics in your stash.)

Then click here to grab your favorite Fandangle fabrics to and get started on your next quilt! Remember to use coupon code SAVE10 at checkout!)

EQ design challenge

Thanks for playing!!

Dot ‘n’ Dash Quilt Along Week 3 – Sewing the Blocks

It’s been fabulous getting to know everyone who’s participating in the Dot ‘n’ Dash Quilt Along. I love seeing all the fabric choices you are all sharing. And getting to know everyone over in my Christa Quilts Facebook group is so much fun. If you are just joining us, grab a jelly roll of fabric & some background and you’re all set!

Dot n Dash Quilt AlongClick here to purchase yardage & bundles of Fandangle fabric.
Click here to purchase just the Fandangle Strip-pie (jellyroll).
Click here to grab a signed copy of Piece and Quilt with Precuts.

Pressing and Piecing Tips

Before we get into sewing the blocks, I’d like to share a couple of general sewing tips.
I prefer to sew with a shorter stitch length (2.0 instead of the default 2.5). This helps ensure that the seams won’t split open at the ends during sewing.

I also press ALL of my seams open. I use a hot dry iron for pressing with NO steam. (Steam can distort the blocks, and adding water to your iron is one of the easiest ways to break it!!)

Seams pressed open.

I press all of my seams open for 2 reasons: (1) it makes the blocks super flat which makes machine quilting on a home sewing machine sooooo much easier to do. And (2) I don’t have to think about which way the seams need to go from block to block so it makes joining the blocks together much, much easier.

I gently press each seam open with my fingers as then follow it up with the iron. After each seam is pressed, I press the whole block on both sides to make a flat, crisp block!

Closeup of Seams Pressed Open

I use a lot of pins when joining my blocks and I make to sure to sew a little bit slower than normal so that I don’t veer off the end of each piece while sewing.

And don’t worry if you make a hot mess while you are sewing. The image below is what my actual process looks like when chain piecing. Fortunately, once the threads are clipped between units and everything is pressed as I go, I can quickly calm this unruly chaos:

Dot n Dash sewing in progress

The instructions and tips I offer during the quilt along are just suggestions and ideas that work for me. Remember – you are the boss of your quilt, so feel free to use your own favorite methods if you are happy with them and getting good results!

Sewing the Dot ‘n’ Dash Blocks

Follow the instructions in the book on pages 52-53 to make the blocks. Take care to make both versions of the block as shown in the diagrams. They are similar and easy to confuse but the layout for both is slightly different.

Dot n Dash Block Layout

To speed things up, I’ll lay out all of the block parts in order on a mat next to my sewing machine. Because we are going for a random scrappy look, don’t overthink the fabric placement. Just try not to have the same fabric repeat in each block and you will be fine.

Stack up a whole bunch of units at once so that you can assembly line sew.

Dot n Dash blocks in progress

As you are piecing, keep the background rectangles (gray in my image above) on top as you sew. This will ensure that you are sewing the long skinny strips in opposite directions each time. This is so the blocks won’t warp or skew as you make them.

Also, use pins if needed to ensure that your pieced units and gray strips match up on both ends. If for some reason they are not the same size, you can trim them down, but be sure that all units are the same length so your blocks will go together correctly.

Dot n Dash Blocks in progress

Notice how the units in the A & B blocks go in different directions. Be sure to pay close attention to the block assembly diagrams in the book and make the correct number of each.

For those of you making Dot ‘n Dash with the light gray Fandangle fabric kit, here’s what your finished A block may look like:

Dot n Dash Block light gray

Once you’ve finished piecing all 30 blocks (15 A + 15 B), give them a final press if desired and admire your pretty handiwork!

Homework

Finish sewing all of the blocks. Then share pictures of your progress in my facebook group and/or on instagram #dotndashqal. I love to see how you are doing!!

If you are blogging about your progress, be sure to add a link to your blog post in the comments below so we can all head over there and cheer you on!!

Finished A Blocks for Dot n Dash QAL

Don’t you just love a pretty stack of finished blocks??

Click here for the Dot ‘n’ Dash Quilt Along Schedule and Supply List.