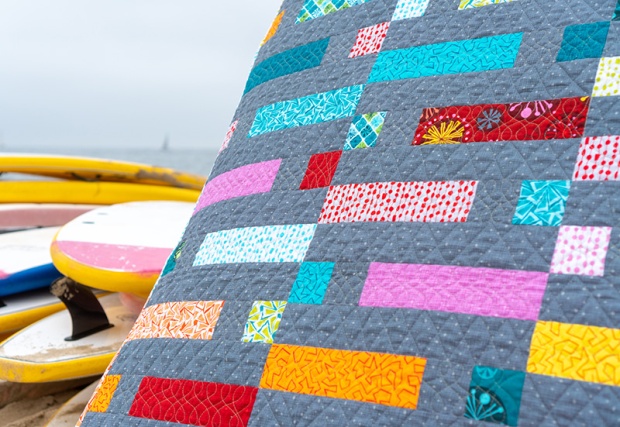
Good news! I’ve restocked the Dot ‘n Dash Kit in the light gray colorway.
Click here to order or visit shop.christaquilts.com.
I’m so glad we spent a little extra time machine quilting this quilt. Making a quilt from start to finish isn’t hard – it just takes a little time to break down the steps into doable chunks of time. This week we are going to finish up the quilting with a fun free-motion variation inspired by one of the quilting designs from my third book, Piece and Quilt with Precuts.

I’m all about perfectly imperfect texture in my quilts!
I like to quilt my quilts densely to add amazing texture and the more they are loved, used and washed, the softer they’ll get!
After quilting the double zig-zags last week, it’s time to tackle the “Double L’s” motif this week. These are based based on the “Cursive L’s” motif as shown in the Arrows quilt on pages 78-85 of the book, and also on the cover.

Arrows is the cover quilt from Piece and Quilt with Precuts.
Sketch it. Then quilt it.
I’ve also used this design in a slightly different way on Twinkling Diamonds found on pages 56-63. So take a look at the quilting plans for those quilts to give you a better understanding of how to form the design.
The first thing I do when figuring out any design is sketch it first on paper. You can see in my rough drawing below, I tried a couple of different versions of the cursive L’s.

Sketch it – then quilt it!
At first I thought I would quilt the L’s and then echo them, but when I tried that on a practice sample, it didn’t look so good. I also thought of doing a more linear geometric version (in the upper left of my sketch) but that wasn’t right either. So I opted for two rows of cursive L’s, overlapping each other just like I overlapped the modern zig-zags in the gray areas of the quilt.
I tried quilting the L’s both horizontally and vertically and found it much easier to rotate the quilt so that I was quilting them vertically, from top to bottom in each row across the quilt.

I’ve rotated the quilt so I can quilt each row from top to bottom.
First Pass Across the Quilt
First, I did one pass of Cursive L’s across the quilt, starting on the upper right of the quilt, quilting one row at a time from top to bottom, and working my way toward the center. Once the quilt got too bulky in the middle, I rotated it and started from where I left off (center, top) to the other side of the quilt.
I’m using the same Aurifil gray thread (top and bobbin) that I’ve used for the whole quilt, and it blended in nicely on all the different Fandangle fabrics.

Cursive L’s quilting – 1st pass across the quilt. Notice the gaps between the loops.
I recommend practicing a couple of times on scrap fabric and batting to get the hang of how you’ll form the design.
I’m not at all worried about the spacing of each motif or whether or not all of the loops are perfectly smooth. I’m aiming for texture over perfection. To get from one strip unit to the next, I’ll aim for the corner, or I’ll backtrack in the seam as needed to get to the next section to quilt. Notice that I’m treating the pieced units and the small gray background square as one area to quilt.

Head for the corners, or backtrack in the seams to get to each new section to quilt.
After the first row of Cursive L’s, I repeated the process, adding another row of L’s on top of the first row, intersecting the lines and quilting the design in opposite directions.
I squeezed in the second set of loops in the gaps between the previous loops. This added more texture and also made the imperfections less noticeable.
Second Pass Across the Quilt

Squeeze the second round of quilting in between the gaps of the first.
The more quilting you add to the quilt, the more thread you’ll use of course. So I would check your bobbin level at the end of a row of quilting and change it out as soon as it looks low (or pay attention to your bobbin indicator light if you have one on your machine).
Don’t play bobbin chicken!! I’d rather have a little leftover bobbin than run out in the middle of the quilt. If you are using cotton thread in your bobbin, you can always use the leftovers when piecing your next quilt.

I love using soft 100% cotton thread and natural fiber batting for my quilts.
This allows me to quilt densely while still ensuring a cuddly quilt!
Quilting Homework
Finish quilting the quilt! Feel free to mix and match quilting motifs from my books, or use some of your favorite designs. However you decided to quilt it, please share your quilt in progress in my Facebook group and on instragram #dotndashqal. I love seeing everyone’s work!
Next week, we’ll trim up the quilt and bind it to finish. I can’t wait!

I love how these surfboards at the beach match the coloring of my quilt!
Click here for the quilt along schedule, supply list, and links to all the tutorials.
Click here to purchase Fandangle precuts and coordinating yardage.
It would not have occurred to me to do this design in two passes–looks great. I will try this one soon.