Craftsy Review – Creative Quilting With Your Walking Foot

Can I just tell you how awesome Jacquie Gering’s newest Craftsy class is? It’s called Creative Quilting With Your Walking Foot and is truly one of the best classes I’ve watched.

20140530_creative_quiltingJacquie’s class is chock full of good tips and tricks for using your walking foot to achieve amazing machine quilted results. One of my favorite tongue-in-cheek reminders she offered is that it’s a walking foot, not a running foot! So going slow is the key to walking foot quilting success. πŸ™‚

I’ve met Jacquie in person a few times and am currently working with her on some behind-the-scenes QuiltCon show prep. She is probably one of the most kind-hearted people I’ve ever met, and she really cares about those to whom she teaches. In this class, she’s all about sharing what she knows in such an easy-going conversational way, that you can’t help but enjoy every minute of the class.

jacquie_1
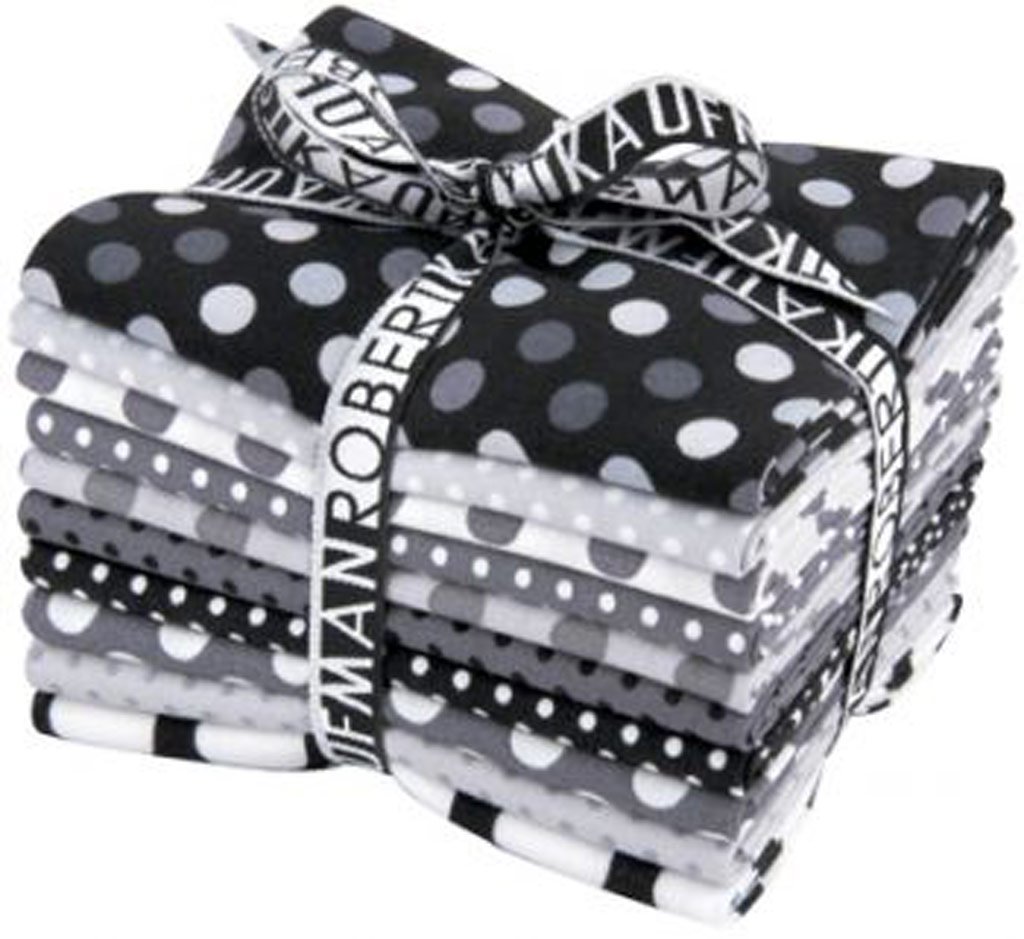
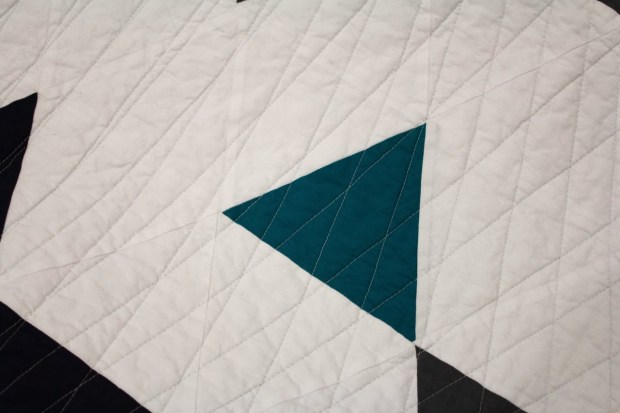
Sinking Sun by Jacquie Gering – one of my all-time favorites! Image courtesy of Jacquie.

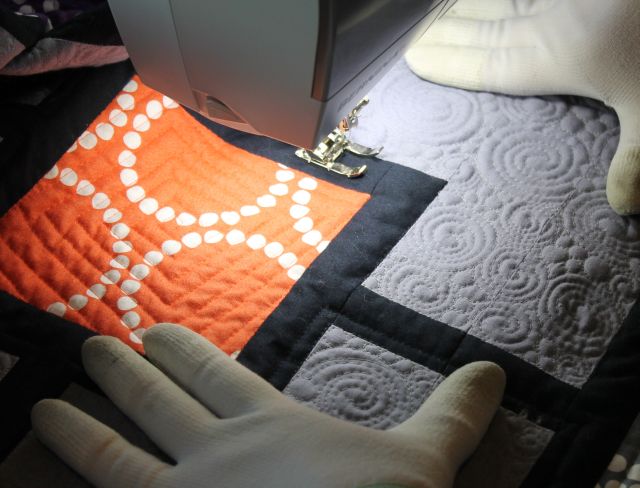
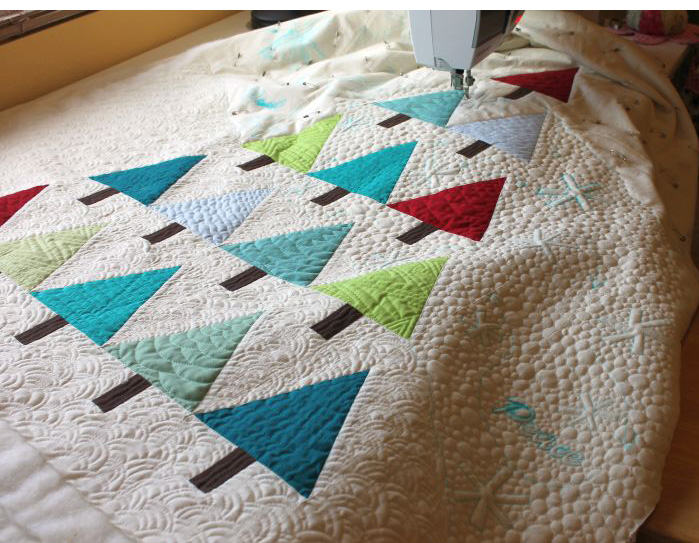
In Creative Quilting With Your Walking Foot, Jacquie makes the comparison of quilting to a good paint job: more time may be spent prepping your work than you think, but good preparation is another key to good quilting success. She echoes my sentiments that proper basting and good tools help eliminate puckers and tucks. She prefers spray basting and flat battings (hear, hear!) and one tip I picked up was that you can iron your cotton batting to help get it nice and smooth. Now why didn’t I think of that??

One of my favorite “modern” quilting textures is matchstick quilting where you literally quilt every 1/4″ to 1/8″ over the surface of your quilt. I love Jacquie’s method for achieving precise lines that add such amazing texture to her quilts! If nothing else, this class is worth it for that demo alone!

jacquie_matchstick_quilting
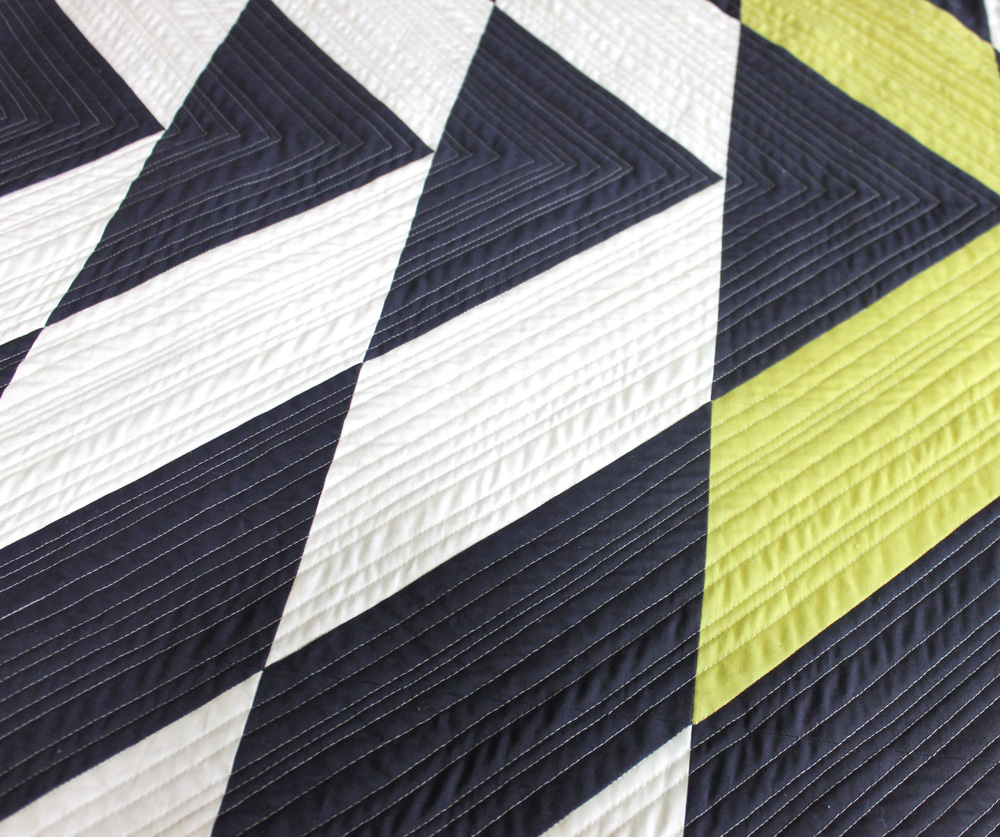
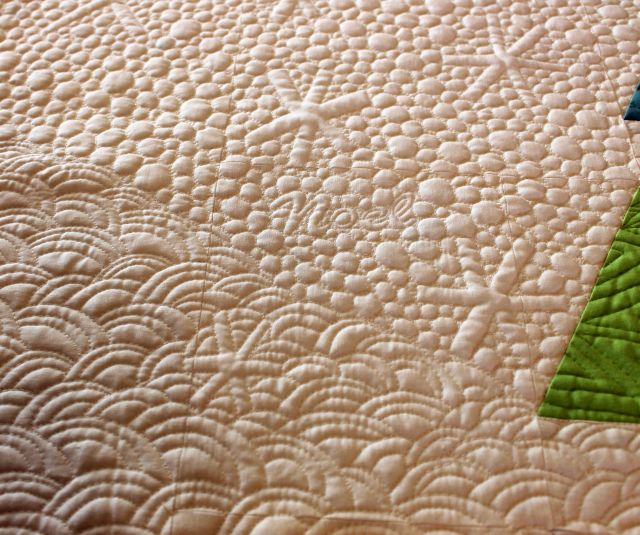
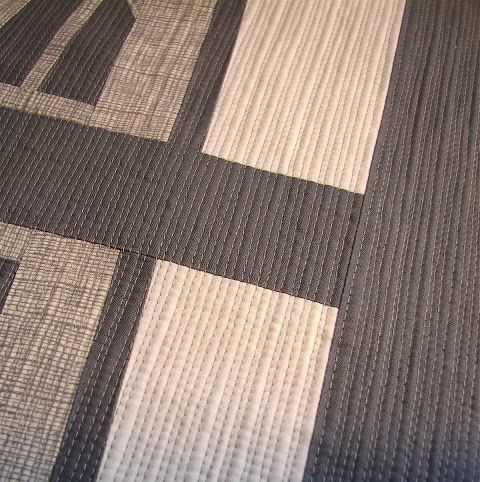
Jacquie’s amazing matchstick quilting – one of my favorite techniques!

The Class runs for approximately 3 1/2 hours, broken up into 8 easily digestible lessons. Topics covered include walking foot basics, decorative stitches, quilting curves & text, and more! It ends with a section on quilting strategies which is super helpful for you to learn how to manage the bulk of a large quilt under the machine.

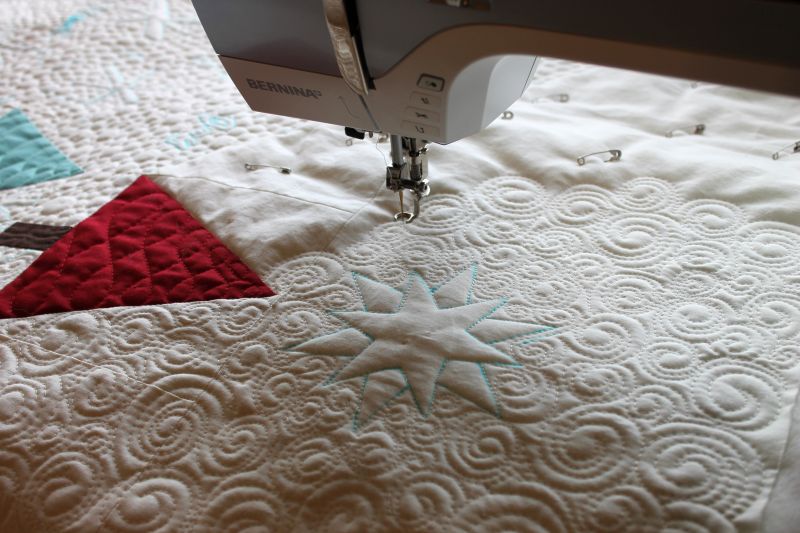
Jacquie validates many of the techniques that I like to employ in my walking foot quilting, such as using the edge of your foot as a guide and counting stitches when figuring out when to turn your work for echo quilting.

jacquie_hidden_gems

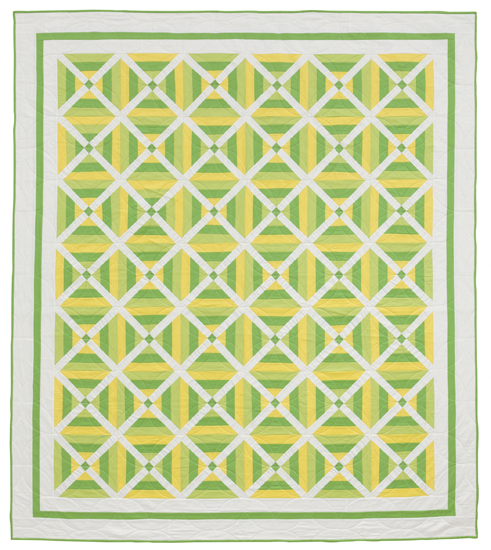
Jacquie shows how to quilt wonderfully straight lines as shown in Hidden Gems, above.

I love how Jacquie is not afraid to shy away from quilting large quilts and she doesn’t even quilt with a super-sized machine, either. She introduces several ways to add gentle curves to your quilts, and she offers tips on how to start and stop, along with what to do when you run out of thread.

I personally get excited when others finally understand just how fun quilting your own quilts can be. With this class, you can learn how to quilt all those quilts (modern or not) without feeling like free-motion quilting is your only option to achieve amazing results.

jacquie_2

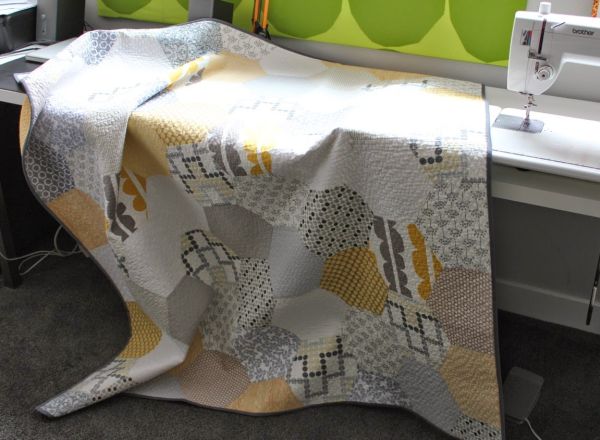
Jacquie’s hexagon quilt – all done on her home machine. Image courtesy of Jacquie.

I highly recommend Creative Quilting With Your Walking Foot. In fact, I think I’ll go watch it again, just to pick up more tips that I may have missed the first time around!

Save

Super Huge Clearance – Getting to the End!

Hey guys, I appreciate the support you all have been giving me as I clear out all of my older ChristaQuilts fabric and gifts. We are getting close to the end here and more than half of the clearance items are now reduced to 50% off!

clearance_palm_fanPalm Fan by Kaffe Fassett – such a cool print!

This weekend we just marked all remaining Amy Butler and Kaffe Fassett fabrics to 50% off and everything else is at least 30% off!

Yes, that still includes the free US shipping with reasonable international rates, too.

clearance_buttonsButtons by Kaffe Fassett – It needs a good home!

Our plan is to shut down the old website at the end of June while we travel and attend to other things (meaning deadlines) this summer. So shop early for best selection and scoop up some super summertime savings!!

Thanks a bunch! πŸ™‚

Fabric Friday – Shimmer and Blueprint Basics

This week I’m excited to tell you about some fun new fabrics that are just arriving in the precut store!

20140530_shimmerShimmer by Jennifer Sampou – Love it!!

First up is Shimmer by Jennifer Sampou for Robert Kaufman fabrics. Thanks to social media, I learned about this line from fellow bloggers out there, even before my sales reps showed it to me! It just goes to show how word spreads quickly online. πŸ™‚

20140530_shimmer_swatchesShimmer – swatch layout by Jason Watson, (copyright Christa Quilts Inc. 2014)

Shimmer includes a beautiful assortment of neutrals with just a hint of sparkle. Modern geometrics are always a favorite of mine! The precut line includes a 25 piece fat quarter bundle (one of every fabric from the line), a regular size roll up (4o – 2 1/2″ strips), and precut 10″ squares. I just checked my inventory and these guys are selling out fast!

20140530_blueprintsBlueprint Basics by Valori Wells – a perfect set of colors!

Next is Blueprint Basics by Valori Wells for FreeSpirit. I’ve always admired Valori Wells’ work (as well as her mother Jean Wells’ quilts, too). The tagline for the collection is, “a collection of classic modern designs in glorious colors for your adventurous creative pursuits.” I think that’s a great description, don’t you?

20140530_blueprint_swatchBlueprint Basics – swatch layout by Jason Watson, (copyright Christa Quilts Inc. 2014)

Blueprint Basics precuts include half rolls (20 – 2 1/2″ strips), ten squares (layer cakes), charm packs and fat quarter bundles. As of this writing, not all of the precuts have made it to the store warehouse quite yet, so keep an eye out for them in the next couple of days!

Our goal is to add new precuts every week! Which are your favorites?


Blog Improvements – What’s on the Menu?

I’ve been making a few changes around here, organizing my blog content so it’s much easier to find, and updating a few of my graphics and images. I didn’t realize how much I’ve written over the last several years, until I started trying to gather it all in one place.

Please join me for a tour of my new menus! They are all listed below, but you’ll need to click the links at the top of the page to get to them.

Christa QuiltsAbout Me – Kind of obvious, right? This was probably the hardest page to write to describe myself and what I’m all about. However, it does include some super cool artwork my friend drew, including fun captions that go along with each of my quilting caricatures!

Christa’s Quilts – This is the place where I’ve been sharing my quilt finishes. I blog about them as I go, then I write up a separate “page” for each quilt. This is a place for me to gather all of the quilt statistics in one place, list any awards or honors the quilt has received, and then link to any of the WIP posts, in case you missed them the first time.

herringbone_hst_stackTutorials & Freebies – This drop down menu has a lot of content in it! It includes links to all of my quilt alongs, plus free patterns, EQ7 downloads and tutorials I’ve written.

Craftsy Articles – This menu item will take you to all of the content I’ve written for Craftsy’s blog. I usually write my posts days ahead of schedule, so I’m not exactly sure when new ones will post, but it’s fun to see them go live. πŸ™‚

CraftsyTeaching Schedule – This menu item is super new. I put together a page listing all of my current teaching events. I will keep this updated as often as possible. (This one is the most useful for me so I can see at a glance, where I need to be next, LOL!!)

Shop – Another obvious one. This is where you can find my patterns for sale, my precut store, and the remaining items on clearance. All of my various selling venues are all gathered into one place – now that’s convenient!

spot_on_shadow

If you blog, how do you like to organize your content? Is there anything else I’m missing?

Christa’s Soap Box – We Can Do Hard Things

We Can Do Hard Things

That is a family motto of ours. Jason and I did a really hard, yet fun thing this past Saturday night. We ran a half marathon, on a trail, in the dark. πŸ™‚

desert_dashJason and Christa at the start of our race, before the sun went down.

The race started off at dusk and we were required to run with headlamps so we could see our way once the sun went down. I had been having a particularly rough day and wasn’t quite in the mood for such a stroll, but I was determined to see it through. After all, this race was a goal of ours, and if you know me, I like to set pretty high expectations for myself.

How the Online Community Saved My Run

I had shared the above picture on Instagram just before the start of the race. A couple of miles in I wasn’t feeling so hot, and was entertaining the thought of giving up right then and there. I took a walking break, checked my phone and had this nice outpouring of love and support from my IG followers, cheering me on. It was just the support I needed to keep going and to not quit!

city_lightsView of Las Vegas at night, as seen from my run.

Then, about 4 miles away from the finish, I hit another wall. It was fairly dark at this time, but man, I got a beautiful view of the city lights off in the distance!

I usually like to listen to audio books or podcasts while I run to help distract me. I was listening the latest episode of Modern Sewciety (which had been broadcast earlier) when all of a sudden, Stephanie the host gives a little shout out to me during the show! I couldn’t believe it! Little did she know that was like an extra spring in my step at just the right time. πŸ™‚

Date Night

Jason and I train together, but when we run races, we go at our own pace. He was able to finish his run, and then he came back for me and ran me in to the finish. He’s not a competitive person with running (like I am with quilting), but he ended up finishing in 2nd place!

MedalsOur medals from the race.

Another one of our family mottos is “Work Hard – Play Hard.” We have a lot of hard but good things coming up in the next year or so, mainly due to some intense goals I’ve set for myself.

The next time things get tough, or I feel like giving up on my dreams, I’ll just remember back to this night, and how I was able to make it through with the support of so many of you!


Blogger’s Quilt Festival – Voting Begins Today!

Don’tΒ  forget to vote for your favorite quilts in the Spring 2014 Blogger’s Quilt Festival!

Spiraling out of Control is in the Original Design category and Modern Trees is listed in the Home Machine Quilted category. You can vote for one quilt per category, and there are a total of 11 categories in which to vote.

Modern Quilt

Spiraling out of Control by Christa Watson, 70″ x 70″

You can vote for Spiraling Out of Control here.

Modern Trees

Modern Trees by Christa Watson 43″ x 50″

You can vote for Modern Trees here.

Have fun and good luck to all who entered!

Quick Quilt Tips Tour – 5 Tips for Faster Quilting on Your Home Machine

Hi old friends, and welcome new ones! I’m happy to be participating in Amy Smart’s Quick Quilting Tips Tour – Round 2. Amy has gathered together several bloggers to offer some of their favorite tips for faster and better quilting. (Click here to read all of the tips shared in Round 1.)

20150529_tips_amy_smartMachine quilting is one of my great passions so I thought I would share some of my favorite tips for faster quilting on your home machine.

Tip #1 – Use Basting Spray

I am a recent convert to using basting spray and I don’t know if I will ever go back to using safety pins. While it takes me the same amount of time to spray baste as it does to pin, I save a ton of time not having to stop and remove pins while quilting.

spray_basting_0Click here for my spray basting tutorial.

Tip #2 – Embrace No-Mark Quilting

When I jumped on the modern bandwagon (after considering myself a traditionalist for so many years), the best thing I embraced was letting go of perfectionism and symmetry. This meant I didn’t have to mark all of my quilting lines anymore, or use stencils to quilt perfectly aligned motifs. What freedom!

herrinbone_quiltingThere’s nothing quite like a good random stipple to add texture to your quilts. Herringbone, shown above is one of my fastest finishes to date!

My quilting has improved because I can just doodle with my needle and thread while enjoying the improvisational nature of quilting random free-motion shapes and textures.

More TextureNone of the quilting was marked in String of Pearls – I just eyeballed the FMQ and used the edge of my foot as a guide for the straight lines.

Tip #3 – Try Quilting Designs from Edge to Edge

I love quilting lines which can start on one edge of the quilt and end on the other side. This is a huge time saver because there’s no need to bury threads when you start and stop. I quilted the uneven lines of Modern X starting on one side of the quilt, pivoting to follow the design, and then back off the other side.

straight quiltingWhen I felt like my bobbin was getting low, I switched it out so I didn’t have to worry about running out of thread halfway through a line of quilting.

(Bonus tip – since I use Aurifil 50 wt cotton for both piecing and quilting, I use up any partial bobbins on my next piecing project!)

Tip #4 – Use the Same Color Thread in Top and Bobbin

This is a huge time saver because I don’t have to hassle with my machine’s tension to keep tiny pindots of thread from poking through the top or bottom of the quilt. When I want a super-fast finish, I prefer to quilt with one blending thread color over the entire surface of the quilt so that I don’t have to stop and change threads.

test_blockThis recent test block from Modern Logs shows how a thin neutral thread blends in to many different fabrics. It’s such a time-saver when you don’t have to switch thread colors. (I also quilted this quilt using an edge to edge design and it went so fast!)

Tip #5 – Wind Plenty of Bobbins Ahead of Time

It’s much quicker to wind a bunch of bobbins at the start of a project rather than having to stop mid-quilt for more winding. I recently upgraded to a new Bernina 710 sewing machine. One of my favorite features is the huge bobbin capacity, compared to the older machines. So if you get a ever chance to use a machine with a bigger bobbin, I highly recommend it. πŸ™‚

Bernina BobbinsI keep plenty of bobbins on hand and use the biggest capacity bobbin I can.

I hope you’ve enjoyed my tips for faster machine quilting! Be sure to check out the other stops on the Quick Quilt Tips Tour. You just may learn something new. πŸ™‚

Be sure to check out Amy’s new book, Fabulously Fast Quilts. In case you missed it, I recently reviewed it here on my blog.

20140520_fabulously_fast_quilts

New around here?

Be sure to sign up for my Friendly Threads newsletter and get a free PDF quilt pattern!

Book Review – Fabulously Fast Quilts by Amy Smart

I want to give a quick thanks to Amy Smart and Martingale for giving me a review copy of Fabulously Fast Quilts so I can tell you all about it. First – a quick background: I got to know Amy when I used to sponsor blogs to advertise my online store (before I decided to switch hats from store owner to pattern designer).

I love Amy’s blog style, the content she shares, and her genuinely friendly manner. I finally got to meet her in person at Sewing Summit last year and appreciate how down to earth and “real” she is!

faboulously_fast_quiltsAll images courtesy of Martingale. Photography by Brent Kane.

When I found out Amy was writing a book, I couldn’t wait to get my hands on it because I knew it would be chock full of quilty goodness! Let me tell you – it does not disappoint!

Fabulously Fast Quilts is an easily digestible 48 page book full of 12 fresh and fun patterns, all designed by Amy. The designs are simple, yet striking, and I can honestly say I would enjoy making each one!

crossing_guardCrossing Guard, shown above is my favorite design from the book. It’s very clean looking and modern. Plus it includes one of my favorite color combinations – green and yellow! I also really like the scrappy goodness of Fast Four Patch, shown below.

fast_four_patchI love how Amy is able to add depth and dimension in a relatively low volume quilt, as shown in Floating Shoefly, below. That pop of orange really sparkles against all the scrappy neutrals, and the border treatment makes for a very effective design.

Floating ShoeflyThe number one thing I’ve been learning about what makes a successful pattern designer is being able to create effective, interesting combinations with enough contrast to really make the design pop. Amy has nailed that with her book!

Although it’s a quick read (yes, I do enjoy “reading” patterns, LOL!), there is enough introductory information in the book to get you started on making these fabulous quilts in a hurry. The book is divided up into four sections: Strip Piecing, Quick Corners, Slick Slicing, and Stack, Slice & Shuffle. Each section gives patterns for 3 different quilts showing you how to utilize each of these techniques.

Butterfly Effect, shown below, is an example of using Slick Slicing to make an exciting scrappy quilt. Just think of how you can plow through your stash with this one!

butterfly_effectThroughout the book, Amy has included tips and tricks for quicker cutting, piecing, and assembly. She’s even included size options on several of the quilts, which is always nice to have. I appreciate well-written instructions with good illustrations and this book has plenty of those, too.

So be sure to pick up your copy of Fabulously Fast Quilts by Amy Smart. You’ll be glad you did!

Advice for New Bloggers – 6 Ways to Build a Better Blog

For the past two years, I have participated in the Let’s Get Acquainted Blog Hop for new bloggers hosted by Beth from Plum and June. This year I get to return as an alum and share some of my favorite tips and advice on how to build a better blog. πŸ™‚

(You can read my previous blog hop intro posts here and here.)

20140505_new_blog_hopHere are 6 Ways to Build a Better Blog:

1. Figure out Your Persona

This is my take on the common advice, “Just Be Yourself.” I would add – be the best version of yourself. Do you want to give off a nice, friendly, helpful vibe? Do you want to come off as a bit out of the box and edgy? Or do you want to just “keep it real”? All of the above are fine, depending on who your audience is and what you want to accomplish with your blog.

I look at blogging as practice for the best version of myself I want to become. I can’t edit myself in real life, but on my blog, if I write something that sounds a bit goofy, I sure love that I can go back and clean it up before I hit publish (and sometimes, even after the fact, too!)

2. Decide on a Regular Schedule

This can be as general or as detailed as you like. Do you want to blog 3 times a week – Monday, Wednesday, Friday for example? Or everyday? Or once a week on the weekends? Setting up a consistent schedule for yourself will make it easier to blog, knowing what to expect. Your followers will appreciate it, too. But of course, be flexible if you need to be and don’t beat yourself up if you need to skip a post every now and then. Life does get in the way sometimes!

In my excitement when I started growing my blog, I put up new posts 6 days a week. I’ve now cut that down to 4 days a week, which is still a lot by some standards. I take the weekends off and I force myself to skip at least one weekday so that I can spread my content out over a longer period of time.

3. Brainstorm Blogging Topics

Whenever I have an idea for a blog topic I want to explore, I’ll add it to an ever-growing list. That way, whenever I’m stumped about what to write, I look at my list and pick what sounds interesting to me at the moment. I’ve also set up categories of things to write about. Some of my regulars are: my soap box posts, books and product reviews, tutorials, works-in-progress, and sew and tell. Sew and tell is one of my favorites because it’s not necessarily stuff I’m working on. If something catches my interest, I love to tell my readers all about it!

It’s also OK to schedule out posts ahead of time. I will often think of things to write that are not time sensitive. So if I get the urge to write, I’ll jot down a few thoughts and edit it over time, sometimes days or even weeks ahead. Then I feel like I’m on top of my game!

4. Take Your Camera Everywhere!

I always keep a camera on hand, whether it’s my digital camera, or my phone. You never know when inspiration will strike. So often I’m always thinking, “that would make a great blog post!” so I try to capture things in the moment when they happen. They say a picture is worth a thousand words, so if I have a couple of great photos, that can generate a lot of blog content.

5. Keep it Brief and Stick to One Topic

In my free-lance writing work, I’ve learned that an average magazine-length article is only about 1000 words, and the average blog article should be around 500-600 words. So if you start getting a little too wordy, your followers may lose interest. If you have a lot to say (like I often do), break it up into 2 or more blog posts. That will keep your readers coming back for more, and will give you more coverage!

Moreover, unless you are doing a “roundup” type post, try to keep your blog post to one main idea. If you are excited to show us your latest 5 finishes, only show one or two per post. It will be much more interesting that way, and you can share more details!

6. Make it Easy to Find and Follow Your Content

This goes without saying, but at a minimum, make sure you have a link to your home page at the top of your blog and a search button somewhere on the blog. When you have more time, create a nicely organized menu at the top of your page so followers can browse your content. Although pretty buttons on the side of your blog are nice, they don’t show up when someone is viewing your blog on their phone, but menus do. And by all means include a link to follow via email and/or a blog reader like bloglovin’.

These are just a few of my top tips and this post is already getting long, so I will stop right there. If you have any advice to add, please do so in the comments!

Blogger’s Quilt Fest Entry – Modern Trees (Home Machine Quilted)

I’m excited to share another entry into the online Blogger’s Quilt Festival. It’s called Modern Trees. I finished it in December of 2013, and I’ve entered it into the Home Machine Quilted category.

You can view my other entry here.

Modern TreesModern Trees, 43″ x 50″ by Christa Watson, Home Machine Quilted

Modern Trees was made as one of my free quilt alongs and you can still access all of the tutorials to make your own version of this quilt here.

Because I love to encourage and teach others how to free-motion quilt on their home machines, I’ll tell you a little bit more about the machine quilting on this quilt.

Quilting Modern TreesI think free-motion quilting on a domestic machine is super fun and relaxing!

I knew that I wanted to evoke the feeling of snow, but wanted to mix up the background quilting to make it a little more modern. I usually have better results if I plan out my quilting first. Rather than sticking with one motif, I roughly divided the quilt into 3 sections as shown in my diagram below:

20131022_trees_quilt_sketchThe swirls in the top section represent the sky full of billowing clouds ready to burst! The middle section shows snowflakes and snow clusters gently falling to the ground; and the bottom section evokes snowdrifts piling up on the ground. I also decided to throw in a few words just for a touch of holiday whimsy – it’s fun to doodle!

I don’t always stick exactly to the plan, but sketching out my quilting designs gives me a rough guideline to follow.

20131120_quilting_modern_trAs you can see, I used a washable blue marker to write the words, and to draw the larger snowflakes and the star. I quilted the rest of it without marking, adding lots of yummy texture and varying the size of the motifs for interest.

Quilting SwirlsQuilting the swirls was definitely my favorite partΒ  – they are so fun and forgiving! It’s interesting to see how much “poof” is created when quilting so densely.

20131105_aurifil_threadsAnother fun part of any quilt is picking out matching threads for each section. After a couple of years of trial and error and testing on numerous quilts, Aurifil has become my go-to thread for piecing and quilting.

I like to match my threads as closely as possible so you see the texture of the quilting rather than the thread. πŸ™‚ I tried to quilt each tree with a different motif to “decorate” it.

tree_details

Here’s a closeup of the quilting after the blue marks have been removed – so yummy! (Forgive the lighting – this was taken before I got better lighting in my sewing room!)

20131120_fmq_detail_1And one more, just for fun… (with more bad lighting….)

FMQ Trees DetailThe quilting on this piece actually went very quickly. It took a total of 13 hours and I only worked on it for a couple of hours a day. I think that’s a reasonable amount of time, considering the density of the quilting and customization of the designs. Can’t you just imagine how tactile all this texture feels?

If you like Modern Trees, you can vote for it in the Home Machine Quilted category, starting May 23rd. Entries will appear randomly each time, so you may need to scroll through to find the picture of Modern Trees.

You can also click here to get all the free tutorials to make your own version! πŸ™‚

Modern Trees

Modern Trees by Christa Watson 43″ x 50″

Thanks for stopping by!