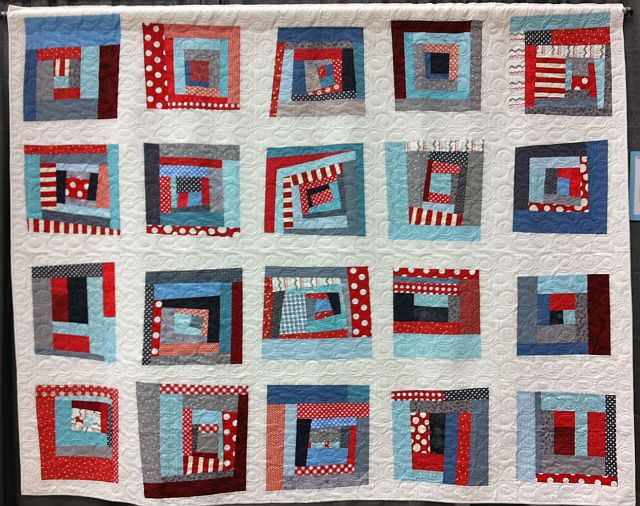
Hugs ‘N Kisses 48″ x 64″
Welcome to part 5 of my Hugs ‘n Kisses Quilt Along!
For anyone just joining me, Hugs ‘n Kisses Quilt Kits are available for purchase while supplies last.
Be sure to work at your own pace and please share pictures of your progress on flickr.
Scroll to the end of the post for the quilt along schedule.
It took me a total of 6 hours to follow the steps below and complete my Hugs ‘n Kisses quilt top.
Step 1 – Arranging The Blocks (30 Minutes)
I decided to go with all X blocks for my layout. You will notice that my blog header shows part of a Hugs ‘n Kisses quilt I made several years ago in reds and oranges. I decided to try something different this time around and I encourage you to make it your own. 🙂

Using a design wall or other large surface, play around with your blocks until they are in a pleasing arrangement. I tried to create a radiating effect by grouping all of the lighter blocks together in one corner and gradually darkening them across the quilt.
Step 2 Sewing the Blocks into Rows (1 Hour, 30 Minutes)
Lay out your design forming 5 blocks across by 7 rows down. To keep track of my rows, I took a picture with my camera phone. Then I was able to refer back to it for proper block placement. I pinned at the intersections and pressed all of my seams open.


Sew each set of blocks into a row. For easier joining, press rows 1, 3, 5 one way and press rows 2, 4, 6 the opposite way. Or press all seams open like I did.

Step 3 – Joining the rows (1 Hour, 15 Minutes)
Join two sets of rows into one piece. Repeat for 3 pairs of rows with one left over. When pressing my seams open, I open them with a wooden seam roller, then press with an iron.


Join rows 1-2 and 3-4. Then join rows 5-6 with row 7. Then sew the two pieces together.
Step 4 – Adding the Inner Borders (45 Minutes)
Measure the width of your quilt top. An easy way to do this is the fold it in half and measure using a cutting mat. My folded measurement is 20.5 inches which means my quilt measures 41 inches. (Mathematically it should measure exactly 40.5 inches so mine grew slightly.)

Trim two 2.5 inch background strips to this measurement. Attach carefully with pins and sew one strip each to the top and bottom. Usually I sew side borders first. However, since I wanted to avoid piecing the top/bottom borders I sewed them first. 🙂

Next, measure the length of your quilt including the added strips. Use the same folding trick as above. Mine was 61 inches (mathematically it should have been 60.5 inches). You will need to join multiple background strips together for length. Trim two pieced strips so that they measure this length exactly. Add rows to either side.
Step 5 – Adding the Pieced Outer Border (2 Hours)
Each pieced border is composed of bricks that you cut out previously. You need a total of 54 bricks that measure 2.5″ x 4.5″ each. Sew them together into segments until you have 4 pieced segments (you can make them random or gradated):

2 Top/Bottom Borders – 12 Bricks Each
2 Side Borders – 15 Bricks Each
Top & Bottom: 12 segments sewn end-to-end (Make 2)
Sides: 15 segments sewn end-to-end (Make 2)
Add the pieced side borders to your top first. If they are too short, you may need to go back and re-sew a few segments with slightly narrower seam allowances. Or you can insert a piece as needed.
If the rows are too long, you may need to go back and increase the width of a few of your seam allowance segments to shorten it up. Or just trim off the excess.

Add the top and bottom borders on in the same way. Voila! A finished quilt top!
If you have any questions about this week’s homework, please be sure to join my flickr discussion or email me directly at christa@christaquilts.com.
Quilt Along Schedule – Links will go to each active post when published.


 If you have just now found my Hugs ‘n Kisses Quilt Along that’s no problem – come join the fun!