Hugs ‘N Kisses 48″ x 64″
Welcome to part 2 of my Hugs ‘n Kisses Quilt Along! Today I will be discussing fabric selection and layout.
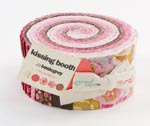
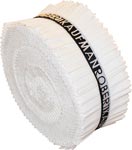
Hugs ‘n Kisses Quilt Kits are available if you’d rather not worry about fabric selection.
For a successful design, this quilt relies on contrast between the print fabrics and the solid background.
You could choose one of your favorite themed fabrics like solids, batiks, or a favorite color range, and pair them with either a totally light solid or a totally dark fabric for contrast.
That being said, what if we play around a little? You will notice my original version has a few light colored strips. What if you wanted a modern, low-volume quilt? Just blur the contrast between the prints and background to achieve this sort of look in the pink design below.

Low Volume Hugs ‘n Kisses

Juvenile Hugs ‘n Kisses
And if you want to make a more playful, juvenile quilt, you can choose a bright background solid that matches one of your print fabrics. You could also use several different background fabrics if you want to make it a bit more “scrappy.”
If you are working with a kit where all of the fabrics are already chosen, you can make it your own by changing the setting of the squares, also known as block layout.

Hugs ‘n Kisses Bowties

Hugs ‘n Kisses Waves
The basic unit we will be constructing next week is the bow-tie block. You could lay out your entire quilt with the bow ties all going the same way to achieve a totally different look. Or how about zig-zags, all kisses, or all hugs? It’s up to you!

Hugs ‘n Kisses all X’s

Hugs ‘n Kisses All O’s
I even dare you to play around with the borders if you are so inclined. What if you swapped the border fabric for the binding fabric, i.e., a solid border and a scrappy binding instead? If you want to make a larger quilt, who is stopping you from cutting a few extra strips from your stash and mixing them in with the other blocks? You can always “borrow” the inner border strips to cut up into more block backgrounds, and replace them with something else.
I want you to look at the kits as a starting point and explore your creativity (but only if you want to – there are no hard and fast rules here)! Who knows, I might even change up my own quilt a bit when I get to that point. 🙂
Here is this week’s “homework” for those of you cutting your own strips:
- Cut out 36 assorted 2.5″ print strips for your blocks and pieced borders
- Cut 23 – 2.5″ solid strips for your background and inner borders
- Set aside 1/2 yard of coordinating solid for the binding and be sure to prewash it.
If you have any questions about this week’s homework, please be sure to join my flickr discussion or email me directly at christa@christaquilts.com.
Quilt Along Schedule – Links will go to each active post when published.
- 5.1 – 2/27/13 Supply List
- 5.2 – 3/6/13 Choosing Fabrics and Alternate Layouts
- 5.3 – 3/13/13 Cutting and Sewing the Bow Tie Blocks
- 5.4 – 3/20/13 Sewing the X and O Blocks (or alternates)
- 5.5 – 3/27/13 Finishing the Quilt Top and Pieced Borders
- 5.6 – 4/3/13 Piecing the Backing
- 5.7 – 4/10/13 Pin Basting
- 5.8 – 4/17/13 Stitching in the Ditch
- 5.9 – 4/24/13 Decorative FMQ
- 5.10 – 5/1/13 Additional Quilting
- 5.11 – 5/8/13 Binding – It’s Finished!