BOM and WIP Blocks

I am adding to my list of UFO’s with my BOM and WIP! What in the heck does all that mean?

It means I am starting some more quilts that are quickly becoming Unfinished Fabric Objects. My newest quilt is a Block Of the Month project where I make a couple of quilt blocks each month until it is done. As long as I work on my quilts on a regular basis, they become my Works-In-Progress.

Sound Wave

Sound Wave

Magnum

Magnum

Here are my two blocks that I just finished, following along with the Skillbuilder Block of the Month at PileOFabric.com.

I absolutely love these blocks. I think they are turning out very modern and I am gaining more color confidence in working with solids.  I am using Kona Coal Grey as the background and am very pleased with how it looks against the solids.

Modern Block - Not!

Modern Block – Not!

A few months ago I tried to make my first “modern” quilt block by adding grey to a paper pieced block I was making from bright  mottled fabrics.

The block design was awesome, but it just didn’t work with the grey!  I think my blocks above are much better.

In these last few months I have learned that it takes a lot more than simply adding grey to your quilt to make it modern. 🙂


While sewing my BOM blocks, I used lots of starch to keep the skinny strips nice and straight. I also cut the strips on the grain parallel to the selvedge (instead of cutting them WOF – the Width of Fabric). This grain has less stretch and give to it. While sewing, I also flipped my sewing direction on each successive strip so as not to distort the fabric.

Block Piecing

It’s amazing how much this block shrinks up due to the seam allowances!

I pressed all of my seams open first with a wooden seam roller (loving this tool!) and then with a dry iron. They are nice and flat!

Seam Roller Pressing

You can read my previous BOM post about picking fabrics. If you would like to join me, my friend Alyssa and a few (hundred) others making these fabulous blocks, just go to PileOFabric.com and check out her Skillbuilder Block of the Month.

ChristaQuilts Giveaway – Win a $20 Gift Certificate to My Store

It’s time for another giveaway! But this one is a little different. I am still awarding the prizewinner, but the actual giveaway is being hosted by Lucy from Charm About You.

ChristaQuilts

To enter, visit her blog and leave your comment there. She will randomly pick the winner from all comments at the end of the week. This gives you a chance to visit my store, and her blog. So good luck and thanks for stopping by!

You may leave comments for me here, but only comments submitted to Charm About You will count for the giveaway.

Updated February 5th – More Chances to Win!!

I almost forgot (well I did forget until now)! Faith over at Fresh Lemons is also hosting a giveaway with prizes from 10 different shops and of course one of them is mine. So here’s another chance to score another $20 gift certificate to my shop. Again, to be entered to win, you must leave a comment on her blog.

Good luck again and happy blog hopping!!

Christa’s Quilt Links, QuiltCon Intro and More

I’m linking up to a couple of different posts today. Then I’ll tell you about more fun linkups at the end! Warning: this post is heavy on words and light on pictures! 🙂

The Modern Quilt Guild is hosting a linky party for those of us attending QuiltCon in just a couple of weeks.  It’s a fun way for us to share pictures of ourselves so we can recognize each other when we meet in person. I’m also introducing myself  for the Thinky Thursday linky party. Here are 5 things you may not know about me:

Here's Christa!

Here’s Christa!

1. I signed up to go to QuiltCon all by myself with no roommate or traveling buddy. No, I’m not a loner. It’s just when I first heard about QuiltCon in August, I had never met or talked to any modern quilters before so I didn’t know a soul. I just knew I had to go to QuiltCon and make some modern quilts. In the few months since, I have met many online friends through their blogs, gotten one of my quilts juried into QuiltCon and now officially consider myself a modern quilter!

2. I’ve been quilting since I was 20, (a year after I got married) but sometimes feel like I’m still a beginner. It took me about 10 years to figure out stippling and another 10 to finally give starching a try. But this is the year I make up for lost time, LOL!!

3. I turn 40 this year. I had to put that in there because sometimes I feel a little “sandwiched” in between the younger modern crowd, and the more experienced ‘quiltie ladies’ from my guild as I call them, (some old enough to be friends with my grandmother). But I love them all!

4. My husband and I work full-time from home running our online quilt shop.  We also homeschool our 3 kids. Yes, we get in each other’s way and step on toes quite a bit so it’s kind of a crazy lifestyle. But we are in charge, so we love it! (We both used to be accountants so we know that a hard day at home is better than a great day at the office!)

Hubby and Kids

Hubby and Kids

5. I hated writing papers in college but I love to blog about quilting! Ok, that one is sort of cheesy but what it really means is that sometimes I can be a little long-winded. That’s the beauty of written thoughts. I can write pages and pages of blog thoughts and then edit them down to one or two simple posts. And yes, this is the shortened edited version, LOL!!

So now that I’ve shared where I’m linking up, I wanted to include the following linky parties that I have come across in my blog travels.

They are all sewing and quilting related, and I can spend hours browsing through them and finding tons of inspiration. Just click the images to go that blog and enjoy!

Monday Linkups:

Tuesday Linkups:

Wednesday Linkup:

WIP Wednesday at Freshly Pieced

Thursday Linkups
Live A Colorful LifeThursday Think Tank

And Sew Thinky Thursday Hosted by Mommy’s Nap Time

Friday Linkups

Lily's Quilts

And Finish It Up Friday Hosted by Crazy Mom Quilts

Weekend Linkups:

Finding FifthFree Motion Quilting Project

If you have any other fun quilt-related linkups you participate in, just let me know!

Christa’s Sew and Tell – A Few Quilt Along Finishes

Here are a couple of great finishes from followers of my previous quilt-alongs:

Joanne P. finished her version of Baby Bricks featuring some fantastic geometric prints. It looks very modern and makes me want to make another one to try out more fabrics! (I’m still in the the process of adding more quilting to my two baby bricks quilts).

Joanne's Baby Bricks

Kathleen W. sent me a picture of her lovely Charming Chevrons finish. Doesn’t it look fantastic in shades of black, white and gray? She did a wonderful job with the quilting, too.

Kathleen's Chevrons

Both of these quilts are posted on my flickr group. I want to see your quilt-along pics, too!

No matter what tutorial step you are on, or which quilt pattern you are making. I hope you’ll join so we can all share in the fun and get inspired!

The link is: http://www.flickr.com/groups/christasquiltalong/

Modern Dresden Block – Paper Pieced Pattern

Pattern Update

I have now turned this block tutorial into a full-fledged foundation paper pieced pattern called Party Time. It includes multiple sizes, the foundation pattern to photocopy & quilting suggestions.

Click here to purchase the Paper Pieced PDF Download.

Original Design Idea – Modern Dresden

This my contemporary interpretation of a Dresden Plate block.

Modern Dresden in OrangeI started with the idea of “plates” or “wedges” radiating out from a center. But instead of classic curves, I wanted to keep my design straight and angular. So I played around with lines and angles in EQ and this is what I came up with.

And just for the fun of it, here’s the same design in purple. It really sparkles by using lighter hues of the same color at the edges of the blocks.

Modern Dresden in Purple

Christa’s Quilt Along 4.6 – Basting Sea of Squares

I finished my pieced backing from last week and now it’s time to baste Sea of Squares!

The backing took me 2 hours to cut, piece and starch. The basting also took 2 hours, so it was a very pleasant way to spend my day today. 🙂

Pieced Quilt Backing

Sea of Squares Pieced Backing

I follow these four steps whenever I baste a quilt:

(1) Completely secure the backing to a large flat surface. I use two heavy duty utility tables that I got from an office supply store. They are 8′ long and I keep them up all the time. It’s my work surface and my cutting area, plus the kids use them for art projects and homework. So they get a lot of use!
Secure The Backing

  • You can also use just one table if space is limited and move your quilt around as needed. I use office binder clips to secure the two edges of my backing to the edge of the table.
  • Then I use a generous amount of tape to secure the other edges. You want to make sure that your backing extends past your batting and quilt top by at least a couple of inches.

Batting (2) Next, layer your batting on top of your backing and smooth it out nicely.

I am using 1 layer of cotton batting with 1/2 layer of wool – yes, it actually pulls apart. (For my previous quilt, Charming Chevrons, I used a layer of cotton and a full layer of wool. I loved the “heft” of it but it was a bit thick to quilt through. I’ll let you know I like it.)

  • Notice that there is no need to secure the batting layer.

Sea of Squares Quilt

(3)  Grab a helper to gently lay your quilt top onto the center of your batting/backing layer.

If you are doing this solo, you can quarter your quilt instead and unfold it one quarter of a time. But I prefer a helper if I can manage it! If either your top or backing are directional, don’t forget to check to make sure your quilt is oriented correctly before you begin.

Add the PinsCap with Pinmoors


(4) Finally, let the basting begin! I prefer to use flat flower pins and pinmoors to baste. I insert the pins in the quilt first, one section at a time. Then I cap them all with pinmoors.

  • With my table, I can reach all the way to the center of the quilt, so I can baste half of the quilt from one side; then I finish up on the other side.

Pinmoor Basting

A note about Pinmoors…

Pinmoors are a bit pricey but are well worth the investment. If you’d like to try them, I suggest buying one package and baste as much area as you can. Then, baste the rest of the quilt with regular safety pins.

When you are done quilting, take note of how much quicker and easier the pins and pinmoors were to remove versus regular safety pins!

One note of caution – if you move and scrunch your quilt under your machine like I do, watch for any pinmoors that accidentally fall off so you don’t get poked! Be sure to push the pins in far enough so that they are secure.

Now the quilt is ready for quilting next week. Be sure to post pictures of your quilt top, pieced backing or quilting on my flickr group: Christa’s Quilt Along.

You can also share pictures of any of my previous quilt-alongs that you are working on!


Quilt-Along ScheduleLinks are Active at the Completion of Each Step:

Quilt Kits are available for a limited time in these two colorways:

Apple Jacks

Apple Jacks

Sea of Squares

Sea of Squares

Techniques and Tools – Intro to Free-Motion Quilting

Welcome to Technique Tutorial Tuesday. This is a long post so sit back, relax, and read awhile!

Today I will be presenting an introduction to Free-Motion Quilting (FMQ for short). I will cover topics such as thread selection and tools needed for successful quilting, as well as starting and stopping and the density of your quilting.

I quilt all of my quilts on a Bernina machine that’s almost 20 years old. If I can do it, so can you! I hope you will give FMQ a try because I think it’s the most fun part of making a quilt!

Machingers Quilting GlovesSupreme SliderTopstitch NeedlesThread


For starters, here are my 3 favorite tools for quilting:

  1. Machingers quilting gloves help grip the quilt while quilting which in turn reduces stress and tension on your shoulders. They are machine washable and breathe well.
  2. A Supreme Slider helps for two reasons: it allows your quilt to glide smoothly under the bed of the machine. It also acts as a cover for your feed-dogs so you can still have FMQ success even if you are unable to drop them.
  3. Superior Titanium Coated Topstitch needles come in several sizes according to the weight of your thread. They have a larger eye which makes them much easier to thread. They also have a longer needle shaft which helps prevent thread breaks. I use a new needle at the start of each quilt and change them about every 8-10 hours of quilting.

FMQ FootFor FMQ, you also need to use a darning foot or free-motion foot made specifically to fit your machine.

Speaking from experience, it’s best to get this straight from the dealer. The best type of foot has an “open toe” so you can see where you are stitching.


Thoughts on Thread and Tension

I love lots of quilting on my quilts but I want the quilting to show, not the thread. In order to do this, I try to blend my threads as much as possible on my quilt. I have a rainbow of colors and I don’t mind switching thread colors or weights when needed, even in the same quilt.

Auditioning Thread Choices

Auditioning Thread Choices

Quilted Thread

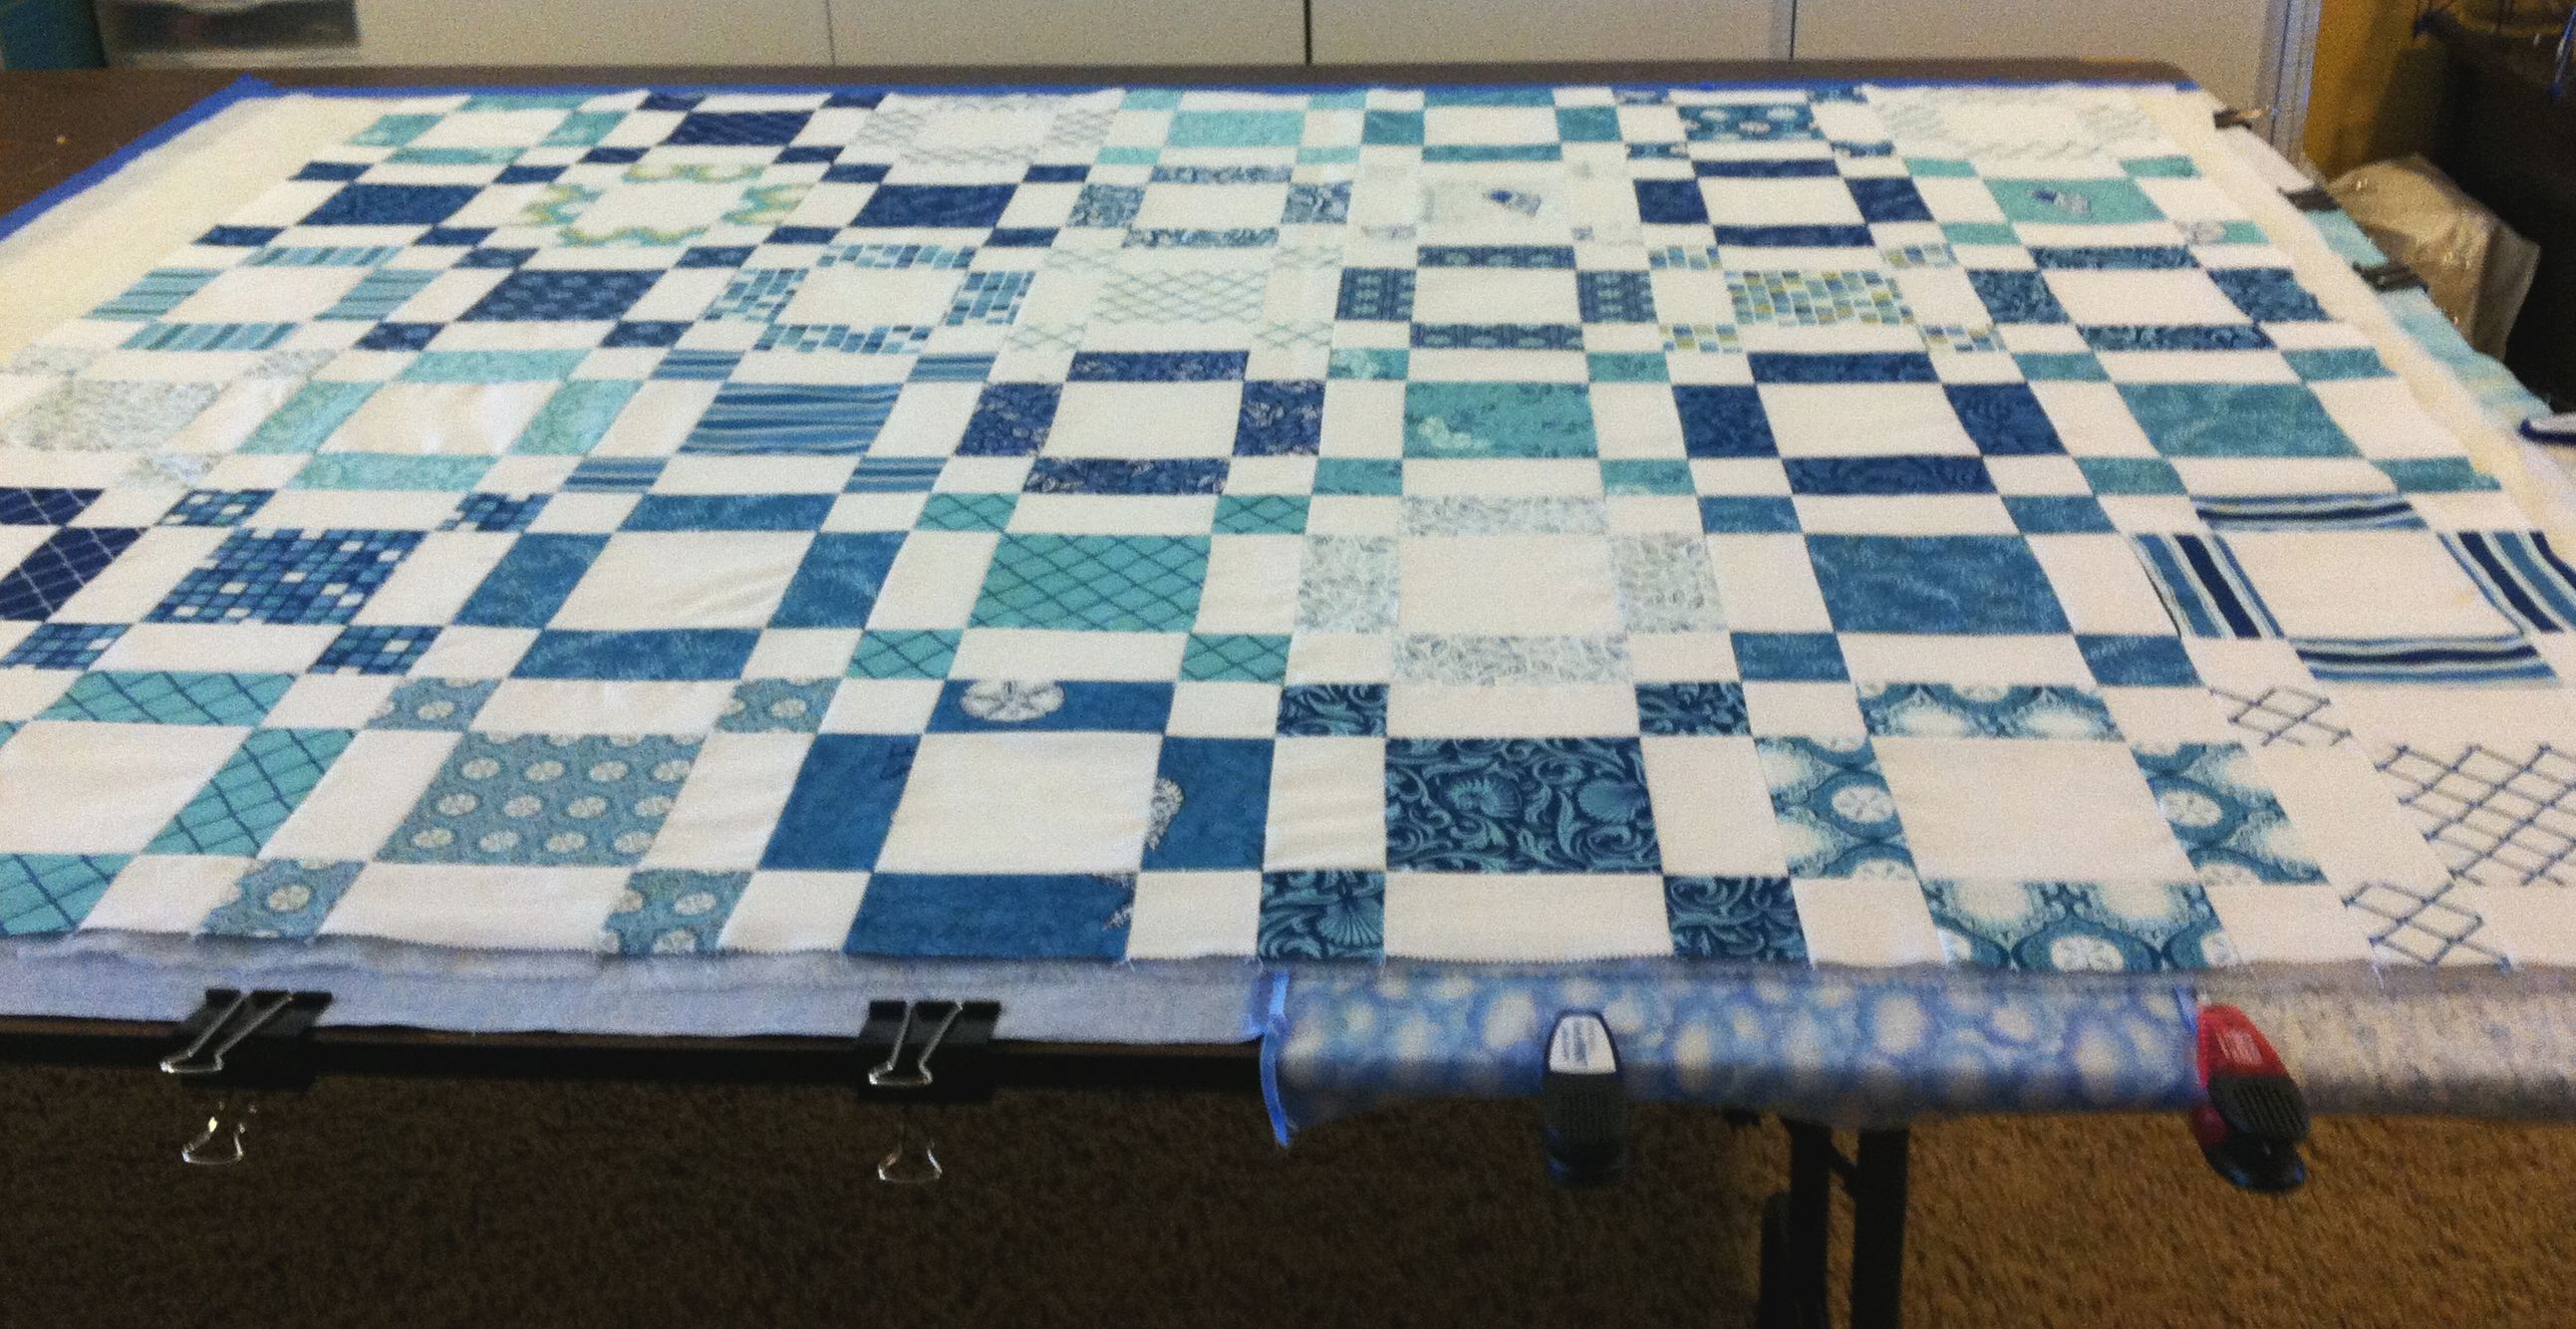
Light Grey for Background, Colors for Blocks


To decide on the correct thread color for a quilt, I will audition several choices and see which one “disappears”  most into the quilt. I test the thread out on a practice piece first,  to check the tension and to see how well the thread blends or stands out. Here are more tips:

  • With a thinner thread like silk or 60 weight polyester, your stitches will blend more, even if the thread does not exactly match the fabric. You can use neutrals to quilt over lots of different colors. If you want your stitches to show, use a heavier 30-40 weight cotton or polyester. A medium 50 weight cotton is a great choice for beginners because it is very forgiving and can cover a lot of area quickly without looking too “thready”.
  • Some of my favorite brands that I use are Superior Threads (in cotton, polyester or silk), Isacord (polyester), or Aurifil (cotton). Unfortunately, I have not had good results with invisible threads so I stay away from them as much as possible!
  • Use the same color thread in the top and bobbin. You don’t have to use the same weight. You can use a heavier weight on top and a lighter weight in the bobbin, or they can be from the same spool. No matter how well I balance my tension, little thread “pokies” still show through if the thread colors are vastly different.
  • If you can’t match your thread exactly to your fabric, opt for a darker thread color rather than a lighter color. A darker color will blend more; lighter colors stand out.
  • Use a “busy” backing for the lining of your quilt. This will easily hide any less than perfect tension issues or quilting mistakes. A busy back also hides lots of different thread color changes. Save the solid backings for when you want to “show off” your precise quilting, or if “thread play” is a part of your intended design.
  • To balance your tension, do not be afraid to change your bobbin tension as well as your top tension. Superior Threads has a great visual on how to balance your tension:

Thread Tension

Click to Enlarge

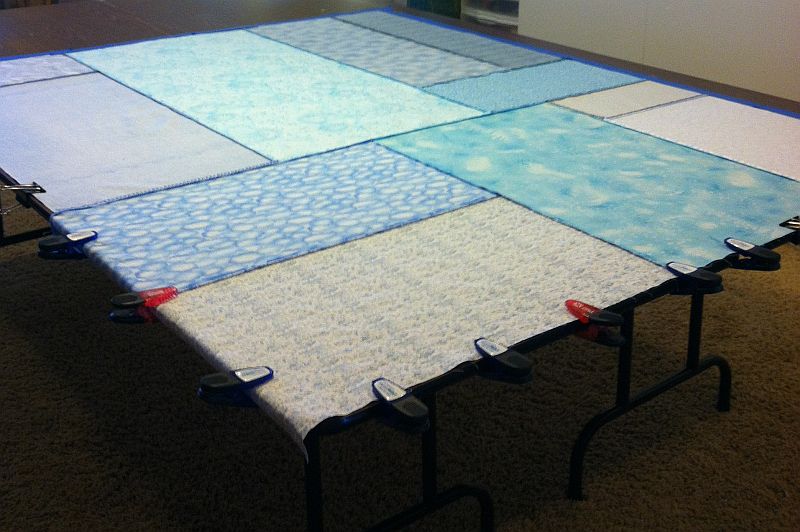
Starting, Stopping and Smooshing

When beginning a session of free-motion quilting, I like to use this phrase: needle down – foot down, needle up – foot up to bring the bobbin thread up through the top of the quilt. Be sure that your feed-dogs are disengaged, or covered with your stitch length set to zero.

Catch Bobbin Thread

Ending Thread


Hold both thread tails lightly with your hand, then take a few tiny stitches in place to lock your threads. When you come to the end of a quilting session, you will need to end with a few small stitches, then pull up a loop of bobbin. You can either clip the threads close to the surface, or make a knot by hand and “pop” it through to the batting.

When quilting a larger quilt, I use my hands as a hoop and quilt in one  small area at a time.

Hoop Your HandsYou will want to quilt your quilts enough so that the batting will not fall apart during washing. How much more dense you quilt is a matter of personal preference. I personally think that quilts look best when all areas are quilted, but this does take some time to do.

When the bulk of a quilt gets too much to handle, I simply move and “smoosh” it out of the way. If it’s been basted properly, all of the tugging, pulling and scrunching of the quilt will not cause any problems.

Smoosh and Scrunch

Smoosh and Scrunch

Practice, Practice, Practice!

It cannot be stressed enough: you need to practice a lot to get really good at FMQ. Make several practice sandwiches by inserting a piece of batting between two scrap pieces of fabric. It will take some time to find a rhythm that you are comfortable with. It took me a good solid year of FMQ to get to where I was happy with it.

Scrap 1

Scrap 1

Operate your foot pedal at a speed that keeps you in control of your hands and do not move your hands faster than the speed of your machine. Here’s a good rule of thumb (or foot!): if you are making tiny stitches, you need to slow down the speed of your foot pedal and increase the speed of your hands moving the practice sandwich around under the machine.

Scrap 2

Scrap 2

If your stitches are too big, you need to slow your hands down and and speed up your foot. Practice different combinations of speed between your hands and feet until it feels right. Your stitch movements should not be jerky, they should be nice and smooth.

“Handwriting Practice”

Handwriting PracticeIf you can draw it, you can quilt it! Think of your needle as an electric pen writing on a quilted canvas.

You have to practice your handwriting to know where your hand is moving on the paper. The same thing applies to FMQ with needle and thread.

You need to build muscle memory and hand eye-coordination.

The best way to do this is to draw, draw, draw. Take some time and sketch out some doodles like I did. I can sit for hours sketching out pages full of quilting designs!

Straight Line QuiltingSerpentine QuiltingThese are just a few of my favorite tips when it comes to free-motion quilting.

But do not overlook the possibilities of quilting with your walking foot, too.

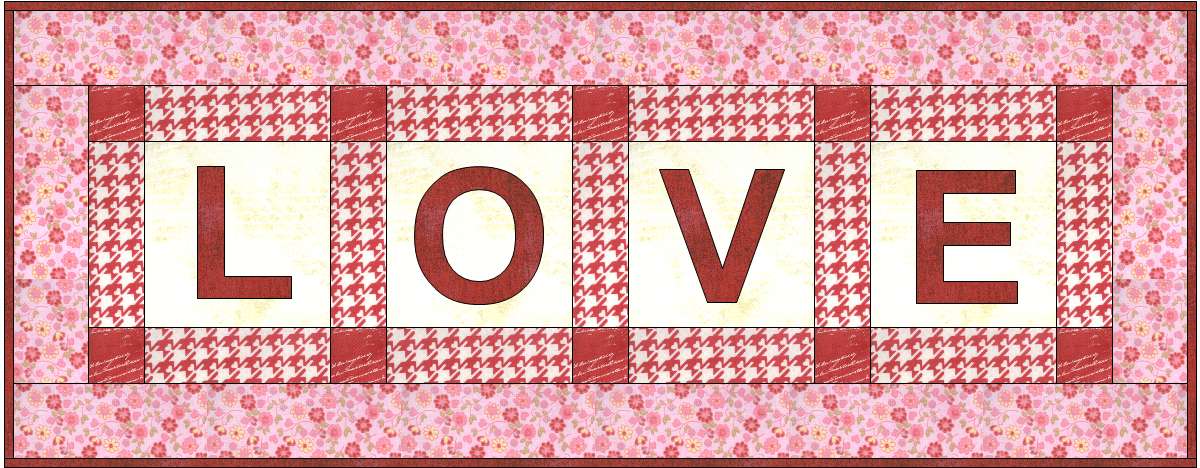
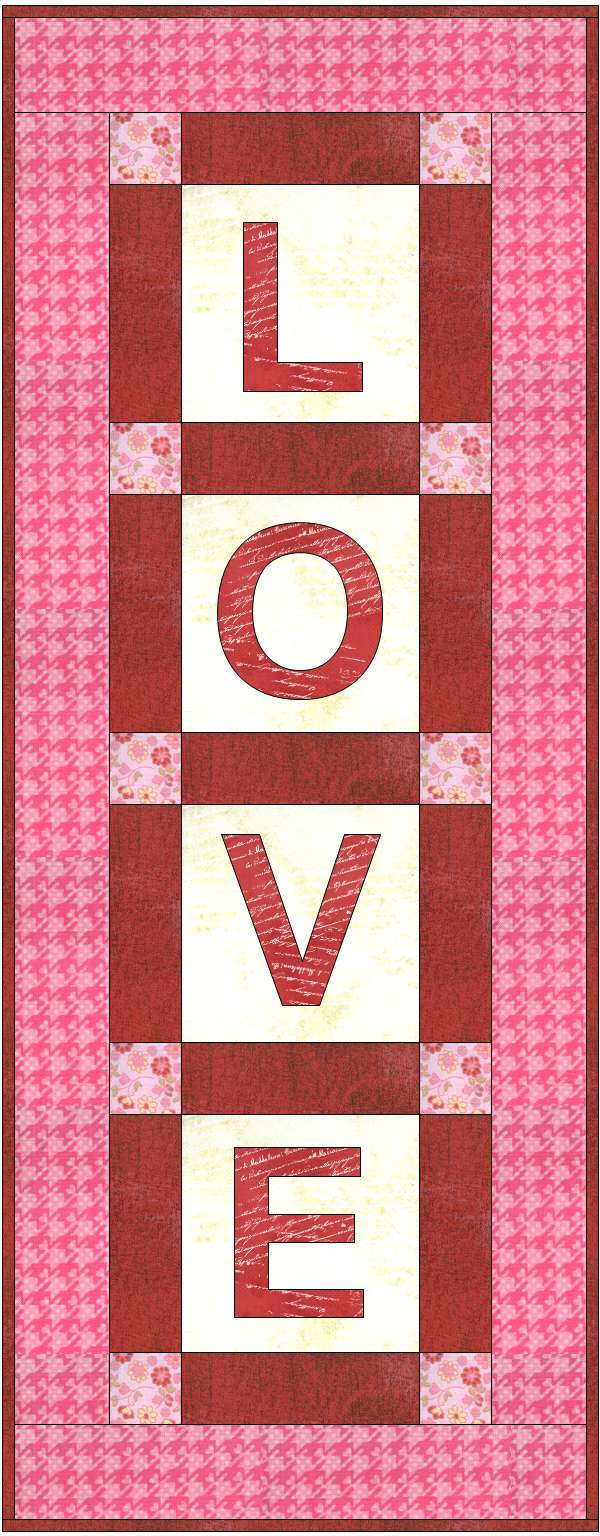
Straight-line quilting can add lots of texture, especially when quilted closely together.

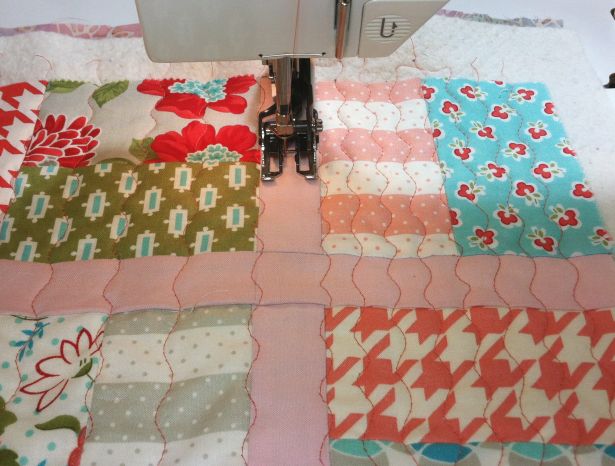
You can also add interesting designs by playing around with decorative stitches, too. The quilt below was quilted entirely with a serpentine stitch and my walking foot.

My final words are to have fun with it and don’t stress too much. Stick with it and you will see improvement over time, I promise!

Modern Love Mini Quilt Along #2

Thanks for joining me for part 2 of my Love Mini Quilt Along. Links for the supply list and the tutorial schedule are shown at the end of this post.

I am making this table runner which finishes approximately 30″ x 12″. I played around with EQ7 and fabric swatches from BasicGrey’s Kissing Booth to come up with a couple of different color options. My version is shown for the step-by-step photos and at the end.

Love Runner

Step 1 – Cutting the Fabric

  • Cut 4 roughly 4.5″ squares for your letters (red).  You will prepare them in step 2 below. Or you can fussy cut your appliques by using a big chunk of fabric instead.
  • Cut 4 – 5″ squares of background fabric (cream).
  • Cut 13 – 2″ x 5″ rectangles for sashing (red check).
  • Cut 10 – 2″ squares for sashing squares (red).
  • Cut 2 – 2.5″ x 8″ strips for side borders (pink floral).
  • Cut 2 – 2.5″ x 30″ strips for top/bottom borders (pink floral).
  • Cut 3 – 2.25″ x WOF (Width of Fabric) strips for binding.
  • Cut 1 – 14″ x 32″ piece of batting.
  • Cut 1 – 16″ x 34″ piece of fabric for backing.

Step 2 – Preparing the Love Letters

Love ReversedDownload and print of a copy of the letters L-O-V-E (click here). (Or if you’d like to be a little more creative, you can enlarge any font style you like and make your own letters.)

Flip your paper over so that your letters are backwards. Trace the backwards letters onto the paper side of your fusible web.

You may need to use a lightbox to see through the paper. Or print the letters out on transparent vellum for tracing.

Rough cut around each fusible paper letter. Then following the mfg’s instructions, adhere your fusible web to the backside of  your letter fabric. Use this phrase: rough to wrong. The rough (glue) side of the web needs to be stuck to the back (wrong) side of your fabric.

Use Fusible Web

I used Pearl Bracelets fabric for my letters and positioned them to take advantage of the printed design. Cut out the letters following their outlines. Don’t forget to cut out the center of the O! You have now made your own iron-on appliques.

Love Lettters

Step 3 – Assembling the Quilt Top

Sew your inner-quilt pieces (IQ) into 3 separate rows (sash row, block row, sash row):

Sew the Rows

You will notice I have not added the letters yet. I like to add them once the top is done so I can space them just right. Press seams open or towards the sashing fabric.

Add the Borders

Join the rows and add side borders that are trimmed to size. Then add the top and bottom borders and press towards the border fabric.

Lover Runner

Remove the backing from your cut out letters. Following the mfg’s instructions, adhere them to your block backgrounds. You can eyeball them in place, arrange them whimsically, or use a ruler to measure exact placement. It’s up to you!

Next week I will demonstrate you how to applique and quilt all at the same time. The key is to use thin thread that matches your letter fabric. I prefer silk or very thin polyester thread for this, but regular cotton thread is ok, too.

Here is the mini-quilt along schedule. Links will become active once that blog post is done.

Please join my ChristasQuiltAlong flickr group to share pictures of your work-in-progress!

For these other arrangements, just follow the modified steps below.

Love Wall QuiltLove Squared
The vertical love wall banner uses the exact same directions as the table runner except that the letters are arranged vertically instead of horizontally – watch out for directional fabrics and cut them accordingly.


To make the 18″ Love Square wall-hanging or pillow, use these cutting instructions:

  1. Cut 4 – 4.5″ squares for your letters.
  2. Cut 4 – 5″ squares of background fabric.
  3. Cut 12 – 2″ x 5″ rectangles for sashing.
  4. Cut 9 – 2″ squares for sashing squares.
  5. Cut 2 – 2.5″ x 14″ strips for side borders.
  6. Cut 2 – 2.5″ x 18.5″ strips for top/bottom borders (pink floral).
  7. Cut 2 – 2.25″ x WOF (Width of Fabric) strips for binding (for wallhanging only).
  8. Cut 1 – 20″ square piece of batting.
  9. Cut 1 – 22″ square piece of fabric for backing (use muslin or scrap for pillow).

Then sew together so that it looks like the diagram above.

Christa’s Quilt Links – Flickr Groups To Check Out

Ok, I know I’m hitting the flickr thing a little hard, but I’ve really become addicted. So for today’s version of my favorite quilt links,  I will be listing a bunch of different groups I’ve found, and invite you to check them out as well.

Of course, I need to start with my very own flickr group that I created a couple of weeks ago: Christa’s Quilt-Along. I’ve been pleased with the response and it’s been fun to see pictures that everyone’s been posting.

Two other flickr groups that I’m personally involved with are Pile O’ Fabric’s Skillbuilder Block of the Month and Quiet Play’s And Sew On Paper Pieced Block of the Month.

If you are into modern quilting like I am, you can check out these two groups: The Modern Quilt Guild and Fresh Modern Quilts.

A group I just recently was invited to join is Quilt as Desired. Their focus is on machine quilting so I was all over that one!

And of course, everyone and their buddy is jumping on the Scrappy Trip Along bandwagon, so that’s another fun one to check out.

These few groups are like just a drop in the bucket compared the hundreds of different quilt and sewing related sites, and the thousands of groups available on flickr. So browse around, have fun, and don’t forget to come back and tell me any other fun groups I should join!

Sew and Tell – Shopping My Stash

I have a fabric pull that I’m excited to share with you and several “a-ha!” moments. First take a look at these lovely pretties:

Warm Fabric StashI originally pulled these fat quarters from the shelves of my store for the  Skillbuilder BOM I’m doing. I love the analagous color scheme of red, orange and yellow. It’s so warm and inviting. There are a few Kona Solids in there, some Kaffe Fassett and Amy Butler pieces, a few older Lily Ashbury geometrics, some Laurel Burch Basics that blend surprisingly well, and of course a few Pearl Bracelets.

Black and GreyThen I started looking through my stash of backgrounds to decide on black or grey.

My mini “a-ha” moment came when I thought – why not all of them?

I could make each set of blocks with a different shade of black or grey and maybe even grab some shades I don’t have yet.

Warm SolidsThis led to another “a-ha” moment. I really liked the last completely solid quilt I made, so why not do another?

So I set aside my bundle of colorful print fabrics above and instead went with all solids in red, orange and yellow with a hint of turquoise.

This picture isn’t really great but the colors really do speak to me for this specific project.

And my final “a-ha” moment of the week: I gave myself permission to take the print fabric stack above out of my store’s inventory and keep them for myself. After all, they were my original inspiration, so that means means they belong in my stash, patiently waiting for the perfect project to use them in. 🙂