Blog Hop Party and Fabric Giveaway!

I have jumped on the blog hop party wagon! I’ve been reading lots of quilting blogs recently and  have discovered this fascinating world of tutorials, inspiration, freebies and giveaways. (I know many of you have known about these for years – I’m a little late to the party!)

Anyway, you’ll notice I have implemented many of those ideas here on my blog like my Jolly Jelly Roll quilt tutorial, with a new tutorial starting next week.

Blog Hop Party with Give-Aways

To keep the inspiration coming, I decided to join up with the Quilting Gallery and participate in their Blog Hop Party. From August 26th – September 3rd you can check out the hundreds of participating blogs with a chance to win something from each host!

For my giveaway, I will be offering a $20 gift certificate to spend on fabric or anything else that catches your eye at ChristaQuilts.com. Here’s how to enter:

Go to my website and sign up for my newsletter. Quickly browse around to see what I have to offer. Then come back here and leave a comment on this post telling me what you would buy if you win! I will randomly select one person from all the comments as my winner.

This contest is open to everyone; I am happy to ship worldwide. I’ll announce the winner here on my blog on September 4th. Happy hopping!

Sew and Tell Friday – Zazzle, Turning Twenty Diamonds

I am excited to share some more Sew and Tell with you today.

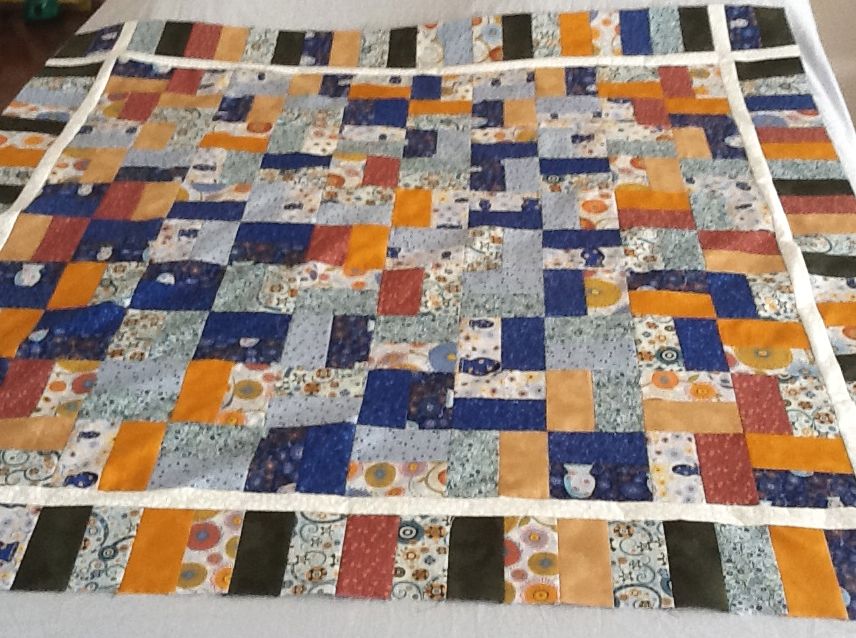
Joanne P. is following along with my Do-it-Yourself-Quilt tutorial. But, instead of using a jelly roll, Joanne cut up her strips from Mark Lipinski’s Zazzle line in blue. She mixed in some brown and gold Moda scraps from her stash to add a little sparkle. How beautiful! I love how the white inner border provides a contrasting frame to the quilt. Notice how she used a piano keys border variation. Love it! Now I can’t wait to see it quilted!

Jolly Jelly Roll Zazzle

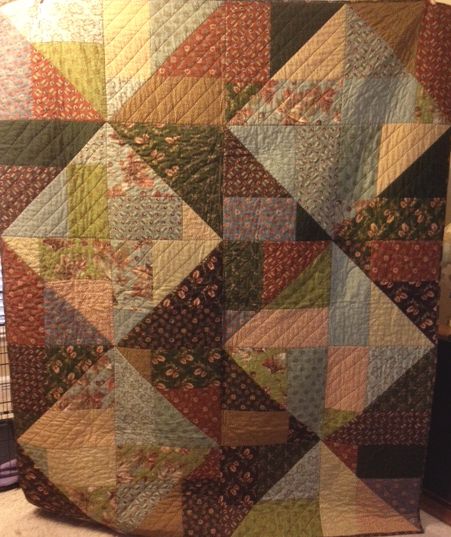
Anne Y. recently finished a Turning Twenty into Diamonds quilt using Arnold’s Attic from Moda. (How did I miss that quilt pattern? I better put it on my list to add!) I love all of the texture that her quilting gives to the piece. She quilted straight lines in a diagonal setting. Don’t you think the quilting makes the quilt?

Turning Twenty Into Diamonds

In the next couple of weeks I will be improving my blog so that we can have more sew and tell fun. Instead of waiting for everyone to send me their show and tell pics, we’ll have some link-up parties where you can post your own quilt-along pics, finished quilts, and wip’s (works-in progress). So stay tuned for that.

In the meantime, you can still email me pictures of your finished projects, using one or more fabrics that you got from me. Plus, I can’t wait to see more finished quilts from all of you who are finishing up your own Jolly Jelly Roll quilts. Happy Quilting!

Christa’s Quilt Along 1.6 – Machine Binding to Finish

Free Pattern

Be sure to sign up for my email newsletter to get a free quilt pattern!

Jolly Jelly Roll Quilt Wrap Up


Here are all of the previous bog posts, if you are just now joining us:

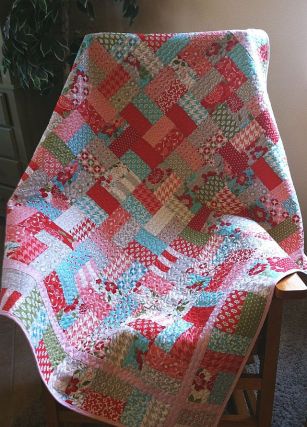
Week 1 – Supply ListJolly Jelly Roll Quilt
Week 2 – Sewing the Blocks

Week 3 – Completing the Top

Week 4 – Backing and Basting

Week 5 – Machine Quilting

Remember, you can click on any picture to enlarge it. Now, onto the binding!

I use the same techniques to attach the binding to all my quilts, whether finishing by hand or machine.

Step 1 – Square Up the Quilt

Use a large square ruler to trim up all four corners of your quilt. The square will help you achieve a nice straight 90 degree corner. Trim up all four of the sides with a longer ruler.

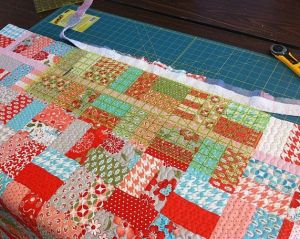
Square Up the Corners

Trim the Sides

Step 2 – Measure the Quilt Perimeter and Cut Enough Binding Strips

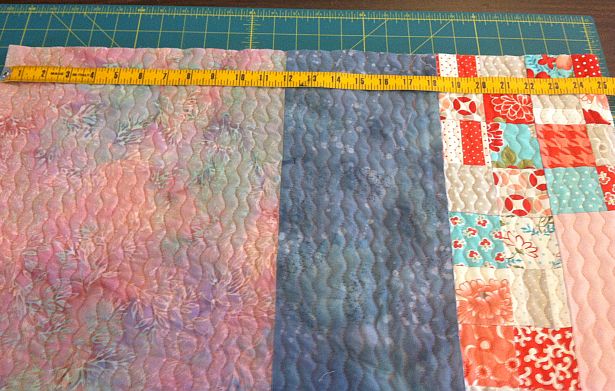
Measure the perimeter of your quilt so you know how many strips to cut.  Lay it out on your cutting mat or use a measuring tape. I folded my quilt in half to make it easier to measure. Divide your perimeter by 40 inches (the useable length of one strip).
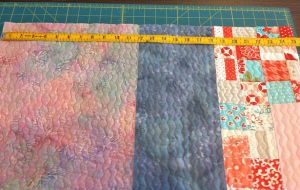
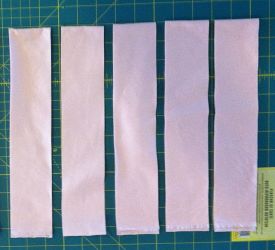
Measure the Quilt PerimeterCut 5 strips 2 1/4 Inches Wide

Round up to the nearest number of strips and cut them 2 1/4″ wide. I cut 5 strips for my quilt.

Step 3 – Make Continuous Binding

This method is called double-fold straight grain binding. Sew all of your strips together to make one continuous piece. Miter the strips by sewing on an angle to distribute the bulk of the seam. If you are using a solid fabric, be sure to sew them all together on the same side!

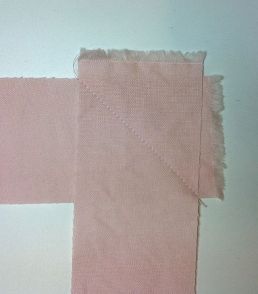
Join Binding StripsSew on an AngleYou can eyeball the seam.

Trim 1/4 inch seams to the right of your sewing line and press open.

With a small square ruler, cut off one end of your binding on a 45 degree angle. Make sure your binding strips have not been folded or pressed yet. Once the end is cut, then press your binding in half along the entire length, with wrong sides touching and right sides out.

Angle the BegninngPress Binding in HalfWatch your seams if using solid fabric!

Step 4 – Attaching the Binding to the Quilt

Begin sewing your binding to the quilt with a walking foot, leaving a tail of about 6-8 inches unsewn. Be sure to start on the side of your quilt, not at a corner and sew the binding to the front of the quilt. The folded side of your strips will be to your left. The open sides will be to your right. Use a quarter inch seam allowance and match your thread to your binding fabric.
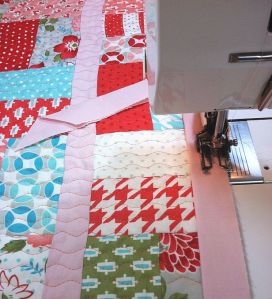
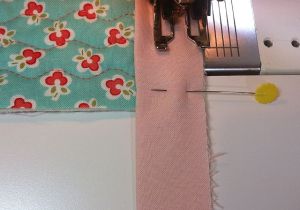
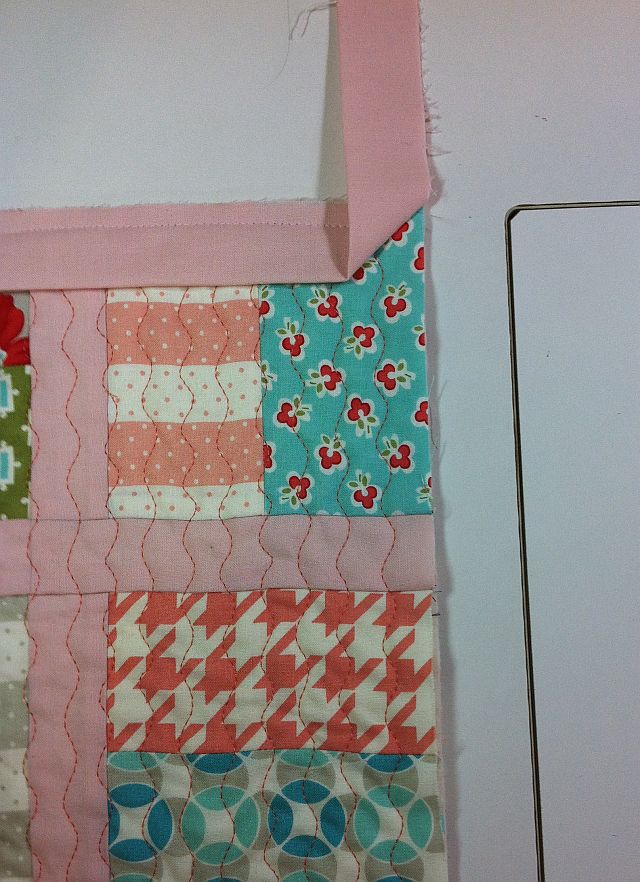
Leave a TailStop 1/4 Inch AwayWhen you reach a corner, stop sewing 1/4 inch away from the end. Mark it with a drawn line or a light pencil mark if needed. Sew off the side.

Rotate the quilt and flip the binding strip up so that it is even with the side of the quilt. Then, flip it back down, forming a “pinch” of fabric at the corner. This will be the fullness that will flip around to the back creating a nice mitered corner on the front.

Sew off the Side at 1/4 InchFlip Binding UpThen Flip DownRepeat this technique for all four corners of the quilt. When you are nearly finished sewing the binding onto the front side, make sure to leave another tail of about 6-8 inches of binding so you can join the beginning and ending binding pieces.
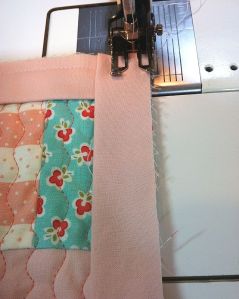
Next Corner

Leave a GapNext, you will trim and join the ends so they fit together exactly.

If you have a lot of excess binding, you can trim some off.

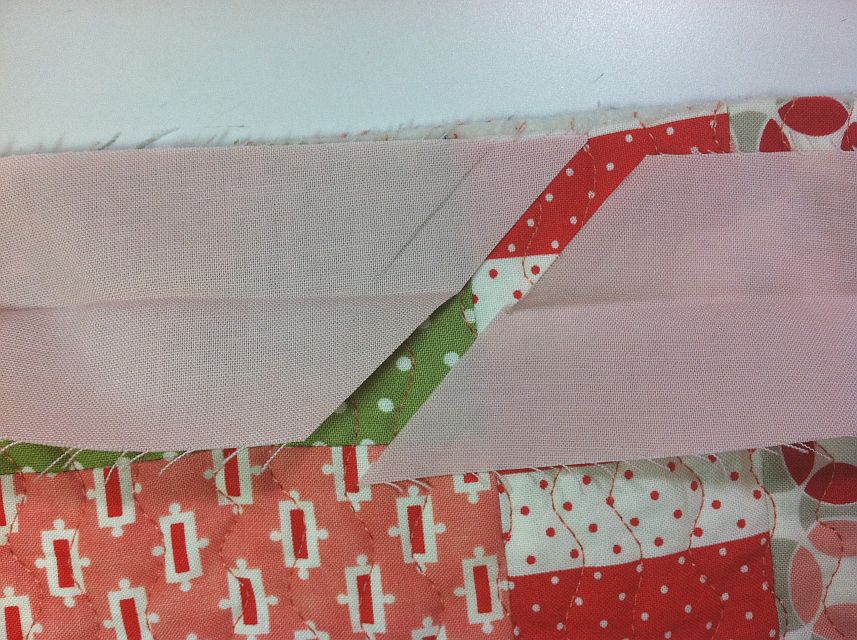
Open up both binding ends and nestle your beginning binding piece (the angled cut end) on top of the ending piece so that it is flat and smooth. Mark an angle on the ending piece where the beginning piece rests on it – should be a 45 degree angle. Cut 1/2 inch away from this marked line. This will take into account the seam allowances for both pieces. Make sure your binding is not twisted and that both angled cuts are parallel to each other.

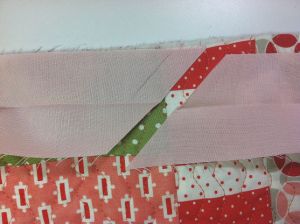
Mark the AngleCut 1/2 Inch Past Marked LineJoin the two ends by offsetting them slightly to create little tiny tips at each end. Where my pin is pointing, sew from the crevice of one triangle tip to the other, with 1/4 inch seam. Trim off the triangle tips, and press the seam open. It should be a perfect fit!

Joining the Beginning and Ending StripsFinishing the Front BindingFinger press the rest of the binding closed and complete your stitching on the front side.

Step 5 – Finishing the Binding with Decorative Machine Stitching

Pinmoors for BindingThe key to a really nice binding, whether finished by hand or machine, is to make sure it lies flat all the way around the quilt and that the corners are secure.

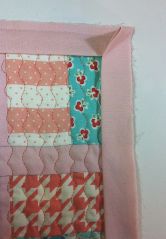
Once the binding is sewn to the front, simply fold it over to the back to stitch.  I like to use pins with Pinmoor anchors for safety to keep everything in place. Fold over the corners to create a nice miter and pin.
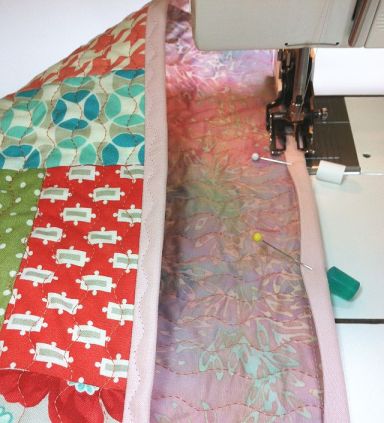
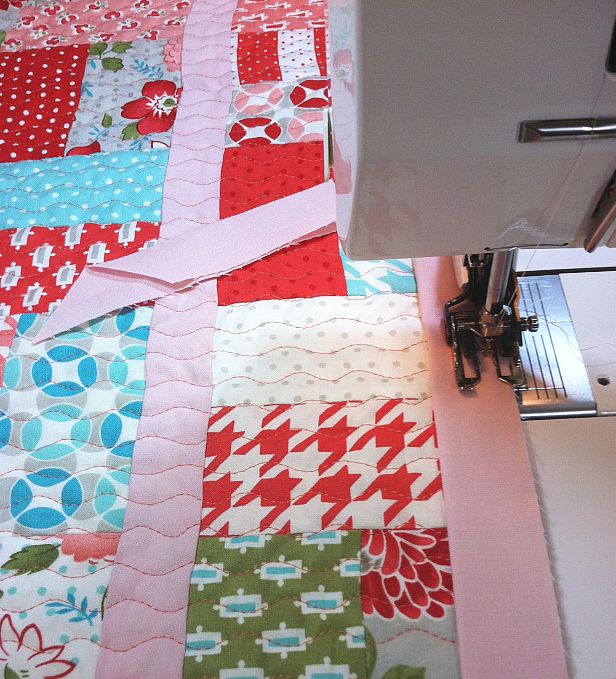
Binding by MachineI used the same decorative serpentine stitch for the binding that I used for the quilting.

You will notice I am actually stitching by machine from the back side of the quilt. This seems to give me the best results and I can control how wide the stitching is so it shows up nicely on the front.

You can see where I’ve already stitched some of the binding.

On the back, be sure to cover the line of straight stitching that was used to sew on the binding  from the front side.

The binding is just as beautiful on the backside as it is on the front. Another finished quilt!

Another Finished Quilt!

Sharing is Caring

I’d love to see your version! Please share your work in progress in my facebook group: Quilt With Christa . 🙂

Weight Loss Week 18 – Birthday Treats

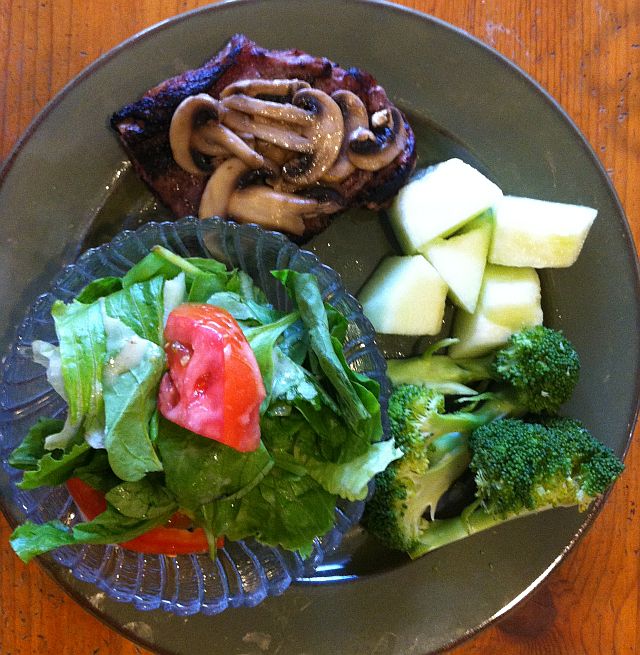
I started off my week great since losing 20 pounds last week. I was eating healthy and keeping up with my exercise habits. Jason grilled a nice steak dinner one night  and instead of loading up on potatoes and bread, we added lots of veggies and fruit to our plate.

Eat This...

Eat This…

Not That!!

Not That!!

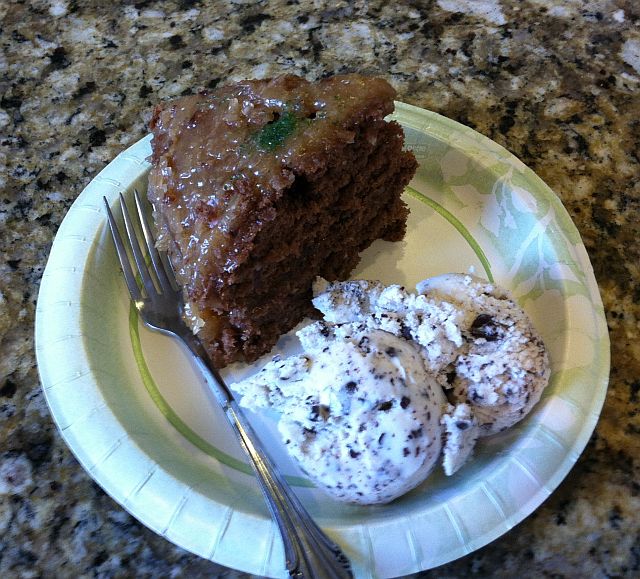
However,  by the end of the week my eating took a turn for the worse. We celebrated my birthday, so that night I had cake and ice cream for dinner, and one night of indulgence quickly lasted all weekend…

About ChristaI gained a teeny tiny 2 tenths of a pound this week which wasn’t really all that bad, considering. But, I would like to have another big weight loss soon.

For my birthday, my younger son and daughter made my favorite cake, German Chocolate, and my oldest son whipped up the home-made chocolate chip ice-cream. I loved the sentiment and the treats. Yum!

I was also very impressed with my creative husband, Jason. He assembled the “Christa Art” and framed it for me all without me knowing! All that graphic arts web design is paying off. 🙂

And, my crafty friend Alexis, Crocheted Pincushionwho blogs over at Persia Lou, made this adorable crocheted pincushion for me. How sweet!

So, this week’s goal is to get myself back on the right track, (including anyone else who’s following along and is hopefully inspired by my journey).

To do this, I will remember who I’m getting healthy for and why I am doing it:

1. To have enough energy to get through my busy days.

2. To live long enough to make all the quilts I want to create.

3. To be around for my family for a long, long time!!

Here’s to a great week ahead!

And the Winner is….

Loralie’s Sew Creative!!

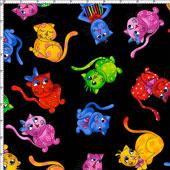
Thanks to all of you who participated in my first fabric survey – that was fun! I gave you the choice of four new and re-released Loralie Harris fabric lines to choose from: Cool Cats, Nurse Central, Sew Creative or Fast Women.

Sew Creative won the survey with 44% of the votes so I am definitely going to order that one now. Cool Cats was a close second with 37% of the votes, Fast Women got 12% and Nurse Central received 7%. This was a very helpful survey because without it, I probably would have just ordered Nurse Central, which was actually the least popular group.

If I have enough budget left, I will also order Cool Cats since that one also received a lot of votes and comments here on my blog. Be sure to sign up for my newsletter so you’ll get an email when these fabulous fabrics arrive.

Now, for the 2 winners who will get a ChristaQuilts.com $10 gift certificate:

I used a random number generator based on all of the comments received. I did not include my own comments. The winners are:

Blog Comment WinnersComments number 14 and 24!! That would be

Joyce Ellis: “I voted, it was hard to choose, they’re all cute. Decided on the cats.”

and

Heather: “I voted too.”

Congratulations to these lovely ladies. I will email each of you your gift certificates now.

This giveaway was so much fun – I think I will have to do this again in the near future!

Sew and Tell Friday – 3 Jelly Roll Quilt Tops

For today’s show and tell we have a triple header! These three beautiful quilt tops come from Linda and Martha, a couple of friends who have been moving right along with my Jolly Jelly Roll do-it-yourself-quilt tutorial.

Linda & Martha's Jelly Roll QuiltsThese two gals love working with jelly rolls “sew” much! Martha sewed the two holiday quilts using Christmas Spirit and Trick or Treat, and Linda is making hers from the girl colorway of Meadow Friends. They will present their show and tell at their next “Strip Club!” Now they just have to quilt and bind their lovely quilts and they can move onto their next projects.

Speaking of finishing, I will present a machine binding tutorial to finish these quilts up next week and will then start another complete quilt project the week after.  I’m toying  around with switching up my blog software so that more of you can share your WIP’s! (Works in progress), so stay tuned for details. Also, be sure to subscribe to my blog if you haven’t done so already, so you can stay abreast of all the latest happenings.

Oh, and if you have any suggestions on what types of quilt projects you’d like me to demonstrate, please leave a comment. The next do-it-yourself-quilt tutorial will either use fat quarters or a layer cake (I’m designing it now). But I’d love to have more ideas, and I plan to offer these free tutorials on an ongoing basis. Eventually, I’ll offer patterns and kits to go along with them, too!

Don’t Forget to Vote – Includes Fabric Giveaway!

Don’t worry, I’m not trying to be political. This is just a reminder to vote in my fabric survey at http://www.surveymonkey.com/s/FDV57YC, if you haven’t done so already.

I am collecting votes to find out which fabric line to order next from designer Loralie Harris. The choices are: Cool Cats, Nurse Central, Sew Creative, or Fast Women.

Cool CatsNurse CentralSew CreativeFast Women

So now for the giveaway:

I am all for incentives to get you to participate! I am pleased with the response I’ve gotten so far with the survey but want to “sweeten the pot” as they say.

Two lucky winners will each win a $10 gift certificate to my fabric store at ChristaQuilts.com. You can use this to buy a yard of the winning Loralie fabric collection when it arrives, or you can select anything else in the store – your choice!

Here’s how you get your chance to win:

Vote in my survey and then come back here and leave a comment telling me you voted. If you voted previously that’s fine – just leave a comment here indicating you did so.

On Saturday morning, August 18 at 10 am Pacific time, I’ll cut off the voting and will choose 2 winners at random. I’ll then announce which fabric collection won and will be on its way.

Happy voting and good luck!

Christa’s Quilt Along 1.5 – Machine Quilting

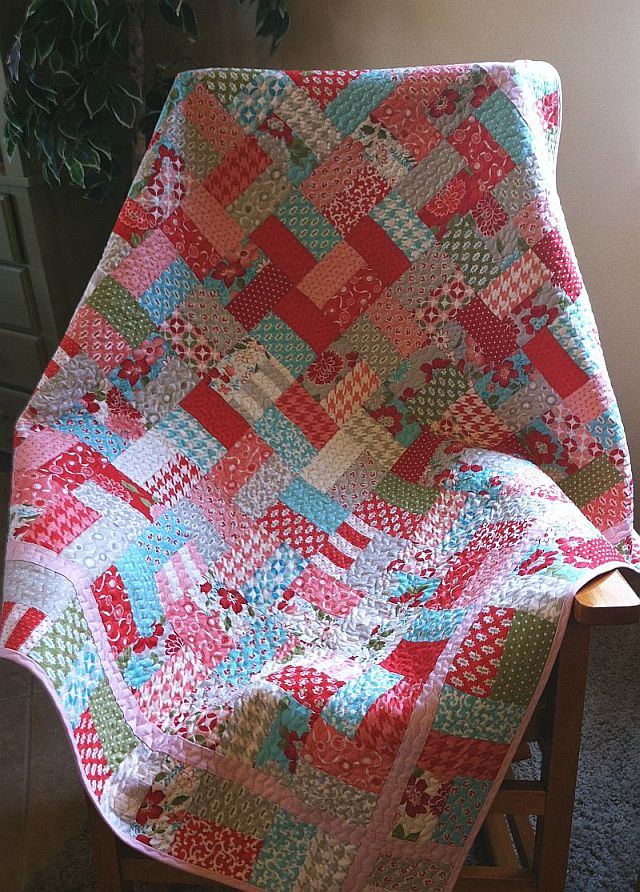
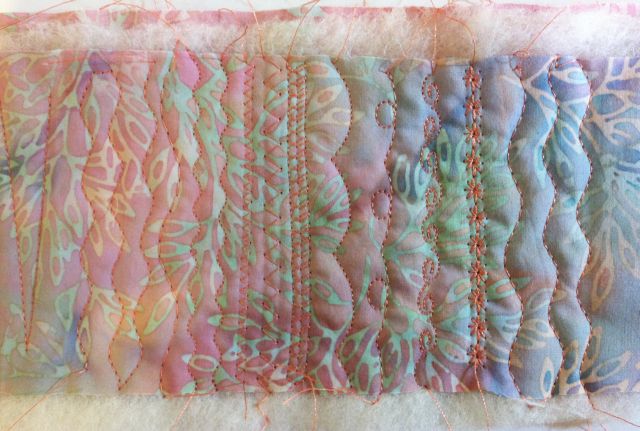
This week’s post is the one I’ve been waiting for. I think machine quilting is the best part of making a quilt, so I couldn’t wait to get my Vintage Modern jelly roll quilt top finished and basted so I could start the fun! I quilted it using a serpentine stitch with my walking foot.

Machine Quilting 2" ApartBefore I started quilting, I tried out a few of my machine’s decorative stitches to see how they would look.  All of these can be done using a walking foot with the feed dogs engaged.

Stitch SamplesI used a 40 weight high-sheen polyester thread with a size 90 needle and used the same thread for both the top and bobbin.

This gives better results than using different colored threads.

Step 1 – Decorative Ditch Quilting

Quilting 4" ApartBe sure your needle plate has a wide enough opening to accommodate your decorative stitch and test it out first so you avoid broken needles.

Quilt along the seam lines in one direction in between your blocks, about 4 inches apart. The first pass took me 30 minutes.

This will secure the quilt and you can remove the pins as you go.

Next, make second pass in between each line of quilting. Now your quilting is about 2 inches apart and the quilt is starting to get some texture! I quilted parallel lines across the quilt. I did not mark any of these lines – I just used the seams as a guide and eyeballed it across the fabric where there was no seam to guide me. This is both liberating and fun!

Quilting Parallel Wavy LinesThis second pass took another 30 minutes so I’m just at 1 hour total quilting time. Not bad! At this point, this is enough quilting to hold your quilt together. However, I want more…

Step 2 – Adding More Quilting

Quilting 1 Inch ApartMy motto is that you can never add too much quilting to a quilt!

So I added another line of quilting in between each of the rows above. This was my 3rd pass and now the quilting lines are about 1 inch apart.

This took only another 30 minutes and I can’t believe how fast this is going!

There is still enough room to add another row of quilting and do a fourth pass, so I decided, what the heck?

The fourth pass took 1 1/2 hours because I had now doubled the amount of quilting on the quilt, but I loved every minute of it!

Half Inch Quilting Lines

I ended up with quilting lines about 1/2 inch apart over the surface of the quilt. Total quilting time was 3 hours and I used up a full 500 yard spool of Superior Highlights thread.

Textured QuiltingSuperior Threads Tri-Lobal Polyster

I love all the texture on the back!

Pieced Backing with Quilting

So next week, we will finish our quilts, can you believe it? We will trim them up and bind to finish. I really can’t wait to see how everyone’s quilting turns out. Be sure to email me pictures of your progress, no matter where you are,  so I can share with everyone else.


Here is the complete Jolly Jelly Roll Quilt-Along Schedule:

Week 1 – Supply ListJolly Jelly Roll Quilt

Week 2 – Sewing the Blocks

Week 3 – Completing the Top

Week 4 – Backing and Basting

Week 5 – Machine Quilting

Week 6 – Machine Binding to Finish

Favorite Tools #6 – Needles

Since we will be quilting our Jolly Jelly Roll quilts this week, I thought it was an appropriate time to talk about sewing machine needles. Needles are often the least expensive but one of the most important components of making a successful quilt!

If your needle is old, bent, or flawed, it will make quilting much more difficult. Often times when you think thread or tension is the problem, it may actually be your needle!

Superior Needles

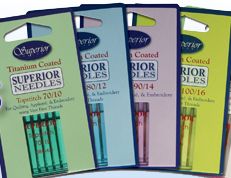
My favorite needles to use for both piecing and quilting are Superior’s Titanium Coated needles. They come in a variety of sizes and work wonderfully. There are a lot of different types of needles out there – really more than you need.

The titanium needles are perfect for  sewing, piecing, machine applique, and machine quilting. They work well with metallic threads, too. So forget about having different needles for different purposes, ie: universal, ball point, sharp, or metallica needles. Just stick with the titanium topstitch needles for everything and all you have to think about is which size to use. They last much longer than most of the other brands, too.

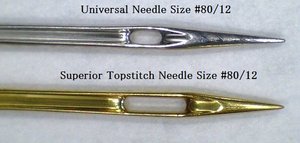
So how do you know which sized needle to use? It depends on your thread. The titanium needles come in 4 sizes – 70/10; 80/12; 90/14; 100/16. They have a much larger eye which allows the thread to pass through with less tension and therefore fewer thread breaks.Needle Closeup

Size 70 needles are  for very fine threads such as 60 weight cotton or polyester, monofilament, #100 and silk threads. I use these with silk thread for machine applique that blends into my quilts.

Size 80 needles are for for fine threads such as 50 weight cotton or polyester. I use these for piecing quilts together and sometimes for allover stippling with cotton thread that blends into the top.

Size 90 needles are for medium threads such as 40 weight cotton or polyester. This is the also the needle I use for decorative threads and metallics. The thread does not shred!!

Size 100 needles are for heavier weight cotton or polyester threads. I’ve only used these needles once so far when I quilted with a 30 weight variegated thread. It worked like a charm with no thread breaks or skipped stitches!

I use the 80’s & 90’s most often in my everyday piecing and quilting. Since these needles last for a long time I can usually piece and quilt a medium throw sized quilt with just one needle.

I’m still not convinced that Superior Threads offers my favorite thread, however. You can read my opinion about the company here on my soapbox, but I do love their needles!

Weight Loss Week 17 – Another Milestone

20 Pounds Weight Loss

20 Pounds Weight Loss

I can’t believe I have been working so hard for so long!

It’s been 4 months, but I have finally hit the 20 pound weight-loss mark.

I lost what I gained last week plus a little bit more to reach a total of 20.2 pounds gone forever! I still have about 16 more to go.

It took me only 5 weeks to lose the first 10 pounds, but then more than double that time to lose the next 10.

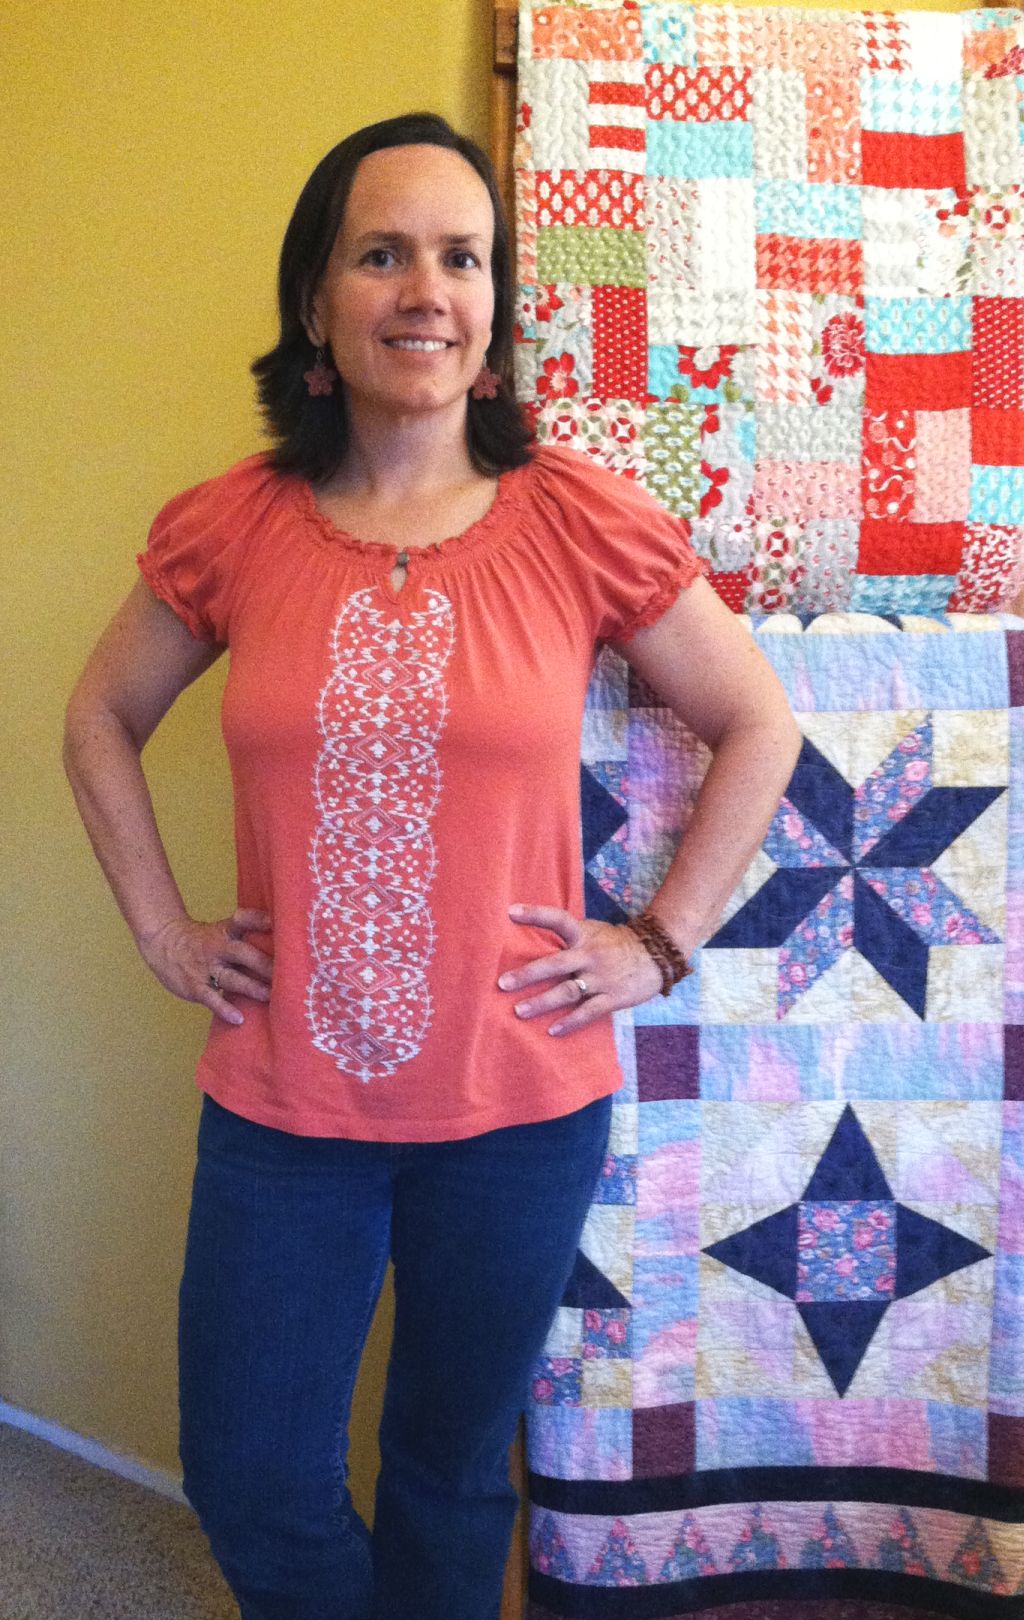
One thing I can say for sure is that I’ve learned how to persevere! Here are some “before” and “during” pictures so you can see how far I’ve come.

I’ll show my progress again in another 10 pounds.

Week 1 Starting

Week 1 – The Start

First 10 Pound Weightloss

10 Pounds Gone

My favorite shirt is fitting better and I had to switch to some smaller sized jeans. Whoo-hoo!

You can also  see I’ve finished up a couple more quilts in the meantime.

My hair has grown a lot so as a little reward I’m getting it cut off again tonight.

Here are this week’s tips on how to continue to persevere and make it to the next weight loss goal. It will take awhile but  it will be worth it.

1. See yourself in pictures. Taking pictures along the way is keeping me motivated. For a long time, I had up a  “fat” picture on my fridge which made me pause every time I wanted to raid the fridge for a snack. Sometimes you can’t really tell how you look until you step back and look at those photos. Like, was I really that fat? Or, hey I look pretty good in that outfit!

2. Share With Others. If nothing else, consistently keeping up with my blog keeps me accountable. My mom has promised me a shopping trip when I get to my goal. Now she can see how hard I’m working to earn it! Plus, when I have other things to blog about, like the quilts I’m working on, it helps keep my mind off food.

Hopefully it won’t take me as long to get to the next 10 pounds….