So we just did a crazy thing. We decided to buy a new house!! After 13 years of living in the same home, we started thinking about how we could expand my studio space – because thanks to all of you – I’ve outgrown my current situation. So my husband Jason and I sat down and started planning out whether to renovate our current home, rent out a separate office/studio space, or just buy a bigger home.
(Scroll to the end for links to all of the posts I wrote about our moving journey)

This will be our new home very soon, if all goes according to plan.
Being the former CPA that he is, Jason was able to crunch the numbers and realize it made more sense to find a bigger used home in great condition. The perfect place for us would ideally be not too far from our current home, since we love the area and we have established roots here.
So we thought it would take a while to find exactly what we needed, and I was worried about the timing. Next year starts getting really busy for me in the spring and summer, which are usually the most popular times of the year to move. But low and behold, a few days after we started looking, we found the exact floor plan we were looking for at a price we could afford, and it’s ready for immediate move-in.

The sleek modern cabinets, wide open spaces, and gorgeous kitchen really sold us on this house.
Now to start making some cozy quilts to match…..
The best part is that this house is just a few minutes away from our current home, and (super important for our kids) in the same church community where we’ve spent years developing friendships. And to make it even more perfect, it’s on the same street as one of my daughter’s really good friends. So this really seems to be another case of the universe leading me where I need to go. (I love it when that happens!)
So here’s where the timing gets super interesting. Although this particular home had been on the market for several months with no offers, once we quickly decided it was “the one,” it seemed as if everyone else wanted to buy it, too! The day we decided to put an offer on the house, we were notified that there were already two other offers and they weren’t accepting any more after the end of THAT day. Oh no… but this is OUR home we thought!!

I love open floor plans with lots natural light.
Decorating this space is going to be so much fun!
As luck would have it, we were able to get a quick pre-approval from the bank, and thanks to the excellent (and quick) work of our realtor friend, we were able to make a strategic offer that was below the asking price, but still the highest offer on the table. If we had waited one extra day to decide… we would have lost out on it!
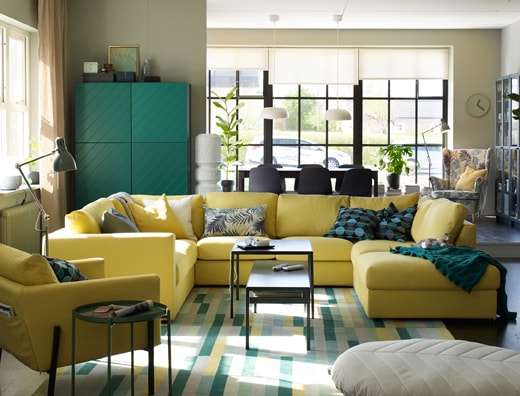 Image from Ikea – not my home, though I wish!!
I imagine this cheerful Ikea couch would look so fun in my new home.
Or maybe one in teal, or navy, or seafoam…. it will be fun to decide!
So now, we need to get ready to move! Of course there’s paperwork to finalize and there’s always the chance that something could fall through. But I’m an optimist and prefer to think about what could go right and the steps I need to take to make it happen.

Here’s my friend’s dining room, who recently purchased the exact same home. I love the accent walls and want to achieve the same look, but with more of a modern vibe.
Now the plan is to measure all of the rooms, budget out some improvements, and begin the moving process while still living in our current home.
In order to avoid the horrors of having to temporarily move to a smaller rental, or even worse, trying to move an entire household AND business in one weekend, we are going to move a little bit at a time over a few weeks so as to avoid any major disruptions with our business. After all, if we don’t work, we don’t eat – one of the “joys” of being self-employed! 🙂

This will be my new sewing studio. The camera angle makes it look long and skinny, but it’s more of a square. I imagine built-in cabinets along the left wall, my sewing table under the window, and a humongous design wall along the right wall (which needs to be repainted first).
And here’s another fortunate miracle of timing: after being busy with deadlines, projects and travel non-stop for the last 4 years, I actually have a bit of a breather over the next few months.
My next book deadline isn’t until later next year, I don’t have any sewing deadlines until fabric samples arrive in the spring, and my next teaching event isn’t until QuiltCon in February. So rather than sewing in December and January, I’ll be “piecing” together my new creative space!

This is the view from the opposite end of the sewing room. The corner nook would be perfect for more built in shelving, with a cozy chair for hand-work or reading. The guest room is nearby with a large walk-in closet for extra storage and my husband gets a larger office, too.
I’m excited to document this process in real time, and hope you’ll indulge me as I focus a little bit more on home-making and a little bit less on quilt-making.
But don’t worry, I’m still planning to host our next quilt along in January, but with a slightly later start date. Fortunately the quilt along steps have already been sewn and photographed, so you all can sew-along, while I’m setting up my new workspace. I’ll approach this new venture like any other large project: one step at a time!

The backyard isn’t very big since the house footprint takes up most of the land. But I love the low- maintenance landscaping, and there’s still plenty of room to spray baste my quilts.
Stay tuned for the next part of my new-home adventure. I can’t wait for the journey!
Updated 2019 – Click each of the links below to read about hour new home.