I just returned from a fun, but busy two weeks away from home – one week teaching in North Carolina, and the following week on a family vacation to the Riveria Maya in Mexico (near Cancun). I’m interspersing some pictures of our family vacation with my thoughts about blogging so you have something interesting to look at while you read.

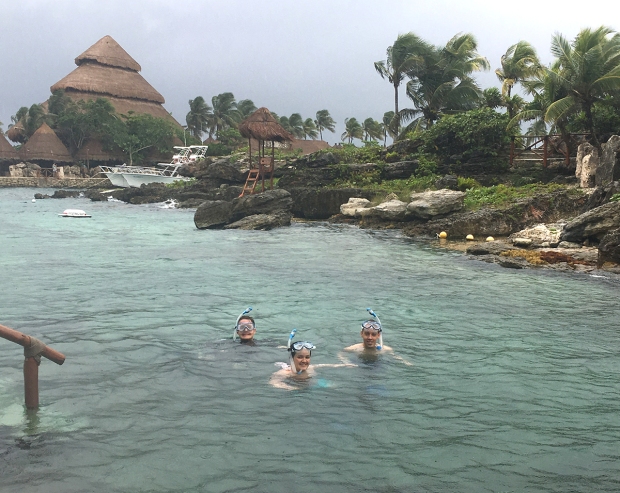
Snorkeling at Xcaret, a natural theme park in the jungle of Mexico
We also visited two other eco-parks: Xplore and Xel-ha and they were all amazing!
While I was away on vacation, I had one of those moments of clarity that only happens when I’m away from my machine or relaxing and doing something else. Last year I wrote a post about my need to simplify social media. I followed it up a few weeks later with another post about what it was like a few weeks in. Now that a significant time has passed I realized what channel I enjoy the most – blogging!!
I enjoy being able to go in depth about thoughts I have, and being able to share multiple pictures to tell a more complete story. I still share in-the-moment experiences and projects on Instagram and Facebook (find me on IG @christaquilts and my FB group ChristaQuilts) but I love being able to think about and express longer-form thoughts here on the blog. In fact what I usually like to do is gather the pictures and snippets I’ve shared on IG or FB over a period of days or weeks, and then turn that into a more complete story here on the blog.
Our family motto is work hard – play hard! We work a LOT so we can enjoy fun family vacations on a flexible schedule. Near the end of our trip it got very rainy and windy but that didn’t stop us from having a great time! The waters are warm and the views are spectacular!
When it comes to my thoughts on blogging, I’ve resisted the urge to follow the standard monetization model: churning out daily content to increase page views and qualify for google add revenue. There’s certainly nothing wrong with that model and plenty of bloggers earn a successful income doing that. (It’s also one of the reasons there’s so much free content out there – to attract more viewers and clicks.)
For me, the blog is more of a way for to document my quilting life (and occasional personal life) in real time. Of course I’ll still blog about new product announcements, workshops I’m teaching and quilting events I’m attending because after all, quilting is my full-time job and marketing is a huge part of that. But my favorite posts to write are process posts, sharing tips and techniques along the way while I’m creating. I also enjoy penning the occasional thought-provoking soapbox post, too!

My husband Jason, hamming it up at the Sea Turtle Exhibit
You’ll also notice I don’t do as many giveaways either. Although they are always fun and generate lots of traffic, it’s really too much to keep up with the flood of comments. I much prefer the thoughtful interactions we can have when you all leave comments or email me directly on a post of substance. I do try to respond to each comment personally (which you won’t always see in the comments section unless it’s something that everyone else needs to read, too).
Because I’m one of those people who tends to think out loud, blogging also helps me process things and get them out of my system. So it really IS true that quilting, or even writing about quilting is great therapy!! Since I recommitted to the blog at the end of last year, I’ve found that it’s easier to do consistently the more often I try.

I fell in love with Sea Turtles on our vacation – the babies (above) have the most beautiful patterns on their shell! I’d never seen a full grown one (below) in real life until now – they get huge!!

It’s hard to tell the scale of this turtle but this one is at least 10x bigger than the baby. There was an even larger one but I missed getting a pic – trust me – they are huge!!!
When writing my blog, it takes me a long time to finalize each post, adding links and images where necessary and double, triple, quadruple checking for typos each time! But I heard once that if you “create before you consume” you feel a whole lot more productive. That seems to work for me as I usually try to start a blog post in the morning as part of my routine before I get into the flow of my workday.
It usually takes me a couple of days to knock out a blog post – so once I quit worrying about trying to blog daily and settled on 2-3 posts per week, I felt that’s something I can easily manage. That means if you see a week where I’ve only managed to write once, you’ll know there’s something big happening behind the scenes, or I’m just way behind on my work, LOL!!

I did manage to get in a bit of exercise while on vacation. Our resort had lots of winding pathways that were perfect for jogging through the lush jungle. We saw all kinds of critters, too: iguanas, monkeys, coati and even racoons!! But alas, they were all too fast for my camara!
I try to keep a running list of topics I want to write about and will keep an editorial calendar so that I can be thinking about what I want to convey before I sit down to write. By keeping a running list, I can also pick and choose what I feel like writing at any given time. For example, I’m writing this one just as I returned from vacation, but wrote two more “evergreen” posts ahead of time while I was on vacation. They were faster and easier to crank out in in small snippets of time. Because I’ll have lots of catch up sewing to do when I get back, knowing I have a couple of posts in the queue waiting to go lets me relax and start writing more without feeling like it has to be done RIGHT NOW!!
Blogging is actually very similar to how I design and quit: I’ll think about something for awhile, block out time to work on a project, and then settle in for the actual work time without distractions. Also, when I’m not trying to cram something in last minute – either blogging or quilting – I can be more relaxed about it and enjoy the process more.

Another thrilling part of our adventure was zip-lining through the jungle – most times it ended in water which was refreshing after a fun, heart-thumping ride!
Every now and then I hear about people lamenting the downfall of blogging and others questioning whether or not blogging is still relevant when there are so many other choices. Just like with anything else in life, writing a blog or even reading a blog isn’t for everyone, and that’s ok, too!
Ironically what I’ve found is that be because fewer people are blogging these days it actually allows my blog to be seen more, unlike the “blogging boom” of a few years ago when everyone was doing it. Because there’s not such a drive for me to monetize the blog – or stress about whether my “SEO” is “MIA” – I can can focus more on being a quilter who blogs, not a blogger who quilts.
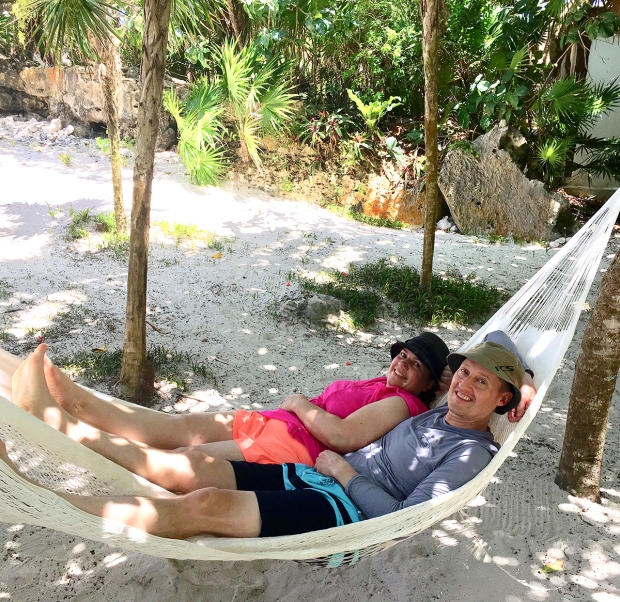
Proof that we’re not working ALL THE TIME though sometimes it might seem like it!
And with that said, now it’s time for me to unpack, do some laundry, and start thinking about the next quilt. It was a fabulous vacation, but now I’m excited to be home and I’m ready to get back to my sewing machine!!


 Fabric selection for this class is super easy – just pick two