Today I’m finishing up the making of Sparkling Stars, one of the brand new quilt patterns made from my brand new Fandangle fabric collection. Fandangle means embellishment or ornamentation and rather than embellishing my quilts with baubles and beads, I do it with fabric and thread!

Spiral Quilting Detail on Sparkling Stars
Marking the Center Spiral
Because I was on a tight deadline to finish this quilt, I chose a really fun walking-foot quilting design that looks great and is easy to do. I went with the large continuous spiral which is one of the designs I teach in my quilting classes and also in my book with Angela Walters, The Ultimate Guide to Machine Quilting.
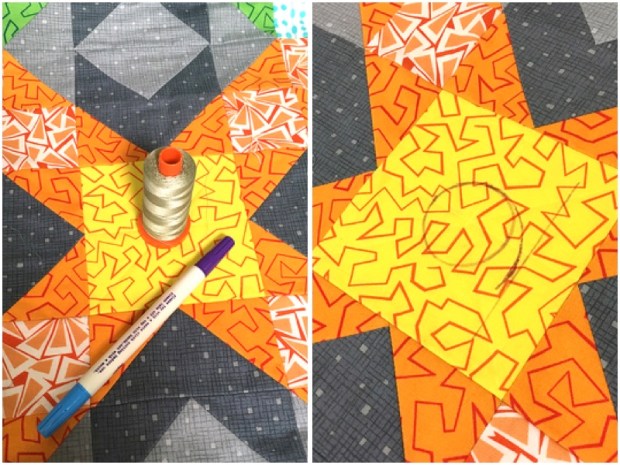
The trick to this design is to mark the center spiral, and then follow it around with the edge of your walking foot until the entire thing is quilted. I like to use a small circle shape to start. A spool of Aurifil thread works great by the way!!

Speaking of Aurifil thread, I used variegated 50 weight cotton #4650 Leaves for the quilting. I’ve really been enjoying using variegated threads on colorful quilts because they add an extra bit of texture and dimension to my quilts. In this case, it really emphasizes the “sparkling” effect.
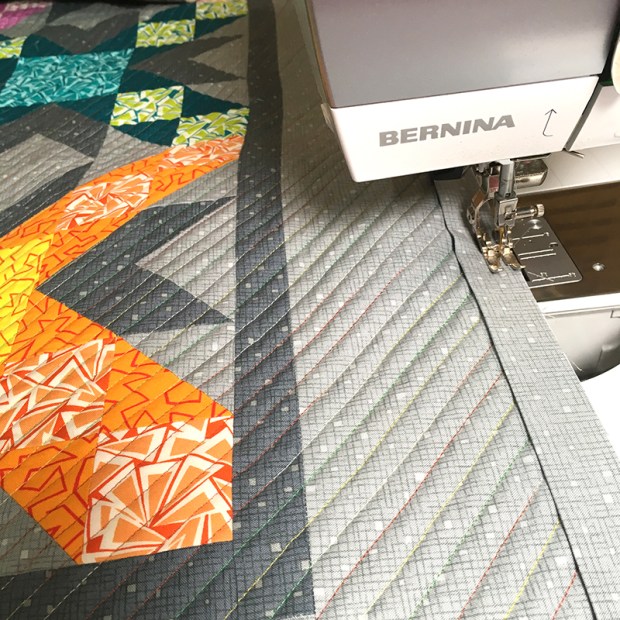
Spiral Quilting

Yes, I had to rotate the quilt about a bazillion times, but once you get past the first few spirals it goes very quickly. It really helps to use a hands free system (knee-lift) or hover feature if you have one so that you can keep your hands on the quilt at all times.
I don’t ever stress too much about perfection in my quilting. If it wobbles a bit while quilting, I know that once my face isn’t two inches away from the quilt, it won’t be noticeable. Another walking foot quilting tip is to lower the presser foot pressure while quilting (not all machines can do this so check your manual). I also increase the stitch length to 3.0 to help compensate for friction and drag on the quilt.

Rather than using a walking foot, I use the BERNINA dual feed that’s built into my 770 QE. It allows me to get the same result, but I can use different feet. I use the 20D foot – the open toe embroidery foot – for straight line quilting, and the 37D – 1/4″ patchwork foot – for attaching my binding.
Binding the Quilt
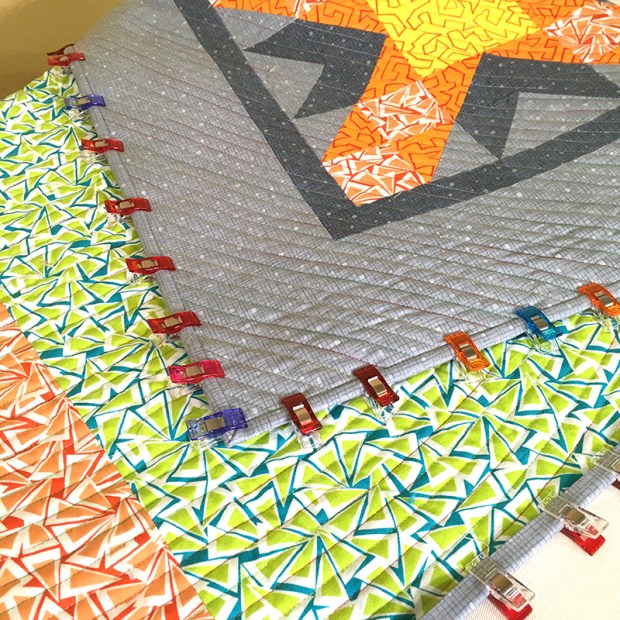
I use skinnier strips cut at just 2″ for my binding so that they finish at 1/4″ on both sides of the quilt. Click here for my binding tutorial for a previous quilt.
I will press the binding to the back of the quilt and then keep it in place with about 200 binding clips all the way around the perimeter. I know some people like to use just a few clips and that works too!
When I bind, I keep the quilt away from me and bind from right to left. I use a thimble to protect my finger and push the needle through with the middle finger of my left hand. I think it’s interesting that there’s no one right way to do it. Some people do it holding the quilt in the opposite direction, while others stitch from left to right. As long as you are comfortable stitching, that’s the important thing!

I know that binding by machine goes a lot faster, but there’s something I love about snuggling with the quilt at the end for a little hand-stitching. It’s like my reward after all the work it takes to make a quilt! Plus, I just really really like the way hand binding looks.
The final step in my quilt making process is to photograph the quilt. Thankfully Jason does that for me since I do NOT like that part, LOL!! We use my design wall to take flat shots that will be used for the cover of the quilt pattern. The hardest part is getting the lighting right! Later on, we’ll do pretty styled shots outside, but that’s a completely different process.

I hope you’ve enjoyed the making of this quilt! You can now purchase the pattern by using any of the links below. And if you make one, be sure to share and use #sparklingstarsquilt on social media so I can see your progress!
