This week for 99 Machine Quilting Designs we are learning to quilt Triangle Texture, a design that’s great for modern OR traditional quilts! Watch below and let me know what you think!
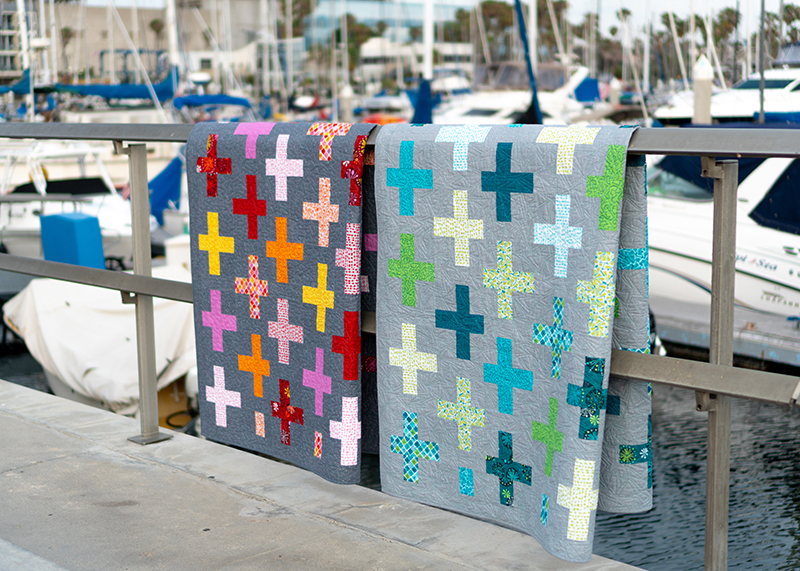
Get the Surplus Strips Quilt Pattern or Kit I recently combined 2 motifs – boxes and triangles on the gray version of my Surplus Strips quilt! You can now grab the kit to make this quilt with the gray or white background, or grab the pattern and choose your own colors. It’s fun to make and fun to quilt!
If you’d like to choose your own adventure, grab the Surplus Strips quilt pattern and then rummage through your stash for the perfect colors to make it your own. It’s the perfect design for using up leftover (surplus) precut strips!!
Below are 2 versions I made a few years ago and it looks great no matter what!
If you are looking for a geometric, modern free-motion fill, this week’s machine quilting tutorial is just for you! I break down this fun design step by step with 2 different variations for you to try. Take a look below and let me know what you think!
All of the designs I’m sharing in this year long series come from my book 99 Machine Quilting Designs. Although it’s gone out of physical print, you can still grab the PDF download from my Etsy shop.
Over the course of the year I’m going to demonstrate how to sketch out each and every design in the book! Be sure to bookmark the video playlist so you’ll be able to back and watch them again and again!
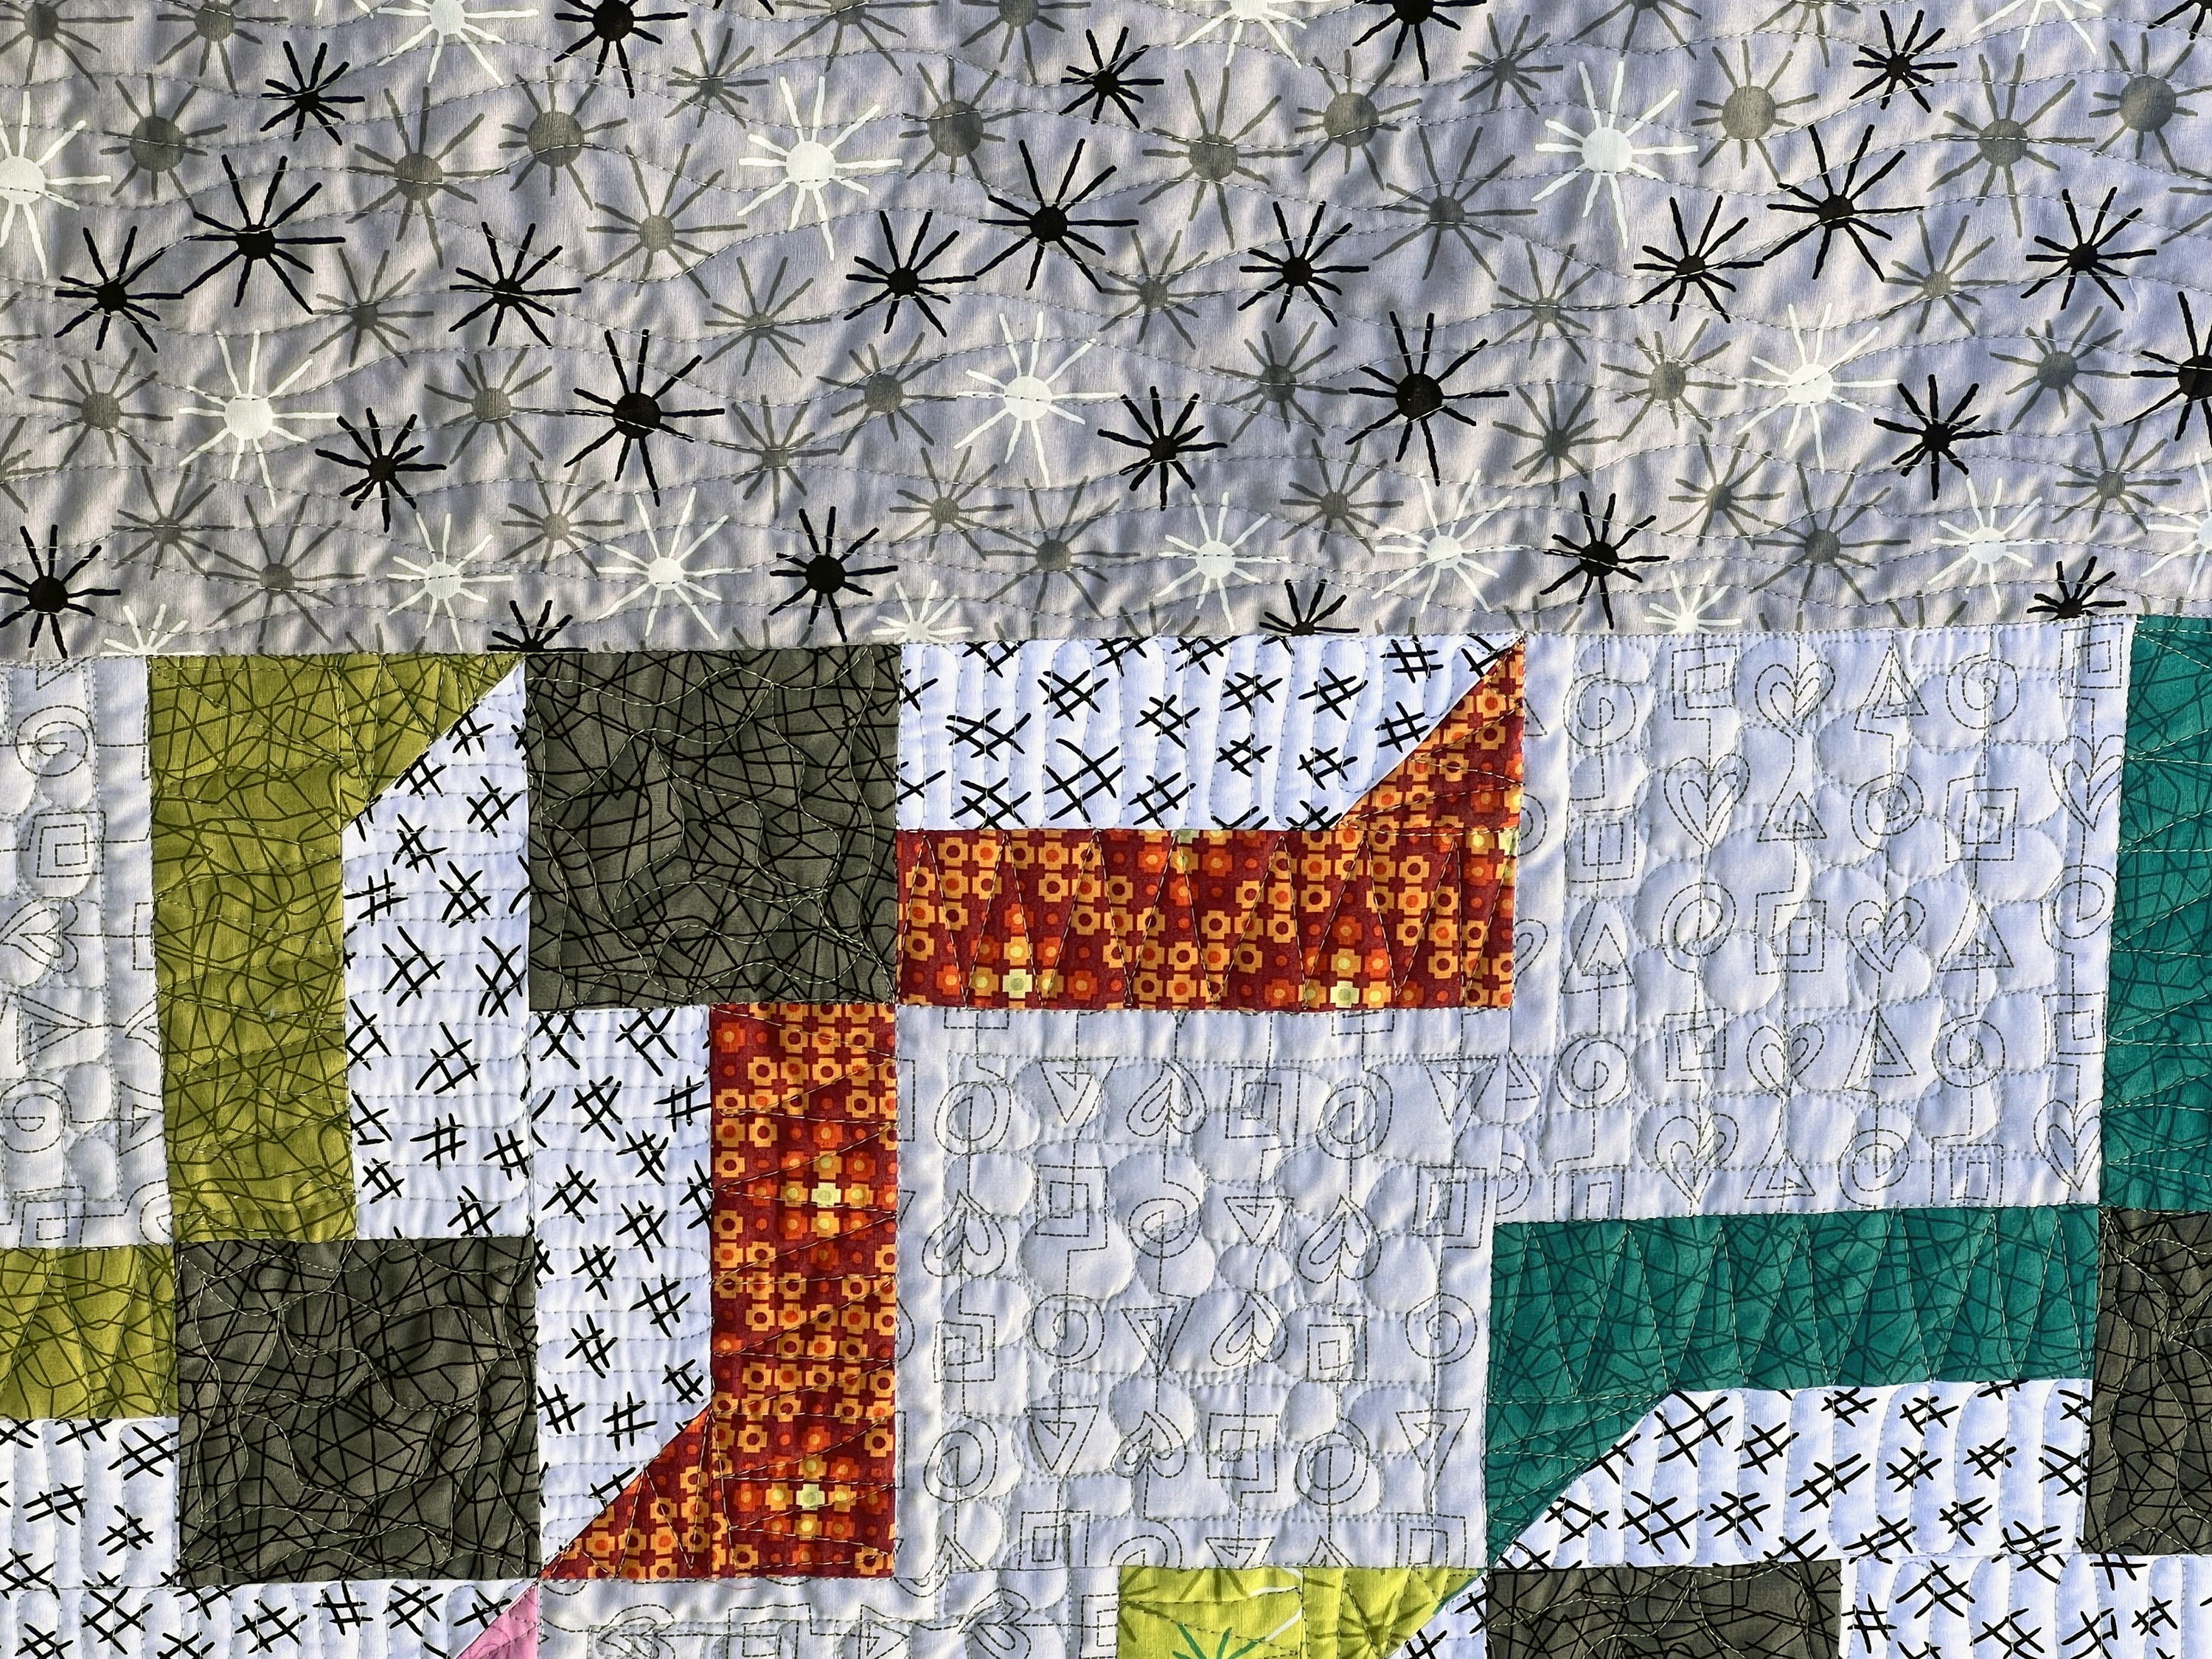
If you’d like to take things up a notch, be sure to watch this bonus video below where I show how to apply this week’s quilting design to an actual full-sized quilt. I quilted boxes and spiral boxes on a scrappy version of Terrace Tiles made from my Stitchy Fabric collection.
Get the Terrace Tiles Stitchy Kit!
For a limited time, you can make the exact version of Terrace Tiles I show in the video above. It’s made from fat quarters and is literally the easiest quilt pattern I’ve designed!
It’s QuiltCon time and this is the one show I’ve been to every single year since it launched in 2013. I’m headed to Phoenix, AZ this time around to attend some amazing lectures, volunteer my time on the show floor, and do a little fabric and book promotion. If you are planning to attend, please come and see me during one of these times shown below. I’d love to see you there!!
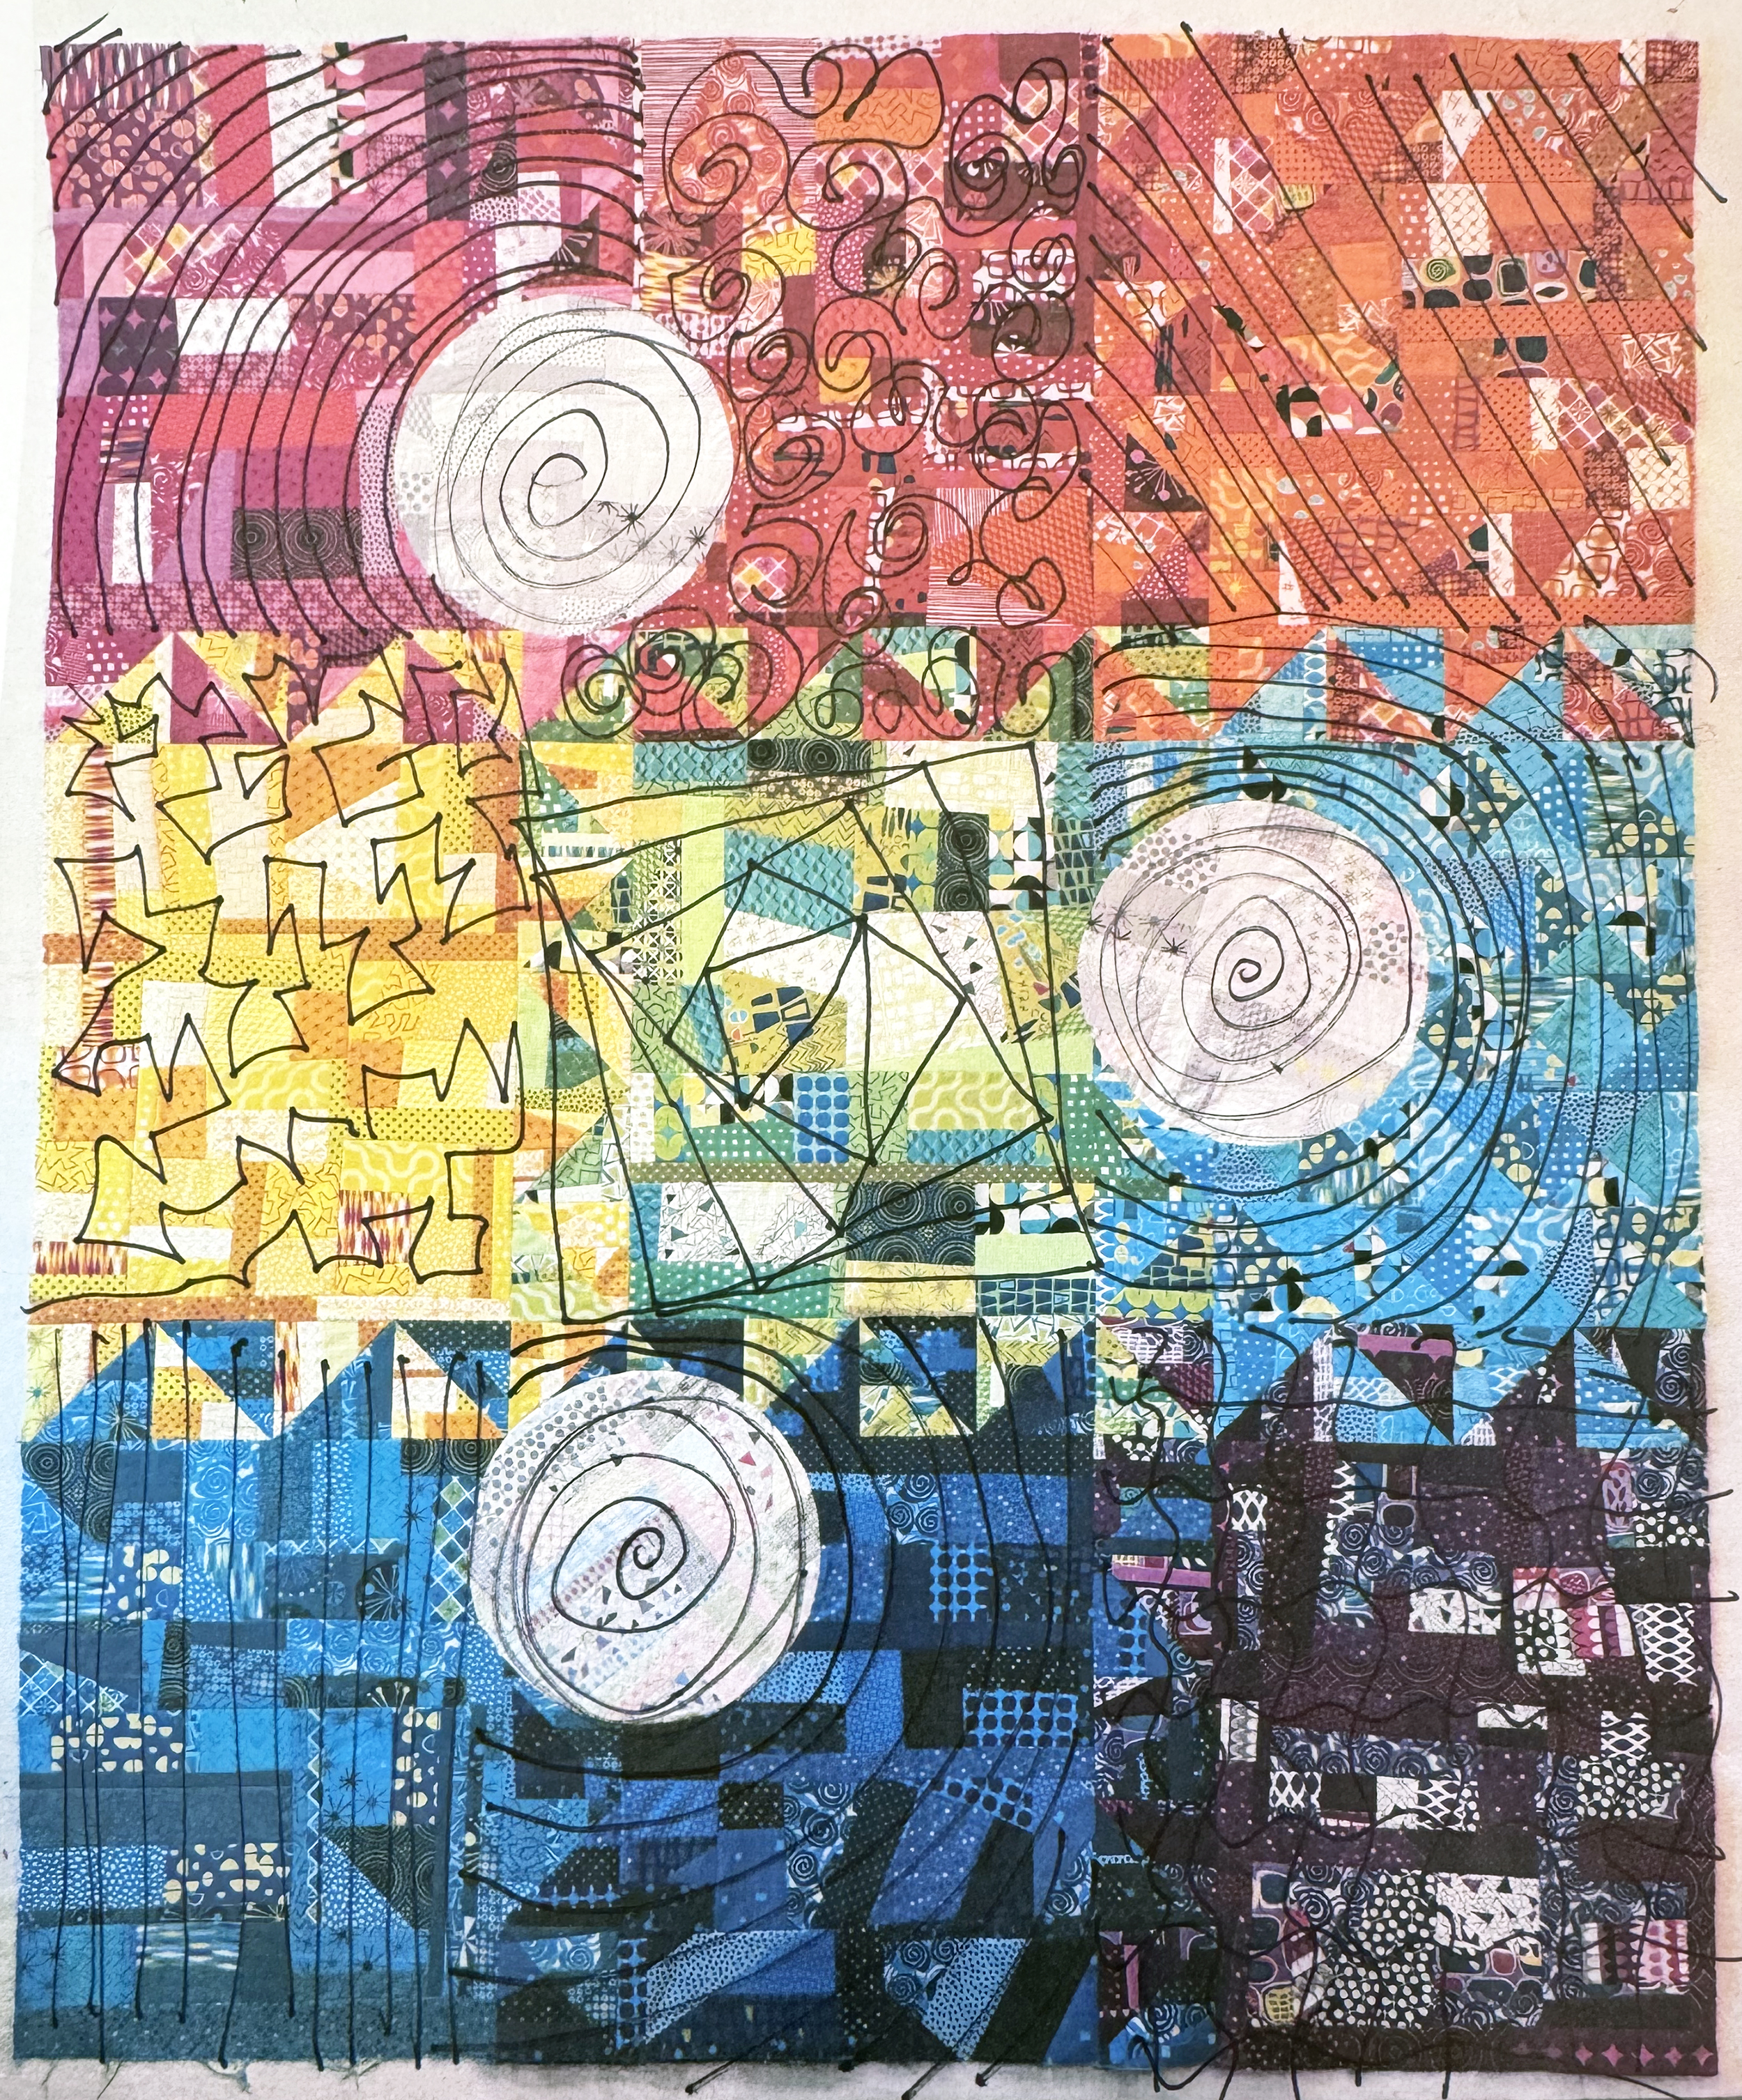
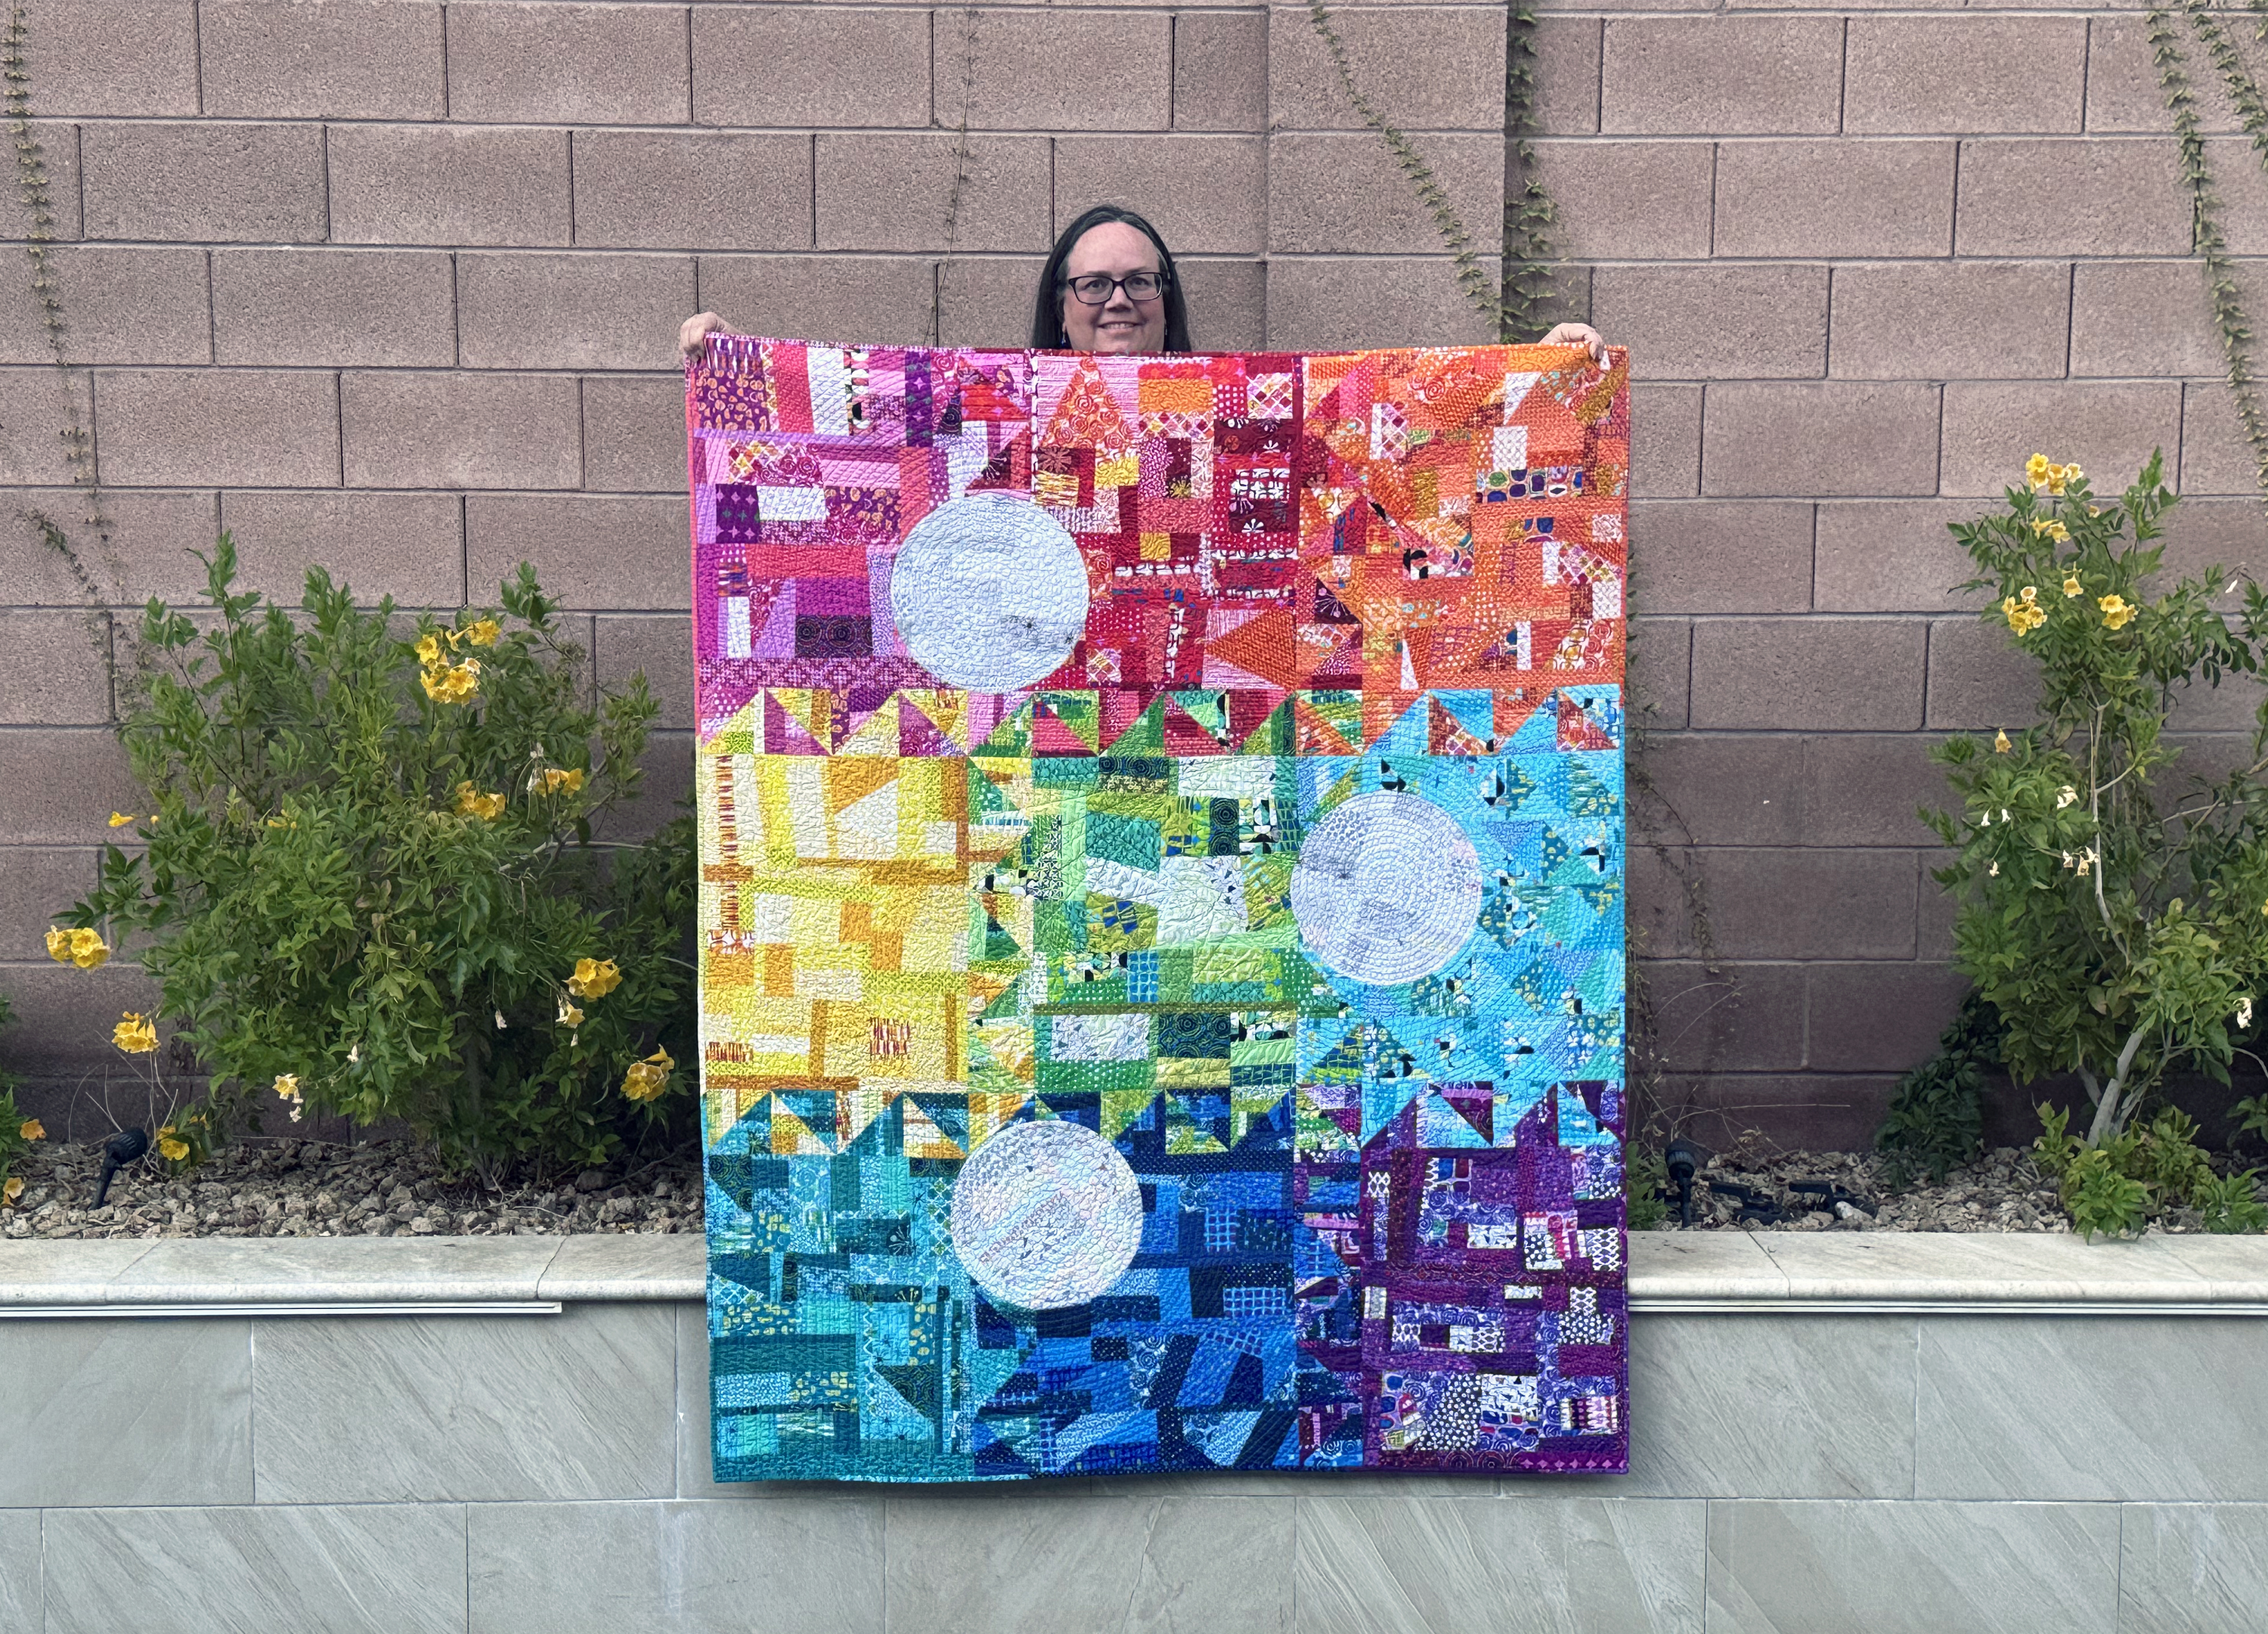
After a hiatus of entering quilt shows the last couple years, I just got the exciting news that Colorful Chaos was juried into the international quilt show in Paducah, KY!! There’s no pattern for this quilt because it’s part of my renewed push to make new and exciting experimental work that pushes me out of my comfort zone. I’m thrilled with how it turn out. Read more about it below….
In this post I thought I would share more about my machine quilting process and how I decided to quilt it. I hope you enjoy all the quilty eye candy!
Step 1 – Make a Quilting Plan
Before I begin quilting, I always start off with a quilting plan. I printed off a few color copies of my finished quilt top and then sketched out several different possibilities. These were simple pics I took from my phone and printed on a regular piece of paper. I wanted to emphasize the circles with the quilting and then fill in the other areas with some fun, geometric designs. This is just a roadmap, and I usually change it up a little when I get to the actual quilt.
I always make a quilting plan before quilting, and it’s totally ok to deviate from the plan!
Step 2 – Choose Thread Colors
For most of my quilts, I usually just choose 1 or 2 thread colors, and I always use the same thread in the bobbin. For this colorful quilt, however, I wanted to quilt each colorful section with a matching thread color.
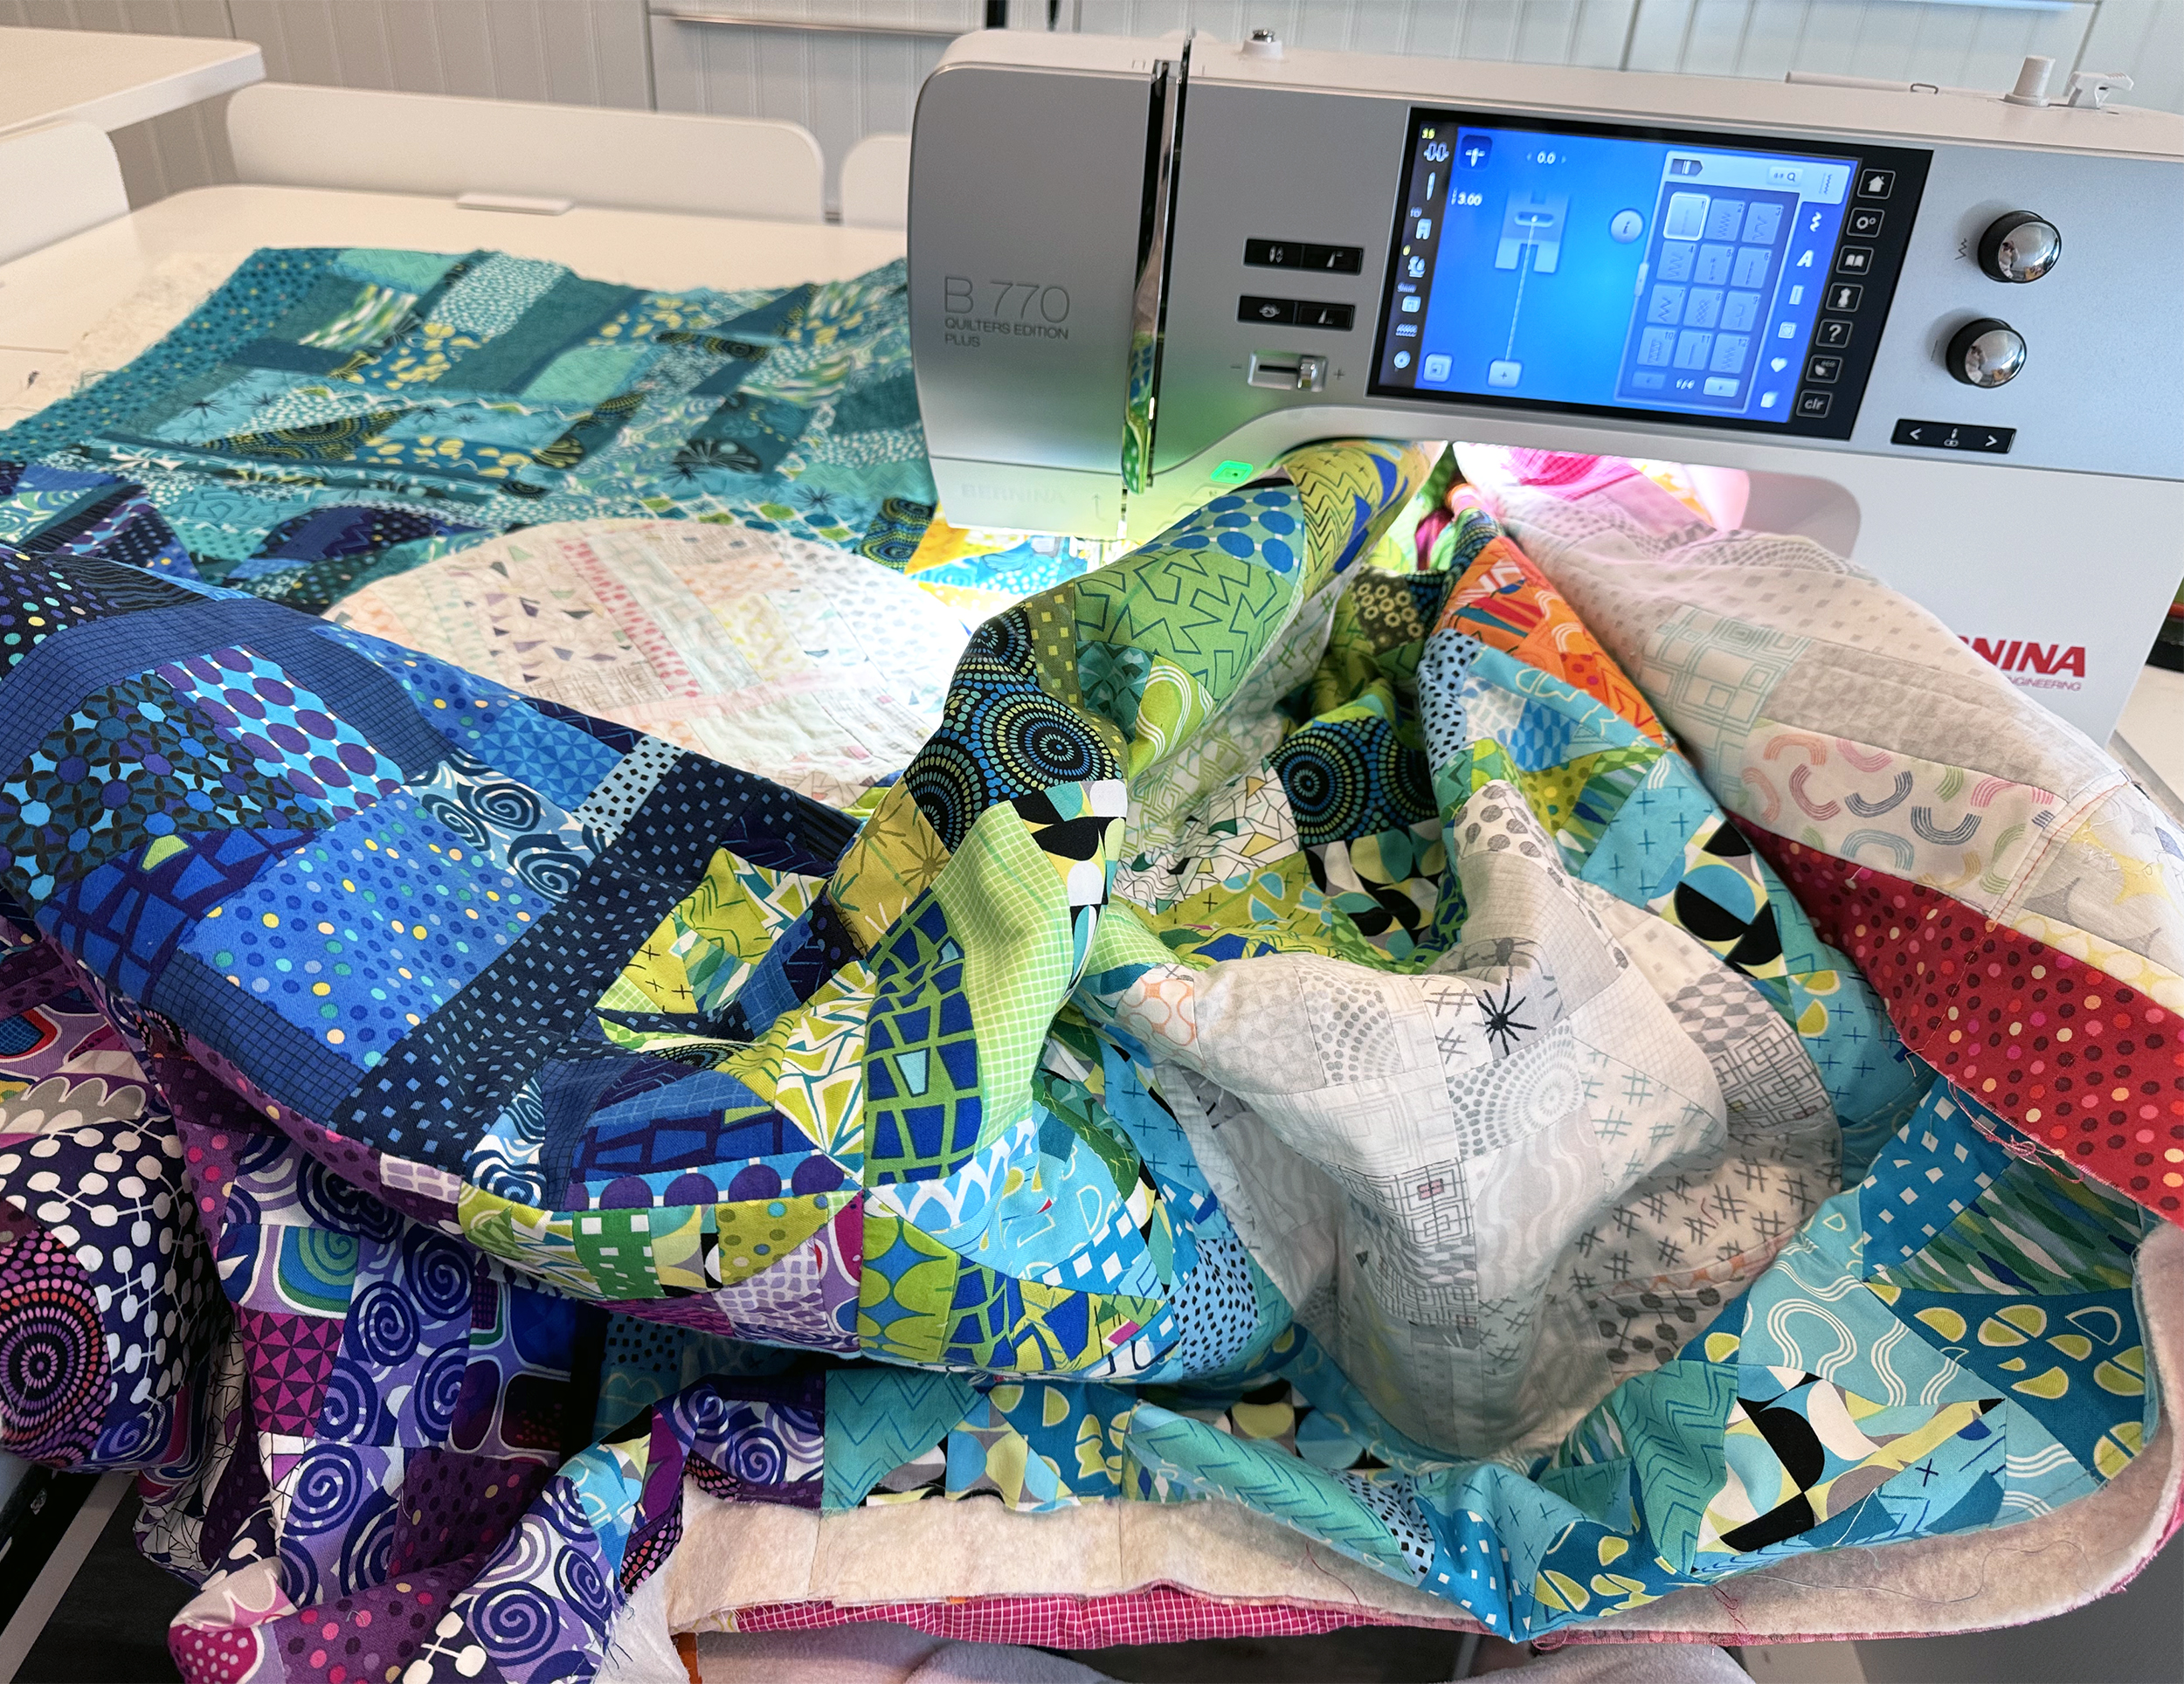
When I’m doing custom quilting, I take my time and focus on one area at a time. For this quilt I did some light stitching in the ditch between sections to anchor or secure the quilt. Then I went to town with different motifs in each colored area.
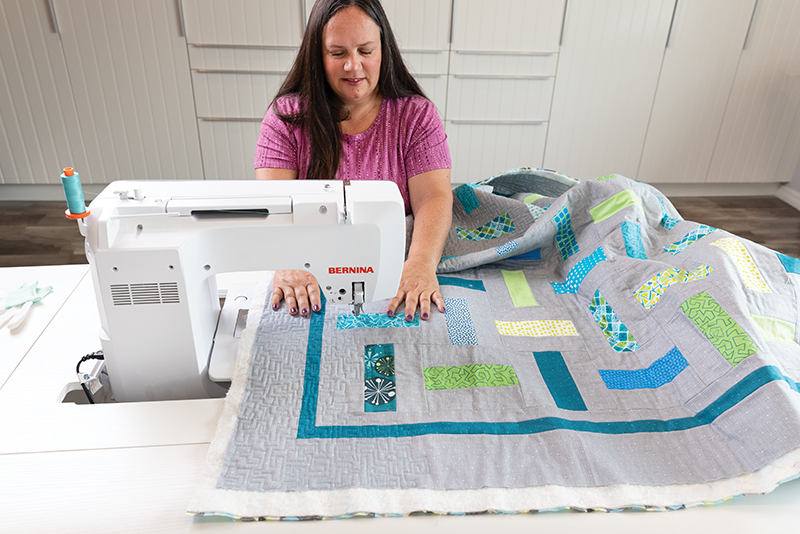
Above is what it looks like when I’m scrunching and smooshing my quilt under the machine. I’m using my Christa Cabinet to hold the weight of the quilt and it’s a game changer for domestic machine quilting!
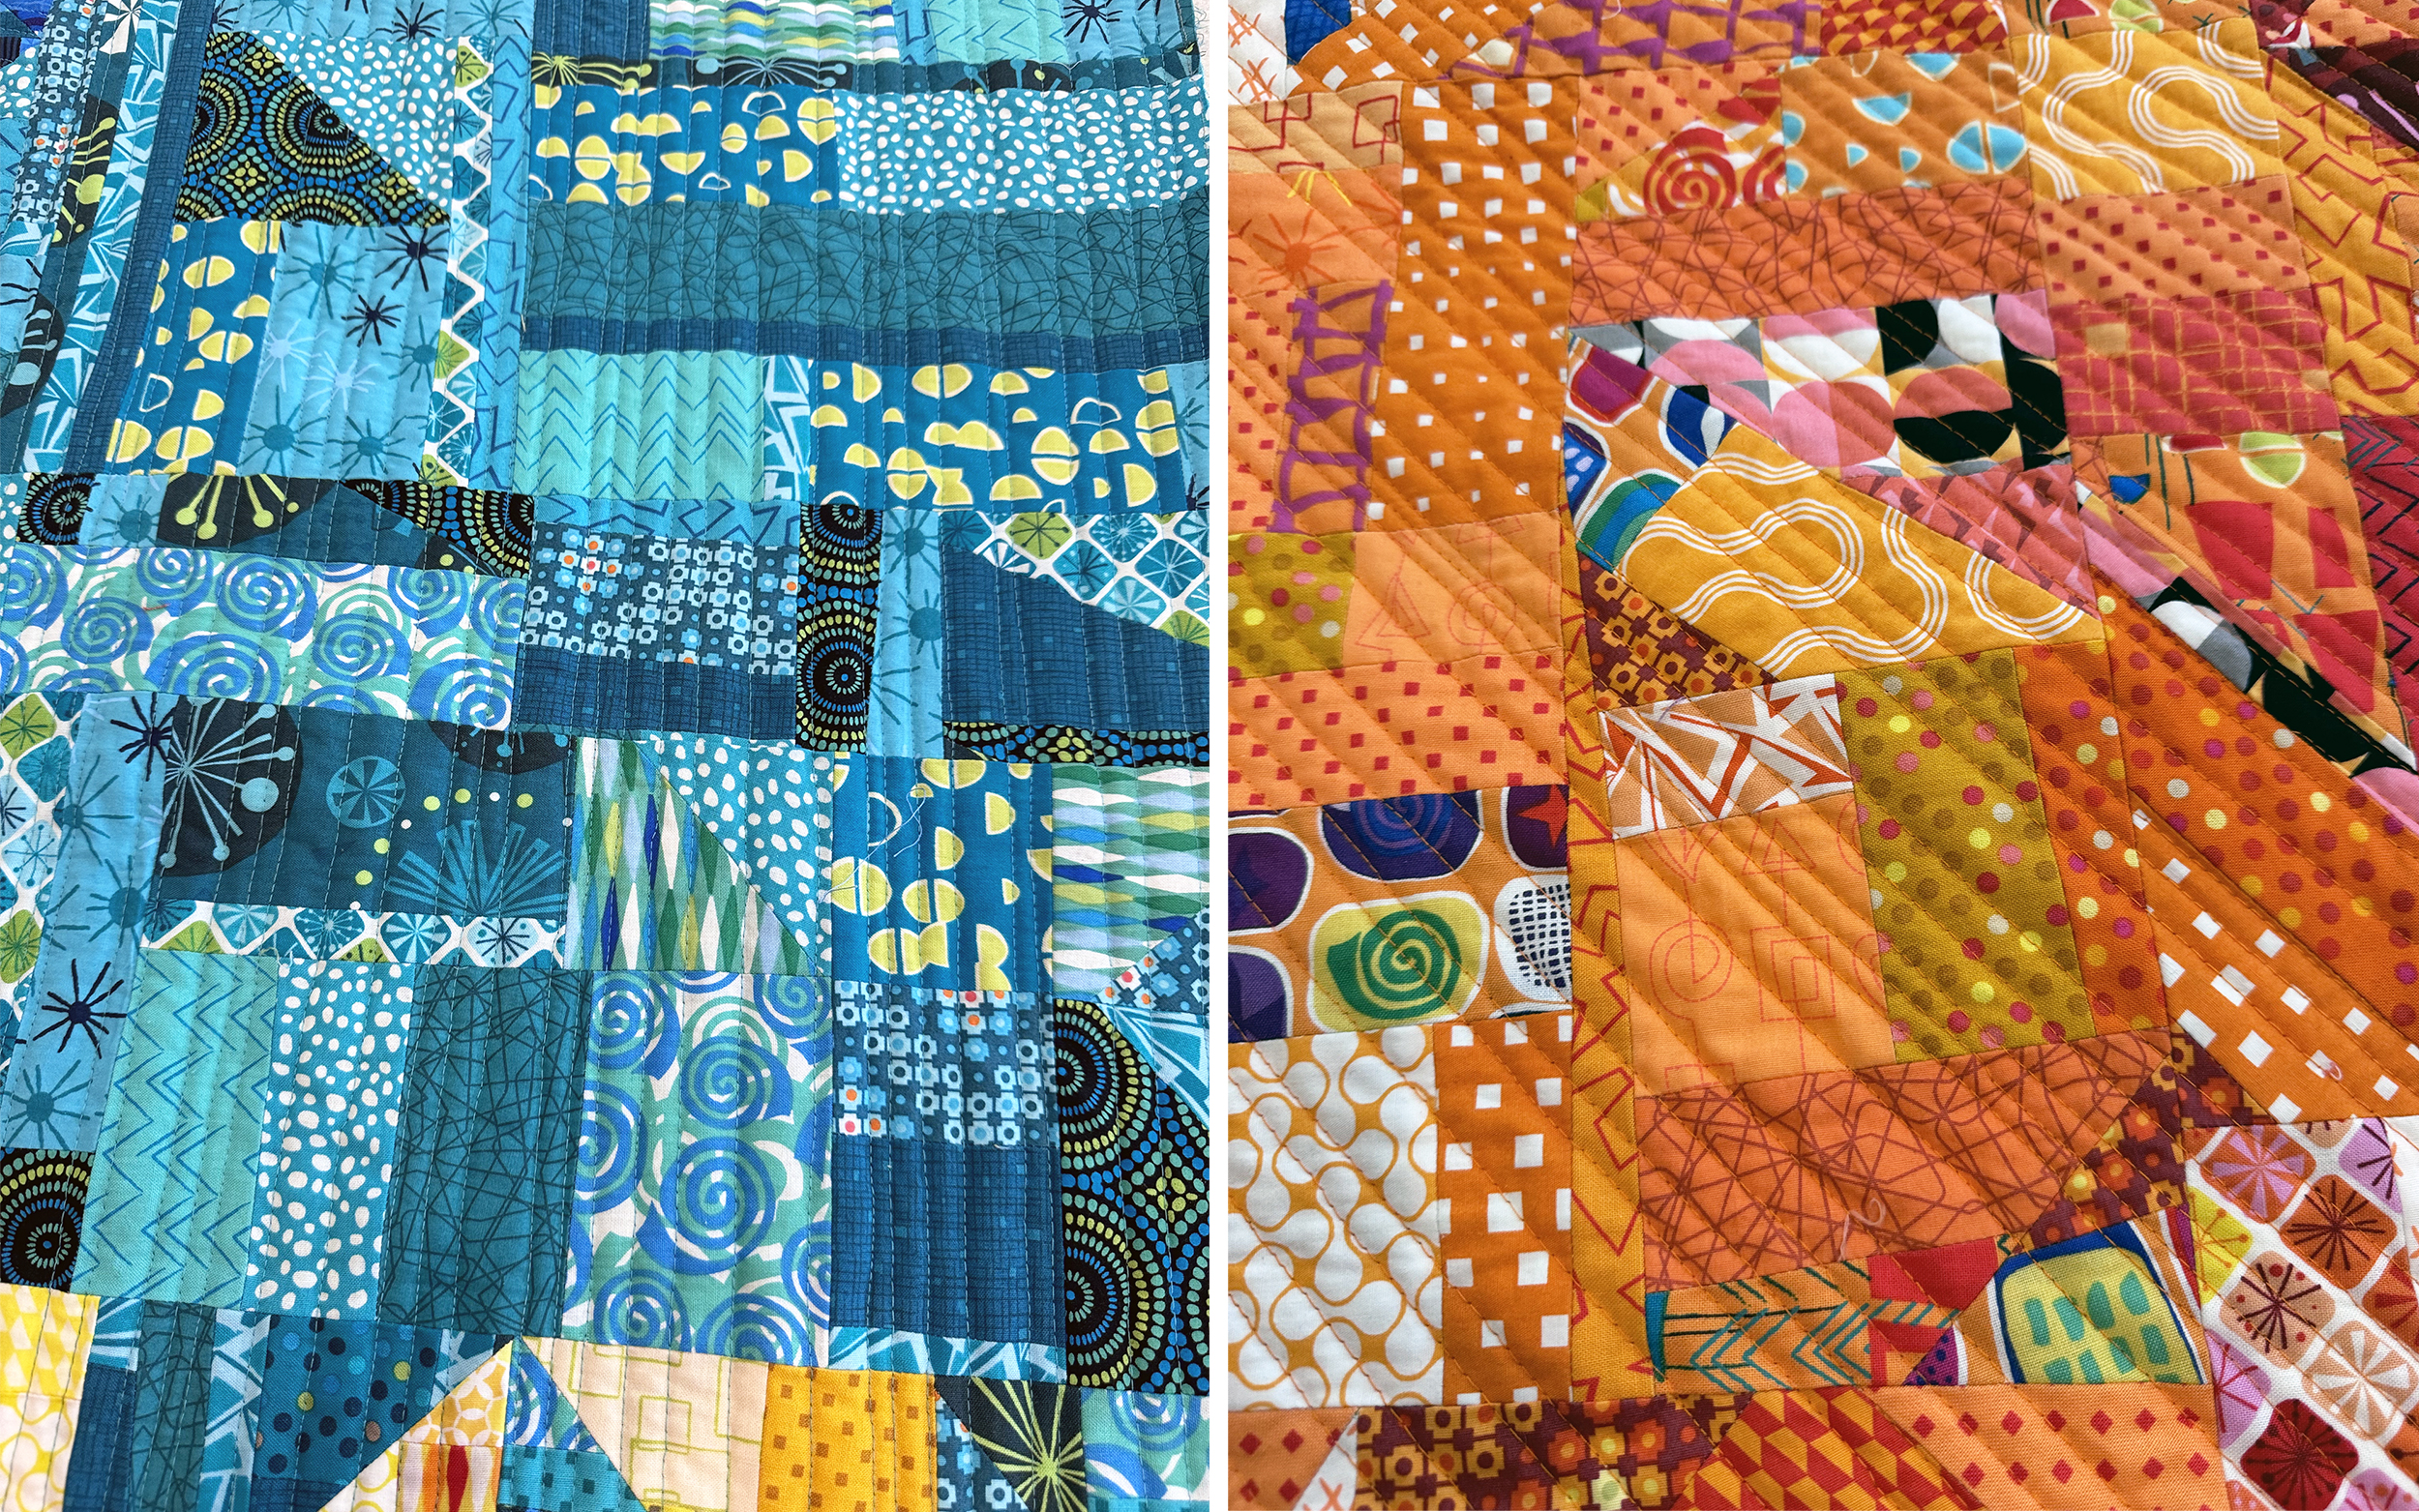
Below I’m using pieces of painters tape to help me quilt straight lines using my dual feed system, which performs the same function as a walking foot.
Straight lines are super versatile because they can be stitched at lots of different angles, and they always look great! My secret is to quilt them in an irregular pattern rather than trying to have an even amount of spacing between the lines.
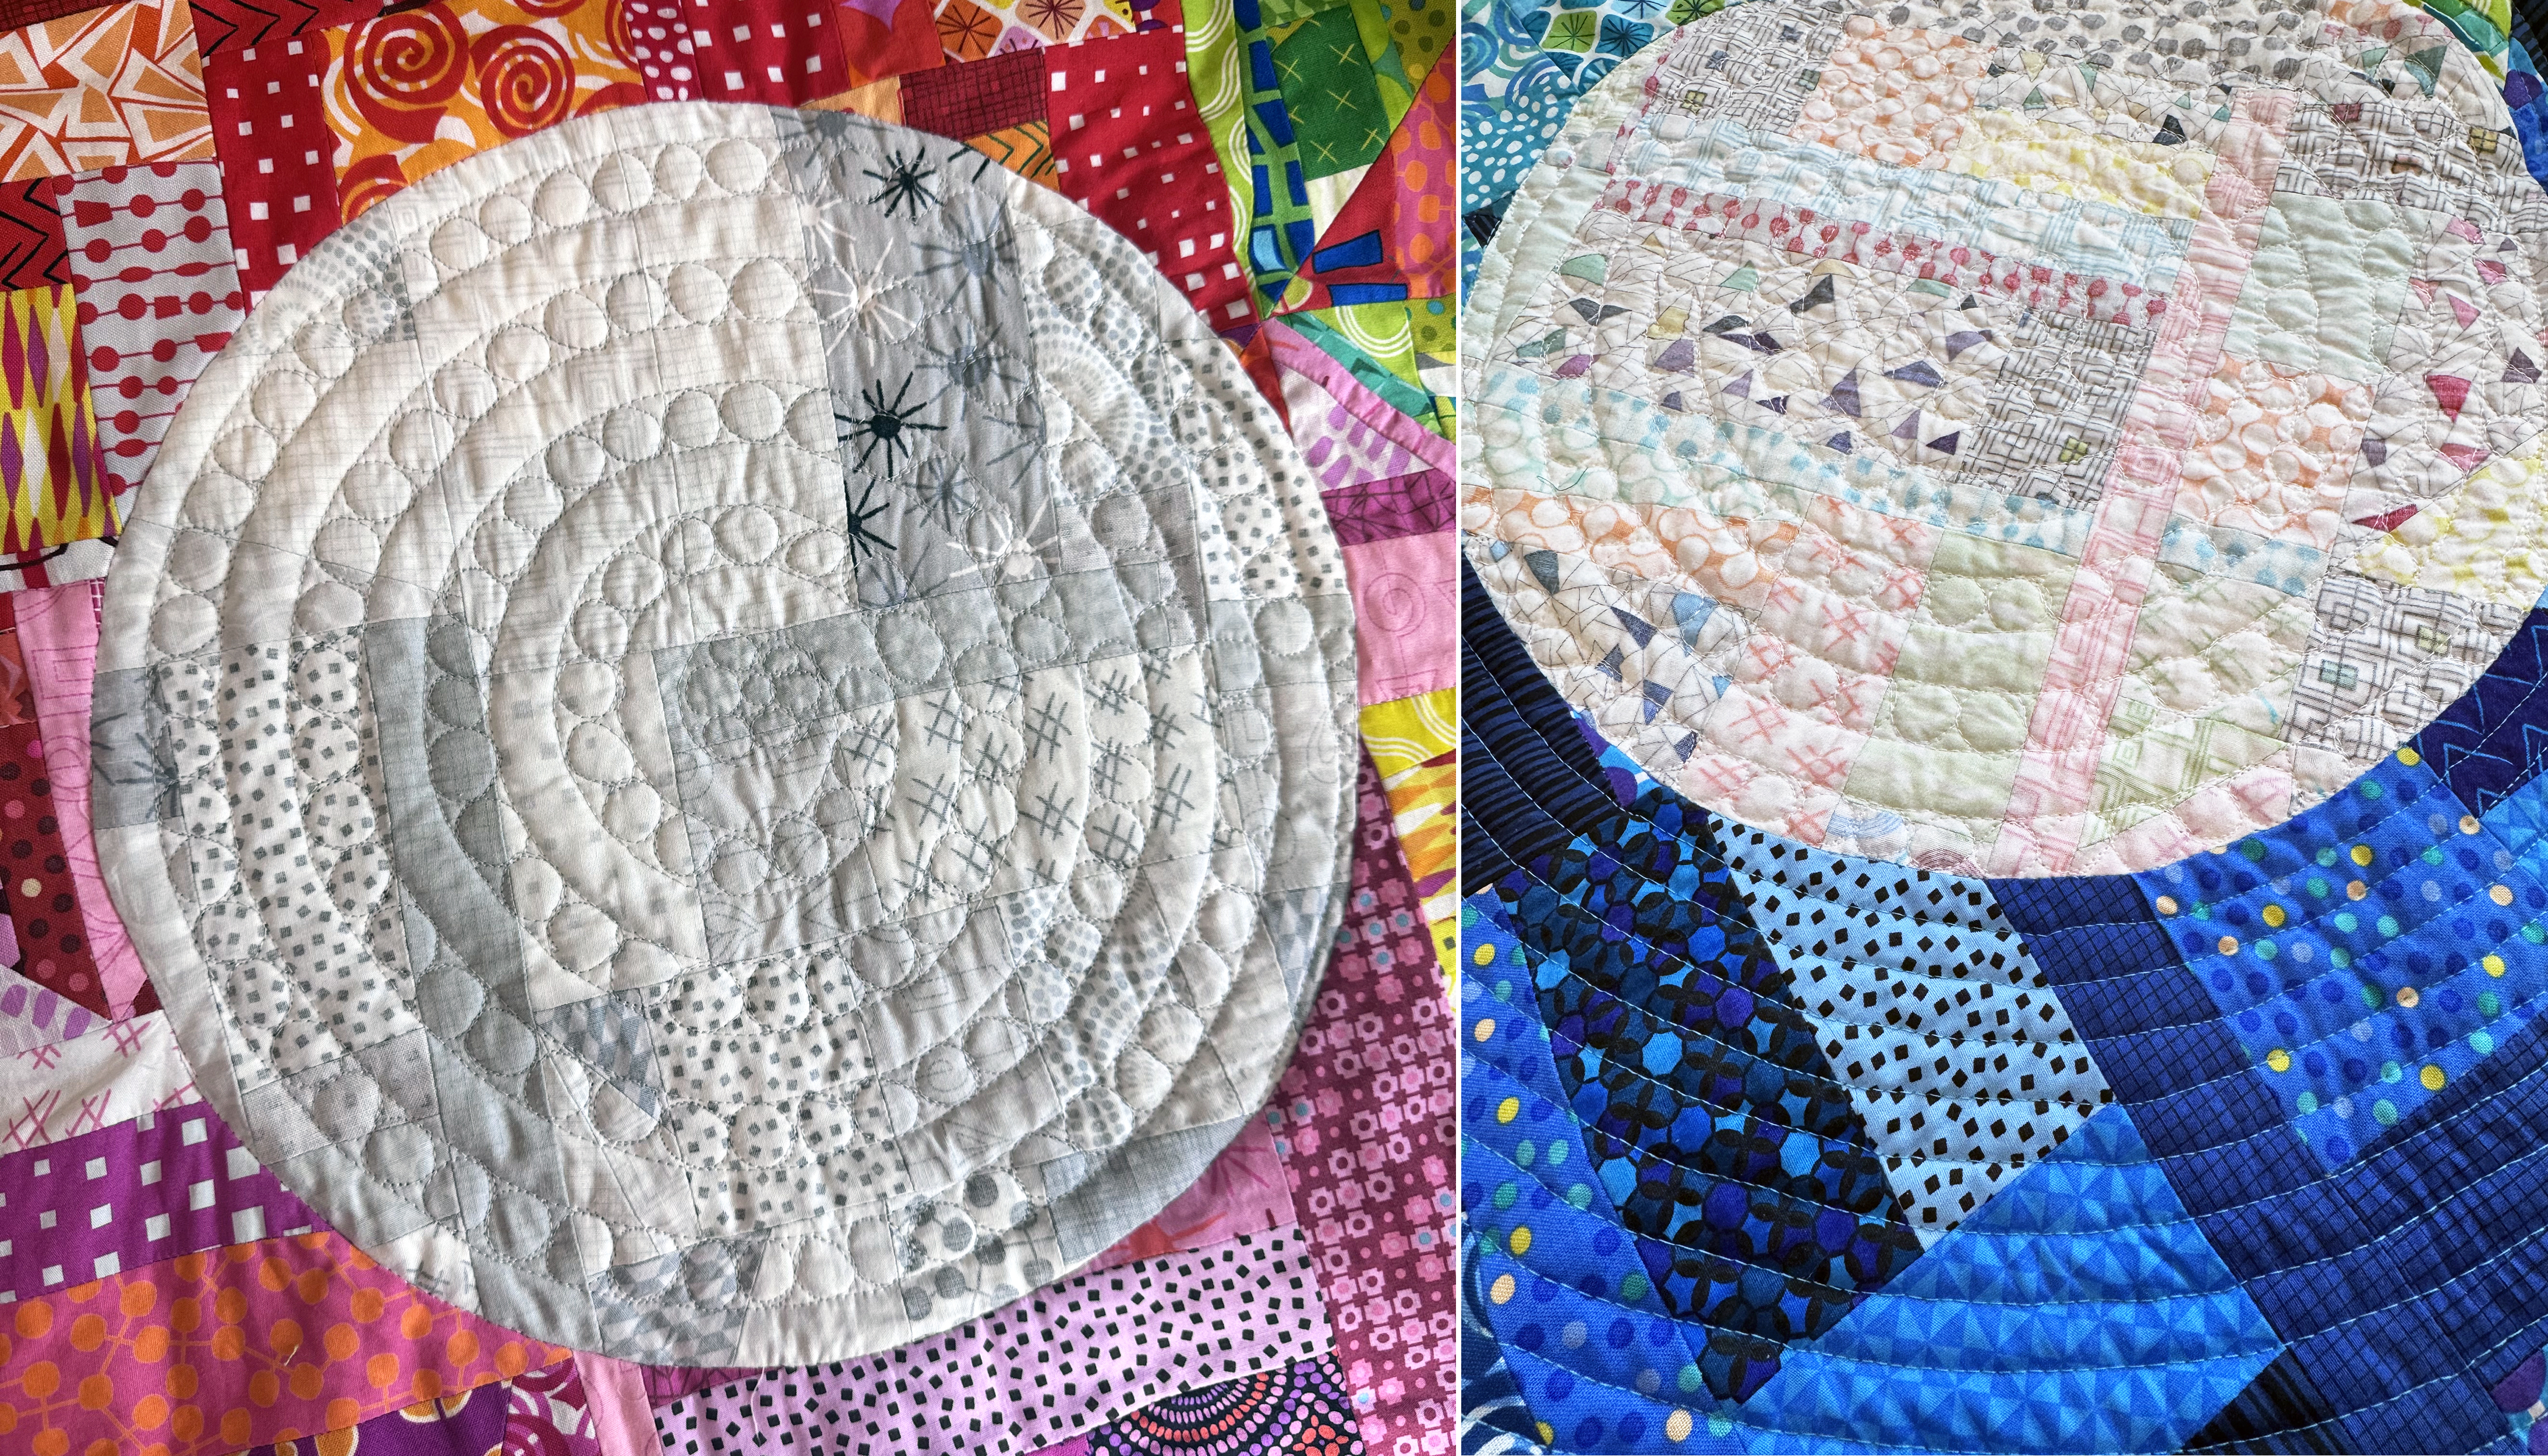
I also used walking-foot style quilting to stitch spirals inside and outside of each inset circle. To jazz them up a bit, I then went back and free motion quilting pebbles in between each of the spirals. It was a fun challenge figuring out how to make that work, but I love trying new things with every quilt I make!
This year it’s been my goal to work on what I call my “runway” quilts in between other projects. These are quilts that are a bit more edgy and push the boundaries of what I can do. There’s no pattern for them so that frees me from the need to be able to replicate everything I do.
But just like runway fashions inspire colors and style you’ll see at your local department store, my experiments will show up in bits and pieces, such as this practice sample that I’ve added to my “Spirals and Swirls” machine quilting workshop:
I continued the rainbow colors around the edges with matching binding. I pieced the binding in sections and then added one section at a time, splicing the seams together roughly were the colors overlapped.
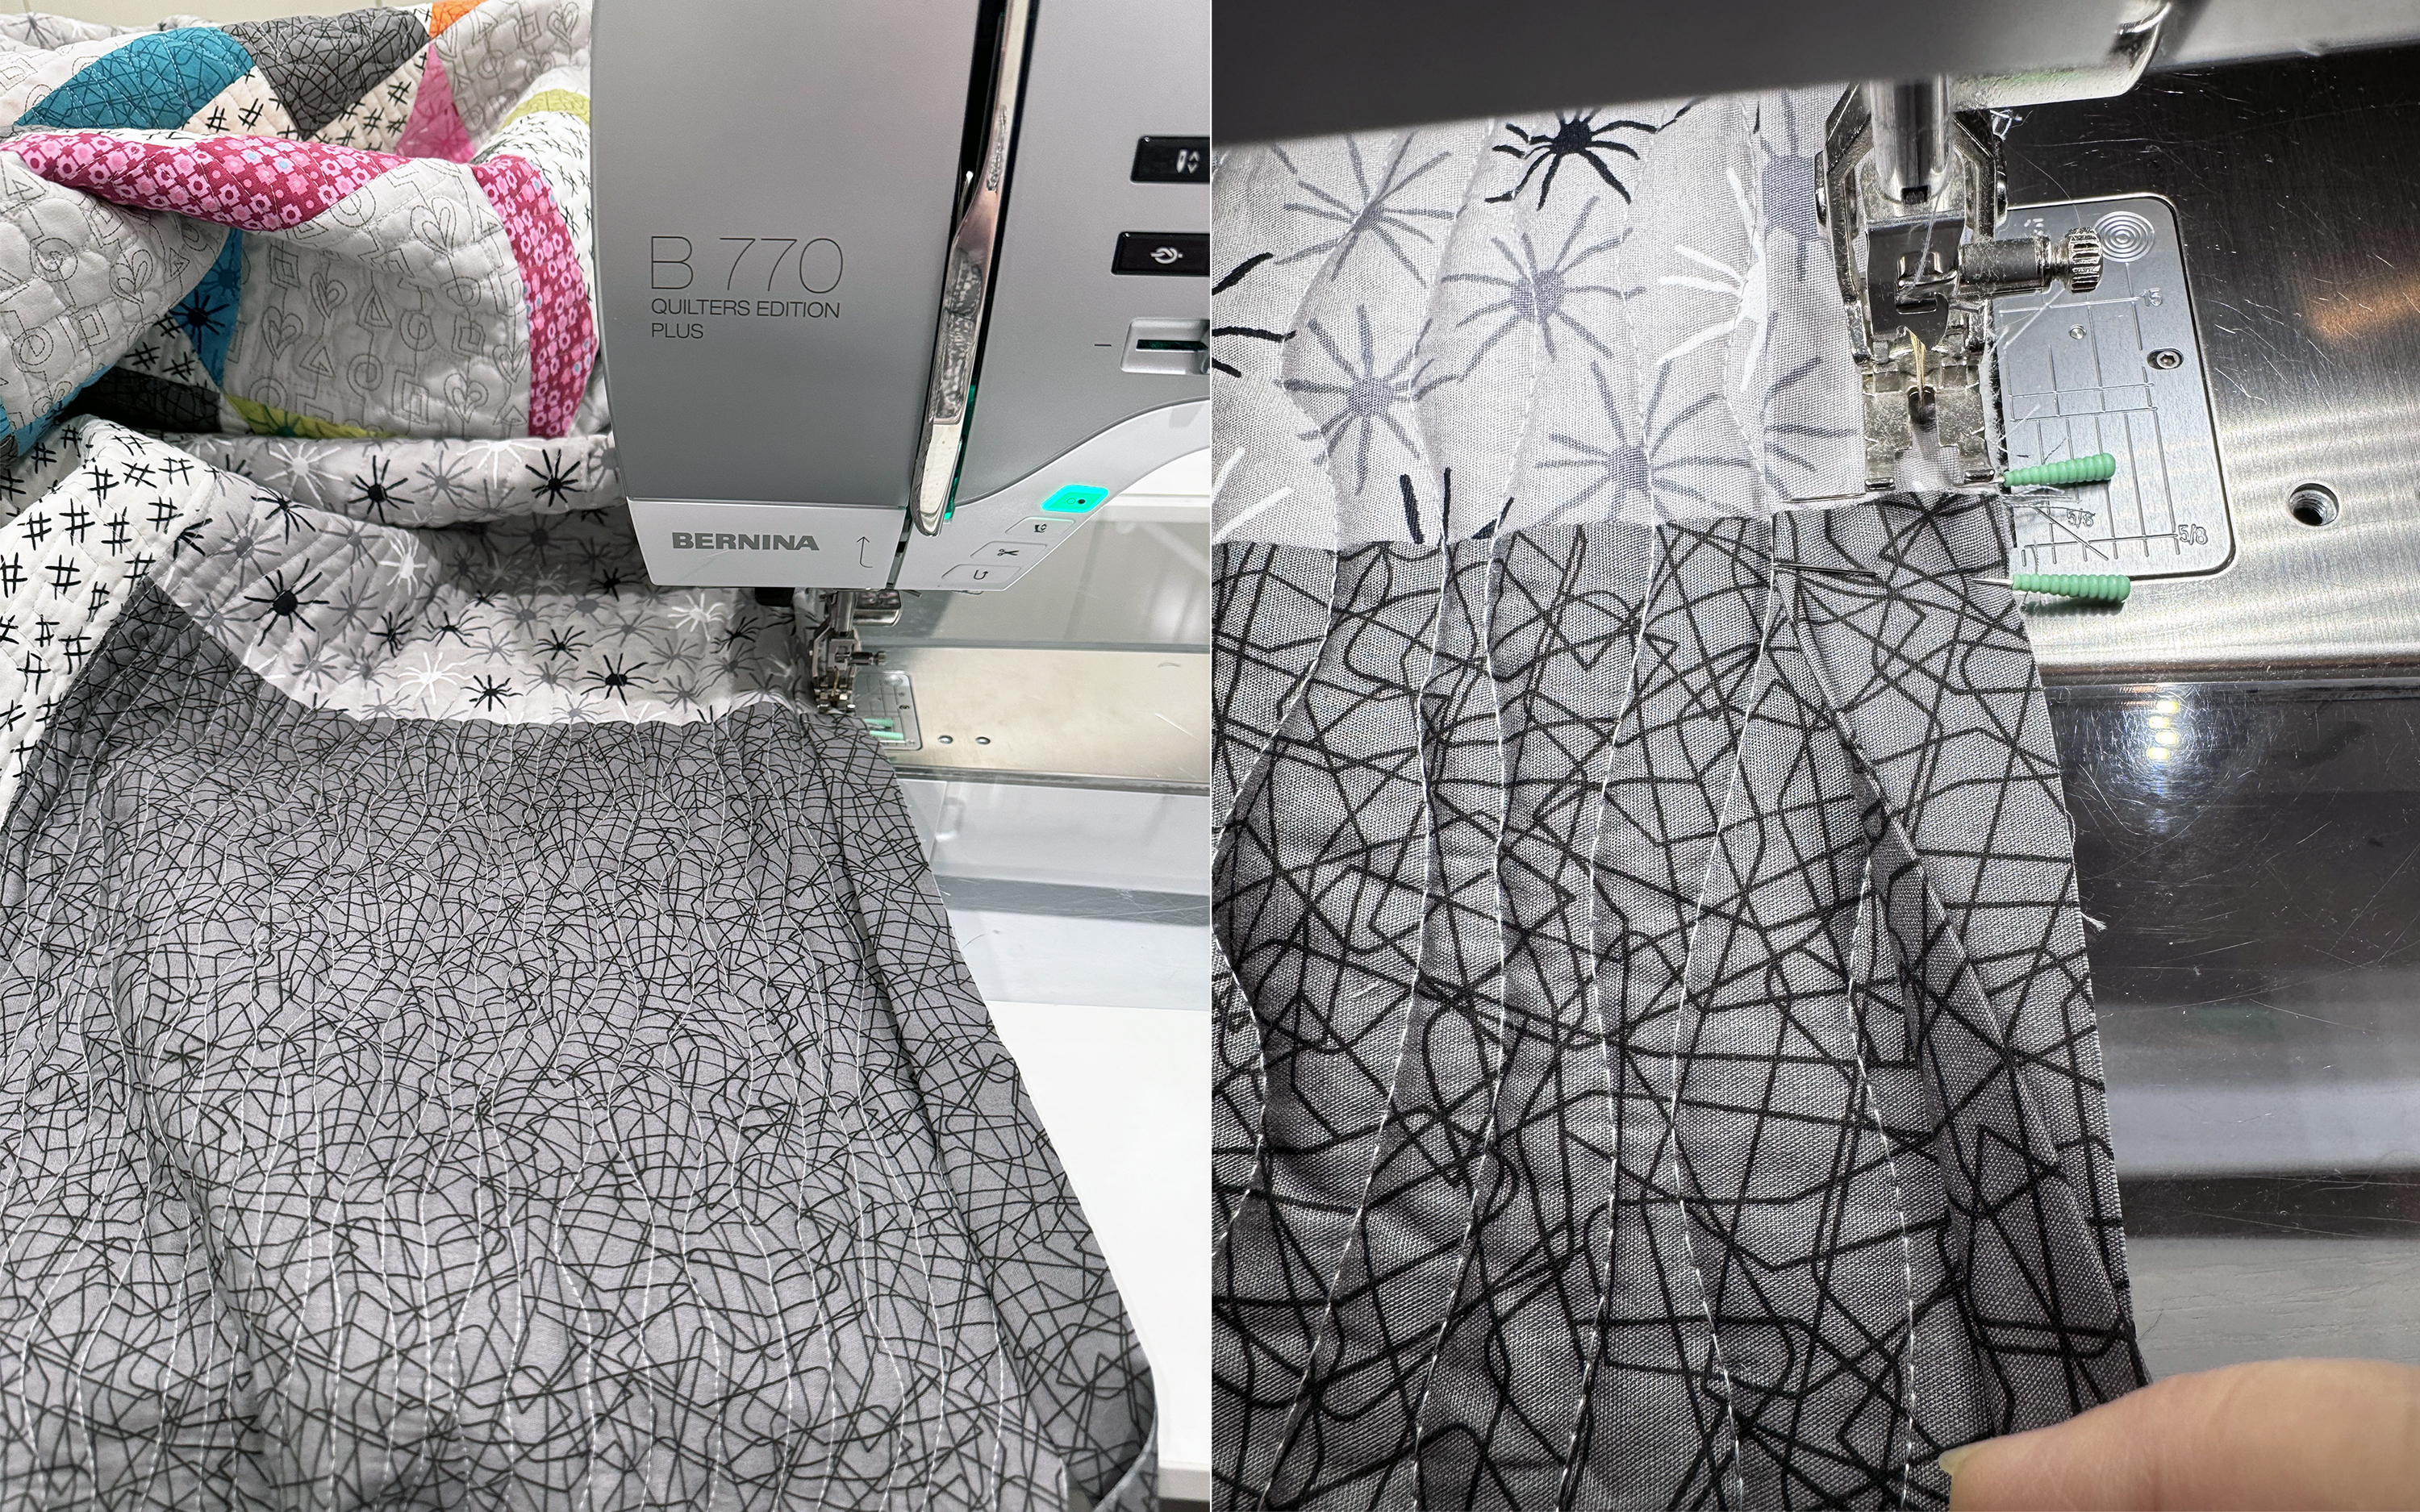
Recently, I shared a tutorial demonstrating how to quilt wavy grids on a small practice sample as part of my “99 Machine Quilting Designs” free video series. Now I’m back with a bonus video showing how to take this design and quilt it on a real, full sized quilt! You can change it up and quilt it with straight lines, too. Either way you want to quilt, take a look to see how I did it below:
Get Your Color Weave Quilt Kit – Made from Dazzle Dots
Fun fact: I created my Dazzle Dots collection in rainbow colors, specifically so I could remake this quilt, one of my best selling patterns ever! Also, I worked with Benartex to offer precut strips not only for the main collection, but for the two background grey fabrics as well. Kits will be available as long as this collection is around, so grab one now and make this fun colorful quilt!
I do love a good rainbow, but this pattern looks fabulous in really any color scheme you can think of. The trick is to pick 2 precut strips for each rainbow color shown above. You can also make it from fat quarters!
If you want to go super scrappy you can use a variety of different prints for each colored row and really see where your creativity takes you. The pattern is available in print or PDF if you’d like to work with what you’ve got and choose your own adventure!
If you decide to make this quilt, let me know how it goes. You can email me pics, leave a comment, or share your progress over in my Christa Quilts Group on Facebook. I love to cheer you on!!
This week I’m showing how I spray basted Colorful chaos using my design wall and 505 spray. Something I do before I start is to take a picture of the batting with the quilt so I can remember what I used. For this quilt I decided to use some Hobbs Tuscany Silk batting. It’s so dreamy and drapey and because it’s a natural fiber, it clings to the cotton fabric which helps prevent shifting while quilting.
Whenever I baste a double sided quilt, folks ask how to line up both sides precisely. Well, the answer is that I don’t do that AT ALL! That’s way too much for my brain to think about. So all I do is make sure that the backing is at least a couple inches larger than the quilt top on all sides, knowing that the edges will get trimmed.
The next step is to spray an even amount of the 505 on the wrong side of my quilt top and backing. The nice thing about both sides being pieced is that it’s easier to remember which areas I’ve sprayed. I use a plastic table outdoors that’s been covered with a king sized sheet that acts as a drop cloth.
Next I assemble the layers inside on my design wall. First I pin the backing wrong side up and smooth it out with my hands and a long acrylic ruler. Then I add the batting that’s been trimmed larger than the quilt top but smaller than the backing. I take my time to make sure it’s nice and smooth before adding the top.
Then I add the quilt top in the same manner. I ensure that there’s backing and backing sticking around all 4 sides of the quilt top, and then I trim it to only about 1-2″ sticking out. This is so that I don’t accidentally fold the extra underneath the quilt while stitching!
The final “magic” step in this process is pressing the quilt on both sides to secure the glue. This also gives me another chance to iron out any wrinkles, or smooth out any puckers that have formed on either side of the quilt. This will make machine quilting a breeze, especially when every inch of the quilt is sticking to itself.
Although there’s no pattern for my Colorful Chaos quilt, the improved pieced Spools quilt on the wall was made using a similar technique. That’s one of the patterns included in my book Piece and Quilt with Precuts which is available as a PDF download in my Etsy shop!
Now that it’s basted and ready to quilt, I can set it aside for awhile until I’m ready to quilt! If you love bright, bold colorful fabrics like I do, you can check out the latest fabrics I’ve designed over at my online website at shop.ChristaQuilts.com.
Bonus Spray Basting Video Tutorial!
Although I only took photo stepouts while making this quilt, I do have another video you can watch showing the same process on another quilt called Color Weave. Take a look below:
Have you tried this technique for spray basting your quilts? Let me know what you think, or if you prefer another way. There’s no right or wrong way to do things when it comes to quilting, only lots of options to choose!!
Wavy Lines are one of my absolute favorite motifs to quilt and it’s so fun to see how small changes can lead to a completely different design! In my latest machine quilting video tutorial, I’m showing how to form a simple wavy grid. If you’d like to take your wavy lines up a notch, you can echo them to add a touch of elegance to your project. Take a look by clicking play below:
It’s been fun to quilt these designs on “real” quilts so I can demonstrate that anyone can have success quilting on their home sewing machines. Watch my bonus video below showing how I applied this technique to my Terrace Tiles quilt pattern. This is one of those patterns I’ve made half a dozen times and it never gets old!
As I’ve been adding more videos to this series, you can check out the entire playlist over on my YouTube channel. Please let me know what design you’d like to learn next!
Speaking of fun things, be sure to stock up on your favorite Dazzle Dots and Dazzle Dots 2 fabrics. The original features bold bright colors while the newest addition to this collection rounds out the group with softer, more pastel colors. I even have plans to use them both together, and I can’t wait to show you, so stay tuned!
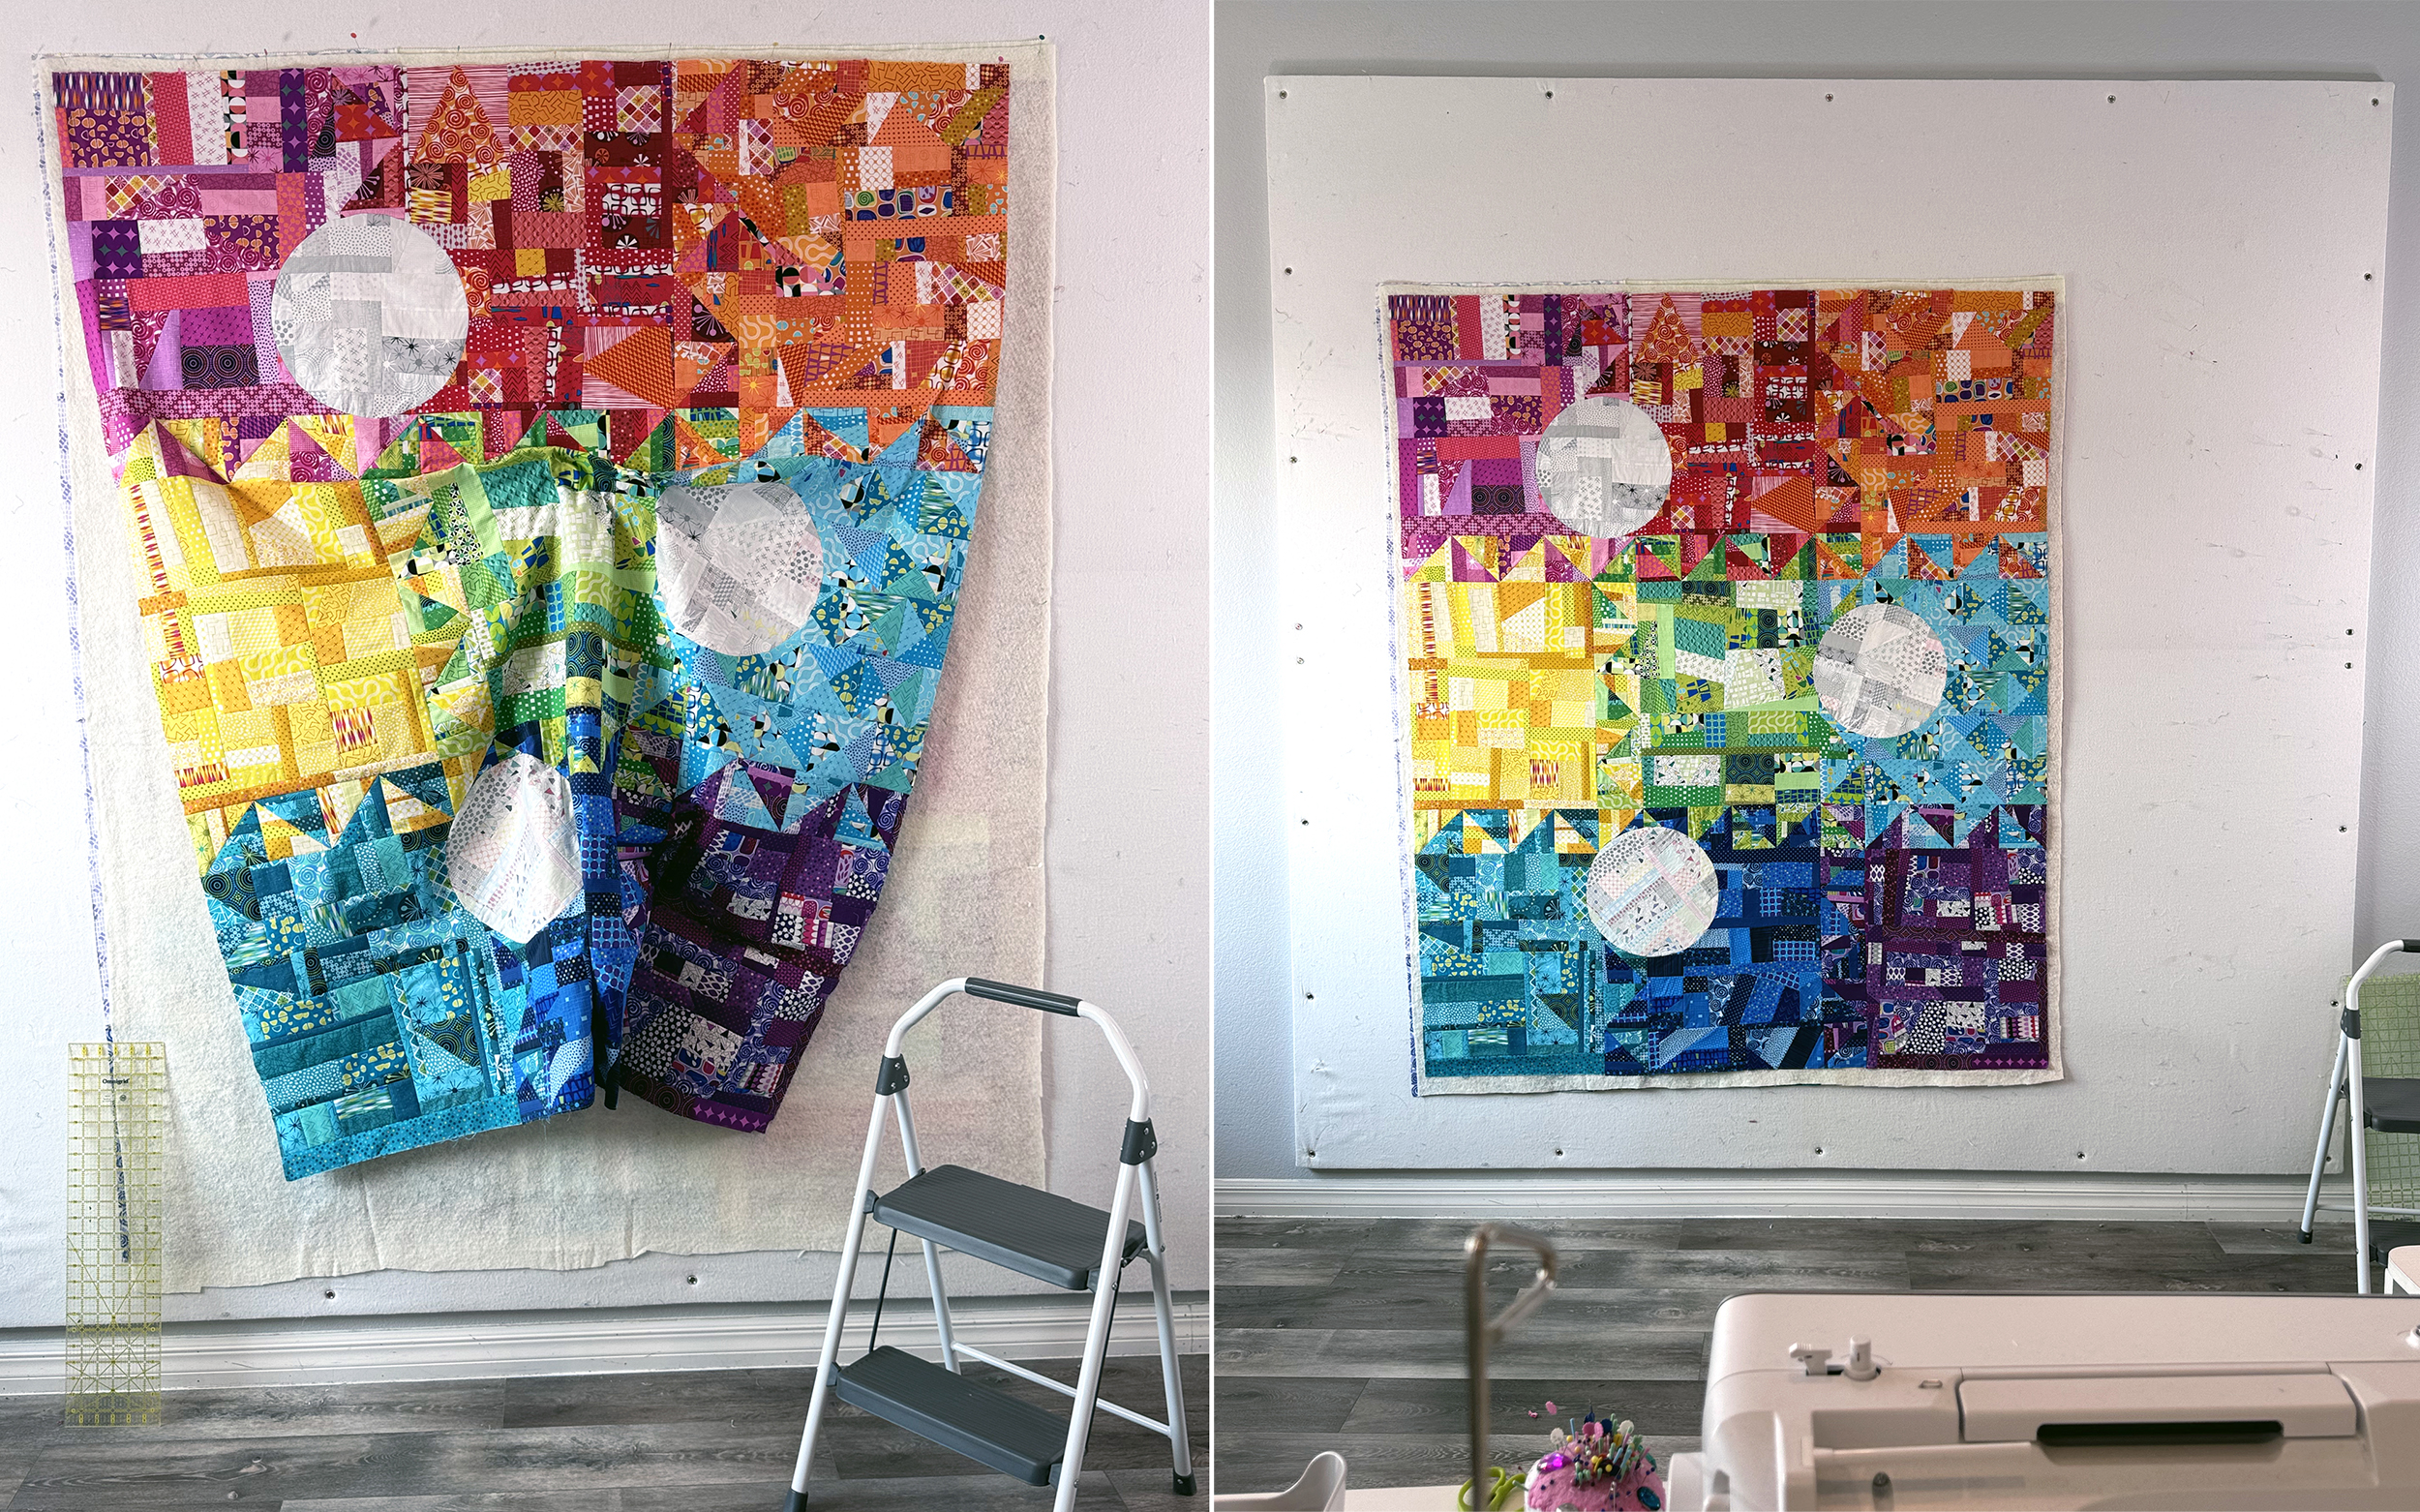
I recently finished making a fun yet chaotic quilt backing from leftovers of my colorful fabrics. I’m calling the quilt Colorful Chaos and it was a fun experiment in learning to piece inset circles. You can see the image of the front pinned to the design wall next to the backing.
This is my 3rd post in a series about making this quilt. It’s been wonderful to sew on between other “work” projects, without a strict deadline. Click below to read about parts 1 and 2, written before I finally designed on a name for this quilt:
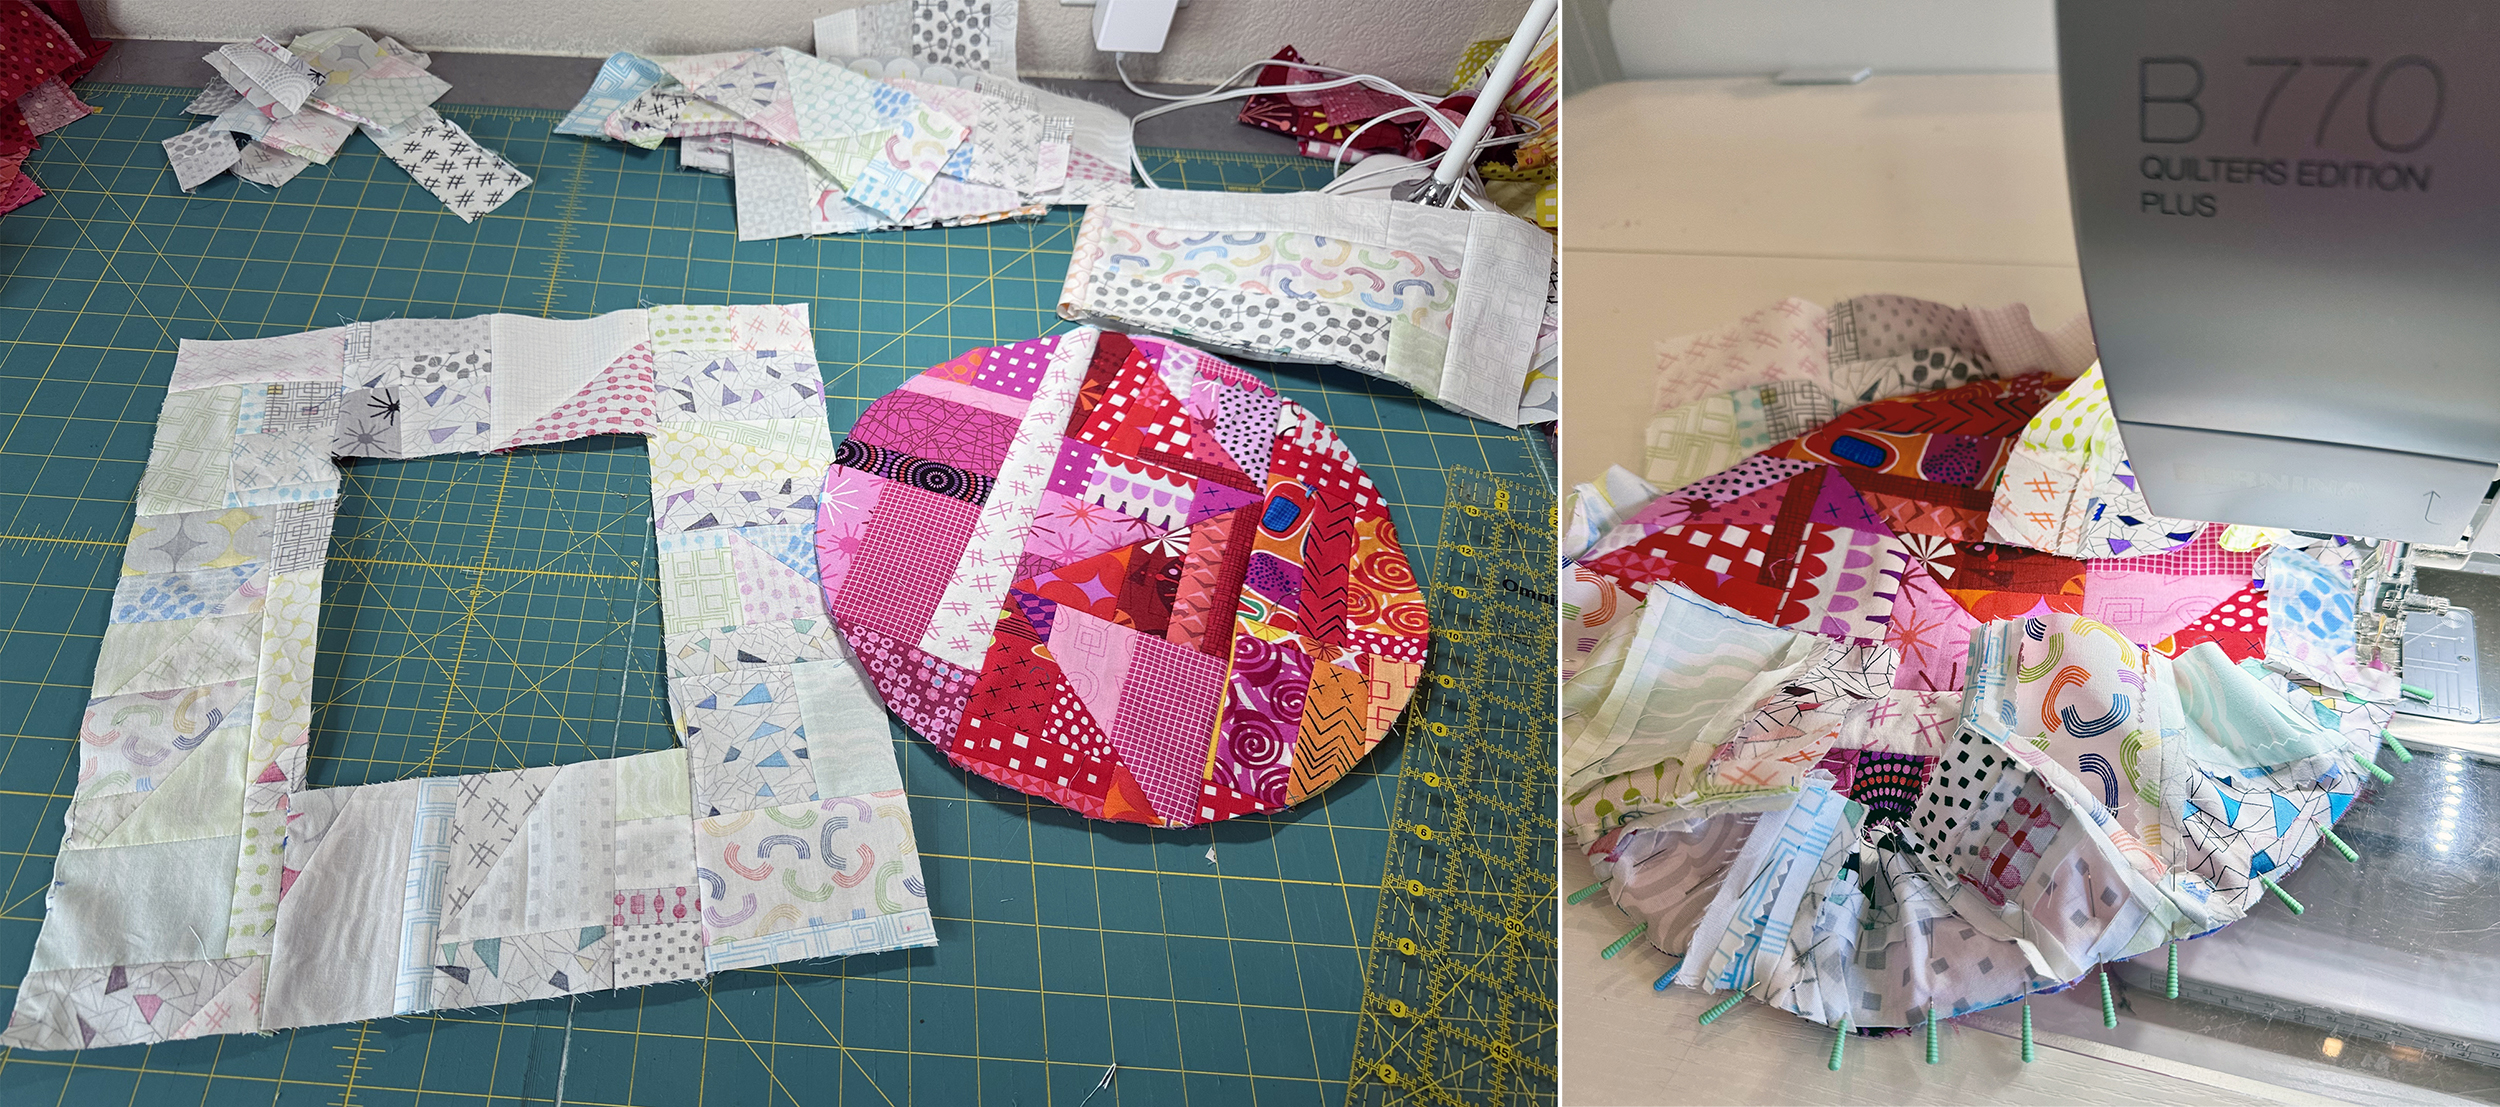
Here’s a little bit about the process of making the pieced backing, which was just as much fun to make as the front! First of all, I gathered up misc. leftover scraps that didn’t make it to the front of the quilt. I had 3 circles left over after I cut them out of the quilt top and a bunch of low volume scraps that I used for the backgrounds of each circle.
For the pink unit, I pieced a background square with fabric missing from the middle since that would be cut away anyway. I cut a circular hole from the middle that was 1″ smaller than the pink circle. I very carefully pinned and sewed it around the pink colorful circle. (See part 2 above for a more detailed explanation of this process).
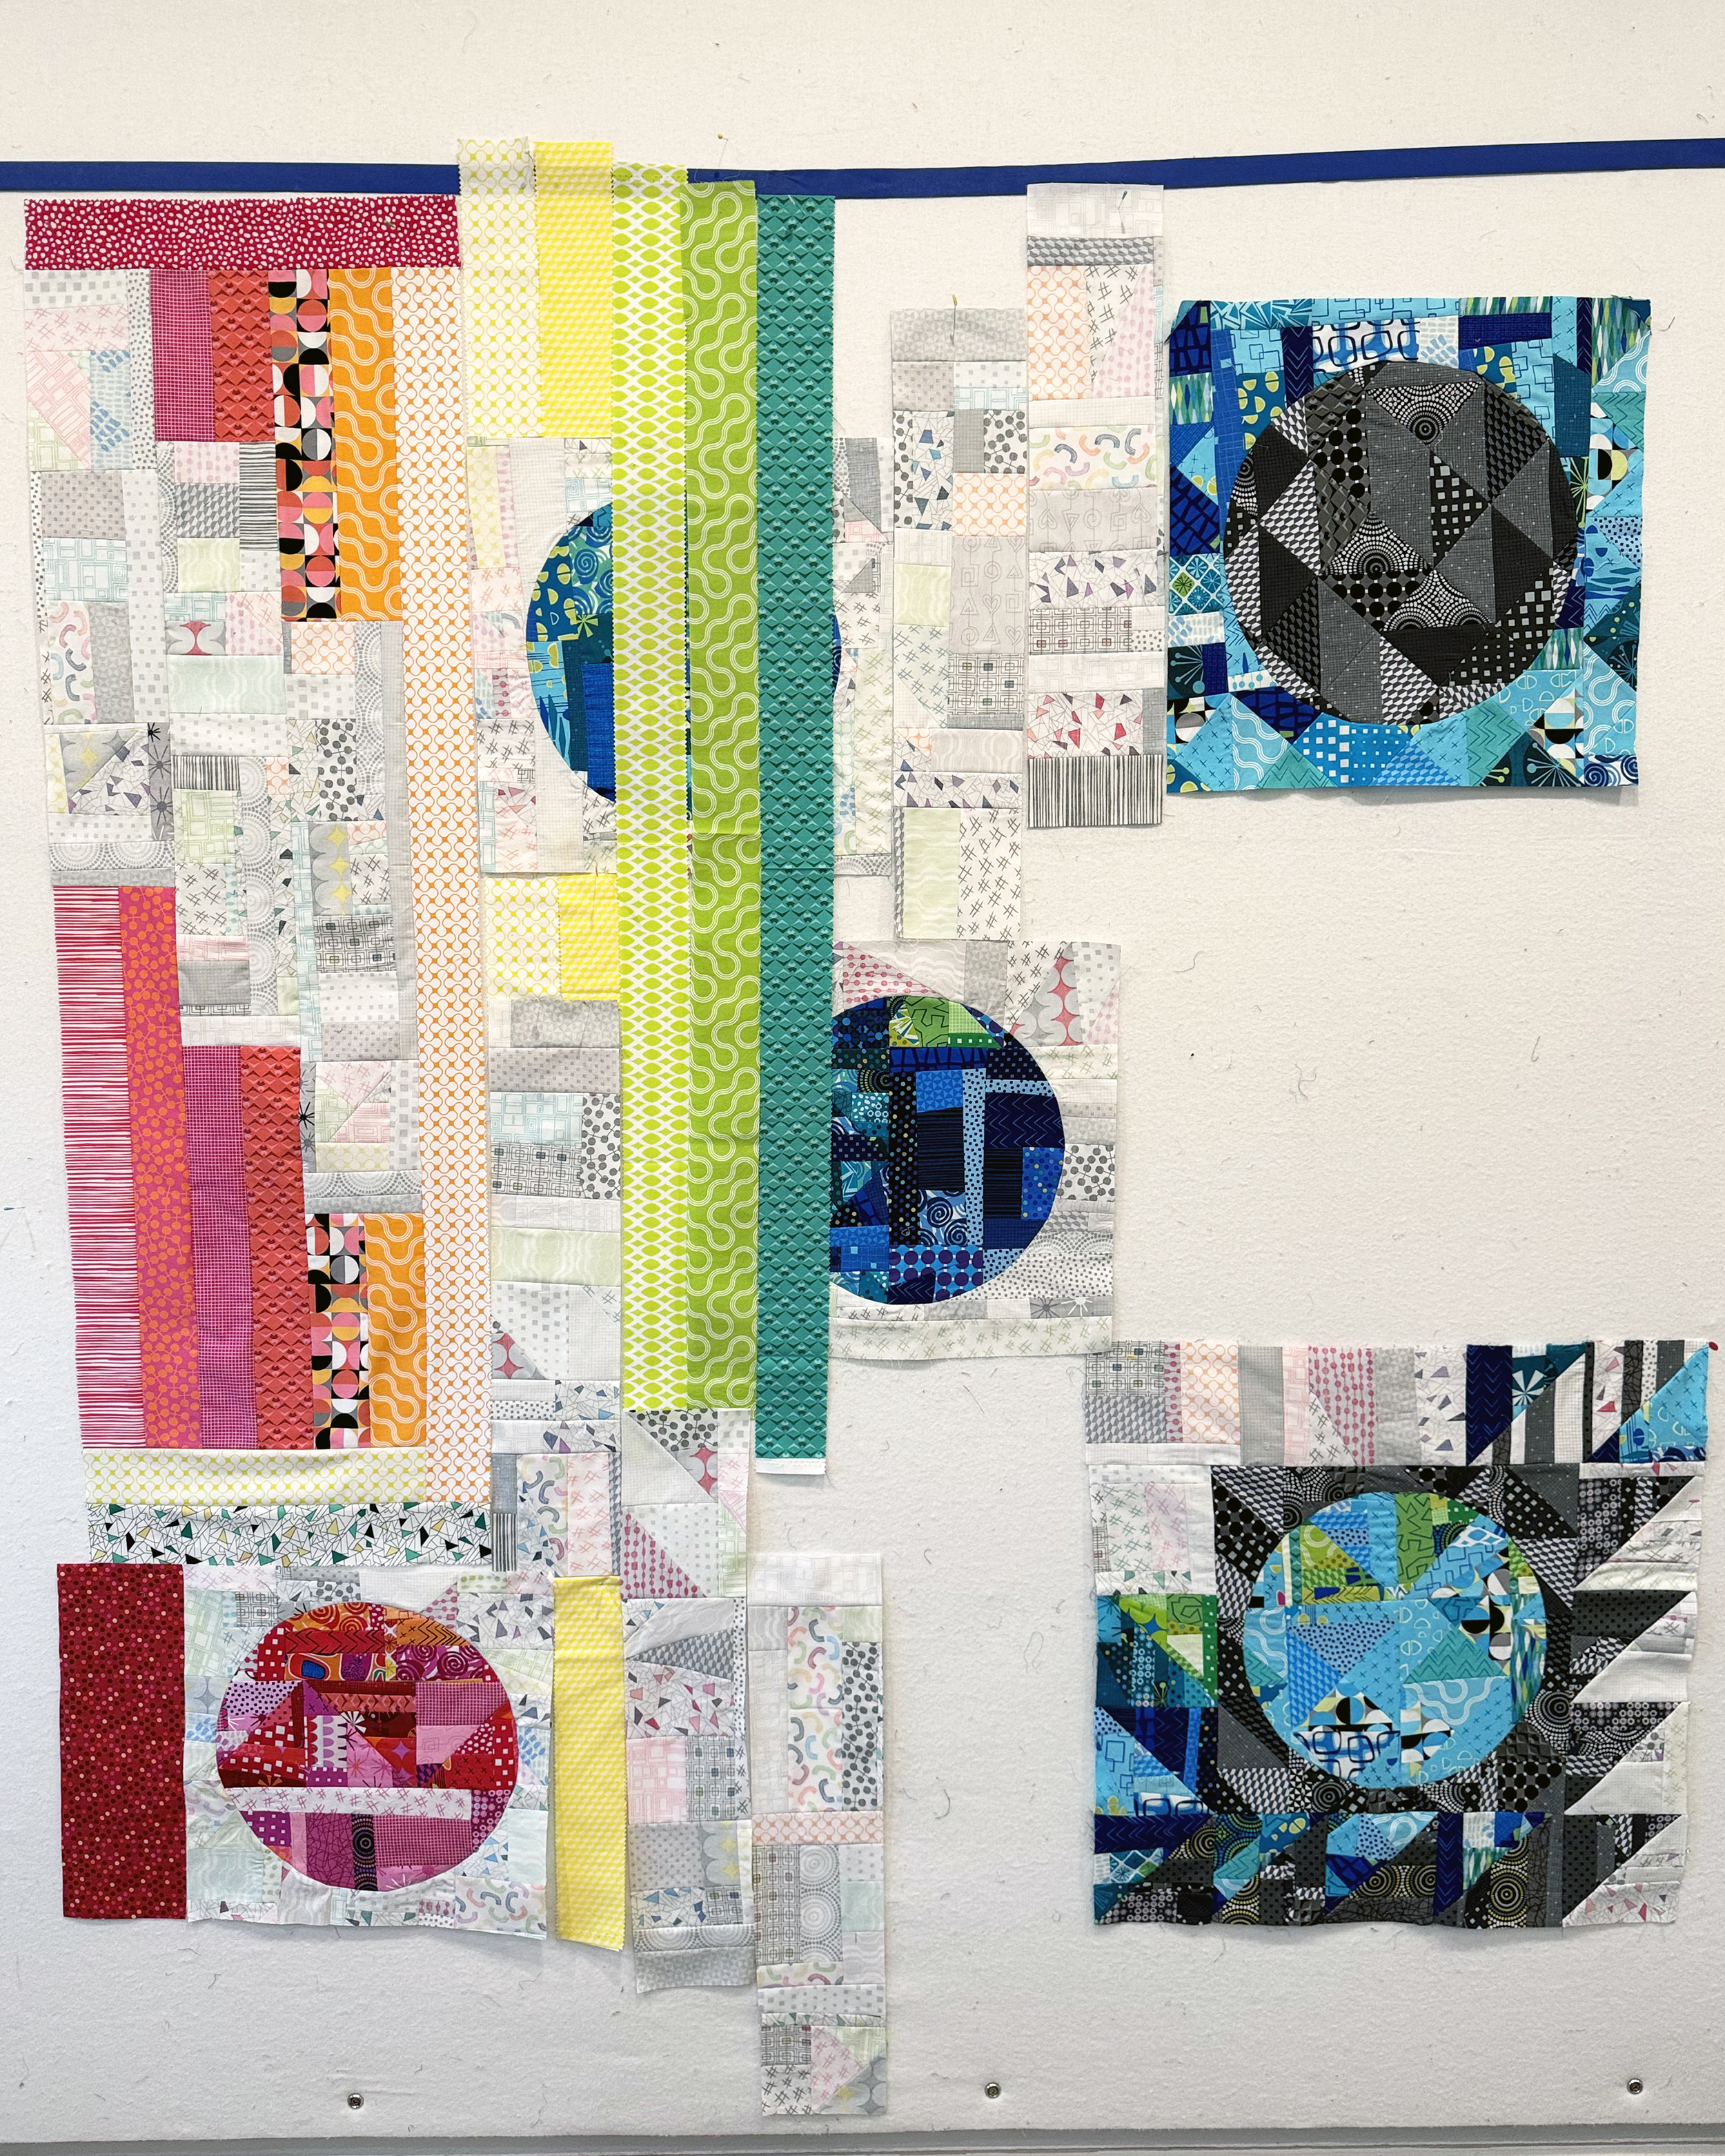
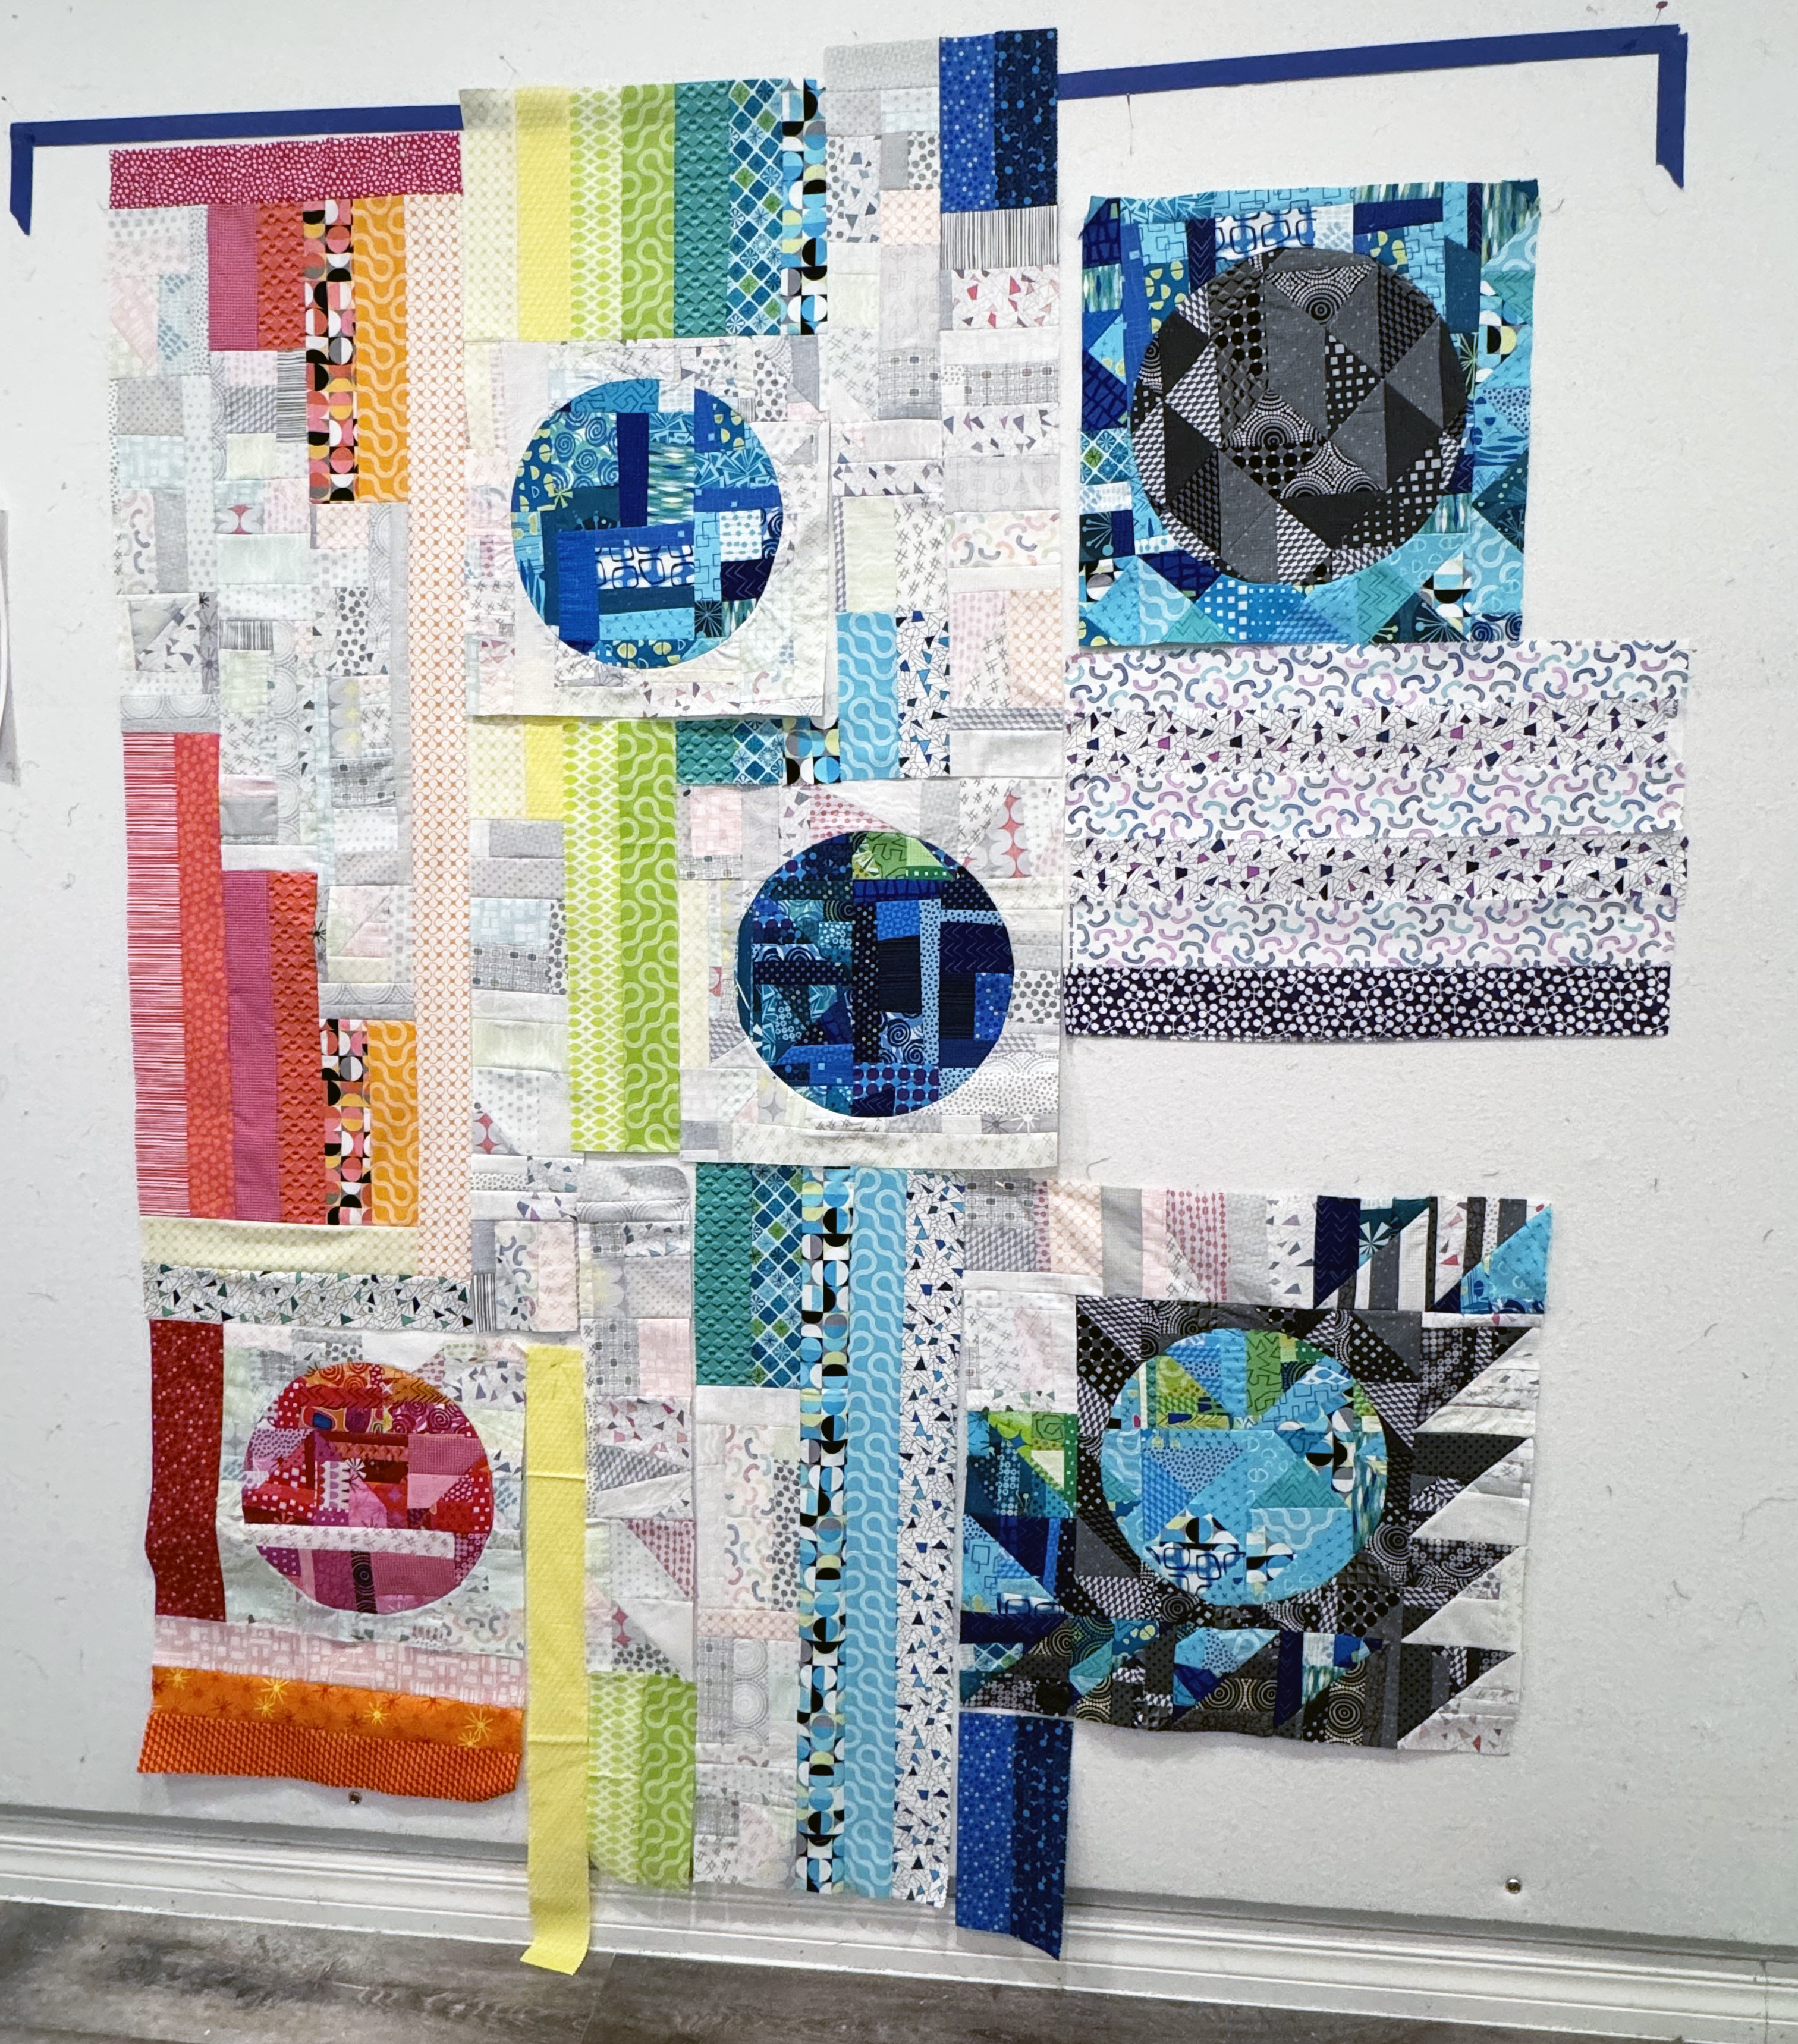
Then I repeated that a few times for the other colors I had, including more of the blue, plus a chunk of dark grey improv which didn’t end up working on the front. I also made way more low volume pieces that I needed, so I gathered up all these starter bits and pieces and threw them on my design wall to begin a secondary composition.
I put some blue painters tape on the design wall to set the boundaries for how big the backing needed to be. Once I decided on the placement of the circles, I started randomly filling in the gaps with low volume strips and rainbow colored strips, leftovers from my various fabric collections.
This part of the process gave me complete freedom to just play and see what happened. I had no real plan in mind which is half of the fun of improv piecing. I used both front and back of my various low-volume fabrics. My philosophy is that you paid for both sides of the fabric so you may as well use them!!
The hardest part about this type of piecing is keeping everything relatively square. I do what I call the “puzzle” method where I piece together sections at a time and make sure the sizes fit together before sewing. Sometimes that means trimming off a bit or adding onto another section, but it all works out in the end!
Here are a couple of my go-to improv piecing techniques: sewing together similar sized strips to create a band of color, making stair-step panels and filling them in with contrasting background fabrics; cutting half square triangles from improv patchwork and joining them with other colors.
I also get asked a lot how I sort my scraps. Rather than cutting them to size, I sort them all into bins by color. My bins fit into rolling drawers in my fabric storage shelving unit. Whenever they start overflowing, that tells me it’s time to start a new quilt, LOL!
If you’d love to stock up on fun rainbow fabrics along with some low volume neutrals – check out my current stock of fabrics I’ve designed at Shop.ChristaQuilts.com. It’s been fun to mix pieces from all of the various collections I’ve designed!
Stay tuned as I’ll be sharing a couple more posts, showing how I basted and machine quilted this colorful quilt!
Sometimes you may get tired of quilting smooth curving lines and you want to opt for something different, and maybe a little bit edgy. Well, this week’s video tutorial is the perfect fit! These are some of my go to designs for edge to edge quilting, and they always look great! Take a look below to watch:
Whenever I teach machine quilting workshops in person, I always remind my students that it’s important to practice stitching angular designs as well as curvy ones. You may find that one type is easier than the other so that’s useful information to have!
For this week’s bonus video, check out how I quilted jagged stipple from edge to edge on an actual real quilt. I had a blast making the 6th version of my Terrace Tiles quilt, this time from Dazzle Dots. Click play below to watch:
If you are enjoying this series and want to continue learning with me live and in person, be sure to check out my current travel schedule. I’m also happy to come teach in person at your group or guild. Just pass my name along to your group’s program chair or feel free to email me for details: christa@christaquilts.com.
I’m usually pretty good about making a new project from start to finish, but every now and then one of my quilts takes a little longer to finish. My Interlinked quilt was sitting for 2 years just waiting for me to put the binding on – can you believe it??
But I finally finished it on a recent beach vacation so I was able to get some fun “on location” photos of it. Fun fact – we took a photo of this quilt on the same pier at Manhattan Beach where they filmed a scene from La-La Land.
I’m most proud of how I finished the borders on this quilt with the darker corners and I even made the binding to match. This was a matter of sewing the binding in sections to the quilt and pinning it precisely where it changed from light to dark grey.
Bonus Video Tutorials!
While I was making this quilt, I created 2 separate videos – showing how to baste a quilt that was too larger for my design wall, AND how to machine quilt such a huge quilt on a regular domestic machine. You can watch both by clicking the images below to play:
The Interlinked pattern itself includes 4 different sizes with 2 different layouts. In case you missed it, I made the original version as a smaller throw size in neutrals:
The larger version was made from my colorful Stitchy fabrics and I really had fun with the machine quilting!
What’s one of your favorite designs that you’ve made more than once? Leave a comment and let me know. I love making the same quilt in different ways to explore different color combinations and quilting designs!
Fast Facts About These Quilts
Finished Size: Neutrals – 64″ x 80; Color – 104″ x 112″
Fabrics Used (all designed by me for Benartex): Neutrals – fabrics from Geo Pop, Gridwork & Fandangle; Color – all from my Stitchy collection