When we moved into our new home, the highest priority for me was getting my quilting studio up and running since quilting is my full-time job. I’ve had many people asking me how I built my design wall in my old house, so when we created it again in the new place, I took step by step pictures so I could tell you all about it in detail. So here goes:
My design wall does double duty – I also use it for flat quilt photography.
Materials to Build a 96″ x 96″ Quilt Design Wall
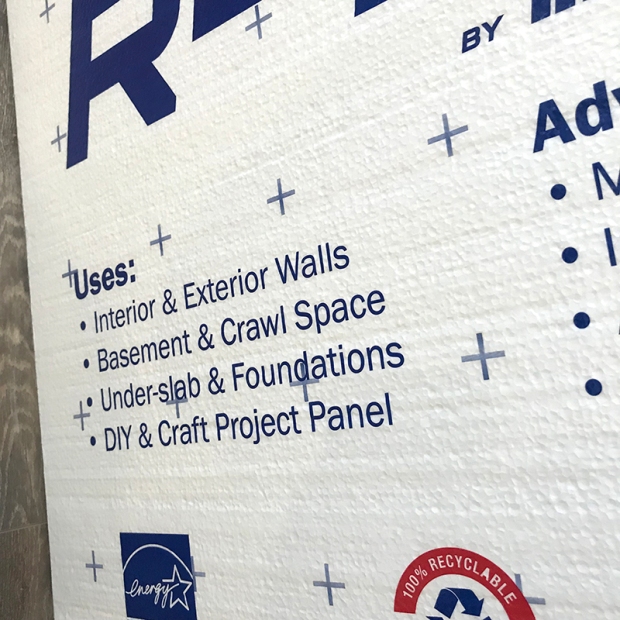
Two Foam Core Insulation boards, 4′ x 8′ each. You can always cut them down if it’s too big. These are available from Home Depot or other home improvement stores. Be careful handling them as they are very fragile and can dent and break easily. When Jason and I purchased them, we had to look through all of them on display to find the nicest, newest looking boards.

Getting the boards home in our SUV was the hardest part of the job! Fortunately they just barely fit in the back of the car with the seats down.
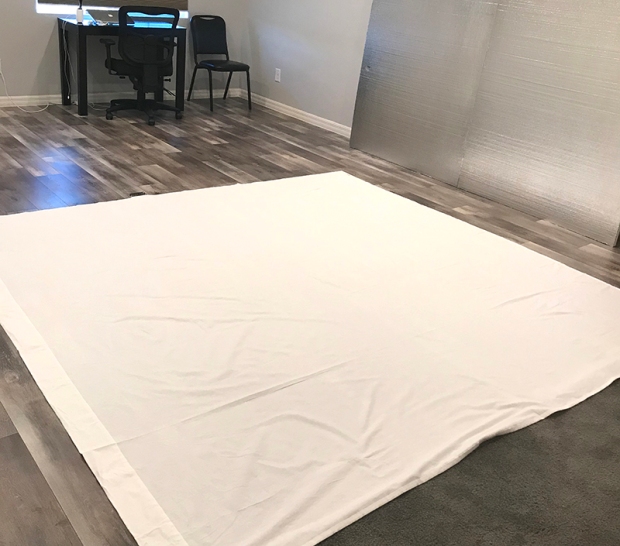
California King Size White flannel flat sheet. Because the design wall is square, you want as much extra room as possible to wrap around the edges. I found a 108″ x 108″ sheet set from Bed, Bath and Beyond. It was easier to purchase the whole sheet set rather than just the top sheet, so I just donated the fitted sheet and pillowcases. You’ll want to iron it ahead of time to get out all of the wrinkles. I did not prewash because I didn’t want it to shrink up.
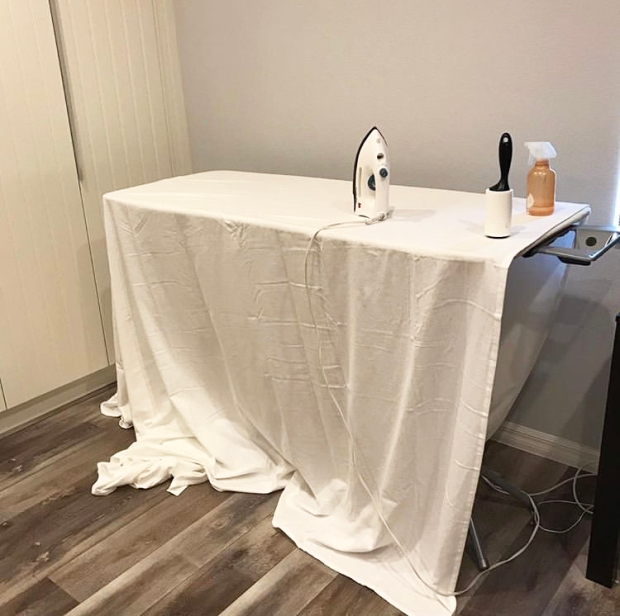
Be sure to iron out the wrinkles as much as you can.
Supplies: washers, screws, duct tape, screwdriver, level and a staple gun. This design wall is very light weight and attached directly to the wall so no crazy equipment is needed. We used regular 2″ long screws with washers to hold them in place. A level comes in handy, too.

Not pictured: duct tape, level, and a hand-held screwdriver.
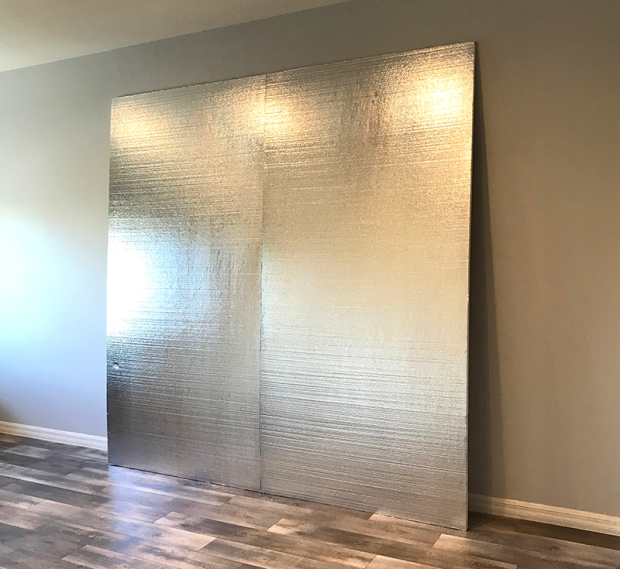
Step 1 – Tape the Insulation Boards together
The boards we bought have writing on one side, and a silver reflective surface on the other side. We chose the silver side to be the front so that none of the writing would show through on the front. It’s also easy to pin into.
One of the boards had a small dent on the front which we didn’t see. Fortunately, it didn’t show up at all, once we covered them in flannel and attached to the wall.
I thought it was funny that the boards say they are specifically for craft projects. I don’t remember that writing the last time I made a design wall for my other house over 5 years ago.
We started off by taping the boards together on top of a couple of tables and barstools pushed together at the right height. But then we realized you could do this on a hard floor as well. My previous studio was carpeted so we needed to do everything on a flat table. This time around, the studio floor worked well for all of the other steps.
Jason taped the back middle seam with duct tape as far as he could reach. We had to be careful handling it because it wanted to fold along the seam. At this point, it’s not very stable, but big and awkward.

Step 2 – Cover the Boads with A Flannel Sheet
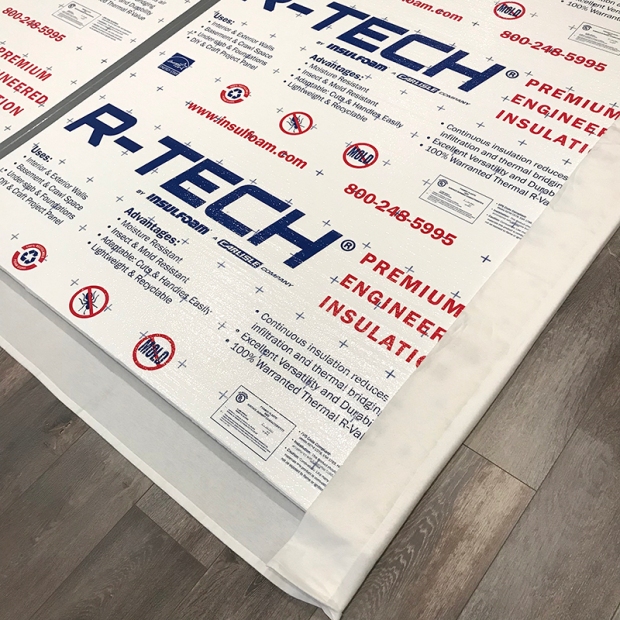
The reason I chose a flannel sheet is that it’s lightweight, gives an even surface, and fabric and quilts will stick to it. I also think it looks much nicer and cleaner than batting and I can still pin into it if needed. We laid the flannel sheet on the floor first, and then gently laid the taped boards wrong side up on top of it.
There was just barely enough width on the floor for the sheet and boards because we installed a floor plug in the middle of the room where my sewing machine goes. It’s important to have a flat work surface when doing this part so it doesn’t dent the foam. I didn’t worry about the top seam in the sheet since it would be wrapped around to the back side.
When this is hung, the seam will be horizontally in the middle so that one board basically sits on top of the other. That will make the seam on the front side less noticeable and will give the whole structure more stability once it’s attached to the wall.

Very smoothly and carefully, we wrapped the excess flannel around the boards, 2 sides at a time.
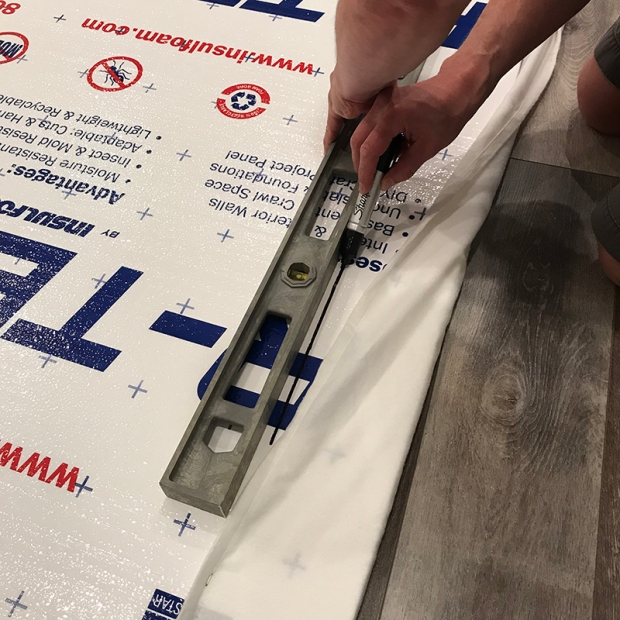
First we stapled the “top” and “bottom” sides and then the edges, very close together. Jason discovered that he had to put a little bit of pressure while using the gun and staple straight down, otherwise the staples would come out easily.

After a few staples, Jason drew a straight line so that he could pull the edges taught and even and line up the staples about 5″ or so from the edge. Keeping a little tension on the sheet was important so that it would be smooth and tight across the surface and not sag.
The corners were a bit bulky so I tried to fold them over as best as I could so that it was smooth and tight around the corners. We used lots more staples here. I probably could have cut some of the bulk from the corners, but didn’t want to risk it in case we had to redo something. Fortunately we didn’t and the bulk of the flannel was smooshed flat against the wall, once everything was attached.
On the sides with corners, Jason stapled a few in the middle, then the corners, then worked his way in sections to even out any of the stretch in the flannel.

We added lots and lots of staples to secure the flannel.
Step 3 – Attach the Design Boards to the Wall
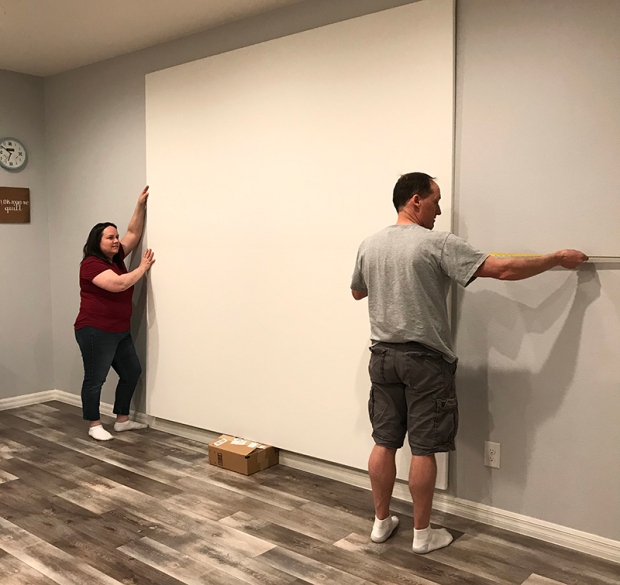
We measured where we wanted to hang the design wall – centered halfway across the room and in between two plugs on the wall. We wanted it 5″ from the floor so we found a box that height that we used to rest the design wall on while we gently nudged it into place.
My job was to carefully hold the design wall against the wall while Jason attached it into place with screws. He used a measuring tape and level to ensure that it stayed straight and square while attaching.
Jason measured 1 1/2″ away from the edges using a washable marking pen. Then he screwed the screws directly into the wall with a regular screwdriver, making a hole in the flannel that was covered by the washer. The washer gives a decorative element and also prevents the screw from digging into the foam.
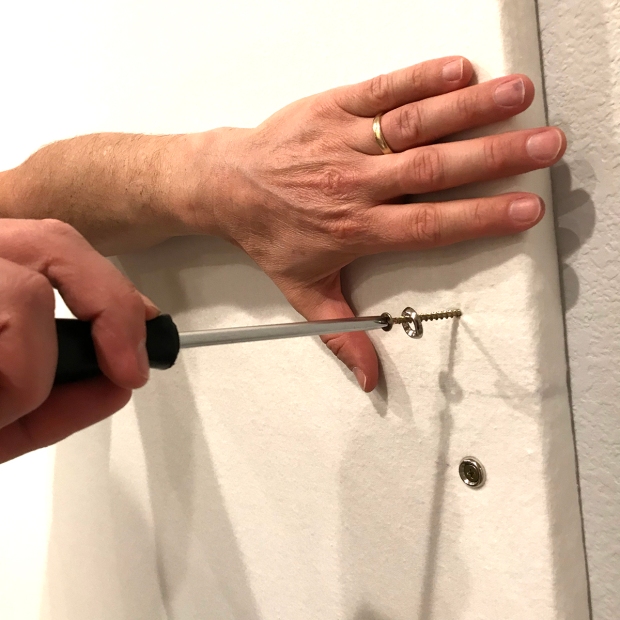
First Jason attached two screws on either side, where the boards meet up in the middle. This would be the two top corners of the bottom foam board. Then he attached screws in the upper corner of the design wall, and then in the lower corners.

Then he attached 2 more screws in the lower corners of the first design board – so 8 screws and washers to secure the boards to the wall, holding down all 4 corners of each foam board.

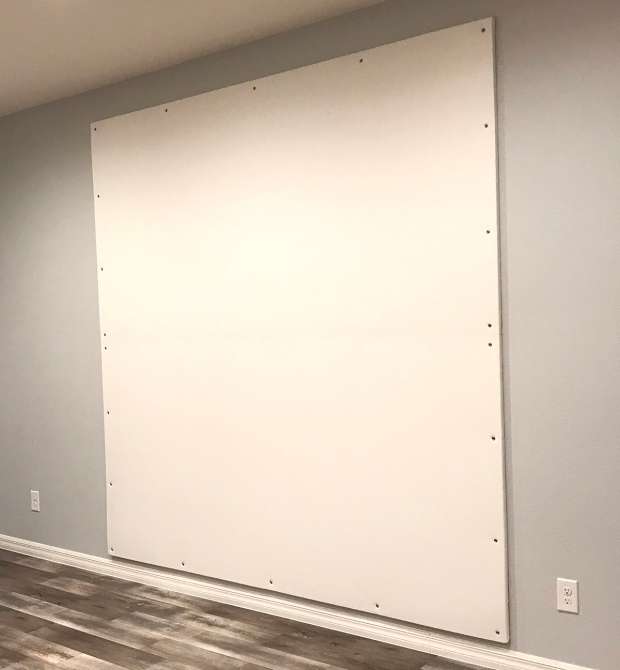
We attached a total of 14 screws and washers, evenly across the top and side edges. Here’s what it looks like with all screws attached. You can see the faint line where the boards meet up in the middle, but that softens up over time and will be mostly covered by quilts anyway.
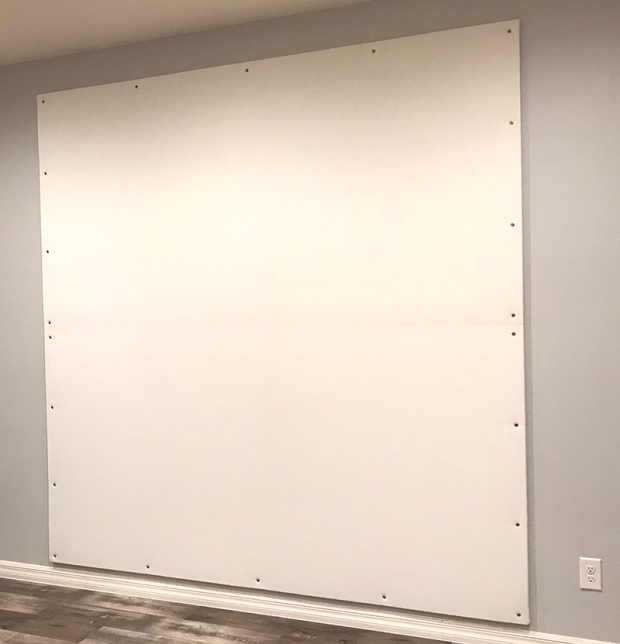
I added a recent quilt finish to the wall to give my room a pop of color that I really love! Now I’m ready to make and photograph more quilts for your viewing pleasure!!

The quilt on the wall is my Color Weave Quilt Pattern
I hope you enjoyed this tutorial and peek into my sewing room. Because I know you’ll ask – my sewing table is one I purchased from a dealer over 20 years ago. Sadly the dealer is no longer in business and I can’t remember the brand of table it was! But I’m in the process of finding a new table with a built-in side section that forms an L shape – giving me more room to hold up the quilt. So be on the lookout for more sewing room updates, and more fabulous quilts!

Thank you for posting this. We followed your directions to put together a design wall like this. Loved seeing your pictures and your comments. My design is perfect now.
Thank you for sharing!
How thick is the foam core insulation board? I have found it comes in 1/2″; 3/4″. 1″ & 2 ” thickness. I saw you used 2″ screws.
I had the same question actually. I didn’t see a reply, but judging the size of Jason’s fingers next to the board and the length of the screws, I’m gonna guess 1″. Gonna build mine this week. Thanks for sharing Christa and Jason.
Thank you! Love it!
Thank you for a clear crisp explanation of what you did. Plus the pictures. The reason for the added craft work phrase on the boards is because many Crafters are using them to model things they want to build.
Yay…specs for a DIY project (early Christmas present) for Thanksgiving week-end!
Thanks Christa (and Jason)!!!
I saw picture on you FB page! Letting you know as requested.
I saw it on Facebook, did the link and read the the pst on “How to build a design wall.
Good information. I made my design wall using foam core and a sheet. But I attached it to my Murphy Bed. When the bed is up my design wall shows but when I have company it’s under the bed. Works great. As my studio is the spare bedroom I can still have the space I need for a design wall but it hides away quickly when I need the spare room for guests. I live in Canada and got my Murphy bed from wall beds Canada but I assume most would work for this. It uses a standard mattress so is very comfortable.
Susan, So funny to hear that you are using a Murphy Bed. That is what I plan on doing as well, I made one for the upstairs sitting room and you are right, it is very comfortable. My studio is the last project we have going and we will probably only use the bed at Christmas when the entire family is here…but when you need it, a Murphy bed is so handy.
Genius!
I like your design wall. I made one which is similar but different. I used a 4′ X 8′ sheet of the foam board but also another thicker one which is pink and more dense. I cut about a foot off the length of both so I could get it through my doorway and stand it up in my sewing room. The pink has a smooth surface which is difficult to pin into. I glued the two different foam boards together with Liquid Nails. I wrapped the whole thing with white flannel and used Gorilla tape to fasten it to the back. I was afraid staples wouldn’t hold. I use the backside when I want to block a quilt. I use T pins to hold the quilt in place and it get’s laid on my bed to dry. I need the portability of this size, as I don’t have a big wall for a permanent installation.
Good idea I have a Murphy bed too going to do this thank you
I used the same product. Staples hold beautifully. I originally saw this demonstrated with push pins on the side. While they work, not for long. I pulled out my pneumatic upholstery gun and fixed that.
My wall sits in a computer rail that snugly holds the bottom. I’m fortunate that I have two walls that give me enough square footage to have the 96×96 wall. I had to move it recently, so all I had to do was slide the base and hold her steady. (That Gorilla tape really holds!)
Hi Christa, quick question…did you use any anchors for the screws? My hubby is convinced we need to use drywall anchors so it won’t move when it’s being used…thoughts?
it’s so light that it doesn’t need anchors. Besides it would be really hard to put them in, since we just screwed the screws straight through the fabric, foam core and into the wall. Lining up the anchors ahead of time would be super difficult I think.
Christa Watson Instagram @christaquilts website/blog: ChristaQuilts.com
Thank you! That’s what I was trying to tell him… I’ll let him know that you agree 😉
I was wondering the same thing – if the screws go into any studs – or is it just into the drywall? Thanks so much for the post – love all the pictures!
Quite simple to do and great step by step instructions. Thanks.
I made a design wall the same way. (Except mine is in my bedroom because my studio doesn’t have enough wall space. I’m jealous of your lovely space!) I didn’t know if the silver covering would have any impact, so peeled it off before covering it with flannel. It’s been in use for a year now and I love it.
Thank you for the great detail. As for a new cabinet for your sewing machine, Tracy’s Tables do a great job and he has lots of configurations. He’s at most major quilt shows.
Enjoyed your tute. You have a great room. I bought a Horn table that is L-shape when it’s all open? I love it,so sturdy,also white. You can get machine inserts to fit other machines also. I have had it 6 years and absolutely love it. Well worth the money.
I placed my design wall (on two walls) in the corner. I covered my foam board with 4 pieces of white loose flannel fabric & stapled with standard paper staples. My foam board is long enough to be wedged between the carpet and the ceiling & because it is also in the corner, I haven’t needed to use anything to anchor it to the wall. However, I do lose a little at the bottom where it leans some.
I recommend using stainless steel bridal & lace pins for pining pieces of fabric on the boards, (for those of us that take a long time to finish our projects); particularly after heavily starching. They won’t rust and also keep cats from being fascinated with falling fabric pieces.
Oh dear- I’m fighting the green eyed monster right now. So envious of your glorious design wall! I do have one question though – you make numerous comments about the fragility of the board and how you have to be careful not to dent it. Do you never have troubles with “denting” when you’re actually using the board?
It’s secure once it’s attached to the wall, though you still have to be careful because it’s foam core. It will hold a quilt securely and I can pin into it.
Beautiful and easy to follow hope to have one someday
Good job Jason!
I think we are all a little envious…because your studio is Awesome!
Thank you for this tutorial. I was thinking earlier today about how I was going to build one in my new studio. 🥰
My friend made a design wall like this. She added 1/4 ribbon (in a barely seen color) at 12 inch intervals, making a grid to help keep the blocks square on the wall.
Fun to see this process. Now I think you need to rent out Jason to help anyone who needs a design wall like this. I made mine similarly, but went down to JoAnn’s and bought that gridded flannel, adding borders in plain so it stretched across my foam core art boards. I really enjoy having that. I then put another layer of a specialty batt over the top of that, so the lines are faint, and the pieces stick really well.
I love seeing all the ways to make a design wall–this will be so helpful!
I have to admit, you are going to have a fantastic studio to quilt in, one of the best I have ever seen! The biggest design wall I could fit in this small 2 bedroom apt is 44″ x 64 hanging on my large bedroom closet door. I had admired your Color Weave pattern done in yellow and gray but I really like the colors in the new Rainbow Weave. Job well done!
I agree with Elizabeth E. So much easier to just rent out Jason’s Design Wall services. Your studio is stunning and the design wall is to die for!!! Keep the pics coming. 😊
Thank you for a great tutorial. I am in the process of making a design wall and I will surely use your tutorial as a reference. Congratulations on your delightful sewing space/studio.
I am building my quilting space now and have a wall dedicated to making a board. Your tutorial will help me so much. Thank you very much for sharing.
Nice tutorial and fabulous space! I made a similar design wall but the foam boards that I found were the pink panther brand. Caution to others… the pink shows through the flannel ever so slightly giving a pink cast to the wall. 🤔 I used lots of command strips instead of screws because I didn’t want holes in the wall. They have been holding just fine!
I also have a wall that is a design board. Love it. I am also looking for a table . My set up is a large L shape, from Ikea. The support do not allow us to cut a hole for the machine. I was going to ask where you got yours as I could add something like that on to mine. I will be watching to see what you find. I also used bedroom closets on one wall and shelves all from Ikea on another wall. Pleased with the arrangements. I know you will be happy with yours and that they will look great. Enjoy.
This is perfect!! Can’t wait to show it to my hubby so he can make one for me…although my space will require something a little smaller 😉 Thank you for sharing all the details!!
Christie,
The flooring; is it wood panels or is it sheeting? It is beautiful… By the way; the wall is GREAT!!
Thank you for sharing this process
My husband made a design wall just like that several years ago and I’m still thanking him for it!! It makes a huge difference in putting quilts together!! Great tutorial!