Recommended Sewing Machine Features for Free-Motion Machine Quilting

In my latest Craftsy blog post, I’ve made a list of 6 things to look for when considering purchasing a domestic sewing machine for machine quilting. My favorite feature is the extra wide throat space my Bernina has, which makes it much easier to “squish and smoosh” my quilts as I go.

fmq_sitd

Closeup of my String of Pearls Quilt in progress

Click here to read the rest of my recommendations!

Craftsy Class Review: Free-Motion Quilting with Lines, Curves and Loops

I have a confession to make: one of the perks of being a Craftsy writer is getting to view some of their top classes so I can review them and tell others what I enjoy. I think I need a sign that says “will work for quilting classes!” 🙂

It’s even more exciting when I get to take my friend’s classes, too! I first met the fabulous Debby Brown when I took a feather quilting class from her at Road to California in 2014. Let me tell you – she can rock a feather like no other! I was immediately drawn to her warm, friendly teaching style and this gal really knows her stuff. So without further ado, let me tell you all about Free-Motion Quilting with Lines, Curves and Loops.

fmq_linesloops

Class Overview

The class is broken down into 7 different video lessons, each under 1/2 hour so they are presented in easily digestible chunks of information. And the best part is – you can watch them in any order! (Tip – I like to watch a session before I begin my day’s sewing to really get me in the mood!)

Debby includes great tips like setting up your home sewing machine and how to control the tension. She even shows starting and stopping in detail plus how to easily create temporary guidelines to help balance the motifs.

fireworks

Debby’s fireworks sample – this would look fantastic on a modern quilt!

Debby then goes onto show you how incorporating simple letter shapes can make for better free-motion quilting. I use a lot of e’s and o’s to create circles in my personal work, but I never really though about i’s (lines), c’s (curves), j’s (curls) and s’s (swirls)!! Yes, she really does walk you through how to turn letters your brain already recognizes into useable (and pretty) free-motion quilting textures! Within each of these basic shapes, Debby includes several easy-to-quilt free-motion textures to try.

My favorite tip that Debby shares is one that I teach my own students: draw first, then quilt! That helps your brain recognize the stitching path and makes it much easier to know where to move when it’s time to quilt. She also includes a few bonus tips and tricks like using free-motion quilting to mimic the look of machine applique, plus trapunto techniques and bobbin work.

Debby rounds out the class by teaching you how to combine motifs to create amazing custom textures. I love it! Complete supply lists are included in the class materials and you can ask questions for Debby at any time via the Craftsy platform.

My Favorites

My all-time favorite motif I learned from Debby is how to quilt swirly feathers. I’m really not much of a feathers gal, but I love this one! It’s so funky and fun and actually pretty easy to stitch.

Swirling Feathers

 My practice sample when I took Debby’s class last year.

I also really like her in-depth section on quilting linear motifs with free-motion. When you know how to do that, the sky really is the limit when it comes to fun free-motion quilting.

Of course, the best part about this class is that you can watch it anytime, on your schedule. Debby is such an amazingly talented instructor that she can’t possibly give enough in-person classes for everyone who wants to learn from her. So I’m extremely grateful that I can watch her class at my convenience, day or nite! In fact, for several of the motifs I found myself using the Craftsy 30-second repeat option so I could watch her form the stitches over and over again.

On Sale Now!

As I was watching and reviewing Free-Motion Quilting with Lines, Curves and Loops, I got the heads up that it is on sale now, along with dozens of other courses, this weekend only. So be sure to sign up while you are thinking about it!

In fact, be sure to click here for all Craftsy classes on sale. Then be a good student and engage with your fellow classmates and share pictures of your work!


Herringbone WIP – Simple Stipples and FMQ Tips

Today I’ll share with you how I’m quilting my Herringbone quilt. Just call me the stipple queen. 🙂 I did all piecing and quilting on my Bernina 710 without a stitch regulator.

stipplingHerringbone by Christa Watson; free quilt pattern designed for Camelot Fabrics

I spent the first 10 years of my quilting career stippling everything I could get my hands and needle on! Then I took a break due to stipple burnout and starting spending way too much time quilting more labor intensive custom designs on my quilts. However, for Herringbone, I returned to my favorite go-to allover motif: stippling!

Since I wanted the quilting to enhance the graphic nature of the design rather than steal the show, I chose to go with a thin, 50 weight Aurifil thread in both top and bobbin. I tried out several colors to see which would blend in the most with both the yellow and grey fabrics.

aurifil_thread_choicesTip: audition thread colors before you begin quilting. The grey blends best!

I ended up going with Aurifil #2600-Dove which I think is just the perfect shade of light grey! It surprised me how well it seemed to disappear into the yellow fabric – providing scrumptious texture, rather than a heavy, “thready” appearance.

For this quilt, I practiced on a few scraps first (like I always do) and tested my machine’s tension. Here’s a quick tip: if your machine has really nice tension when you are sewing regular seams, it shouldn’t need to be adjusted too much for free-motion quilting.

herrinbone_quilting_glovesI usually quilt with flat hands forming a hoop – gotta love those Machingers!

Don’t be afraid to experiment a little until you get a pretty stitch! For some reason, the day I quilted it, I was able to achieve more consistent stitches with the feed dogs engaged, but covered with a Supreme Slider. I didn’t fret about why, I just went for it. I’m very pleased with the consistency of my stitching on this quilt and I think slowing down just a little helped, too.

I made a label ahead of time and ironed it to the backing fabric with fusible web before I quilted it. Because I am using a thin blending thread, the quilting stitches will hold the label in place nicely without too much distortion of the writing.

herringbone_label

I chose to use a coordinating chevron print from the line for the backing – “sew” fun!

I also tried Soy batting for the first time with this quilt and I really like it. It stuck really well to the quilt while spray basting, and I like the drape and heft of it. I reminds me most of quilting with a nice cotton batting (like Warm ‘N Natural) but with a little more loft to it. Now I need to see how it washes up!

bamboo_battingSoy Blend batting given to me by my friend Cory. It was fun to try!

I timed myself like I usually do, and it took less than 4 hours to completely stipple this baby. After spending over 40 hours intricately quilting my last quilt, that was like a speed record for me! (Hmm – I need to seriously quilt more quick and fun allover motifs for the next few quilts….)

Now I’ll go get the binding put on and share the final reveal next time!

Roundup of Machine Quilting Blog Posts I’ve Written:

I’d like to leave you with links to several blog posts I’ve written about machine quilting, both here on my blog and for Craftsy. Some of my tools and techniques have changed slightly and a few things may be repeated, but I’ve covered a lot of basics:


Craftsy Class Review – Elizabeth Dackson’s Start Free-Motion Quilting

I’m excited to review another fantastic Craftsy class with you today! It’s Elizabeth Dackson’s “Start Free-Motion Quilting” and I love it on so many levels! Although machine quilting is one of my favorite subjects to teach, I cannot get enough free-motion quilting education myself. 🙂

ed_fmqEveryone has their own different ways of teaching which is why I highly recommend taking as many classes as you can from as many different instructors as you can. When it comes to free-motion quilting, it really helps to learn those techniques over and over again so they really sink in.

Elizabeth’s class is broken down into a series of 9 easily digestible lessons for a total of just over 3 hours of class time. After traveling far and wide to take classes from well-known instructors, I think this class is quite a bargain indeed. 🙂

Specific quilting motifs taught in class include stipple patterns, loopy flowers, woodgrain, circuit board, wishbones, mock clamshells and more. Once you get the hang of how these designs are formed, you’ll be adding them to your quilts in no time!

20140411_fmq_elizabethAll images courtesy of Elizabeth Dackson and Craftsy; shared with permission.

Elizabeth prefers many of the same tools and supplies that I do: she encourages the use of quilting gloves (on larger sized quilts), enjoys quilting with an open-toe free-motion foot for visibility, and enjoys machine quilting with Aurifil thread.

I don’t know about you, but it makes me feel great as a quilter knowing that I’m doing at least a few things right, LOL!! I really like Elizabeth’s “golden rules of quilting” which I think everyone should have posted in their sewing rooms.

The Golden Rules of Quilting

  1. Practice, practice, practice!
  2. Give yourself permission for things not to be perfect right away.
  3. Walk away and take a break if you feel that you’re getting frustrated.

Throughout the lessons, Elizabeth sprinkles in other techniques for you to learn such as how to start and stop, burying your threads, tips on batting, and how to baste. Rather than hitting you over the head with all of the material at one time, it’s presented in smaller snippets that are easier to understand and remember.

To keep it real, Elizabeth shows images her first very first quilt. It’s quite amazing to see how far she’s come by simply diving in there and quilting her own quilts. She’s great at encouraging beginners that they’ll get better in time. 🙂

20140411_elizabeth_1st_quilt

Elizabeth’s first quilt – isn’t it great? Check out the class for quilting closeups.

My favorite part of any Craftsy class is reading through the questions that are asked by students, along with the instructor’s responses. Usually when I’m watching a lesson, I’ll read through all the questions first, then go on and watch the lesson. It makes me feel like I haven’t missed anything and it helps give me a really thorough understanding of the material presented.

One of my favorite tips that I read in the Q&A is Elizabeth’s emphasis on experimentation as a great way to find out what settings and tools work best for your particular machine.

I hope that this gives you just a taste of Start Free-Motion Quilting. Whether you are an absolute beginner or more experienced with free-motion quilting, I hope you’ll enjoy it as much as I have!

Christa’s Soap Box – Teach a Friend to Quilt….

Teach a friend to quilt… and you’ll have a fabric-friend for life.  My longtime friend Janice popped in over Christmas and she asked the best favor that any friend could request – she asked me to teach her how to machine quilt!

Janice Quilt

Janice and Her Quilt

First a little backstory – Janice and I have been friends since just after I got married and she’s always been crafty. In fact, I’ve mentioned her on my blog before and we’ve swapped a few artistic creations over the years. Way back in those days when I started quilting I told her I’d make a quilter out of her someday… and now that day has finally come!

Janice reads my blog on a regular basis and recently told me she was inspired to learn to quilt because of my quilt alongs. Living across the country from me, she sought out her local quilt shop and signed up for a class. Although her beginner’s class only focused on piecing the top, she proudly showed me her beautiful piece. (Why, oh why, do shops not teach how to make the entire thing from start to finish?? That’s another soap box post for another day!)

Minky on the back

Minky on the back is super cozy!

She backed it in soft minky and had the shop quilt it for her in a pretty swirly design. Then she promptly sat me down and asked me for a lesson in free-motion quilting. Yay! 🙂

So I started her off how I usually do when introducing machine quilting to my students, with a paper and pencil, and we set to sketching out some interesting designs.

Quilt Doodles

Doodling on paper is so fun!

First she filled up a page with some simple stipples…

Janice Quilts

Practice on paper first!

Then we went to town trying all sorts of fun motifs like pebbles, swirls, geometrics and loops. After a few pages, she had the rhythm down and started to make that muscle memory connection between her brain and her hands. After all, the hardest part of machine quilting is knowing where to go next!

Next, it was time to hop on my machine and try out what she’d learned.

Janice Quilts

FMQ can be fun!

While she practiced, I made sure to tell her all about my favorite FMQ tips and I gave her a mini tutorial on binding by machine. I mentioned that it may take awhile to get the knack for free-motion quilting, but she can feel proud of doing it herself!

(These pictures remind me that I really should pretty up my hands when I quilt, LOL!!)

Janice Quilts

By George, I think she’s got it!

I fully expect that when Janice comes out for her annual visit next time, she’ll have completed her next quilt completely – from start to finish. I can’t wait for the show and tell!

Sew and Tell – A Visit with Cindy Needham

This past weekend I had the great pleasure of meeting quilting diva Cindy Needham and taking a fabulous machine quilting class from her, on how to quilt heirloom feathers and backgrounds. All photographs were taken by me and shared with Cindy’s permission.

Cindy and Christa

Cindy Needham and Christa Watson at DQN Guild Meeting

Cindy’s specialty is turning vintage heirloom linens into beautifully quilted masterpieces! She is my hero because she find joys in extensively quilting her quilts and encourages others to conquer their fear of free-motion quilting. I love this quote from Cindy, shared on the back of one of her beauties:

Cindy's QuoteIt reads, “Take the time to quilt something beautiful. Your work will speak to generations to come about your passion for quilting, and give your quilt a voice to speak to those who choose to listen…” Isn’t that lovely?

Click on each of the pictures shared below to enlarge and appreciate the details!

Cindy Needham Quilting

Heirloom quilting by Cindy Needham.

Although Cindy’s quilting style is beautifully vintage, with heirloom quality stitches machine quilted on a breathtakingly small scale, I was able to learn so much from her and contemplate how I might apply her techniques to my modern quilts.

Cindy Needham Quilting

Cindy’s quilt sample. Imagine what a beautiful, modern wholecloth this would make!

In fact, during class I kept laughing to myself whenever she would show samples of her “larger scale” designs. I mentioned that her large scale is my small scale. 🙂 I think that a good way to describe the differences in motif size could be called be “Heirloom Scale” and “Modern Scale” – both equally beautiful and appropriate for their quilting styles.

Cindy's Feathers

Cindy’s Feathers

Cindy reminded us that it was okay to be “consistently inconsistent” and that perfection in quilting is over-rated. Words to live by. The sample below is one of my favorites. I love her nod to asymmetry in this piece! I think it’s a touch modern, don’t you?

Cindy Quilts

Quilting Sample by Cindy Needham

If you ever get a chance to take a class from Cindy, or listen to one of her lectures, I highly recommend it! She also has a couple of machine quilting classes on Craftsy, one of which I reviewed previously on my blog. Now I’m off to doodle… and dream sweet machine quilting dreams….

Craftsy Class Review – Quilting Big Projects on a Small Machine

Over 24,000 students have taken the online Craftsy class, Quilting Big Projects on a Small Machine so I figured I may as well join them and tell you all about it. 🙂

Quilting Big Projects on a Small Machine

Award winning quiltmaker Ann Petersen quilts her designs completely on her home machine (yay!) which is a Bernina (double yay!) and her class includes eight lessons which cover five different methods for quilting a big quilt. Total running time is approximately 4 1/2 hours and I enjoyed watching the class one or two sections at a time over the last week or so.

Reflections of a Rising Sun by Ann Petersen 2008 -40" x 40" Shared with Permission

Reflections of a Rising Sun by Ann Petersen 2008 -40″ x 40″
Shared with Permission

I quilt a lot of big quilts on my home machine and try to share the love of machine quilting with as many people as I can. I think the number one issue domestic machine quilters deal with is how to handle the bulk of the quilt under the arm of the quilt. Ann covers this and more in her fabulous class.

I think my favorite section was when Ann demonstrated how she sandwiches her quilts using basting spray and an iron to heat set the adhesive. I’ve never tried this method of basting before, but after watching this class, I’m definitely willing to give it a try!

Curves Again!-35" x 35" by Ann Petersen Shared with Permission

Curves Again!-35″ x 35″ by Ann Petersen
Shared with Permission

I thought it was very cool that during class, Ann actually demonstrates how to quilt using a real queen-sized quilt. You can see how she moves the large quilt under her little machine, and she shares a few hints on the order of her quilting. (She starts with stitching in the ditch on her borders first to keep them straight – genius!)

I learned a few new tips including why sharp (topstitch) needles are really preferred for machine quilting (rather than ball-point or universal needles). Ann confirmed my experience with polyester batting – it’s really too slippery to use when quilting on a home machine! I also appreciate that she validated another point that I love to teach – where possible, use a blending thread and match your top and bobbin colors to eliminate little “pokies” of thread showing through on either side of the quilt.

In addition to showing how she quilts a full quilt under the machine, Ann also covers several quilt as you go methods which I haven’t tried yet but have always wanted to.  I was very intrigued by Ann’s “split-batting” and “split-quilt” methods to deal with the bulk.

Modern Baby Quilt, 39" x 34" by Ann Petersen Shared with Permission

Modern Baby Quilt, 39″ x 34″ by Ann Petersen
Shared with Permission

Other valuable tutorials she covers include properly setting up your machine space for quilting, choosing the appropriate threads, and thinking about the quilting designs you’ll use before you begin.

Ann includes downloadable extra course materials as part of this class such as her step-by-step tips for spray basting, favorite tools for marking and steps for blocking a quilt.

Sunshine & Shadow - 2012 - 20" x 20" by Ann Petersen Shared with Permisssion

Sunshine & Shadow – 2012 – 20″ x 20″ by Ann Petersen
Shared with Permisssion

The questions that are asked during the class (listed on the sidebar while watching) are also very informative. There was a discussion on the best ways to handle quilting with clear polyester thread and I picked up quite a few tips from reading them.

The pictures above are just a few of Ann’s beautiful quilts, which she allowed me to share with you. To see more of her fabulous work and gain confidence with your machine quilting skills, I encourage you to register for Quilting Big Projects on a Small Machine today. You’ll be glad you did. 🙂

Sewing with Certainty – Yes, You Can Quilt It Yourself!

I love to encourage others to try their hand at machine quilting. I’ve blogged about getting started with free-motion quilting here and some of my favorite FMQ tips here.

The number one tool I like my machine quilting students to acquire costs nothing, and everyone has one of these if they know where to look:

It’s a “can-do” attitude. 🙂

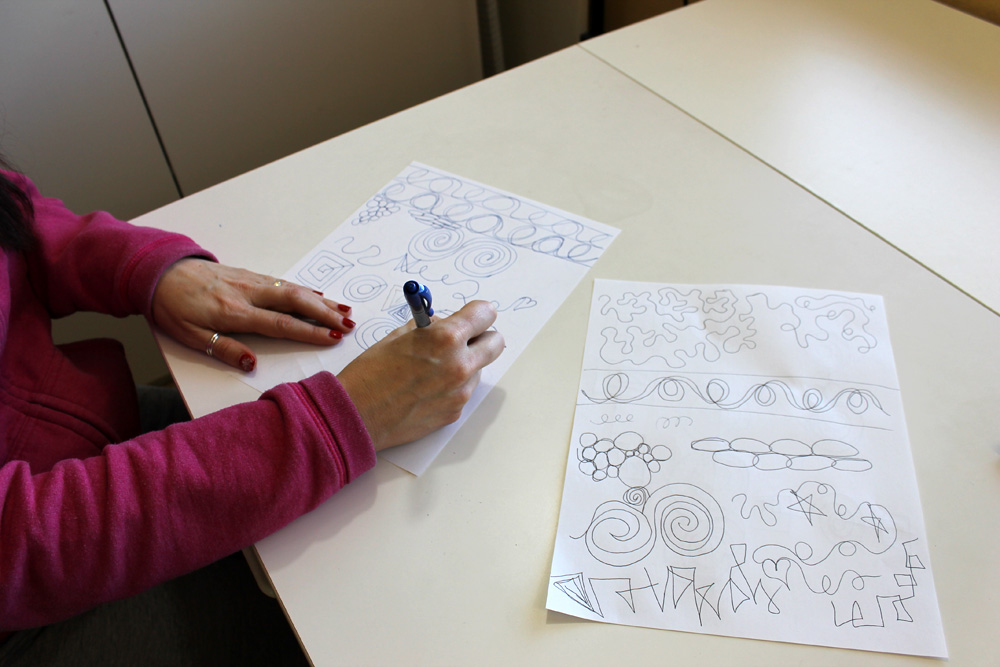
Before you feel like you need to jump in and quilt elegant feathers or spend a ton of time stitching intricately quilted designs, try these tricks instead for effective, quick results:

(1) Don’t underestimate the capabilities of your walking foot.

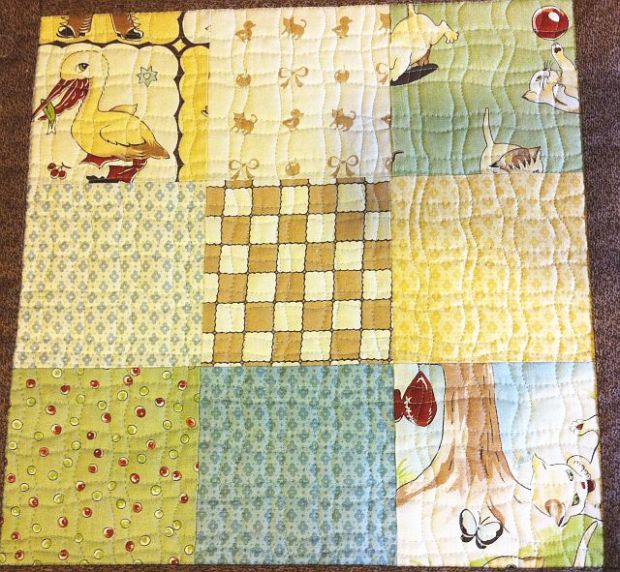
You can add amazing texture to your quilts with simple straight (or not-so straight) lines.  I quilted Baby Bricks by marking a series of straight lines across the diagonal of the quilt and quilting them with a blending cotton thread.

Baby Bricks in Blue

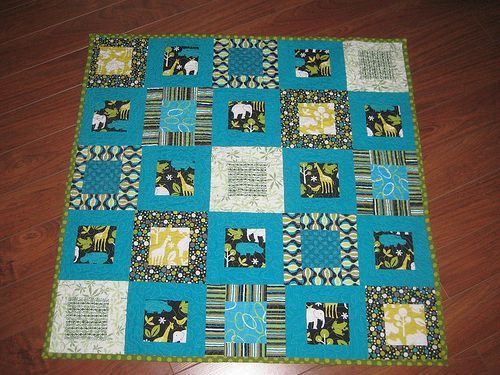
Baby Bricks Quilt Along by Christa Watson

This was an effective way to quilt this quilt and it’s enough to hold the quilt together so that it’s washable and useable. However, I always like to add more quilting so I went back later and quilted many more rows in between the original lines. I didn’t mark any of the extra quilting. I simply used the edge of my walking foot as a guide.

More Quilting

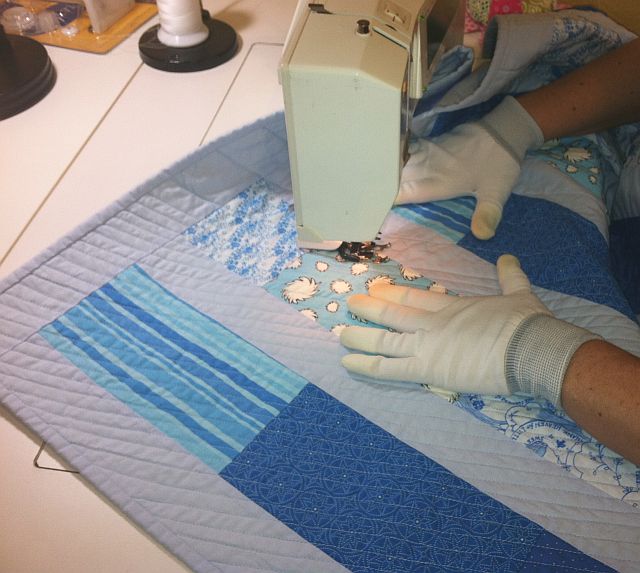
(2) Try stitching “near” the ditch.

Stitching in the ditch is boring and time consuming, so I came up with a jazzier way to quickly quilt the seam lines while adding a little texture. Use a built-in decorative stitch  with your walking foot and quilt across the seam lines so you can see it. Most machines will allow you to change the stitch length or width for a variety of options.

Machine Quilting Wavy StitchesThis is such an easy way to quilt, even a child can do it! My daughter quilted her first quilt when she was just 8 years old. 🙂

(3) Try quilting gentle wavy lines with your free-motion foot and the feed dogs dropped.

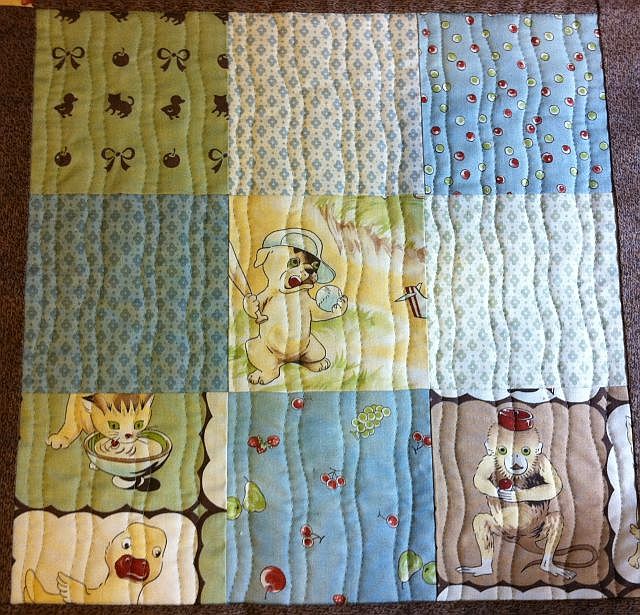
For my Li’l Rascals quilt, I quilted an unmarked grid with a very thin blending thread. I started by quilting roughly parallel wavy lines all going the same way:

wavy_plaid_quiltingI then turned the quilt and quilted perpendicular to my first set of lines to create an “improv” sort of grid. I love quilting textures that don’t have to be evenly spaced!

Wavy Plaid Quilting

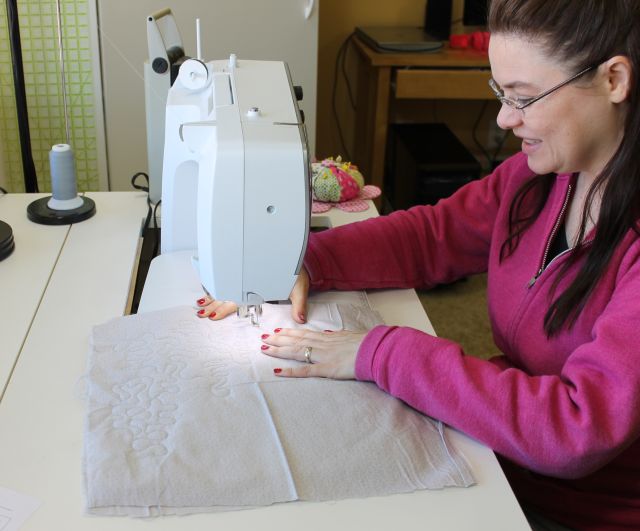
(4) Practice quilting on real quilts.

The best way to learn is by actually quilting on a real quilt. Don’t stress too much about perfect tension or quilting designs. Try out your idea, dive in and do it, and then give the quilt away (to charity, or a family member or loved one). The recipient will love it and they will not notice your mistakes, I promise! It’s much easier to push past your mistakes when the quilt will not be around as a constant reminder of your learning.

(5) Remember: the best machine for quilting is the one you have right now.

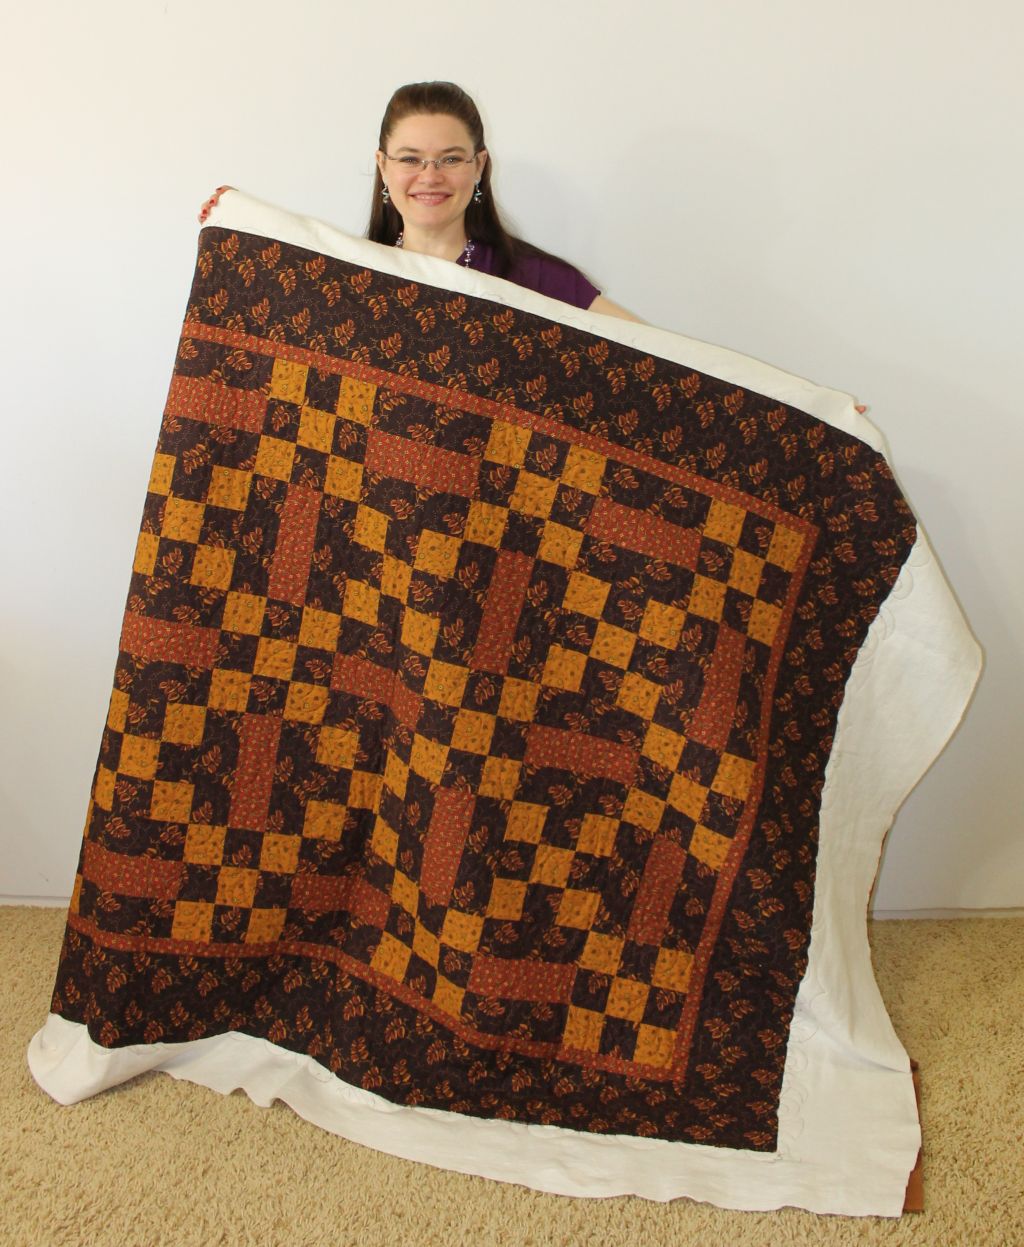
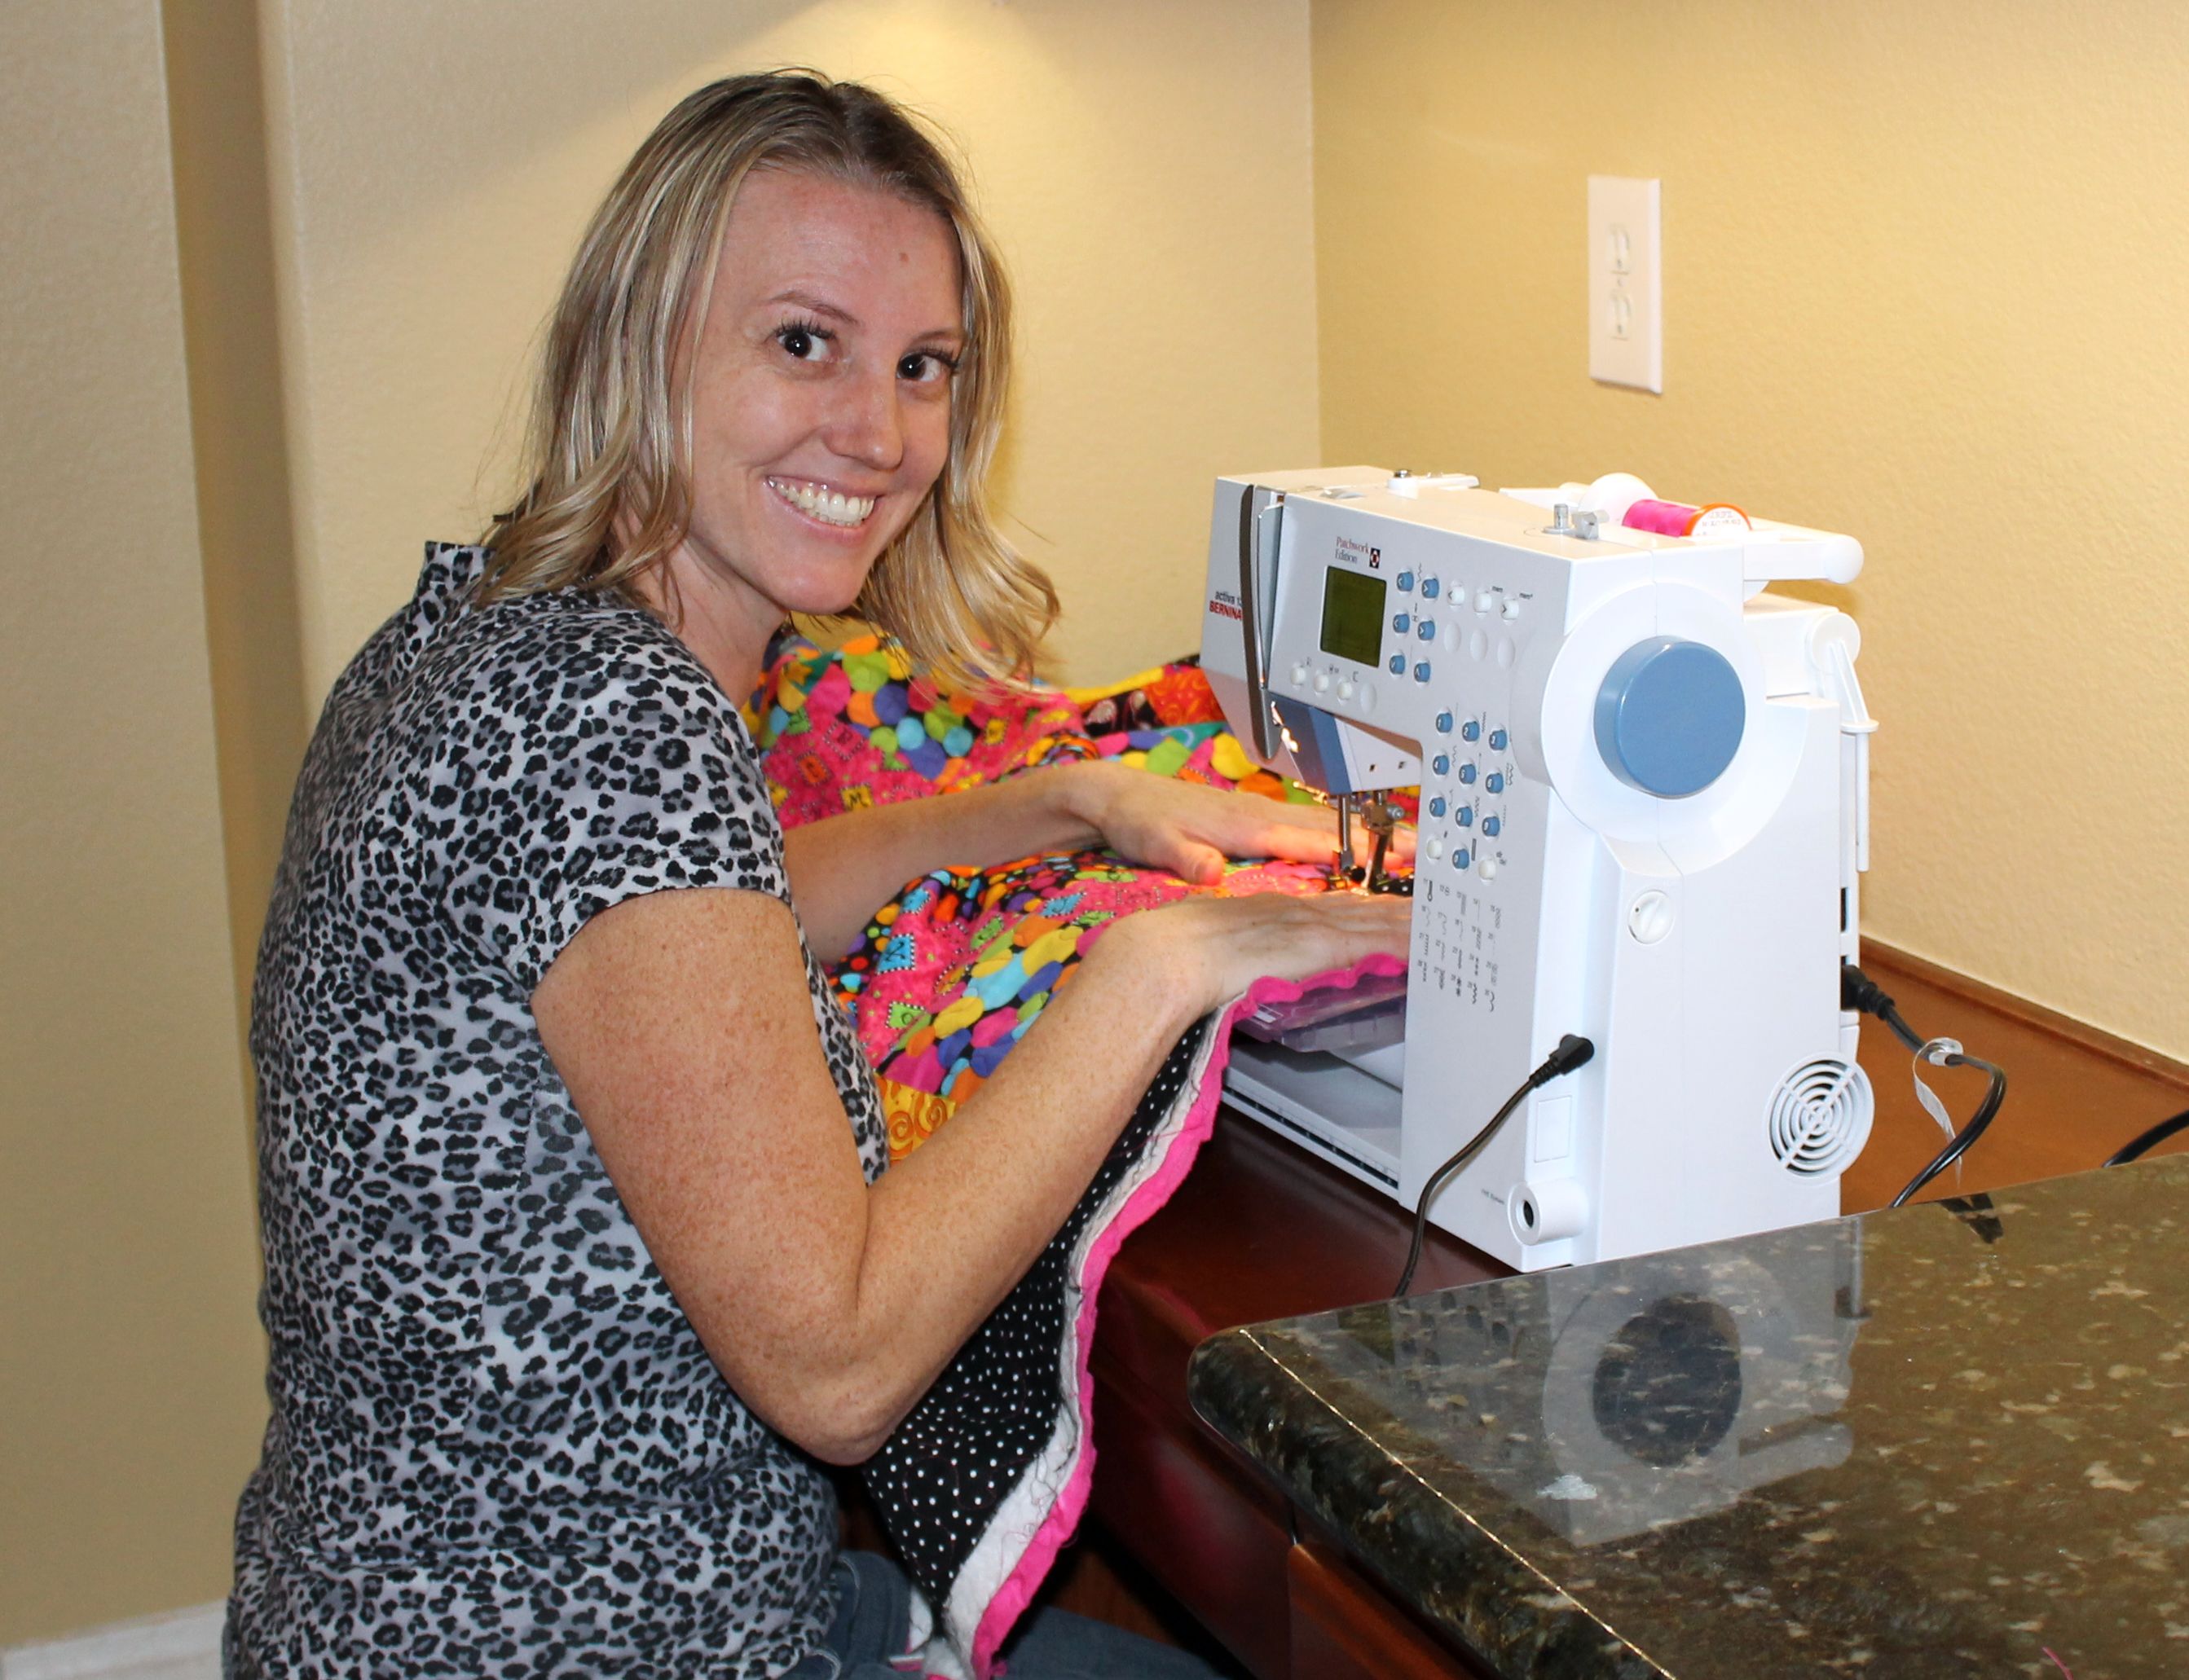
My friend Lacey is stipple-quilting her very first quilt! I gave her two rules when I agreed to teach her how to quilt. #1 – She wasn’t allowed to use cheap fabrics. #2 She had to quilt her own quilt. 🙂

First Quilt

Lacey is working on her very first quilt. Whoo hoo!

Lacey doesn’t have all the fancy-schmancy equipment or a drop-in table with tons of room. She purchased a very basic, used Bernina from a local dealer and she doesn’t even own a walking foot. In fact, when quoted the price for a new walking foot, Lacey’s reply was, “for that amount of money, it should be called a running foot!” 🙂

Quilting

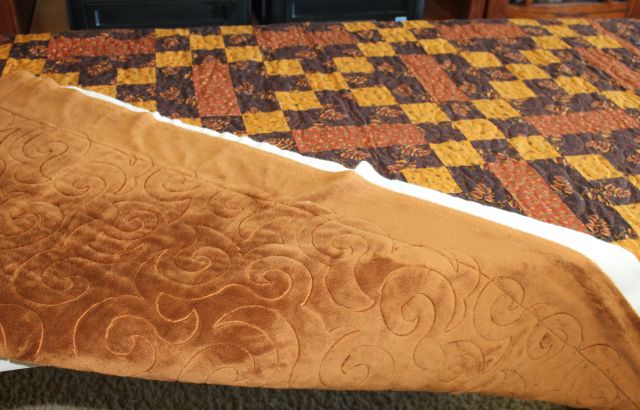
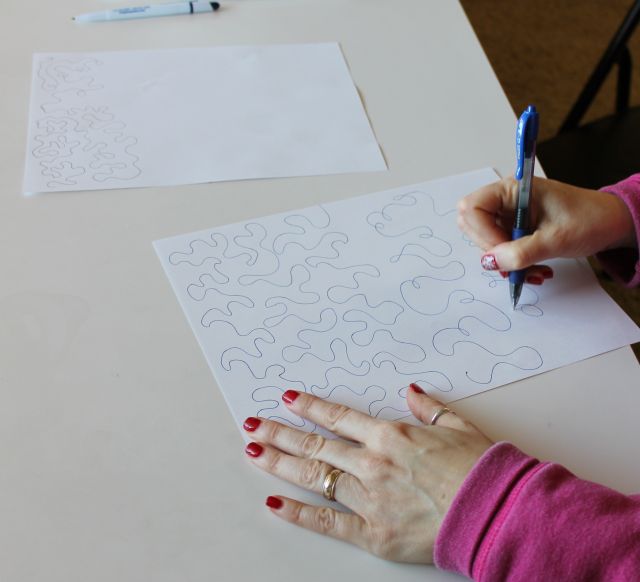
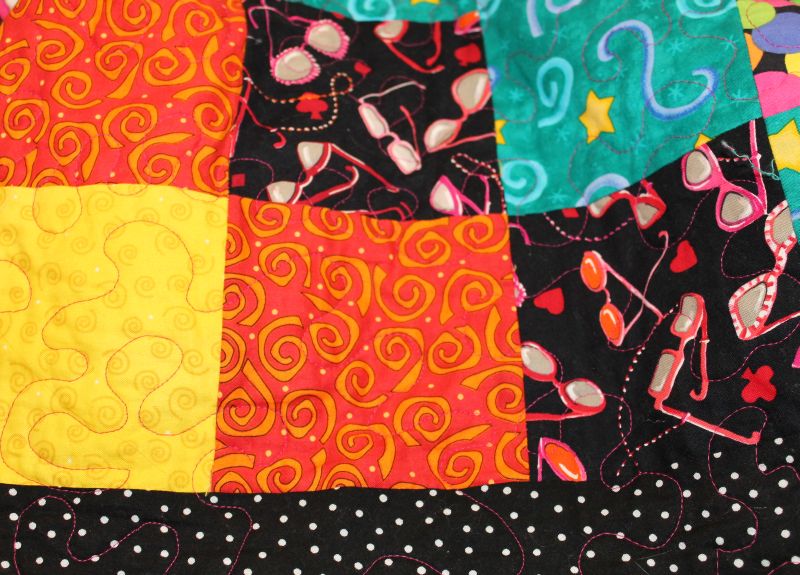
Closeup of large stippling, also called “meandering.”

Lacey practiced on a couple of sample scraps to learn the rhythm of her machine, then she jumped right in and gave it a try on her actual quilt. She’s quilting on a larger scale, also known as meandering. She picked a bright pink thread that goes will all the colorful fabrics in the quilt. Doesn’t it look great so far?

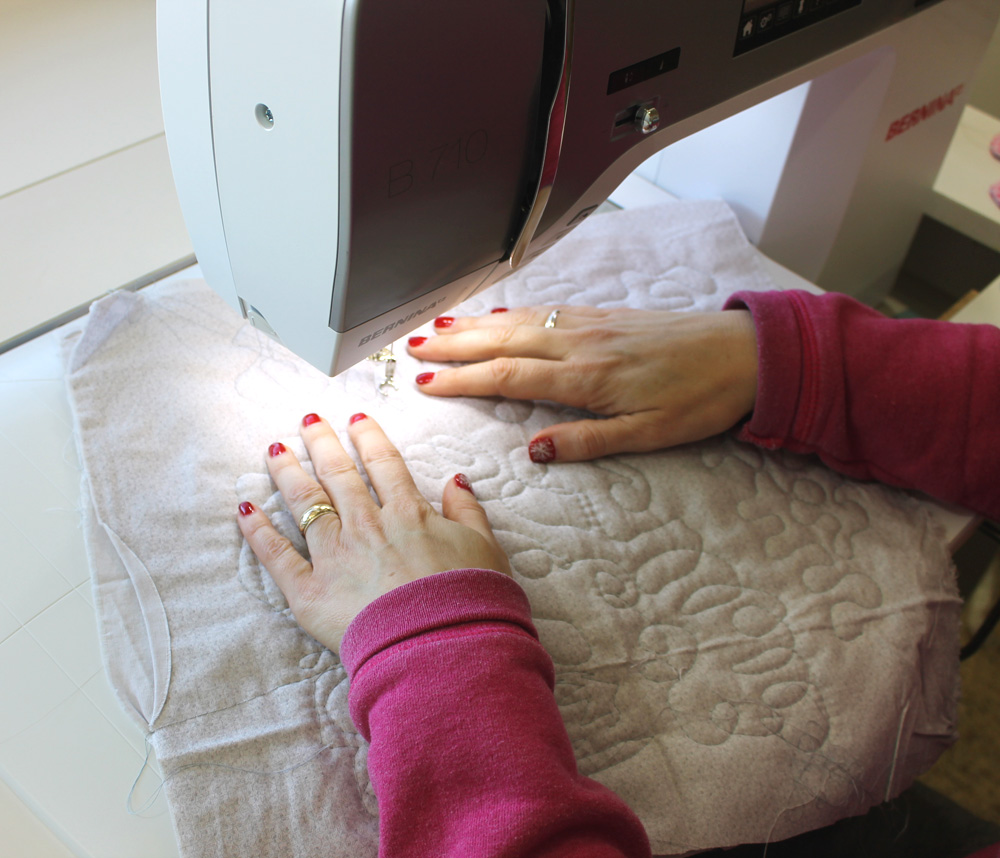
(6) Give yourself permission to make mistakes.

The beauty of machine quilting is in the overall texture that quilting stitches add to the quilt. When you step back from your work a few feet, things look much better than when your nose is two inches away from your stitches. And when in doubt, add more quilting! The best way to hide imperfect stitches is with more imperfect stitches. 🙂

Think about it this way – if you are just beginning your journey into quilt-making, then your quilting skills will be at about the same level as your piecing skills. If you challenge yourself to quilt all of your quilts from the beginning, you can improve both techniques simultaneously, one quilt at a time!

Some of My Favorite Machine Quilting Books

I buy a lot of books about quilting! I love to read them, be inspired by the pictures and fantasize about the quilts I’d make if money and time were no object! From time to time publishers or authors will send me copies of their books to review which I absolutely love to do. On many other occasions, I’ll simply buy and review books just because I want to. 🙂

FMQ BookI have a back-log of books that I’d like to tell you about, but for today I’ll just give a few snippets about several of my favorite machine quilting books. (Each of these will eventually have their own in-depth review, too!) The money I spent on these books has been a fantastic investment,  and my skills have dramatically improved because of them!

First, I’ll start off with Free-Motion Quilting with Angela Walters. This is definitely a must have if you have an affinity for modern quilts and machine quilting.


The thing I like most about this book is that Angela shows you the design process behind the machine quilting with plenty of detailed diagrams to follow along.

Angela Walters StudioIt doesn’t matter that Angela prefers to quilt on a long arm while I choose to use a domestic machine. Many of the design principles are applicable to both.

Angela has written a fantastic follow-up book, In the Studio with Angela Walters which of course I promptly purchased an autographed copy of at QuiltCon. She’s also written a Free-Motion Quilting Workbook which I’m anticipating this spring. I’ll review it as soon as I get my hot little hands on it!


FMQ I recently purchased First Steps to Free Motion Quilting by Christina Cameli. She takes you through the steps of machine quilting with smaller projects to practice your skills.

Though I’m pretty comfortable with FMQ techniques, I still picked up a few tips from her books as well as some new free-motion quilting design ideas.

In fact, my Modern Trees quilt incorporates one of her motifs into my quilting. Can you guess which one?


FMQ GuideNext on my list of favorites is Guide to Machine Quilting by Diane Gaudynski.

Written in 2002, this book is still relevant because Diane walks you through everything you need to know to successfully quilt your home machine.

Diane been one of my quilting muses for quite a number of years and her beautiful, traditional designs will take your breath away!

Harriet Hargrave FMQFinally, Harriet Hargrave’s Heirloom Machine Quilting is an oldie, but a goodie.

I own the 3rd edition (from 1995) and the 4th edition (from 2004). It was from this book that I first learned how to bind my quilts properly.

Although Harriet’s focus is on detailed heirloom quilting, it’s all done on a domestic machine and there are numerous tips on basting and moving the bulk of the quilt under the machine.

Weekly Giveaway Winner!

Speaking of fabulous books, I’m pleased to announce this week’s winner of my weekly giveaway: Barbara W. has won a copy of Simply Retro by Camille Roskelley.

Be sure to check back here on Monday when I will participate in Sew Mama Sew’s huge Giveaway Day as part of my weekly giveaway series #35!

Christa’s Soap Box – Why I am Not a Longarmer

At my guild’s annual quilting retreat I attended this past weekend, I made an important discovery about why I am not a longarmer – my arms are not long enough, LOL!

Long Armers

You need long arms to be a long-armer.

During the retreat, I hung out with many of my BQF’s (Best Quilting Friends), including the amazing talented long-armer and nationally award winning quilter Cory Allender. (That’s quite a few adjective for one sentence). 🙂

She told me how she made the switch from quilting on her domestic machine to a long arm because her hands and fingers kept getting in the way. So I quickly snapped a picture to compare our hand sizes. Holy cow – what a difference!

Size Matters

Hand size really does matter!

I honestly have tried to quilt on a long arm. I’ve taken classes with Angela Walters, tried out machines every time I attended a quilt show, and seriously chatted with Lisa Sipes about getting a long arm when I was in the market for a new machine.

However, no matter how I tried, or what I adjusted, I always felt like I was driving a tank. It also doesn’t help that I’m only 5′ tall.

Machine Quilting

I love my Bernina!

So now that I’m pretty comfortable machine quilting on my Bernina, I am happy to say that I’m proud of being a domestic machine quilter. After all, it doesn’t really matter how you (or other people) quilt your quilts, so long as you have fun doing it!

One more thing: I recently discovered a fabulous blog by Amy Johnson of Free-Motion Quilting Adventures. She actually machine quilts on her domestic machine using long-arm rulers. How fantastic – I must find out more and try that out for myself, soon!

FMQ

Free Motion Curved Crosshatch Quilting with Long Arm Ruler
Image Courtesy of Amy K. Johnson

Â