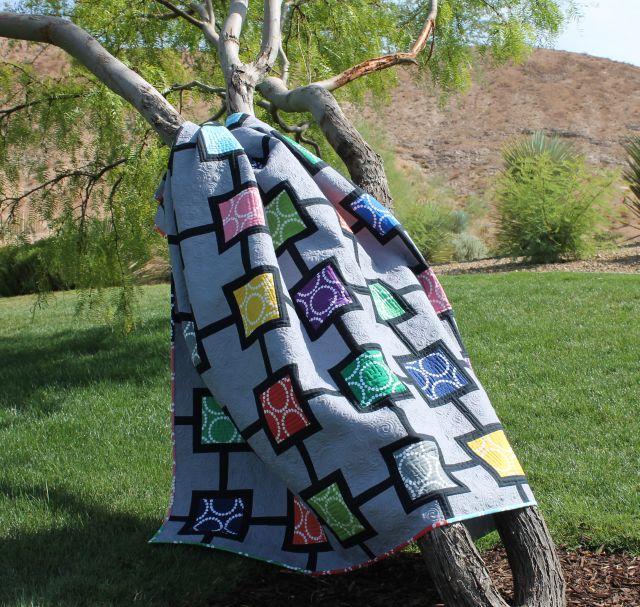
Hugs ‘N Kisses 48″ x 64″
Welcome to part 3 of my Hugs ‘n Kisses Quilt Along!
This week we will cut our strips into pieces and sew the bow tie units that make up the hugs and kisses blocks. Today’s post is pretty lengthy but I want to remind you to work at your own pace. Making this quilt is not a race; rather it is about enjoying the process.
I timed each step as I completed it to give you an idea of how long it will take to sew (total of 9 hours). Rather than try to hurry and finish it all at once, I completed 1-2 steps per day so I never felt rushed.
Before cutting into segments, I starched my strips.
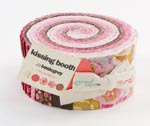
I also replaced a few jelly roll strips with a couple from my stash. (That’s because I borrowed them to make a previous Valentine’s Table Runner last month, LOL!!)

Kissing Booth Jelly Roll Plus Stash Strips
Optional Step 1 – Starching the Strips (1 Hour, 15 Minutes)
I sprayed a light mist on the backside, let it soak in, then gently pressed from the front. Take care not to stretch your skinny strips out of alignment. It’s not mandatory, but I do get better results by starching. You can read my previous post about using starch here.


If you decide to starch your background strips, take care that you don’t scorch them. I would suggest testing on a piece of white fabric first to make sure you don’t get any yellowing or flaking of the starch. Here’s a hint – cut some of your starched strips into units while you are waiting for other starched strips to dry in between pressing.
If you select any one of the layouts from last week’s post you can cut all of your fabrics according to the chart below. But feel free to modify your design further if it pleases you.
Step 2 – Cutting the Print Strips into Segments (2 Hours)
From each of 35 print jelly roll strips (2 .5″ x 42″), cut:
- 8 – 2.5″ squares (2o inches so far)
- 8 – 1.5″ squares (32 inches so far)
- 1 – 2.5″ x 4.5″ brick (37 inches total)

Cut Squares
Be sure to cut off the selvedges first and stack up to 4 layers of strips for cutting efficiency. Just remember – measure twice, cut once! I found it easiest to cut the 2.5″ squares, then the brick, then trim the rest of the strip down to 1.5″ before cutting the smaller squares.
You should have one stack of squares (8 large, 8 small) for every complete X or O block.
From 3 print jelly roll strips, cut:
- a total of 19 more 2.5″ x 4.5″ bricks

Border Brick Units
You should have a total of 54 bricks that measure 2.5″ x 4.5″. Stack all of your bricks together and set aside for now. Keep your squares above sorted by color.
Step 3 – Cutting the Solid Background Strips (30 Minutes)
From 18 solid background strips (2 .5″ x 42″):
- Cut a total of 280 – 2.5″ squares. Yes, this is a lot of background squares.
- You need 8 squares per large block and will be making 35 blocks total.
- You can get 16 – 2.5″ squares per strip.

Cut 4 stacks of squares per background strip.

280 Background Squares
Here’s a hint: fold one of your background strips into 4 layers so that it is at least 10 inches wide.
Cut one background strip at a time into 4 stacks of 4 squares each.
Continue cutting until you have a total of 280 squares. You will use a total 17.5 strips exactly for the squares.
Set aside 6 extra full strips for borders = 24 background strips total.
Step 4 – Sew and Trim the Bow Tie Corners (1 Hour, 15 Minutes)
- Layer one smaller print square in the corner of one larger background square.
- Sew diagonally from corner to corner on the print square.
- Trim off the corner, leaving 1/4″ seam allowance.
- Press the print corner down to complete the square.
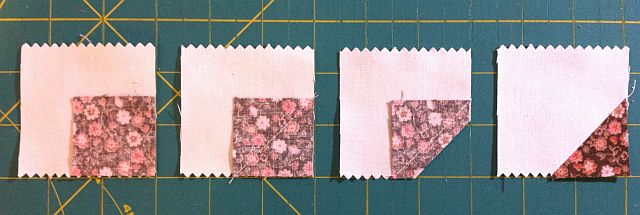
Bow Tie Corners

Chain Piecing
Practice making one bow tie corner unit so you get the hang of it.
I didn’t worry about marking my sewing line since it was such a small square.
Assembly line sew all of your squares until you have a total of 280 pieced corners (8 of each fabric).
This is also called chain piecing. Sew all of the squares before cutting in between each one.
Step 5 – Press All the Pieced Squares (45 Minutes)
Taking care not to scorch your fabrics, press all 280 pieced squares with the fabric towards the dark side. At this point, they can all face the same direction.

Bow Tie Corners
Step 6 – Sewing the Bow Tie Blocks (3 Hours, 15 Minutes)
It takes 2 print squares and two pieced background squares per bow tie unit. For efficiency, you can turn the pieces all the same way and join them together assembly line style. Be sure to sew one test unit first so you know you are putting it together correctly.

Bow Tie Squares

Bow Tie Piecing
Sew two half units together to complete one bow tie unit.

Bow Tie Units
Pressing tips: I like to “finger” press each half of the bow tie unit with a wooden seam roller. Then, after sewing the halves to complete the bow tie, I will press open with an iron.

Seam Roller Press

Press Seams Open
Sew a total of 140 bow tie units, 4 of each color. You may have 8 bow ties of some colors if you have duplicate strips. Next week we will sew them into blocks.
If you have any questions about this week’s homework, please be sure to join my flickr discussion or email me directly at christa@christaquilts.com.
Quilt Along Schedule – Links will go to each active post when published.