Bonus Quilt Along – Make My Charming Chevrons Pattern with Alyssa from Penguin and Fish

I know that many of you are eagerly awaiting the start of my Squiggles QAL which officially launches next Monday. But in the meantime, you can quilt along either virtually or in real time with my friend Alyssa Thomas of Penguin and Fish. All you need is a copy of my Charming Chevrons pattern and your favorite charm packs (5″ squares).

Each weekday night from now until she finishes, Alyssa is posting a live “relax and craft” video stream on Facebook. Then she’s uploading the recordings to YouTube so anyone can view them later. So you can make the quilt along with her, or just hang out and watch her sew! If you do choose to sew along, you can share your progress in my facebook group or hers. (Scroll to the end for all the pertinent links you’ll need.)

Click the image above to watch the very first video with Alyssa.
She’ll be broadcasting her progress each weeknight until she’s finished the quilt!

I love Charming Chevrons so much that I’ve already made it three times, and I recolored it a 4th time using my Modern Marks fabric. Check these out for inspiration, and notice how all 4 versions feature the same block, but rotated in a slightly different position. All 4 layouts are included in the pattern.

Charming Chevrons at QuiltCon 2013

The original Charming Chevrons, shown above, made its debut at QuiltCon in 2013. It was my first time ever entering a national show. It went on to win viewer’s choice in the Blogger’s Quilt Festival in 2013 so it was a banner year!!

Colorful chevrons

A larger remake, Colorful Chevrons with a navy blue background, was my first magazine submission and it graced the cover of Quilty in 2013. It went on to win 3rd place in the first ever modern category at AQS Quilt Week in Paducah, a ribbon at my local guild’s show, and founder’s choice at MQX.

Feathered Chevrons with Kona Solids

Photography credit: Kitty Wilkin

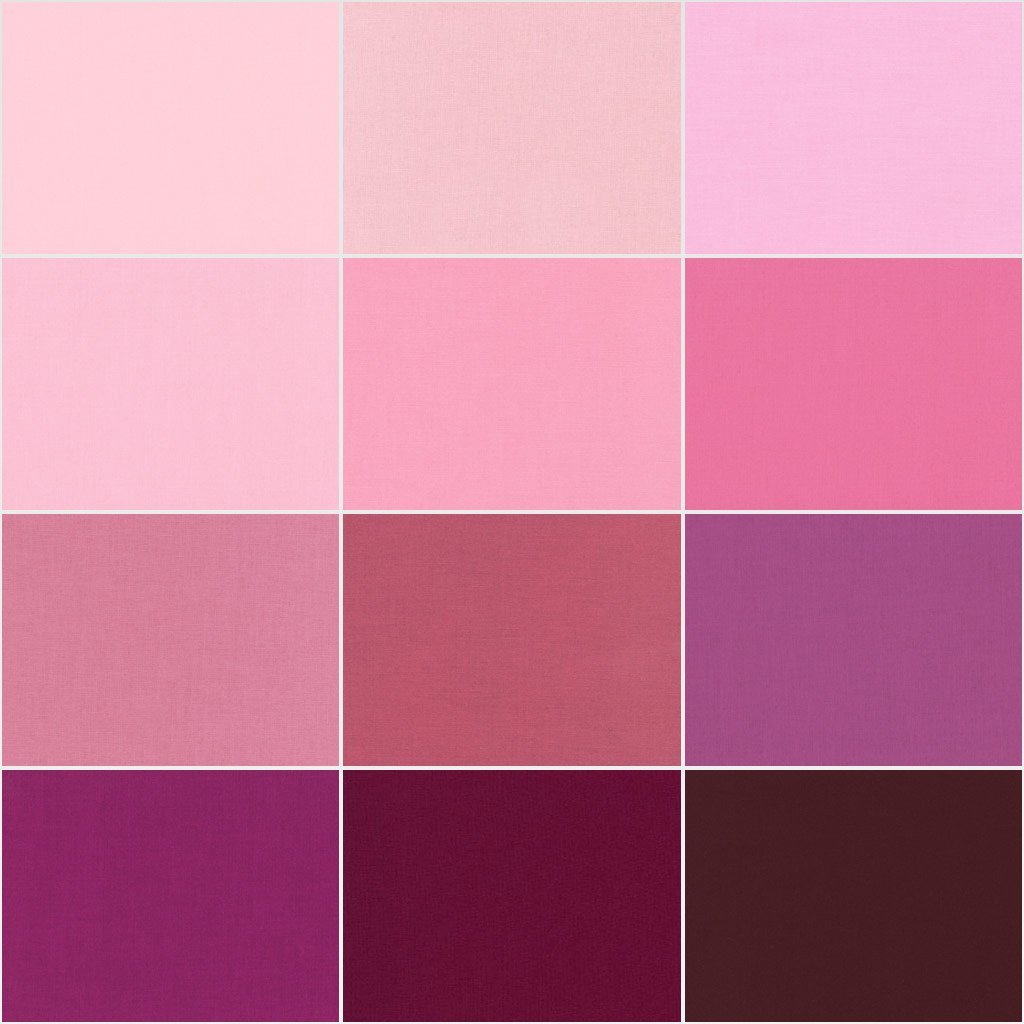
When Robert Kaufman invited me to curate a bundle of solid fabrics for them, I decided to make a third version using my Kona Designer palette in bright citrus hues with a dark gray background. I call this version Feathered Chevrons and it was included as part of the Quilter’s Planner pattern bundle for 2017. The layout above is included in the Charming Chevrons pattern.

Charming Chevrons with Modern Marks

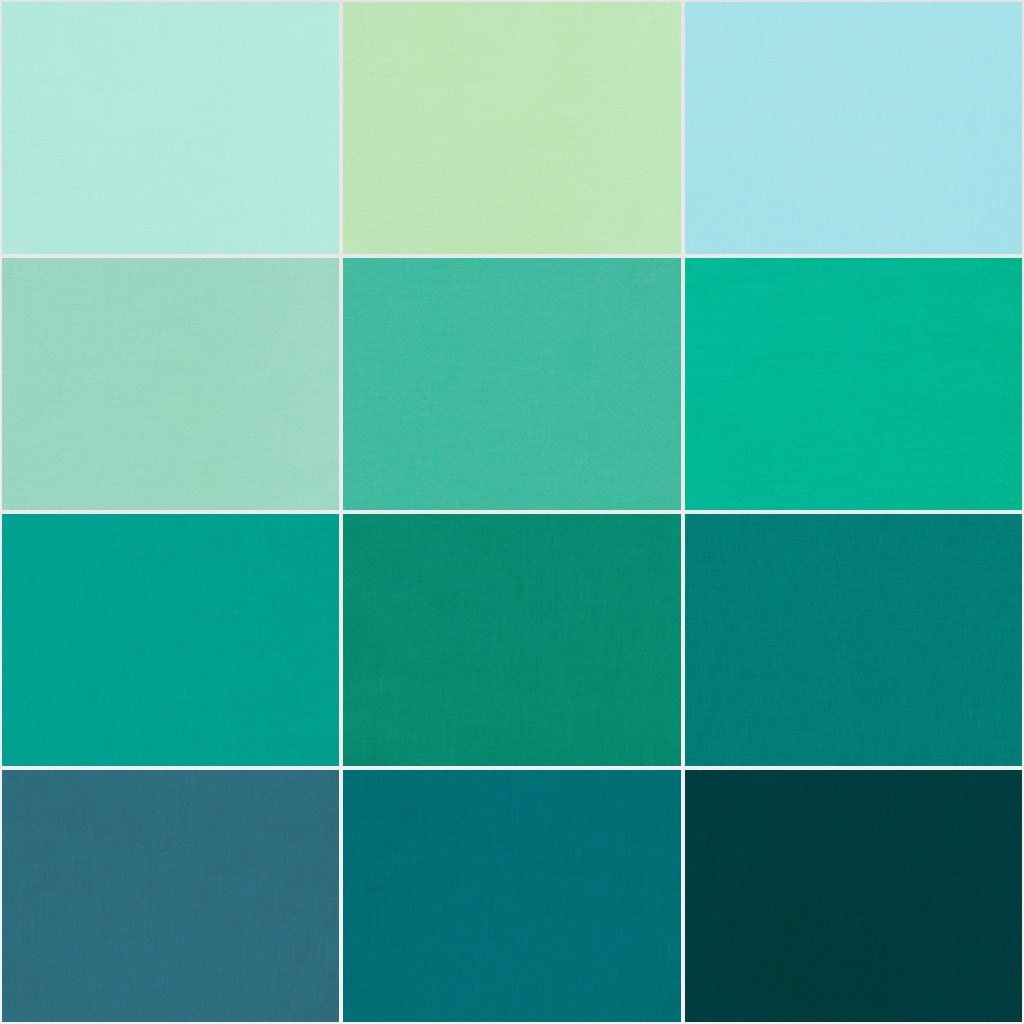
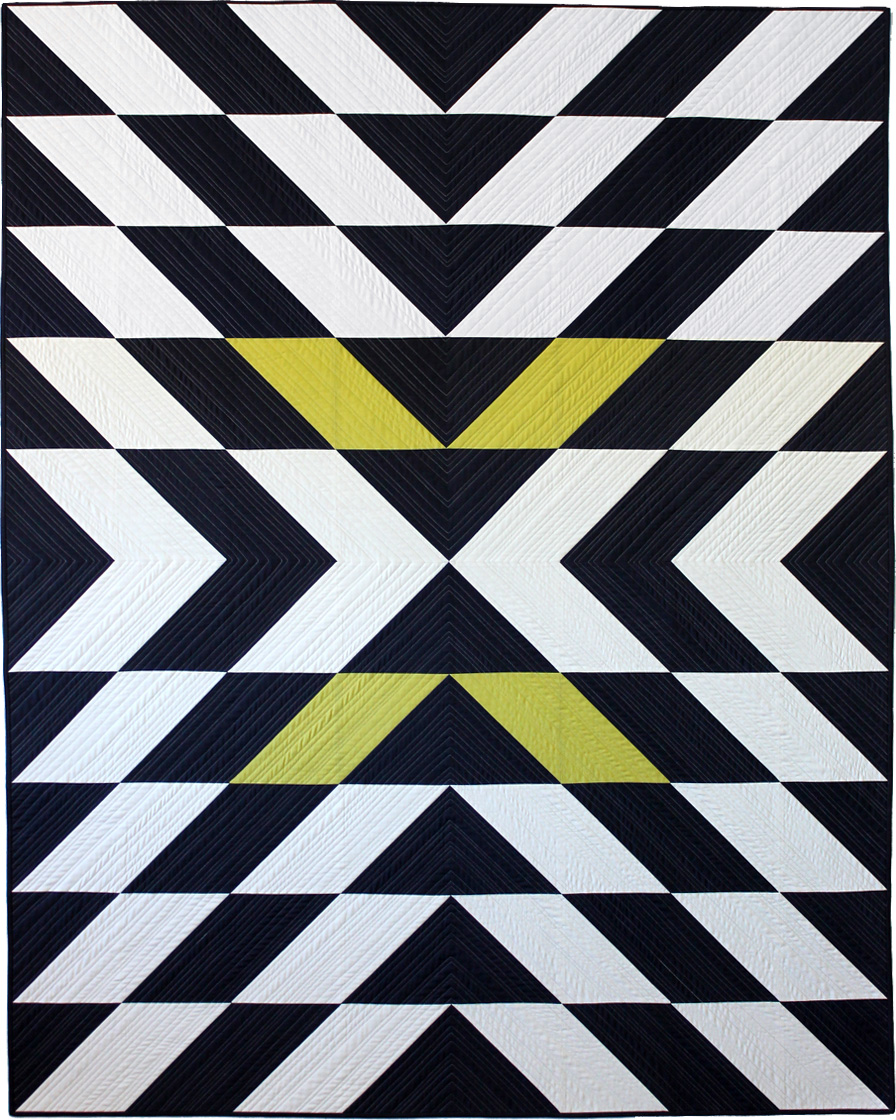
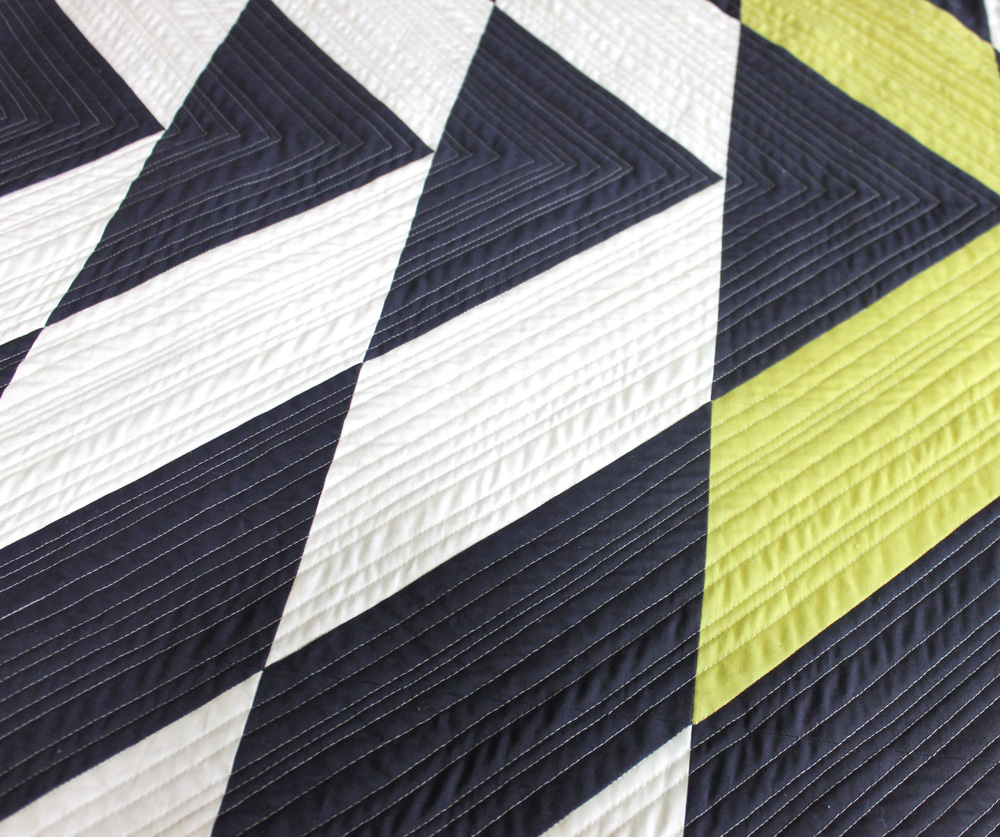
Finally, after making 3 solid versions, I wanted to see what it would look recolored in EQ8 using my Modern Marks collection from Benartex/Contempo. I colored it using the “Double Chevrons” layout that’s also included in the pattern.

Charming Chevrons includes 4 sizes and these are the fabric requirements & # of charm packs needed to make each size:

Links to all the Fun:

Purchase the Print version of Charming Chevrons here.
Purchase the PDF version of Charming Chevrons here.
Click here for the first YouTube video from Alyssa.
Click here to like and follow her page where she’ll post live videos.
Click here to share your progress in my Facebook Group: Christa Quilts.
Click here to share in Alyssa’s group: Penguin & Fish Crafters.
Get the Modern Marks Charm packs here.

Fabric Friday (New Kona Solids) and a Thank You

Before I dive into some new fabrics, I want to give you all a big thanks and a huge hug for supporting our online shop. I’ve been running it now for almost 12 years and Jason’s been with me full-time for the last 8 years. Our switch to selling only precuts and thread (and now my own patterns) was an exciting but scary change. However, our niche focus has given me much more time to design, write, and teach, which I love doing. So big smooches to all of you!

 New arrivals – Kona Solids

Robert Kaufman has recently organized all 303 of their Kona Cotton Solids into a plethora of new color ways and we have them all (at least… I think we do!) The color assortments are available as charm squares (42 – 5″ squares), ten squares (42 – 10″ squares), and roll ups (40 – 2 1/2″ strips). There are at least 2 dozen different groupings, not to mention the single color-precuts! Check out a few of them below:

Cherry wood

cherrywood

Gray Area

gray area

Lush Lagoon

lush lagoon

Mustard Seed

mustard seed

Powder Room

powder room

Yucca Tree

yucca tree

These are a few of my favorite colors – what are yours?

Click here to view all Kona Solid Charm Squares

Click here to view all Kona Solid Ten Squares

Click here to view all Kona Solid Roll Ups

Christa’s Giveaway New Kona Cotton Solid Bundle

How are you all coming on your Abacus Quilt Along? The best part of any group project is seeing how everyone interprets the pattern in their own colors and fabrics. In fact, I have an alternate colorway to share with you today. I call this colorway “Parfait,” using some of the new 2014 Kona Cotton colors with a white background. Isn’t it cheerful?

Abacus - New Kona ColorsAlternate Kona colorway – designed by Christa Watson in EQ7

Thanks to my generous friends at Robert Kaufman, one of you will get to win this lovely bundle! It contains 1 fat quarter of the following colors shown in my sketch above: Heliotrope, Honeysuckle, Grellow, Limelight, Creamsicle, Niagra, Titanium and Nectarine. Plus enough white for the background and binding. Aren’t those fun colors?

Kona New ColorsFabric Bundle of New Colors up for Grabs

Here’s another sketch of what the quilt would look like with the colors in a different arrangement. There’s enough fabric that you can play around and put them in any order you like! Isn’t half the fun of any project picking the fabric placement?

Abacus - Kona's Pick White GridHere’s How to Enter

Kona Cotton solids are definitely one of my favorite fabric to work with. To stock up on some of your favorites, checkout my huge selection of Kona Solid precuts! (And yes, I should have the new color bundles in stock soon!)


Kaufman Solids Bundle Winner and a Few Tidbits

Thanks for all your sweet comments during the Kaufman Bundle giveaway. It’s great to know that so many of you are still making quilts from my Quilt Alongs. I love it!

Abacus starts tomorrow and I can already tell it’s going to be fun to see how everyone interprets it in their choice of fabrics and colors. And now, on to the winner!

20140918_kona_giveaway

Congratulations to Abby L. who is my random winner for the fabulous Kona Solids bundle!! I will have another giveaway later this week, so stay tuned. 🙂

See you tomorrow for Abacus!! (The pic below shows the EQ7 drawing and then my sewn quilt top. )

20140918_abacus

P.S. In other news, I got an email today letting me know that Craftsy’s super big fall sale has been extended one more day. So check it out if you haven’t already.

craftsy-logo

Giveaway Featuring Kona Solids and Abacus Quilt Along Schedule

Thanks to my fabulous friends at Robert Kaufman for donating this lovely bundle of Kona Solids for one of you to win!

20140918_kona_giveaway

This is to get you guys jazzed about my upcoming Quilt Along which starts next week!

Included in the bundle are 8 fat quarters of the exact same colors I am using in my version of Abacus. They are: Navy, Turquoise, Baby Blue, Jade Green, Berry, Cerise, Petunia and Pomegranate. Also included is a nice sized chunk of Medium Grey which is what I picked for my background and binding.

Abacus Full Res

Now, you don’t have to quilt along to enter and win, and what you make from these fabrics is entirely up to you! The contest is open to everyone through next Tuesday at noon.

To enter, just leave a comment below telling me which is your favorite quilt along that I’ve offered (or one you’d love for me to do in the future).

Click here to see all of my quilt alongs.

I know we don’t all have time to do every quilt along, but isn’t it fun to dream, or follow along virtually?

Abacus Quilt Along Schedule, Posted Each Wednesday:

  • Week 1 – Fusing & Cutting (September 24)
  • Week 2 – Machine Applique (October 1)
  • Week 3 – Sewing the Top (October 8)
  • Week 4 – Backing and Basting (October 15)
  • Week 5 – Machine Quilting (October 22)
  • Week 6 – Binding to Finish (October 29)
  • Parade of Quilts – November 12

New this year – a parade of quilts! If you finish your quilt by November 10th, email me a picture and I’ll feature it on my blog on November 12th!

Click here for the Abacus Quilt Along supply list.

Start gathering (or winning) your fabrics and I’ll see you next week!

EQP.S. I’ve also made Abacus available as a free EQ7 download. Click here to import it into your Electric Quilt software.

P.P.S. For a bonus entry, please share my Quilt Along logo on your blog, instagram, flickr, facebook, or social media of choice. #abacusqal

<div align="center"><a href="http://christasquiltalong.com" title="Christa's Quilt Along" target="_blank"><img src="https://christaquilts.files.wordpress.com/2013/03/christas-quilt-along-175-2.png" alt="Christa's Quilt Along" style="border:none;" /></a></div>

Modern X – A Free Pattern for Modern Quilt Guild Members

I’m pleased to share with you my latest quilt finish – Modern X.

I made it for the Modern Quilt Guild as a free pattern for their members. One of the benefits of being a MQG member is getting a free pattern with each of their monthly newsletters in 2014. I got selected to be “Miss March.”

modern_x_cquilts_mqgModern X – designed, pieced and quilted by Christa Watson – 56″x 70″

All of the quilts of the month will be shown at a special exhibit at QuiltCon next year, so it will be exciting to see them all presented in one place.

If you are not a member of the Modern Quilt Guild (why not?) I also have this pattern available for sale in my Craftsy Pattern Store. It runs 7 pages in length and also includes diagrams on how to machine quilt it, if you are so inclined.

I used Kona Cotton Solid fabrics for the quilt and it is pieced and quilted using Aurifil threads in 50 wt. cotton. Here’s a detailed shot of some of the quilting:

aurifil_quiltingBe sure to come back later in the week as I’ll share a couple of basting and binding tutorials I put together for this quilt. 🙂

Book Review – Color Essentials by Amanda Murphy

I’m so excited I get to share my review of a fantastic book with you today. It’s called Color Essentials by Amanda Murphy (author of Modern Holiday and recently featured on Quilty’s meet a modern quilter.)

Color Essentials

Color Essentials by Amanda Murphy

This is a book after my own heart. It features 12 crisp and vibrant quilts (3 smaller projects and 9 full-size quilts) made from precut solids. Need I say more? Don’t worry – I will!

Color Essentials starts off with a fantastic presentation on color theory using Amanda’s cleverly designed “Kona Color Wheel”. All of the quilts in this book were made entirely from Kona Solid precuts in three gorgeous coloways – Sunrise, Sunset and Bright. In fact, Amanda partnered with Robert Kaufman to create the first two palettes to go along with the book. How fantastic!

Kona Sunrise

Kona Sunrise

Kona Sunset

Kona Sunset


Amanda divides the colors up into warm and cool hues and uses actual Kona Solid fabric swatches to illustrate examples of color play interactions. She offers suggestions on how to pick the colors for your projects and includes several pages of Kona color swatch charts for you to use.

If you liked using solid fabrics before (like me), you will fall in love with them after viewing these gorgeous quilts. Amanda includes a wide range of skill levels and techniques in her book including strip piecing, machine applique, handwork, and non-traditional finishes such as prairie points and zig-zag bindings.

Color Essentials

Color Essentials Quilts by Amanda Murphy

My favorite part of the book is where she shows 3-4 alternate colorway possibilities for each quilt! It really gets your creative juices flowing. There is plenty of machine quilting eye-candy for you to drool over and I was so proud to read that she even quilted a few of them herself!

Illusion Pillow

Illusion Pillow, Pieced and Quilted by Amanda Murphy

Throughout the book, Amanda encourages you to move outside your comfort zone and experiment with new color combinations that you may not have tried before. I think this is a wonderful approach to quilt-making which can yield beautiful results.

Color Essentials is published by Stashbooks (C&T) and it consists of a total of 143 gloriously illustrated pages with full-color diagrams throughout. You can purchase it on Amazon or at your favorite Quilt Shop!

Skillbuilder BOM – January Blocks Quilted

I am excited to share a WIP/block finish with you today! I am participating in Pile O’Fabric’s Skillbuilder Block of the Month series where we sew and quilt two blocks a month using quilt-as-you go techniques. I’ve never made a quilt like this before, and it’s “sew” fun!

Here are my finished blocks from January, called Magnum and Sound Wave. Click each picture to enlarge so that you can see closeups of the quilting detail.

Magnum, Quilted

Soundwave, Quilted


I chose fat quarters of Kona Cotton Solids in shades of red, orange and yellow, with a complement of turquoise thrown in, just for fun. I used cotton threads (Aurifil and Superior) to match all the colors of the fabrics with thin grey polyester thread for the background.

Colorful Thread

I stitched in the ditch through all of the seams first to stabilize them, then filled in each color with a fun design, changing thread colors as I went. I used a quarter to mark the circles.

Quilting

Add a Quarter


Here are the backs of the blocks. I love how the thread colors stand out!

Soundwave BackMagnum Back


Now I’m off to catch up on February’s Blocks!

Sew and Tell – Shopping My Stash

I have a fabric pull that I’m excited to share with you and several “a-ha!” moments. First take a look at these lovely pretties:

Warm Fabric StashI originally pulled these fat quarters from the shelves of my store for the  Skillbuilder BOM I’m doing. I love the analagous color scheme of red, orange and yellow. It’s so warm and inviting. There are a few Kona Solids in there, some Kaffe Fassett and Amy Butler pieces, a few older Lily Ashbury geometrics, some Laurel Burch Basics that blend surprisingly well, and of course a few Pearl Bracelets.

Black and GreyThen I started looking through my stash of backgrounds to decide on black or grey.

My mini “a-ha” moment came when I thought – why not all of them?

I could make each set of blocks with a different shade of black or grey and maybe even grab some shades I don’t have yet.

Warm SolidsThis led to another “a-ha” moment. I really liked the last completely solid quilt I made, so why not do another?

So I set aside my bundle of colorful print fabrics above and instead went with all solids in red, orange and yellow with a hint of turquoise.

This picture isn’t really great but the colors really do speak to me for this specific project.

And my final “a-ha” moment of the week: I gave myself permission to take the print fabric stack above out of my store’s inventory and keep them for myself. After all, they were my original inspiration, so that means means they belong in my stash, patiently waiting for the perfect project to use them in. 🙂

Christa’s Quilt Along 3.5 – Charming Chevrons Quilt Top

This week I assembled my Charming Chevrons quilt top made from just four charm packs. Be sure to scroll to the end of this post for links to all of the previous weeks’ tutorials. For your convenience, quilt kits are available for a limited time in 3 different colorways.

It took me a total of 3 hours to follow the steps below and finish sewing my quilt top. (I think it took longer than that just to edit the pictures and write this blog post!)

Charming Chevrons Quilt TopAnd yes, this is my actual completed quilt top, not a computer generated picture.

Step 1 – Sewing the Block Pairs (45 Minutes)

Lay out your chevron blocks in a pleasing arrangement on your design wall or other large flat surface. You will have 7 rows with 6 blocks per row for a total of 42 blocks.

Sew each row into pairs of 2 blocks each. Each row will have 3 pairs of sewn blocks. Now you have 21 w’s instead of  42 v’s! (Yes, I’m missing a row in the picture because it wouldn’t fit on my design wall. You should still have 7 rows.)

Chevron Block Pairs

Step 2 – Sewing the Pairs into Rows (1 Hour)

Now you can sew 2 pairs of chevron blocks together in each row. You can see a “hole” in my quilt where I’ve flipped the second pair onto the first along the right side edges. I left the third pair of each row on the design wall so I can remember where each one goes as I sew.

Sewing the RowsNow that you have 2/3 of each row finished, you can add the last pair to the end of each row. Be sure to pin generously and flip over any seams if needed so that your seams lie flat.

Partial Rows

PPress The Seamsress the seams so that they are all going the same direction in each row.

Be sure that your seams for rows 1, 3, 5 and 7 are all going one way and that rows 2, 4, and 6 are pressed in the opposite direction.

You could also press them open if you prefer. This took me a little while but it was worth it.

Step 3 – Join The Rows to Complete The Quilt Top (1 Hour, 15 Minutes)

Join 2 rows together at a time, pinning at the intersections. You will then have 3 pairs of sewn rows with one row left over. Press each long seam open.

Joining The RowsNow join these last 3 seams to complete the quilt top and give it a final pressing. It’s fun to see how the actual top turned out compared to my original computerized drawing. I like the chevrons with the tips pointing down better. But you can decide either way!

Computer Design

Computer Designed Version

Finished Quilt Top

Actual Quilt Top


I’m very pleased with how my top turned out – now I can’t wait to see yours! Please email me pictures of your work in progress and I’ll be glad to share them here on my blog.

Sewing Schedule (All links will be active once each step has been completed.)