With quilt show season upon us, I thought I would share my favorite method for making a 4″ wide hanging sleeve. This is the quilt show standard, so that a pole can easily slide through the back. I made this sleeve for my Modern Logs quilt which will be hanging in the modern quilt category at Road to California later this month.
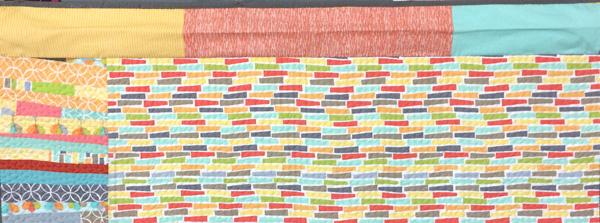 My Modern Logs backing was scrappy, so I made the hanging sleeve to match!
Materials Needed:
- 8 1/2″ strip of fabric by the width of your quilt
- Pins for hemming
- Cotton thread to match your fabric
- Hand sewing needle
- Washable fabric glue (optional)
Step 1:
Measure the width of your quilt and cut a strip of fabric 8 1/2″ wide by 1 inch less than the width. Piece together additional strips if needed, for quilts wider than 42″. For example, my quilt measures 48″ wide so I will cut scrappy fabric strips, seam them together, and trim the strip to be 47″ long.
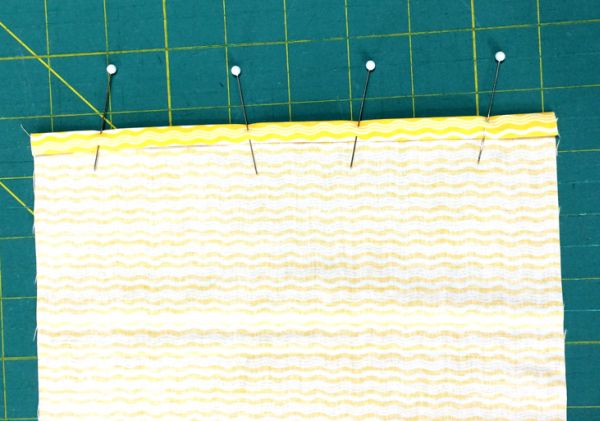 Pin the hem in place – use a seam gauge if necessary to keep it even.
Step 2:
Hem both short sides by folding them over 1/4″ twice. You will be folding them over to the back side of the strip. Use a seam gauge if necessary to get consistent width folds. Pin to hold the folds and secure with stitching on both ends.
 Use matching cotton thread so your seams will blend.
Step 3:
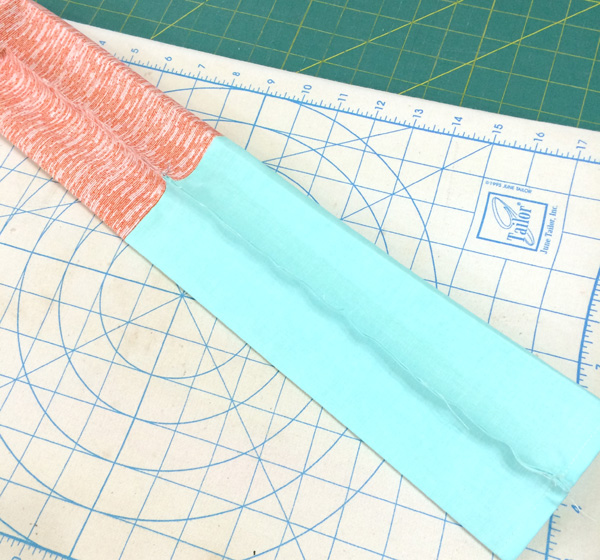
Fold the strip in half along the long side, wrong sides together. Press the fold on the bottom for a nice sharp crease.
 The bottom of this picture is the folded, creased side. The top is the raw edge.
Step 4:
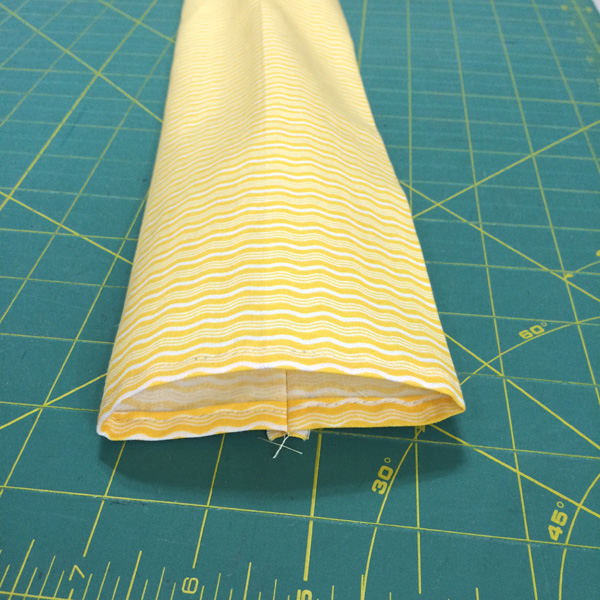
Open up the strip and bring each half of the strip together in the middle at the crease. Press the top and bottom edges to make a crease on both sides. These will be your guidelines for later.
 The original crease is in the middle; you are adding 2 more creases.
Step 5:
Open up the strip and align the raw edges wrong sides together. Pin if needed and sew the raw edges along the length with 1/4″ seam. Backstitch at the beginning and end of the strip to secure.
 Pin and sew the raw edges together with 1/4″ seam allowance.
Step 6:
Wiggle the sleeve so that the seam is now in the middle of the sleeve and press the seam open. You will notice that the sleeve does not lie flat. This is correct – the extra room allows the quilt to hang nicely on the pole. Try to avoid pressing the sleeve flat (but if you do, it’s not the end of the world and it will still work).
 The sleeve will not lie flat on both sides – that is correct!
Step 7 (optional):
If desired, gently add glue along the length of the hanging sleeve, on the seam side. Be sure you use a light hand, keeping at least 1/8″ away from the edges so the hand stitching won’t get caught up in the glue. You can skip this part and use pins only, if you prefer.
 Glue-basting the sleeve on Abacus. Keep that glue away from the edges!
Step 8:
Lay out your quilt on a flat surface and gently place your hanging sleeve into position, seam side down, right along the edge of the binding. Center the sleeve so that you have about 1/2″ left on either side of the quilt. The sleeve will bubble up a bit along the center, giving you that extra hanging space.
 The sleeve should bubble up, giving you extra wiggle room for the hanging pole.
When you are happy with the sleeve position, press with a dry iron to secure the glue. It’s easiest to press on either long edge, one at a time, to avoid pressing out the bubble. Add a couple of pins around the edges for extra security while sewing.
 I like to line my sleeve right up next to the binding.
Step 9:
Using several lengths of cotton thread, hand sew the sleeve into place using a whip stitch or a ladder stitch. Secure all four ends and pop the knot into the batting of the quilt each time you finish up a length of thread.
Variation:
You can avoid sewing the top of the sleeve by hand if you add the sleeve to the quilt after the binding is sewn to the front of the quilt, but before it is flipped over to the back for finishing. In this case, align the top edge of the sleeve with the edge of your quilt. Stitch in place by machine, then finish the bottom and sides of the sleeve by hand. The binding will cover about 1/4″ of the sleeve but that should still be okay.
 A quilt sleeve partially sewn by machine, covered by binding on the top edge.

Excellent tutorial, will be telling all the DQN members to take a look. Very informative and helpful to first timers and as a reminder how to do it right for the rest of us.
Thanks, nice to have the pictures too. Now to make something I want to hang!
Thank you! This is exactly what I needed! I’ve got three (maybe four) quilts to prepare for an upcoming local show. :/. Better find a couple good movies and get to work!
thank you christa! I always love your helpful tutorials!
Glueing it on is a revelation for me, haha! Totally doing that next time, I always hate the copious, pokey, fiddly pins holding it on while I hand sew it on.
Thanks for the tutorial. I’m going back and forth on displaying quilts at home. Not sure whether to add sleeves to them or use alligator clips. I’ve seen both work well. The latter allows them to be changed around frequently, but I’m worried about what they might do to the fabric.
I just want to thank you for your free tutorials. Money is very tight and having your free tutorials helped me make some great gifts. Thank you!