I’m back with the second part of my Paper Pieced Log Cabin Christmas Wreath. You can see part 1 here.
Today I will demo the rest of paper piecing the blocks, finishing the top, and machine quilting my mini-quilt to finish.
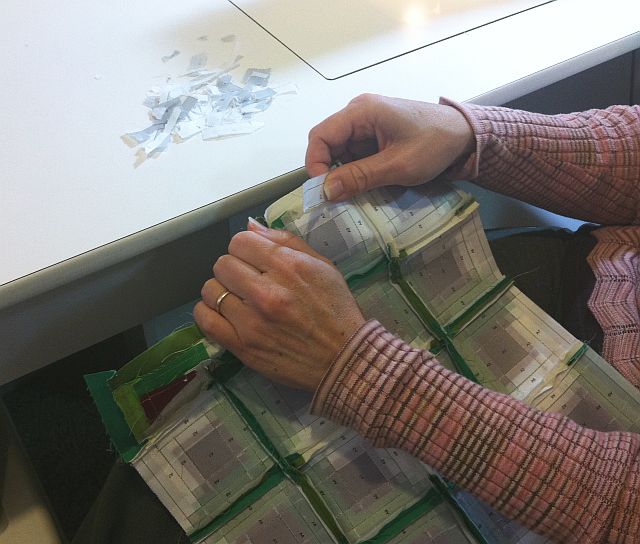
Here is a refresher of the paper piecing process from last week with a few more detailed pictures. My favorite method of paper piecing uses a straight edge and an add a quarter ruler. Be sure to click the images below for closeups.
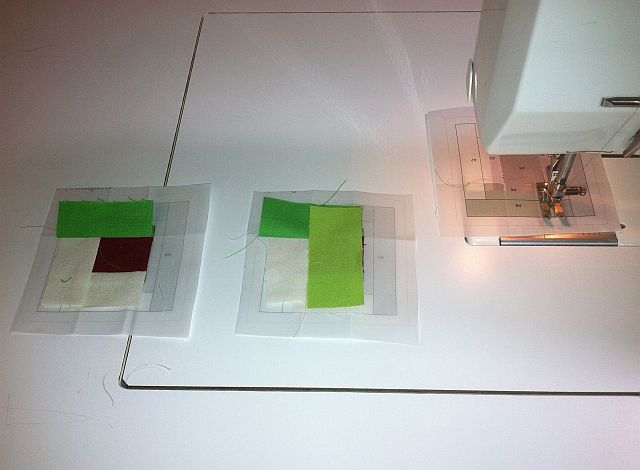


Step 1 – Paper Piece all of your Log Cabin Blocks from Last Week
(You can download the log cabin foundations for free or you can purchase a set of printed foundations on lightweight see-through vellum paper from my store.)
- Add your next log to a freshly trimmed side.
- Flip over and sew from the paper side following the numbered lines in order
- Press your sewn seam with a wooden seam roller
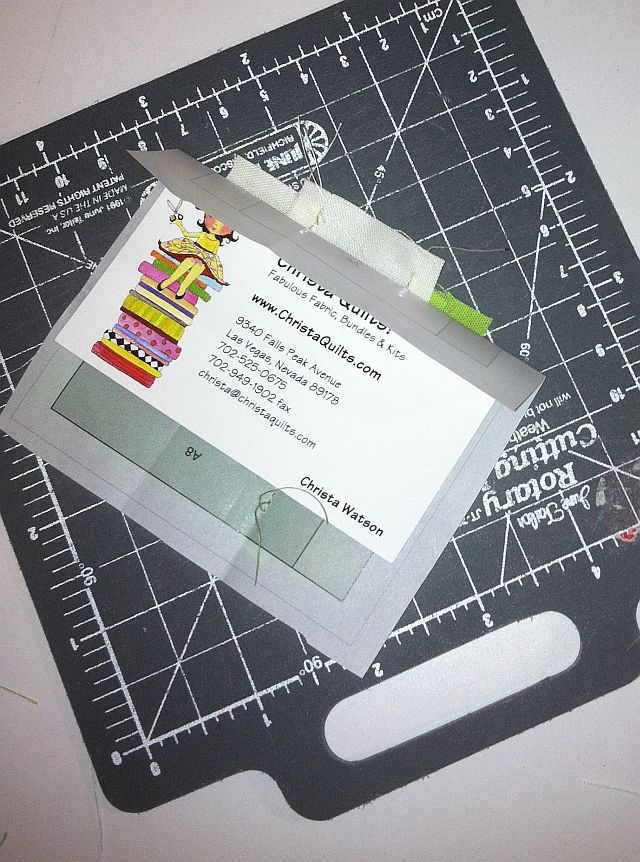
- Fold the paper on the next seam number that you will be sewing (use a business card or postcard as a straight edge)
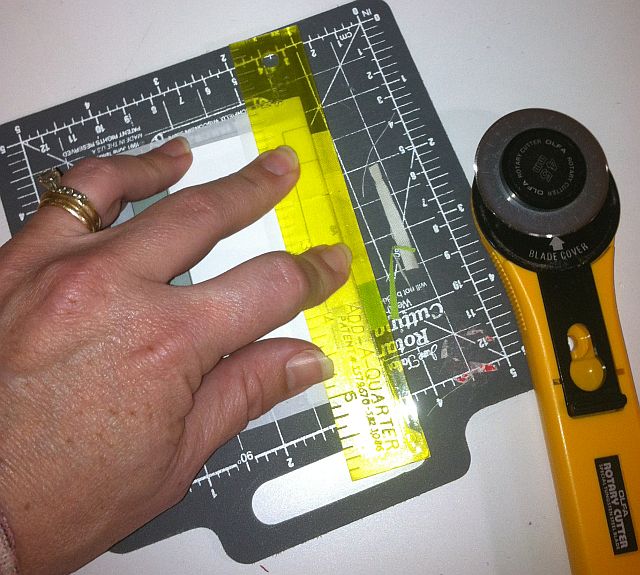
- Pull back your excess fabric, use the add a quarter inch ruler and trim the excess.
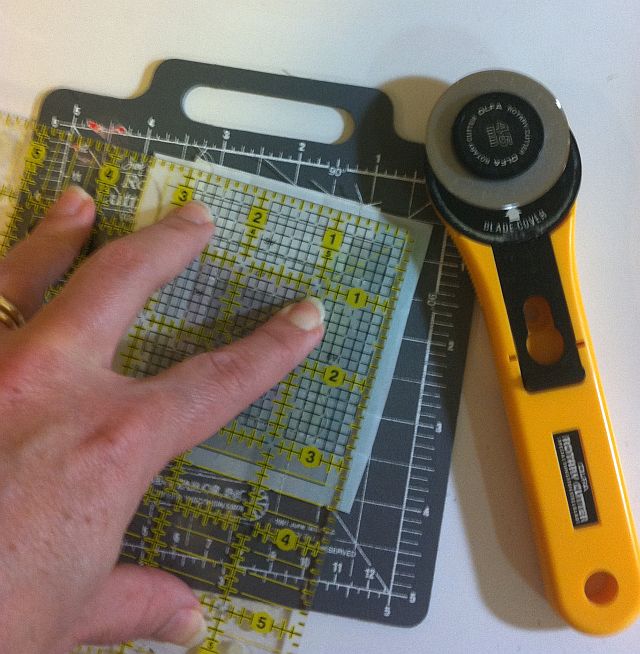
- When all 16 blocks are sewn, trim from the paper side leaving 1/4″ seams all around


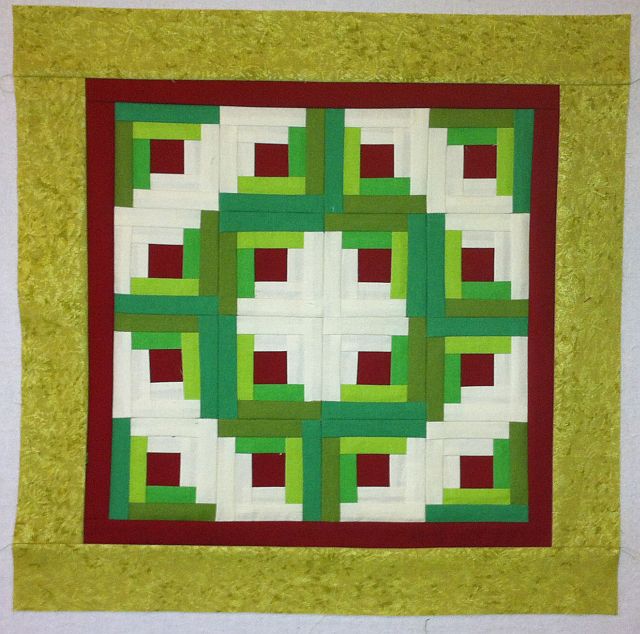
Step 2 – Sew The Top
- Lay out your 16 Log Cabin blocks so that they form a wreath shape.
- Sew each row into pairs and then the pairs into rows of 4 blocks
- Finger press your seams open, or press with a wooden seam roller
- Join the rows to complete the top
- Once the top is complete, carefully remove all the papers
- Add the thinner red borders to the sides and top
- Add the wider green borders around the outside
Step 3 – Baste and Quilt
I quilt everything on my regular Bernina home sewing machine and I love it!
 I use Pinmoors and flat flower pins to baste all of my quilts because they are so easy to remove while machine quilting.

Before basting, I marked straight lines around the wreath design with a water soluble pen. Always be sure to test your fabrics for marking removal and to make sure they won’t bleed when they get wet.
I quilted the straight lines with my walking foot. Then I added double loops in the borders and smaller loops in the background with my free-motion foot.
I used matching solid red fabric for the binding. For this quilt, I tried a Sewline glue pen to keep the binding in place on the back while finishing by hand. It keeps my binding nice and tidy!
 You can see an in-depth binding tutorial here.
Voila! It’s finished!
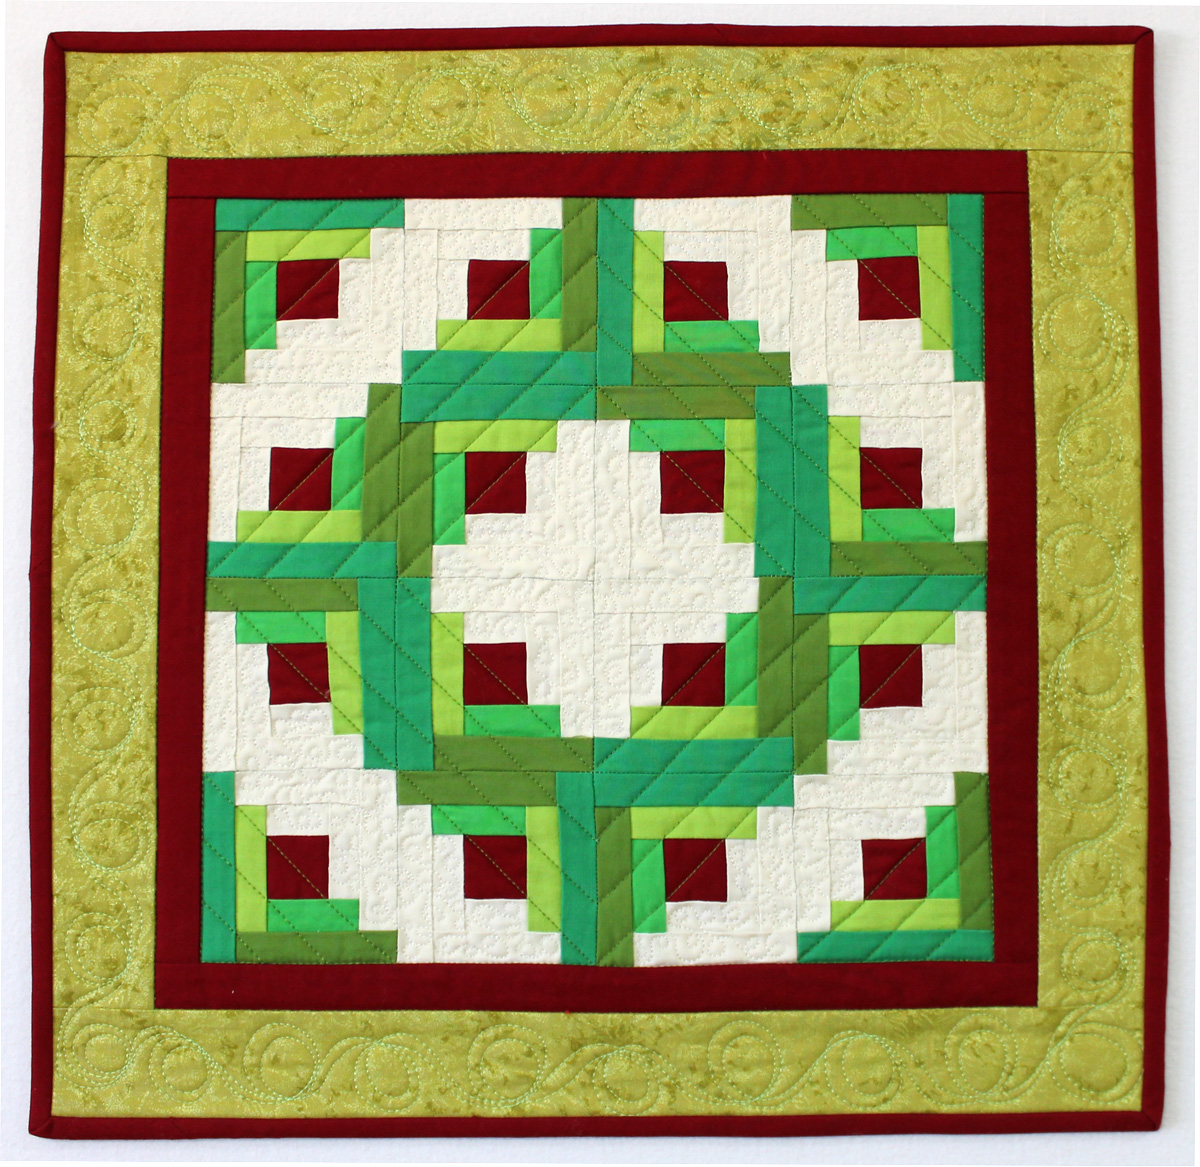
Log Cabin Wreath, Pieced and Quilted by Christa Watson
18″ x 18″
I have tons more ideas of what you can do with these blocks:
- Use as the center of a larger quilt.
- Sew a pillow, wall-quilt or table topper
- Make more blocks for a larger throw sized quilt
- Turn one block into a Christmas Ornament
- Make matching placemats
That was fun. Be sure to email me pictures when you make one, too!

Wonderful. The quilting adds just the right touch in both design and depth. Great idea with the glue pen too. Thanks for linking up on my blog this week. Cheers, Karen
What a great tutorial. And I am so impressed with your quilting seeing it’s done on your Bernina. You give the rest of us hope!
All those little log cabins are so gorgeous! Such a great pattern 🙂
Your little log cabins are just adorable. Thanks for the tutorial!
Love the tiny log cabins for the wreath 🙂
Beautiful, can’t wait to do!
This looks great! I love how the quilting is simple but really makes it look like a wreath!
Love the colors. Looks wonderful!