For today’s Abacus Quilt Along, we will be sewing together our quilt tops! Be sure to click here for links to the rest of the tutorials and supply list. It took me a total of 2 hours to complete this week’s lesson. Feel free to jump in at any time!
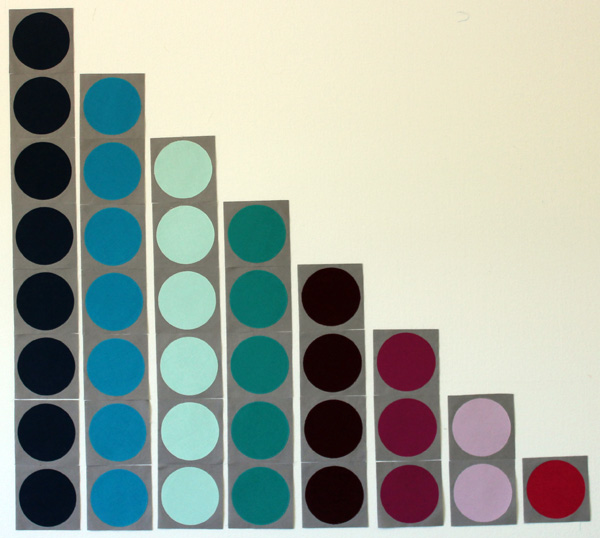
 Abacus quilt top – you can tell it’s real from all the wrinkles! 🙂
Step 1 – Sewing the Rows (3/4 hour)
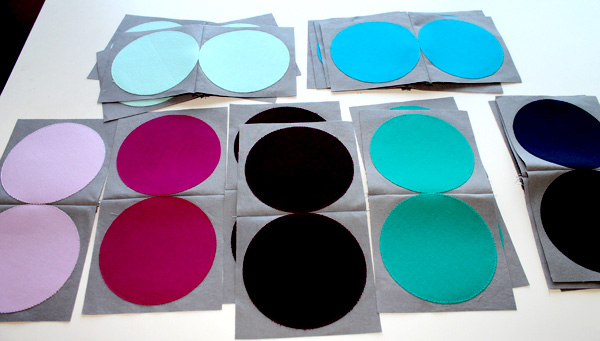
For ease in construction, lay out all of your machine appliqued and trimmed blocks in order on a design wall or other large flat surface.
 Lay out your blocks in order on a design wall or take a picture with your phone!
Sew matching bead blocks together in pairs, chain piecing for faster assembly. Sew all blocks from one color into a row for a total of 8 rows of beads.
 Be very accurate when you sew your 1/4″ seams so that you don’t cut off any of the circle. Press your seams open to reduce bulk. This will also help the circles align better.
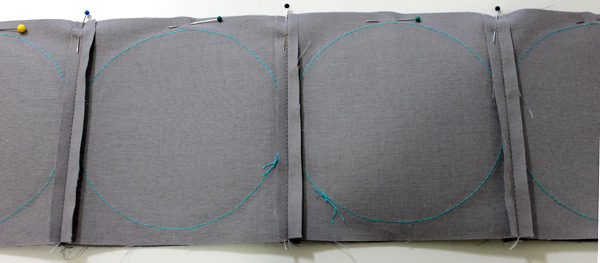
When placing your blocks right sides together, try to match up the circle positions as closely as you can. You may need to sew more slowly and use pins to ensure accuracy.
 You want the edges of the circles to just barely touch without catching any of the circle fabric in the seam allowance.
Sew all of the beads together first, then add the background strips to complete each column. The diagram below shows the position and cut length of each background strip.
 Step 2 – Quilt Top Assembly (1 1/4 Hours)
Sew together pairs of columns to complete the quilt top. When joining rows, be sure to pin at block intersections. I also pinned in the middle of each block, matching up the two circles in the same position.
Optional: If you want to ensure perfect alignment, you can use a larger machine basting stitch to sew a few stitches only where each of the horizontal pins is below. Once you are happy with the alignment, you can go back and restitch the entire row.
 Join the columns together into pairs, and then into halves to complete the quilt top. Stay stitch 1/8″ around all the edges to secure the seams while quilting.
 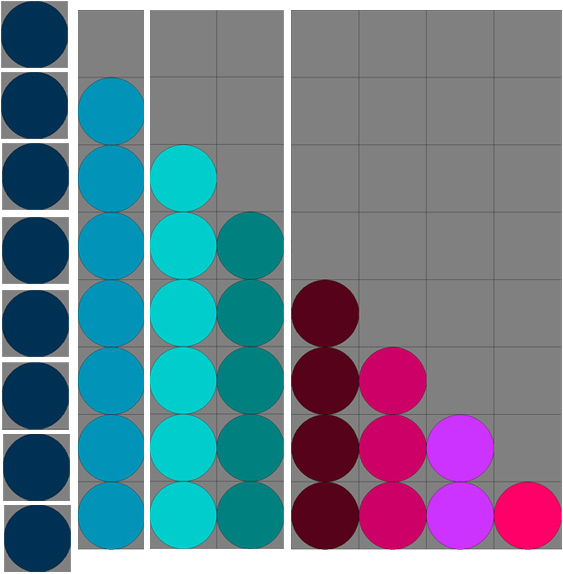 Abacus Quilt Top Assembly
Just for fun, I designed an alternate solid colorway for Abacus, which I call Parfait. I think it would look great in prints, too.
 Play around with different fabric combinations and see what else you can come up with!
I encourage you to share you progress on your own blogs and leave a link in the comments below. If you don’t have a blog, you can always share your pictures on my flickr group, or on instagram (#abacusqal), or via good old-fashioned email! 🙂
Next week we will baste the quilt together. It’s easy peasy and will give everyone a chance to catch up, although you are never behind because the goal is to work at your own pace!

Thanks Christa
Christa what is stay stitching? I have personally done that with my quilts before?
That is where you sew a line of stitches all the way around the perimeter, about 1/8 in from the edge so it will be covered up by binding and you don’t have to remove it. It holds the edge seams in place and prevents the fabric from raveling while you quilt it.