Last week in part 1, I began this series to help troubleshoot the most common machine quilting challenges I hear from you all. I got a whole list of them via my followers on Instagram. I’ll continue to post this weekly series until I’ve gone through them all. Hopefully you’ll pick up a few tips that will encourage you and help improve your quilting skills.

Image from my Craftsy class The Quilter’s Path: Design It, Stitch It, Quilt It.
Problem: Not having a table flush with the bed of your machine.
My Suggestion: While it’s true that it helps to have a nice flat space for quilting, if you look closely at the images from my Craftsy class, you’ll notice that I quilted the whole time on a regular counter-top surface with my machine set on top of it. Google “sewing machine extension table” to find a wealth of resources for custom inserts and extensions. Using a large table will be more beneficial in the long run and you can always build up the area around your machine using styrofoam or heavy books. A small table or adjustable ironing board set up to your left, forming an “L” shape, will help keep the weight of the quilt from dragging, too!
Problem: Not feeling brave enough to to try something new.
My suggestion: Just go for it and don’t look back. Challenge yourself to make a small quilt as a gift or charity donation. Resolve to try a new design or technique and don’t stop until you finish! Then give it away so you never have to see it again. I promise the next one will be sooo much easier!!
Problem: Messy starts and stops.
My suggestion: If you are a beginner, try quilting an edge to edge design where you can start and stop the quilting design off the quilt in the batting. If you are more comfortable with quilting, start by bringing the bobbin thread to the surface of the quilt. Then take a series of 6-8 tiny stitches at the beginning and end of each line of quilting. This will be secure and much less noticeable then quilting forwards and backwards in place. And please, stay away from using the automatic tie off function on your machine. It just makes a mess!
If you want to up your game, check out this great 3 minute video tutorial from my good buddy Leah Day. She shows you how to tie off your thread ends using a self threading “cheater” needle.
Problem: Managing the bulk of the quilt under the machine.
My suggestion: I employ a not-so scientific method of “scrunching and smooshing” the quilt out of the way however I can. Although it’s super helpful to have a large roomy area under the machine, just remember that you are only dealing with a small part of the quilt at anyone time. Ann Petersen recently filmed her outstanding class Small Machine, Big Quilts, Better results using a regular sewing machine. She employs methods like quilt-as-you-go and using split batting so you have less bulk under the machine. It’s worth checking out!
Problem: I’m impatient and hate being a beginner.
My suggestion: Here’s a virtual hug – I know how that feels! XOXOXOXOX
When I was first starting out, I wanted things to be perfect. Over the years I learned to embrace my imperfections. Try learning just one or two designs to start and quilt them on everything! When I first conquered stippling, I stippled all my quilts for a solid year and that’s ok. Start out with walking foot designs and then when you are comfortable move on to free-motion. Just remember, if you start out as a beginning machine quilter the same time you start learning to piece, both skills will improve together at the same time.

Stipples and Spirals make a fun combination.
Problem: There are too many design options to choose from.
My suggestion: see above answer. 🙂 Just pick one or two you like and start with that. If you can’t narrow it down, write them all down on slips pf paper and throw them into a bag. Choose two of them randomly for your next quilt. Then choose two more for the next quilt, and so on. Wouldn’t it be fun to say “I’m quilting stipples and spirals today” and not even have to think about it?!
Problem: I don’t know enough design ideas.
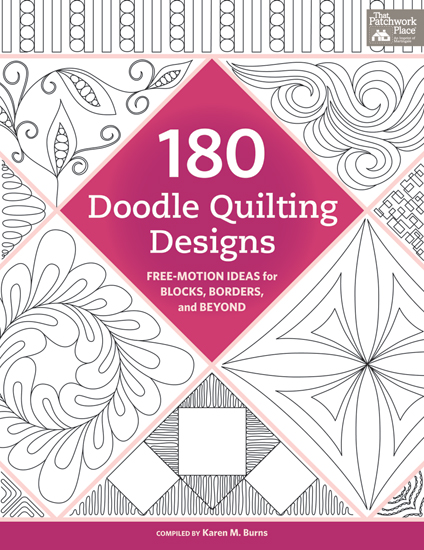
My suggestion: Do some fun research. Take a look at beautiful quilts you see in public at quilt shows or online on social media. Pay attention to the quilting details for design inspiration. I also recommend increasing your collection of quilting books – both those that teach machine quilting techniques (like mine), plus books that are a library of design ideas such as 180 Doodle Quilting Designs. Before long, you’ll have too many to choose from! (See my answer to that dilemma above.)
Problem: I don’t have a very nice sewing machine.
My suggestion: Remember that the most important tool in your tool box is a “can-do” attitude. I started out with a cheapie-not-very-good sewing machine but I persevered. When I knew that quilting was here to stay, I upgraded to a nicer but still low price range machine that could do a little bit more. Once I became more serious, I got my first “nice machine.” This was about 20 years ago and I bought it used from a dealer, for less than half of the original price. It’s only been in the last 3-4 years that I could justify a “really nice” machine. So don’t let the tools stand in your way. Buy, borrow or rent the best you can afford and get as much use out of it as you can.
I hope you enjoyed these tips. I’ll be back next week with more!

THIS is the table set up I use when we have a sew in up at my sister’s cabin. It works really great til my B-I-L used my insulation panels in the walls. He had to replace them … he lived in the dog house for a day or two.
.
I, too, get bogged down trying to decide how to quilt/what design to use. The “pull it out of a bag” idea is a fun way to challenge myself. I have been on a mini quilt binge lately – a mini is a less stressful chance to practice a new fmq design 😊
What a great list of tips, Christa! I’ll be reading and rereading them as I swim around in the machine quilting pool!
I bought an extension for my machine a few years ago and have never looked back. It was the best quilting purchase I’ve ever made. It is clear plexi and has detachable legs. It packs up easily for retreats. At home, I store my basic accessories and threads under it so I can see where they are, but I don’t have to chase them all over the place.
Great tips–think I’m going to rein myself in and concentrate on a couple FMQing designs. I just finished a baby quilt where I tried everything out and it turned out to be a mess. But I did what you say–got it in the mail the day I finished it. I never have to see it again! HA! Thanks for doing this. I look forward to the answer on how to do edges…..that was a struggle.