So here’s the story about how my quilting table came to be. It’s been a 2 year process, but over 20 years in the making. This is a long story, but I hope you enjoy the journey along with me! And if you want more details about pricing & delivery, shoot me an email: christa@christaquilts.com

So waaay back in the late 90s when I began quilting, my supportive mother picked up an inexpensive sewing table for me that fit my machine. I don’t remember the brand, and the store she purchased it from went out of business soon after. But it worked.
Once I upgraded my machine back in 2013, my original insert no longer fit. So to create as flat of an area as possible I covered the hole with the extension that came with my machine and propped a couple of books underneath so the machine was sitting at *mostly* the right height. That was hack job #1!
Old Table Setup:

Next, I realized the table I had didn’t have enough space to hold my scissors, thread, seam ripper and a drink right where I needed them, to the right of my machine. Stuff was always falling of the side, so I set up a little tray next to my table to catch anything that fell down. Hack job #2!!

Look closely to see the books holding up the machine underneath!!
But most frustrating of all, whenever I quilted a large quilt, most of it would end up in my lap because there was no where to hold the bulk of the quilt as I pushed it under my machine.

I discovered then, that an “L” shaped work surface with an area sticking out to my left was needed to hold the weight of the quilt. So I used various tables, ironing boards etc. to give me some extra room. Hello hack job #3!!

My table against the wall with a small table in front, forming an L shape to hold the quilt.
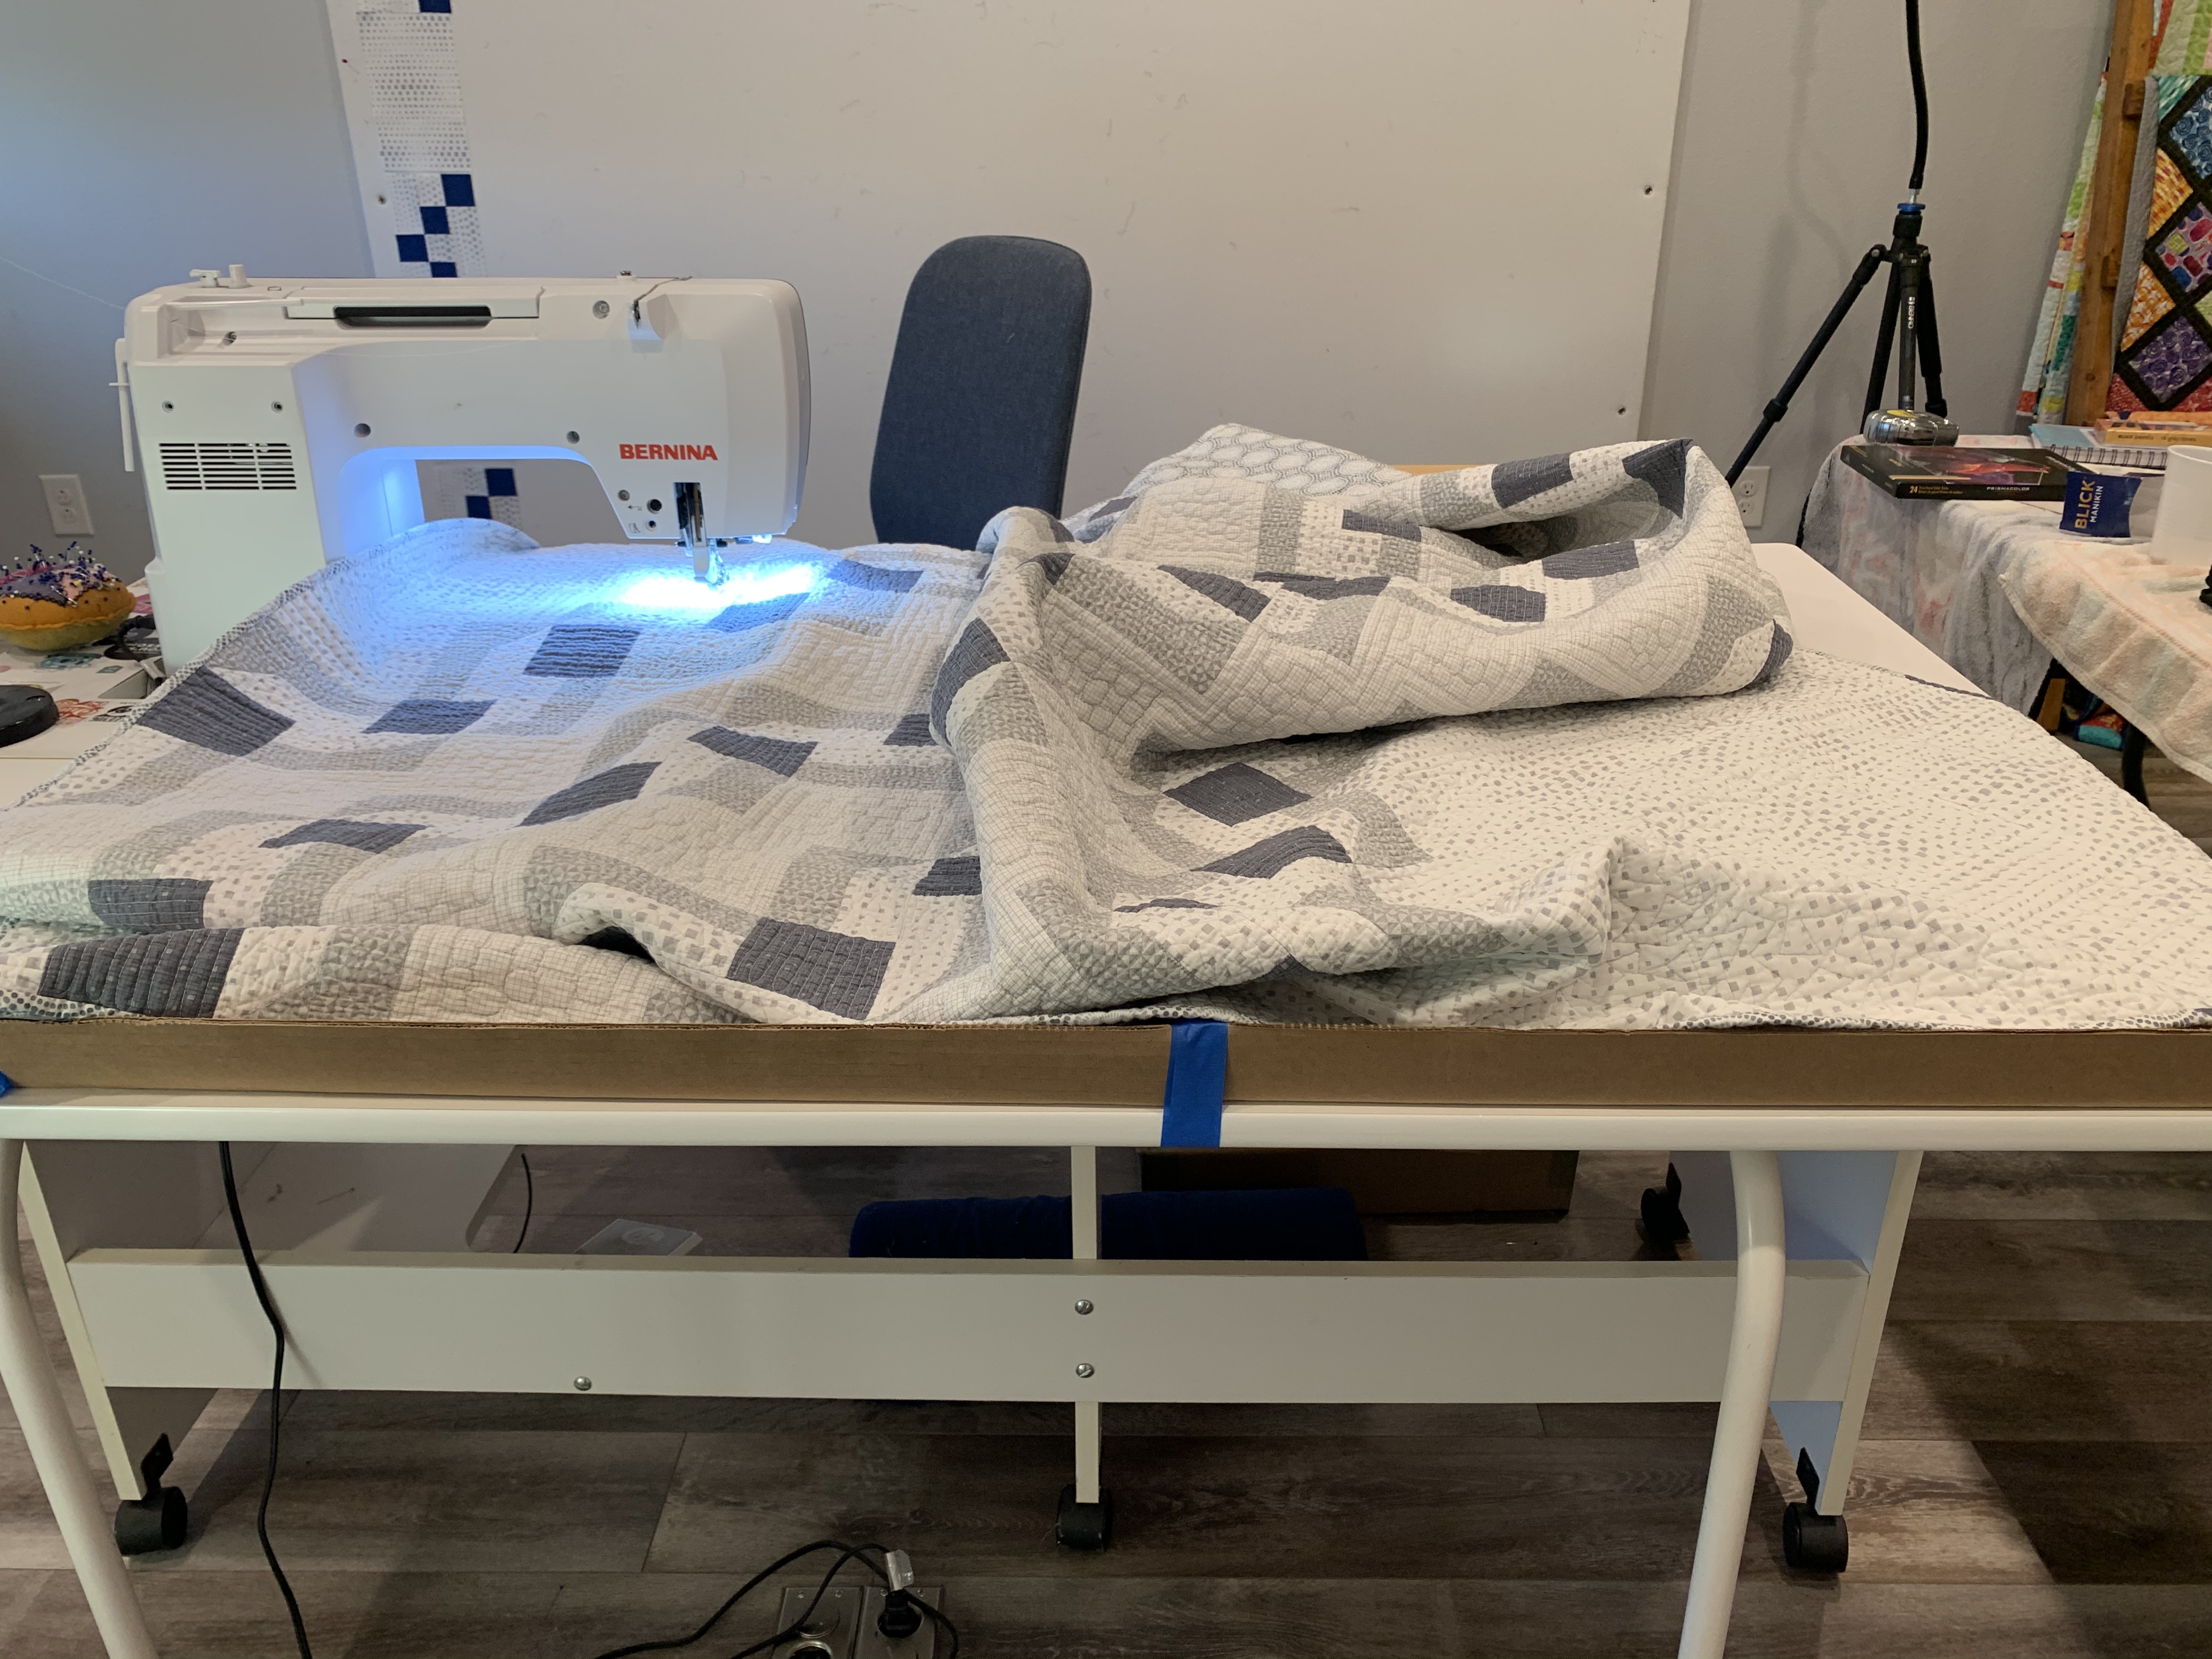
Once I moved into my new house with a larger studio space, I tried several different locations for my workspace. I finally decided to put my old table in the middle of the room instead of tucked into a corner. Now I discovered a whole new set of problems with my workspace!

Hello wobbly legs!!! And non-locking casters that would slip & slide on my laminate flooring!
My older table had very flimsy legs that would move out of position whenever I tried to move the table. That caused the back extension to slam down, sending anything on top of it flying through the room! And the casters didn’t lock so it never did stay firmly in place unless shoved against a wall. But you gotta work with what you have, right??
Also, whenever I quilted a large quilt, it would fall off the back and side of the table causing a ton of grief while quilting.

Due to gravity, a falling quilt creates friction and drag, wreaking havoc on your stitches!
This pulled on the quilt, causing friction and drag… and ugly stitches. I tried to mitigate this with hack job #4: taping up cardboard around the edges, but that didn’t really work!
About this same time I began to share more videos on social media, and folks began asking where to find a table just like mine. I creatively zoomed in so they couldn’t see the ugly hack jobs I had created. And it wasn’t just one or two people, it was dozens and dozens. Like crazy! In fact, I got so many questions about where to find one like mine, that I started shying away from sharing more videos because sadly, I had no answer for them!
So I decided, you know what?? I need to find a table that’s perfect for domestic machine quilting. And if I offered to make some videos about it, maybe a sewing furniture company would give me one in exchange for some promo, or perhaps let me buy one at a discount.
So I started searching and researching and contacting several of the furniture manufacturers out there. I did get a couple of nice offers of tables and cabinets currently on the market but as I examined them, I realized none of them suited my needs. I couldn’t believe NO ONE had a solution to the quilt falling off the sides of the table. And although there were a few tables that came pretty close to my needs, they were either way too big, or much too expensive for my budget.
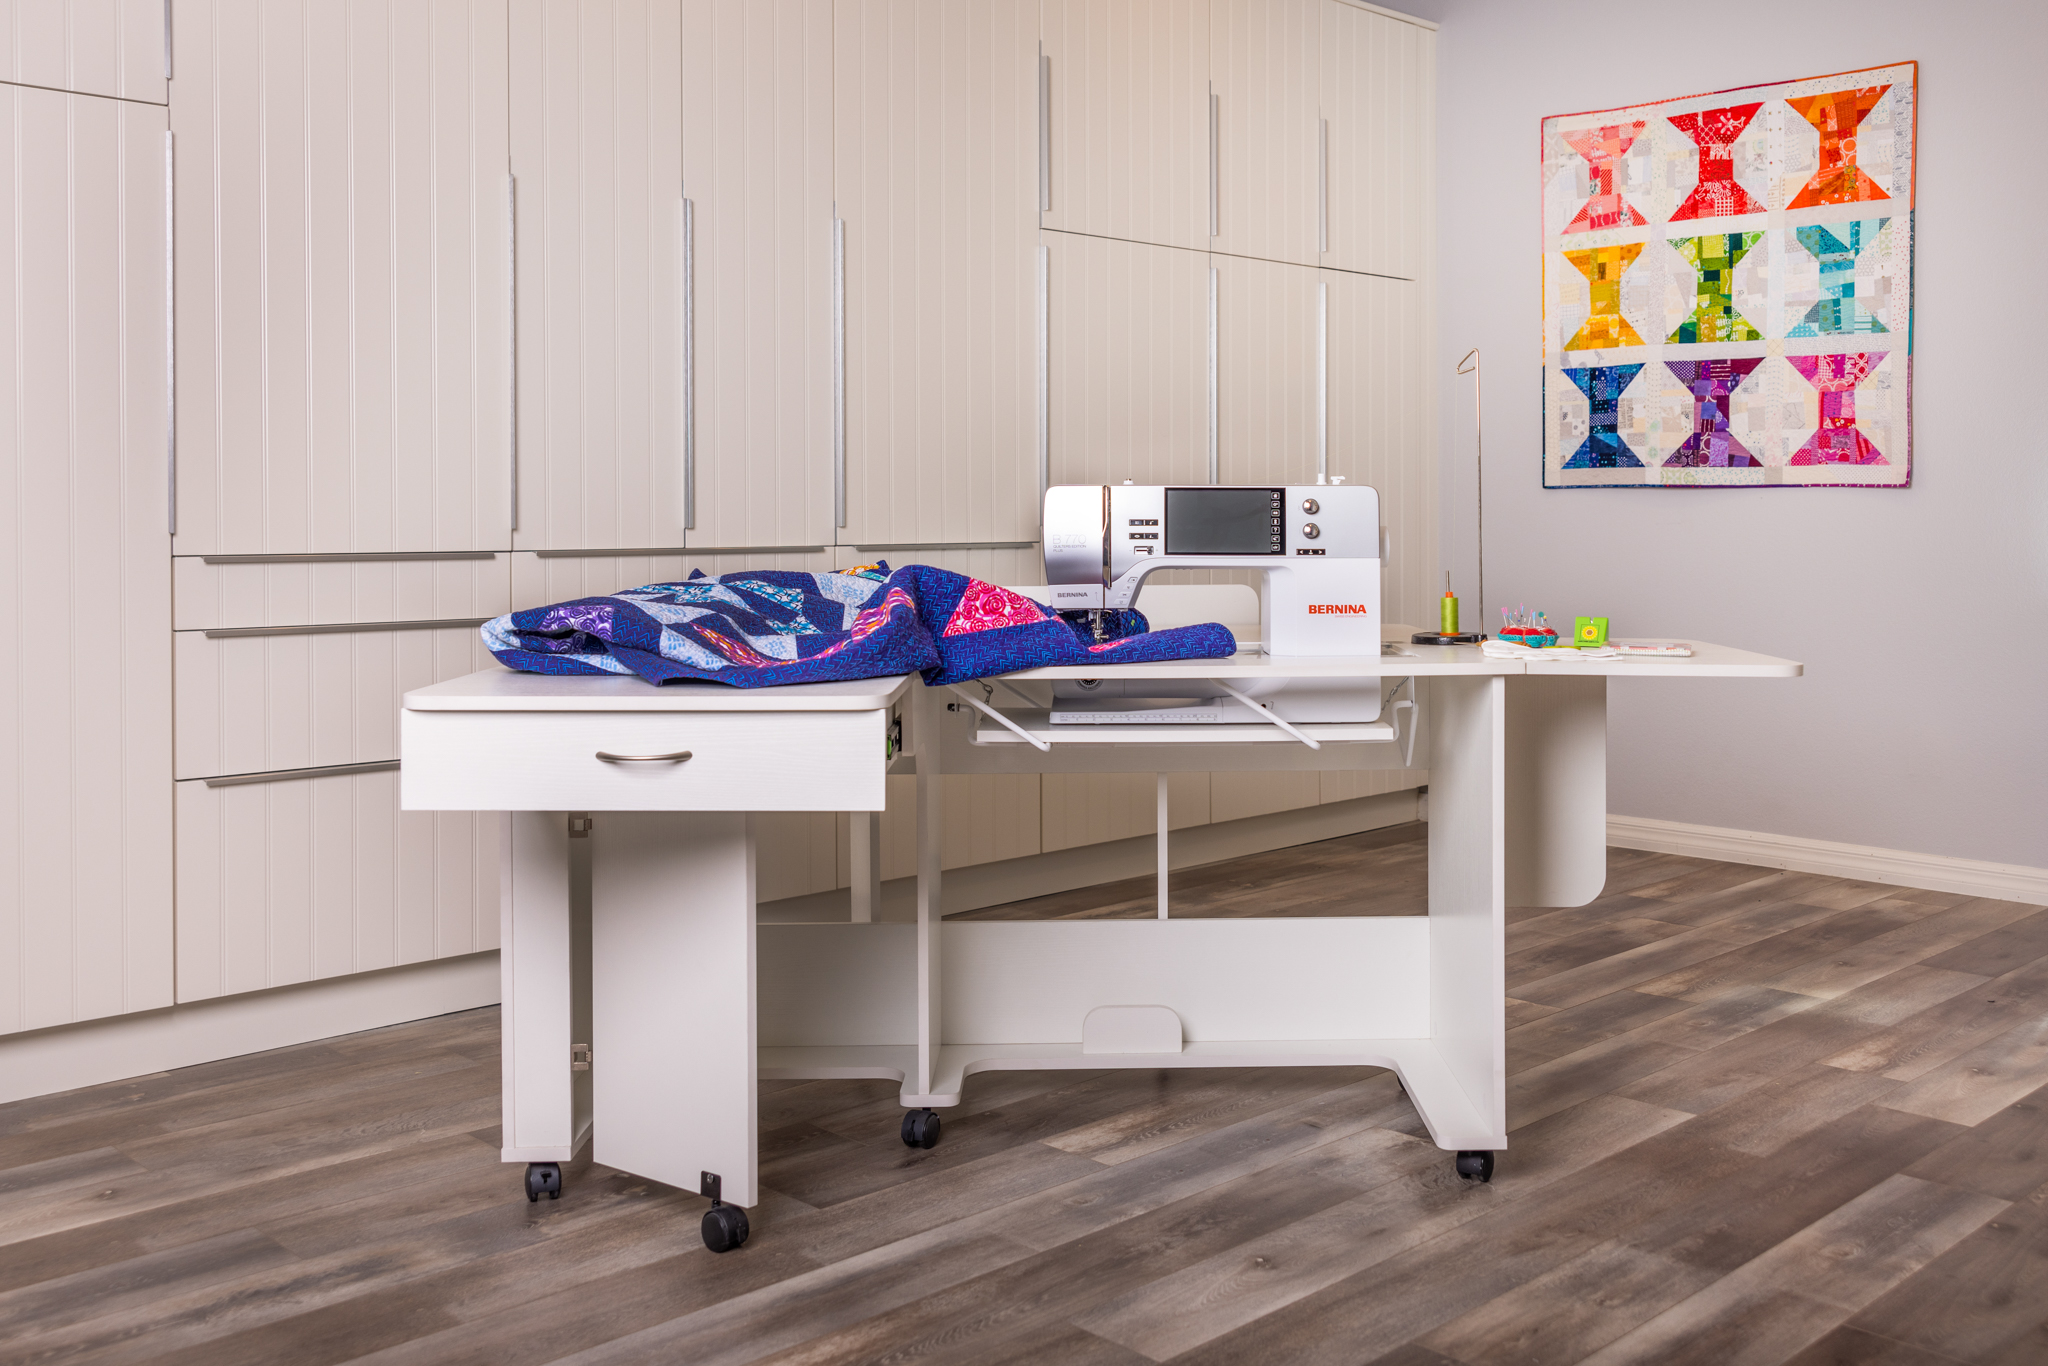
The New Cabinet Situation

It’s “sew” stable!
So you know what they say, necessity is the mother of invention! I began making sketches and taking pics of my hack job in the hopes that I could present my idea for a NEW table to a company who would be willing to work with me. Several helpful folks recommended a few companies that could create a custom cabinet for me. But that’s not what I wanted.
Not only did I need a solution for myself, I needed a stock item that I could recommend to others as well, since I knew the question of “where did you get your table?” would be asked over and over and over and over and over and over and over again!!
Well, thankfully from some mutual industry connections, I was introduced to the amazing team over at Arrow Sewing, and we hit it off from the start! They worked with me on my design specifications and were realistic to let me know what was possible and what wasn’t.
We recently launched the Christa Cabinet and Christa’s Quilt Blocks at a trade show right here in Las Vegas. This was for sewing dealers who come to these events to find the latests and greatest for their shops. I was a little nervous since I’d never done anything like this before.
We set up a cabinet display and I actually demoed for 3 days in a row, showing how the everything worked while quilting an actual quilt. Well, the cabinet and blocks where a hit! I was actually surprised with how well the quilt blocks sold, but when folks realized that they could fit on any table, including those they already had in stock, it was a no brainer.

Christa’s Quilt Blocks are like guard rails for your quilt! They keep it from falling overboard!
Arrow talked me into becoming a drop-ship dealer which means that you can order it directly from me, and then they will ship the cabinet directly to you so that I don’t have to warehouse, since I don’t have an actual shop.
It’s a nice way to get the cabinet to people who don’t have a local dealer nearby. And so as not to compete too much with other dealers, I’m only offering MY table & accessories, rather than their full catalog of furniture.
Push play above to watch a short video clip.
I really have been pleased throughout the entire process and very happy with the reception so far. I’ll be opening up online orders on May 2nd, so be sure and sign up to get notified once it’s ready to launch. I’ll email you with special incentive that I can’t share publicly!!
I’m excited that my Christa Cabinet is finally being introduced into the world, and I can’t wait to see other folks sewing and quilting on it, too!
Click here to learn more about my Christa Cabinet & Quilt Blocks.

I love your cabinet. Yes, those blocks are ingenious. Where can I find out more? thanks for sharing your inspiration with us!