I’m currently making a quilt from my new Stitchy fabric collection from Benartex that calls for about a gazillion flying geese units. Because accuracy is important, I decided it would work best if I sewed them slightly larger and then trimmed them down to size. So here’s a quick tutorial showing how to do exactly that:

First you need to know the unfinished size of the units you are working with. These units are 2 1/2″ x 4 1/2″ unfinished. When sewn together the finished size will be 2″ x 4″ because geese are twice as wide as they are tall.
Rather than purchasing a specialty ruler just for flying geese, I’m trimming these up with my new Mini Mat and Ruler Set, which is perfect for making smaller cuts while at your machine. This saves me loads of time since I don’t have to get up and move to my larger cutting table.

I’m also trimming them up with my new ergonomic rotary cutter, part of my collection of Christa Quilts Notions that I just released in collaboration with Brewer Sewing.
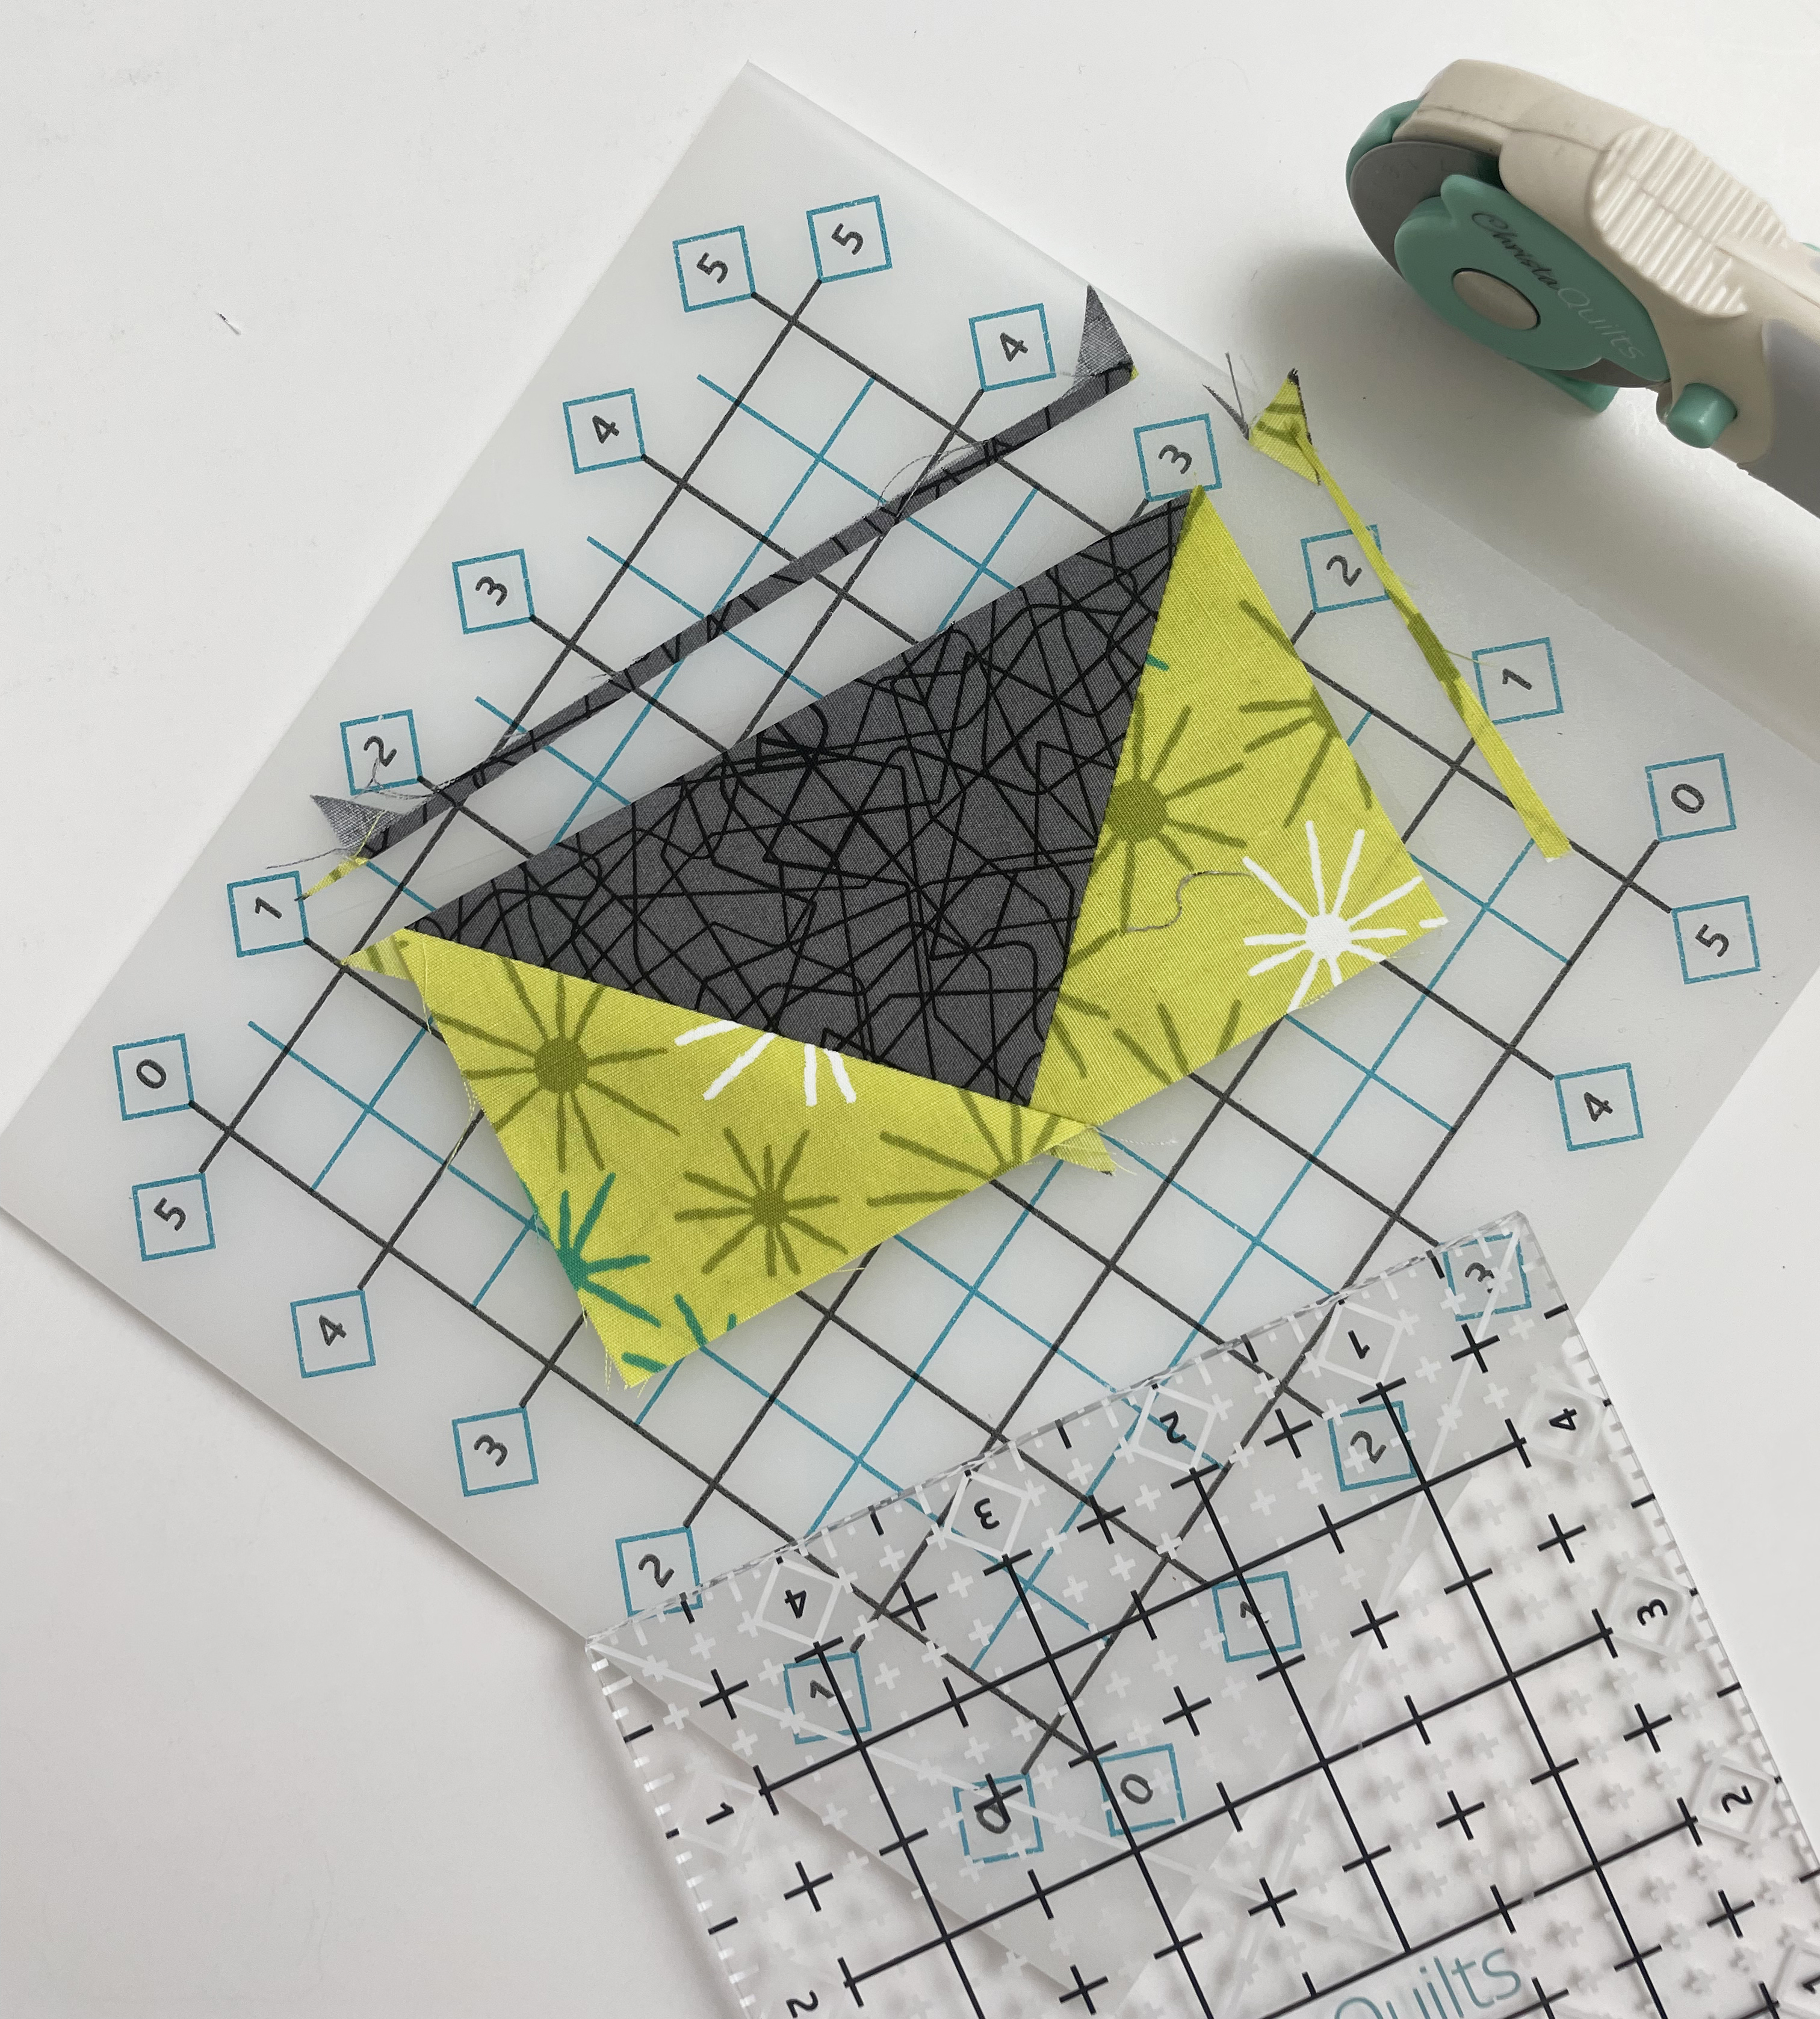
Step 1: Find the midpoint of your geese unit
From the right, measure halfway across the unit which in this instance is 2 ¼”. Line up the 45 degree diagonal line on the ruler with the right diagonal seam. The little blue plus that I’ve marked should be the intersection of the dark triangle tip and the diagonal line. The bottom of the geese unit should hit right on the 2 ½” line.

Step 2 – Trim the first 2 sides only
Trim the right side and the top of the unit only. Notice that you are preserving the 1/4″ distance from the goose point at the bottom to the edge of the unit to account for seam allowances. The diagonal points at the corners of the blocks should go all the way to the edges.
Step 3 – Rotate the block and find the midpoint again
Flip the unit upside down. Measure over from the right, ½ the width of the block, so 2 ¼” again for this unit. Line up the left side of the block with the unfinished width, or 4 ½” for this unit. Line up the bottom with the unfinished height of the unit, or 2 ½” in this example.
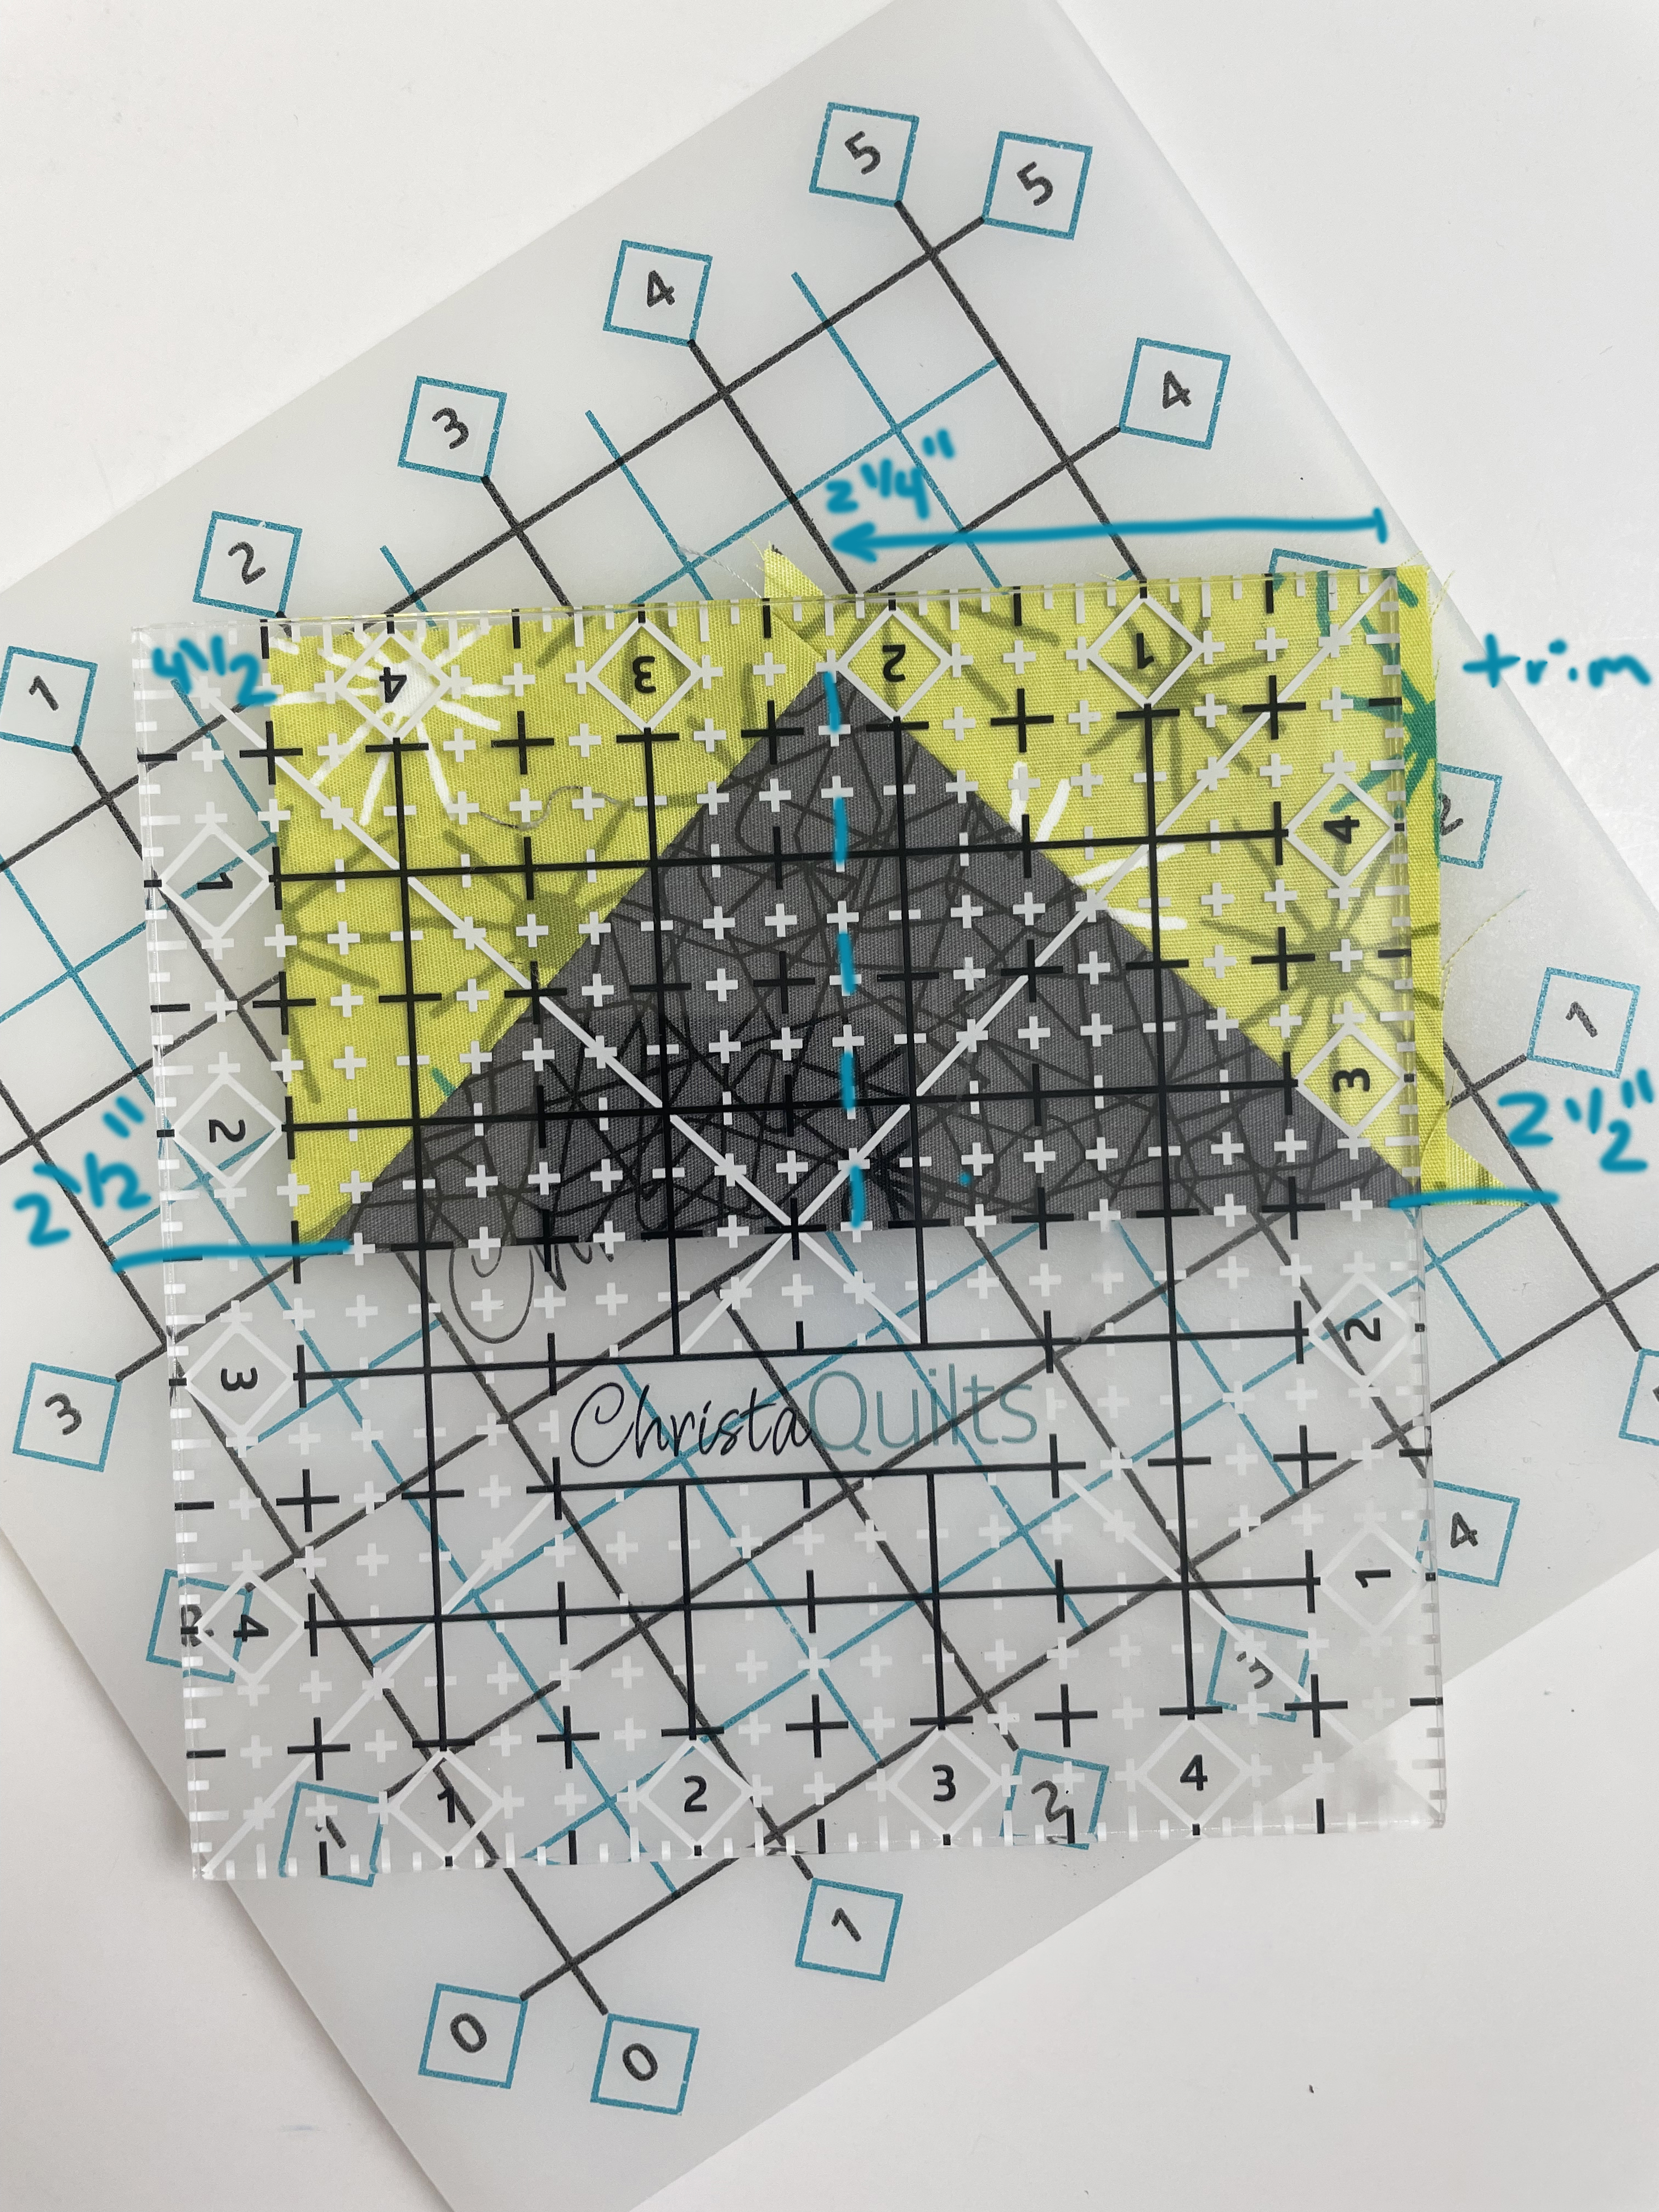
Step 4 – Trim the other 2 sides of the unit
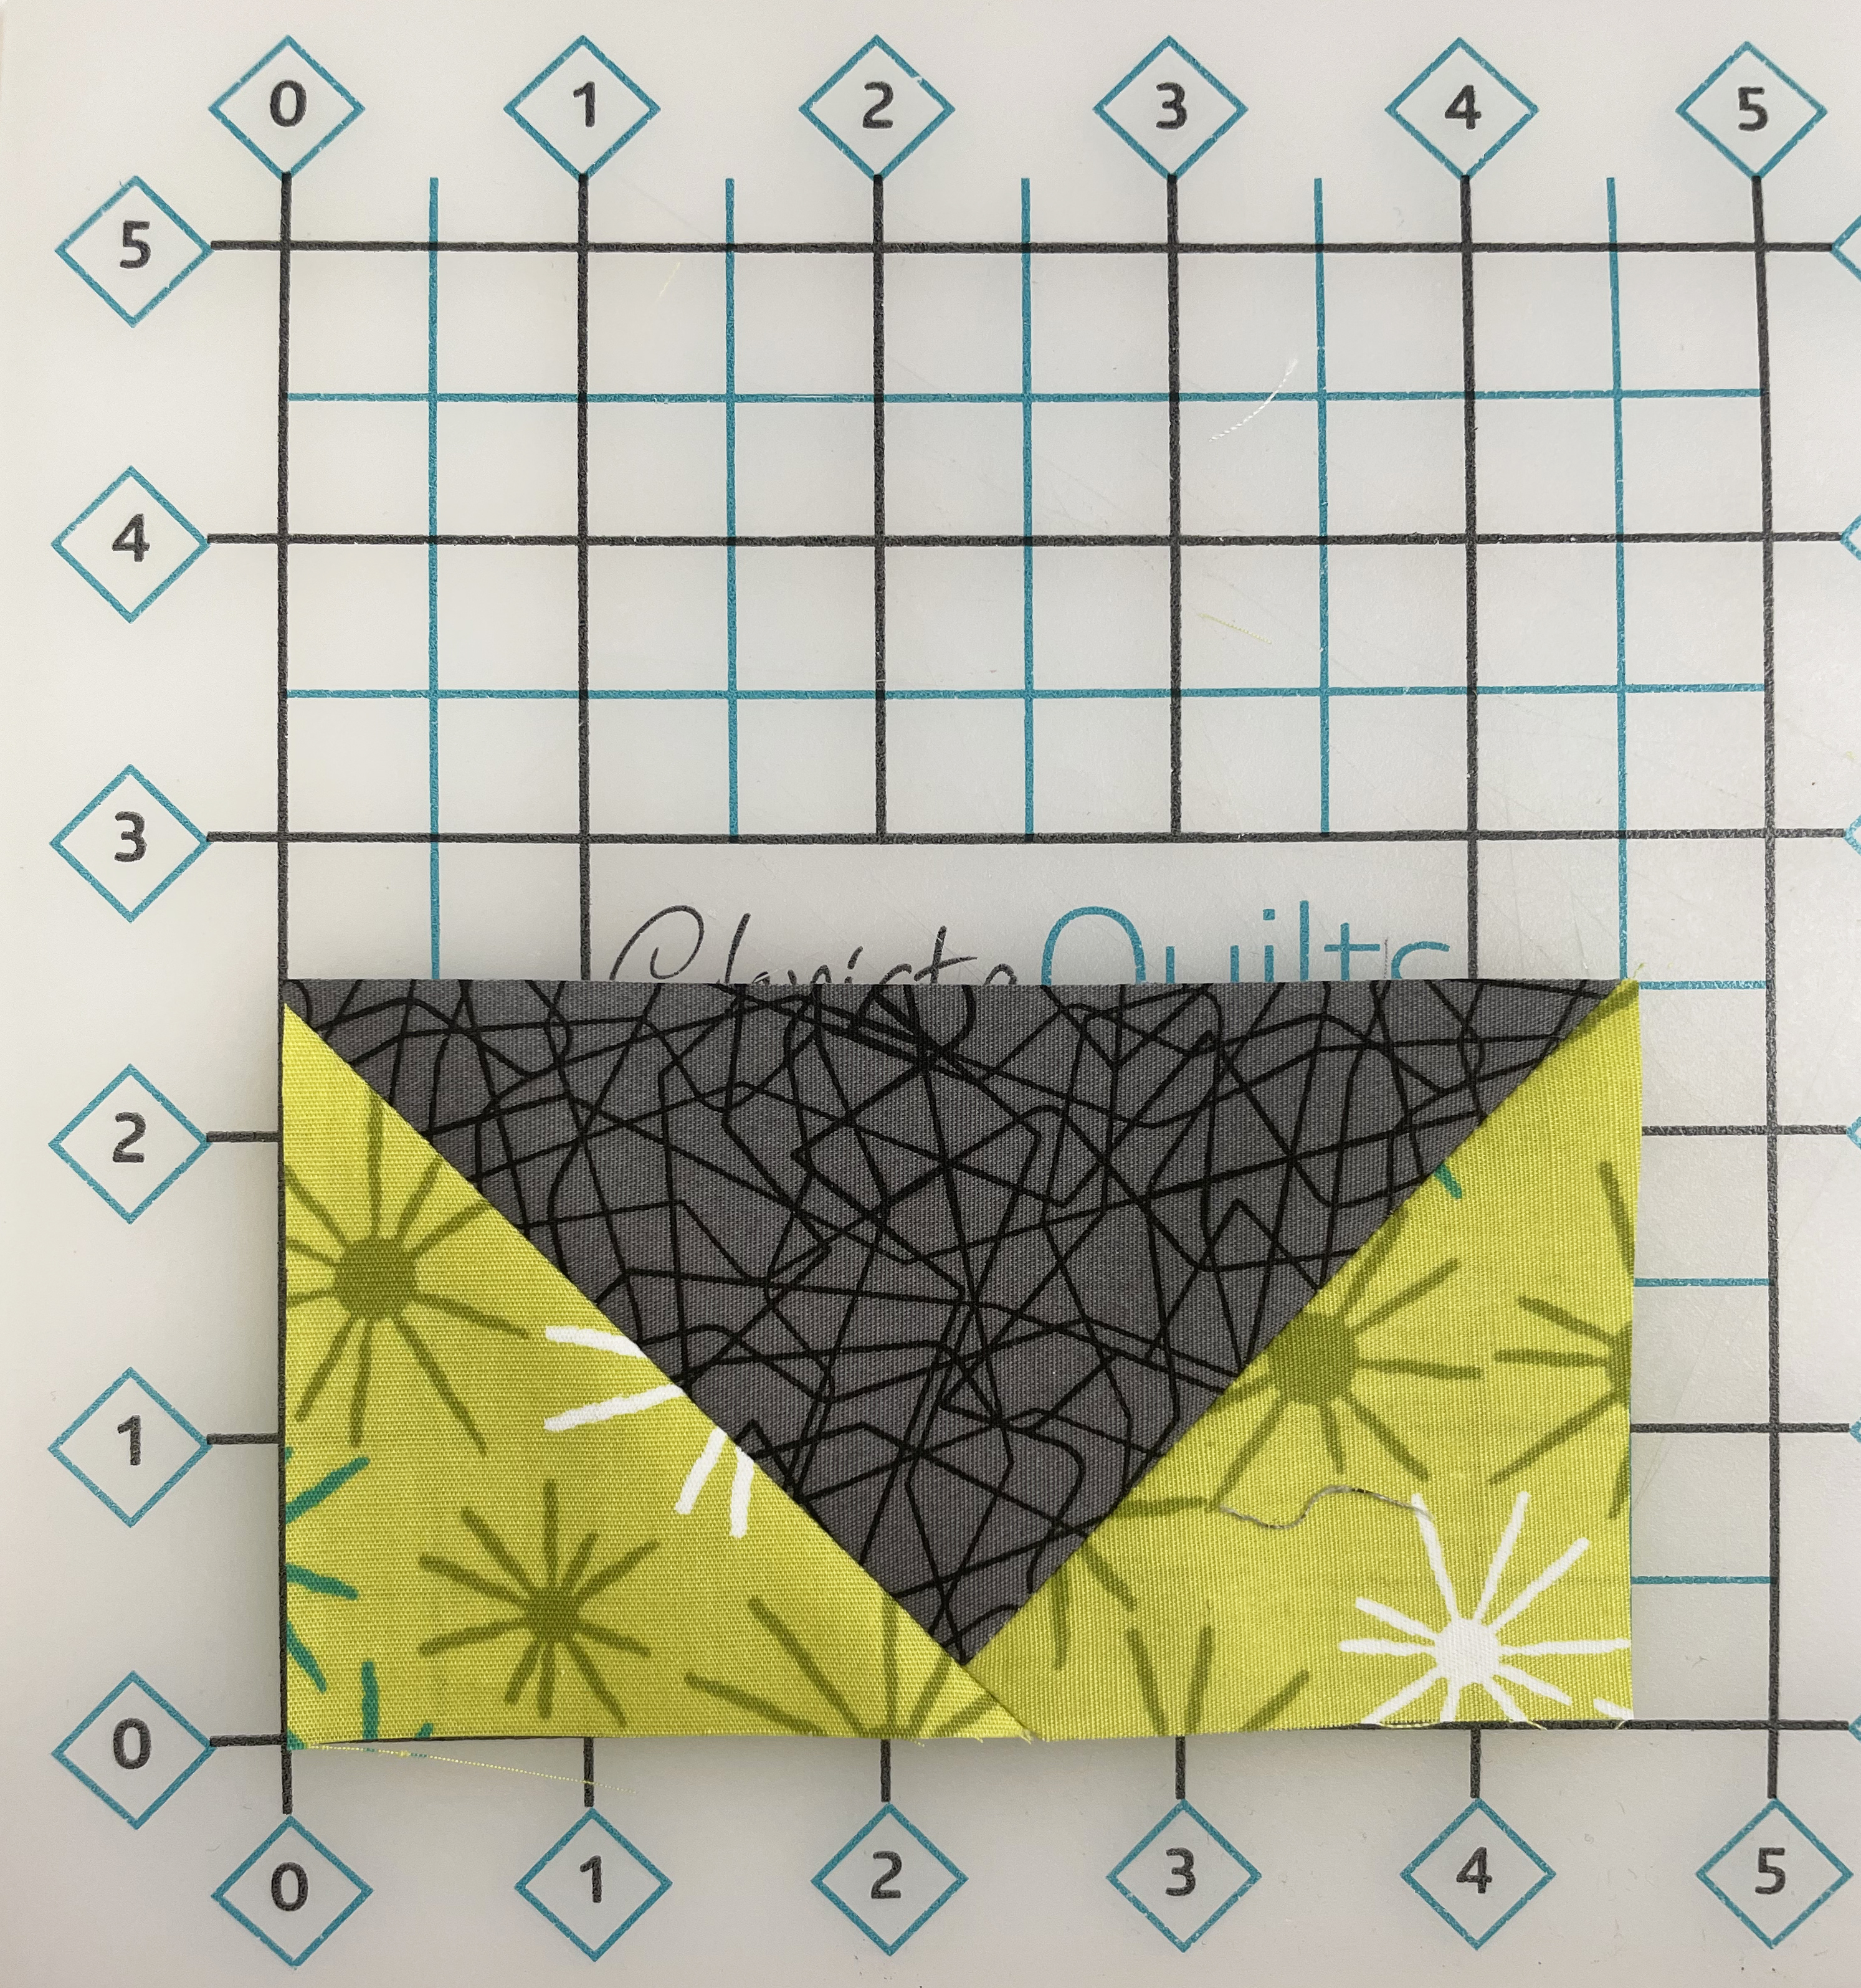
Now trim the right and top of the unit again. This will result in a perfectly trimmed flying geese unit! Repeat this for as many blocks as you have. Adjust your trimming based on the unfinished size of your geese units.
If the triangles of your geese are a little wonky, you can fudge your cutting a little bit to accommodate, but try to ensure that there’s enough fabric to trim on all 4 sides of the block.
See a sneak peek of my new Christa Quilts Notions!
I made a short little video about my new notions and included a bonus tip on trimming binding ends, too. You can check it out by clicking the video image below. Be sure to subscribe to my YouTube channel for more fun videos & quilty tips!
Click here to learn more about my Christa Quilts Notions from Brewer. They are a must have for your sewing toolbox!

Wish I had seen this before I made my 50 flying geese blocks for a quilt
I hear ya! I only recently learned how to do this!!
Add post to tutorials page